
Chapter 7: Traffic Shaping
This chapter presents the basics of traffic shaping and Quality of Service (QoS). You'll learn what the traffic shaper rules can do in OPNsense, how to create and apply QoS in a local network, and how to monitor and test it.
The following are the topics we'll explore in this chapter:
- Introduction to traffic shaping
- Possible scenarios
- Creating rules
- Monitoring
Technical requirements
To follow this chapter, we'll need an understanding of the TCP/IP network stack and how to manage filter rules in OPNSense's WebGUI. It is optional to have an OPNsense instance running with a host in a local network, but this is advisable in order to be able to test some of the steps presented in this chapter.
Introduction to traffic shaping
Let's think about car traffic – on a bustling road, if an ambulance, fire truck, or police vehicle needs to pass, they have priority, right? The same situation also applies in the network packets world, where some packets need to be treated with higher priority to keep the protocols operating smoothly. With all sorts of different packets passing through the firewall, it is necessary to classify them to choose which traffic requires higher priority to keep an application, such as a voice over IP (VoIP) application. For example, if there are 20 VoIP packets and 1 for HTTP, the firewall or the streaming apps may work smoothly. The term QoS is also often used to refer to traffic shaping, and in this chapter, it will be used to refer to the classification and prioritization of packets.
To apply QoS to network traffic, OPNsense uses dummynet and ipfw, independent of the packet filter rules (which use pf). Ever heard of dummynet and ipfw before? Let's clarify them in the following sections.
dummynet and ipfw – a brief introduction
The OPNsense core team chose to not support or use the pf QoS (ALTQ) system in favor of the combination of dummynet and ipfw. This means basically that under the hood, packet filtering, which is done by pf (as we learned above), is independent of the traffic shaping system, so you can disable packet filtering and keep the traffic shaping in operation. dummynet is a FreeBSD system facility that allows classifying packets to the ipfw to manage later. Just in case you don't remember ipfw, it is one of the available packet filtering options in FreeBSD, but in OPNsense it is only used for QoS and Captive Portal, so you can't create firewall rules using ipfw on OPNsense.
Before moving on to the common scenarios in which we can use QoS, let's take a look at common terms used in the traffic shaping context in the WebGUI.
Pipes, queues, and rules
A pipe is basically used to define bandwidth in our traffic shaper rules. In more advanced usage, it is possible to define propagation delays, queue sizes, and packet loss rates in a pipe.
A queue is combined with a pipe to define a weight, which doesn't mean priority, but defines how the available bandwidth will be shared between the packets in the same defined pipe.
A rule is where we can select pipes or queues to apply traffic shaping, defining an interface, source, destination, protocols, and ports.
Let's now check out some examples of when you can use traffic shaping.
Possible scenarios
Some possible scenarios are necessary or considered as contexts where it is a good practice to employ QoS in a network firewall. Let's explore two common scenarios.
Controlling hosts' and users' bandwidth usage
When sharing the same WAN connection across more than one host, it is a good idea to keep some control to avoid a single user consuming all the available bandwidth. A simple way to do that is by applying rules that will limit the maximum bandwidth that each user will have available.
Protocol prioritization
With the massive usage of VoIP and other streaming technologies, it is becoming rare to see someone use a PBX extension with a regular voice line. So, it is very important to prioritize packets for these kinds of application. For example, if there are 20 VoIP packets and 1 for HTTP, the firewall may send out 10 VoIP packets, the HTTP packet, and the rest of the VoIP packets. With all sorts of packets passing through our OPNsense firewall, we need to guarantee that protocols that need real-time processing are first in our packet line, and a good way to do that is by creating traffic shaper rules.
With the massive usage of internet connections in the present world, it is so important to have a good packet filtering ruleset to create and maintain an accurate traffic shaper ruleset. Let's see how to do this in OPNsense.
Creating rules
To start and create a new traffic shaping rule, log in to the WebGUI and go to the Firewall | Shaper menu.
As an example, we will create a rule that defines the maximum download bandwidth usage for each user in our local network. Let's take the example of a local network with a 100 Mbps WAN connection shared across a few hosts.
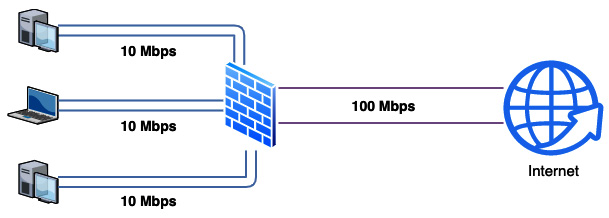
Figure 7.1 – Limiting maximum bandwidth per host
To start creating the rule, go to Firewall | Shaper | Pipe:
- Click on the + icon to add a new pipe.
- Make sure the Enabled option is checked.
- In the Bandwidth field, type 10.
- In the Bandwidth Metric option, select Mbit/s.
- In the Mask option, select destination. This way, each destination will have 10 Mbps available. In our example, with this setting, you can have a maximum of 10 hosts: 10 hosts x 10 Mbps = 100 Mbps.
- Leave the Enable CoDel and Enable PIE schedulers unchecked.
- For the Description field, enter something like Download-10Mbps.
- Click on the Save button.
Note
To learn more about CoDel and PIE schedulers, please take a look at the ipfw man page: https://www.freebsd.org/cgi/man.cgi?query=ipfw&sektion=&n=1
After being created, your pipe will look like this:
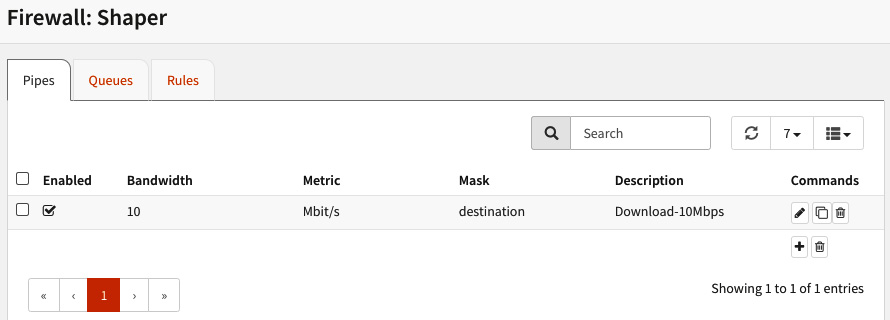
Figure 7.2 – Download pipe example
- Now go to Firewall | Shaper | Rules.
- Click on the + icon to add a new rule.
- Make sure the Enabled option is checked.
- In Sequence, leave the default value (1).
- Interface: For this example, you may select WAN.
- Proto: Leave the default protocol ip selected.
- Source: Leave the default.
- Invert source: As in the case of the firewall rules, you can apply a negate sign here to invert the source selection. Leave this unchecked.
- Src-port: In this example, we will use the default: any.
- Destination: Fill this field with the LAN network address (example: 192.168.0.0/24).
- Dst-port: Leave the default: any.
- Target: Select the previously created pipe.
- Description: Enter something like Download rule.
- Click on the Save button.
- After creating the rule, click on the Apply button. The created rule will look like this:
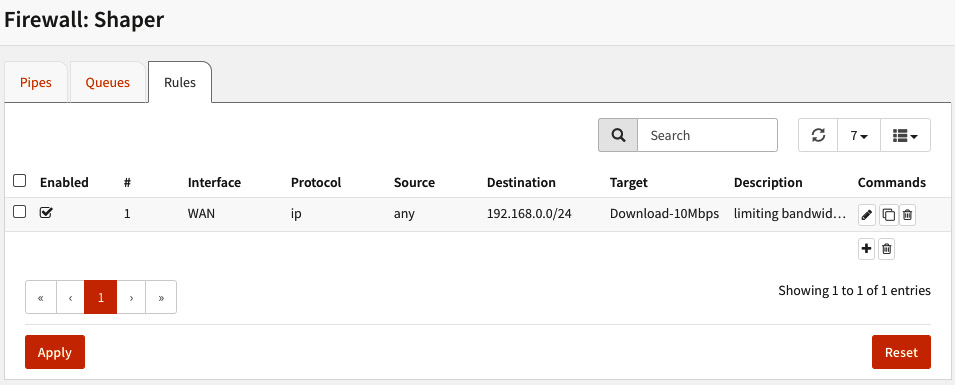
Figure 7.3 – Traffic shaper rule added
To test it, you will need a host connected to your OPNsense LAN. If you try to run a speed test on this host, you might see results like this:
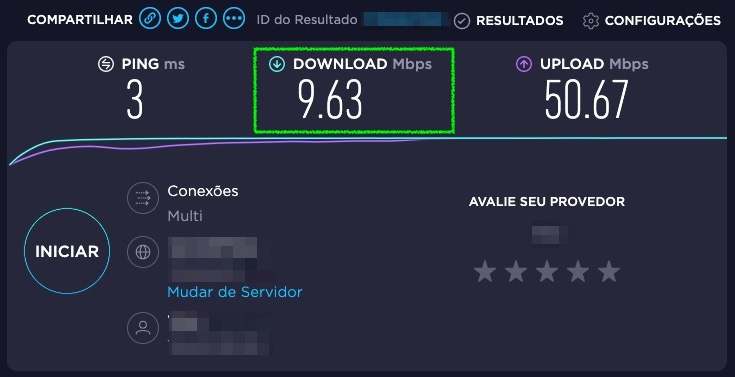
Figure 7.4 – Download results example after traffic shaper rule applied
Notice that only the download was limited. Want to limit the upload too? Pretty easy with OPNsense! Let's do it.
Just clone the created rule, changing Source to the LAN network address and Destination to any. I'll also advise you to set the Description field to something like Upload rule, as this will be useful for clarity in the later Monitoring section in this chapter. Lastly, click on Save and then Apply. Try another speed test:
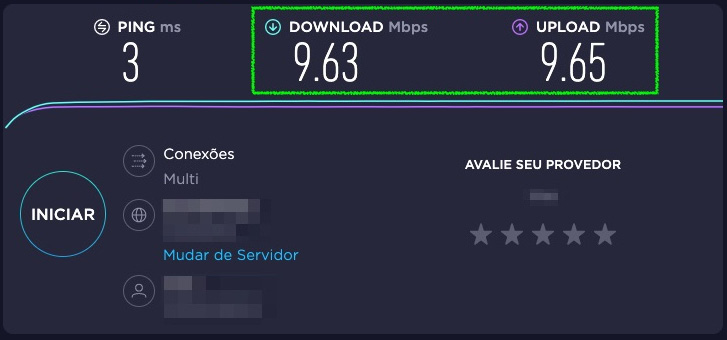
Figure 7.5 – Download and upload results after modifying the traffic shaper rule
Note
Download and upload tests were done using https://speedtest.net.
Great! We have created our first traffic shaping rule, limiting both download and upload bandwidth. Let's now check how to monitor created rules.
Monitoring
To check if the traffic shaper rules are working, you can go to the Firewall | Shaper | Status page. On this page, you will be able to check each rule's statistics, active flows, the number of packets, and the bytes matched by each one.
As an example, I took a couple of screenshots while the speed tests were running:
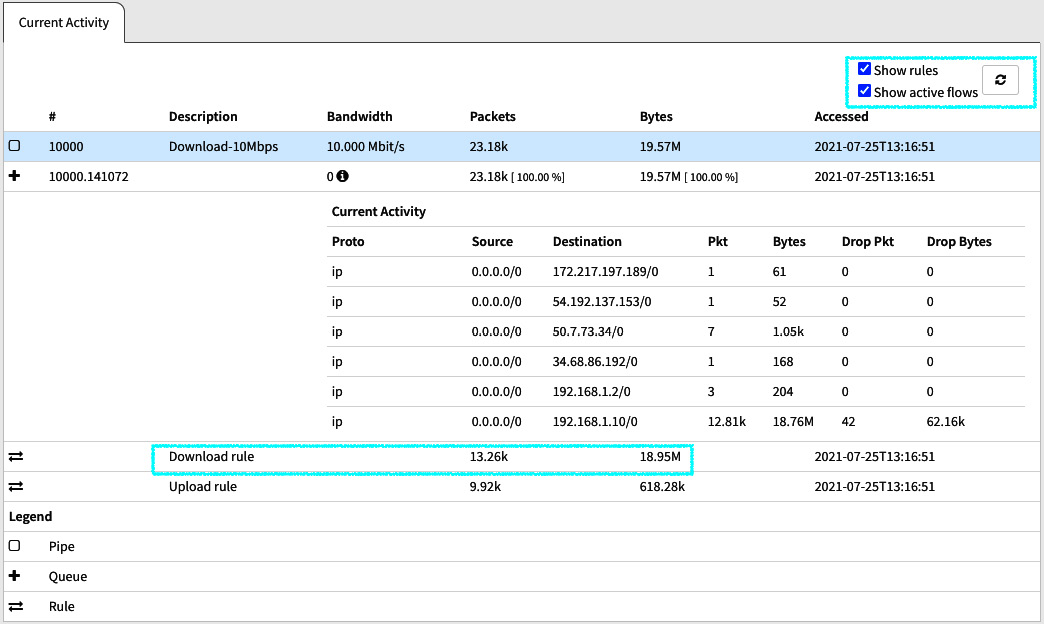
Figure 7.6 – Statistics while testing download speed
Note that the Packets and Bytes values in the preceding screenshot are higher for the download rule than the upload rule.
The following screenshot shows some more traffic shaping rule statistics:
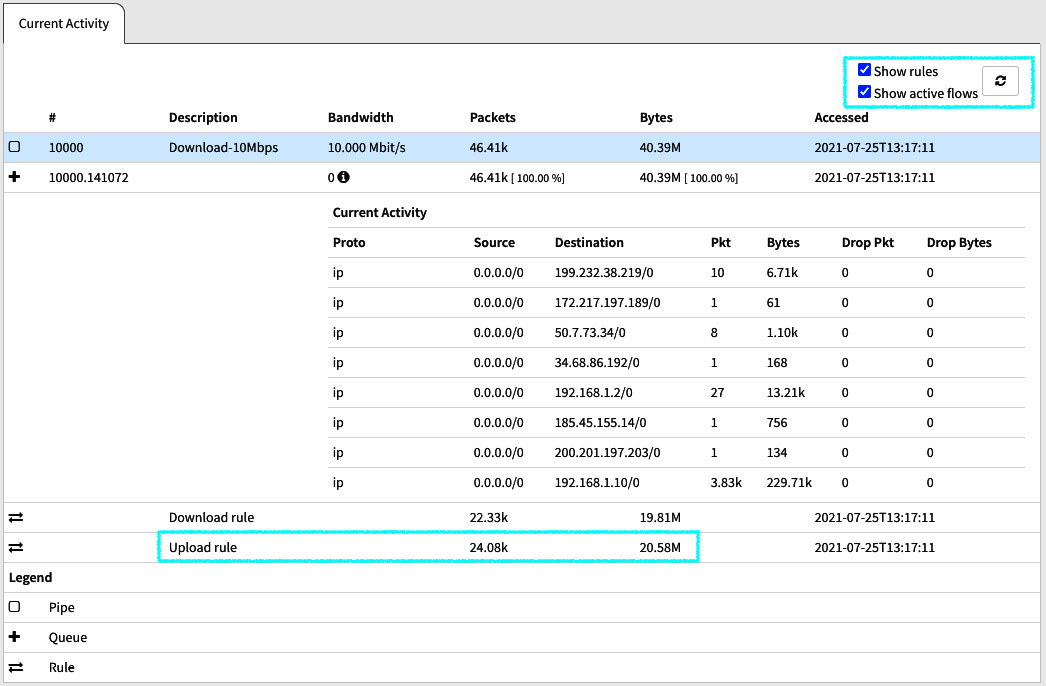
Figure 7.7 – Statistics while testing upload speed
Note that the upload rule's values increased compared to Figure 7.6.
Note
I checked both Show rules and Show active flows before taking these screenshots.
Another way to check bandwidth utilization in real time is on the Reporting | Traffic page, but note that you will be presented with the overall network interface statistics and not specific traffic shaping stats – this is just another visual way to see the maximum bandwidth utilization.
There are other possible traffic shaping scenarios you can explore, some of which you can find in OPNsense's official documentation. There, you'll find some step-by-step "how to" guides that are easy to follow. You can access them at https://docs.opnsense.org/manual/shaping.html.
Due to the limited number of pages available in this chapter, it will not be possible to explore each scenario individually, but the basics you've learned here are sufficient for you to follow any OPNsense traffic shaping tutorial available online.
Summary
In this chapter, you learned about QoS and traffic shaping basics, how to create pipes, queues, and rules in the OPNsense WebGUI, and how to test them. Now you can design a traffic shaping policy based on your network requirements and create rules to apply the policy using OPNsense features. In the next chapter, we will begin our exploration into the world of virtual private networking.