
Chapter 18: Website Protection with OPNsense
With the NGINX plugin, OPNsense becomes a full-featured, solid Web Application Firewall (WAF). It can help you to protect your network and your web servers with the addition of the NGINX plugin. By the end of this chapter, you will be able to use OPNsense as a reverse proxy, WAF, and web server load balancer.
In this chapter, we will explore the following topics:
- Publishing websites to the world
- About the NGINX plugin
- Installing and configuring
- Adding WAF rules
- Troubleshooting
Technical requirements
This chapter requires a clear understanding of how a web server works. Complete knowledge of DNS HTTP(S) and TLS protocols is also essential.
Publishing websites to the world
Nowadays, our modern internet is, essentially, based on web applications. It is rare to see a modern app that is built to run installed on a computer, and even the smartphone-based apps are, for the most part, a responsive version of the website. While managing an OPNsense firewall, you will probably have to deal with websites and web applications. As a modern next-generation firewall solution, OPNsense can provide enough features to keep a website safely online, protecting it against threats. In the following sections, we will explore the NGINX plugin, which does an outstanding job while publishing web server applications and websites protected by OPNsense.
About the NGINX plugin
In the old days, a firewall was just a packet filtering system, and to publish a web server service to the internet, simply adding a NAT rule was enough. With the evolution of the internet, more sophisticated web applications were raised, but the attacks followed at the same pace, becoming more harmful. Good firewall solutions added features such as IDS and IPS to increase the protection level of applications and the users behind them. Still, web applications require more detailed filters to protect them against the threats of bad actors than packet filtering and a network IPS.
A solution to help web servers and applications become better protected emerged: HTTP reverse proxies. Similar to a web proxy, the reverse proxy stands between the users and the web servers, but in reverse, that is, the users are outside the local network and the web servers are inside.
The following diagram illustrates how a reverse proxy works:
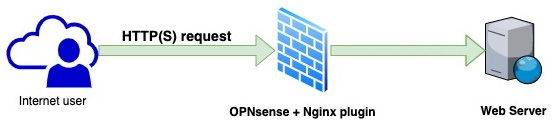
Figure 18.1 – A reverse proxy topology example
Some well-known open source reverse proxies are Apache HTTP Daemon, NGINX, and HAProxy. Deciso, the company behind OPNsense, recently launched an Apache-based plugin that is available for OPNsense Business subscribers. So, supposing you started reading this chapter as a reference to set up a reverse proxy or even a WAF, I suggest you take some time to research the available options for OPNsense so that you can choose the better choice for your project needs.
This chapter will focus on NGINX, as OPNsense has a robust plugin based on it. This plugin is freely available, so you can use a regular OPNsense installation to install and configure it.
NGINX
NGINX (pronounced engine X) is a powerful web server used widely by big websites on the internet. It can also be deployed as a reverse proxy and load balancer. Other than HTTP, NGINX also supports the SMTP, IMAP, and POP3 email protocols for email proxying. The project claims to be faster than its rival, Apache.
Note
At the time of writing, the SMTP, IMAP, and POP3 protocols are currently not supported by the plugin.
In OPNsense, the NGINX plugin was created by Mr. Franz Fabian, an active project contributor – and, proudly, one of the technical revisors of this book!
As a complete plugin with many features, NGINX could be complex to configure. Still, a complete plugin can be used as a reverse proxy, and it eases a lot of the configuration process compared to doing everything using the CLI. The protection level it delivers is pretty decent, and you can do almost all of the usual action only using the webGUI, except if you are an NGINX hacker!
Plugin concepts
Before moving on to the installation and configuration, we need to learn about some essential concepts that the NGINX plugin uses.
Upstream server
Usually, this is the web server host. The upstream server is the host that will serve the website or application to the world or the network.
Upstream
The upstream could be a cluster of servers (or upstream servers). This concept could be used in a similar manner to a load balancer, in which multiple servers (and ports) can be allocated to a single upstream (with a minimum of a single node).
Location
The location is a configuration that maps an HTTP resource path to some configuration. This could be a load balancer target, but it can also be a local directory to serve or force HTTPS.
HTTP server
An HTTP server represents a server configuration block that defines the hostnames, TLS certificate, and more. It will specify the listening port (HTTP/HTTPS) to serve requests, usually to the internet.
These are the basic concepts we will need to understand to configure the NGINX plugin in OPNsense. As I mentioned earlier, the plugin has complete features, and talking about them would require maybe two or three dedicated chapters.
In this chapter, we will focus on how to do the basic configuration of the NGINX plugin with WAF capabilities. Now that we have the basics of the plugin covered, let's move on to the practical part, where we will explore how to install and configure it.
Installing and configuring the NGINX plugin
To install the NGINX plugin, follow these steps:
- Go to the System | Firmware | Plugins tab:
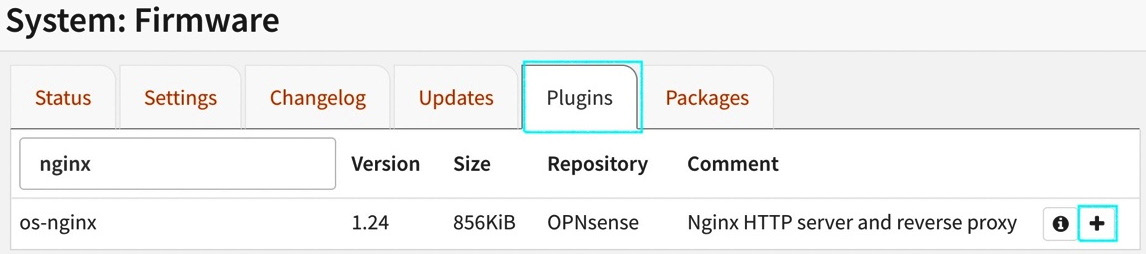
Figure 18.2 – Adding the NGINX plugin
- To add the plugin, find it and click on the + button.
Before enabling the NGINX service, we need to adjust the webGUI configuration to avoid any port conflict between NGINX and the Lighttpd (the process that serves the webGUI).
- To change the webGUI connection port, go to System | Settings | Administration.
- Change the TCP port option from 443 to another port such as 8443, for example.
- Check the HTTP Redirect Disable web GUI redirect rule option. This will free TCP port 80 (HTTP):
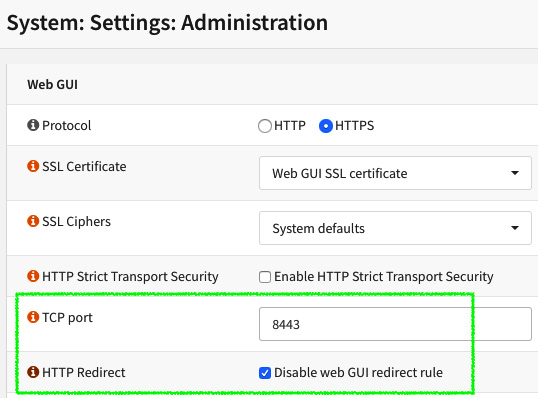
Figure 18.3 – The webGUI configurations details
Note
The following steps will change the ports of the webGUI. Ensure that you have the firewall rules to allow access from the webGUI to the new TCP port configuration before applying the configurations.
- After configuring these options, click on the Save button and access the newly configured webGUI port. You can also access the newly configured webGUI port by changing it on the URL.
- After being installed, the plugin configuration page can be located at Services | NGINX | Configuration.
- Let's start the configuration by creating an upstream server entry. In the Upstream Server page, we will set the web server that will serve requests and has the web page/application hosted in it:
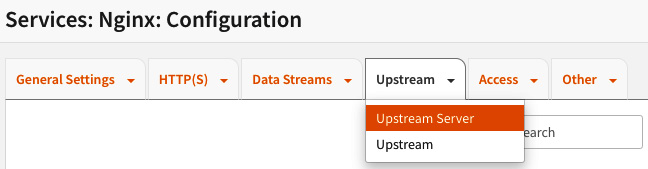
Figure 18.4 – The Upstream Server submenu
- Click on the Upstream menu and then the Upstream Server submenu. To add a new server, click on the + button:
Figure 18.5 – The add button detail
- On the Edit Upstream server page, the following fields are available:
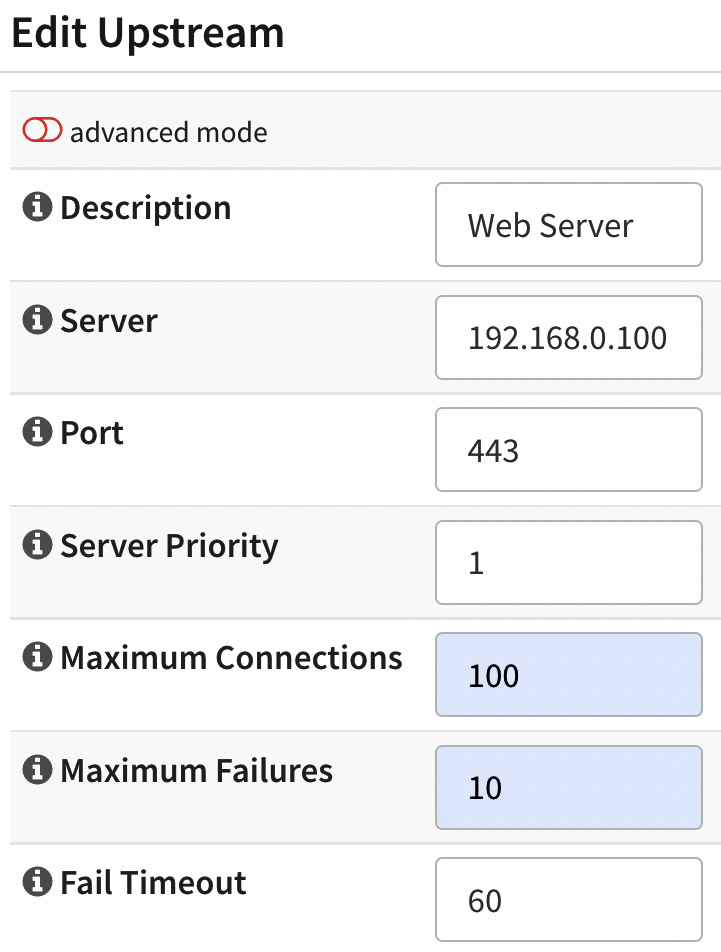
Figure 18.6 – The upstream server edit page
Let's look at each field in a little more detail:
- Description: Here, you can enter the description of the web server entry.
- Server: Here, you can enter the web server's IP address or internal hostname (note that NGINX must be able to resolve it).
- Port: Here, you can enter the web server's port, usually 80 (HTTP) or 443 (HTTPS).
- Server Priority: This defines the priority for this server entry. While using a backend upstream with multiple web servers, this priority will determine which servers will be receiving requests preferentially.
- Maximum Connections: This defines the limit of simultaneous requests that this server will handle.
- Maximum Failures: This refers to the maximum number of connection failures before considering this server offline for the backend.
- Fail Timeout: This refers to the maximum amount of time, in seconds, that the backend will wait for the server to reply before considering it offline.
Click on the Save button to finish the configuration. You should see it listed as follows:
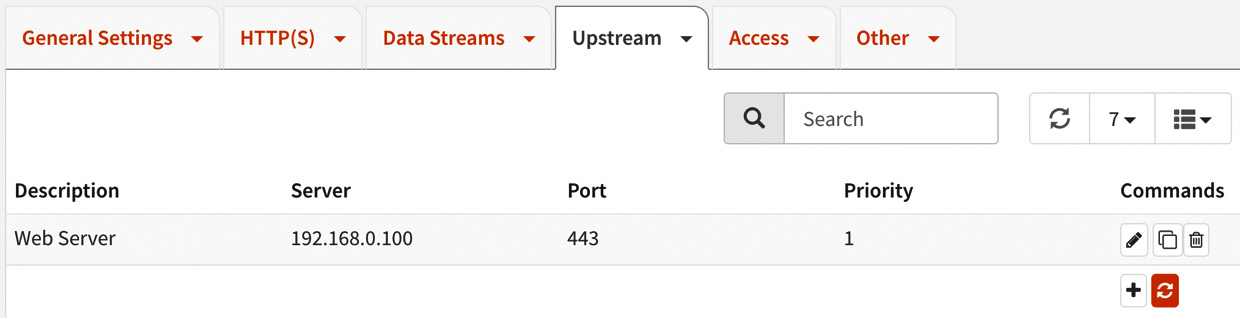
Figure 18.7 – The configured upstream server
- After configuring the upstream server, we need to link it to an upstream. Click on the Upstream menu and then the Upstream submenu to create a new upstream by clicking on the + button.
On the Edit Upstream backend page, the following fields are available:
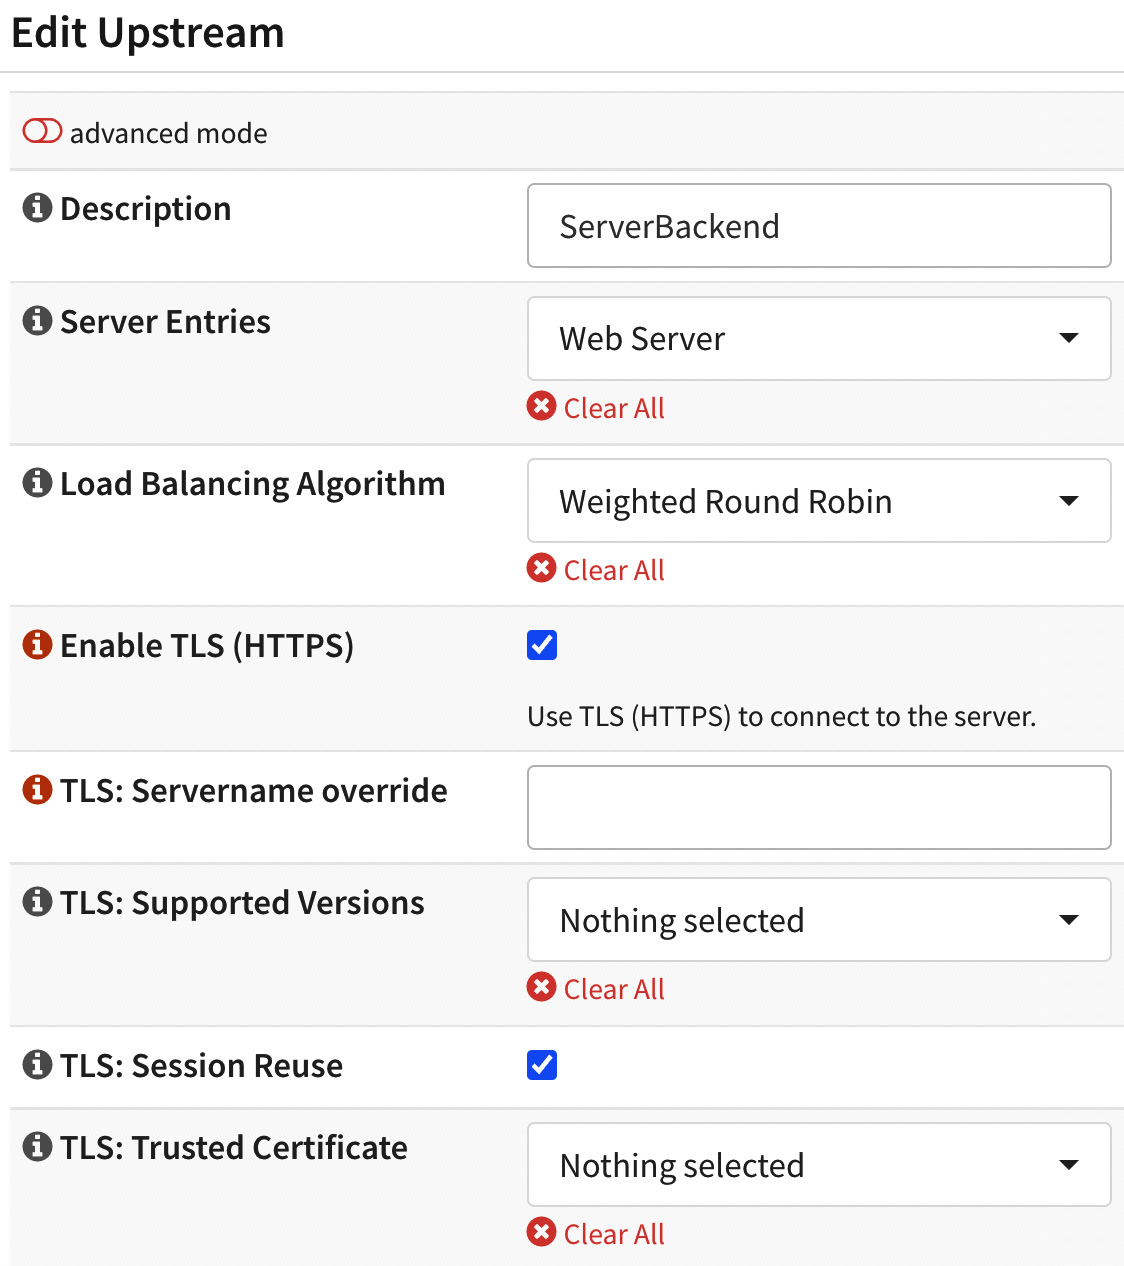
Figure 18.8 – Editing the upstream backend
The following options are available in the Edit Upstream dialog:
- Description: Enter a description for this backend.
- Server Entries: Select the previously added upstream server.
- Load Balancing Algorithm: Select the Weighted Round Robin option.
- Enable TLS (HTTPS): Mark this option to enable HTTPS connection to the upstream server.
- While using a web server with a self-signed certificate, it is necessary to click on the advanced mode option to disable the certificate validation:
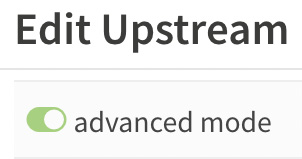
Figure 18.9 – The advanced mode button detail
- Leave the TLS: Verify Certificate option unchecked:
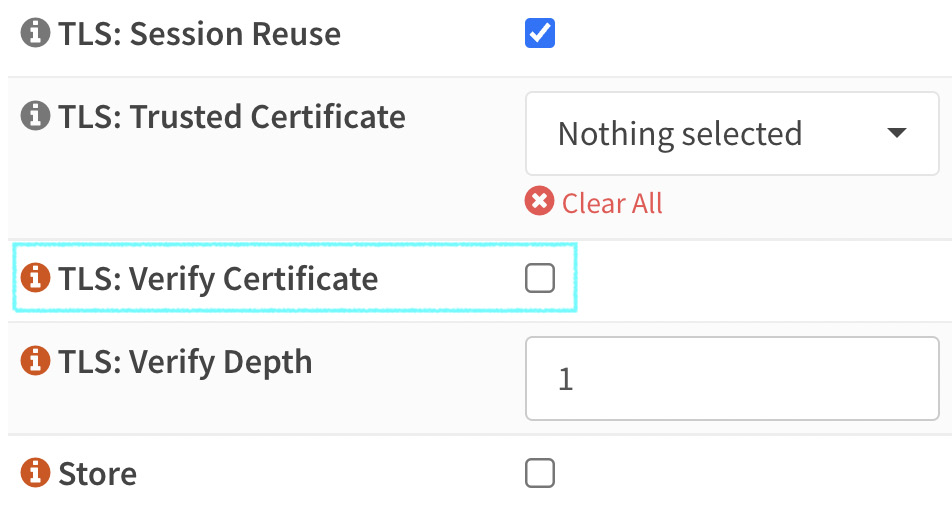
Figure 18.10 – The advanced mode TLS: Verify Certificate option detail
- To finish adding the new backend, click on the Save button.
- After configuring the backend, we need to add a new location. To add a new location, go to the HTTP(S) menu and then the Location submenu.
- Click on the + button to add a new location.
On the Edit Location page, fill in the following fields:
- Description: Enter a description for this location.
- URL Pattern: Fill this with the / (slash character). It will instruct NGINX to set the URL pattern will match to any path published by the web server.
- Upstream Servers: Select the previously created upstream backend.
- If you want to redirect HTTP requests to an HTTPS port, check the Force HTTPS option.
- Finish the configuration by clicking on the Save button. The newly configured location will be listed as follows:

Figure 18.11 – Added location example
- To add a new HTTP server, go to the HTTP(S) menu and then the HTTP Server submenu. Click on the + button to add a new HTTP server.
On the Edit HTTP Server page, set the following configuration options:
- HTTP Listen Address: This will set which port will listen to HTTP requests. You can leave it with the default values – 80(IPv4) [::]:80 (IPv6).
- HTTPS Listen Address: This will set which port will listen to HTTPS encrypted requests. You can leave it with the default values – 443 (IPv4) [::]:443 (IPv6).
- Server Name: This refers to the FQDN hostname for this HTTP server; for example, www.example.com.
- Locations: Select the previously created location.
- TLS Certificate: Select the TLS certificate that will be used for HTTPS requests. Usually, it would be necessary to install a valid certificate in OPNsense for this option to be available. For testing purposes, you can select the Web GUI TLS certificate option.
Note
To use valid certificates at no cost, you can install the os-acme-client that provides the Let's Encrypt backend, which is an open certificate authority created by Internet Security Research Group. Installing the mentioned plugin provides the functionality of creating valid certificates for free.
Another approach is to create a self-signed certificate.
- Finish the configuration by clicking on the Save button.
- Now the NGINX service can be started without any issues. Go back to the Services: NGINX: Configuration menu and enable the service:
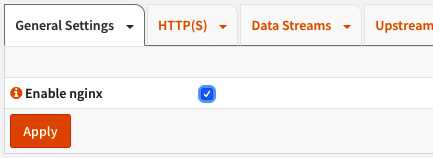
Figure 18.12 – Enabling the NGINX service
- Check the Enable NGINX option, and click on the Apply button.
The following is a screenshot of the NGINX service's running state on the webGUI:

Figure 18.13 – NGINX service running
We will need to simulate the added www.example.com address by adding it to the DNS resolution for our local machine to test. The simplest way to do that is to add it to our operating system's /etc/hosts file.
The path of this file on Windows is c:windowssystem32driversetchosts.
On a Unix-like OS (including Mac and Linux) you can find this file at /etc/hosts.
- Edit the file using a user with administrative privileges, and add the following line:
192.168.3.3 www.example.com
Use one of your OPNsense-configured IP addresses. In this example, I will use IP 192.168.3.3, which is my OPNsense VM WAN's IP address.
- In step 5, we have used IP address 192.168.0.100 as the upstream server. If you have a web server in your local network to test, you can change it to its IP address. Otherwise, we can set it to an external website IP address, such as www.opnsense.org.
- To find the website IP address, navigate to Interfaces | Diagnostics | DNS Lookup on the webGUI and type in the website address (www.opnsense.org) to find its IP address.
As I'm writing this chapter, the OPNsense website has an IP address of 178.162.131.118. So, I will go back to step 5 and change it on the Upstream Server page from 192.168.0.100 to 178.162.131.118, to test using an external web server instead of a local one.
Every time you need to apply changes on the NGINX plugin, after saving the changes, you must click on the button shown in the following screenshot:

Figure 18.14 – The NGINX plugin's apply changes button
- Click on the apply changes button.
- Open an anonymous browser window and type in the following URL: www.example.com. You should see OPNsense's website! Congratulations; you just configured your OPNsense as a reverse proxy!
With this, you have finished the NGINX basic configuration. Now, we can move on to add some website protection to our NGINX plugin's configuration.
Adding WAF rules
The NGINX plugin implements a WAF with the help of the NAXSI (NGINX Anti XSS & SQL Injection) module. This module works with predefined rules that match 99% of known patterns found in website vulnerabilities. The NAXSI module was created and maintained by NBS System, a French security company (ref: https://www.nbs-system.com/):
- To add the NAXSI rules to the NGINX plugin, go to the HTTP(S) menu, followed by the Naxsi WAF Policy submenu. When the rules haven't been installed, the following button will be visible:
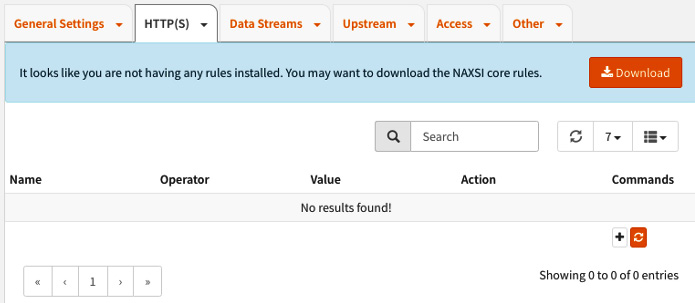
Figure 18.15 – The NAXSI download rules button
- Click on the Download button to install the rules. You will be prompted with a dialog box about the NAXSI rules licensing. You must click on the Accept and Download button to agree with the license terms (the GPLv3 license):
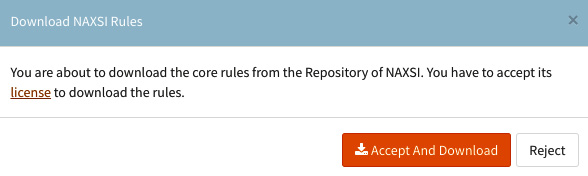
Figure 18.16 – The NAXSI license terms dialog
After it has been downloaded, the rules will be listed as follows:
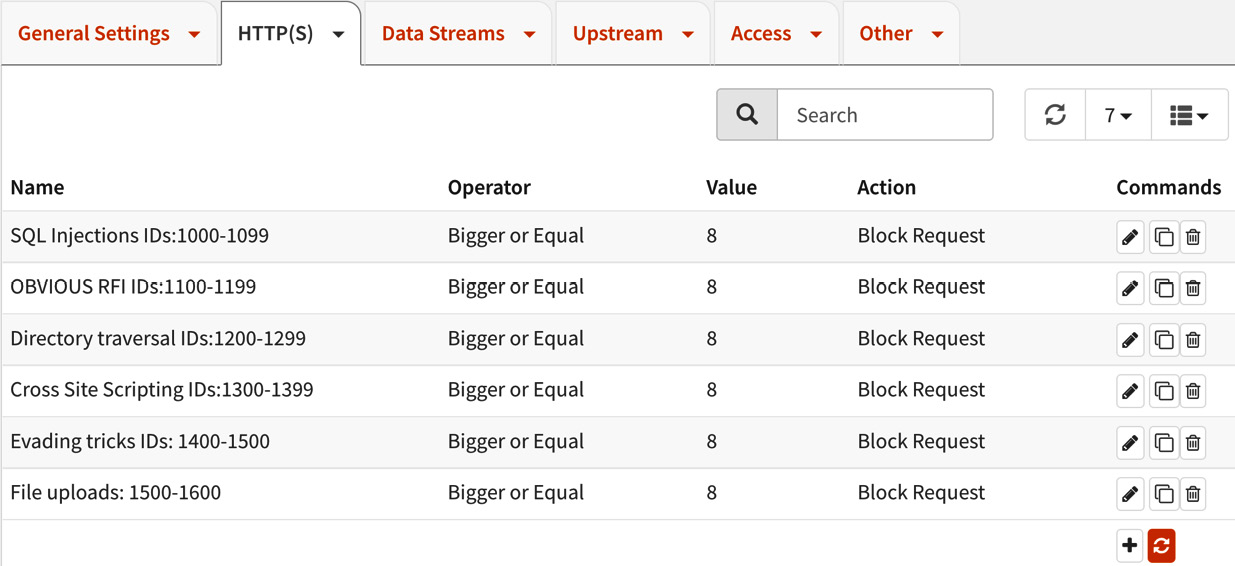
Figure 18.17 – The installed NAXSI rules
- To enable the NAXSI rules and WAF capabilities, go back to HTTP(S) | Location and edit the existing location:
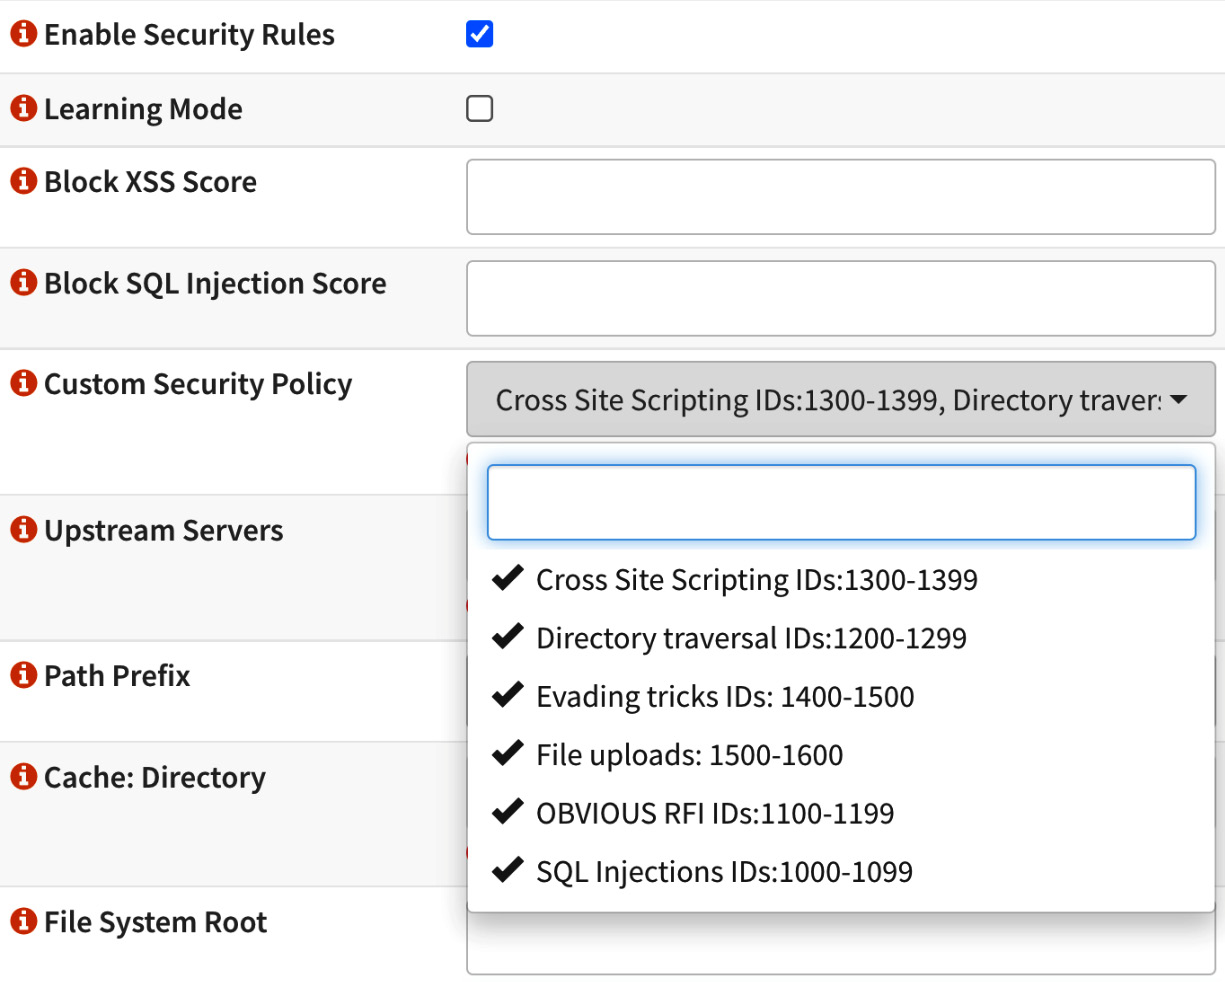
Figure 18.18 – Editing the existing location
- Check the Enable Security Rules option, which enables the WAF in the NGINX plugin.
- The Learning Mode option is useful as it allows you to enable the WAF but without blocking. It will just log the requests that should be blocked. In this way, you can analyze the logs and adjust the rules before blocking any requests. For our example, leave it unchecked.
- In the Custom Security Policy field, select all the existing NAXSI group rules.
- Click on Save, and then click on the apply changes button.
- Now you can try to simulate an attack, such as a SQL injection, for example, and see the WAF doing its job:
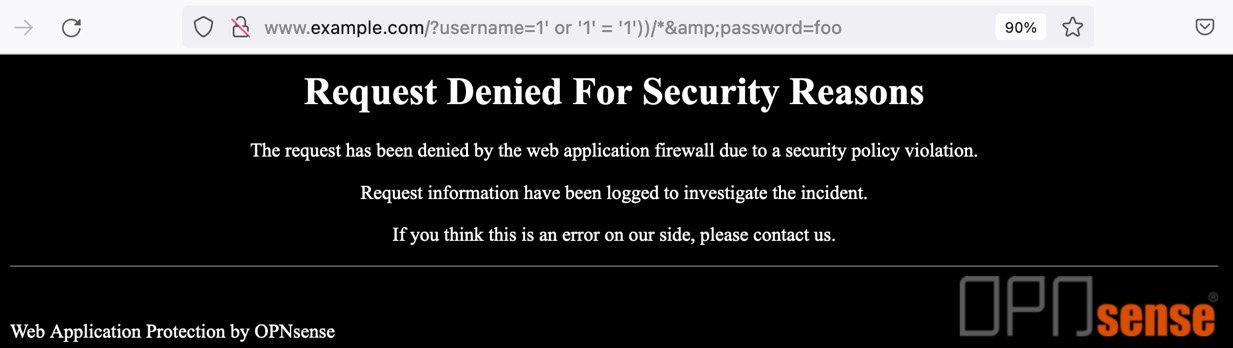
Figure 18.19 – Testing the WAF rules
Here is the tested URL: http://www.example.com/?username=1'%20or%20'1'%20=%20'1'))/*&password=foo.
Note
You can check out some attack examples and how to use them in the complete OWASP guide at https://owasp.org/www-project-web-security-testing-guide/latest/.
Congratulations! Now your OPNsense has one more security feature: a WAF!
Next, let's look at practical tools you can use for troubleshooting the NGINX plugin.
Troubleshooting
As a complex system, a reverse proxy or a WAF can lead you to troubleshooting scenarios that require a lot of logs reading along with some web server and application knowledge. Here, we will explore a few tools that might help you to solve a quest.
Testing for configuration issues
Sometimes, even with all of the help and automations that the webGUI plugin frontend has, some configuration issues could appear, making the NGINX service unable to start. To test the NGINX configuration, you can log in to the OPNsense CLI and run the following command:
root@OPNsense-1:~ # nginx -t
nginx: the configuration file /usr/local/etc/nginx/nginx.conf syntax is ok
nginx: configuration file /usr/local/etc/nginx/nginx.conf test is successful
For a more complete testing and configuration output, you can also run nginx -t.
Logs reading
In the webGUI, we find the NGINX | Logs menu. Inside this page, it is possible to check every created HTTP server log file and the NGINX service log file:
- HTTP Access Logs: This will show the HTTP requests to an existing HTTP server.
- HTTP Error Logs: In this menu, you will find the errors related to the requests. The NAXSI blocks can also be checked in this log file.
- Global Error Log: This is the service log file. If something goes wrong with the NGINX daemon, you will find information about it in this log file.
As I mentioned earlier, a WAF or a reverse proxy is a complex system. It could present many issues depending on the complexity of the configuration, the number of hosted web applications, integrations, and more. Eventually, troubleshooting could demand web server logs, the web developers that are involved, DNS checks, firewall rules, and IPS checks.
Note
Remember to add a firewall rule to allow incoming traffic for NGINX's configured ports.
Summary
At this point, you can affirm that OPNsense has a robust security stack and can even act as a WAF in the frontline of a cloud or network infrastructure. This chapter taught you how to install and configure the NGINX plugin, and you also learned how to enable its WAF features and protect the infrastructure of web servers. In the following chapter, we will jump into the CLI world and see how it can extend your tools and knowledge by executing commands in OPNsense.