Chapter 11
Getting into Word Online
With the release of Office 365, an updated version of Word is available that runs as a web application in your web browser. This development may not sound very spectacular, but it has some nifty benefits that we explore in this chapter.
In this chapter, we explore some of the basic concepts of Word Online, such as using the web interface to create, read, edit, and delete documents. We also look at some of the advanced features of Word Online, including working with styles and tables.
Comparing Word Online and Word
Unless you have been living under a rock, you have probably used or heard of a program called Microsoft Word. Word is an aptly named word processing application. In fact, I am writing this text with Word (and looking out at the Seattle sunshine this afternoon). Word is a thick client, meaning that you run it from your local computer. In Windows 10, you click Start and then All Apps and you click Word to fire up the program. Word then runs on your computer. A web-based application, on the other hand, runs on a computer in a data center, and you access it over the Internet. If you use Outlook.com or Gmail for email or browse a web page, then you are using a web application. You access a web application by using a web browser, which is a program installed on your computer.
Although Word Online is still Microsoft Word, there are some differences between the two. The biggest difference is that Word runs on your local computer, and Word Online runs in the cloud and is accessed by using your web browser.
When you fire up Word on your local computer and create a document, that document can either stay on your local computer or be saved to the cloud. When you click the Save button and save the document, you are prompted for the place where you want to save the file. For example, you can choose to save in a cloud location (such as OneDrive or Dropbox) or you can choose to save the document on your local computer in a location such as the Documents directory or your Desktop. In any case, your creation is a physical file located on a cloud-based storage location or your local computer. When working with Word Online, however, you do not have a local physical file. When you create a document and save it, your document lives out in the cloud. In the case of Office 365, your document lives within a SharePoint Online document library app or OneDrive.

TIP
You can create a document using Word on your local device, save it to the cloud, and then edit it using Word Online. Word Online works even if you are at a computer that does not have Word installed locally, because Word Online only needs a web browser. You can even save a Word Online document to your local device using the Download a Copy button on the File menu.
Getting the Basics
You need to know some basic things about Word Online, such as how it differs from the traditional Word application that runs on your desktop or laptop. You also want to become familiar with the Word Online interface and discover how you can easily work with documents right from your web browser.
Using the Word Online interface
The Word Online interface is almost identical to the regular Word interface, except that it runs within your web browser. The interface contains a Ribbon at the top of the screen, which contains such tabs as File, Home, Insert, Page Layout, Review, and View.
The Home tab contains common functionality in groupings, such as Clipboard, Font, Paragraph, Styles, and Editing, as shown in Figure 11-1.
You use the Insert tab to insert objects into your document, such as a table, a picture, add-ins, links, comments, and notes. The Insert tab is shown in Figure 11-2. You can learn more about how add-ins work with the Office products in Chapter 12.
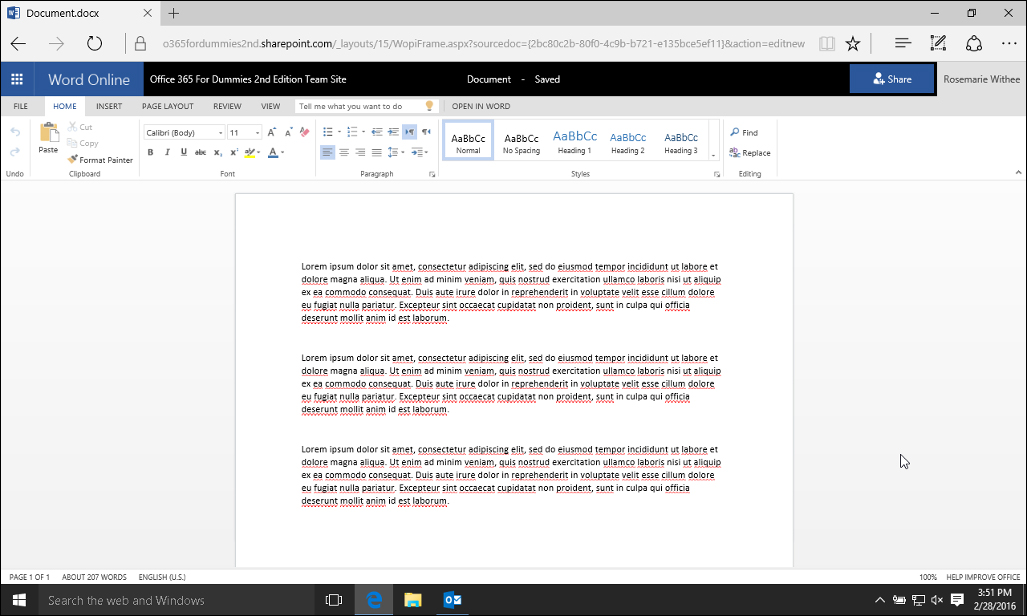
FIGURE 11-1: The Home tab on the Word Online Ribbon.

FIGURE 11-2: The Insert tab on the Word Online Ribbon.
The Page Layout tab is where you can change the formatting of the document. You can change things like the margins widths, orientation (portrait or landscape), the paper size, indentation, and line spacing. The Insert tab is shown in Figure 11-3.

FIGURE 11-3: The Page Layout tab on the Word Online Ribbon.
The Review tab includes such functionality as spell check and comments. You can use the Review tab to add comments and collaborate with others on the document without actually changing the contents of the document itself. The Review tab is shown in Figure 11-4.
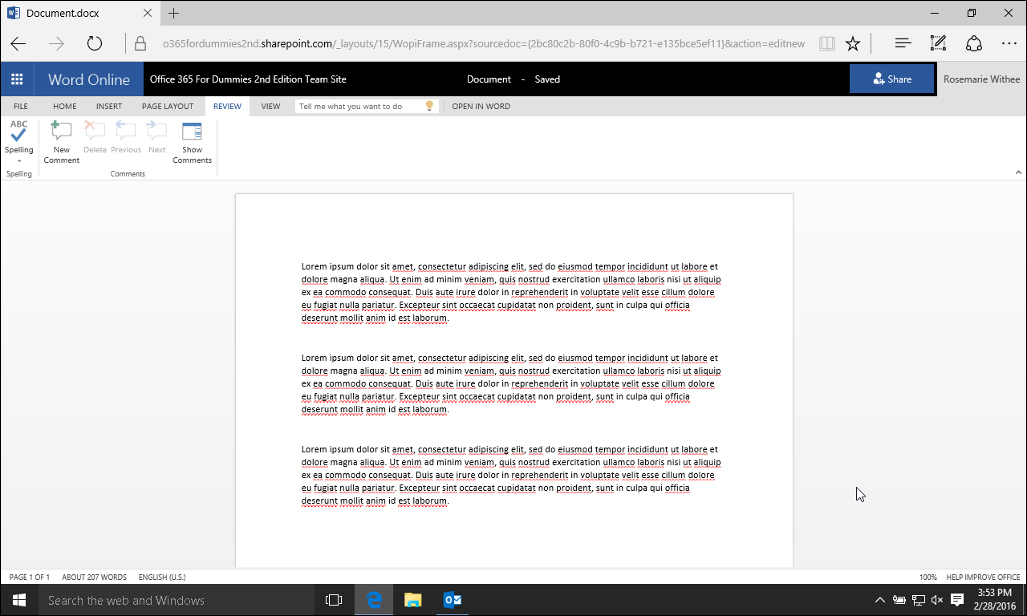
FIGURE 11-4: The Review tab on the Word Online Ribbon.
The View tab allows you to flip between an Editing View and Reading Mode. When in edit mode, you can work with the Home and Insert tabs to modify and develop your document. In addition, you can also find the capability to zoom in on the document and change the view to show page ends and the header and footer. The View tab is shown in Figure 11-5.

FIGURE 11-5: The View tab on the Word Online Ribbon.
In addition to the standard tabs in the Ribbon, there are also specialized tabs that only show up when you are working with certain objects. For example, when you select a picture by clicking on it, you will see a new tab — Picture Tools, as shown in Figure 11-6. The Picture Tools tab contains functionality for working with a picture, such as adding alternate text or resizing the image.
In addition to the Ribbon tabs, the interface also includes a File menu. The File menu allows you to save the document, open it by using the traditional Word application located on your computer, or close the document and return to the document library app that houses the document. The File menu is shown in Figure 11-7.
Working with documents
Creating a new Word document in a SharePoint document library app is easy:
1. Browse to the Documents tab on the Ribbon.
2. Click the New button at the top.
3. Choose the document type, as shown in Figure 11-8.

FIGURE 11-6: The Picture Tools tab on the Word Online Ribbon.

FIGURE 11-7: The File menu on the Word Online interface.

FIGURE 11-8: Creating a new Word document in a SharePoint document library app.
When you create a new document, SharePoint is smart enough to create the new document using Word Online, but you can also open the document by using Word installed on your local computer or device.
After you have finished developing your document, you can save it. Doing this automatically saves it to the document library app in which you created it. You can then click on the document to view it and then edit it further by using either Word Online or the local Word app running on your computer, phone, or tablet.
Editing and Reading Modes
The preceding section discussed working with Word documents in Editing Mode. There are times however when you simply want to read the document and not edit it. When you want to only read the document you can switch to Reading View, which looks very similar to a document that is printed on paper. A document in Reading View is shown in Figure 11-9. The Reading View is found on the View tab.

FIGURE 11-9: A Word document in Reading View in Word Online.
Working with Advanced Functions
Word Online contains features beyond just adding and modifying text-based content. In particular, you can
![]() Manage styles in order to standardize the look and feel of your document.
Manage styles in order to standardize the look and feel of your document.
You find the styles functionality on the Home tab.
![]() Insert Word objects, such as pictures, tables, add-ins, and links.
Insert Word objects, such as pictures, tables, add-ins, and links.
You can insert items on the Insert tab.
Styles
The styles let you consistently format a document by selecting a predefined style rather than going through a manual process. For example, you may want your headings to be larger font and a different color. You can, of course, type the text and then highlight the text and make it bigger, and also change the color, but using this method is a lot of work for every heading. A style allows you to simply click the Heading style to make the change, as shown in Figure 11-10.
FIGURE 11-10: Selecting a heading style in Word Online.
Tables
A table provides a mechanism for organizing content in your document. A table is divided into vertical columns and horizontal rows. You can insert a table with Word Online by following these steps:
1. Click on the Insert tab.
The Insert tab displays the Ribbon that allows you to insert items into your document.
2. Select the Table button.
When you select the Table button, you are presented with a grid that allows you to visually choose the number of rows and columns you want to include in your table, as shown in Figure 11-11.
3. Highlight the number of rows and columns you desire for the table and then click the left mouse button.
The table is automatically inserted into the document.

FIGURE 11-11: Inserting a table into a document by using Word Online.
After the table is created, you can add content to the cells of each column. The table provides a lot of flexibility in the look and feel and layout of the content in your Word document.