Chapter 23
Ten Tips for Increasing Productivity with Office 365
Office 365 as a cloud technology affords any organization the benefits of a sophisticated data center without the hassle and the cost of maintaining one. For as low as $5 per month per user, storing files in the cloud that are backed up to redundant servers relieves businesses of the burden of constantly backing up and archiving critical business data.
In this chapter, you find “ready-to-apply” tips and tricks for increasing productivity and efficiency in your organization or your practice. Think of this chapter as your shortcut to knowing how you can, as Bill Gates puts it, “magnify the efficiency” gains from a much-streamlined operation through the use of Office 365.
Self-Serve from the Service Health Dashboard
If you’re the designated admin for your organization, you’ll most likely receive inquiries about issues your users are experiencing in Office 365. Before you spend a lot of time troubleshooting an issue, check out the Service Health Dashboard in Office 365 first to determine whether the issue is from your end.
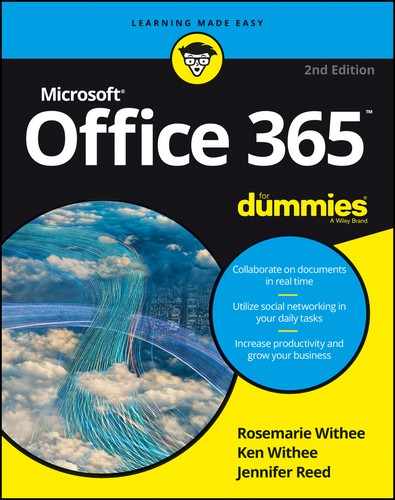
A new look and feel of the Office 365 portal is still in preview but scheduled to be rolled out soon, as of February 2016. In it, you can manage your Office 365 tenant: manage users, create groups, update subscription, review billing, contact support, configure settings, run reports, and view the health of the service (see Figure 23-1).

FIGURE 23-1: Preview version of the new Office 365 admin Dashboard.
If any of the tracked services in the Service Health Dashboard isn’t green, you see helpful information on the background of the issue, who is impacted, what Microsoft is doing about it, and what the next steps are.
Having insight into which service is up or down will save you a lot of time and even a phone call to support if you already know someone is working on it.
Act Like the IT Guy
At one point or another, we all secretly wish we had the awesome powers of the IT Guy. This is the person who can magically unlock your computer, reset your password, and give you access to privileged content in your organization.
So what happens if you lose your phone with confidential data info and the IT Guy isn’t available? Well then, you can act as the IT Guy.
You can easily wipe data from your wireless device and even delete the device from your account to prevent a security and/or privacy breach.
Quickly wipe data or delete your device from your Exchange Online account by taking these steps:
1. Log on to the Office 365 portal at http://portal.microsoft.com.
2. From the app launcher, click the Mail tile.
3. To the right of the Office 365 navigation bar, click the Settings icon.
4. Click Mail from the Settings pane on the right.
5. Click General from the left pane.
6. Click Mobile devices, then select the mobile device that’s synced to your account.
7. Click the Wipe device icon (see Figure 23-2).
You may also want to remove the mobile device altogether from your account by clicking the Remove icon (looks like a minus sign).

FIGURE 23-2: Remotely wipe a device.
Share the Workload
It isn’t uncommon for IT staff to end up spending a lot of time taking care of Help Desk types of tasks and not have a lot of time to be proactive and strategic.
In Office 365, IT staff can empower their users to manage SharePoint site permissions and even enable users to invite external users. Check the settings in the SharePoint admin center and choose one of the two external sharing options (see Figure 23-3) that meets your organization’s needs to start sharing this workload with others in your organization.

FIGURE 23-3: External sharing options in SharePoint Online.
Use the Scheduling Assistant
There’s nothing more maddening than trying to set up a meeting with a bunch of people and not knowing their availability. In Office 365, the free/busy information in Exchange Online saves the day. This functionality lets you know whether the person is free, busy, working elsewhere, out of office, or has a tentative meeting on the calendar. It works not just for people but also for resources, such as conference rooms.
You see a person’s free/busy information when you create a meeting and use the Scheduling Assistant. Here’s how:
1. Create a meeting invitation in Outlook.
2. Add the people you want to invite to the meeting.
3. From the Ribbon, click Scheduling Assistant.
4. If the time you picked looks blocked for any your invitees, find a time that works best for all, then click the Send button.
Share Your Calendar
One cool feature of the Outlook Online is that the calendar is just as robust as the desktop application. You can apply colors to your appointments for an at-a-glance review of your day, week, or month, send a meeting request, set up alerts and notifications, and a whole lot more.
You can share your calendar to people outside your organization to make it easy for them know your availability. You can choose to give them full details for your calendar, limited, or just show your availability.
To share your calendar from the Outlook Online, follow these steps:
1. Click the Calendar icon from app launcher.
2. Click Share from the top navigation, and then click Calendar.
3. Enter the email address or addresses of the people you want to share your calendar with, then choose the details you want to share.
4. Click Send.
Do a Face Recall
If you work for a large organization, you may end up working with several people with the same name. If you search your inbox for an email from someone who shares the same name with other people you work with, you need to make sure you’re picking the right person. You can quickly narrow your search results by looking at the picture that’s displayed next to the contacts’ name right from the search results. Neat, yeah?
Unclutter with Clutter
Filter low-priority emails from your mailbox using Clutter so you can focus on the messages that matter most. Office 365 keeps track of your email behavior and learns from it so it knows which emails matter or don’t matter to you. The emails that end up in the Clutter folder still are there for review; they aren’t deleted. You can also “teach” the system your preferences by moving an email back to the Inbox if it ended up in the Clutter folder.
The great part about this? You don’t have to do anything! Clutter is on automatically so you can move right along to the next tip.
Sync Your Files
Regardless of how connected you are, you’ll inevitably run into a situation where you don’t have Internet access. Just because you’re without access doesn’t mean your efficiency has to go down.
You can continue to work on your OneDrive for Business or SharePoint Online documents offline and sync them back to the server when you have an Internet connection. The OneDrive for Business app should be installed as part of Office Pro Plus. If you don’t see it, click on OneDrive from the app launcher in Office 365, click Sync from the top navigation, then follow the prompts. The same button is available in SharePoint Online document libraries.
Kill the Email Tree
Here’s the situation: You have a report due in three days and you need input from John, Jane, Mary, and Peter. You email all of them asking for input. John and Jane reply with their input. Mary didn’t see your email. Peter replies and copies Beth. Beth replies but bcc’s David. David replies to all but forgets to include Beth. You finally have all the input and you’re about to finalize the report but Mary, at the last minute, replies to all but doesn’t look at the input from Beth and David. So now you have to add her feedback and resend the new version for everyone to review.
This story can go on and on until your hair turns gray out of frustration, but there’s a better way to do this: Kill the email tree. Use Yammer instead.
With Yammer, everyone will see everyone’s feedback. If someone new comes along, that person will see everyone’s feedback. So there. No more email trees.
Get Modern with Your Attachments
In the old world, you would work on a document, save it in a document library, assign the right permissions to the library, grab the link for the document, fire up Outlook, start an email, then send the link to that document to your colleagues so they can coauthor with you.
In the new world, Modern Attachments is the thing. Here’s how it works: You’re on fire. You’ve got four documents you just finished and saved in SharePoint or OneDrive. You go to Outlook, create a new email, and add the recipients. When you click the Attach File button, you see a list of the most recent documents you were working on. From the list, you can pick the document you want to share. Then you remember one of the recipients doesn’t have access to the library. No problem. You can grant access to the file right from Outlook to the recipient without going to OneDrive or SharePoint first. How’s that for modern?