
Sharpen
Hue/Saturation - targeted color adjustment techniques for absolute control
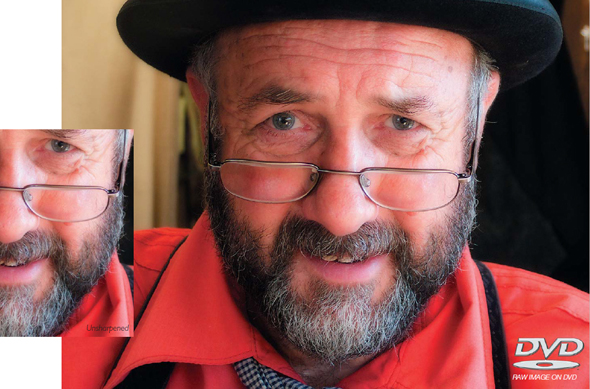
All digital images require sharpening - even if shot on a state of the art digital SLR in focus. Most cameras can sharpen in camera but the highest quality sharpening is achieved in post-production. Elements will allow you to select the amount and the areas that require sharpening most. For images destined for print the monitor preview is just that - a preview. The actual amount of sharpening required for optimum image quality is usually a little more than looks comfortable on screen - especially when using a TFT monitor (flat panel).
The basic concept of sharpening is to send the Unsharp Mask filter on a ‘seek and manipulate’ mission. The filter is programmed to make the pixels on the lighter side of any edge it finds lighter still, and the pixels on the darker side of the edge darker. Think of it as a localized contrast control. Too much and people in your images start to look radioactive (they glow), not enough and the viewers of your images start reaching for the reading glasses they don’t own.
The art of advanced sharpening
The best sharpening techniques are those that prioritize the important areas for sharpening and leave the smoother areas of the image well alone, e.g. sharpening the eyes of a portrait but avoiding the skin texture. These advanced techniques are essential when sharpening images that have been scanned from film or have excessive noise, neither of which needs accentuating by the Unsharp Mask. So let the project begin.
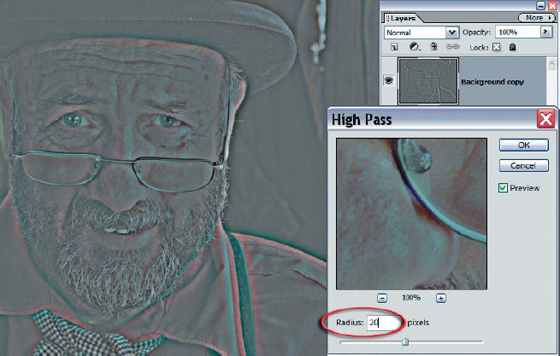
1. Duplicate the background layer. Go to Filter >Other >High Pass. Increase the pixel radius to around 20 pixels for a 5 or 6 megapixel image. Select OK.
Note >The High Pass filter is sometimes used as an alternative to the Unsharp Mask when the layer is set to ‘Overlay’ or ‘Soft Light’ mode. A radius of 1 to 4 pixels is used in this sharpening technique. In this project we are using the High Pass filter to locate the edges within the image only.
PERFORMANCE TIP
If you have any sharpening options in your capture device it is important to switch them off or set them to minimum or low. The sharpening features found in most capture devices are often very crude when compared to the following technique. It is also not advisable to sharpen images that have been saved as JPEG files using high-compression/low-quality settings. The sharpening process that follows should also come at the end of the editing process, i.e. adjust the color and tonality of the image before starting this advanced sharpening technique.
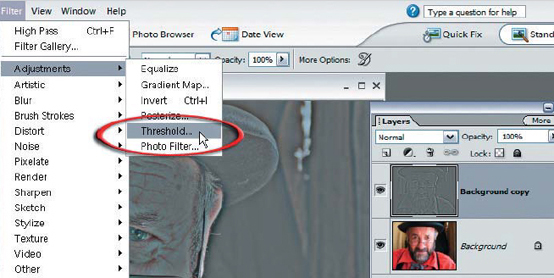
2. Apply a Threshold filter to the High Pass layer from the Filter >Adjustments submenu. The threshold will reduce this layer to two levels - black and white - depending on the brightness value.
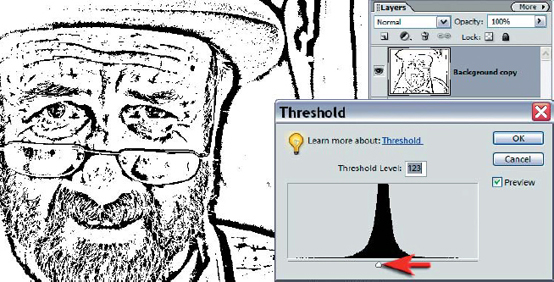
3. Drag the slider just below the histogram to isolate the edges that require sharpening. The aim of moving these sliders is to render all of those areas you do not want to sharpen white (or nearly white). Select OK when you are done. You are half way to creating a sharpening mask. The mask will restrict the sharpening process to the edges only (the edges that you have just defined). Increasing or decreasing the radius in the High Pass filter will render the lines thicker or thinner.
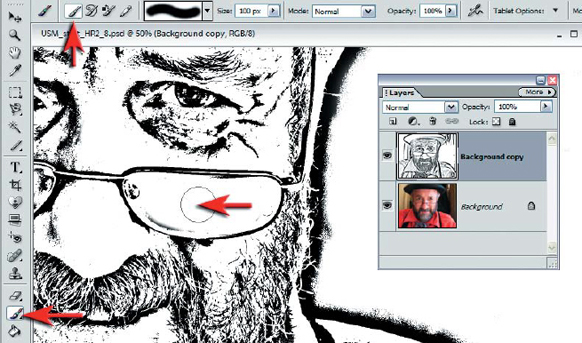
4. Paint out any areas that were not rendered white by the Threshold adjustment that you do not want to be sharpened, e.g. in the portrait used in this example any pixels remaining in the skin away from the eyes, mouth, nose and background were painted over using the paintbrush tool with white selected as the foreground color.
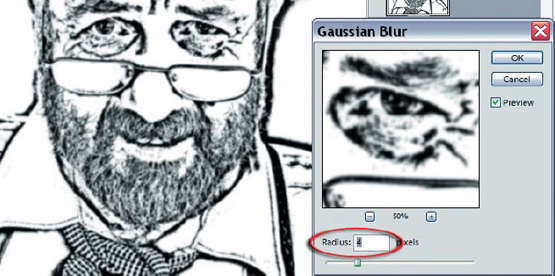
5. Go to Filter >Blur >Gaussian Blur and apply a 4 pixel radius blur to this layer. This step will ensure that the sharpening process will fade in slowly rather than have an abrupt edge.
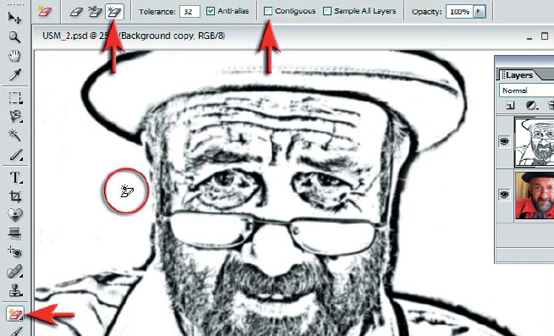
6. Select the ‘Magic Eraser Tool’ in the Tools palette (behind the Eraser Tool). Deselect the ‘Contiguous’ option in the Options bar and then click on any white area within the image. You should be left with only the edge detail on this layer and none of the white areas. The image will appear a little strange until we complete the next couple of steps.
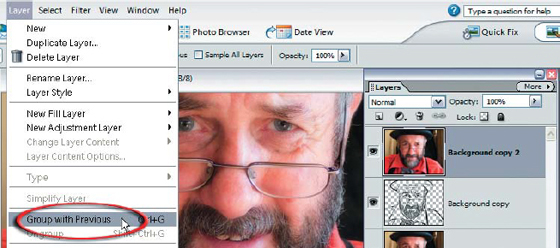
7. Duplicate the background layer and drag this duplicate layer to the top of the layers stack. Ensure the image is zoomed in to 100% for a small image or 50% for a larger print resolution image. From the Layer menu select ‘Group with Previous’. The transparent areas on the Threshold layer will act as a mask so only the important areas of the image will appear sharpened.
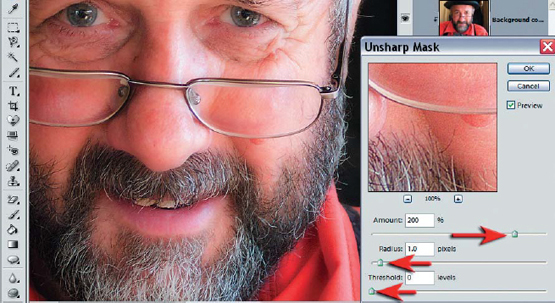
8. Go to Filter > Sharpen > Unsharp Mask. Adjust the Amount slider to between 80 and 150%. This controls how much darker or lighter the pixels at the edges are rendered. Choose an amount slightly more than looks comfortable on screen if the image is destined for print rather than screen. The Radius slider should be set to 0.5 for screen images and between 1 and 2 pixels for print resolution images. The Radius slider controls the width of the edge that is affected by the Amount slider. The Threshold slider helps the Unsharp Mask decide where the edges are. If the Threshold slider is raised the Unsharp Mask progressively ignores edges of lower contrast.
PERFORMANCE TIP
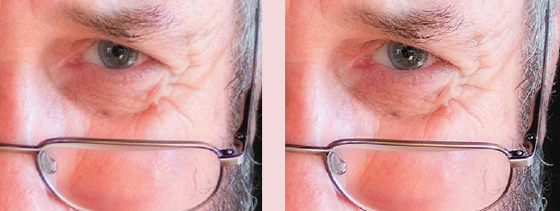
Before and after sharpening. If you are sharpening an excessively ‘noisy’ or ‘grainy’ image the Threshold slider is moved progressively higher to avoid sharpening non-image data. The exact threshold setting is not so critical for this advanced technique.

Create this image using the sharpening techniques from Project 7 in this section