
Hue and Saturation
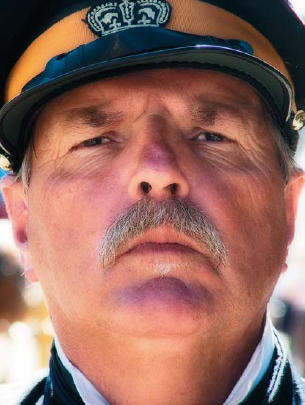
Levels is a powerful adjustment feature for controlling tonality and overall color balance. It cannot however target and control a limited ranges of color values or the saturation of color in general. For this final level of control we need to master the powerful Hue/Saturation adjustment feature. In this project we will target specific colors and then change the hue and saturation of these targeted colors to both repair and creatively enhance images. This technique is not recommended as an alternative to an effective sunscreen block or a good broad-rimmed hat!

Hue/Saturation - targeted color adjustment techniques for absolute control
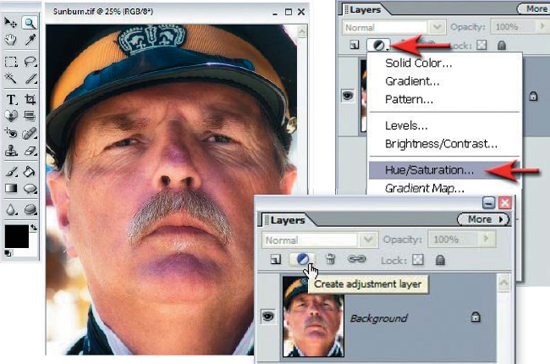
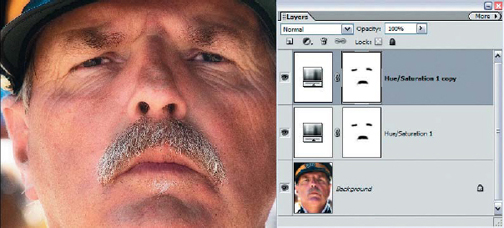
1. From the Layers palette click on the ‘Create adjustment layer’ icon and choose ‘Hue/Saturation’ to open the Hue/Saturation dialog box.

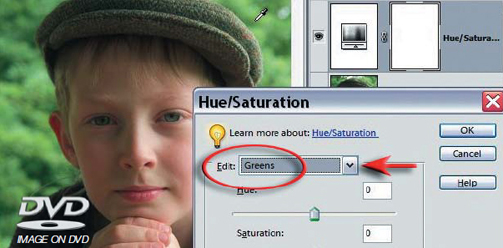
2. From the Edit menu in the Hue/Saturation dialog box choose ‘Reds’ and then increase the Saturation slider to full strength (+100). Increasing the saturation will help us target a very precise range of reds that we wish to adjust.
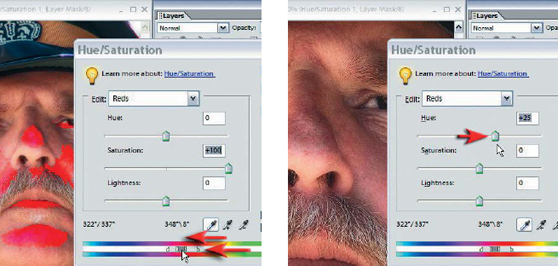
3. At the moment all of the warm colors in the face fall in the broad range of reds and are, as a result, excessively saturated. We will now limit or restrict this range of reds so that only those that represent the sunburnt areas of the face are targeted. On the color ramp in the dialog box you will find four sliders. Move the inner two closer together by dragging them towards each other. Then click between the two sliders and move the range of reds to the left slightly (towards the magenta colors). The aim is to make the skin colors in the image window lose their excessive saturation. When this happens they are no longer targeted. Move the outer sliders inwards. As the target colors move closer to these outer sliders these progressively fall beyond any resulting adjustment. When you have effectively targeted the colors of the sunburnt skin drop the Saturation slider back to ‘0’ and then move the Hue slider to the right to render these colors the same as the rest of the face. Select OK to apply these changes.
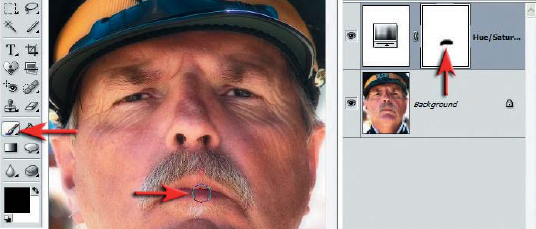
4. Select the ‘Paintbrush Tool’ in the Tools palette with Black as the foreground color. Choose a soft edged brush from the Options bar and paint in the layer mask in the area of the lips and eyes to return these to their normal and healthy (not sunburnt) color.
PERFORMANCE TIP
It may be necessary to create a second Hue/Saturation layer to target and fine-tune any remaining colors. Duplicating the adjustment layer by dragging it to the New Layer icon will ensure your masking work is retained. Double-click the Adjustment Layer icon to fine-tune the colors.
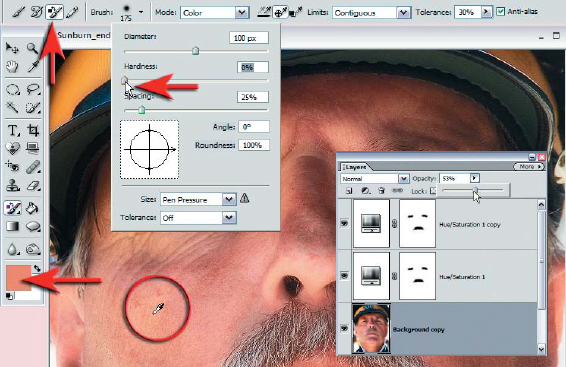
Although not as controlled as using a Hue/Saturation adjustment layer, it is possible to make color corrections using the Color Replacement Brush. Sample a ‘preferred’ color by holding down the Alt key and clicking the mouse. Using a soft edged paintbrush paint over a color that needs to be replaced. It is advised that you work on a duplicate background layer and then lower the opacity of this layer to blend in your corrective surgery.
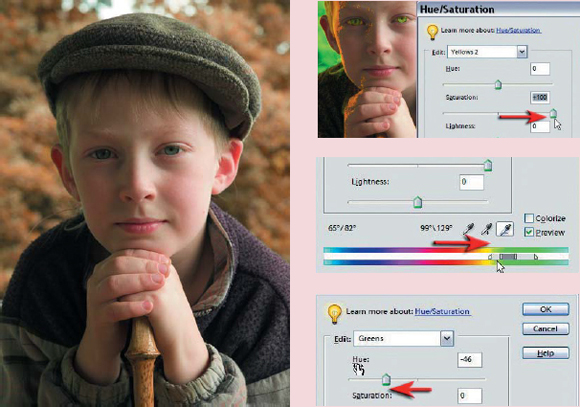
The Hue/Saturation technique has many applications - from changing one odd bloom in a bouquet of flowers to color coordinating a background color with your subject. If you can’t capture your subject against the perfect color backdrop it is usually an option to capture it against a color that has nothing in common with the general skin tones and hair color of your subject, e.g. blue sky or green foliage - just remember to mask the blue or green eyes.