
GIMP is a high-quality, full-featured, image manipulation program. The program is free, but it comes with minimal documentation. This is both good and bad. It’s bad if you want to use the more advanced features, but it’s good for authors who write books like this one to fill the documentation gap. In this chapter, you’ll explore some of the basic uses of this program that you might encounter if you are editing your personal photos. These include the following:
Rotating pictures
Managing files
Cropping images
Adjusting brightness
Correcting colors
You can download GIMP from www.gimp.org . To install it, just run the installer.
Using GIMP
When you first start GIMP, you’ll see a splash screen , as shown in Figure 8-1. The program then takes some time getting together all the files and plug-ins it uses.
Figure 8-1 Splash screen
Note
GIMP caches the information it finds the first time it starts, so it won’t take quite as long on subsequent starts.
Once GIMP starts, it displays three windows , as shown in Figure 8-2.
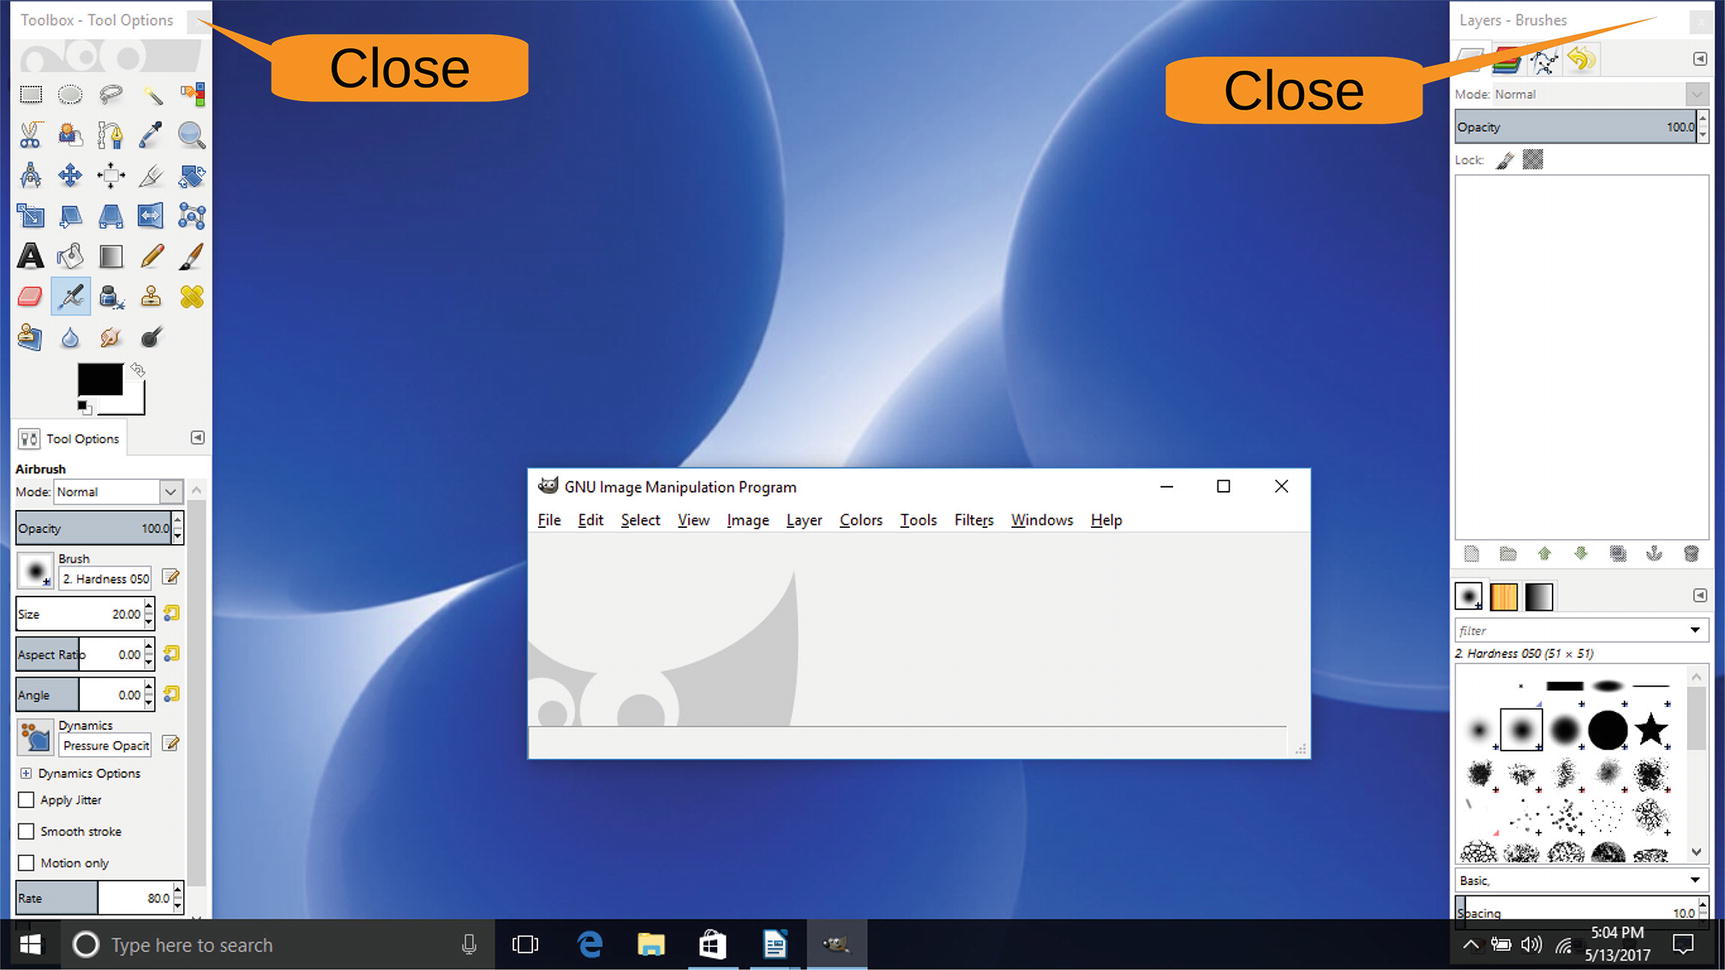
Figure 8-2 Initial GIMP windows
Close the two windows on the sides; you don’t need them for this tutorial. (You can get them back anytime you need them.)
Rotating Images
Select an image from your computer that needs to be rotated and load it into GIMP by selecting File ➤ Open. The picture will display in the main editing window, as shown in Figure 8-3.
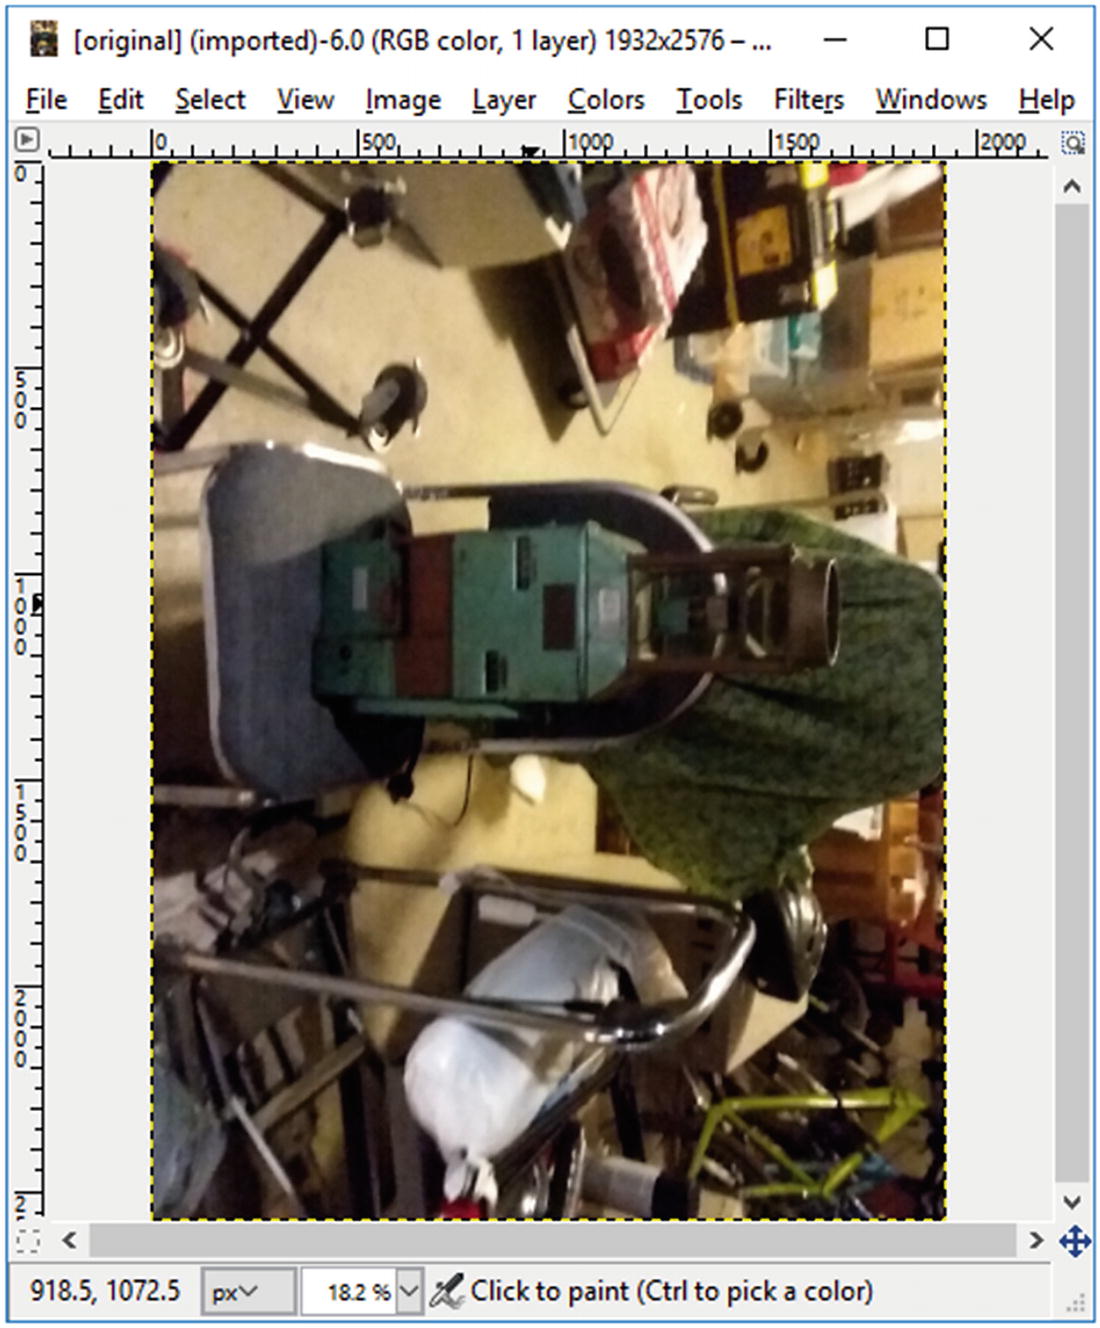
Figure 8-3 Bad picture positioning
To fix the photo’s rotation, select Image ➤ Transform ➤ Rotate 90° counter-clockwise, as shown in Figure 8-4. If you want finer-grained control, you can select Tools ➤ Transform Tools ➤ Rotate. But 90 degrees is good enough for now and covers most cases anyway.
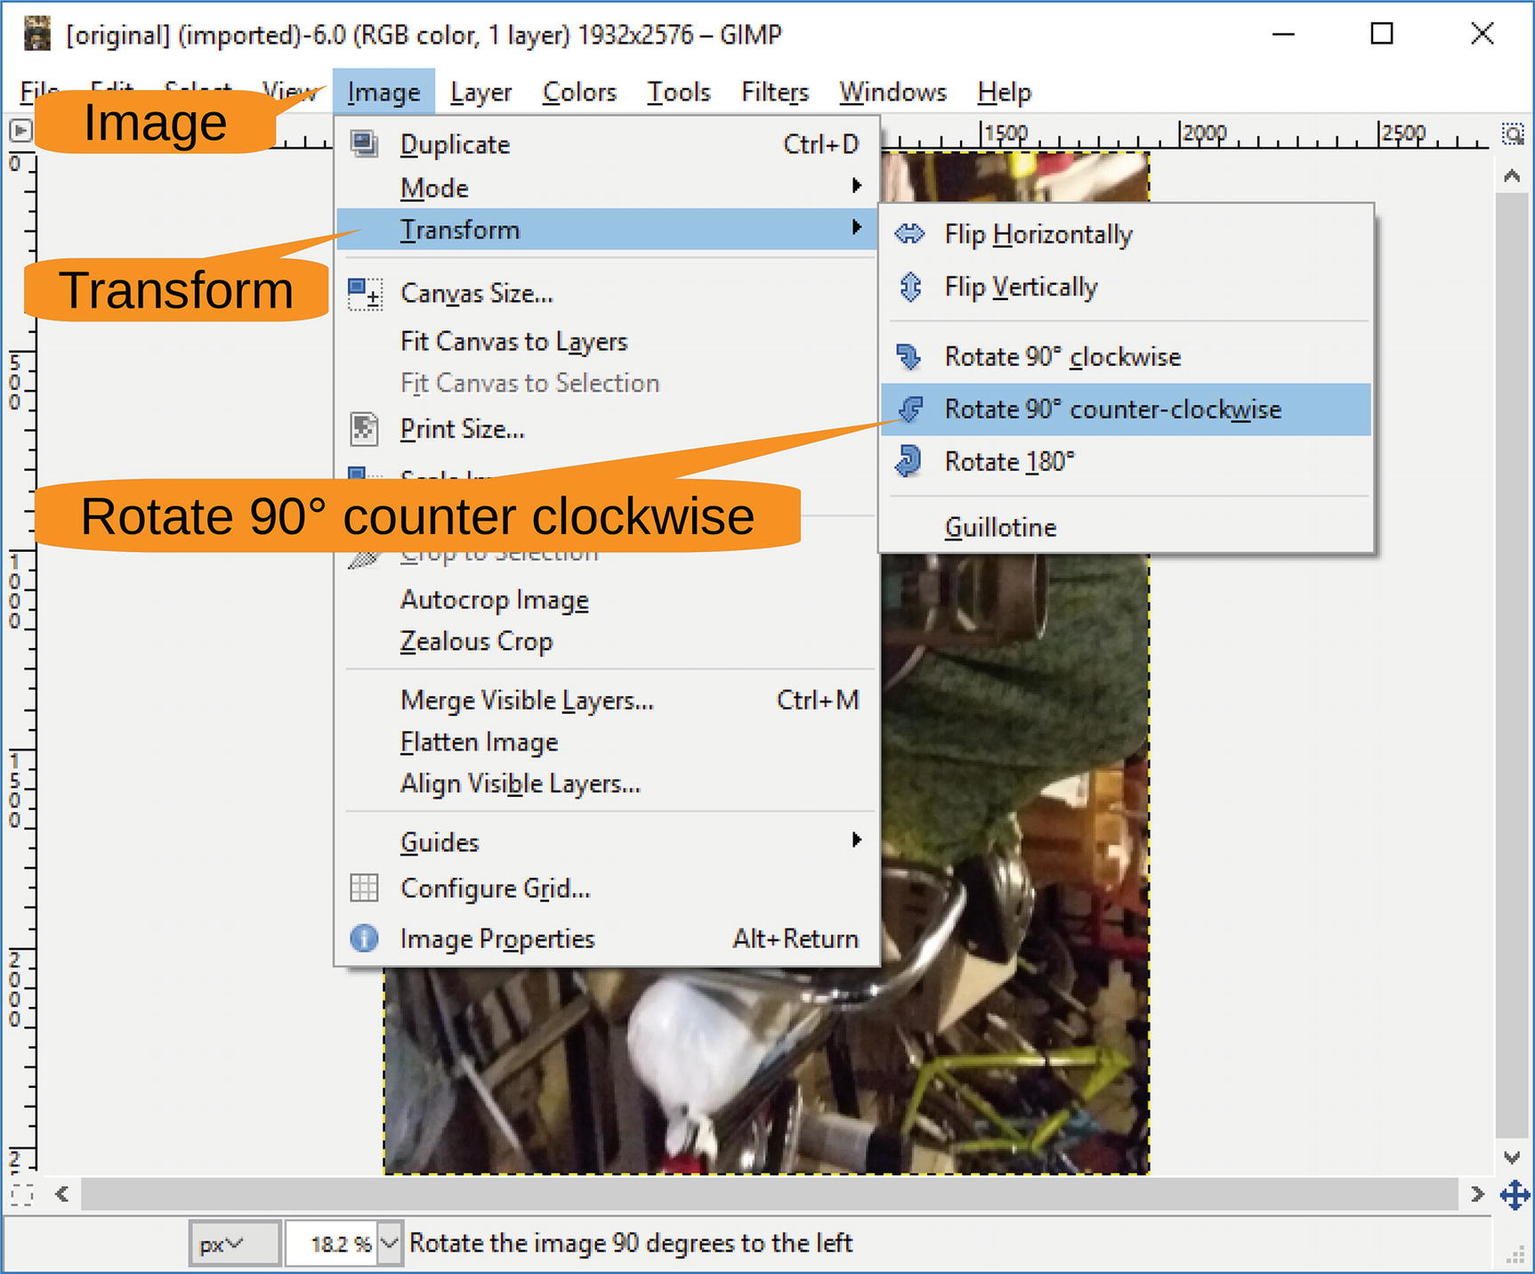
Figure 8-4 Rotating the image
Figure 8-5 shows the result .
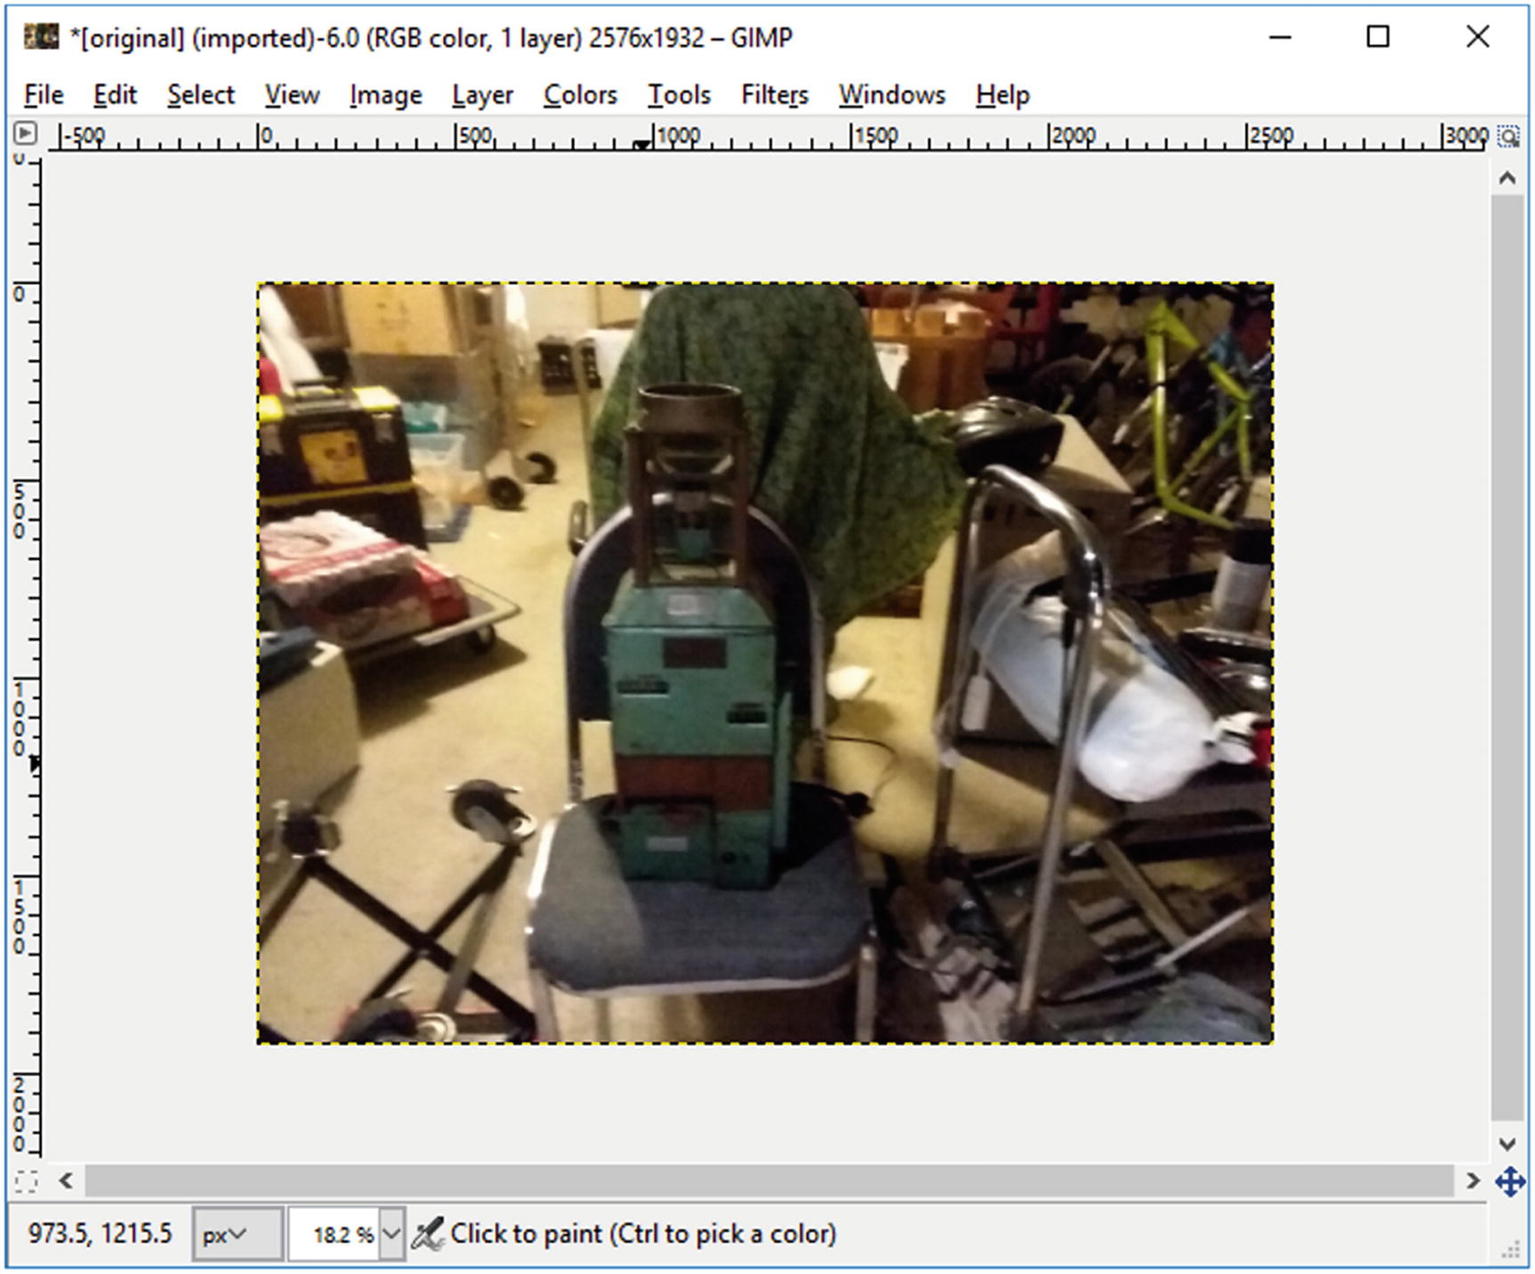
Figure 8-5 Image after rotation
Managing Files
XCF is GIMP’s native file format, which makes it the best one suited for working within this program. Unfortunately, most other programs that display images do not support XCF, so you’ll more than likely want to convert the file to a more universal format , such as JPEG, PNG, or TIF. To do so, you must use Export rather than Save. Otherwise, you will get an error message stating that “The given filename cannot be used for saving.” However, be aware that by changing the format, you will lose some of the image’s properties.
The following are some of the options you can choose when working with your images:
Save a file in GIMP’s native format (XCF). Select File ➤ Save, and it will be saved as XCF and readable only by GIMP.
Change an existing XCF file to a standard format (JPEG, PNG, or TIF). Select File ➤ Overwrite <file name>, as shown in Figure 8-6.
Save an image in a standard format (JPEG, PNG, or TIF). Select File ➤ Export As (Figure 8-6).
You will need to fill in the name of the file name for export. The extension of this fill determine the type of image being saved. Enter the name of the file name (with extension) click Export as shown in Figure 8-7. In this example we used the extension “.jpg” for a JPEG type file (widely used industry standard for photographs).
An option window specific to the file type you select will appear (Figure 8-8). In this case , the image is exported as a JPEG file. Unless you have specific changes, leave the defaults as is and click Export.
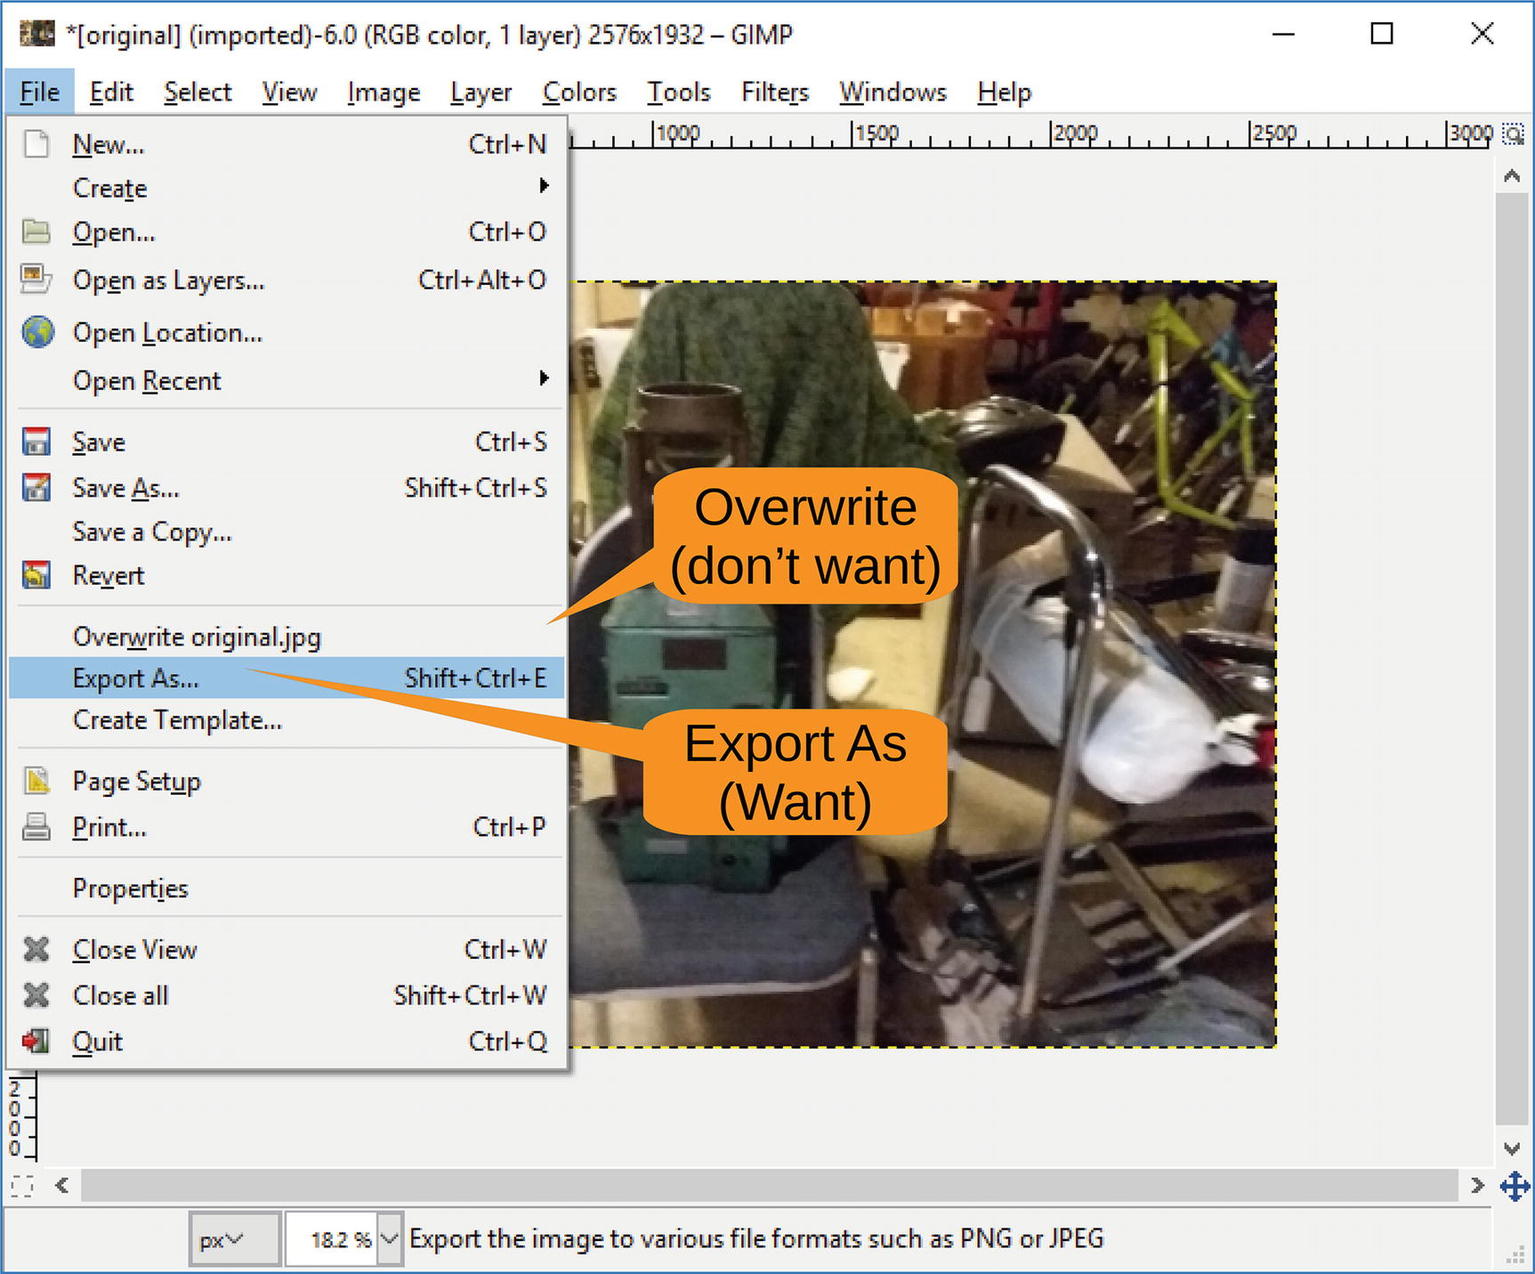
Figure 8-6 Overwriting and exporting menu items
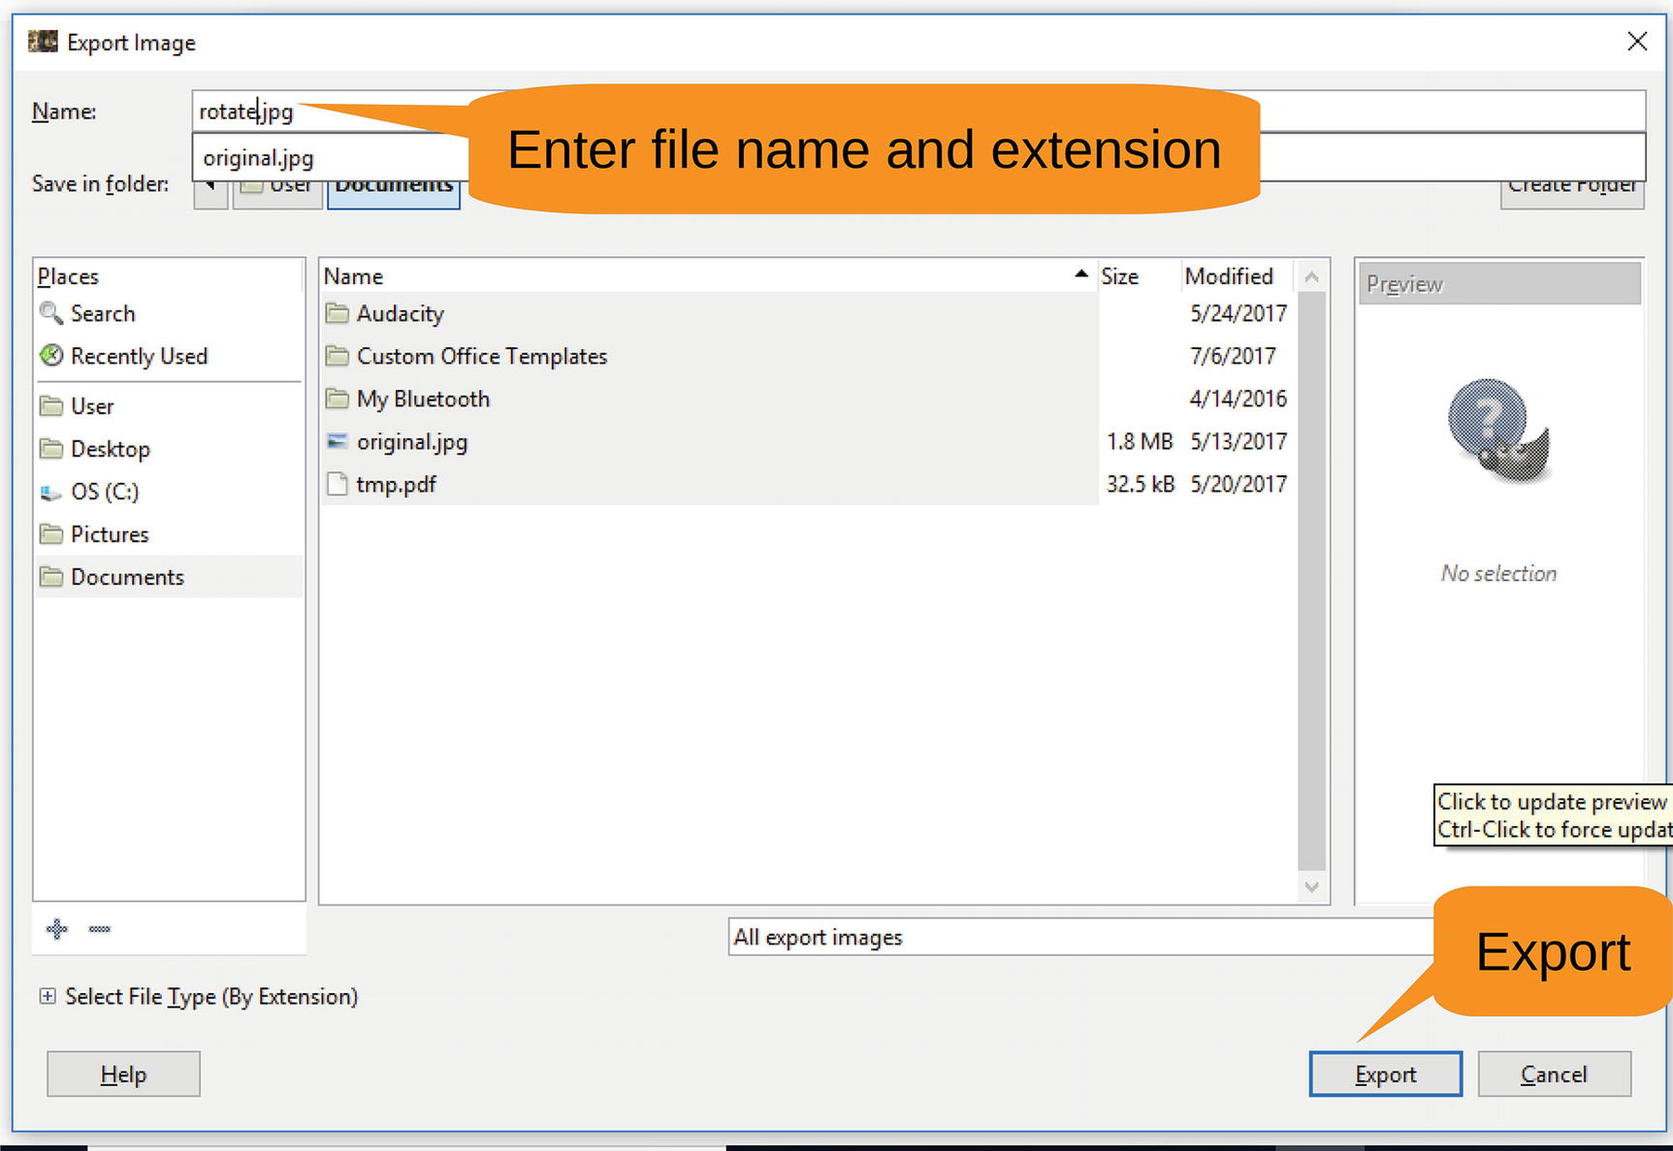
Figure 8-7 Specifying the file to export
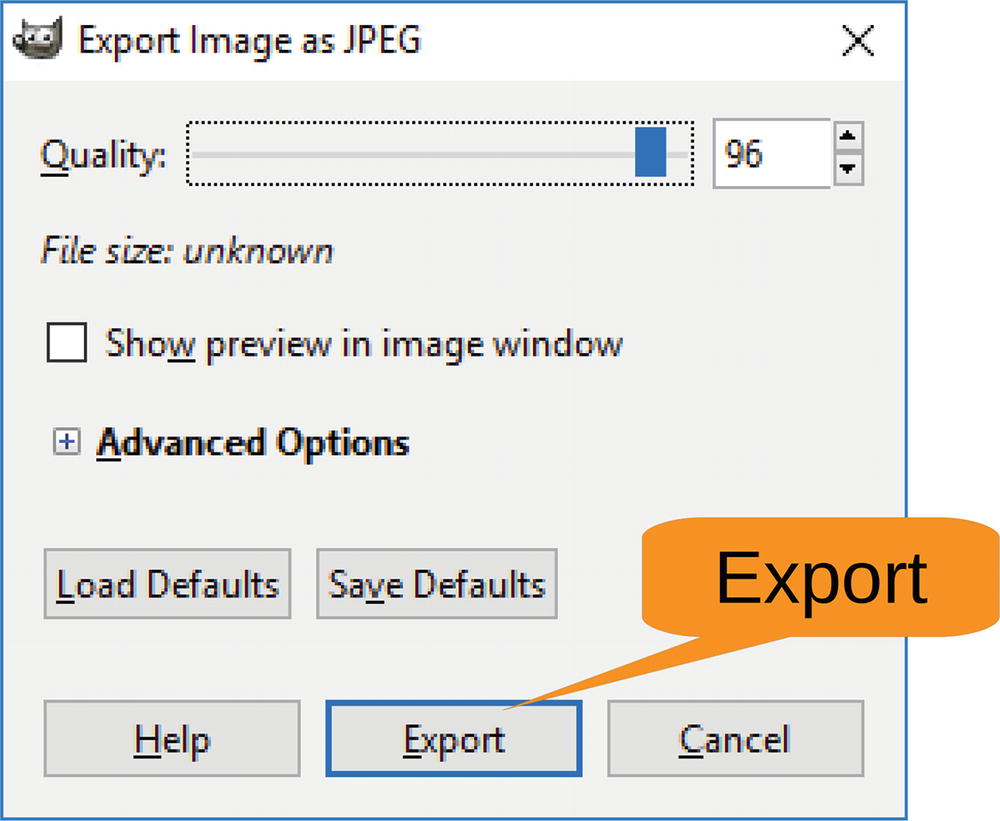
Figure 8-8 File options
Cropping an Image
In this example, the image shows the fare box, which is what you want. It also shows a good hunk of the garage, which you don’t want. Let’s see if you can concentrate the focus on the box by cropping the image . Figure 8-9 shows the command needed; it’s Tools ➤ Transform Tools ➤ Crop.
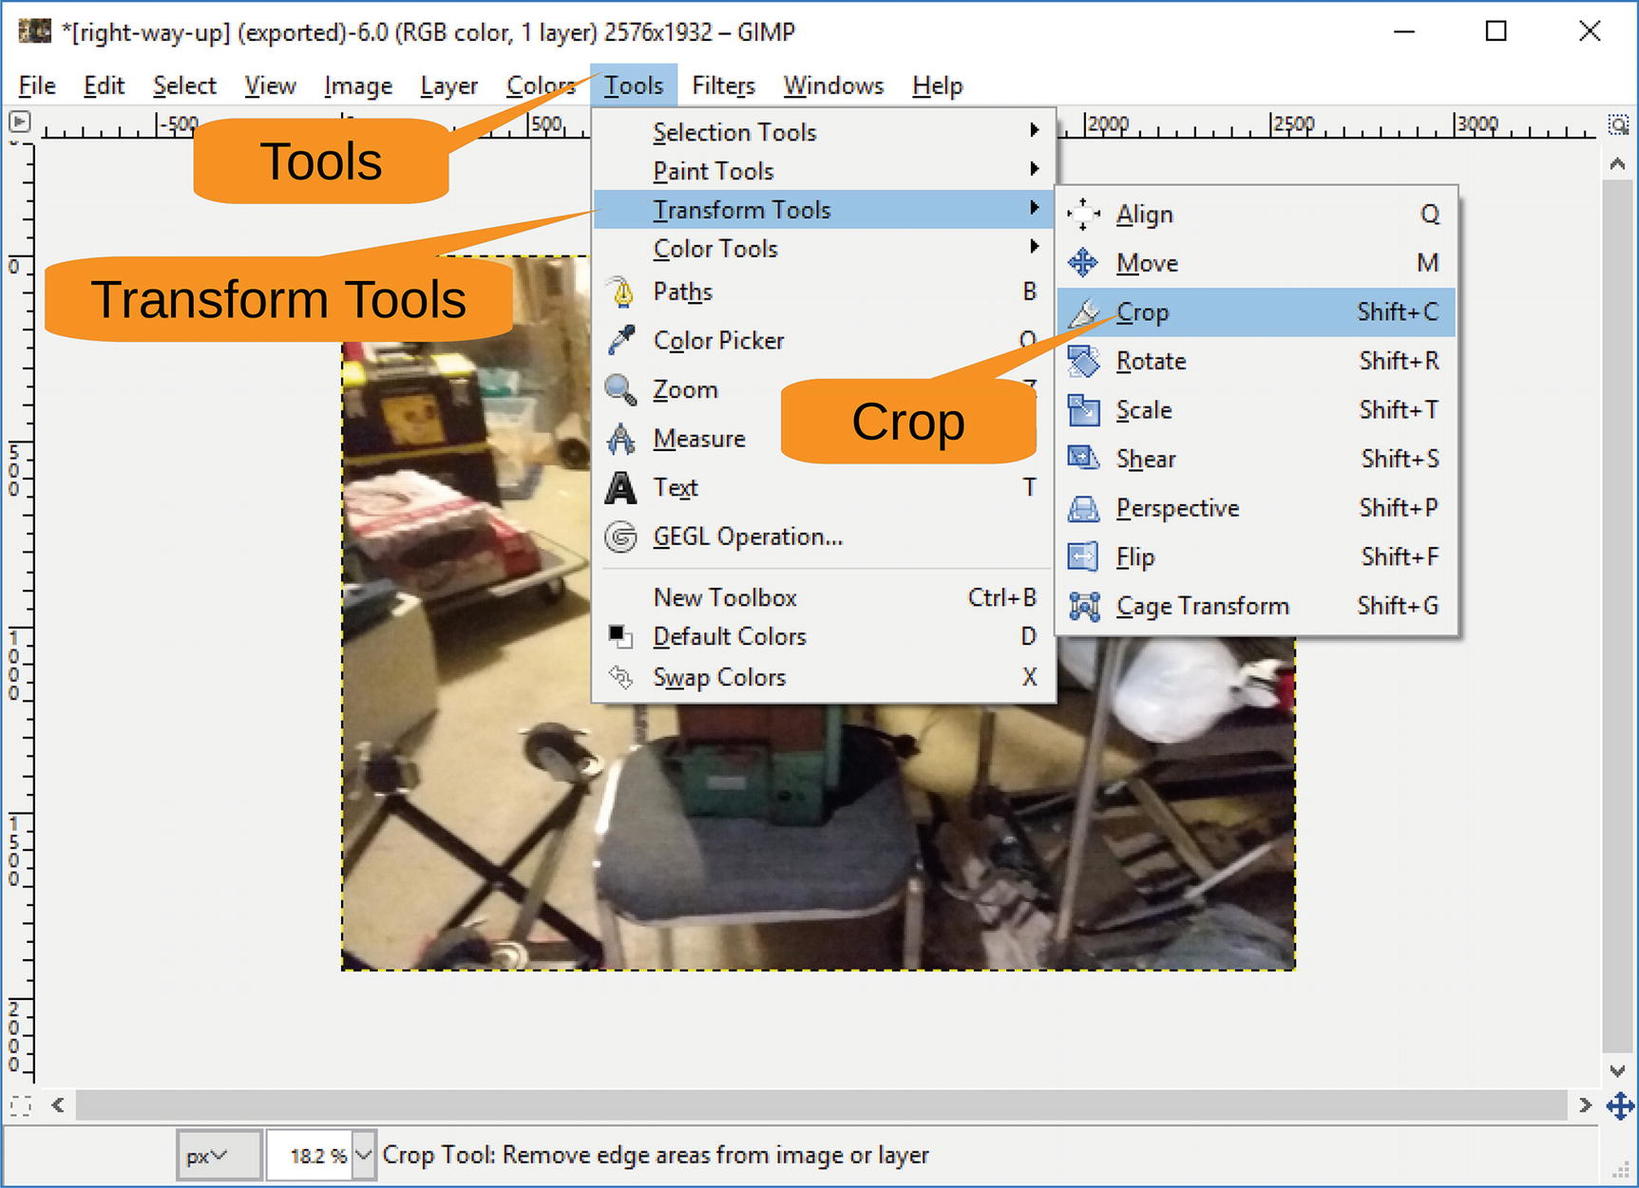
Figure 8-9 Cropping the picture
The cursor changes to a white cross with a knife. Drag the cursor across the picture you want to keep, similar to what’s shown in Figure 8-10.

Figure 8-10 Performing the crop
Four white boxes will show up in the corners . (Only one is visible in Figure 8-10 because we are still performing the initial drag.) You can drag these in and out to get the cropping perfect.
Click inside a square to perform the crop and get something that looks like Figure 8-11.
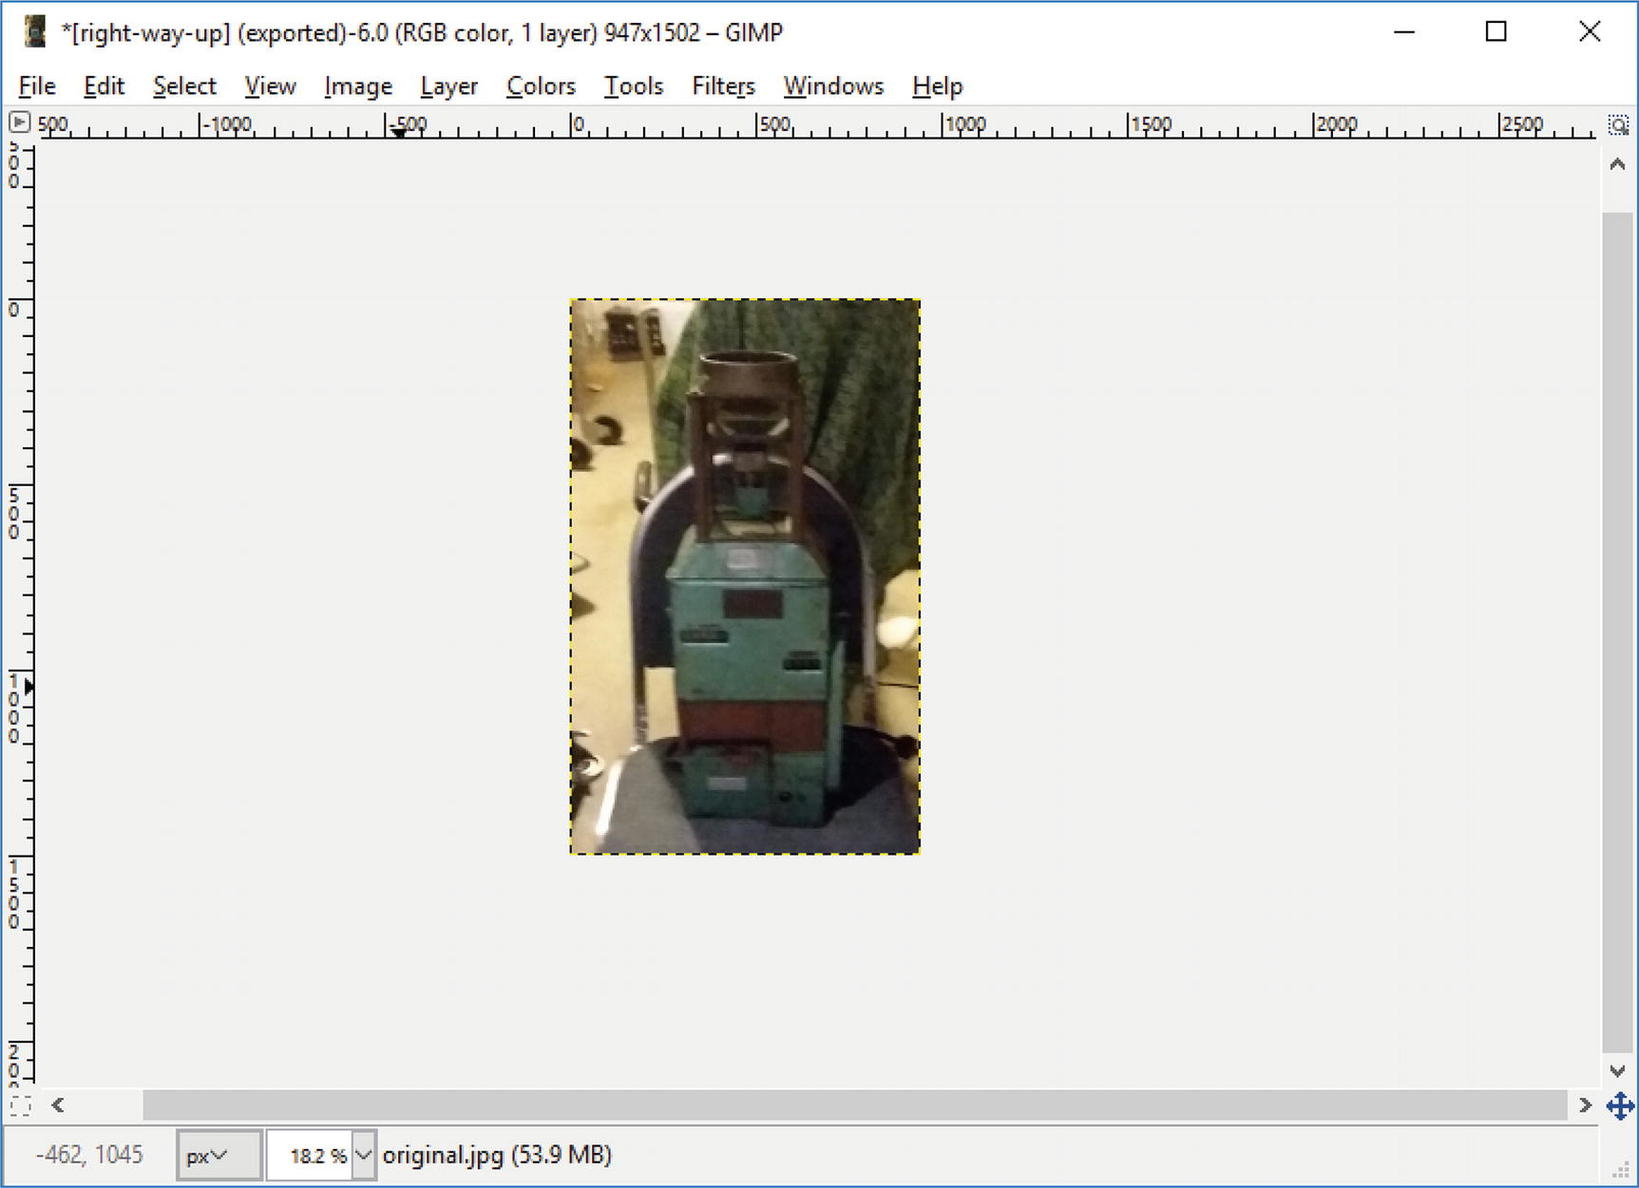
Figure 8-11 Cropped picture
This is a little small for the screen , so let’s zoom in.
You can use the menu View ➤ Zoom ➤ Zoom In a number of times, but that is slow. The shortcut key is +, so let’s press that a number of times until the picture fills the screen, as shown in Figure 8-12.
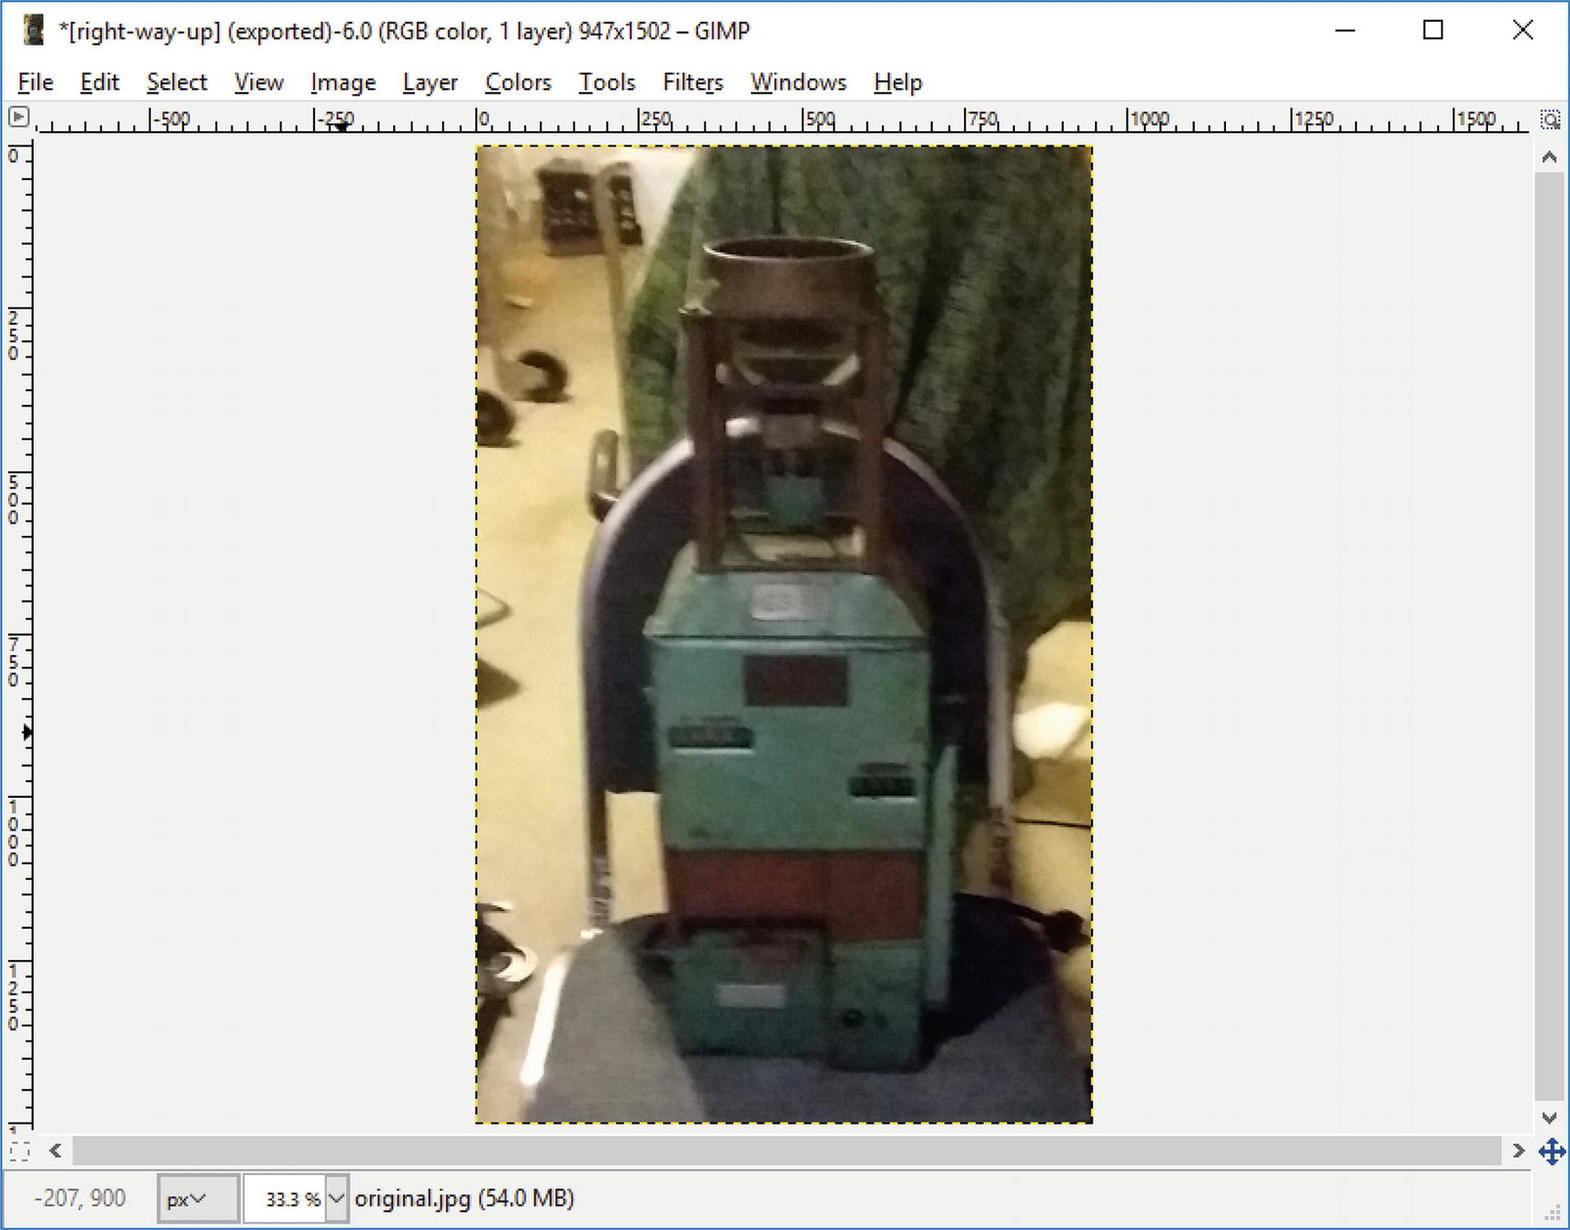
Figure 8-12 Zoomed and cropped image
Now let’s save it with File ➤ Export as right-way-up.jpg. So, now you have nicely cropped image with really bad color. Well, we could have shot the picture in the day without backlight in the first place, but where’s the fun in that? If we had done that, we wouldn’t have needed GIMP to come to the rescue.
Fixing the Color
We’re not sure how well the picture is going to show up in black and white, but take our word for it, the picture is very dark. You need to fix that. Let’s try the simple way first, with Tools ➤ Color Tools ➤ Brightness-Contrast , as shown in Figure 8-13.
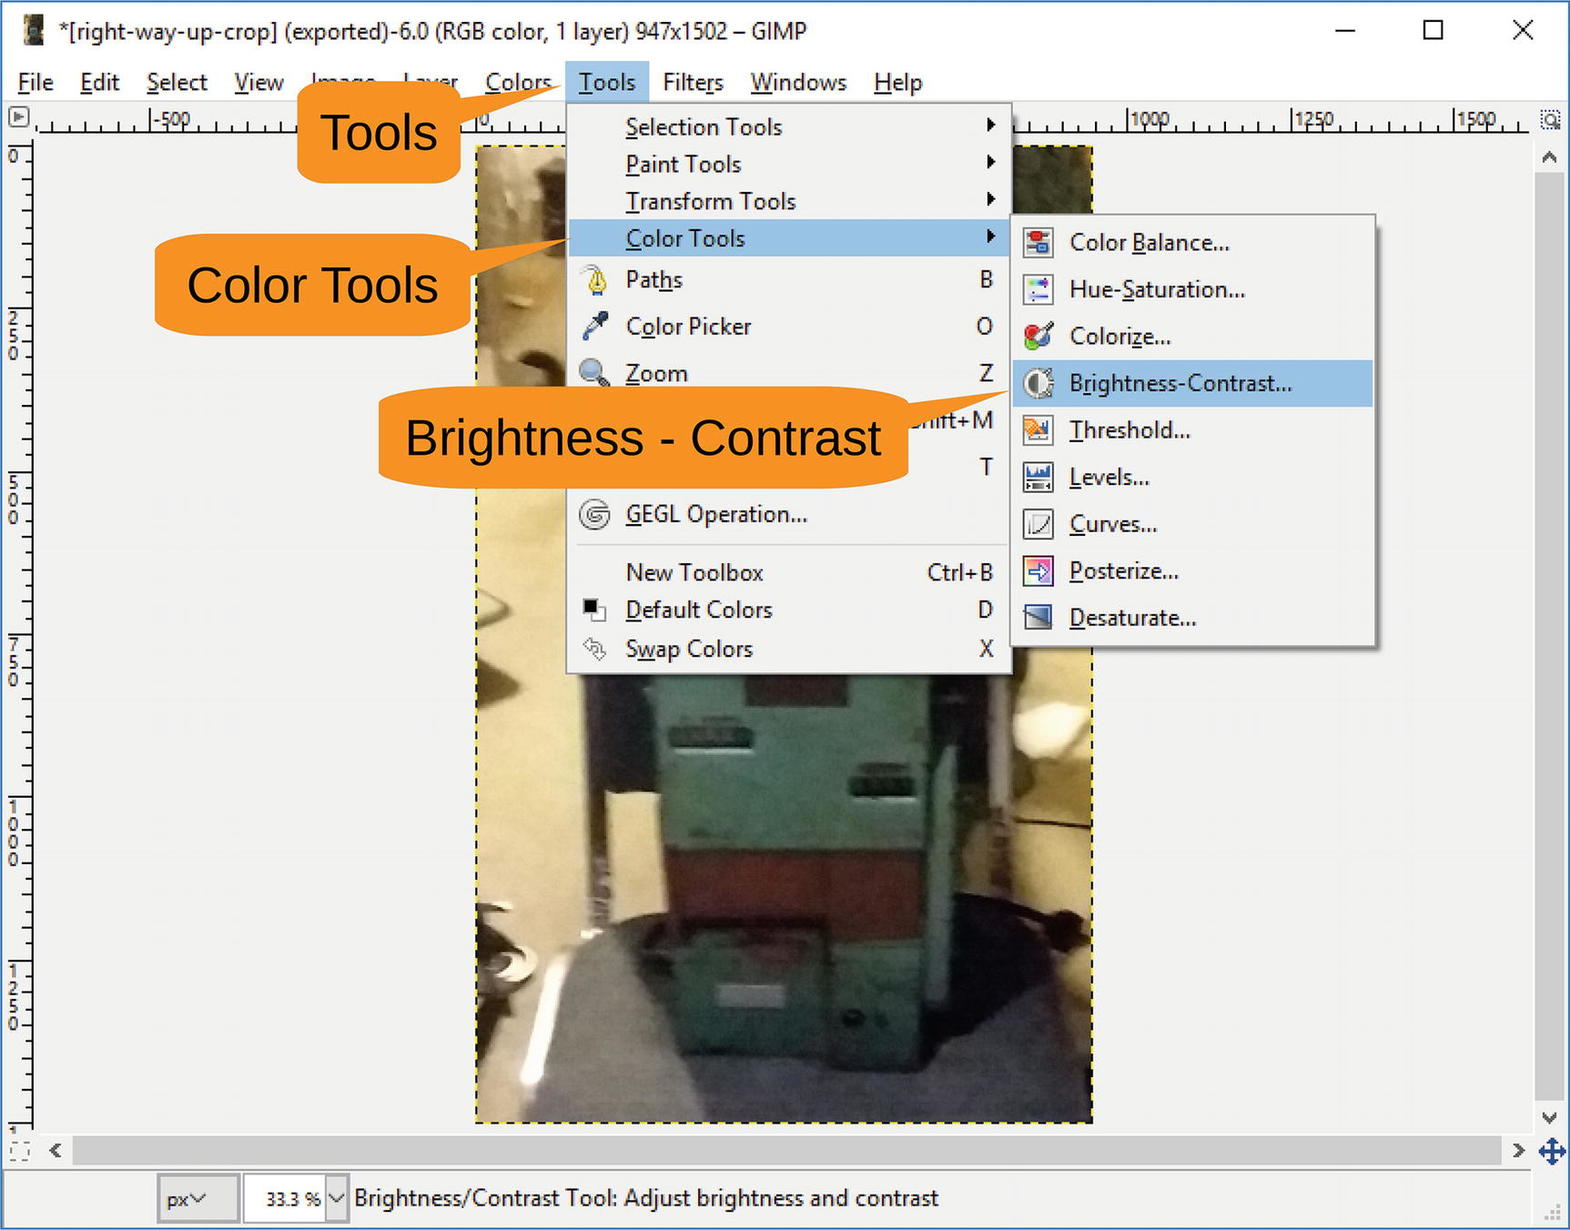
Figure 8-13 Getting to the Brightness-Contract control
Figure 8-14 lets you change the brightness and contrast of the image . Let’s play around a little with the sliders and see whether you can make the picture better. By judiciously setting the controls, you can change the color from bad to lousy. To apply these changes, click OK. In this case, though, you want to try a different tool, so click Cancel to undo the changes.

Figure 8-14 Brightness-Contrast dialog
Let’s try a better tool . Select Tools ➤ Color Tools ➤ Curves , as displayed in Figure 8-15.
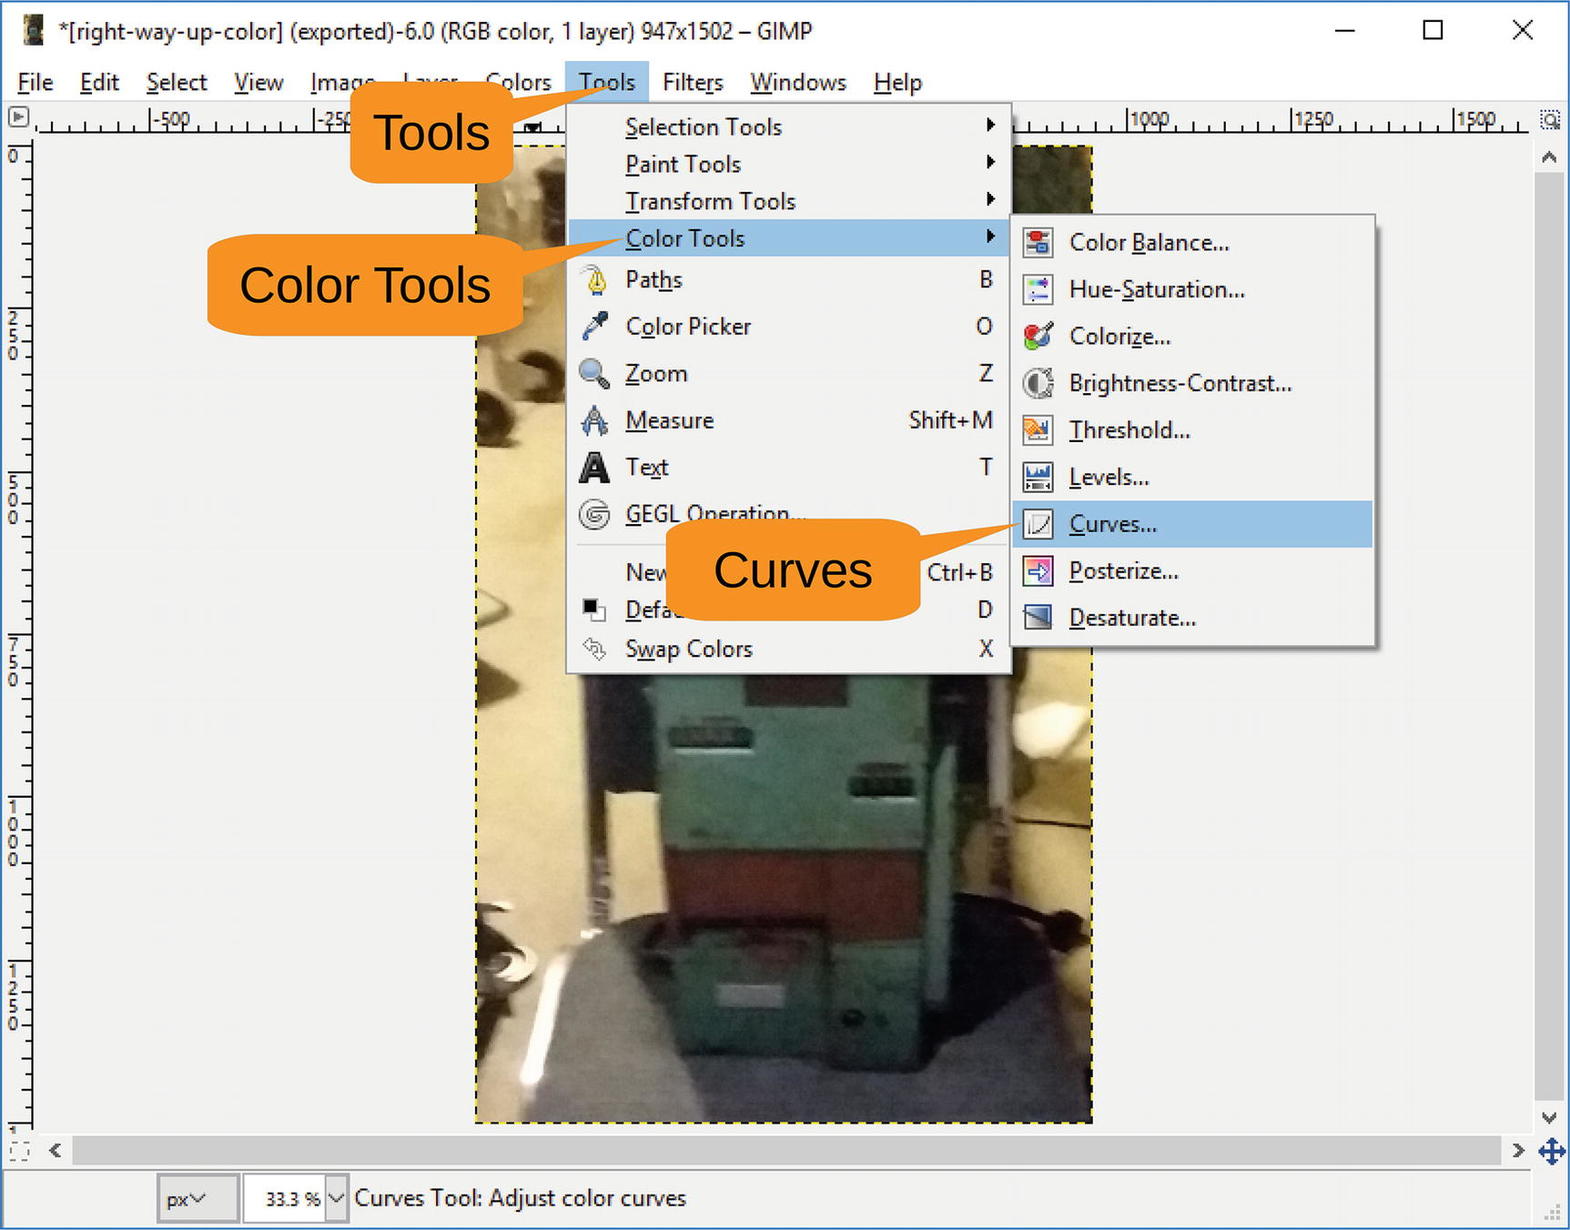
Figure 8-15 Selecting the Curves tool
This brings up the Curves dialog (Figure 8-16) that shows a histogram of the colors in the image. In this case, the image has a lot more dark colors, which is why there is a peak to the left. If you pull up the line with your cursor, it will brighten that section of the color space. Experiment with various line placements to find one that is suitable.
Click OK to set the colors.
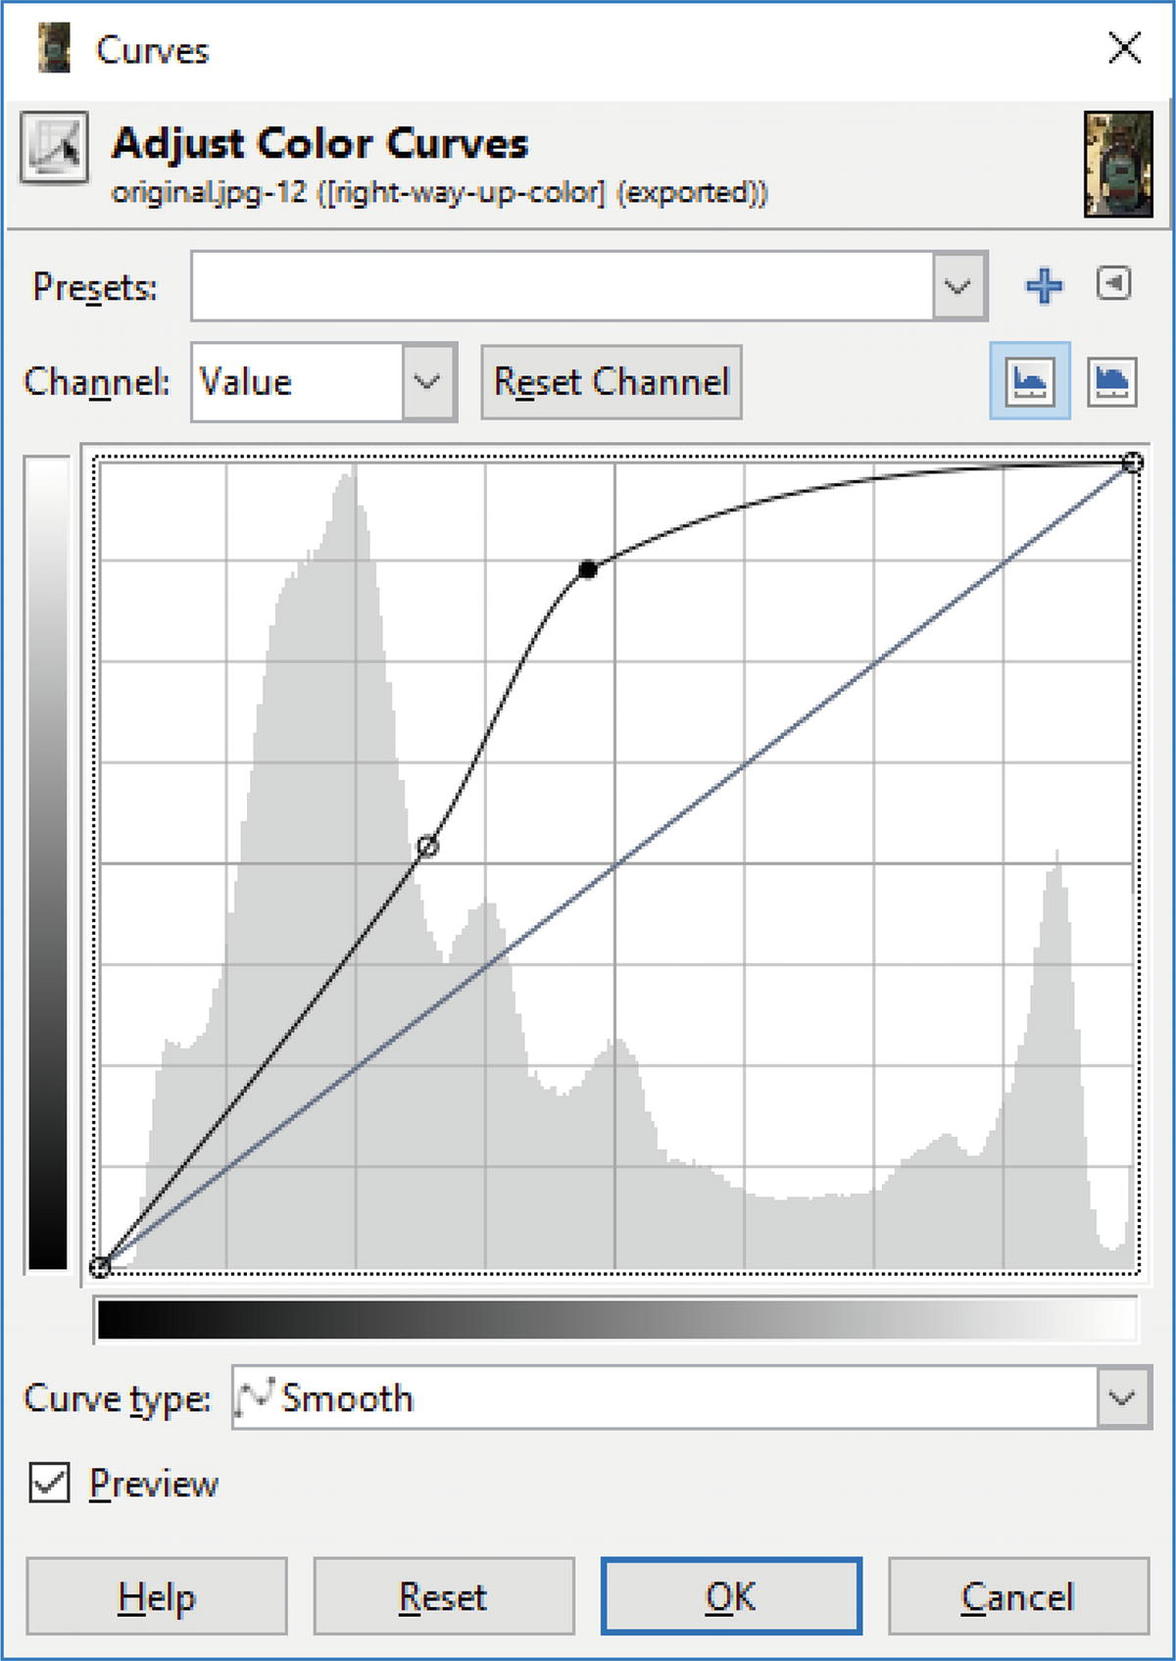
Figure 8-16 Color curves
The image now looks like Figure 8-17. So, by using GIMP , you have taken the picture from very bad through lousy to poor.
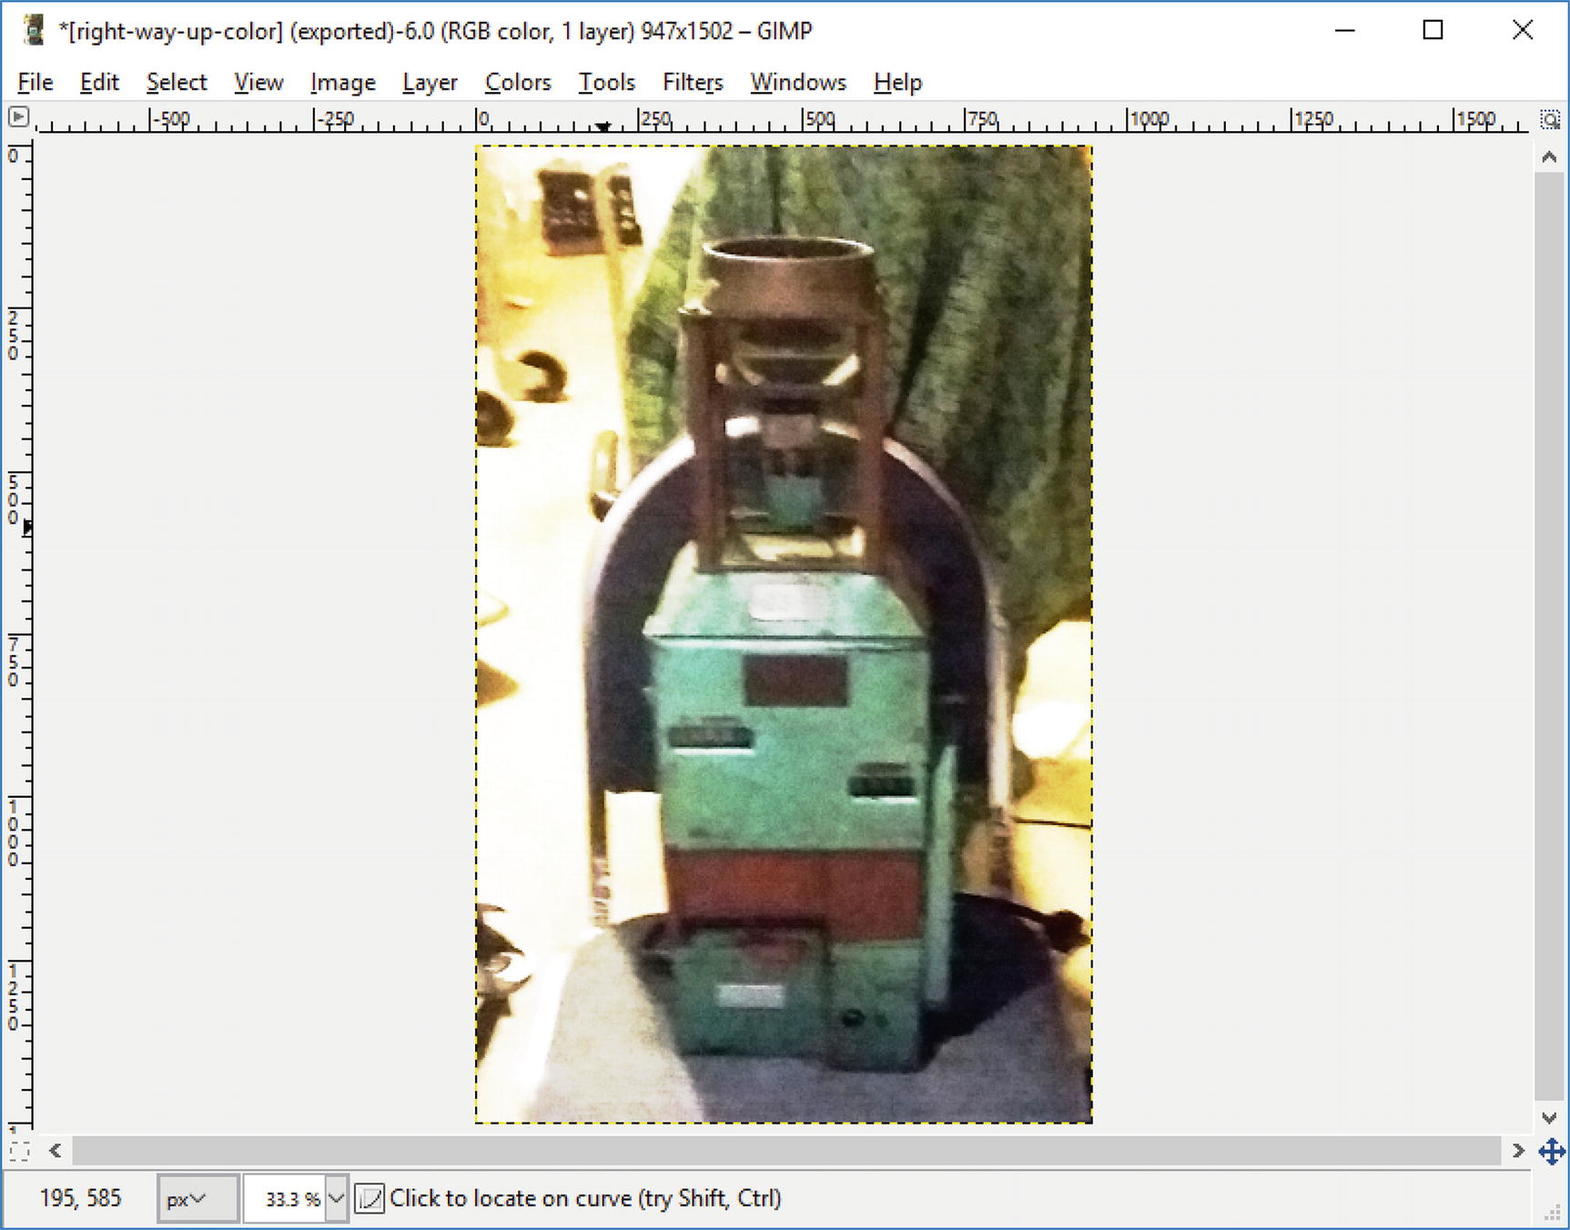
Figure 8-17 There are limits to what can be done with a poor-quality picture
Using Filters
This chapter wouldn’t be complete if we didn’t mention filters. GIMP has a lot of filters, and most of them are useful. We will demonstrate one and hope the effect makes it through the printing process to the book. If not, download the pictures from the web site ( www.apress.com ) to see what we mean.
The filter we are going to show how to use is called Clothify (Figure 8-18). In other words, it makes a nice image look like it was painted on cloth. To get the full effect of this filter , you can start by zooming in a little. Then select Filters ➤ Artistic ➤ Clothify.
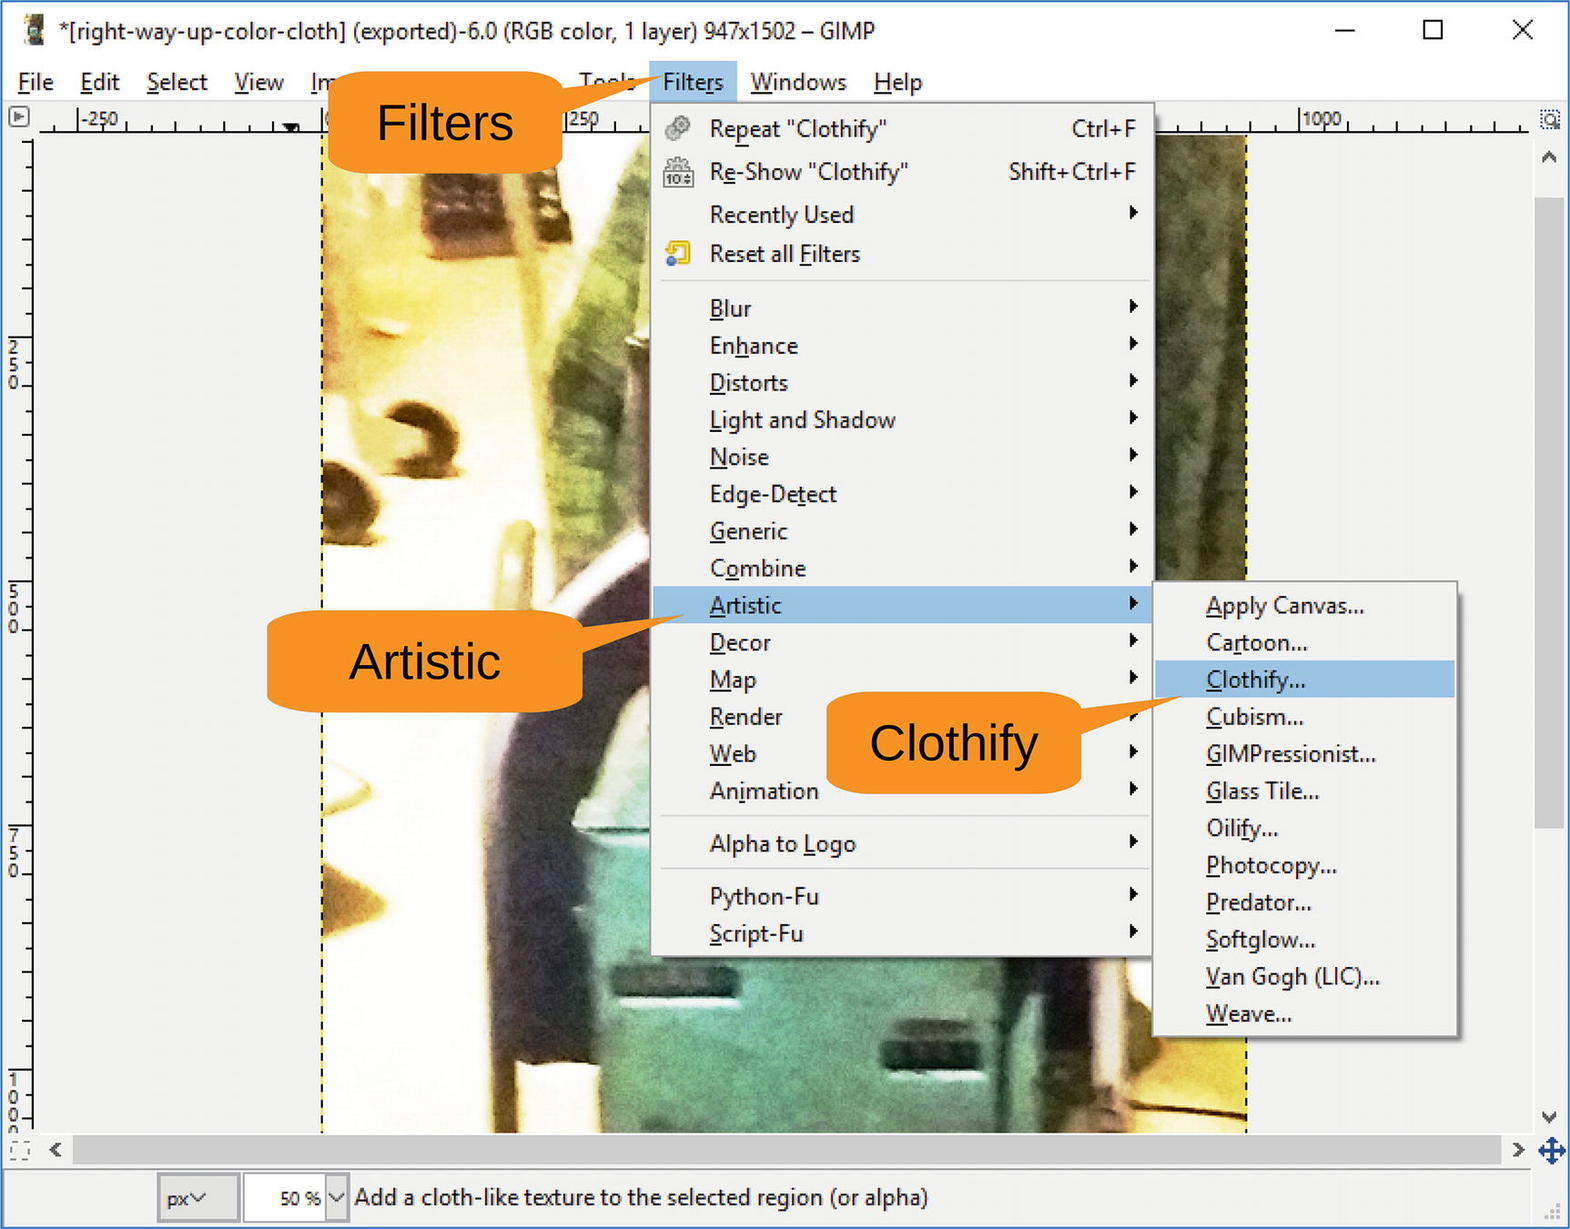
Figure 8-18 Selecting the Clothify filter
Figure 8-19 shows the Clothify dialog that appears. You can play around with the settings later; for now, let’s use the defaults and click OK.
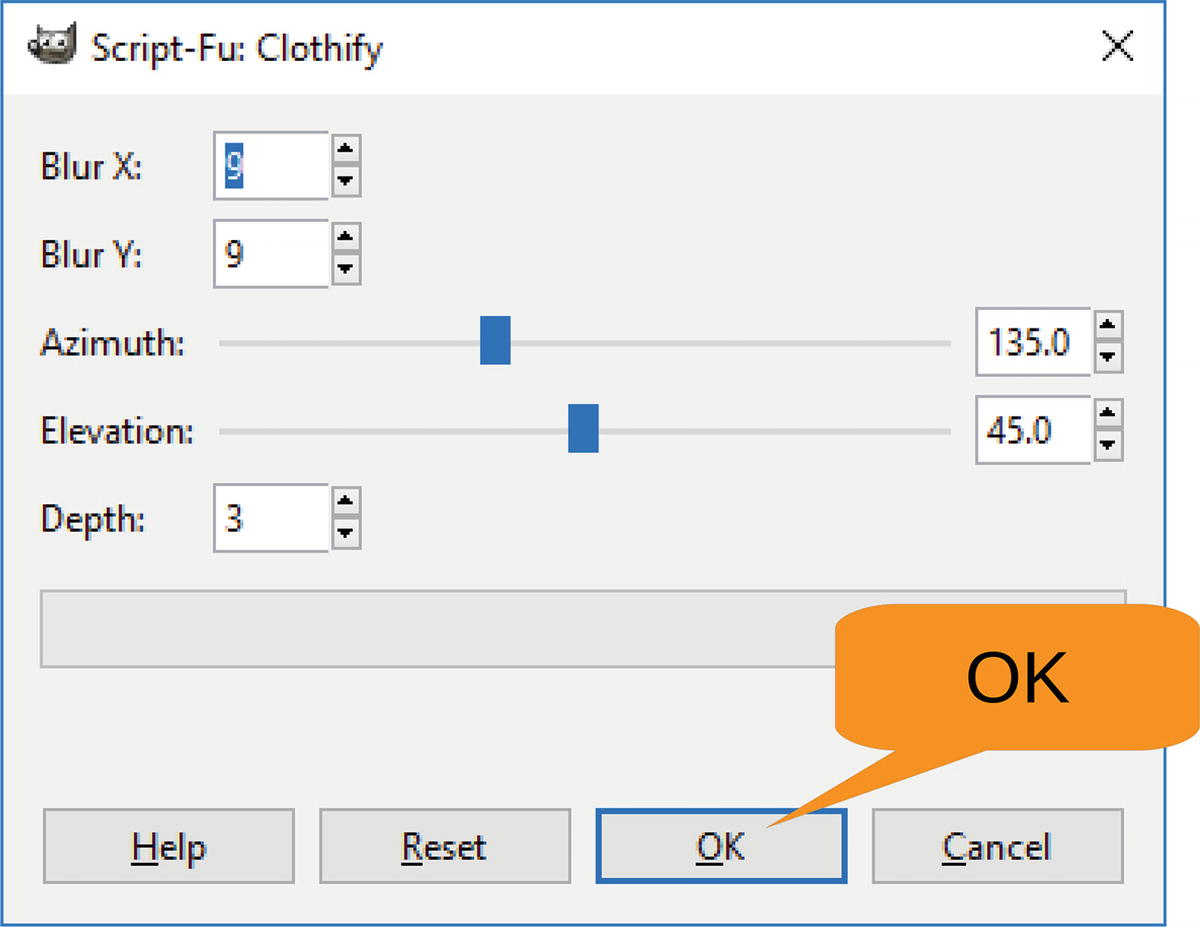
Figure 8-19 Clothify dialog
Clicking OK causes the image to be run through the filter , resulting in Figure 8-20.
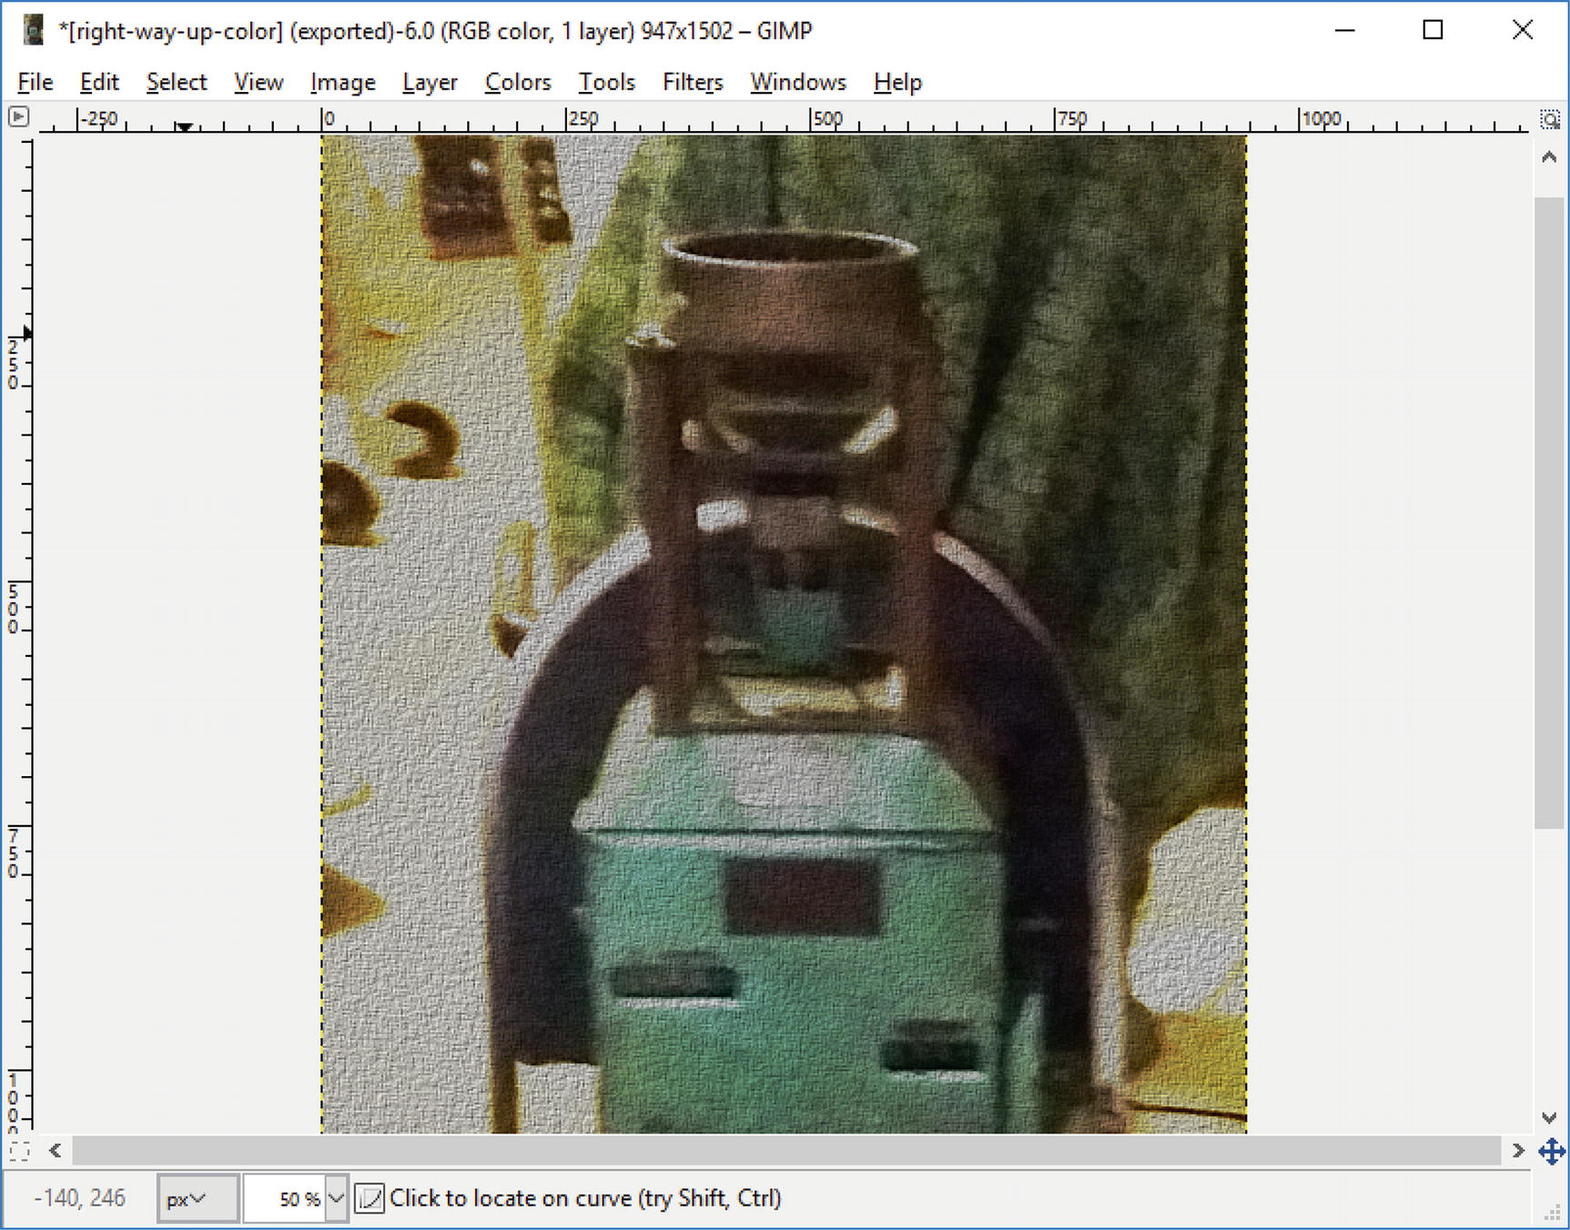
Figure 8-20 Cloth image
Summary
GIMP has many different tools for making your pictures look better, a surprising number that make them look strange, and a few that make them look worse. You can explore these tools on your own to see what each of them does.
In this chapter, we covered the tools that help casual camera users improve their photos and then store them in the Pictures folder.