Now that you have created a video (see Chapter 13), you’ll learn how to turn it into a DVD. The DVD will be split into individual chapters and also have a Play All button for those who want to watch the entire video. After creating the DVD, you will have a file you can put on a USB stick and send to your friends and relatives, or you can burn the file onto a real DVD for playing on a computer or that antique machine called a DVD player.
Getting Started with DVDStyler
DVDStyler is a basic DVD creation program. It gives you the ability to create simple DVDs with features such as chapters, menus, and other basic elements. It’s not as full featured as some other DVD creators, but they tend to be so complex that it is difficult for a novice to do simple things. DVDStyler lets you create something that looks good and works well without hassling you with 5,000 different options.
You can download the program from www.dvdstyler.org . To install it, it’s the same ol’ drill: download, run, and accept the defaults. The download page even has a nice ad-blocking detector, as shown in Figure 14-1.
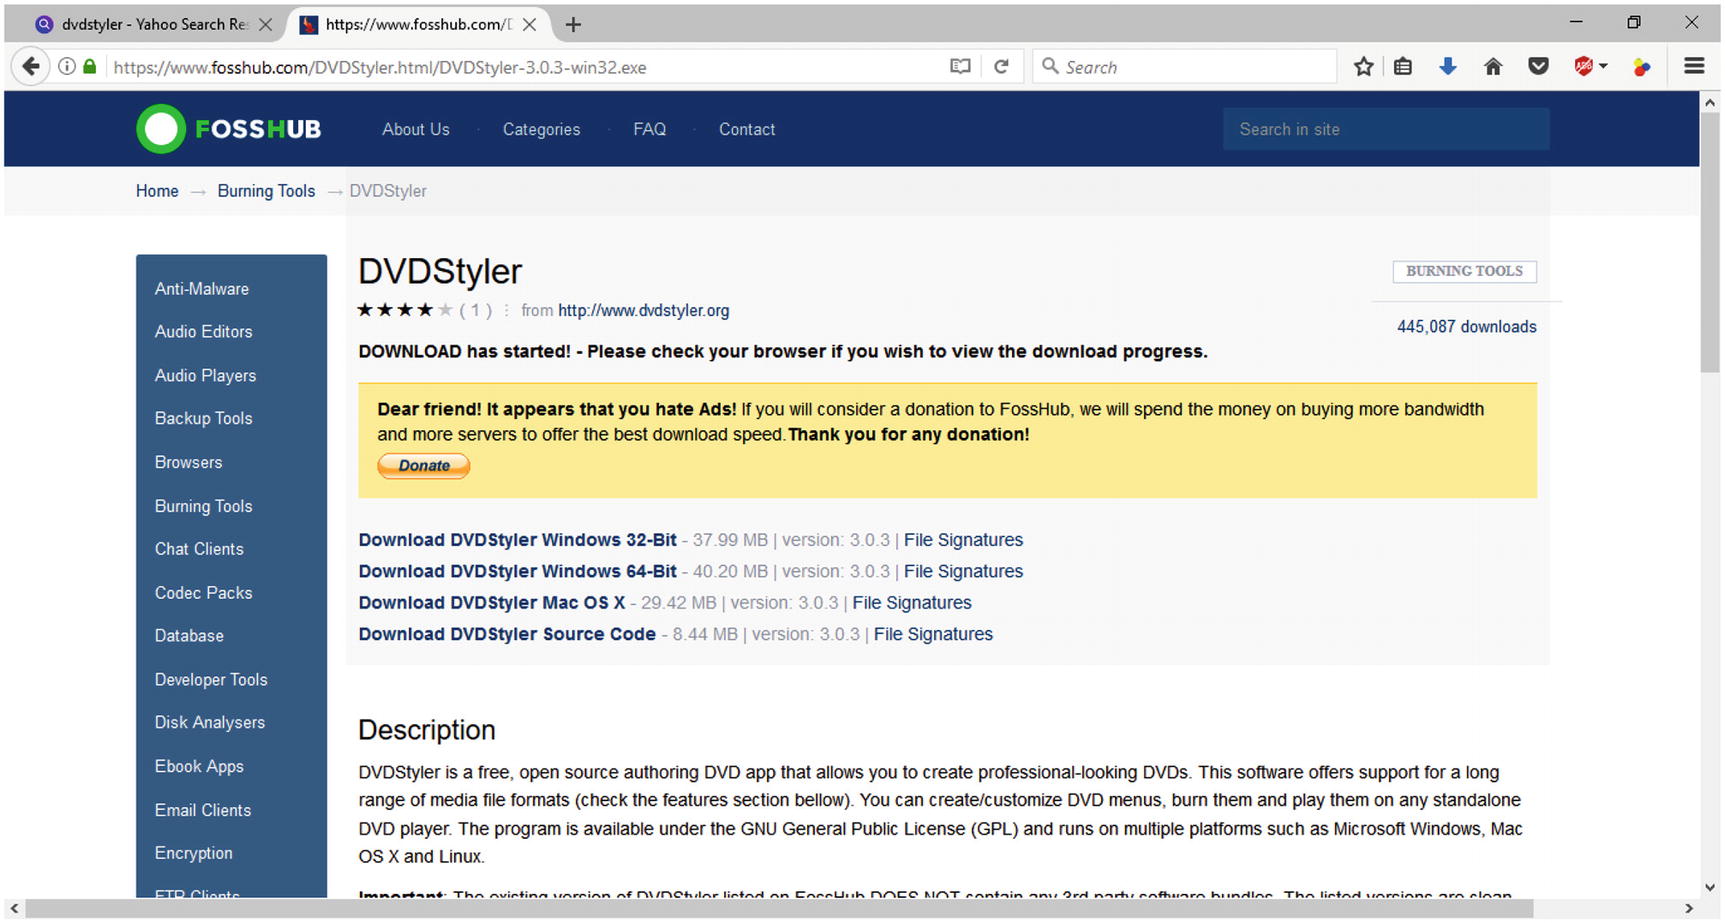
Figure 14-1 Ad blocker detected
Since FossHub has been so nice to give us DVDStyler for free, we’re going to send in a few bucks. Feel free to join us.
Preparing the Video Clips
Before you start, you need four video clips containing the four segments you put together in the previous chapter. We’ll leave it to you to use OpenShot to transform those clips into something useful and store them in the files J Part1.mp4, J Part2.mp4, J Part3.mp4, and J Part4.mp4.
Using DVDStyler
When DVDStyler starts, it displays a Welcome dialog. This lets you define the project or open an existing project. This video is going to be about the farebox shown in earlier chapters, so enter Johnson farebox for the label. If you are in the United States, you should make your DVD in the NTSC format, so select that option. Finally, click OK to start the project , as shown in Figure 14-2.
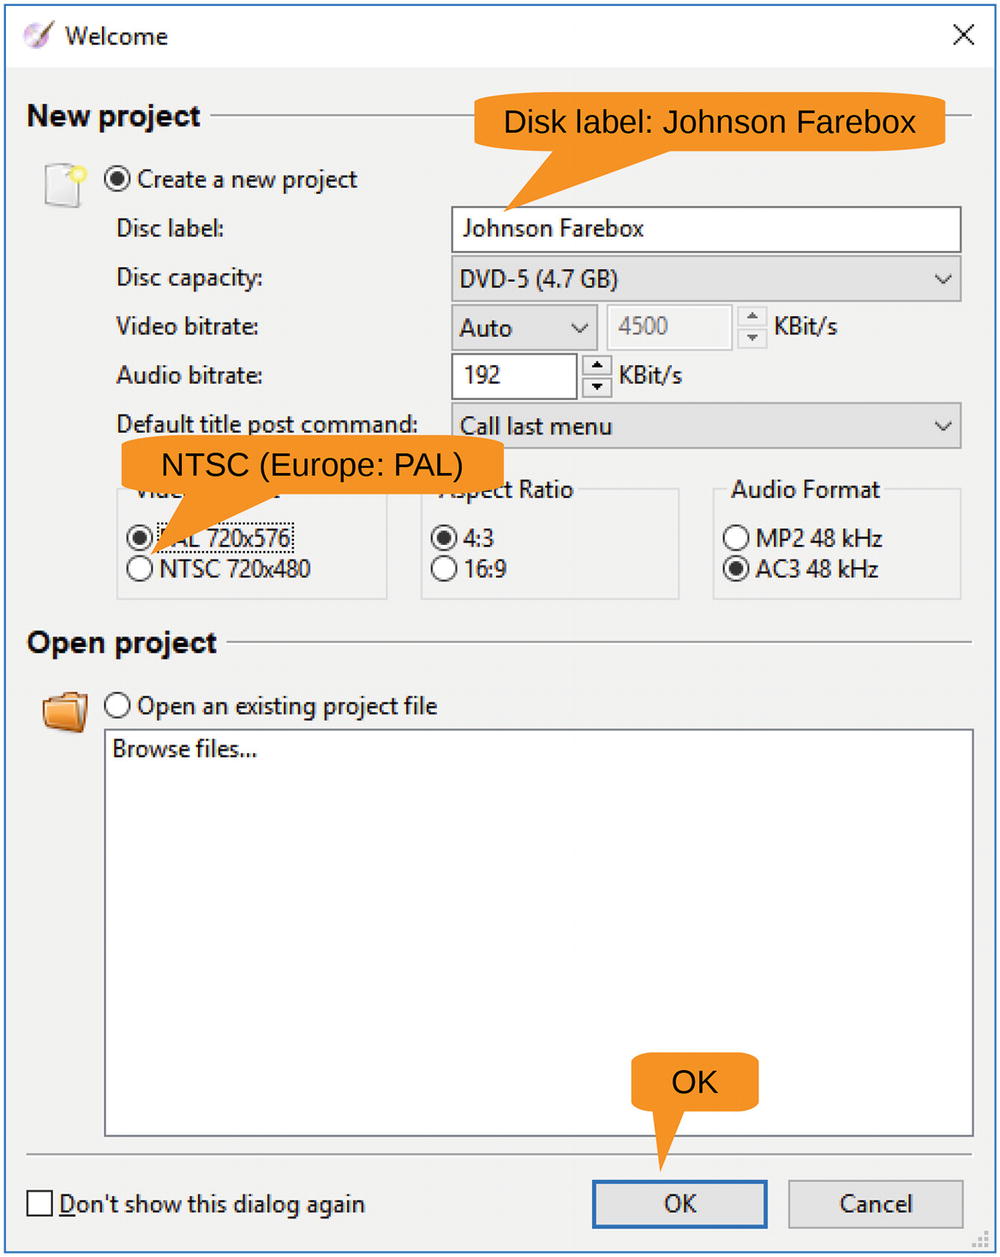
Figure 14-2 Welcome dialog
You will see a dialog (Figure 14-3) asking you to select a template for the menu screen. Enter Johnson Farebox Operation in the Caption field. For Template, just select the first one since none of them really looks like what you want. Finally, click OK to finish the selection process .
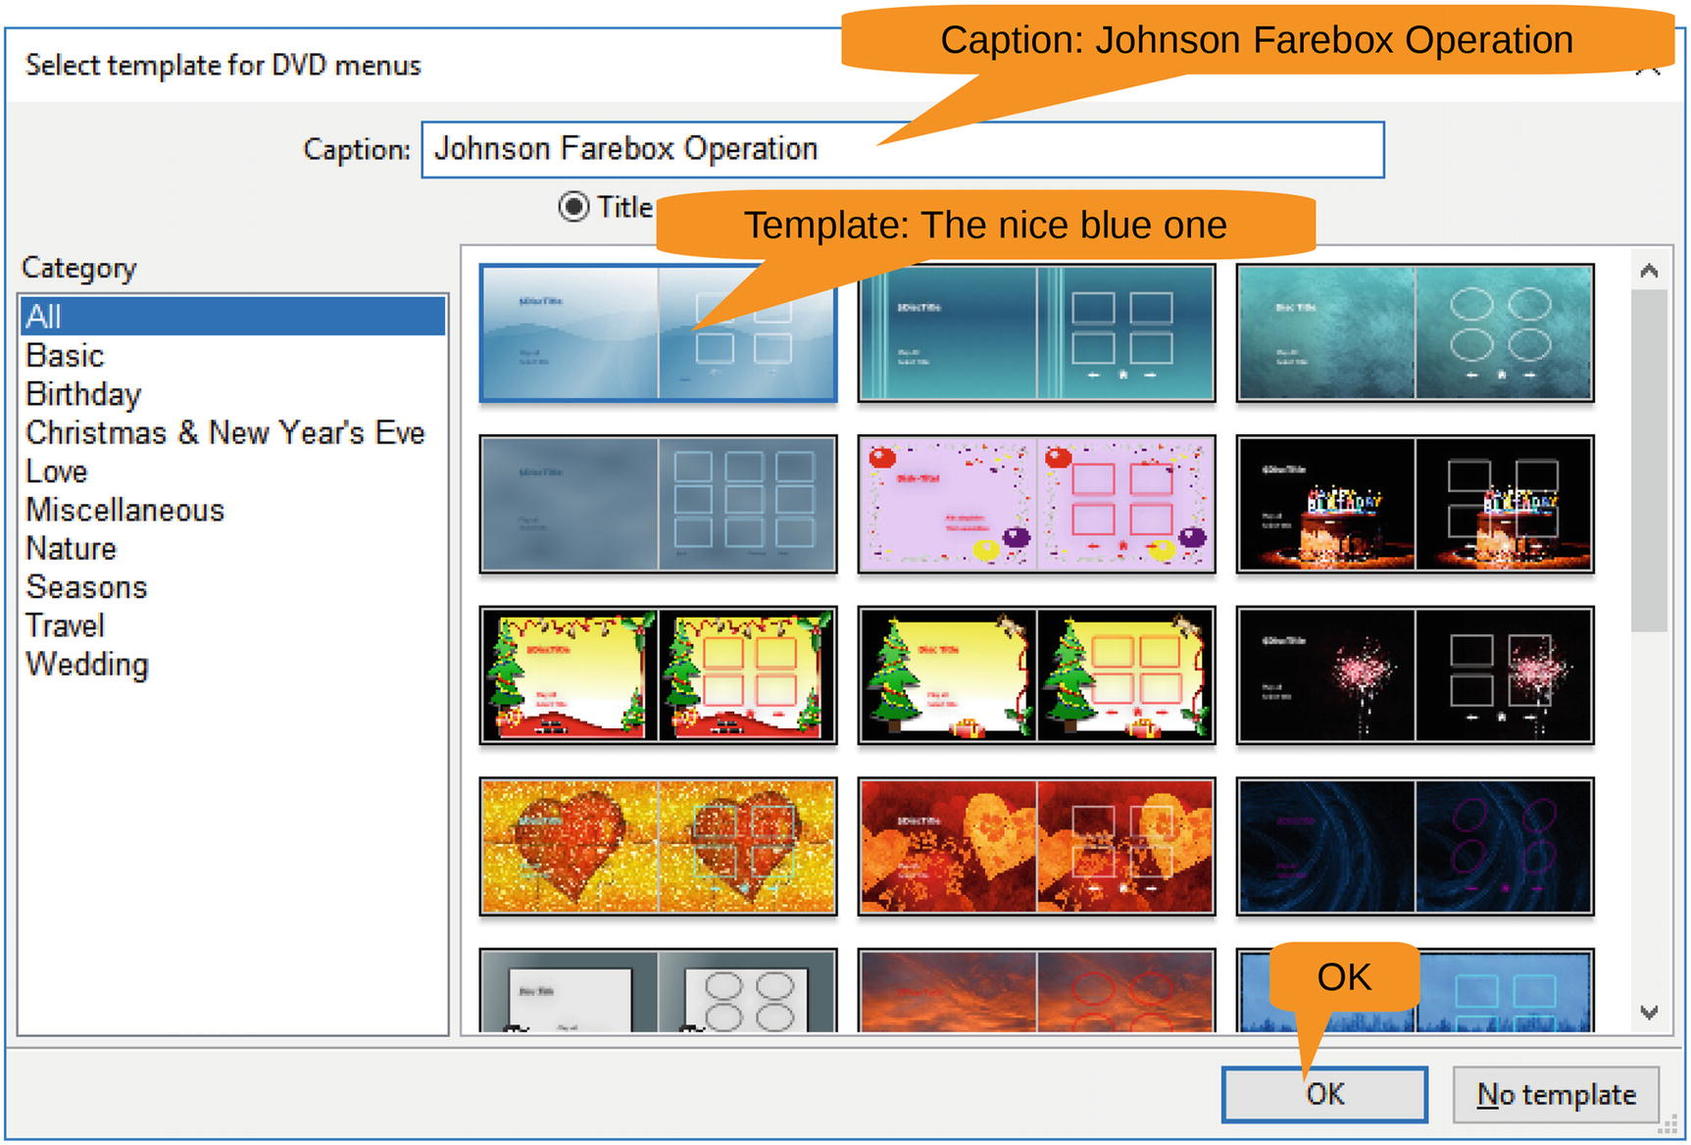
Figure 14-3 Selecting a template
The main window appears, as shown in Figure 14-4. It shows you a list of backgrounds (which you don’t care about for this example) on the left and the first menu on the right. The menu looks OK, so click the second menu screen at the bottom to take a look at that. Also, click the File Browser on the left and go to the directory containing your files .
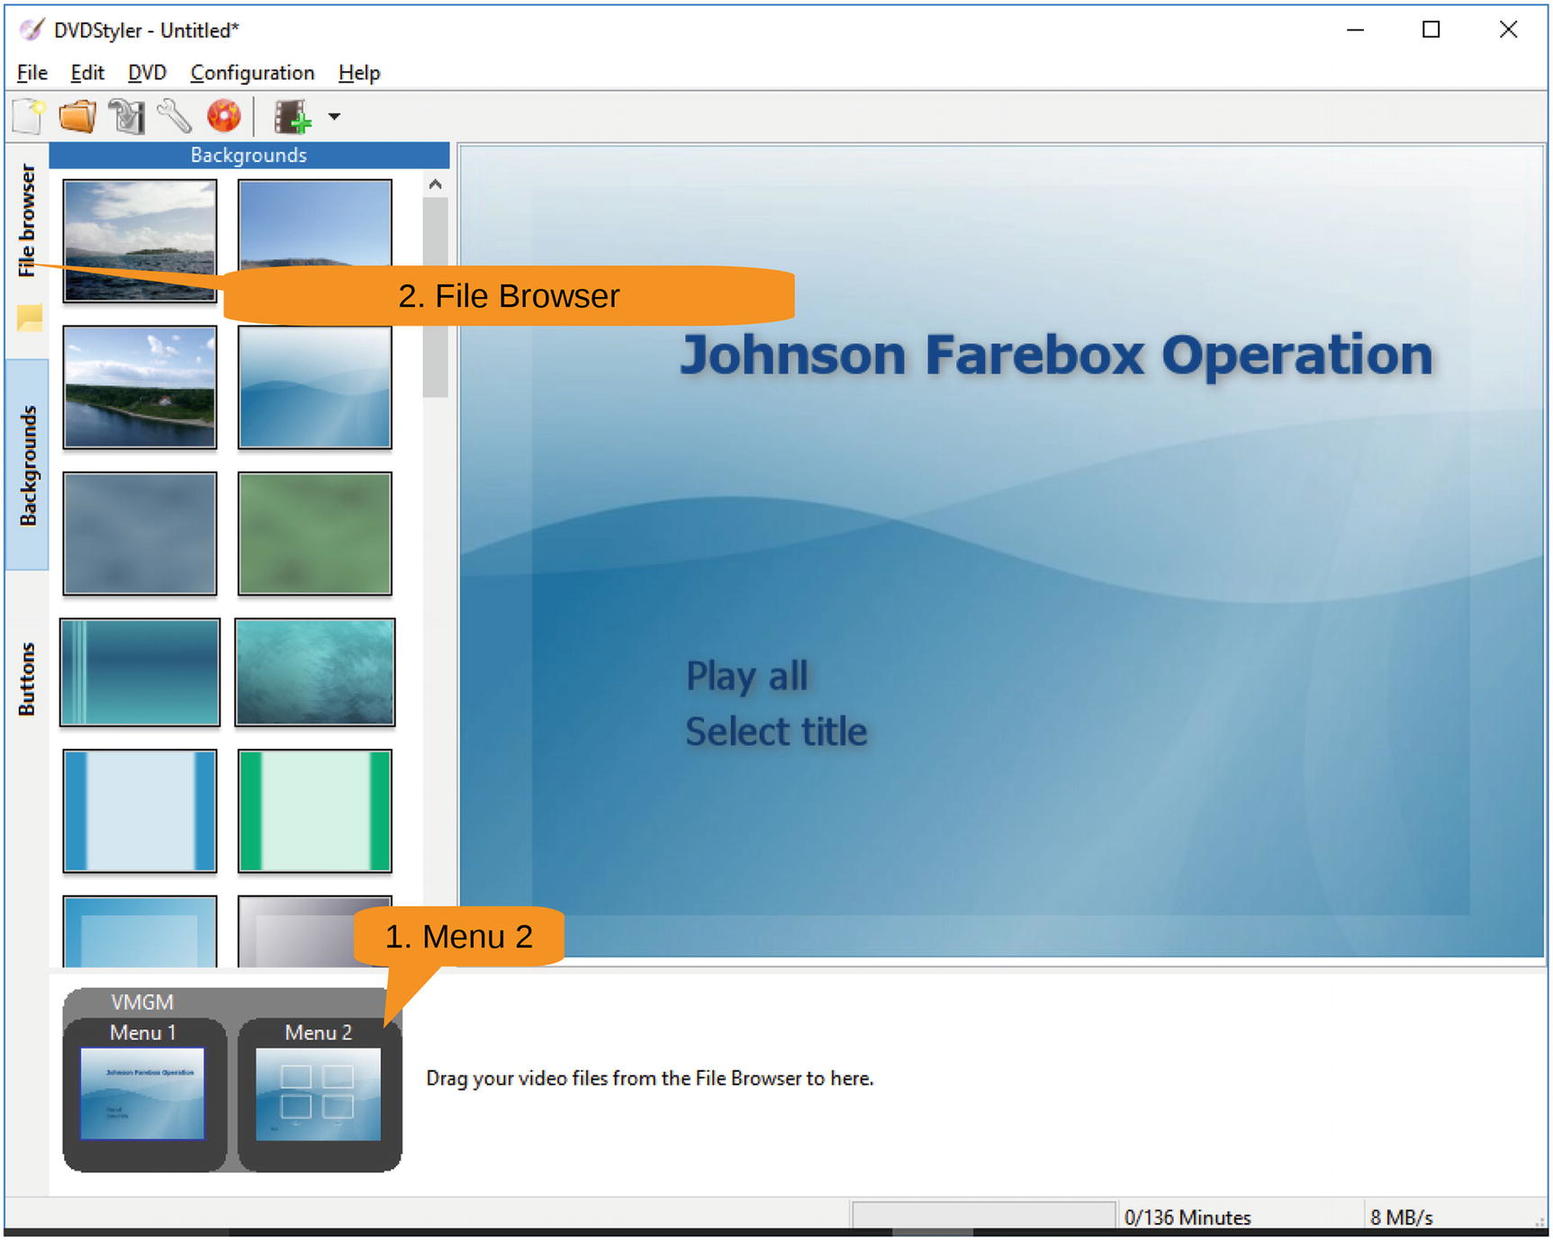
Figure 14-4 Initial editing window
Let’s now add the video to the menu . Drag the video J part1.mp4 to the first square in the menu , as shown in Figure 14-5.
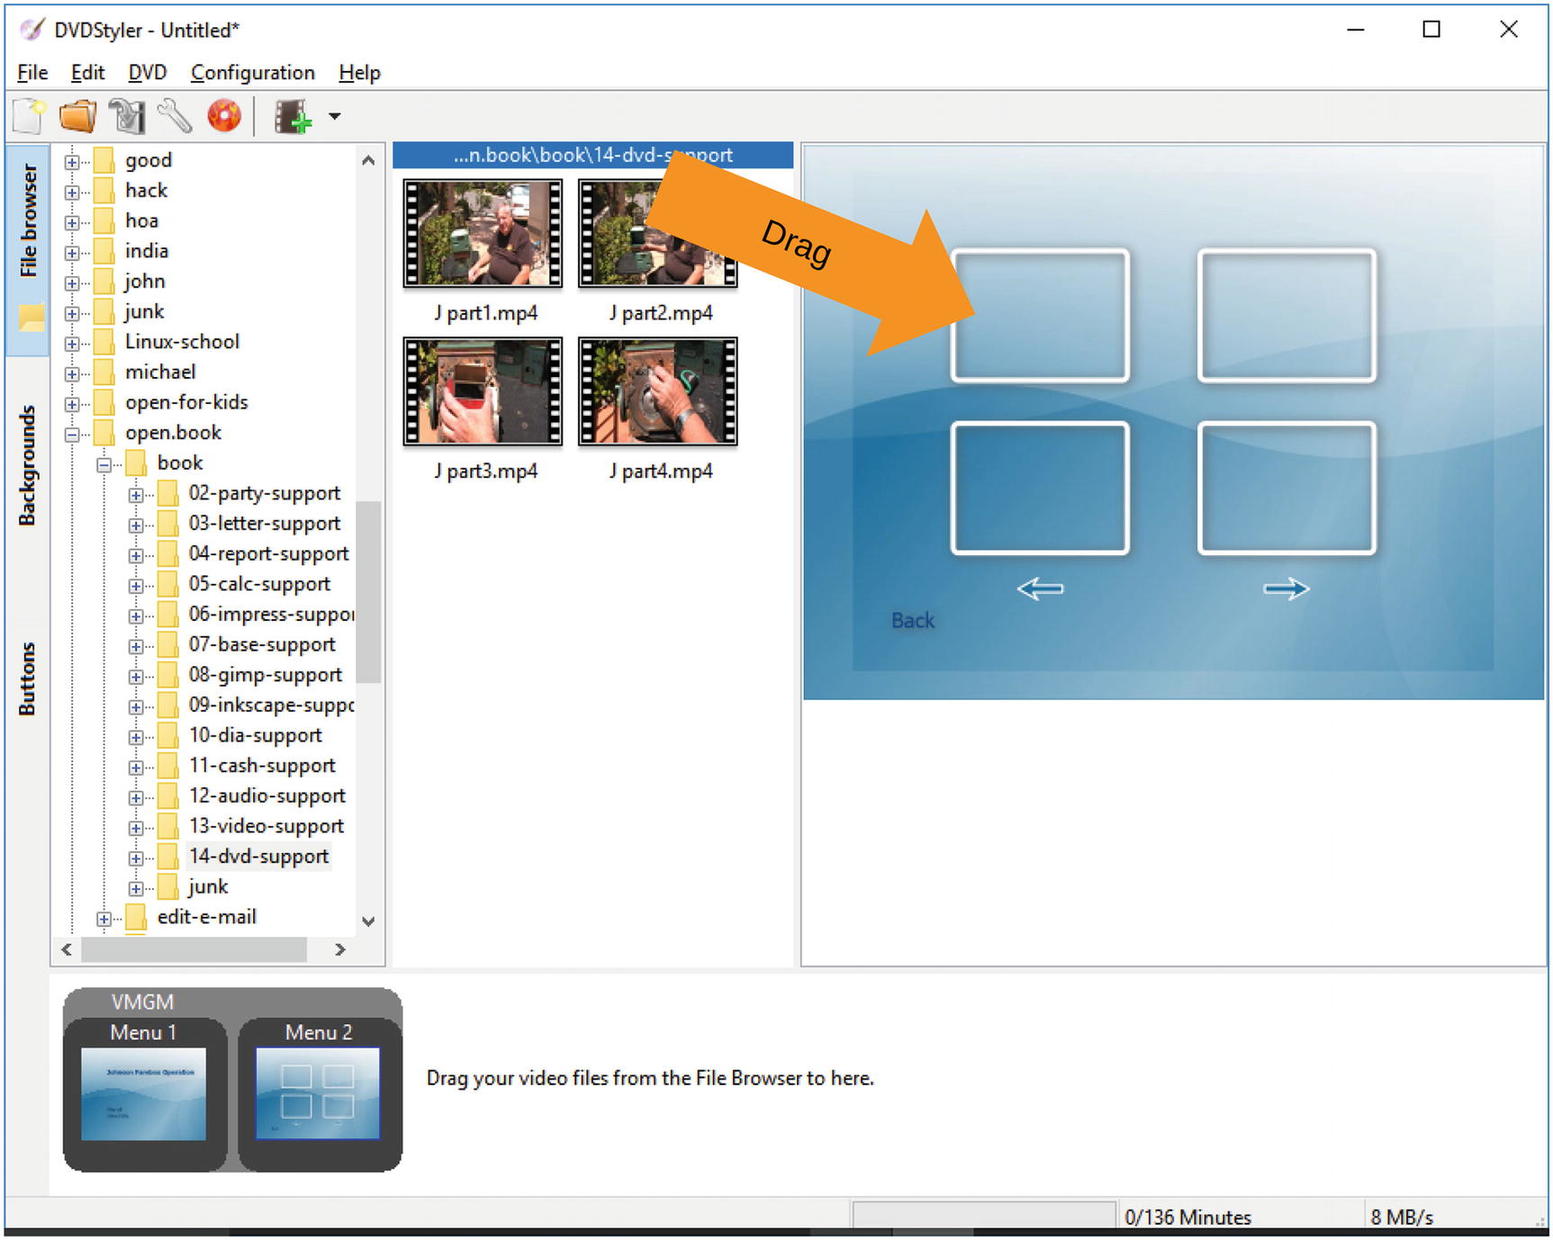
Figure 14-5 Adding a video to the menu
The program will pop up a warning dialog asking if you want the video converted, as shown in Figure 14-6. Click Yes.
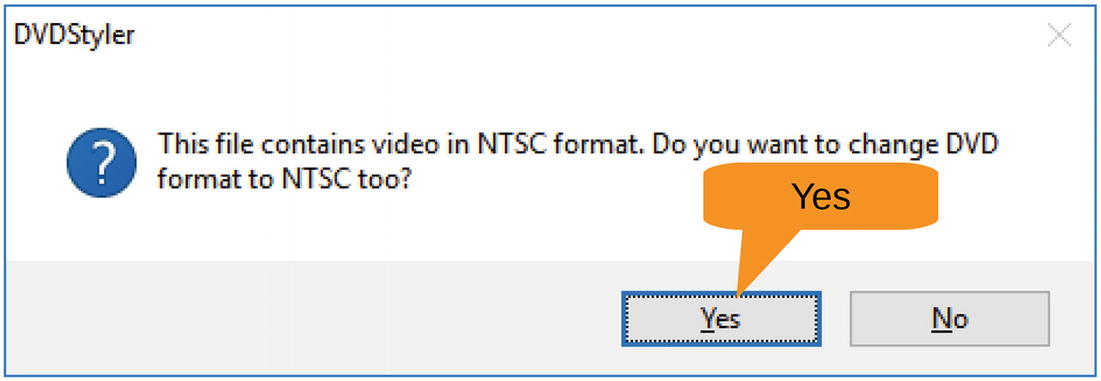
Figure 14-6 Conversion question
Repeat the dragging process for the other three videos. The result will look like Figure 14-7.

Figure 14-7 Completed project
Now is a good time to save your project by selecting File ➤ Save, as shown in Figure 14-8.
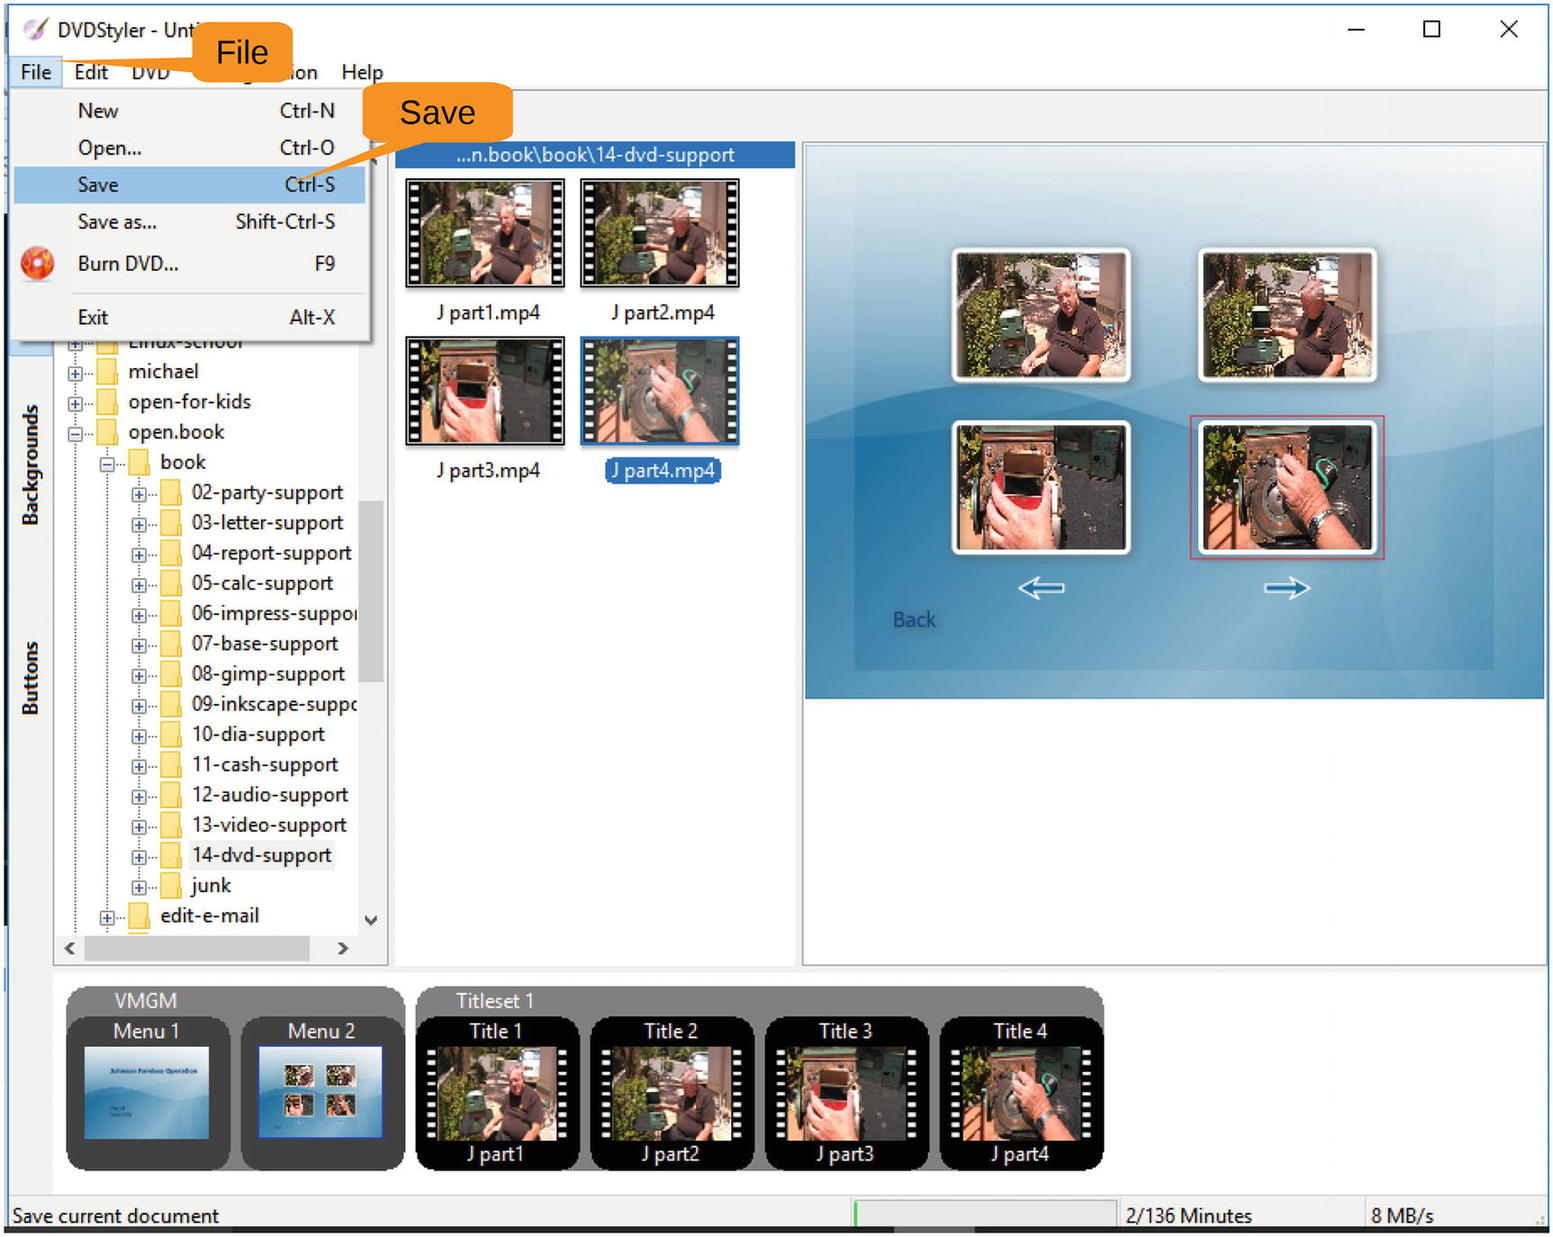
Figure 14-8 Final project
Now let’s create the DVD by selecting File ➤ Burn , as shown in Figure 14-9.
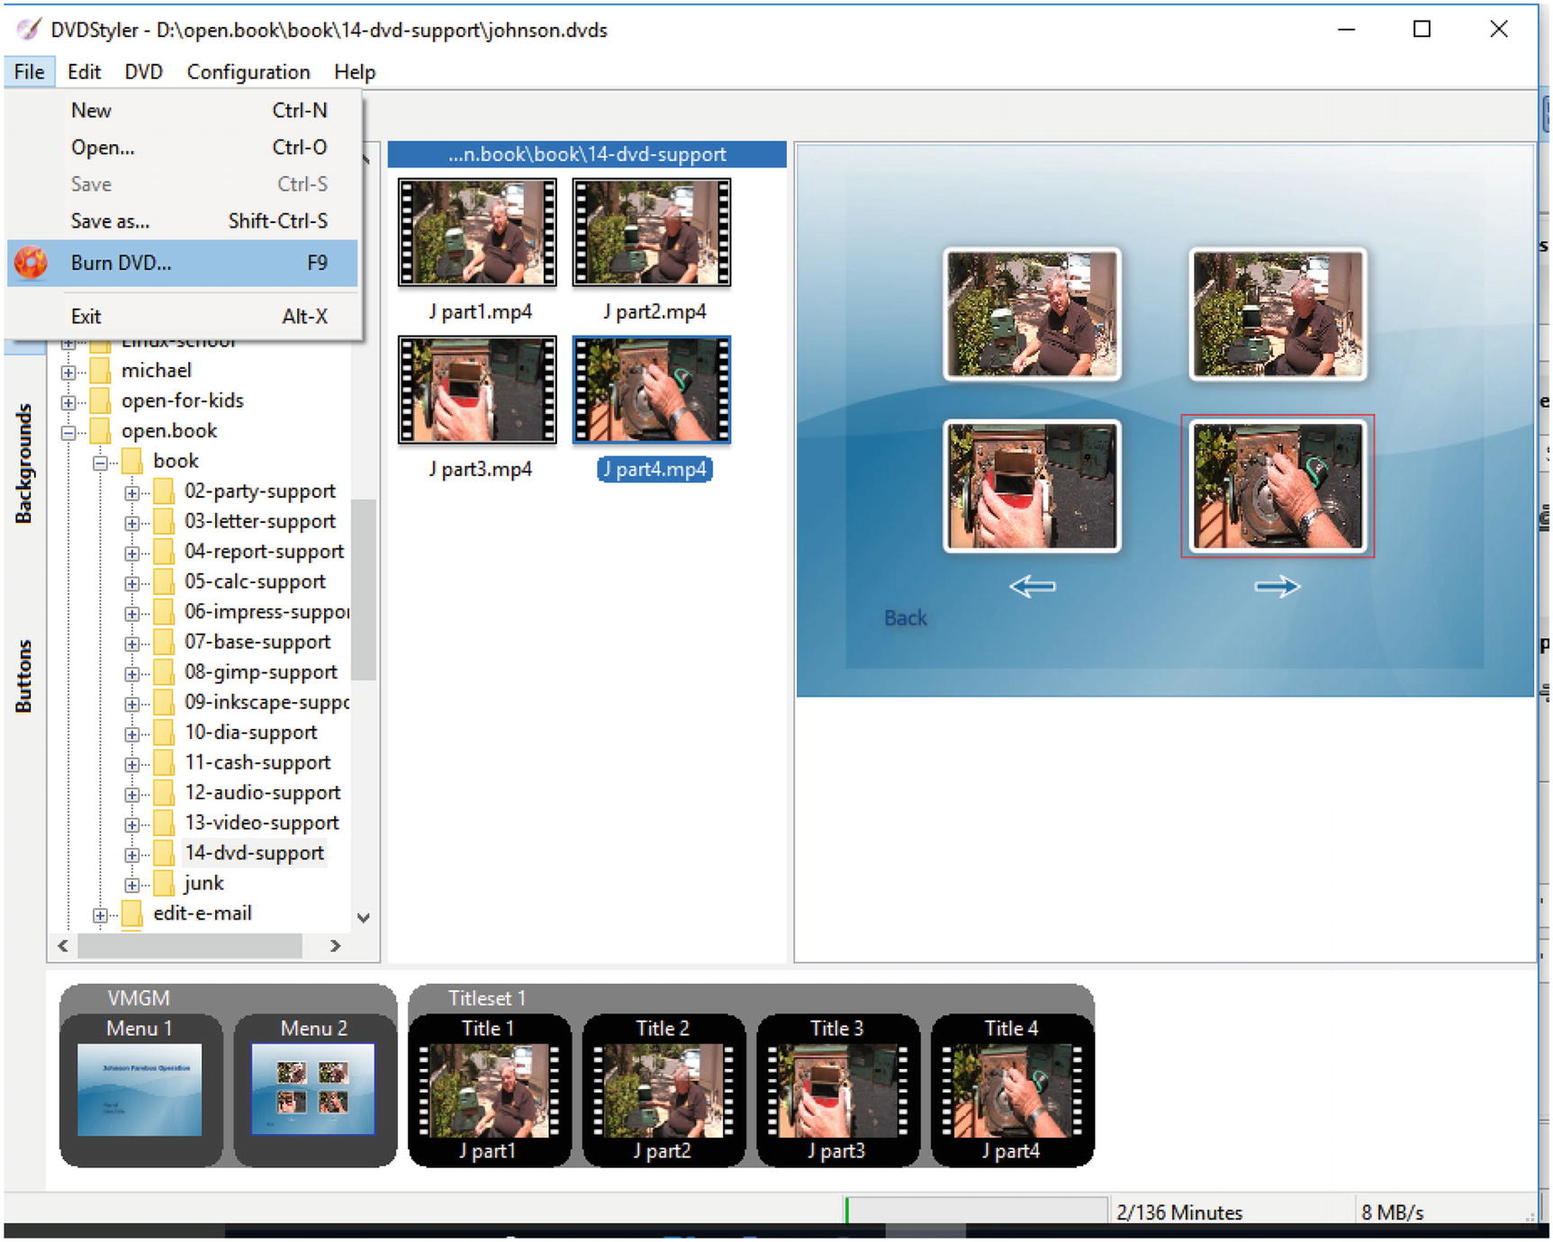
Figure 14-9 Burning the DVD
The Burn dialog appears, as shown in Figure 14-10. This allows you to create an image file (called an iso file) or burn the DVD using an attached DVD burner. In this case, that option is grayed out since we don’t have a DVD on this laptop.
So, for this example, we’ll leave “create iso image” selected, put the file name in the “Save to” field, and click Start.
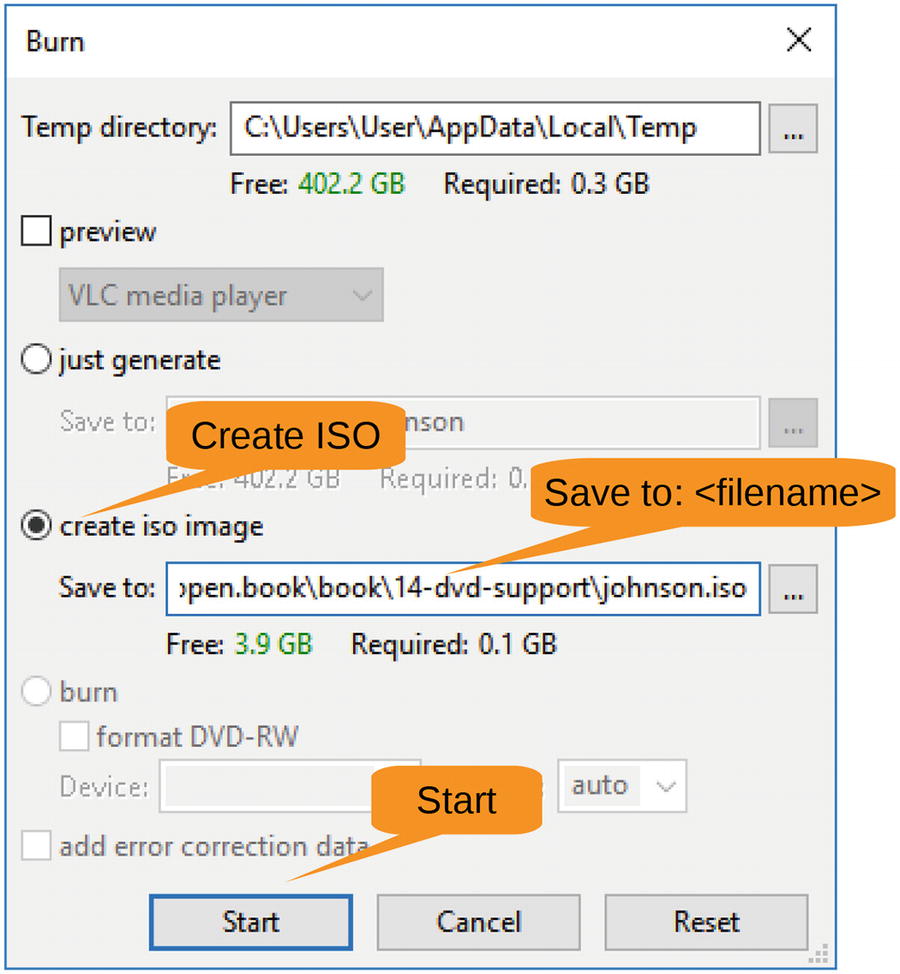
Figure 14-10 Burn dialog
A Generate DVD window appears and displays the progress of the burn, as shown in Figure 14-11. It contains lots of helpful details mostly of use to the developer of this software but not to you. This will take a while, so go for coffee.
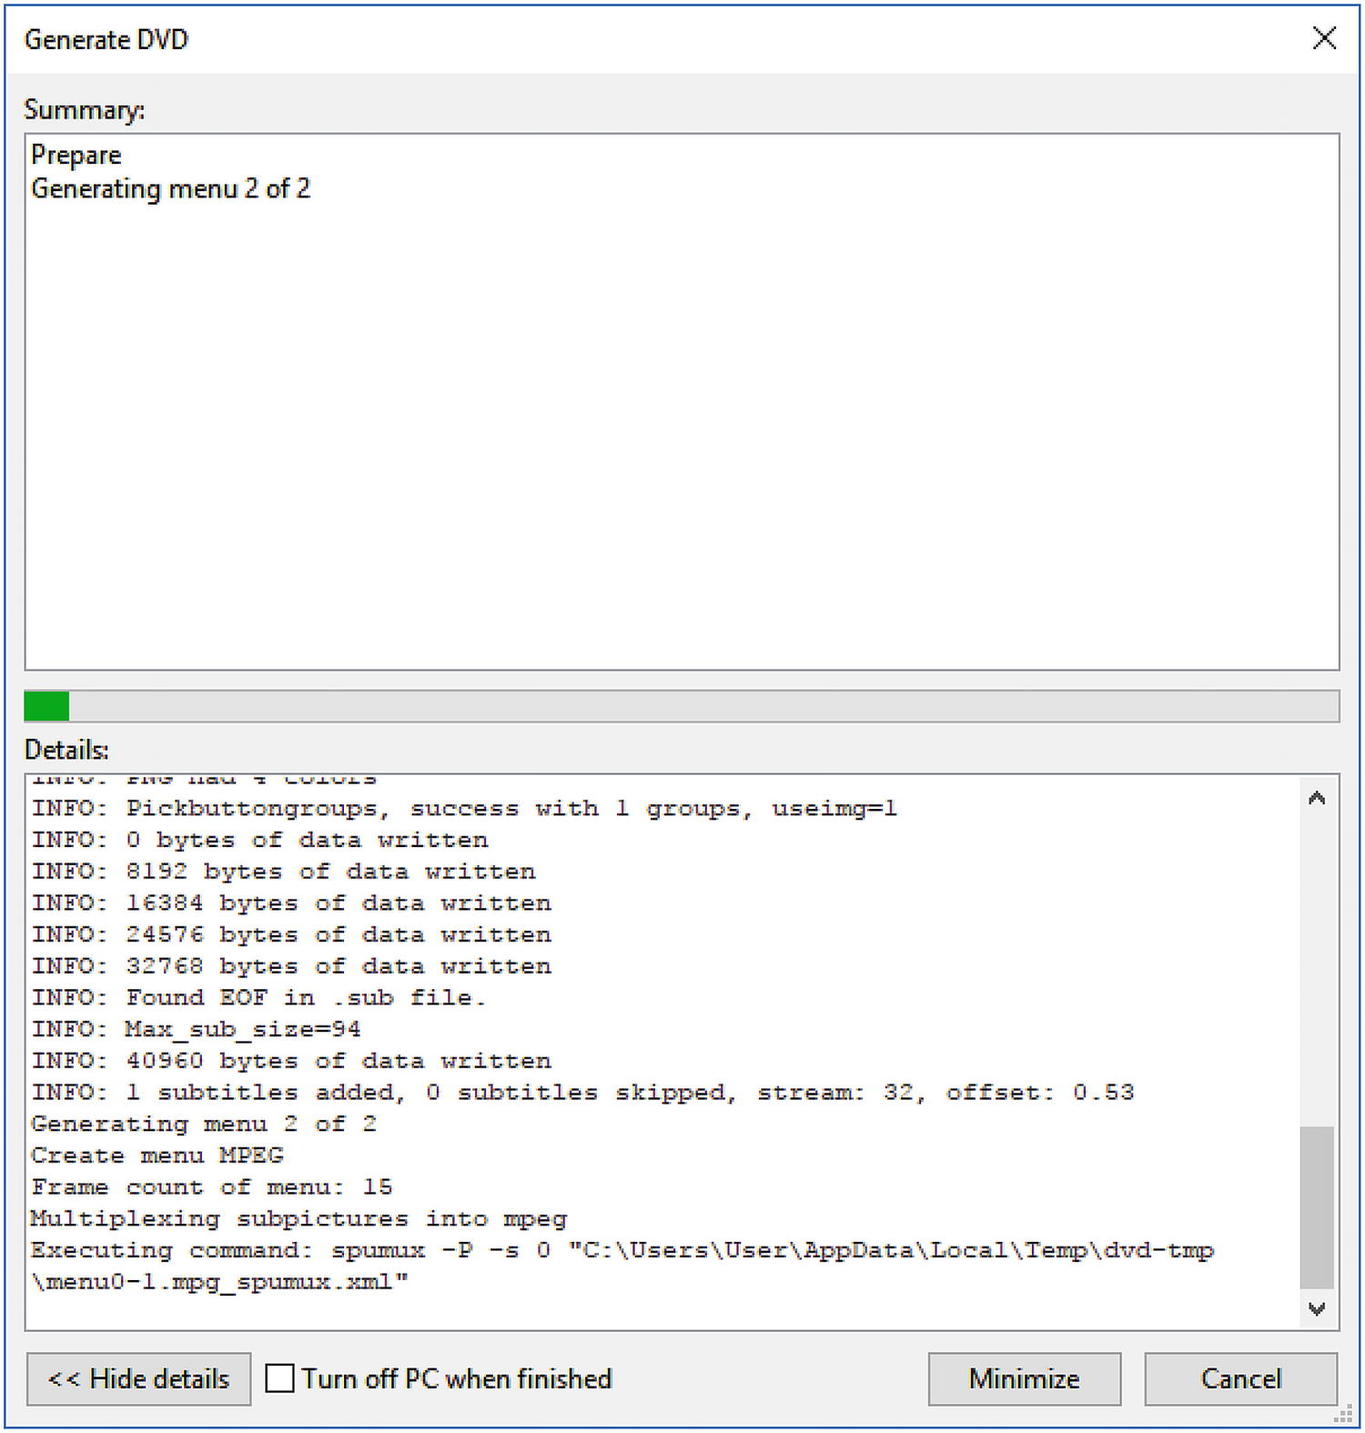
Figure 14-11 Generate DVD dialog
We see you’re back from coffee. Don’t spill it on the keyboard. If you took long enough, the DVD generation is finished, and you’ll see a message on the bottom indicating success , as shown in Figure 14-12. Close the dialog.
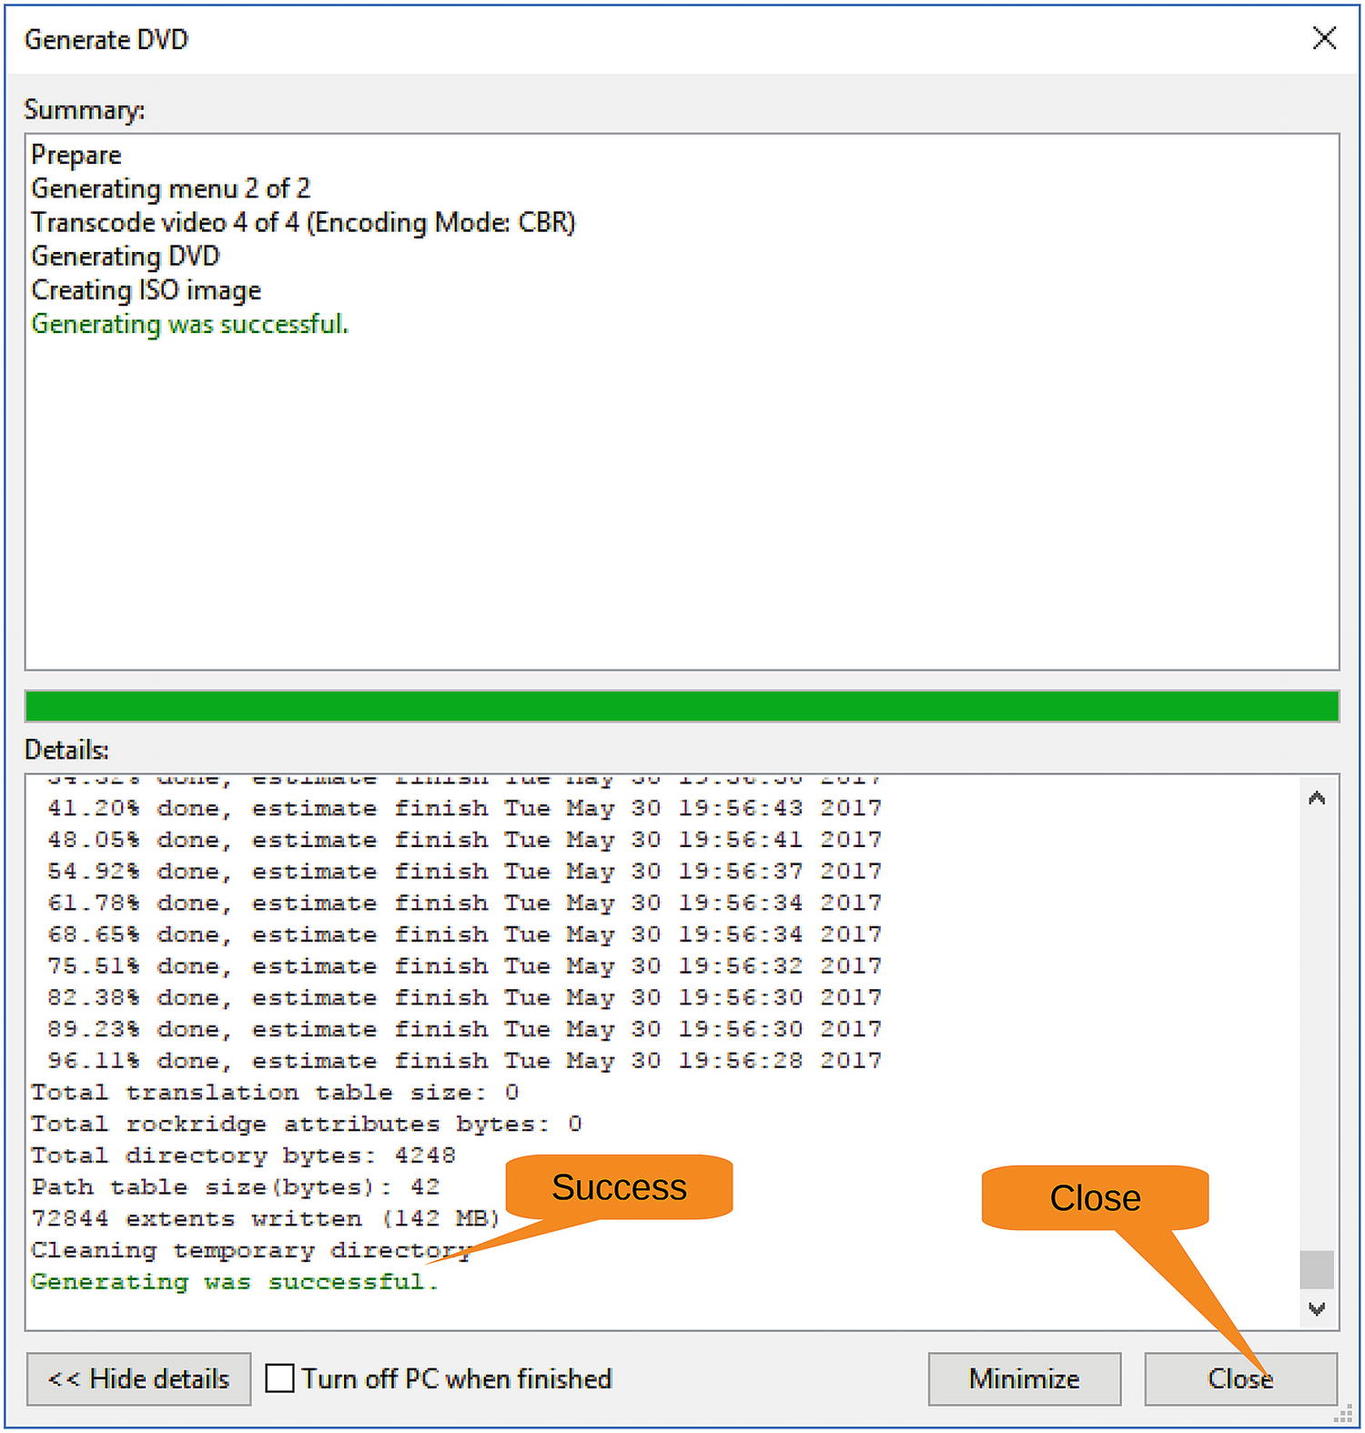
Figure 14-12 Success
Summary
DVDStyler is a good tool for making basic DVD videos. There are more advanced authoring tools out there, such as DVDAuthor, but they have steeper learning curves that must be overcome to work them. DVDStyler has a nice balance between features and usability that should satisfy most users.