
4. Starting a New Session
When you start a new project in Pro Tools, you start a new session. A Pro Tools session is analogous to a session in a real-world recording studio: It contains all the elements you need to record, edit, process, mix, master, and store audio recordings.
This chapter tells you how to start a new Pro Tools session from scratch. First, I’ll show you how to create a new session and how to configure basic parameters such as sample rate, bit depth, audio file type, and I/O Setup.
Then we’ll look more closely at I/O Setups. You’ll learn how to define new signal paths and map channels, and how to save your I/O Setups to use in later sessions. I’ll also cover how to create new session templates and discuss sharing sessions between Pro Tools LE and Pro Tools HD systems.
Creating a New Session
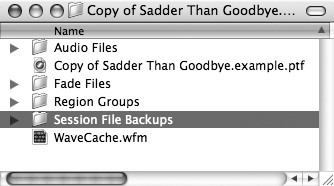
Each time you create a new session, Pro Tools places a new Session folder (Figure 4.1) on your hard drive. In Pro Tools 7 this folder contains a Session file (.ptf), a WaveCache.wfm file, an Audio Files folder, a Region Groups folder, and a Fade Files folder (Figure 4.2).
Figure 4.1. A Pro Tools Session folder.
Figure 4.2. The contents of a Pro Tools 7 Session folder: a Session file (.ptf), an Audio Files folder, a Fade Files Files folder, a Region Groups folder, and a WaveCache.wfm file.

The session file contains data that maps the current configuration of your session, including your latest mix, edit, and automation settings. And it keeps track of all audio files attached to your session. All Pro Tools 7 session file names end with a .ptf (Pro Tools File) extension.
The WaveCache.wfm file stores all waveform display data for the session. Each time you open a session, Pro Tools 7 refers to this file and is thus able to quickly redraw the session’s audio waveforms.
All audio files recorded or imported during a Pro Tools session are stored in the Audio Files folder; all region groups exported from a session are logged in the Region Groups folder; and all fades and crossfades created during a session are stored in the Fade Files folder. Audio files and other basic session elements are discussed in Chapter 2: Software Basics.
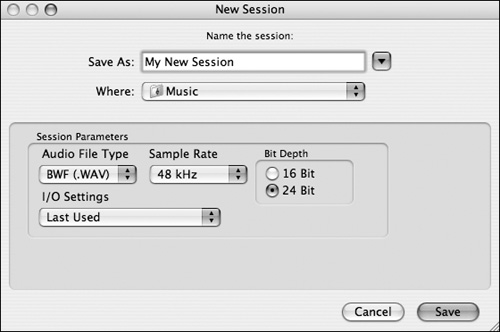
When you create a new session, the New Session dialog box appears (Figure 4.3). Here, you can name the session and set session file parameters, such as Audio File Type, Sample Rate, Bit Depth, and I/O Settings.
Figure 4.3. The New Session dialog box.
To create a new session
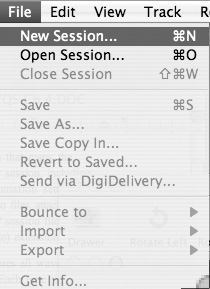
1. Choose File > New Session (Figure 4.4).
Figure 4.4. Choose File > New Session.
2. Choose the destination hard drive for your session. (Make sure you’re using a dedicated audio hard drive.)
3. Select the session audio file format (Figure 4.5).
Figure 4.5. Select the session audio file format.
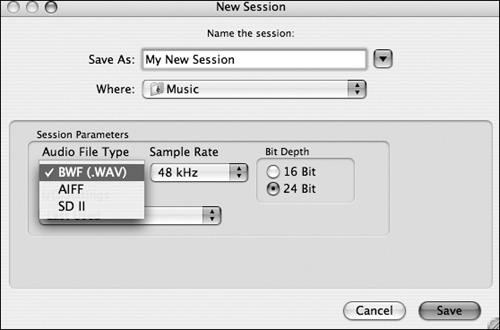
Sound Designer II (SDII) files are not supported on Windows systems or at sample rates above 48 kHz. For best cross-platform compatibility, set the file type to BWF (WAV).
4. Select a sample rate (44.1 kHz, 48 kHz, 88.2 kHz, or 96 kHz) and a bit depth (16- or 24-bit). (For more information see the sidebar, What Are Sample Rate and Bit Depth? later in this chapter.)
6. Select the I/O settings for the session.
7. Name the session and click Save.
Opening a session
Use the Open Session dialog box to open existing sessions. Pro Tools will automatically scan the session directory for the associated audio and fade files.
If the number of tracks in a session exceeds the maximum number of voices available on your system, those extra tracks are set to voice off when the session is opened.
To open an existing session
1. Choose File > Open Session.
The Open Session dialog box appears (Figure 4.6).
Figure 4.6. The Open Session dialog box.
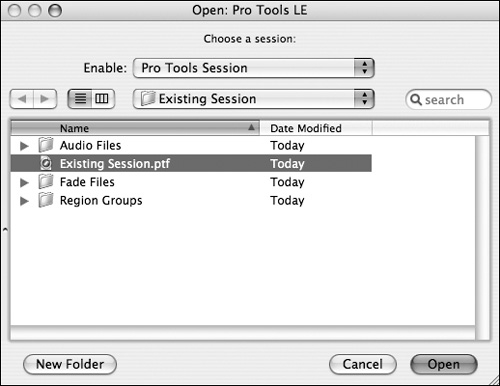
2. Select a session and click Open.
• Use the DigiBase Work7space browser to quickly locate and open a session file (Figure 4.7). Double-click the session file icon to open it. For more information on DigiBase see Chapter 9: Managing Audio Files with DigiBase.
Figure 4.7. The DigiBase Workspace browser lets you quickly locate and open your Pro Tools session file.

Saving a session
The Save command saves the changes you make to a session, writing over the previously saved version of the session file. The Save command cannot be undone.
To save a session
• Choose File > Save.
• Save your session frequently. You don’t want to lose detailed mix, edit, or automation data because of a computer crash or inexplicable technical mishap.
• To automatically back up your session files: Choose Setup > Preferences. Click the Operation tab. In the AutoSave section of the Operation panel click Enable Session File Auto Backup (Figure 4.8). Session file backups are stored in a Session File Backup folder, which is automatically added to the Session folder (Figure 4.9).
Figure 4.8. Enable AutoSave to protect your session files: Choose Setup > Preferences. Click the Operation tab. In the AutoSave panel click “Enable Session File Auto Backup.”
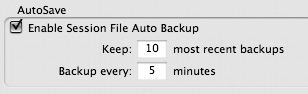
Figure 4.9. AutoSave stores automatic session file backups in the Session File Backups folder inside the Session folder.
Reverting to a previously saved session
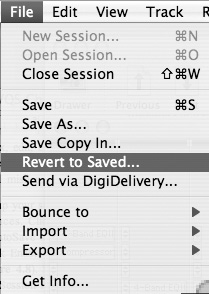
If you want to discard changes that you have made to a session file and subsequently saved, use the Revert to Saved command. Revert to Saved recalls the last saved version of a session.
To revert to the last saved version of a session
• Choose File > Revert to Saved (Figure 4.10).
Figure 4.10. Choose File > Revert to Saved.
The Save As command
The Save As command lets you rename a copy of a session. It closes the current session and leaves the renamed copy open. The Save As command duplicates session files only—it does not duplicate audio or fade files.
To rename a session
1. Choose File > Save As
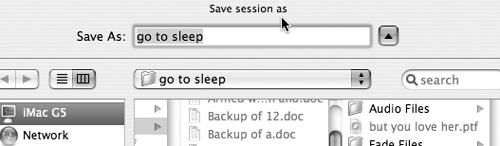
The Save Session As dialog box appears (Figure 4.11).
Figure 4.11. The Save As dialog box lets you rename a session file copy.
2. Enter a new name for your session
Pro Tools 7 lets you name files with as many characters as your operating system supports.
3. Click Save.
The renamed session document is saved in the Session folder along with the original session. Any new audio files that you record in the renamed session are stored in the same Audio Files folder created with the original session.
• The Save As command is useful for developing sessions in successive stages: You can save a session at any stage and continue working on a renamed copy.
The Save Copy In command
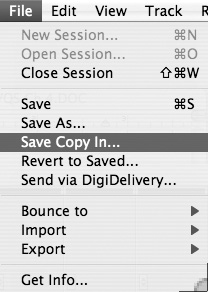
The Save Copy In command (Figure 4.12) lets you save a copy of the current session file, along with its audio files, fade files, plug-in settings files, and movie or video files. You can also designate a new session file format, audio file format, bit depth, sample rate, and +6 or +12 maximum fader gain for the session copy.
Figure 4.12. Choose File > Save Copy In.
The Save Copy In command is useful for changing the sample rate or bit depth of a session. It’s also useful for generating session files and audio files for use on a different Pro Tools system or operating system platform.
The Save Copy In command does not close the original session—the original session remains the open and active session.
To save a session copy in a new location
1. Choose File > Save Copy In.
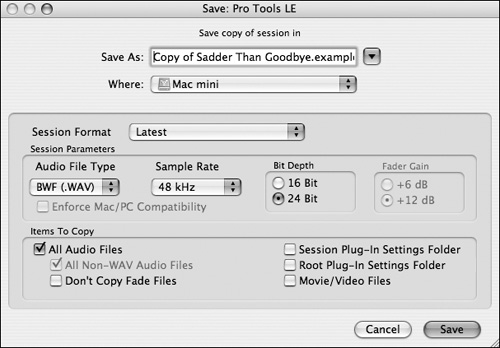
The Save Copy In dialog box appears (Figure 4.13).
Figure 4.13. The Save Copy In dialog box.
2. Choose a destination and type a name for the new session file.
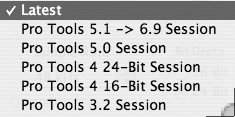
3. Select the session format for the session copy (Figure 4.14). Select “Latest” to save the session copy in Pro Tools 7 format.
Figure 4.14. Select a session format.
4. Select the session parameters (Audio File Type, Sample Rate, and Bit Depth,) for the session copy (Figure 4.15).
Figure 4.15. Select session parameters, including Audio File Type, Sample Rate, Bit Depth, and Fader Gain (when converting to Pro Tools 5.1-6.9 formats only) .

5. Select the Items To Copy to the new session (Figure 4.16).
Figure 4.16. Select Items To Copy.

6. Click Save to save the session in the new location.
• A Pro Tools session can use mixed audio file types. If your original session uses mixed file types, the Save Copy In command will not convert audio files unless you specify that they be converted. Sessions with mixed audio file types require more processing power and can thus reduce system performance.
• If you are saving a session to an earlier (5.1–6.9) Pro Tools format, and want to create session and audio files that can be used in both the Macintosh or Windows version of Pro Tools, select Enforce Mac/PC Compatibility (Macintosh) or Enforce PC /Mac compatibility (Windows).
• If, when saving a session to an earlier Pro Tools format, you save a session with a +12 dB maximum fader gain as a session with a +6 dB maximum fader gain, any automation breakpoints over +6 dB will be lowered to +6 dB.
Closing a session
You can work on only one session at a time in Pro Tools. The Close Session command closes the current session, leaving the Pro Tools application open so you can create or open another session.
To close a session
• Choose File > Close Session.
The current session closes, leaving the Pro Tools application open.
Quitting Pro Tools
Pro Tools will prompt you to save changes you’ve made to a session before it quits.
To quit a session on Mac OS
• Choose Pro Tools > Quit Pro Tools
To quit a session on Windows
• Choose File > Exit.
Creating an I/O Setup
A signal path refers to the way that audio is routed in, out, and through a Pro Tools session. A signal path can have many different configurations. For instance, you may want to bus audio to a DSP plug-in or output audio to an external hardware effect. This signal path configuration is called an I/O Setup. For more on I/O Setup, see Chapter 2: Software Basics.
Using the I/O Setup dialog box
The I/O Setup dialog box (Figure 4.17) lets you create I/O Setups. Use this checkerboard-like dialog box to define track inputs and outputs, inserts, and bus paths. You can save your definitions as I/O Settings files for use with later sessions. (See Importing and Exporting I/O Settings Files later in this chapter.)
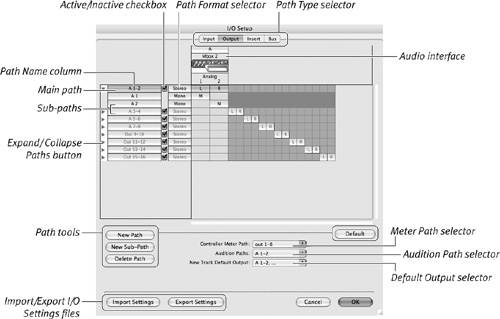
Figure 4.17. The I/O Setup dialog box.
To open the I/O Setup dialog box
1. Make sure your audio interface is enabled and configured properly in the Hardware Setup dialog box.
2. Choose Setup > I/O (Figure 4.18).
Figure 4.18. Choose Setup > I/O.

The I/O Setup dialog box appears. Its parameter controls include the following:
Path Type tabs: The Path Type tabs let you choose a path type (input, output, insert, or bus).
Path/sub-paths arrows: The Path/sub-paths arrows let you expand the path name to display the sub-paths associated with a main path.
Path Name column: The Path Name column displays the current path name. Enter a new name in the field to rename a path.
Active/Inactive checkbox: The Active/Inactive button lets you turn a path on or off.
Path Format selector: The Path Format selector lets you choose a format (mono or stereo) for each path.
Channel grid: The Channel grid lets you map out paths between the I/O interface and channels in a session.
Path tools: Path tools let you customize paths. Path tools include New Path, New Sub-Path, Delete Path, and Default.
Default Output selector: The Default Output selector lets you set the default output assignments for new tracks.
Audition Path selector: The Audition Path selector lets you configure Audio Regions list previewing.
Meter Path selector (Pro Control only): The Meter Path selector lets you set the paths displayed across the Pro Control Output meters.
Defining new paths
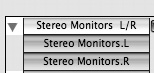
The I/O Setup dialog box lets you define main paths and sub-paths. Main paths are logical groupings of inputs, outputs, inserts, or busses, such as a stereo (two-channel) output. Sub-paths are signal paths within the main path. For example, a main path stereo output has two mono sub-paths (Figure 4.19).
Figure 4.19. Main path stereo outputs and corresponding sub-path mono outputs.

You can define new main paths and sub-paths in the I/O Setup dialog box.
To create a new path
1. Choose Setup > I/O.
2. Click a path type tab (Input, Output, Insert, or Bus) (Figure 4.20).
Figure 4.20. Click a path type tab (Input, Output, Insert, or Bus).
![]()
3. Click the New Path button, or press Command-N (Macintosh) or Control-N (Windows).
or
Select a main path and click the New Sub-Path button.
4. Double-click the Name field and enter a path name. (The path names appear globally in Pro Tools’ track-routing selectors.)
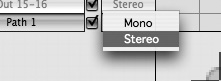
5. Choose a format (Mono or Stereo) from the Path Format selector (Figure 4.21).
Figure 4.21. Choose a path format (Mono or Stereo).
6. Configure other path types (Input, Output, Insert, or Bus).
7. Click OK.
• You don’t need to configure the I/O Setup before you begin recording—Pro Tools’ default I/O Setups are adequate for most basic recording situations. As you expand your system, however, you’ll likely want to experiment with new I/O Setups.
Mapping channels
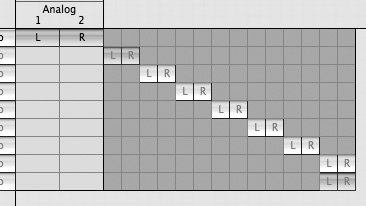
Once you’ve defined a path, you can map it in the I/O Setup dialog box’s channel grid (Figure 4.22). Channel mapping is subject to these limitations:
• No two main output paths, insert paths, or main bus paths can partially or completely overlap.
• A new output or bus path must be entirely independent of other paths, or it must be a sub-path completely contained within a main path.
• Output and insert paths can overlap, but they cannot be used at the same time.
Figure 4.22. The I/O Setup dialog box’s channel grid.
To map channels
1. Select a main path or sub-path (Figure 4.23).
Figure 4.23. Select a main path or sub-path.
2. In the row for the selected path, click in the grid column under the audio interface and channel (Figure 4.24).
Figure 4.24. Map channels in the channel grid.

Remapping channels
You can move individual assignments to different channels and redefine a path.
To remap channels in a path
• Drag the channel to the new location in the grid (Figure 4.25).
Figure 4.25. Remap a channel by dragging it to a new location in the grid.

Other channel assignments automatically move (shuffle) to accommodate the dragged channels.
Making paths active or inactive
Paths can be active (on) or inactive (off). You can switch paths between these states on single tracks or session wide.
To toggle a track path assignment between active and inactive
• In either the Mix or Edit window, Command-Control-click (Macintosh) or Control-Start-click (Windows) on a track Input, Output, Insert, or Send selector.
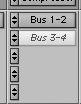
Inactive paths are italicized and grayed out in the track path selectors (Figure 4.26).
Figure 4.26. Inactive paths are italicized.
To toggle a global path assignment between active and inactive
1. Choose Setup > I/O.
2. Select a path type tab (Input, Output, Insert, or Bus).
3. Click the Active/Inactive checkbox (Figure 4.27).
Figure 4.27. Click the Active/Inactive button.
![]()
• Active paths use system resources. Make paths inactive whenever possible to conserve CPU power and improve system performance.
About I/O Settings files
When you start a session, you can choose from several I/O Setup configuration options:
• Default I/O Setups: These Pro Tools factory presets give you useful basic main path and sub-path definitions.
• Custom Presets: You can store and recall custom presets using the import and export features in the I/O Setup dialog box.
• Last Used: The most recent I/O Setup configuration is saved as a Last Used settings file (Figure 4.28).
Figure 4.28. The Last Used settings file.

Importing and exporting I/O Settings files
You can import and export I/O Setup configurations as I/O Settings files. This lets you save I/O Setups for reuse.
To export and save an I/O Setup configuration
1. Click Export Settings in the I/O Setup dialog box (Figure 4.29).
Figure 4.29. Click Export Settings to save I/O Settings files.

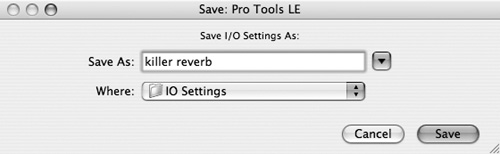
2. Name and save the settings file (Figure 4.30).
Figure 4.30. Name and save the settings file.
To import an I/O Settings file
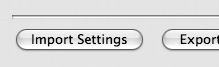
1. Click Import Settings in the I/O Setup dialog box (Figure 4.31).
Figure 4.31. Click Import Settings to import a settings file.
2. Select the desired settings file in the dialog box. Click OK.
3. You’ll be asked if you want to delete the existing unused paths.
4. Select one of the following:
Yes if you want to delete existing paths. This remaps the original session path definitions to your current audio interface.
No if you don’t want to delete existing paths. This adds session paths to the current I/O Setup.
Initializing I/O Setup
Before Pro Tools recognizes a new I/O Setup as valid, each path must have a name, a format (mono or stereo), and a valid channel mapping. See Mapping Channels earlier in this chapter for channel mapping requirements.
To set the current I/O Setup configuration
• Click OK in the I/O Setup dialog box.
Creating Custom Session Templates
You can create a custom session template that retains all the parameters of a session, including mixer configurations, track setups, signal path routing, track views, and preference settings. This saves you the hassle of re-creating your studio setup each time you start a new session.
Creating Macintosh session templates
You can create a session template on the Macintosh by saving a session as a stationery pad. Once you do this, the session acts as a template that you can open and save just as you would a normal session.
To create a custom session template on Mac OS
1. Configure your session parameters as desired.
2. Choose File > Save.
3. Name the session and click Save.
4. Close the session.
5. Locate the session file that you just saved.
6. Click once on the file to select it.
7. Choose File > Get Info.
A File Information window appears.
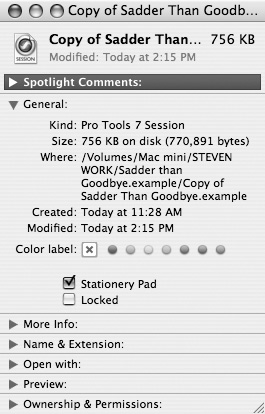
8. Click the Stationery Pad check box to save the file as a template, and then close the window (Figure 4.32).
Figure 4.32. To save a file as a template, choose File > Get Info and click the Stationery Pad check box.
To open a custom session template on Mac OS
• Double-click a session that was previously saved as a stationery pad.
or
1. Select File > Open Session.
The Open Session dialog box appears.
2. Select the session template file and click Open.
You are prompted to either edit the session template or start a new session (Figure 4.33).
Figure 4.33. Choose whether to edit the session template or start a new session.
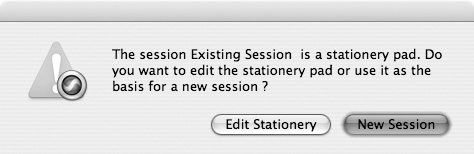
3. Choose Edit Stationery if you want to edit the session template.
or
Choose New Session.
This creates a new Session folder containing a new session file (based on the template), with a new Audio Files folder and a new Fade Files folder.
Creating Windows session templates
You can create a Windows session template by making a session file a Read Only document.
To create a custom session template on Windows
1. Configure the session parameters as desired.
2. Choose File > Save.
3. Name the session and click Save.
4. Close the session.
5. Locate the session file that you just saved.
6. Right-click the file and choose Properties.
7. Under Attributes, deselect Archive and select Read Only.
To open a custom session template on Windows
• Double-click a session file that was previously saved as Read Only.
or
1. Select File > Open Session.
The Open Session dialog box appears.
2. Select the session template file and click Open.
When you first save the session, Pro Tools asks you to rename it. Your original session template remains unchanged.
• To modify a session template in Windows, reopen its properties, deselect the Read Only option, and select the Archive option. Make your modifications, then reopen its properties and change it back to a Read Only file.
Using Sessions Created in Pro Tools 7 with Earlier Versions of Pro Tools Software
Pro Tools 7 session files (.ptf) cannot be opened in earlier versions of Pro Tools software (Pro Tools 6.9.x or earlier). However, you can make a Pro Tools 7 session file (.ptf) compatible with previous versions of Pro Tools by using the Save Copy In command and choosing a destination session format. Sessions created in earlier versions of Pro Tools software can be opened in Pro Tools 7.
To make a Pro Tools 7 session file (.ptf) compatible with previous versions of Pro Tools software
1. Select File > Save Copy In.
The Save Copy In dialog box appears.
2. Click the Session Format pop-up menu and select the desired previous version of Pro Tools software (Figure 4.34).
Figure 4.34. Use the Session Format pop-up menu to select the desired previous version of Pro Tools software.
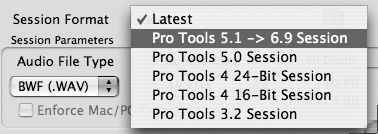
3. Click Save
A session copy is saved that is compatible with the selected previous version of Pro Tool software.
When saving a Pro Tools 7 session file (.ptf) to Pro Tools 5.1 –> 6.9 session file format, the following occurs:
• Fader Gain levels and automation breakpoints higher than +6 dB will be changed to +6 dB.
• Long names will be shortened to 31 characters.
• Instrument tracks will be split into separate Auxiliary Input and MIDI tracks.
• The following attributes will be dropped:
• Region groups
• Region loops
• Sample-based MIDI regions
• Sends F–J and any associated automation
• Marker/Memory Locations 201–999
• Busses 17–32 (Pro Tools LE and Pro Tools M-Powered)
When saving a Pro Tools 7 session file (.ptf) to Pro Tools 5.0 session file format, the following occurs:
• Long names will be shortened to 31 characters.
• Instrument tracks will be split into separate Auxiliary Input and MIDI tracks.
• The following attributes will be dropped:
• Region groups
• Region loops
• Sample-based MIDI regions
• Sample-based MIDI tracks
• Sends F–J and any associated automation
• Marker/Memory Locations 201–999
• Busses 17–32 (Pro Tools LE and Pro Tools M-Powered)
• Multi-mono plug-ins
• Multichannel tracks (Pro Tools HD only)
• Sends assigned to multichannel paths of subpaths of multichannel paths
• I/O settings will be rerouted as follows:
• Tracks assigned to “No Output” will be routed to busses 31 and 32
• Tracks/sends assigned to busses 33–64 will be routed to busses 31 and 32
• Tracks assigned to multichannel paths of sub-paths will be routed to busses 31 and 32
• Tracks/sends assigned to stereo paths referring to even/odd channels (such as 2–3) will be routed to busses 31 and 32
Sharing Sessions Between Pro Tools 7 HD and Pro Tools 7 LE and M-Powered
Sessions created on Pro Tools 7 HD systems will run on Pro Tools 7 LE and M-Powered systems. However, because LE systems have less processing capability than HD systems, the following limitations apply:
• All tracks beyond the first 32 tracks, including inactive tracks, are set to voice off.
• Any assignments to busses beyond 32 are made inactive.
• Any instrument tracks beyond 32 are made inactive.
• TDM plug-ins with RTAS equivalents are converted; those without equivalents are made inactive.
• Multichannel surround tracks are discarded.
• Any sends beyond A–E are removed.
• Unavailable input and output paths are made inactive.