
5. Working with Tracks
A track is a designated space in a recording system that’s assigned to carry a single audio signal. Tracks let you direct the flow of audio into your system, through DSP effects, and then back out to your ears and/or mixdown machine. Every audio or MIDI signal that comes into Pro Tools is routed to a track.
This chapter shows you how to work with tracks in Pro Tools. You’ll learn the five basic track types—audio tracks, auxiliary inputs, master faders, MIDI tracks, and instrument tracks—and then we’ll show you how to create them and assign inputs and outputs.
We’ll also discuss some of Pro Tools’ track-viewing features, such as adjusting track height and color-coding track waveforms, which can help you reduce monitor clutter and eye strain.
Finally, you’ll learn how to create and work with groups of tracks in the Mix and Edit windows.
About Track Types
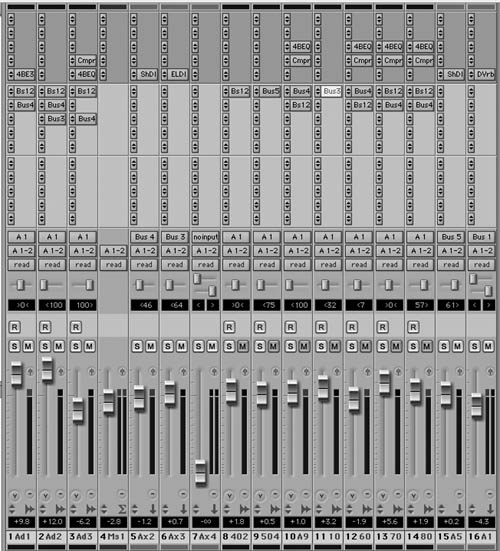
Pro Tools includes five types of tracks (Figure 5.1):
Audio tracks: Audio tracks control recorded or imported audio files.
Auxiliary inputs: Auxiliary inputs let you add mono or stereo effects to bused signals. They’re also useful for submixes and other audio-routing tasks.
Master faders: Master faders control the level of a session’s main outputs. They’re also useful for inserting effects on the main mix.
MIDI tracks: MIDI tracks store MIDI note, instrument, and controller data.
Instrument tracks: Instrument tracks combine audio track and MIDI track features. You can use them to monitor the audio output of an internal (software) or external (hardware) MIDI device (such as a synthesizer or sound module).
Figure 5.1. Pro Tools track types: audio, auxiliary inputs, master faders, MIDI, and instrument.
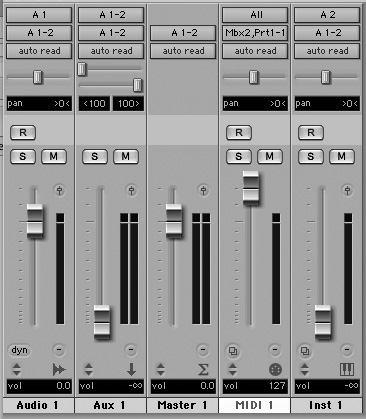
Each track type has a corresponding channel strip, which appears in the Mix and Edit windows. Tracks that handle audio (audio tracks, auxiliary inputs, and master faders) can be formatted for either mono (one track) or stereo (two track).
Pro Tools also allows Movie tracks, which display a picon (picture-icon) overview of imported QuickTime movies (Figure 5.2). The closer you zoom in on the track, the more frames you see. Movie tracks appear only in the Edit window.
Figure 5.2. A movie track in the Edit window.

For more information on track types and channel strips, see Chapter 3: The Mix and Edit Windows.
Creating New Tracks
The New Track command lets you create mono or stereo audio tracks, as well as MIDI tracks. (Pro Tools TDM systems also let you create multichannel tracks.)
To create a new track
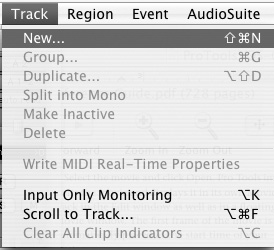
1. Choose Track > New or press Shift-Command-N (Macintosh) or Shift-Control-N (Windows) (Figure 5.3).
Figure 5.3. Choose Track > New to launch the New Tracks dialog box.
The New Tracks dialog box appears.
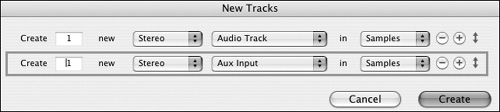
2. Select a track type from the Track Type pop-up menu (Figure 5.4).
Figure 5.4. Select a track type from the Track Type pop-up menu.

3. Select Mono or Stereo from the Track Format pop-up menu (Figure 5.5).
Figure 5.5. Select Mono or Stereo from the Track Format pop-up menu.

4. Enter the number of new tracks and click Create.
• If you want a new track to appear next to a specific track, click that track’s name to select it. If you want a track to appear last in a session, make sure no track names are selected.
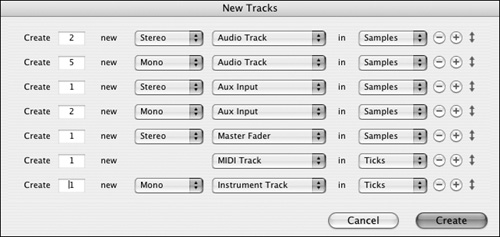
Using the New Tracks Dialog Box to Create Multiple Track Types
The New Tracks dialog box in Pro Tools 7 lets you create multiple copies of each track type simultaneously. Thus, you can create a track layout for a session very quickly. For example, you could create 6 audio tracks, 3 auxiliary inputs, 2 MIDI tracks, and a stereo master fader (or any variation thereof) using a single New Track dialog box.
To create multiple track types simultaneously
1. Choose Track > New or press Shift-Command-N (Macintosh) or Shift-Control-N (Windows).
The New Tracks dialog box appears (Figure 5.6).
Figure 5.6. The New Tracks dialog box.

2. Select a track type, track format, and number of new tracks.
3. Click + to add additional track types.
An additional new track selection bar appears (Figure 5.7).
Figure 5.7. Click + to add additional track types in the New Tracks dialog box.
4. Repeat step 2 for each additional track type you want to create (Figure 5.8).
Figure 5.8. Multiple track types being created simultaneously in the New Tracks dialog box.
5. Click Create.
Naming Tracks
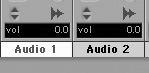
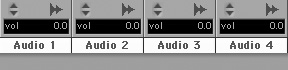
When you create new tracks, Pro Tools, by default, names them according to their track type, and then appends them with consecutive numbers. For example, if you create two new audio tracks, the default names will be Audio 1 and Audio 2 (Figure 5.9).
Figure 5.9. Default track names.
![]()
Pro Tools 7 lets you create track names of virtually unlimited length (determined by the maximum number of characters that your operating system allows). You can also add comments to any track.
To rename a track or add comments
1. In the Mix or Edit window, double-click the track name (Figure 5.10).
Figure 5.10. Double-click the track name to rename the track.
![]()
The Track Name/Comments dialog box appears.
2. Type a new track name (Figure 5.11).
Figure 5.11. The Track Name/Comments dialog box.
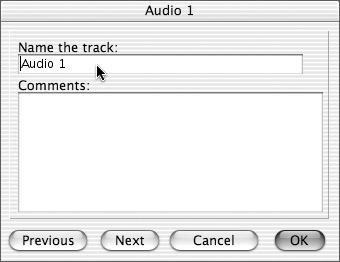
3. Type comments for the track in the Comments text box.
4. Click the Previous or Next button to rename another displayed track.
5. When you’re finished, click OK.
Understanding audio file and region names
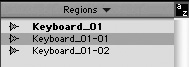
Audio files and regions are named after the track on which they’re recorded. For example, when you record audio on a track called Keyboard, the audio file written to disk will be called Keyboard_01. The appended digits refer to the take number (Figure 5.12). In addition, when you separate an audio file into regions, a region name appears in the Regions list with a second set of digits that refers to the region number (Figure 5.13).
Figure 5.12. An audio file in the Regions list. The appended digits refer to the take number.
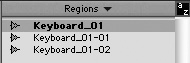
Figure 5.13. Audio regions in the Regions list. The second set of digits refers to the region number.
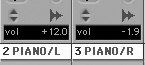
When you record stereo tracks, the audio files and region names for the left and right channels are appended with .L and .R suffixes, respectively.
Assigning Audio Track Inputs and Outputs
After you’ve created a new audio track in Pro Tools, it’s important to properly route audio in and out of the track. You can assign audio track inputs and outputs using either Mix or Edit window channel strips.
Audio tracks and auxiliary inputs let you assign audio input from audio interfaces and internal busses (Figure 5.14). In turn, you can assign outputs from audio tracks and auxiliary inputs to audio interfaces and internal busses (Figure 5.15).
Figure 5.14. The Input selector pop-up menu lets you assign input from audio interface channels or internal busses.
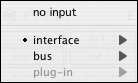
Figure 5.15. The Output selector pop-up menu lets you assign output to audio interface channels or internal busses.
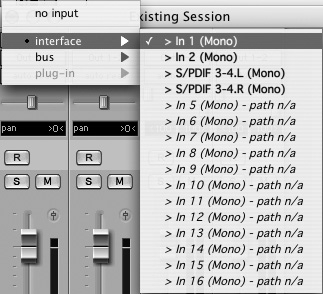
When you create new tracks for a session, they’re automatically assigned inputs in ascending order. For example, if you’re using an Mbox 2 audio interface and you create two new mono audio tracks, they’ll be assigned In 1 and In 2, respectively (Figure 5.16). Similarly, if you create two new stereo tracks, they’ll be assigned consecutive stereo input pairs: In 1–2 and S/PDIF 3–4 (Figure 5.17).
Figure 5.16. New mono audio tracks with automatically assigned consecutive inputs: Mic/Line 1 and Mic/Line 2.

Figure 5.17. New stereo audio tracks with automatically assigned consecutive input pairs: In 1–2 and S/PDIF 3–4.

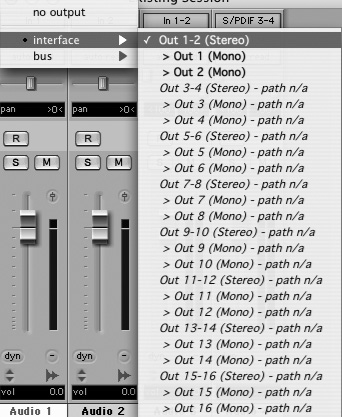
Outputs are automatically assigned to the first output pair or according to the I/O Setup.
The inputs, outputs, and busses available to tracks are defined as paths in a session’s I/O Setup. You can use a default I/O Setup or create your own in the I/O Setup dialog box. For instructions on creating a customized I/O Setup, see Chapter 4: Starting a New Session.
To assign an audio track input
1. Display track inputs and outputs in the Edit window as follows (track inputs and outputs are always visible in audio track channel strips in the Mix window):
Choose View > Edit Window > I/O.
The Edit window I/O view appears (Figure 5.18).
Figure 5.18. Inputs and outputs shown in the Edit window I/O view.

2. In the Mix or Edit window, click the track Input selector, and choose from the available audio interface channels and busses (Figure 5.19).
Figure 5.19. Select an audio interface channel or internal bus from the Input selector.
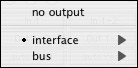
Select No Input to remove all the input assignments on that track.
To assign an audio track output
1. Display track inputs and outputs in the Edit window as follows:
View > Edit Window > I/O.
Track inputs and outputs are always visible in audio track channel strips in the Mix window.
2. In the Mix or Edit window, click the track Output selector and choose from the available audio interface channels and busses (Figure 5.20).
Figure 5.20. Select an audio interface channel or internal bus from the Output selector.
Select No Output to remove all the output assignments on that track. The playlist becomes dimmed on tracks with no output assignments.
• Use the No Output option with care. Assigning an audio track, auxiliary input, or master fader to No Output erases pan and plug-in automation.
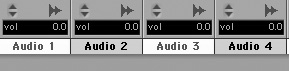
Using Track Position Numbering
Pro Tools 7 assigns a track position number to each track according to its sequential position in the Mix and Edit window. When you change the position of a track, it is renumbered according to its new position.
To view track position numbers in the Mix and Edit window
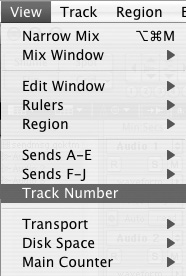
1. Choose View > Track Number (Figure 5.21).
Figure 5.21. To enable track position numbering, choose View > Track Number.
Track numbers appear next to each track name in the Mix and Edit windows (Figure 5.22).
Figure 5.22. Track position numbers appear next to each track name.
![]()
Navigating by track position number
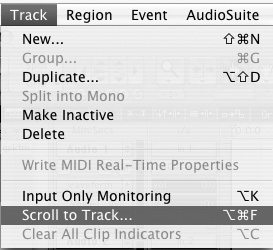
Using the Scroll To Track command in the Track menu, you can quickly navigate to any track by entering its track position number.
To navigate directly to a track position number
1. Choose Track > Scroll To Track (Figure 5.23). Or Press Command-Option-F (Macintosh) or Control-Alt-F (Windows).
Figure 5.23. To navigate directly to a track position number, choose Track > Scroll To Track and enter the track position number.
The Scroll To Track dialog box appears (Figure 5.24).
Figure 5.24. The Scroll To Track dialog box.
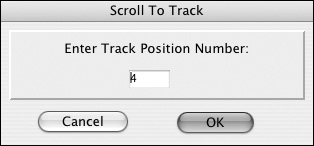
2. In the Scroll To Track dialog box, enter the Track Position Number.
3. Click OK.
Selecting Tracks
Selecting tracks is necessary to perform operations such as duplicating tracks, deleting tracks, showing and hiding specific tracks, and grouping tracks.
To select an individual track
• Click the name of any track channel strip.
The track name becomes highlighted, indicating the track is selected (Figure 5.25).
Figure 5.25. Click a track name to select it. Highlighted track names indicate a track is selected.
To deselect an individual track
• Command-click (Macintosh) or Control-click (Windows) on any highlighted track name.
The track name becomes unhighlighted, indicating the track is deselected.
To select all tracks
• Option-click (Macintosh) or Alt-click (Windows) on any unhighlighted track name.
The track names of all channel strips become highlighted, indicating all tracks are selected.
To deselect all tracks
• Option-click (Macintosh) or Alt-click (Windows) on any highlighted track name.
The track names of all channel strips become unhighlighted, indicating all tracks are deselected.
To select noncontiguous tracks
• Command-click (Macintosh) or Control-click (Windows) the names of any track channel strips you want to select.
The selected noncontiguous tracks become highlighted (Figure 5.26).
Figure 5.26. To select noncontiguous tracks, Command-click (Macintosh) or Control-click (Windows) the desired track names.
To select a range of tracks
1. Click the name of the first track in the range of tracks you want to select.
2. Shift-click the name of the last track in the range of tracks you want to select.
All tracks between the first track selected and the last track selected become highlighted, indicating the range of tracks selected (Figure 5.27).
Figure 5.27. To select a range of tracks, click the first track name in the range and Shift-click the last track name in the range. The selected range of tracks becomes highlighted.
Duplicating Tracks
Pro Tools 7 introduces the Duplicate Tracks dialog box, which lets you create multiple copies of selected tracks along with selected track data. This lets you perform multiple edits on the copies of a track while maintaining easy access to your original track configuration.
The “Data to duplicate” options in the Duplicate Tracks dialog box lets you copy track data as follows:
• Active Playlists
• Alternate Playlists
• Automation
• Inserts
• Sends
• Group assignments
To duplicate a track in the Mix or Edit window
1. Select the track(s) you want to duplicate in the Mix or Edit window.
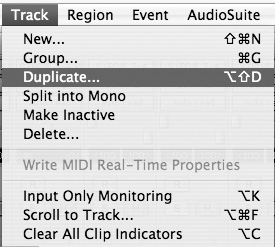
2. Choose Track > Duplicate (Figure 5.28). Or press Option-Shift-D (Macintosh) or Alt-Shift-D (Windows).
Figure 5.28. To duplicate a selected track, choose Track > Duplicate.
The Duplicate Tracks dialog box appears (Figure 5.29).
Figure 5.29. The Duplicate Tracks dialog box.
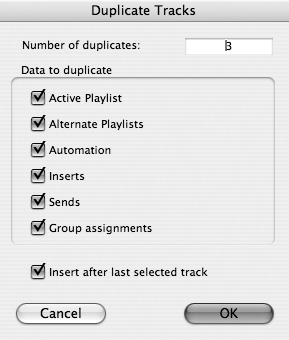
3. Select the “Data to duplicate” options as desired.
4. Select the “Insert after last selected track” option to place duplicate tracks adjacent to source tracks.
or
Deselect the “Insert after last selected track” option to place duplicate tracks after all visible tracks (at the far right of the Mix window and at the bottom of the Edit window) (Figure 5.30).
Figure 5.30. To place duplicate tracks adjacent to source tracks, select “Insert after last selected track” in the Duplicate Tracks dialog box.

Deleting Tracks
Deleting tracks from a session does not delete the audio files or MIDI data associated with that track from your hard drive—audio and MIDI regions are retained in the Regions list. However, deleting tracks does remove associated track playlists (assemblages of regions on a track).
To delete a track
1. Select the track you want to delete by clicking the track name in the track channel strip. (For more information on selecting tracks, see the Selecting Tracks section earlier in this chapter).
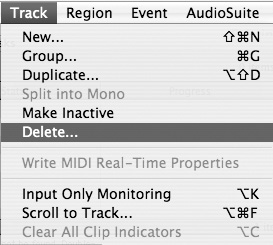
2. Choose Track > Delete (Figure 5.31).
Figure 5.31. To delete a track, choose Track > Delete.
A warning box appears asking you if you are sure you want to delete the selected tracks from the session (Figure 5.32).
Figure 5.32. Pro Tools provides this warning before permanently deleting tracks.
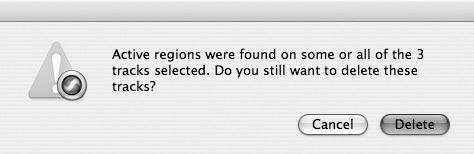
3. Click Delete.
The selected track is deleted from the session.
Viewing Tracks
Pro Tools gives you many different ways to view tracks in a session. These viewing options help you mix and edit more quickly and efficiently.
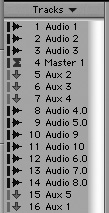
Using the Tracks list
The Tracks list (Figure 5.33), located in both the Edit and Mix windows, displays all the tracks in a session. You can show or hide a track by selecting or deselecting its name. A hidden track will continue to play normally as part of the session. Inactive tracks appear in italics in the Track list.
Figure 5.33. The Tracks list.
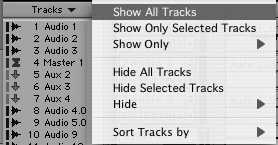
The Tracks list pop-up menu (Figure 5.34) gives you options for showing or hiding tracks. You can show/hide tracks according to track type, group, or name.
Figure 5.34. The Tracks list pop-up menu.
If a hidden track is a member of an active group, performing edits on other group members in the Edit window will not affect the hidden track. In the Mix window, however, performing operations other than record-enable on group members will affect the hidden track.
To hide a track
• Click a highlighted track name in the Tracks list (Figure 5.35).
Figure 5.35. Click a highlighted track name to hide a track.
![]()
The selected track’s channel strip disappears from the Mix and Edit windows.
To show a track
• Click a track name that is not highlighted in the Tracks list.
The selected track’s channel strip reappears in the Mix and Edit windows.
1. Click the Tracks list pop-up menu at the top of the Tracks list.
2. Choose Hide All Tracks.
To show all tracks
1. Click the Tracks list pop-up menu at the top of the Tracks list.
2. Choose Show All Tracks.
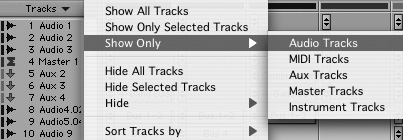
To show tracks by track type
1. Click the Tracks list pop-up menu at the top of the Tracks list.
2. Choose Show Only.
3. Select a track type (Figure 5.36).
Figure 5.36. Select a track type from the Tracks list pop-up menu.
To show noncontiguous tracks
• Command-click (Macintosh) or Control-click (Windows) the name of the unhigh-lighted tracks that you want to show in the Tracks list.
The selected noncontiguous tracks become visible in the Mix and Edit windows.
To hide noncontiguous tracks
• Command-click (Macintosh) or Control-click (Windows) the name of the highlighted tracks that you want to hide in the Tracks list.
The selected noncontiguous tracks disappear in the Mix and Edit windows.
To show a range of tracks
1. Click the name of the first track in the range of tracks you want to show in the Tracks list.
2. Shift-click the name of the last track in the Tracks list that you want to show.
All tracks between the first selected track and the last selected track are displayed.
Adjusting the track size
Pro Tools provides several ways to adjust track sizes. In both the Mix and Edit windows, you can expand channel strips to display the Inserts, Sends, Input/Output, and Track Comments views. The Mix window also lets you choose between narrow and wide channel strip views. The Edit window gives you a wide range of preset track height views, including mini, small, medium, large, jumbo, and extreme.
For more information on viewing tracks in the Mix and Edit windows, see Chapter 3: The Mix and Edit Windows.
To view the narrow Mix window
• Select View > Narrow Mix. Or press Option-Command-M (Macintosh) or Alt-Control-M (Windows).
The Narrow Mix window appears (Figure 5.37).
Figure 5.37. The Narrow Mix window.
To change the track height view in the Edit window
1. Click the Track Height Selector button.
The Track Height pop-up menu appears.
2. Select a track height.
or
1. Click in the ruler at the far left of any track’s playlist.
The Track Height pop-up menu appears (Figure 5.38).
Figure 5.38. The Track Height pop-up menu.
2. Select a track height.
or
1. Place the edit cursor in the track.
2. Press Control–Up Arrow key (Macintosh) or Start–Up Arrow key (Windows) to increase the track height. Press Control–Down Arrow key (Macintosh) or Start–Down Arrow key (Windows) to decrease the track height.
Zoom Toggling Views
The Zoom Toggle button lets you quickly switch between customized views in the Edit window (Figure 5.39). Zoom Toggle recalls the following viewing parameters: zoom level, track view, track height, and grid value.
Figure 5.39. The Zoom Toggle button beneath the Zoomer tool in the Edit window lets you switch back and forth between two customized views.

To store a Zoom Toggle view
1. Make an edit selection on one or more tracks in the Edit window.
2. Click the Zoom Toggle button beneath the Zoomer tool in the Edit window to enable zoom toggling.
The Zoom Toggle button becomes blue, indicating that zoom toggle is enabled.
3. Select a Zoom Toggle view by selecting zoom level, track height, track view, and grid settings as desired.
4. Click the Zoom Toggle button to store your selected settings.
The Zoom Toggle button becomes gray, indicating zoom toggle is not enabled.
To use Zoom Toggle
1. Click the Zoom Toggle button or Press Control-E (Macintosh) or Start-E (Windows), or with Commands Focus enabled, press E.
The selection is zoomed to the stored Zoom Toggle view.
2. Click the Zoom Toggle button again to return to the original Edit window view.
For more information on using zoom tools, adjusting track heights, and expanding channel strip views, see Chapter 3: The Mix and Edit Windows and Chapter 10: Editing Basics.
Using Continuous Zoom
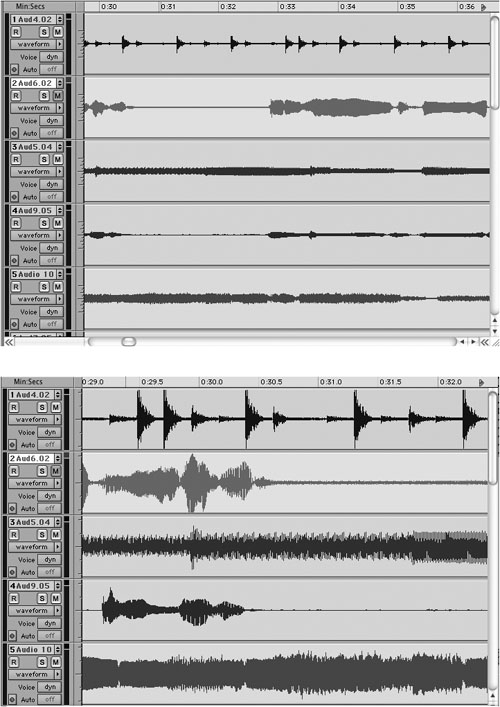
Continuous zoom lets you zoom in and out on individual tracks or multiple tracks seamlessly. Continuous zoom makes it much easier to maintain your orientation as you search for appropriate edit locations.
To use continuous zoom on an individual track or a group of tracks
1. Select the Zoomer tool (Figure 5.40).
Figure 5.40. The Zoomer tool in the Edit window.

2. Press and hold Control (Macintosh) or Start (Windows) and move the zoom tool as follows:
• Drag up to zoom in vertically.
• Drag down to zoom out vertically.
• Drag right to zoom in horizontally.
• Drag left to zoom out horizontally.
By default, all tracks move together when zoomed horizontally. Tracks zoom in and out horizontally centered on the location where you click.
To zoom in and out vertically on all audio tracks with continuous zoom
1. Select the Zoomer tool.
2. Press and hold Control-Shift (Macintosh) or Start-Shift (Windows) and drag the Zoomer tool up or down.
All audio tracks zoom vertically in and out continuously (Figure 5.41).
Figure 5.41. Continuous zoom lets you vertically zoom all tracks simultaneously.
For more information on using zoom tools, adjusting track heights, and expanding channel strip views, see Chapter 3: The Mix and Edit Windows and Chapter 10: Editing Basics.
Color-coding Regions in Tracks
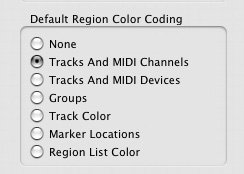
Color-coding is handy for differentiating regions in tracks in the Edit window. You can assign colors using the Region Color Coding options in the Display Preferences window (Figure 5.42). Select from these default color-coding options:
None: Turns off color assignments to regions.
Tracks and MIDI Channels: Assigns colors to regions according to the track number and MIDI channel assignment.
Tracks and MIDI Devices: Assigns colors to regions according to the track number and MIDI device type.
Groups: Assigns colors to regions according to the group ID of their tracks.
Track Color: Assigns colors to regions based on the track color assignment.
Marker Locations: Assigns a color to the marker location ruler between selected marker locations.
Region List Color: Assigns a color to each region in a track based on its color in the Region list.
Figure 5.42. The Edit Window Color Coding options in the Display Preferences window.
Using the Color Palette
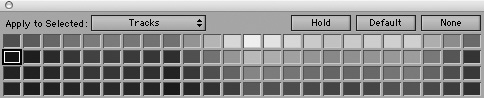
The Color Palette lets you apply custom colors to tracks, regions, groups, and markers (Figure 5.43). The Color Palette includes the following options:
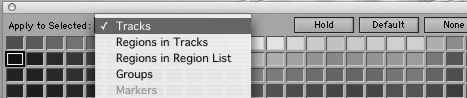
• Apply to Selected: The Apply to Selected pop-up menu lets you select the item to which you will apply color. You can apply color to Tracks, Regions in Tracks, Regions in Region List, Markers, and Groups.
• Hold: The Hold button lets you apply the same color to multiple items without reselecting it.
• Default: The Default button lets you reset a selected item to its default color settings.
• None: The None button removes all color from selected items. Waveform displays in the Edit window become black and white
Figure 5.43. The Color palette.
To apply a color from the Color Palette
1. Choose Window > Color Palette.
The Color Palette appears.
2. Click the Apply to Selected pop-up menu and select the item you want to color-code (Figure 5.44).
Figure 5.44. Click the Apply to Selected pop-up menu and select an item to add color.
3. Select a color from the palette.
For more information on color-coding tracks in Mix and Edit windows, see the Pro Tools Reference Guide.
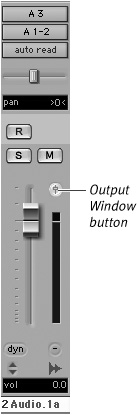
Using Track Controls
Track controls on audio and MIDI channel strips let you control level, pan, mute, solo, record-enable, and automation (Figure 5.45). For more information on channel strips, see Chapter 3: The Mix and Edit Windows.
Figure 5.45. The audio channel strip track controls.

You can open an Output window (Figure 5.46) by clicking a channel strip’s Output Window button (Figure 5.47). Output windows contain the same track controls as channel strips, but they are larger and can float independently over the Mix and Edit windows. This gives you quick access to track controls while you’re mixing and editing. For more information on Output windows, see Chapter 14: Mixing Basics.
Figure 5.46. The audio channel strip Output window.
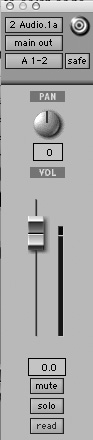
Figure 5.47. The Output Window button on the audio channel strip.
About +12 dB Volume Fader Gain in Pro Tools 7
In Pro Tools 7 all volume faders provide a maximum gain level of +12 dB (Figure 5.48). The +6 dB fader gain option available in earlier versions of Pro Tools has been removed from the New Session dialog box.
Figure 5.48. The +12 dB volume fader.

You can convert Pro Tools 7 sessions to earlier versions of Pro Tools containing the +6 dB fader gain option using the Save Copy In command.
Muting and soloing tracks
Mute and Solo turn tracks off and on. The Mute button silences a track. The Solo button mutes all tracks except the soloed track, so you can audition tracks separately during playback. You can mute and solo multiple tracks simultaneously.
To mute a track
• Click the Mute button on a track (Figure 5.49).
Figure 5.49. The Mute button.

The track is silenced.
To solo a track
• Click the Solo button on the track.
The button is highlighted and all other tracks are muted (Figure 5.50).
Figure 5.50. The Solo button.

When you solo more than one track, they’re usually latched, which means each soloed track is added to the mix. But Pro Tools also lets you unlatch Solo buttons, so you can solo just one track at a time.
1. Choose Setup > Preferences.
2. Click the Operation Window tab.
3. Select X-OR (Cancels Previous Solos) (Figure 5.51).
Figure 5.51. To unlatch Solo buttons: Select X-OR (Cancels Previous Solos) in the Solo Latch options of the Operations Preference window.

When X-OR is enabled, pressing subsequent Solo buttons cancels previous solos.
4. Click Done.
For more information on mute, solo, volume level, pan, record-enable, automation, and other track controls, see Chapter 3: The Mix and Edit Windows.
About Sends in Pro Tools 7
Pro Tools 7 provides 10 sends per track, which are divided into two independently viewable groups: Sends A–E and Sends F–J (Figure 5.52).
Figure 5.52. Sends A–E and Sends F–J.

Earlier versions of Pro Tools provide only five sends per track. When you convert a Pro Tools 7 session to an earlier version of Pro Tools, Sends F–J will be discarded, along with any automation data recorded for Sends F–J.
In addition, a Pro Tools HD 7 session opened on a Pro Tools 7 LE or M-Powered system will retain its first 32 busses per send; additional sends become inactive.
For more information on sends, see Chapter 3: The Mix and Edit Windows and Chapter 14: Mixing Basics.
Grouping Tracks
By grouping tracks, you can perform operations on multiple tracks simultaneously. For example, you can group tracks so that their faders move together and their relative volumes are maintained. Or, you can make edits across multiple tracks.
Pro Tools lets you create up to 26 groups. It also lets you create nested groups (subgroups within groups). Grouping affects the following track parameters:
• Track Timebase
• Volume levels
• Solos
• Mutes
• Automation modes
• Send levels
• Send mutes
• Track view
• Track height
• Editing functions
Grouping does not affect these parameters:
• Record-enable
• Panning
• Send panning
• Output assignments
• Inserting plug-ins
To create a group
1. Shift-click the tracks that you want to include in the group (Figure 5.53).
Figure 5.53. Shift-click the track names to select the tracks you want in a group.
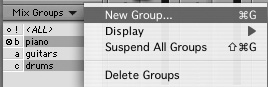
2. Choose Track > Group or click the Group list pop-up menu and select New Group.
The New Group dialog box appears (Figure 5.54).
Figure 5.54. The New Group dialog box.
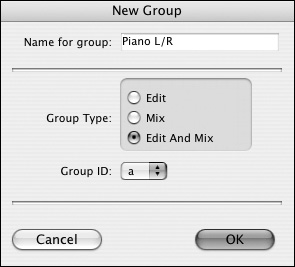
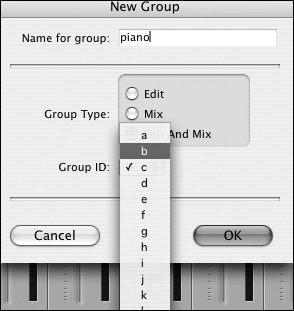
3. Enter a name for the group and choose a Group ID (a letter from a to z) from the pop-up menu (Figure 5.55).
Figure 5.55. Choose a Group ID (from a to z).
4. Choose a Group Type (Edit, Mix, or Edit and Mix).
5. Click OK.
The new group is added to the Groups list.
Using the Groups list
The Groups list (Figure 5.56) lets you manage groups in a session. The list displays the name of each group, a group ID (a letter from a to z), and symbols that indicate the group’s selection status in the Mix or Edit window. Here’s what the symbols mean:
• A filled-in circle (Figure 5.57) indicates that all members of the group are currently selected.
• A hollow circle (Figure 5.58) indicates that only some members of the group are currently selected.
• A circle with a dot inside (Figure 5.59) indicates that all members of the group are currently selected, along with additional members outside of the group.
Figure 5.56. The Groups list.
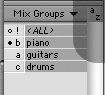
Figure 5.57. A filled-in circle means all members of a group are currently selected.
![]()
Figure 5.58. A hollow circle means only some members of a group are currently selected.
![]()
Figure 5.59. A circle with a dot inside means all members of a group are currently selected, plus additional members outside of the group.
![]()
By default, every session has a group named All, which includes every track in the session. You cannot edit or delete the All group.
To enable a group
• In the Groups list, click the name of the group that you want to enable. The group name is highlighted to indicate that it’s enabled (Figure 5.60).
Figure 5.60. Enable a group by clicking its name in the Groups list.

To disable a group
• In the Groups list, click the name of the group that you want to disable.
To rename a group
1. In the Groups list, double-click to the left of the group’s name.
The New Group dialog box appears.
2. Enter a new name for the group.
3. Click OK.
The group is renamed in the Groups list.
Using the Groups List pop-up menu
The Groups list pop-up menu lets you create new groups, display groups by type (Edit, Mix, or Edit and Mix), suspend groups, change group members, and delete groups.
To change the members of a group
1. Shift-click the tracks that you want to keep in the group.
2. Choose New Group from the Group pop-up menu (Figure 5.61).
Figure 5.61. The Group pop-up menu.
The New Group dialog box appears.
3. In the New Group dialog box, select the group ID that you want to update.
4. Click OK.
The new group definition overwrites the original one.
To delete a group
1. In the Groups list, select the name of the group that you want to delete.
2. Choose Delete Selected Groups from the Group pop-up menu.
Be careful: You can’t undo this deletion.
Linking Mix and Edit groups
You can create three types of groups: Mix groups, Edit groups, and Mix and Edit groups. By default, a Mix and Edit Group’s enable functions are linked. This means that when you enable a group in the Mix window, it’s also enabled in the Edit window.
But you may not always want Mix and Edit Groups linked. For example, you may want to keep tracks grouped in the Mix window to maintain relative fader levels, but ungroup them in the Edit window so you can edit a single track. For this reason, Pro Tools lets you unlink groups.
To unlink Mix and Edit groups
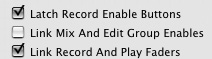
1. Choose Setup > Preferences.
2. Click the Operation tab.
3. Deselect the Link Mix And Edit Group Enables check box (Figure 5.62).
Figure 5.62. Deselect the Link Mix And Edit Group Enables check box.
4. Click Done.
• Click a channel strip’s Mix Group ID button (Figure 5.63) to view the active mix groups (Figure 5.64).
Figure 5.63. The Mix Group ID button.

Figure 5.64. The Mix Group ID button shows the active Mix Group members.
![]()
About Track Priority and Voice Assignments
Although Pro Tools LE hardware systems are limited to a maximum of 32 simultaneous playback voices (depending on the system), a Pro Tools session can contain additional audio tracks beyond this fixed playback number. When a session contains more tracks than playback voices, Pro Tools assigns a playback priority for tracks according to their order in the Mix window, Edit window, or Track list.
Pro Tools 7 LE dynamically assigns voices to tracks (unlike HD systems, which let you assign specific voices to tracks). Pro Tools LE systems do, however, let you turn a track’s voice selection off (Figure 5.65). This is useful if you wish to free up voices for use with other tracks.
Figure 5.65. To turn off dynamic voice assignment, click the Voice selector.

For more information on track priority and voice assignments, see the Pro Tools Reference Guide.
To increase a track’s playback priority
• In the Edit window, drag the Track Name button to a higher position. Tracks in a higher position in the Edit window have higher playback priority than tracks in a lower position.
or
• In the Mix window, drag the Track Name button to the left. Tracks to the left of the Mix window have higher playback priority than tracks to the right.
or
• In the Track list, drag the track to a higher position. Tracks in a higher position on the list have higher playback priority than tracks in lower positions.
Making Tracks Inactive
Pro Tools lets you make Audio, Auxiliary Input, and Master Fader tracks inactive. Making a track inactive deactivates all plug-ins, sends, voices, and automation; consequently, the track uses no CPU power. If you’re running low on processing power, making unused tracks inactive can help improve system performance.
To make a track inactive
• Command-Control-click (Macintosh) or Control-Start-click (Windows) the Track Type Indicator in the Mix Window (Figure 5.66).
Figure 5.66. Command-Control-click (Macintosh) or Control-Start-click (Windows) the Track Type Indicator to make a track inactive.

The track becomes inactive and appears grayed out.