
9. Managing Audio Files with DigiBase
DigiBase is a database-like file-management utility designed especially for managing Pro Tools files. DigiBase’s comprehensive file-management tools and smartly designed user interfaces (or browsers) make performing file-management tasks quick, easy, and painless.
This chapter shows you how to use DigiBase to manage your audio files. We’ll start with an overview of DigiBase, including how DigiBase’s database works. Then we’ll take a closer look at DigiBase browsers. You’ll learn how to use browsers to view audio file information, and you’ll learn how to perform file-management tasks, such as searching, copying, auditioning, and importing audio files.
We’ll conclude with a look at DigiBase’s other windows, including DigiBase’s Relink window, which helps you locate missing files; and DigiBase’s Tasks window, which lets you regulate background file-processing tasks.
About DigiBase
DigiBase uses a file-indexing process to gather information about audio files and other session-related files. This file information, or metadata, includes basic file data (file name, file size, date created, etc.) and more complex data (audio file formats, waveforms, sample rate, bit depth, duration, etc.). DigiBase stores this metadata in database files on your system’s storage volumes (hard drives).
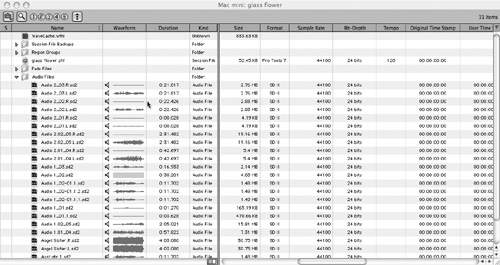
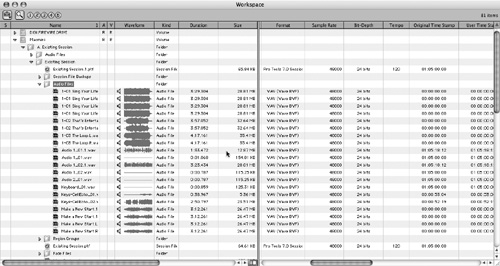
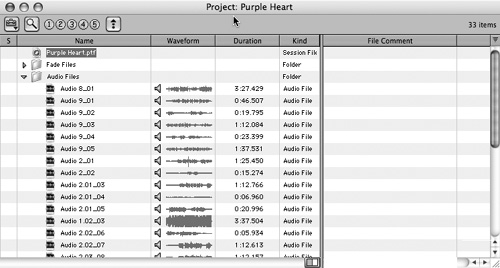
Pro Tools uses stored file data to maintain links between audio files and their associated sessions. This data is also displayed in browsers, where you can perform file-management tasks (Figure 9.1).
Figure 9.1. Typical DigiBase Project browser displaying the contents of a Pro Tools session folder, including audio waveforms and other file information.
For more information on browsers, see About Browsers later in this chapter, or see the Pro Tools Reference Guide. For more information on DigiBase’s database features, see the Pro Tools Reference Guide.
New DigiBase features in Pro Tools 7
DigiBase in Pro Tools 7 includes the following new features:
• Support for Standard MIDI files, REX files, ACID files, and region group files
• Bar|Beat display of Duration for tick-based audio and MIDI files
• New Tempo Column
• Drag and Drop of audio files to plug-ins
• Drag and Drop import of Standard MIDI files, region group files, REX files, and ACID files.
DigiBase elements
DigiBase includes the following browsers and windows, or elements:
Workspace browser: The Workspace browser gives you access to all mounted storage volumes, as well as the folders and files they contain. It lets you search multiple volumes (and catalogs) and designate volume classifications (whether a drive is suitable for recording and playback of audio and video).
Volume browsers: Volume browsers let you manage files on local volumes and network volumes. Changes made using a Volume browser (such as copying, deleting, or moving files and folders) are mirrored on the actual volumes.
Project browsers: Project browsers display files associated with the current session. Project browsers give you tools for viewing, managing, auditioning, and spotting individual audio files.
Catalogs (Pro Tools HD only): Catalog browsers let you organize files from multiple sources into libraries. Catalog browsers give you tools for searching and sorting audio files, and let you share files with other Pro Tools users.
Relink window: The Relink window gives you tools for locating missing files and reestablishing links (relinking) between audio files and their associated sessions.
Tasks window: The Tasks window lets you regulate background file-processing tasks, such as copying, searching, indexing, and fade creation.
For more information on DigiBase elements, see the corresponding sections of this chapter, or see the Pro Tools Reference Guide.
For more information on Workspace browsers, Volume browsers, and Project browsers, see the following sections of this chapter, or see the Pro Tools Reference Guide. For more information on Catalogs (TDM only), see the Pro Tools Reference Guide.
Understanding data flow
To manage your files effectively, it’s important to understand how data flows between DigiBase’s various elements (Figure 9.2).
Figure 9.2. Diagram of data flow between DigiBase elements. Arrows indicate the direction of data flow.

About Browsers
Much like your computer’s operating system, DigiBase browsers give you access to the contents (folders and files) of your storage volumes. Browsers display your volumes, folders, and files, as well as information about this content (stored in the associated database file), including detailed information about your audio files. You can use browsers to organize your storage volumes, audition audio files, open sessions, and perform file-management tasks, such as indexing, searching, moving, copying, deleting, and relinking audio files.
In Pro Tools 7, DigiBase browsers have been enhanced to support the display of additional file formats, standard MIDI files, region group files, REX files, ACID files.
For more information on standard MIDI files, see Part VI: MIDI Sequencing. For more information on region group (.rgrp) files, see Chapter 2: Software Basics and Chapter 12: Working with Regions. For more information on REX files and ACID files , see the Pro Tools Reference Guide.
The Browser window
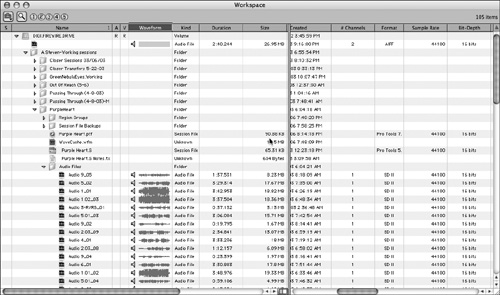
Although each browser type has different features, the basic design of the browser window remains the same (Figure 9.3).
Figure 9.3. The Browser window’s basic design is the same for all types of browsers. The Workspace browser is shown.
Browser windows include the following features:
Title bar: The Title bar shows the browser type and the name of its associated volume.
Toolbar: The Toolbar contains the Browser menu, Search icon, view presets, and browser navigation tools.
Items list: The Items list displays the contents of a volume, folder, or session.
Columns: Columns display metadata for volumes, folders, and files in the Items list. Columns can be resized, rearranged, and dragged between fixed and scrolling panes.
Search icon: The Search icon lets you search for files in volumes and folders.
View presets: View presets let you save up to five different browser layouts.
Sort toggle: The Sort toggle lets you shift the sort order between ascending and descending.
Browser menu: The Browser menu provides commands specific to each type of browser. For more information on the Browser menu, see Browser menu commands, later in this chapter.
Columns and metadata
The metadata gathered about items (volumes, folders, files) and stored in database files is displayed in columns inside the browser window (Figure 9.4). Each column displays a specific data field pertaining to the item. Columns display the following data:
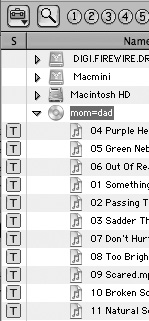
Status: This column displays the status of each item. A T icon is displayed for items on Transfer volumes (Figure 9.5). No icon is displayed for online or offline items.
Figure 9.4. Browser columns display detailed information about your storage volumes (hard drives), session folders, and audio files.
![]()
Figure 9.5. The Status column displays the status of each item. A T indicates the item is on a Transfer volume, such as a CD-ROM.
File Name: This column displays the name of the file, folder, volume, catalog (TDM only), or session. This text field is editable in all browsers except catalogs.
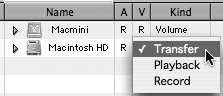
A: This column designates volumes for audio as R (Record), P (Playback), or T (Transfer) (Figure 9.6).
Figure 9.6. The Audio and Video Designator columns let you designate storage volumes as R (Record), P (Playback), or T (Transfer).
![]()
V: This column designates volumes for video as R (Record), P (Playback), or T (Transfer).
Kind: This column indicates whether a file is a session file, audio file, or other. This field cannot be edited.
Date Created: This column displays the creation date of an item. This field cannot be edited.
Date Modified: This column displays the last date the item was modified. This field cannot be edited.
Capacity: This column displays the capacity of a volume. This field cannot be edited.
Free: This column displays the amount of unused space on a volume. This field cannot be edited.
Duration: This column displays the duration, in absolute time, of a file, regardless of time code format. This field cannot be edited.
Number of Channels: This column indicates if a file is mono or stereo. This field cannot be edited.
Sample Rate: This column displays an audio file’s sample rate.
Bit Depth: This column displays an item’s bit depth. This field cannot be edited.
Tempo: This column displays the tempo associated with region group, MIDI, REX, ACID, and session files. This field cannot be edited.
Format: This column indicates the file format of an audio file, such as WAV, AIFF, or SDII. This field cannot be edited.
Waveform: This column displays an audio waveform of an audio file.
File Comment: This column displays any embedded comments associated with an audio file. (AIFF files are not supported.)
Database Comment: This column displays any user comments stored with the database. Available in Project browser only.
Path: This column displays the directory path to the item.
UID: This column displays the unique ID for a Pro Tools file.
Clip Name: This column displays the name of the file, or the Avid clip name when the file is an OMF file.
Tape: When DigiTranslator is installed, this column displays the original Avid tape name if the file is an OMF file. If the file was originally recorded into a Pro Tools session, the original session name is displayed.
FPS: When DigiTranslator is installed, this column displays the frame rate if the file is an OMF file.
Original Time Stamp: This column displays an audio file’s original time stamp.
User Time Stamp: This column displays an audio file’s user time stamp if one exists.
Link Path: This column displays the path to the file used for relinking. Available in Relink window only.
Browser menu commands
The Browser menu provides a slightly different set of commands for each type of browser, as specified below. Browser menu commands include the following:
Update Database for Selected: This command updates the database for the currently selected volumes or folders.
Calculate Waveform: This command calculates waveform displays for selected audio files or all files contained in a selected folder.
New Folder : This command creates a new folder on the current volume. In Volume browsers, a new folder is created on disk.
Reveal in Finder: This command opens the corresponding parent window in the Finder for the currently selected file.
Select Offline Files: This command selects all files currently offline.
Invert Selection: This command inverts (reverses) the current selection.
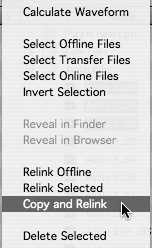
Copy and Relink: This command copies items currently selected in the Project browser to a chosen location and relinks the session to the copies (instead of the originals). Use this to easily move files from a Transfer to a Performance volume. For more information on Transfer and Performance volumes, see The Workspace browser later in this chapter.
Relink Offline: This command opens the Relink window; available in Project browsers only. For more information on the Relink Window, see The Relink window later in this chapter.
Relink Selected: This command opens the Relink window with all selected files from the current browser displayed and selected as Files to Match; available in the Project browser only.
Duplicate Selected: This command creates duplicates of selected items in the same location.
Lock Selected: This command locks all selected items. Currently locked files remain locked. Locking a folder locks all files and subfolders it contains.
Unmount: This command lets you unmount any online volume; available in the Workspace browser only.
Delete Selected: This command deletes any selected items. Deleted items are deleted from disk.
Viewing Browsers
Browser windows provide flexible features for viewing the contents of your hard drives. Using these features will help you find and evaluate your session folders and audio files more effectively.
Using fixed and scrolling panes
A browser’s Items list consists of columns that display information (such as file size, creation date, and sample rate). The Items list provides two panes for viewing these columns: a fixed pane and a scrolling pane.
To show or hide the scrolling pane
• Click the Show/Hide icon in the lower-right corner of the fixed pane (Figure 9.7).
Figure 9.7. Click the Show/Hide icon to show or hide a browser window’s scrolling pane.

Arranging columns
You can move columns in the Items list between the fixed pane and scrolling pane. (You may want to place frequently used columns in the fixed pane and less frequently used columns in the scrolling pane.) In addition, you can resize and sort columns as desired.
To move columns from the fixed pane to the scrolling pane
• Drag the column header to the desired pane (Figure 9.8).
Figure 9.8. To move a column between a browser’s fixed pane and scrolling pane, click and drag the column header.

To rearrange columns in a pane
• Drag the column header to a new position.
To resize a column
• Drag the column header boundary to the desired width (Figure 9.9).
Figure 9.9. To resize a column, drag the column’s boundary to the desired width.
![]()
Sorting items by columns
You can sort the contents of any column in ascending or descending order. This lets you view items (volumes, folders, and files) according to the data displayed in a column.
You can perform secondary sorts, as well, up to a maximum of four.
To sort items by columns
• Click the column title header.
The number 1 appears in the column header (Figure 9.10).
Figure 9.10. To sort items by column data, click the column header. The number 1 appears in the column header, indicating that column is the primary sort column.

To add a secondary sort
• Option-click (Macintosh) or Alt-click (Windows) the column title for the secondary sort.
The number 2 appears in the column header (Figure 9.11).
Figure 9.11. To perform a secondary sort, Option-click (Macintosh) or Alt-click (Windows) the desired column. The number 2 appears in the column header, indicating that column is the secondary sort column.
To toggle a column sort order between ascending and descending
• Click the Sort toggle arrow at the top of the vertical scroll bars (Figure 9.12).
Figure 9.12. To toggle a sort column between ascending and descending order, click the arrow at the top of the vertical scroll bar.

Storing view presets
Browser windows provide five view presets (Figure 9.13), which let you save and recall customized browser configurations. You can save up to five preset views for each type of browser.
Figure 9.13. Browser windows include five view preset buttons, which let you store customized browser configurations.
To store a view preset
1. Open a browser.
2. Arrange columns and views as desired.
3. Command-click (Macintosh) or Control-click (Windows) one of the five view preset buttons.
Viewing region group files (.rgrp) in DigiBase browsers
In DigiBase browsers, region group files (.rgrp) display the Region Group file icon (Figure 9.14) and the following information:
Duration: Indicates the length of the region group file as specified in the last saved timebase.
Kind: Region group file.
Number of Channels (# Channels): Displays both stereo and multitrack region groups, indicated in the number of audio (nA), MIDI, and instrument tracks (nM).
Format: Region group.
Figure 9.14. The (.rgrp) Region Group file icon.

Viewing Rex Files in DigiBase browsers
In DigiBase browsers, REX files display a REX file icon (Figure 9.15) and the following information:
Duration: Indicates the length for tick-based REX files in Bars|Beats as specified in the last saved timebase.
Kind: Audio file.
Format: AIFF (REX 1 files) or ReCycle (REX 2 files).
Figure 9.15. The REX 2 file icon

Viewing ACID Files in DigiBase browsers
In DigiBase browsers, ACID files display a unique icon (Figure 9.16) and the following information:
Duration: Indicates the length for tick-based ACID files in Bars|Beats as specified in the last saved timebase.
Kind: Audio file.
Format: Wav (Wave ACID) or WAV (WAVE).
Sliced ACID files display WAV (Wave ACID) in the format column (Figure 9.17). ACID files with no slice data display WAV (WAVE) in the Format column.
Figure 9.16. A sliced ACID (Wave ACID) file icon

Figure 9.17. Sliced ACID files display WAV (Wave ACID) in the format column. ACID files with no slice data display WAV (WAVE) in the Format column.
![]()
Using Browsers
DigiBase includes the following three types of browsers: the Workspace browser, Volume browsers, and Project browsers.
The Workspace browser gives you access to all storage volumes attached to your system; Volume browsers give you access to individual volumes only; and Project browsers give you access to the current session folder only. In effect, Volume browsers and Project browsers are subsets of the Workspace browser; you can launch Volume browsers and Project browsers by double-clicking the icon of a volume or session folder within the Workspace browser.
The Workspace browser
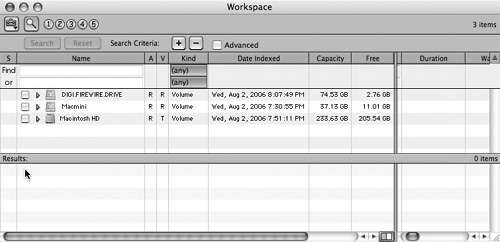
The Workspace browser (Figure 9.18) displays the contents of all storage volumes attached to your system, including all session folders, audio files, and non-Pro Tools files.
Figure 9.18. The Workspace browser displays the contents of all storage volumes attached to your system, including all session folders, audio files, and non-Pro Tools files.
The Workspace browser gives you access to the contents of all session folders: From within the browser you can open session files, audition and import audio files, and manage all of your Pro Tools session-related files. You can also mount and unmount storage volumes within the browser, and you can designate storage volumes as Record and Playback, Playback Only, or Transfer.
In addition, with its broad access to all volumes, the Workspace browser gives you the most comprehensive search capabilities available in Pro Tools. For more information on searches, see Searching Items later in this chapter.
To open the Workspace browser
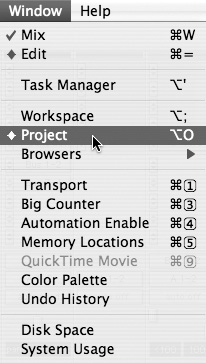
1. Launch Pro Tools.
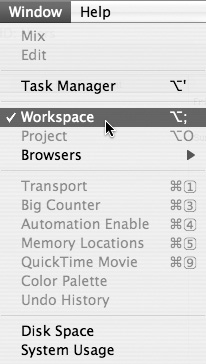
2. Choose Window > Workspace (Figure 9.19).
Figure 9.19. To open the Workspace browser, choose Window > Show Workspace.
or
Press Option-; (semi-colon) (Macintosh) or Alt-; (Windows).
The Workspace browser appears.
Mounting and unmounting volumes
The Workspace browser lets you mount and unmount volumes while Pro Tools is launched.
To unmount a volume from within the Workspace browser
1. Select a volume in the Workspace browser.
2. Choose Unmount from the Browser menu (Figure 9.20).
Figure 9.20. To unmount a volume, choose Unmount from the Browser menu.
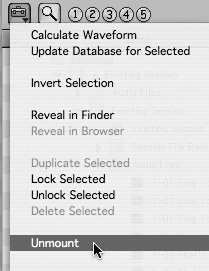
The Workspace browser closes the database file for the selected volume, removes it from the Workspace browser, and then unmounts the disk from the computer. Removable volumes (such as a CD-ROM) are ejected.
Designating audio and video volumes
The Workspace browser provides audio and video designator columns, which let you classify whether storage volumes are Performance volumes (suitable for Record and Playback or Playback only) or Transfer volumes (suitable for storage only).
The audio and video volume designator columns provide the following volume designator options:
R (Record): R designates that a volume can record and play audio and video files.
P (Playback): P designates that a volume can play audio and video already on it but cannot have new files recorded to it.
T (Transfer): T designates that a volume can be used for storing, transferring, or auditioning files but cannot be used for recording or playback (such as CD-ROMs).
To designate an audio or video volume
1. Open the Workspace browser.
2. Click in the desired Audio or Video Designator column (Figure 9.21).
Figure 9.21. The Audio and Video Designator columns in the Workspace browser.
![]()
3. From the Designator pop-up menu, choose the desired designation for the volume (R, P, or T) (Figure 9.22).
Figure 9.22. To designate an Audio or Video volume, choose R (Record), P (Playback), or T (Transfer) from the Designator pop-up menu.
• Use the Workspace browser as the start point and end point for working in Pro Tools. This will help you become familiar with the file-management environment, and it will help you remember to back up your audio files.
To start, launch Pro Tools from the application icon. Open the Workspace browser, then open your session files by double-clicking the session file icon inside the browser window (Figure 9.23). To end, close the session without quitting Pro Tools by pressing Shift-Command-W (Macintosh) or Shift-Control-W (Windows), and then back up your audio files and other session files from inside the Workspace browser.
Figure 9.23. To open a session from within a browser, double-click on the session file icon.
Volume browsers
Volume browsers give you access to the contents of individual mounted hard drives, network storage, and CD-ROMs. You can use Volume browsers to manage, audition, and import individual items in the volume. You can also use a Volume browser to update the database for a volume.
To open a Volume browser
• Double-click a volume or folder in the Workspace browser (Figure 9.24).
or
• Click the Expand/Collapse icon next to the item. This displays the contents of the volume or folder within the current browser.
Figure 9.24. To open a volume in the Workspace browser, double-click the volume’s icon.
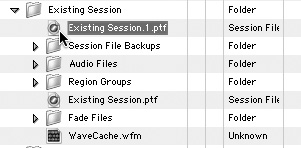
Project browsers
Project browsers (Figure 9.25) give you access to all files related to the current session regardless of what volume they reside on. Project browsers are useful for quickly viewing and auditioning audio files in the current session. Project browsers also provide a Copy and Relink command, which is useful for relinking Transfer files.
Figure 9.25. A Project browser. Project browsers give you access to the contents of the current session.
The Project browser displays the following:
Audio Files Folder: This folder contains all audio files referenced by the session.
Fade Files Folder: This folder contains all fade files referenced by the session.
Render Sources Folder: This folder contains all files that have been imported into the session, but are still being converted, copied, or processed.
Video Files Folder: This folder contains all video files referenced by the session.
1. Launch Pro Tools and open a session.
2. Choose Window > Project (Figure 9.26).
or
Figure 9.26. To open a Project browser for the current session, choose Window > Project.
Press Option-O.
The Project browser opens.
Copying and relinking files
The Copy and Relink command lets you copy files and relink the session to the copies rather than to the originals. This is useful for copying files from Transfer volumes to Performance volumes.
To copy files to a new location and relink to the copies
1. In the Project browser, select the files you want to copy and relink.
2. Choose Copy and Relink from the Browser menu (Figure 9.27).
Figure 9.27. The Copy and Relink command in a Project browser’s Browser menu.
The selected files are copied to the chosen location and relinked in the background.
For information on auditioning files, see Waveforms and Auditioning later in this chapter, or see the Pro Tools Reference Guide.
Indexing
DigiBase uses an indexing process to extract metadata from files. It then stores that data in the associated database file and displays it in the columns of a browser. When you open a browser, Pro Tools automatically indexes the contents of each folder. You can manually index the entire contents of a volume or folder using the Update Database command in the Browser menu.
To manually index the contents of a volume or folder
1. Select the volume, folder, or item in the Items list.
2. From the Browser menu, choose Update Database for Selected (Figure 9.28).
Figure 9.28. To index a volume, folder, or audio file, from the Browser menu, select Update Database for Selected.

The database for the entire contents of the selected volume or folder is updated.
For more information on indexing, see the Pro Tools Reference Guide.
Searching Items
DigiBase browsers include a powerful search tool. The Workspace browser gives you the broadest search capability, letting you access the content of all volumes attached to your system. All other browsers let you search the contents of that individual browser only.
When you perform a search, you can filter the contents of your volumes according to a number of search criteria, including file name (text), date and time, or time code; or you can select a search criterion from the Kind pop-up menu.
Search results are displayed in the Search Results pane, which appears below the Items list when you click the Search icon.
For more information on searching items, see the Pro Tools Reference Guide.
To search the current browser
1. Click the Search icon.
The Search Results pane appears (Figure 9.29).
Figure 9.29. The Search Results pane (lower).
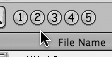
2. Enter text in the File Name field, or enter a date, or select search criteria from the Kind pop-up menu (Figure 9.30).
Figure 9.30. The Kind pop-up menu lets you select additional search criteria.
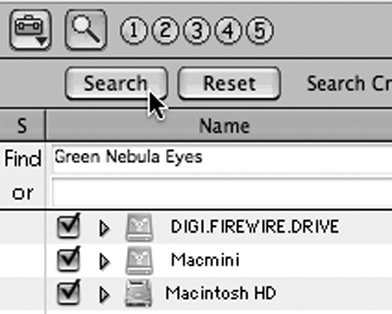
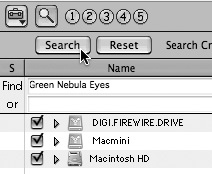
3. Click the Search button (Figure 9.31) or press Return (Macintosh) or Enter (Windows).
Figure 9.31. Click the Search button to begin a search.
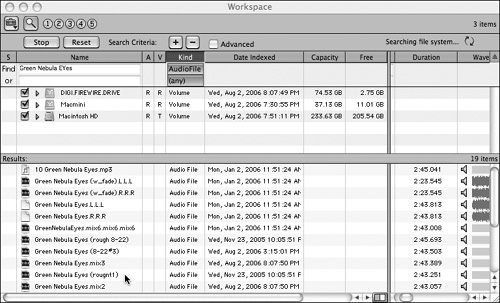
The search begins (indicated by the Search button becoming a Stop button). Results of the search are displayed in the Search Results pane (Figure 9.32).
Figure 9.32. Search results appear in the Search Results pane.
• During a search, click the Stop button (Figure 9.33).
Figure 9.33. Click the Stop button to stop an active search.
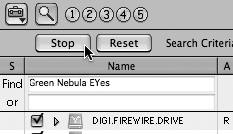
The search is stopped. Search results already found are displayed.
To reset your search settings
• Click the Reset button (Figure 9.34).
Figure 9.34. Click the Reset button to reset your search settings.
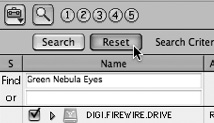
All search fields are cleared and the main browser view (all items) returns.
To close the search pane
• Click the Search icon to toggle the search pane closed/open.
The search is stopped. The Search pane is closed and the window returns to the main Browser view.
For more information on searching items, see the Pro Tools Reference Guide.
Waveforms and Auditioning
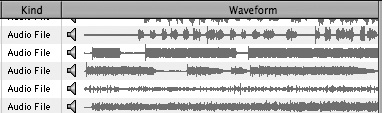
DigiBase lets you audition audio files by clicking directly on the audio file’s waveform inside a DigiBase browser. When you open a session, DigiBase automatically calculates waveforms for each audio file in that session. DigiBase also calculates waveforms when you import audio into a session (Figure 9.35).
Figure 9.35. Audio file waveforms displayed in a browser.
Calculating waveforms
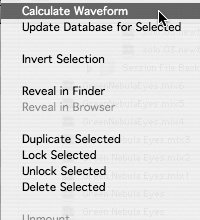
When browsing in DigiBase, you may encounter audio files (in folders other than the current session) that do not yet have waveforms calculated. In this case, a gray bar appears in the waveform column (Figure 9.36). These files have not yet been indexed by Pro Tools, and thus do not have waveforms calculated. In order to audition these files, you can, however, direct Pro Tools to calculate waveforms as follows:
To calculate waveforms in a browser
1. Select online audio files, or folders, in a browser.
2. Choose Calculate Waveform from the Browser menu (Figure 9.37).
The audio file’s waveform appears in the Waveforms column.
Figure 9.36. If an audio file’s waveform has not been calculated, a gray bar appears in the browser’s Waveform column.
![]()
Figure 9.37. To calculate a selected audio file’s waveform, choose Calculate Waveform from the Browser menu.
Auditioning audio files
You can audition audio files inside any browser. Auditioning is useful for identifying and evaluating audio files before importing, copying, or deleting them.
To audition an audio file
1. Select an audio file in the browser’s Items list.
2. Press the spacebar.
or
Click and hold the Speaker icon (to the left of the waveform display) (Figure 9.38).
Figure 9.38. To audition an audio file, click and hold the Speaker icon.

To audition from a specific point within an audio file
• Click and hold on the audio file’s waveform display at the desired location (Figure 9.39).
Figure 9.39. To audition an audio file from a specific point, click and hold on the audio file’s waveform at the desired location.
![]()
To loop audition an audio file
1. Select an audio file in the browser’s Items list.
2. Press Option-spacebar.
or
Option-click (Macintosh) or Alt-click (Windows) in the waveform.
Moving, Copying, Duplicating, and Deleting Items
DigiBase follows the same protocol for moving, copying, duplicating, and deleting items as your computer’s operating system. For example, moving an item from one volume to another volume copies the file, and Pro Tools warns you if an item is about to be overwritten.
To move items
• Select one or more items and drag them to a new location.
Moving an item to a new location on the same volume moves the item. Moving an item to a different volume copies the item.
To copy and move items
• Select one or more items and Option-drag (Macintosh) or Alt-drag (Windows) them to a new location.
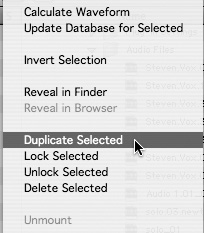
To duplicate one or more items
1. Select one or more items.
2. Press Command-D (Macintosh) or Control-D (Windows).
or
Choose Duplicate Selected from the Browser menu (Figure 9.40).
Figure 9.40. To duplicate selected items, choose Duplicate Selected from the Browser menu.
1. Select one or more items.
2. Press Delete.
or
Choose Delete Selected from the Browser menu (Figure 9.41).
Figure 9.41. To delete selected items, choose Delete Selected from the Browser menu.
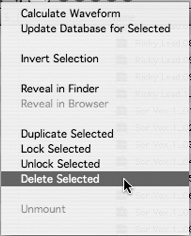
Pro Tools asks you to confirm that you want to permanently delete selected files from disk.
3. Click Delete.
The files are deleted from disk.
To delete locked files
1. Select one or more locked files.
2. Press Command-Delete (Macintosh) or Control-Delete (Windows).
The locked files are deleted from disk.
Importing Audio Files Using Drag and Drop
Pro Tools lets you import audio files by dragging and dropping from a DigiBase browser into the Regions list, existing tracks, or new tracks. You can also spot audio at a desired location in a track.
If an imported audio file does not match the sample rate, bit depth, or file format of the current session, Pro Tools automatically converts the file to match the session upon import. For more information on file conversion, see Chapter 8: File Management Basics.
To import audio files into the Regions list
1. Select the audio files in a browser.
2. Drag the files onto the Regions list of the current session (Figure 9.42).
Figure 9.42. To import audio files into the Audio Regions list, drag and drop the files you want to import directly into the Audio Regions list.
The imported audio files appear in the Audio Regions list.
To import audio files into an existing track
1. Select the audio files in a browser.
2. Drag the files onto an existing track in the Edit window of the current session.
The imported audio files appear within the existing track at the desired location.
To import audio files into new tracks
1. Select the audio files in a browser.
2. Drag the files onto any empty space in the Edit window.
or
Shift-drag the files anywhere in the Edit window.
The imported audio files appear in new tracks inside the Edit window.
To import and spot audio into a track
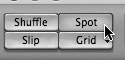
1. Enable Spot Mode (Figure 9.43).
Figure 9.43. Select Spot mode in the Edit Modes section of the Edit window.
2. Select an audio file in a browser.
3. Drag and drop the items into a Track playlist.
The Spot Dialog box appears (Figure 9.44).
Figure 9.44. The Spot Dialog box lets you select an exact location to place imported audio files.
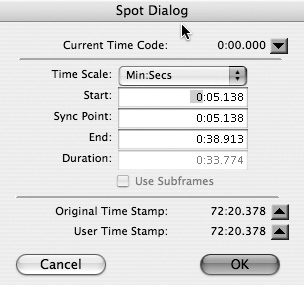
4. Enter the time location where you want to spot the item.
5. Click OK.
The imported audio file appears in the track at the desired time location.
To import and spot an audio file using its waveform
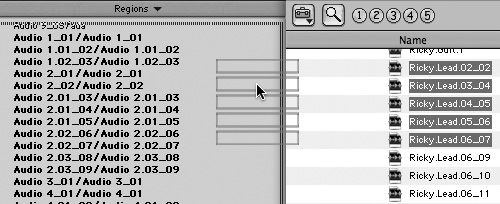
1. Command-click (Macintosh) or Control-click (Windows) in the audio file’s waveform display at the approximate time location you want to spot the audio in the track (Figure 9.45).
Figure 9.45. To import and spot an audio file using its waveform, Command-click (Macintosh) or Control-click (Windows) at the approximate location you want the audio spotted. Drop the waveform into a track.
![]()
2. While pressing Command-click or Control-click, drag and drop the waveform onto an existing audio track.
The imported audio file appears in the track at the desired time location.
Importing region groups, REX, and ACID files using drag and drop
Pro Tools 7 lets you import Standard MIDI files, region group files, REX files, and ACID files into a session using drag and drop from a DigiBase browser.
To import a region group file
1. Choose File > Import > Region Groups.
2. Select the desired region group to import.
3. Click Import
or
Drag and drop the desired region group file from a Digibase browser to the Regions list, a track, the Track List or the Timeline.
Depending on where you drop the region group the following occurs:
• Dropping a region group in the Regions list adds the region group to the list. All audio, MIDI, and region groups contained with the dropped region group also appear in the Regions list.
• Dropping a region group in a track imports files contained within the region group directly to that track and spots the region group to the drop location. If multitrack files are contained within the region group, those files are imported to adjacent tracks.
• Dropping a region group in the Track List or Timeline creates new tracks for the imported region group.
To import a REX file into Pro Tools
• Drag and drop the desired REX file from a DigiBase browser to the Regions list, a track, the Track List, or the Timeline.
The REX file is converted to a region group when imported, and all its slices are converted into individual audio files and regions
To import an ACID file into Pro Tools
• Drag and drop the desired ACID file from a DigiBase browser to the Regions list, a track, the Track List, or the Timeline.
The ACID file is converted to a region group when imported, and all its slices are converted into individual audio files and regions. If no slice data is present, the ACID file is imported as a regular audio file.
For more information on importing audio files, see Chapter 8: File Management Basics. For more information on importing items with drag and drop in DigiBase, see the Pro Tools Reference Guide. For more information on region groups see Chapter 13: Advanced Editing. For more information on REX files and ACID files, see the Pro Tools Reference Guide.
Relinking Audio Files
When you open a session, Pro Tools attempts to locate all files linked to that session. When missing files or Transfer files (files on drives unsuitable for record and playback) are detected, Pro Tools prompts you to relink the files.
Relinking Transfer files
When a Transfer file is detected, a dialog box appears, prompting you to copy the Transfer file to a Performance volume (suitable for record and playback).
To relink Transfer files
• In the Transfer files dialog box, click Yes.
Files are copied to the selected Performance volume. The copies are then relinked to the session.
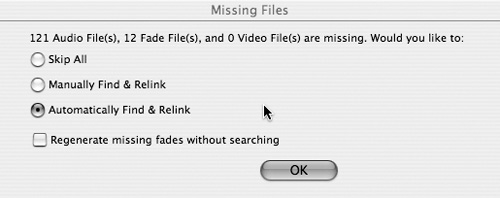
Relinking missing files
When a missing file is detected, Pro Tools launches the Missing Files dialog box (Figure 9.46). The Missing Files dialog box gives you the following options:
Skip All: The Skip All option ignores all missing audio files and fades. Missing files remain offline in the session.
Manually Find and Relink: The Manually Find and Relink option opens the Relink window, where you can search, compare, verify, and relink missing files.
Automatically Find and Relink: The Automatically Find and Relink option searches all performance volumes and automatically relinks matching files with the session. Note: This option automatically commits relinked files without asking for verification.
Regenerate Missing Fades: The Regenerate Missing Fade option excludes fades from the relinking process and recalculates them instead.
Figure 9.46. The Missing Files dialog box.
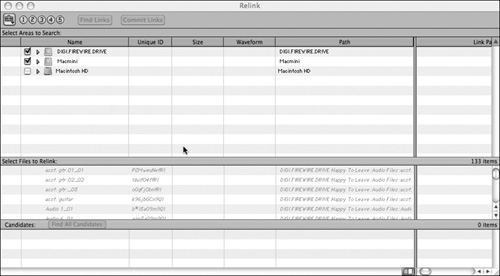
The Relink window
The Relink window (Figure 9.47) lets you search, compare, verify, and relink missing files. The Relink window includes the following:
Menu and Toolbar: This includes the Relink menu, view presets, and relinking buttons.
Select Areas to Search: This selects volumes on which to search for missing items.
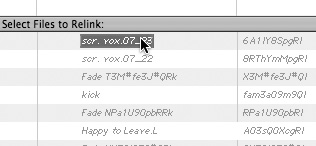
Select Files to Relink: This lists missing files.
Candidates: This lists files that match the “relinking criteria” for a missing file. The link icon next to the candidate can be toggled to link (or unlink) the candidate to the selected missing file.
Figure 9.47. The Relink window.
1. From the Missing Files dialog box, select Manually Find and Relink.
or
In an open session, Choose Window > Project.
2. Choose Relink Offline from the Browser menu (Figure 9.48).
Figure 9.48. To open the Relink window from inside a browser, in the Browser menu, select Relink Offline.
The Relink window appears.
Configuring areas to search
You can configure searches in the Relink window by selecting specific volumes and folders in the Select Areas to Search (Figure 9.49) pane. When you perform a search, only those volumes and folders selected are searched. Configuring the Select Areas to Search pane will help make your searches more accurate and less time-consuming.
Figure 9.49. The Select Areas to Search pane of the Relink window.
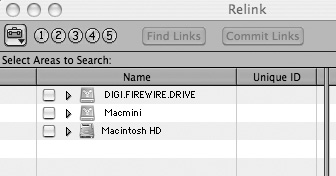
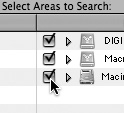
To configure the Select Areas to Search pane
• In the Select Areas to Search pane, click the Search column next to each volume or folder you want included in the search (Figure 9.50).
Figure 9.50. In the Select Areas to Search pane, check the box next to the volumes and/or folders you want included in the search.
Relinking single and multiple missing files
The Relink window lets you relink missing files individually or in batches. When you relink files individually, you use the Find All Candidates button, which displays all candidate files. You can then select the best-suited file to relink.
Relinking multiple files in batches is handy if you need to relink numerous missing files in short order. When you relink files in batches, you use the Find Links button, which displays a link icon, indicating Pro Tools has found the best-suited candidate. You can then view that candidate file and commit the link. (Or, if you need further confirmation before committing a relink, you can view all candidates for an individual file, and select the best-suited candidate yourself.)
To relink a single missing file
1. Configure the Select Areas to Search pane.
2. Select one item in the Select Files to Relink list (Figure 9.51).
Figure 9.51. In the Select Files to Relink pane, select a single file.
3. Click Find All Candidates (Figure 9.52).
Figure 9.52. The Find All Candidates button in the Relink window.
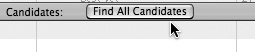
Pro Tools searches the selected volumes and folders and displays all files with matching File Name and/or Unique ID in the Candidates list (Figure 9.53). (Link icons indicate if a file is already linked.)
Figure 9.53. The Candidates list displays all candidate files matching search criteria for relinking.

4. Click the Link toggle next to the candidate you want to relink (Figure 9.54).
Figure 9.54. Click the Link toggle next to the candidate file you want to relink.

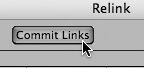
5. Click Commit Links (Figure 9.55). (Note: Committed links cannot be undone).
or
Figure 9.55. The Commit Links button.
Repeat steps for additional missing files, leaving the Commit process until later.
To relink multiple missing files
1. Configure the Select Areas to Search pane.
2. Select one or more items in the Select Files to Relink list.
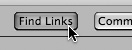
3. Click Find Links (Figure 9.56).
Figure 9.56. Click the Find Links button to search for multiple files to relink.
The Linking Options dialog appears (Figure 9.57).
Figure 9.57. The Link Options dialog box.
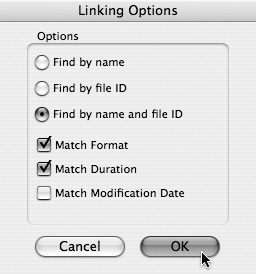
4. Select the desired Linking options.
5. Click OK.
Pro Tools searches the selected volumes and folders. A link icon appears next to each file in the Select Files to Relink list as Pro Tools identifies a suitable candidate for the link.
6. In the Select Files to Relink list, click an individual file to view the candidate file.
7. Click Commit Links.
or
Click Find All Candidates to view all candidate files, and select the best-suited candidate.
Committing links
Relinking cannot be undone. When using the Relink window to relink missing files, you must click the Commit Link button in order to finalize the relink. Once you have committed a relink, the old link is lost, and the relink cannot be undone.
To commit links
1. Use the Relink window to find a relinking candidate.
2. Click Commit Link.
The candidate file is relinked to the session.
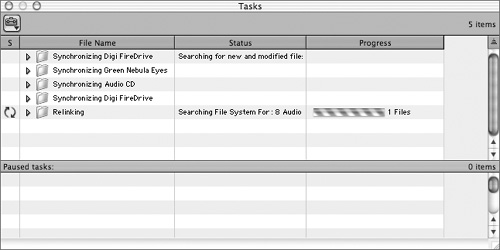
Managing Background Processing with the Tasks Window
Pro Tools performs most file-management tasks (such as copying, indexing, and relinking) in the background, letting you record, edit, and mix without interruption. Background processing can, however, especially on slower computers, divert CPU power and impact a session.
To help you optimize CPU resources, the Tasks window (Figure 9.58) lets you monitor, pause, and cancel background processing. The Tasks window is also useful for checking the status of a task and for stopping unwanted tasks from being performed.
Figure 9.58. The Tasks window.
The Tasks Window
The Tasks window includes the following features:
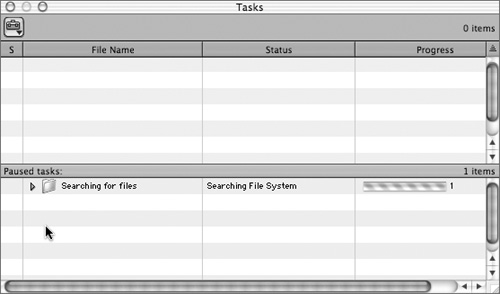
Active Tasks pane: The Active Tasks pane (upper) shows the tasks that are in progress or in queue to start. When a task is completed, it disappears from the queue. Incomplete tasks are moved to the Paused Tasks pane.
Paused Tasks pane: The Paused Tasks pane (lower) displays paused tasks. Tasks listed in this pane must be moved to the Active Tasks pane for processing to proceed.
Tasks Window menu: The Tasks window menu provides commands for Tasks window operation.
Columns: Columns display the following data:
• Name: This column indicates the name of the audio file or other affected item.
• Status: This column indicates the action being taken.
• Progress: This column indicates the progress of the task.
• Progress Indicator: This column indicates that the task is in process.
• Quantification: This column shows the percentage of progress of the current task.
• Warning Message: If a task does not complete successfully, this column displays a warning symbol and a message describing the problem.
To open the Tasks window
• Choose Window > Task Manager.
The Tasks window opens.
To toggle between maximized and minimized views
• Click the green View Toggle icon at the top of the Tasks window.
Pausing and canceling tasks
The Tasks window lets you pause, resume, and cancel tasks, as follows:
To pause a task
• Drag the appropriate task from the Active Tasks pane to the Paused Tasks pane (Figure 9.59).
Figure 9.59. To pause a task, drag the task from the Active Tasks pane to the Paused Tasks pane.
The task moves to the top of the Paused Tasks pane.
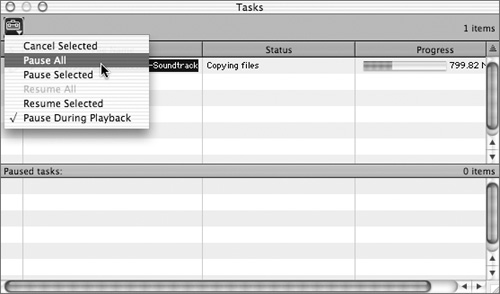
To pause all tasks
• Choose Pause All from the Tasks window menu (Figure 9.60).
Figure 9.60. To pause all tasks, select Pause All from the Tasks window menu.
• Drag a task from the Paused Tasks pane to the Active Tasks pane.
The task returns to its previous position in the queue.
To resume all paused tasks
• Select Resume All from the Tasks window menu (Figure 9.61).
Figure 9.61. To resume all paused tasks, select Resume All from the Tasks menu.
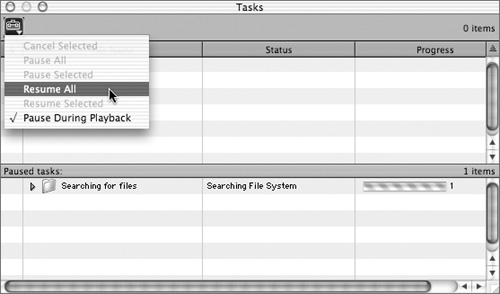
All tasks in the Paused Tasks pane (except failed tasks) are moved to the Active Tasks pane.
To cancel a task
1. Select any task in either pane of the Tasks window.
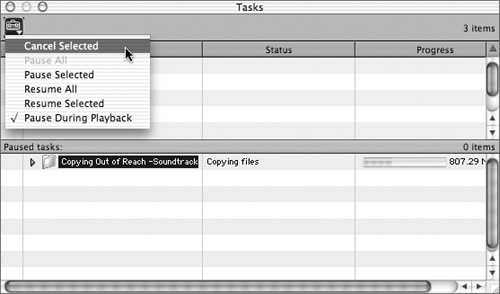
2. Select Cancel Selected in the Tasks menu (Figure 9.62).
or
Press Delete.
The task is canceled and removed from the Tasks window.
Figure 9.62. To cancel selected tasks, select Cancel Selected from the Tasks menu.
To cancel all tasks
1. Select any task in either pane of the Tasks window.
2. Press Command-A (Macintosh) Control-A (Windows) to select all tasks in that pane.
3. Press Delete.
All tasks are removed from the Tasks window. (This command cannot be undone.)
For more information on the Tasks window, see the Pro Tools Reference Guide.