Do you ever wish you could do things beyond what people were designed to do? Like flying? We all dream about it, but we can’t do it without several hundred pounds of jet fuel. Or what about bending steel in our bare hands? Does that sound like anyone you know? Then there’s breathing underwater, doing long division in your head, speaking a foreign language fluently without much study, and having a successful career as an author of popular computer books. Ah, one can dream.
It’s not that we want to do all of these things, but once in a while it would be nice to be slightly enhanced with the ability to do one or two of the things that are beyond our natural abilities. Unfortunately, it doesn’t work for humans very often, but could it work for .NET operators?
You probably didn’t even know that the humble Visual Basic addition operator (+) had dreams of flying, or of speaking Hungarian, or of bending steel. Well, operators are people, too. And now their dreams can be fulfilled because Visual Basic supports operator overloading.
This chapter will show how you can direct the body-building enhancement process for the various Visual Basic operators. I’ll also introduce extension methods, which let you similarly enhance classes, even if you don’t have access to the original source code for those classes.
Operator overloading allows your code to enhance the basic Visual Basic operators, and endow them with abilities not previously granted to them by the compiler. Overloading doesn’t change the syntax used when employing operators, but it does change the types of objects that each operator can manage. For instance, the multiplication operator (*) normally interacts only with numbers, but you can augment it to work with your own custom Bumblebee class.
Dim swarm As Bumblebee
Dim oneBumblebee As New Bumblebee
Dim twoBumblebee As New Bumblebee
swarm = oneBumblebee * twoBumblebee
The meaning you apply to the overloaded operator is up to you. Although you would normally want to retain the additive nature of the addition operator when overloading it, you don’t have to. In fact, you could overload the addition operator so that it subtracts one value from another. But I’d fire you if you did that working for me. Just so you know.
All operator overloading features tie directly to one or more of your classes. Overloaded features look curiously like standard function members, and appear as members of your classes.
Visual Basic includes two types of operators: unary and binary, defined based on the number of operands recognized by the operator. Unary operators accept a single operand, which always appears to the right of the operator name or symbol. The logical Not operator is a unary operator:
oppositeValue = Not originalValueBinary operators accept two operands, one on each side of the operator. The multiplication operator is a binary operator:
ten = two * five
The nature of an operator is that once it has done its work, the operator and its input operand(s) are, in effect, fully replaced by the calculated result. The expression “10/5” is replaced by the calculated “2” result, and this result is used to complete whatever statement or expression the original operation appeared in. It works just like a function.
' ----- These two lines (probably) place the same
'       calculated result in theAnswer.
theAnswer = 2 * 5
theAnswer = DoubleIt(5)
To get ready for operator overloading, alter your mind to see operators as functions. Look past the confines of your operator universe, and open yourself to the truth that operators and functions are one. If you’ve ever programmed in LISP, I truly feel sorry for you. But you also already understand operators as functions. In LISP, everything is a function. To multiply two numbers together in LISP, you use “prefix” syntax, where the operator name comes first. The expression “seven times three” uses this syntax:
(* 7 3)
Once complete, the entire parenthesized expression is replaced, function-like, by its answer. The LISP expression:
(+ 2 (* 7 3))
becomes:
(+ 2 21)
becomes:
23
Defining overloaded operators in Visual Basic 2008 is somewhat similar. If you were to translate the definition of multiplication into Visual Basic function-ese, it might look like this:
Public Shared Function *( _
   ByVal firstOperand As Integer, _
   ByVal secondOperand As Integer) _
   As Integer
The operator (*) becomes a function name, with operands playing the role of function parameters, ultimately generating a value exposed through the function’s return value. Although operators aren’t defined as functions in this way in Visual Basic, overloads of those operators are.
To overload the multiplication operator in our imaginary Bumblebee class, we use the Operator keyword to define a “multiplication function” for operands of the Bumblebee class.
Partial Class Bumblebee
  Public Shared Operator *(ByVal operand1 As Bumblebee, _
         ByVal operand2 As Bumblebee) As Bumblebee
      ' ----- Multiply two bumblebees together.
      Dim finalResult As New Bumblebee

      ' ----- Add special "multiplication" code here, then...
      Return finalResult
   End Operator
End Class
Now, when you multiply two Bumblebee instances together with the multiplication operator, Visual Basic recognizes the “operand1 * operand2” pattern as matching a multiplication operator overload with two Bumblebee arguments, and calls this class-based Operator function to get the result.
All Operator declarations must include the Public and Shared keywords. If they weren’t shared, Visual Basic would be required to create an extra instance of the class just to access the operator overload code, and that wouldn’t be very efficient.
You can overload pretty much any of Visual Basic’s standard operators (except for Is and IsNot), plus a few other features. This section describes each overloadable operator, grouped by general type. Each section includes a table of operators. To overload an operator in a class, use the name in the Operator column as the function name. If there were an operator named XX, the matching Operator statement would be as follows:
Public Shared Operator XX(...)
Visual Basic defines 10 mathematical or pseudo-mathematical operators. All but one of these exists to manipulate numbers. The leftover operator is the string concatenation operator (&), which works with strings, but kind of looks like the other mathematical operators in its syntax and use.
Two of the operators, plus (+) and minus (−), are both unary and binary operators. The minus sign (−) works as a unary “negation” operator (as in “−5”) and as a binary “subtraction” operator (the common “5 - 2” syntax). When overloading these operators, the difference lies in the number of arguments included in the argument signature.
Public Shared Operator -(ByVal operand1 As SomeClass, _
      ByVal operand2 As SomeClass) As SomeClass
   ' ----- This is the binary "subtraction" version.
End Operator

Public Shared Operator -(ByVal operand1 As SomeClass) _
      As SomeClass
   ' ----- This is the unary "negation" version.
End Operator
Table 12-1 lists the mathematical operators that support overloading.
Table 12-1. The overloadable mathematical operators
Visual Basic includes seven basic comparison operators, most often used in If statements and similar expressions that require a Boolean conditional calculation. The Operator methods for these comparison operators have the same syntax as is used for mathematical operators, but most of them must be implemented in pairs. For example, if you overload the less than (<) operator, Visual Basic requires you to overload the greater than (>) operator within the same class, and for the same argument signature.
All comparison operators are Boolean operators. Although you can alter the data types of the arguments passed to the operator, they must all return a Boolean value.
Public Shared Operator <=(ByVal operand1 As SomeClass, _
      ByVal operand2 As SomeClass) As Boolean
   ' ----- The <= operator returns a Boolean result.
End Operator
Table 12-2 lists six of the seven basic comparison operators that you can overload. Each entry includes a “buddy” value that identifies the matching operator that must also be overloaded.
Table 12-2. The overloadable comparison operators
Operator | Buddy | Comments |
|---|---|---|
|
| The equal to operator compares two operands for equivalence, returning |
|
| The not equal to operator compares two operands for non-equivalence, and returns |
|
| The less than operator returns |
|
| The greater than operator returns |
|
| The less than or equal to operator returns |
|
| The greater than or equal to operator returns |
The seventh comparison operator is Like. In standard Visual Basic, it compares the first operand to a string “pattern,” which is a set of matching characters and wildcards:
If (someValueLikesomePattern) Then
You don’t have to use the same pattern rules when overloading the Like operator and you can accept any data type for the pattern operand, but you must still return a Boolean result.
Public Shared Operator Like(ByVal operand1 As Bumblebee, _
      ByVal operand2 As Integer) As Boolean
   ' ----- See if Bumblebee matches an Integer pattern.
End Operator
There is no “buddy” operator that you must implement when overloading the Like operator.
Among the logical and bitwise operators included in Visual Basic, four already perform double duty as overloaded operators. The bitwise And, Or, Xor, and Not operators accept integer operands, generating numeric results with values transformed at the individual bit level. They also work as logical operators, accepting and returning Boolean values, most often in conditional statements. But they can handle the stress of being overridden a little more.
When you do override these four operators, you are overriding the bitwise versions, not the logical versions. Basically, this means that you have control over the return value, and aren’t required to make it Boolean.
Table 12-3 lists the eight overloadable bitwise and logical operators.
Table 12-3. The overloadable bitwise and logical operators
The Visual Basic CType feature looks more like a function than an operator:
result= CType(source,type)
But looks are deceiving. It is not a true function, and as with the other conversion functions (such as CInt), it is actually processed at compile time, long before the program even runs. By allowing you to overload it as an operator, Visual Basic enables you to create custom and special conversions between data types that don’t seem compatible. The following method template converts a value of type Bumblebee to an Integer:
Public Shared Operator CType(ByVal operand1 As Bumblebee) _
      As Integer
   ' ----- Perform conversion here, returning an Integer.
End Operator
If you try to type that last block of code into Visual Basic, it will complain that you are missing either the Widening or the Narrowing keyword (see Figure 12-1).

I mentioned widening and narrowing conversions in passing in Chapter 2, but let’s examine them in more depth. When you convert between some core data types in Visual Basic, there is a chance that it will sometimes fail because the source value cannot fit into the destination value. This is true when converting a Short value to a Byte.
Dim quiteBig As Short = 5000
Dim quiteSmall As Byte
' ----- These next two lines will fail.
quiteSmall = quiteBig
quiteSmall = CByte(quiteBig)
And it’s obvious why it fails: A Byte variable cannot hold the value 5000. But what about this code?
Dim quiteBig As Short = 5
Dim quiteSmall As Byte
' ----- These next two lines will succeed.
quiteSmall = quiteBig
quiteSmall = CByte(quiteBig)
It will run just fine, since 5 fits into a Byte variable with room to spare. (If Option Strict is set to On, the first assignment will still fail to compile.) Still, there is nothing to stop me from reassigning a value of 5000 to quiteBig and trying the assignment again. It’s this potential for failure during conversion that is the issue.
When a conversion has the potential to fail due to the source data not being able to fully fit in the target variable, it’s called a narrowing conversion. Narrowing conversions are a reality, and as long as you have checked the data before the conversion, there shouldn’t be any reason to permanently restrict such conversions.
Widening conversions go in the opposite direction. They occur when any source value in the original data type will always fit easily in the target type. A widening conversion will always succeed as long as the source data is valid.
Visual Basic allows widening conversions to occur automatically, implicitly. You don’t have to explicitly use CType to force the conversion. If you had a widening conversion from Bumblebee to Integer, and you had set Option Strict to On, the following code would work just fine:
Dim sourceValue As New Bumblebee
Dim destValue As Integer = sourceValue
If the conversion from Bumblebee to Integer was narrowing, you would have to force the conversion using CType just so that Visual Basic was sure you really wanted to do this.
Dim sourceValue As New Bumblebee
Dim destValue As Integer = CType(sourceValue, Integer)
When you create custom conversions with the overloaded CType operator, you must inform Visual Basic whether the conversion is widening or narrowing by inserting either the Widening or Narrowing keyword between the Shared and Operator keywords.
Public Shared Narrowing Operator CType( _
      ByVal operand1 As Bumblebee) As Integer
   ' ----- Perform narrowing conversion here.
End OperatorThere are a few other rules you must follow when overloading operators, but first let’s look at a semi-useful Bumblebee class.
Class Bumblebee
   Public Bees As Integer

   Public Sub New(  )
      ' ----- Default constructor.
      Bees = 0
   End Sub

   Public Sub New(ByVal startingBees As Integer)
      ' ----- Assign an initial number of bees.
      Bees = startingBees
   End Sub

   Public Shared Operator +(ByVal operand1 As Bumblebee, _
         ByVal operand2 As Bumblebee) As Bumblebee
      ' ----- Join bumblebee groups.
      Dim newGroup As New Bumblebee
      newGroup.Bees = operand1.Bees + operand2.Bees
      Return newGroup
   End Operator

   Public Shared Operator -(ByVal operand1 As Bumblebee, _
         ByVal operand2 As Bumblebee) As Bumblebee
      ' ----- Separate bumblebee groups.
      Dim newGroup As New Bumblebee
      newGroup.Bees = operand1.Bees - operand2.Bees
      If (newGroup.Bees < 0) Then newGroup.Bees = 0
      Return newGroup
   End Operator

   Public Shared Operator *(ByVal operand1 As Bumblebee, _
         ByVal operand2 As Bumblebee) As Bumblebee
      ' ----- Create a swarm.
      Dim newGroup As New Bumblebee
      newGroup.Bees = operand1.Bees * operand2.Bees
      Return newGroup
   End Operator
   Public Shared Widening Operator CType( _
         ByVal operand1 As Bumblebee) As Integer
      ' ----- Perform conversion here.
      Return operand1.Bees
   End Operator
End Class
The class is pretty simple; it exists to maintain a simple count of bees. But by overloading the addition, subtraction, multiplication, and CType operators, we can use instances of bees with a more natural syntax.
Dim studyGroup1 As New Bumblebee(20)
Dim studyGroup2 As New Bumblebee(15)
Dim swarmGroup As Bumblebee = studyGroup1 * studyGroup2
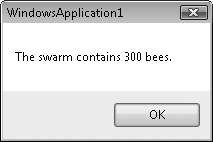
MsgBox("The swarm contains " & CInt(swarmGroup) & " bees.")Running this code correctly generates a 300-bee swarm and the message in Figure 12-2.
Including a CType overload that generates an Integer allowed me to convert a Bumblebee using the CInt operator. I could also have changed the last line to use the true CType operator.
MsgBox("The swarm contains " & _
CType(swarmGroup, Integer) & " bees.")As mentioned earlier, you must always make Operator methods Public Shared. And because the overloaded operators need some sort of intimate connection to their containing class, at least one of the operands or the return value must match the type of the containing class. (In some overloads, Visual Basic requires that it be one of the operands that match.) Either of the two following overloads will work just fine, since Bumblebee is used for one of the operands:
Public Shared Operator <=(ByVal operand1 As Bumblebee, _
      ByVal operand2 As Integer) As Boolean
   ' ----- Compare a bumblebee to a value.
End Operator
Public Shared Operator <=(ByVal operand1 As Date, _
      ByVal operand2 As Bumblebee) As Boolean
   ' ----- Compare a date to a bumblebee.
End Operator
However, you cannot set both operands to a non-Bumblebee type at the same time and still keep the overload in the Bumblebee class.
Class Bumblebee
   Public Shared Operator <=(ByVal operand1 As Date, _
         ByVal operand2 As Integer) As Boolean
      ' ----- This will not compile.
   End Operator
End ClassYou can overload overloaded operators. No, dear editor, I didn’t type the same word twice by mistake. You can add multiple argument-and-return-value signature variations of an overloaded operator to a single class.
Public Shared Widening Operator CType( _
      ByVal operand1 As Bumblebee) As Integer
   ' ----- Perform conversion to Integer here.
End Operator

Public Shared Widening Operator CType( _
      ByVal operand1 As Bumblebee) As Date
   ' ----- Perform conversion to Date here, somehow.
End Operator
As long as the argument signatures or return values differ, you can add as many overloads of an operator as you want. You don’t need to use the Overloads keyword either.
That’s right. Be nice. Just because you have the power to redefine addition to be division, you don’t have to be so shocking. Don’t make the maintenance programmers who have to modify your code later work harder because of your mischievous operator overloads. When you add overloads, let the meaning of the new feature at least have the feeling of the original operator. My fellow maintenance programmers and I will thank you.
What if you want to modify the behavior of a class, but you don’t have access to the source code? You could derive from it and build a new class, but that’s not always convenient. You could call up the original developer and beg for the code, but some of those programmers are tight-fisted when it comes to their software.
Another option is to use a new Visual Basic 2008 feature: extension methods. Here’s how it works:
You decide which class you want to extend with new methods.
You write those methods within a standard
Modulein your source code.You start using the new methods as though they were included in the class definition.
The String data type includes several built-in methods that return a modified version of a string instance. For example, in this code:
Dim bossyString As String = "are you talking to me?"
MsgBox(bossyString.ToUpper(  ))
the text that appears in the message box will be all uppercase because the ToUpper method returns a new uppercase version of the original string instance. A matching ToLower method works the other way, but what I really want is a ToTitle method that capitalizes just the first letter of each word.
MsgBox(bossyString.ToTitle( ))
The String class doesn’t include a ToTitle method, but we can add it thanks to extension methods. To create an extension method, create a method within a standard module that accepts the target data type as its first parameter.
Module MyExtensions<System.Runtime.CompilerServices.Extension( )>_ Public Function ToTitle(ByVal sourceText As String) As String Return StrConv(sourceText, VbStrConv.ProperCase) End Function End Module
Normally, you would call this function as is, passing in the original string.
MsgBox(ToTitle(bossyString))
And that code does work, but the addition of the Extension attribute (from the System.Runtime.CompilerServices namespace) turns ToTitle into an extension method, extending the String data type. Your code isn’t really modifying String. Behind the scenes, the Visual Basic compiler is converting the new method-like syntax into the old function-like syntax on each use of ToTitle.
By themselves, extension methods don’t do much. Calling ToTitle(bossyString) is not that different from bossyString.ToTitle( ). But as with so many new features in Visual Basic 2008, extension methods were added just to raise the price of the product. Just kidding! Actually, the new extension methods feature is an important support for the new LINQ technology.
Operator overloading is a pretty neat feature, but you don’t really need it. Anything you can do by overloading the addition operator you can also do by adding an Append method to a class. But operator overloading does allow you to bring your classes more into the mainstream of Visual Basic syntax usage.
Extension methods can also be replicated using standard method code, but there are some features of LINQ that specifically take advantage of extension methods.
When you do overload your operators or use extension methods, make sure you include sufficient documentation or comments to make it clear what it means to left-shift a customer, Normalize( ) a String, or multiply a bank account. Hey, I’d like to know about that last one.
This chapter’s project will add a lot of code to the Library application, as much as 25% of the full code base. Most of it is identical to code we added in earlier chapters, so I won’t print it all here. There’s a lot to read here, too, so I won’t overload you with pasting code snippets right and left. But as you add each new form to the project, be sure to look over its code to become familiar with its inner workings.
PROJECT ACCESS
Load the Chapter 12 (Before) Code project, either through the New Project templates or by accessing the project directly from the installation directory. To see the code in its final form, load Chapter 12 (After) Code instead.
Operator overloading is a useful tool, and I have grown especially fond of the CType overload. Let’s add a CType overload to a class we first designed back in Chapter 8: ListItemData. This class exposes both ItemText and ItemData properties, providing access to the textual and numeric aspects of the class content. Its primary purpose is to support the tracking of ID numbers in ListBox and ComboBox controls. If we need to know the ID number of a selected item in a ListBox control (let’s name it SomeList), we use code similar to the following:
Dim recordID As Integer = _
   CType(SomeList.SelectedItem, ListItemData).ItemData
There’s nothing wrong with that code. But I thought, “Wouldn’t it be nice to convert the ListItemData instance to an Integer using the CInt function, and not have to mess with member variables like ItemData?”
Dim recordID As Integer = _
   CInt(CType(SomeList.SelectedItem, ListItemData))
Hmm. The code’s not that different. But hey, why not? Let’s do it. To support this conversion, we need to add a CType overload to the ListItemData class. Open that class’s file, and add the following code as a member of the class.
INSERT SNIPPET
Insert Chapter 12, Snippet Item 1.
Public Shared Widening Operator CType( _
      ByVal sourceItem As ListItemData) As Integer
   ' ----- To convert to integer, simply extract the
   '       integer element.
   Return sourceItem.ItemData
End Operator
That’s pretty simple. This widening conversion from ListItemData to Integer just returns the Integer portion of the instance. There are only about four or five places in the current Library Project that directly access the ItemData member, and it’s not that important to go back and change them. But we’ll use this conversion overload frequently in the new code added in this chapter.
We need to add a few more global variables and common global routines to support various features used throughout the application. Two new global variables will track settings stored in the database’s SystemValue table. Add them as members to the General module (in General.vb).
INSERT SNIPPET
Insert Chapter 12, Snippet Item 2.
Public DefaultItemLocation As Integer
Public SearchMatchLimit As Integer
The Library program identifies books and other items as stored in multiple locations, such as multiple branches or storage rooms. DefaultItemLocation indicates which one of these locations, from the CodeLocation table, is the default. The DefaultLocation entry of the SystemValue database table stores this value permanently.
When searching for books, authors, or other things that could result in thousands of matches, the SearchMatchLimit indicates the maximum number of matches returned by such searches. It’s stored as the SearchLimit system value.
Since we’re already in the General module, add two more helper functions.
INSERT SNIPPET
Insert Chapter 12, Snippet Item 3.
ConfirmDefaultLocationThis routine verifies that a valid
DefaultLocationentry exists in theSystemValuetable. It returnsTrueon success.GetCopyDispositionThis routine provides a short description for the current status of a specific library item copy. It analyzes the item’s and patron’s records, and returns one of the following status code strings:
New Item Copy,Checked In,Checked Out,Overdue,Missing, orReference.
What’s in a name? Well, if it’s the author names in the Library Project, they might include first and last names, prefixes (such as “Dr.”) and suffixes (“Jr.”), and dates for birth and death. Some of those parts are optional, so formatting the author name is a multistep process. Since the application will need to format author names in several places throughout the code, let’s add a central routine, FormatAuthorName, that does the work for us.
INSERT SNIPPET
Insert Chapter 12, Snippet Item 4.
<System.Runtime.CompilerServices.Extension(  )> _
Public Function FormatAuthorName( _
      ByRef dbInfo As SqlClient.SqlDataReader) As String
   ' ----- Given an author record, return the formatted name.
   Dim authorName As String

   On Error Resume Next

   ' ----- Format the name.
   authorName = CStr(dbInfo!LastName)
   If (IsDBNull(dbInfo!FirstName) = False) Then
      authorName &= ", " & CStr(dbInfo!FirstName)
      If (IsDBNull(dbInfo!MiddleName) = False) Then _
         authorName &= " " & CStr(dbInfo!MiddleName)
   End If
   If (IsDBNull(dbInfo!Suffix) = False) Then _
      authorName &= ", " & CStr(dbInfo!Suffix)

   ' ----- Add in the birth and death years.
   If (IsDBNull(dbInfo!BirthYear) = False) Or _
         (IsDBNull(dbInfo!DeathYear) = False) Then
      authorName &= " ("
      If (IsDBNull(dbInfo!BirthYear) = True) Then
         authorName &= "????"
      Else
         authorName &= CStr(Math.Abs(CInt(dbInfo!BirthYear)))
         If (CInt(dbInfo!BirthYear) < 0) Then _
            authorName &= "BC"
      End If
      authorName &= "-"
      If (IsDBNull(dbInfo!DeathYear) = False) Then
         authorName &= CStr(Math.Abs(CInt(dbInfo!DeathYear)))
         If (CInt(dbInfo!DeathYear) < 0) Then _
            authorName &= "BC"
      End If
      authorName &= ")"
   End If

   ' ----- Finished.
   Return authorName
End Function
This routine is an extension method that extends the SqlClient.SqlDataReader class. The fully qualified Extension attribute makes the connection between our custom extension and the framework-defined SqlDataReader class. Given a SqlDataReader built from records in the Author table, the function formats and returns a friendly author name in the format “Public, John Q, Jr. (1900–1999).” Elsewhere in the application, it’s called as though it were a member of the data reader instance.
dbInfo.FormatAuthorName( )
We could have left out the extension method features altogether by simply omitting the Extension attribute. Then, calls for author formatting would look like this:
FormatAuthorName(dbInfo)
Now things really start to hop. We’ll add 23 new forms to the application in this chapter. Most of them implement basic code editors, similar to the UserName.vb and GroupName.vb files we built in Chapter 11. Other forms exist to provide additional support for these record editors. I won’t reprint anything I’ve gone over before, but I’ll point out some interesting new code on our way through each of these 23 forms.
If you’re following along in the “Before” version of this chapter’s project, you will need to enable each form as you encounter it. To do this, select the file in the Solution Explorer window, and change the file’s Build Action property (in the Properties panel) from None to Compile.
The first four forms allow the librarian to limit the information overload that comes through using a database with thousands of books, publishers, and authors. You probably remember that the generic ListEditRecords form displays all existing records from a table of records by default. This works fine for the security groups stored in the GroupName table since you probably won’t have even a dozen of those. But listing all books in even a small library can generate quite an imposing list. And depending on the speed of your workstation, it can take awhile to load all book titles into the list.
The four “search-limiting” forms help to reduce the number of records appearing in the list at once. When the librarian accesses the list of books and other library items, the ItemLimit form (see Figure 12-3) provides a quick search prompt that reduces the listed results.
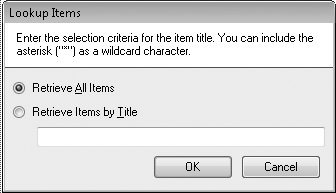
The form lets the user retrieve all records, or specific items based on item name (with wildcard support). Once the matches are loaded, the user can access this form again by clicking on the Lookup button on the ListEditRecords form for those types of code editors that support lookups (authors, items, patrons, and publishers).
We are ready to include these four search-limiting forms in the project:
- AuthorLimit.vb
This form limits author records as loaded from the
Authortable.- ItemLimit.vb
This is the form we just talked about. It limits the display of library items from the
NamedItemtable.- PatronLimit.vb
Just in case patrons are flocking to your library, this form lets you limit the records loaded from the
Patrontable.- PublisherLimit.vb
This form limits records from the
Publishertable.
Although most record editors provide a full editing experience through the ListEditRecords form, some are subordinate to other editor forms. Keywords and subjects are a good example. Though each has its own independent tables (Keyword and Subject), I chose to allow editing of them through the form that edits individual library items, the NamedItem form (added later). That form manages all interactions between the Keyword and Subject records and the NamedItem table, all through the intermediate many-to-many tables ItemKeyword and ItemSubject.
The KeywordAdd and SubjectAdd forms provide a simple text entry form for a single keyword or subject. Include each of these forms now in the project:
KeywordAdd.vb
SubjectAdd.vb
As we’ll see later, the NamedItem form is one of the most complex forms added to the Library Project so far. It manages everything about a generalized library item (such as a book). Each item can have multiple copies, authors, keywords, subjects, and so on. It’s simply too much editing power to include on a single form. We already added two of the subordinate forms: KeywordAdd and SubjectAdd. Let’s add five additional support forms:
- AuthorAddLocate.vb
This form presents a wizard-like interface that lets the user add a new or existing author record to an item. Authors in the Library program is a generic term that refers to authors, editors, illustrators, performers, and so on. This form’s three wizard steps let the user (1) indicate the type of author via the
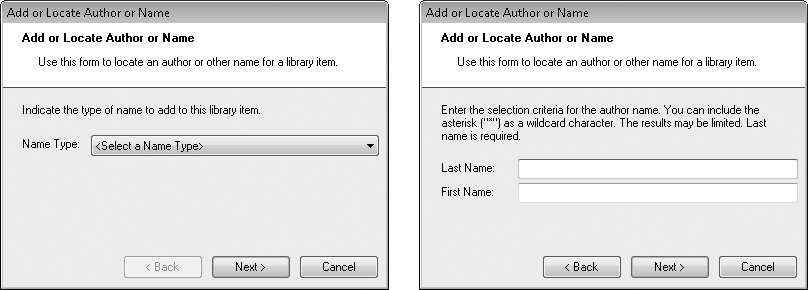
CodeAuthorTypetable; (2) perform a search for an existing author by name; and (3) select from a list of matching author names. If the desired author isn’t yet in the database, the last step allows a new author to be added. Figure 12-4 shows the first two of these steps.Most of the logic is controlled through the Next button’s event handler. The code in this routine varies based on the current wizard panel in view (as indicated by the
ActivePanelclass-level variable). Here’s the code that runs when the user clicks Next after selecting the author type:' ----- Make sure a name type is selected. If (CInt(CType(NameType.SelectedItem, _ ListItemData)) = −1) Then MsgBox("Please select a name type from the list.", _ MsgBoxStyle.OkOnly Or MsgBoxStyle.Exclamation, _ ProgramTitle) NameType.Focus( ) Return End If ' ----- Move to the search panel. ActivePanel = PanelCriteria SecondPanel.Visible = True FirstPanel.Visible = False ActBack.Enabled = True LastName.Focus( )Did you see the first logic line in that code? We used the
CIntconversion function to get anItemDatavalue from a list item. This calls our overloadedCTypeoperator in theListItemDataclass.- PublisherAddLocate.vb
This form is just like the
AuthorAddLocateform, but focuses on publishers. Its wizard has only two steps since publishers are not grouped by type. It locates or adds records in thePublishertable. When it’s time to add a publisher to an item, the item editor form calls the publicPublisherAddLocate.PromptUserfunction. This function returns the ID of the selected publisher record, or−1to abort the adding of a publisher. A return value of−2clears any previously selected publisher ID.- SeriesAddLocate.vb
This form is similar to the
PublisherAddLocateform, but it prompts for records from theCodeSeriestable.- ItemAuthorEdit.vb
Once an author has been added to an item, the only way to change it to a different author is to remove the incorrect author, and add the correct author separately through the
AuthorAddLocateform. But if the user simply selected the wrong author type (such as “Editor” instead of “Illustrator”), it’s kind of a burden to search for the author name again just to change the type. TheItemAuthorEditform lets the user modify the type for an author already added to an item. It modifies theItemAuthor.AuthorTypedatabase field.- ItemCopy.vb
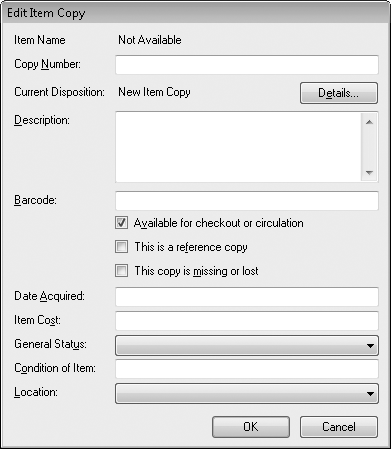
A library will likely have multiple copies of a particular book, CD, or other item. In the Library program, this means that each
NamedItemrecord can have more than oneItemCopyrecord attached to it. Each copy is edited through theItemCopyform (see Figure 12-5).Although this code does not inherit from
BaseCodeFormas other record editors do, it still has many of the features of those forms, including aSaveFormDataroutine that writes records to the database.One interesting thing that this form does have is support for reading bar codes. Many bar code readers act as a “wedge,” inserting the text of a scanned bar code into the keyboard input stream of the computer. Any program monitoring for bar codes simply has to monitor normal text input.
Bar code wedge scanners append a carriage return (the Enter key) to the end of the transmitted bar code. This lets a program detect the end of the bar code number. But in most of the Library program’s forms, the Enter key triggers the OK button and closes the form. We don’t want that to happen here. To prevent this, we’ll add some code to this form that disables the auto-click on the OK button whenever the insertion point is in the Barcode text entry field.
INSERT SNIPPET
Insert Chapter 12, Snippet Item 5.
Private Sub RecordBarcode_Enter( _
      ByVal sender As Object, ByVal e As System.EventArgs) _
      Handles RecordBarcode.Enter
   ' ----- Highlight the entire text.
   RecordBarcode.SelectAll(  )

   ' ----- Don't allow Enter to close the form.
   Me.AcceptButton = Nothing
End Sub

Private Sub RecordBarcode_Leave( _
      ByVal sender As Object, ByVal e As System.EventArgs) _
      Handles RecordBarcode.Leave
   ' ----- Allow Enter to close the form again.
   Me.AcceptButton = ActOK
End Sub

Private Sub RecordBarcode_KeyPress(ByVal sender As Object, _
      ByVal e As System.Windows.Forms.KeyPressEventArgs) _
      Handles RecordBarcode.KeyPress
   ' ----- Ignore the enter key.
   If (e.KeyChar = ChrW(Keys.Return)) Then e.Handled = True
End Sub
With this code, when the user presses the Enter key in the Barcode field manually, the form will not close. But it’s a small price to pay for bar code support.
Twelve of the forms added in this chapter inherit directly from the BaseCodeForm class. Add them to the project as I review each one.
- Author.vb
The
Authorform edits records in theAuthordatabase table. As a typical derived class ofBaseCodeForm, it overrides many of the public elements of its base class. Two overrides that we haven’t yet used in earlier chapters are theUsesSearchandSearchForRecordmethods. These allow the user of theListEditRecordsform to limit the displayed authors through the prompting of theAuthorLimitform described earlier in this chapter. (TheFillListWithRecordsoverride also callsSearchForRecordto prompt the user for the initial list of authors to display.)In
SearchForLimit, the call toAuthorLimit.PromptUserreturns a comma-separated string in “Last, First” format.' ----- Prompt the user for the limited author name. exceededMatches = False userLimit = (New AuthorLimit).PromptUser( ) If (userLimit = "") Then Return
The user can include the asterisk (
*) character as a wildcard in the first or last name parts. The asterisk has become a common character to use in all types of wildcard searches. Unfortunately, it is not supported in SQL ServerSELECTstatements. SQL Server uses the percent (%) character for a wildcard instead (as do many other SQL-compliant database platforms). AsSearchForLimitextracts the first and last names, it ensures that the right wildcard character is used.' ----- Use the limits to help prepare the search text. limitLast = Trim(GetSubStr(userLimit, ",", 1)) limitFirst = Trim(GetSubStr(userLimit, ",", 2)) If ((limitLast & limitFirst) = "") Then Return If (InStr(limitLast, "*") = 0) Then limitLast &= "*" If (InStr(limitFirst, "*") = 0) Then limitFirst &= "*" limitLast = Replace(limitLast, "*", "%") limitFirst = Replace(limitFirst, "*", "%")
This code uses our custom
GetSubStrroutine already added to theGeneralmodule. Once the name parts are extracted, the Visual BasicReplacefunction replaces all instances of*with%. You’ll find similar code in the other record editors that allow limits on the list of records, such as thePublisherform added later.While you have the source code open for this form, zoom up to the top. There, you’ll find an interesting
Importsstatement:Imports MVB = Microsoft.VisualBasic
Normally,
Importsis followed immediately by a namespace. This variation includes theMVB =prefix, which defines a shortcut for theMicrosoft.VisualBasicnamespace for code in this file. With Visual Basic importing so many namespaces into an existing class that also defines a lot of public members, there are bound to be member name conflicts. In this case, the conflict is theLeftform member. Since this source code for theAuthorform sees everything through the prism of that form, when you include the keywordLeftin your logic, the code naturally assumes that you mean the form’sLeftproperty, which sets the left position of the form. The problem is thatLeftis also a common string manipulation function that extracts the leftmost characters from a larger string:smallerString = Left(largerString, 5)
In a form, this code generates an error since it thinks
LeftmeansMe.Left. To use the string version ofLeft, you have to prefix it with its namespace:smallerString = Microsoft.VisualBasic.Left( _ largerString, 5)
The special
Importsstatement lets us substitute a shorter name for the rather longMicrosoft.VisualBasicnamespace:smallerString = MVB.Left(largerString, 5)
You will find a few instances of such code in this and other forms that include the MVB shortcut.
The
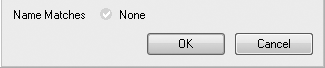
Authorform has one more notable element. A Name Matches label appears near the bottom of the form, as shown in Figure 12-6.This field helps the user avoid adding the same author to the database twice. As changes are made to the Last Name and First Name fields, the Name Matches field gets refreshed with matching author names found in the
Authortable. TheRefreshMatchingAuthorsroutine counts the number of matching authors through the following code:sqlText = "SELECT COUNT(*) AS TheCount " & _ "FROM Author WHERE LastName LIKE " & _ DBText(Trim(RecordLastName.Text)) If (Trim(RecordFirstName.Text) <> "") Then sqlText &= " AND FirstName LIKE " & _ DBText(MVB.Left(Trim( _ RecordFirstName.Text), 1) & "%") End If matchCount = CInt(ExecuteSQLReturn(sqlText))This is similar to the lookup code in the
SearchForLimitroutine, but it only adds a wildcard to the first name before doing the search.- CodeAuthorType.vb
The
CodeAuthorTypeform edits records in the relatedCodeAuthorTypetable. Who knew?- CodeCopyStatus.vb
This form edits records in the
CodeCopyStatusdatabase table.- CodeLocation.vb
As expected, this form edits records in the
CodeLocationtable. Once you’ve added at least one record to that table, you’ll be able to set the default location for the database. I’ll discuss this again a little later in this chapter.- CodeMediaType.vb
The
CodeMediaTypeform, which edits records in theCodeMediaTypetable, includes a few more fields than the other “Code” table editors. Most of the fields accept numeric input. Although I do a final check for valid numeric data just before writing the record to the database, I try to prevent any non-numeric data from showing up in the first place by restricting the acceptable keystrokes. For instance, theRecordCheckoutDaystext field’sKeyPressevent includes this code:' ----- Only allow digits and backspaces. If (e.KeyChar = vbBack) Or _ (IsNumeric(e.KeyChar)) Then Return e.Handled = True
Setting the
e.Handledproperty toTruestops Visual Basic from doing anything else (pretty much) with the entered key. It’s a quick and easy way to dispose of a user-entered keystroke.- CodePatronGroup.vb
This form edits records in the
CodePatronGrouptable.- CodeSeries.vb
This editor manages records in the
CodeSeriestable. Earlier I mentioned how series names and keywords are subordinate to named items. But it made sense to me to also provide direct management for series names, in case you wanted to build up a common list before adding individual library items. So, this form performs double duty: you can access it as a standard record editor through theListEditRecordsform, and it’s also used for a specific named item through the not-yet-addedNamedItemform.When editing item-specific series names, the user first gets to search for a series name by typing it. Since I don’t want the user to have to retype the series name again in this editor form, I wanted to pass the typed series name into the
CodeSeriesform, but none of the overridden public methods supported this. So, we’ll need to add a new method that will accept the typed name. TheAddRecordmember already overrides the base function of the same name.Public Overrides Function AddRecord( ) As Integer ' ----- Add a new record. ActiveID = −1 PrepareFormFields( ) Me.ShowDialog( ) If (Me.DialogResult = Windows.Forms. _ DialogResult.OK) Then _ Return ActiveID Else Return −1 End FunctionLet’s add an overload to this function that includes a string argument. The caller will pass the originally typed text to this argument. We’ll assign it to the
RecordFullNamecontrol’sTextproperty so that it shows up automatically when the form opens.INSERT SNIPPET
Insert Chapter 12, Snippet Item 6.
Public Overloads Function AddRecord( _
      ByVal seriesText As String) As Integer
   ' ----- Add a new record, but use a starting value
   '       previously entered by the user.
   ActiveID = −1
   PrepareFormFields(  )
   RecordFullName.Text = seriesText
   Me.ShowDialog(  )
   If (Me.DialogResult = Windows.Forms.DialogResult.OK) Then _
      Return ActiveID Else Return −1
End Function
Yes, we could have used some name other than
AddRecordfor this function and avoided adding an overload. But it’s nice to keep things consistent.- Holiday.vb
This form manages the records in the
Holidaytable. In a later chapter, we’ll add a cache of holidays within the program for quick access.- Patron.vb
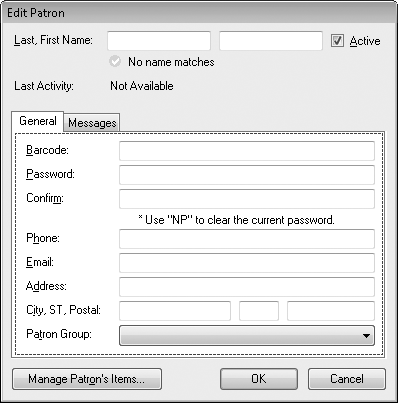
The
Patronform provides editing services for records in thePatrontable, and appears in Figure 12-7.This form includes a
TabControlto help break up the number of fields the user has to experience at once. If you have ever used the tab control included with Visual Basic 6.0, you’ll quickly appreciate the .NET replacement. It manages all of the panel-switching logic automatically when the user selects a different tab. Each panel is a separateTabPageclass instance. In your code, forcing the tab control to display a different tab is as easy as assigning the appropriateTabPageinstance to theTabControlobject’sSelectedTabproperty, as with this code line from theValidateFormDatafunction:TabPatron.SelectedTab = TabGeneral
Although this form looks quite complex, it’s made up almost entirely of code we’ve seen in other forms. Beyond the standard overrides of
BaseCodeFormmembers, this form includes bar code scanning support borrowed from theItemCopyform, password logic stolen from theUserNameform, and name-matching code similar to that used in theAuthorform.I included a Manage Patron’s Items button on the form, but we won’t add its logic until a later chapter. An extra public function,
EditRecordLimited, becomes important at that time.- Publisher.vb
The
Publisherform lets the user edit the records in thePublishertable. It’s a pretty simple form with only two data entry fields. A Status field indicates how manyNamedItemrecords link to this publisher. A small button appears to the right of the text entry field for the publisher’s web site. This is the “show me the web site” button, and when clicked, it brings up the supplied web page in the user’s default browser. To enable this button, add the following code to theShowWebbutton’sClickevent handler.INSERT SNIPPET
Insert Chapter 12, Snippet Item 7.
' ----- Show the web site displayed in the field.
Dim newProcess As ProcessStartInfo

On Error Resume Next
If (Trim(RecordWeb.Text) = "") Then Return
newProcess = New ProcessStartInfo(Trim(RecordWeb.Text))
Process.Start(newProcess)
- SystemValue.vb
This code editor handles items in the
SystemValuetable. Although we will connect it to a link on the main Library form in this chapter, we will change this access method in a future chapter.
Well, that’s 11 of the 12 derived forms. The last one is the NamedItem form, shown in Figure 12-8.
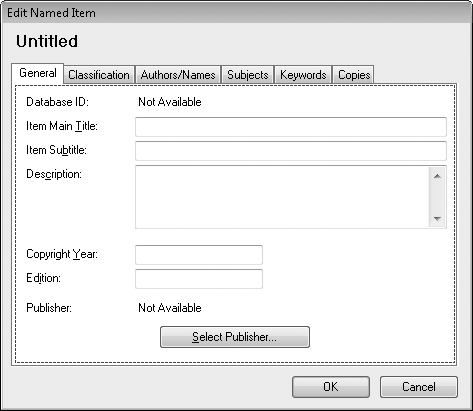
The NamedItem form is the largest and most complex of the forms that derive from BaseCodeForm. It edits primary library items recorded in the NamedItem database table. It’s complex because it also directly or indirectly manages records in other subordinate tables: ItemAuthor, ItemCopy, ItemKeyword, ItemSubject, and indirectly, Author, Keyword, Publisher, and Subject.
All of the fields on the General and Classification tabs are basic data entry fields that flow directly into the NamedItem table, just as is done with the other record-editing forms. The Publisher and Series fields use separate selection forms (PublisherAddLocate and SeriesAddLocate) to obtain the ID values stored in NamedItem. Here’s the code that looks up the publisher:
' ----- Prompt the user.
newPublisher = (New PublisherAddLocate).PromptUser(  )
If (newPublisher = −1) Then Return

' ----- Check to clear the publisher.
If (newPublisher = −2) Then
   RecordPublisher.Text = "Not Available"
   PublisherID = −1
   Return
End If
The other four tabs—Authors/Names, Subjects, Keywords, and Copies—manage subordinate records. The code is pretty consistent among the four different tabs, so I’ll limit my comments to the Authors/Names tab (see Figure 12-9).

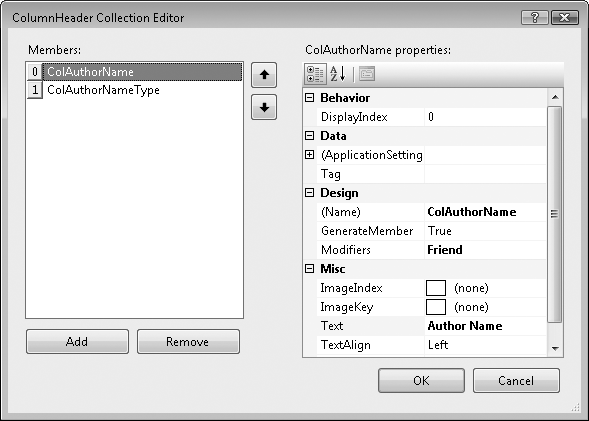
The controls on this tab are quite similar to those on the ListEditRecords form; they exist to manage a set of records in a table. In this case, it’s the ItemAuthor table. For the presentation list, I chose to use a ListView control instead of a standard ListBox control. By setting a ListView control’s View property to Details, setting its FullRowSelect field to True, and modifying its Columns collection (see Figure 12-10), you can quickly turn it into a multicolumn listbox.
When you add an item to this list, you also have to add “subitems” to have anything appear in all but the first column.
Dim newItem As Windows.Forms.ListViewItem = _
   AuthorsList.Items.Add("John Smith")
newItem.SubItems.Add("Illustrator")
The Add button brings up the AuthorAddLocate form, whereas the Properties button displays the ItemAuthorEdit form instead.
Before any of the subordinate records can be added, the “parent” record must exist in the database. That is because the “child” records include the ID number of the parent record, and without a parent record, there is no parent ID number. If you look in each of the Add button routines on this form, you will find code such as the following:
' ----- The record must be saved first.
If (ActiveID = −1) Then
   ' ----- Confirm with the user.
   If (MsgBox("The item must be saved to the database " & _
      "before authors or names can be added. Would you " & _
      "like to save the record now?", _
      MsgBoxStyle.YesNo Or MsgBoxStyle.Question, _
      ProgramTitle) <> MsgBoxResult.Yes) Then Return

   ' ----- Verify and save the data.
   If (ValidateFormData(  ) = False) Then Return
   If (SaveFormData(  ) = False) Then Return
End If
If this is a brand-new NamedItem record (ActiveID = −1), this code will save it before allowing the user to add the subordinate record. Any invalid data that prevents the record from being saved will be caught in the call to ValidateFormData.
Actually, the calls to both ValidateFormData and SaveFormData are the same ones that occur when the user clicks on the OK button. Normally, that triggers a return of the new record’s ID number to the calling form. But what if SaveFormData gets called by adding an author, but then the user clicks the Cancel button (which normally returns a −1 value to indicate “no record added”)? To avoid that, the SaveFormData function sets a class-level variable named SessionSaved:
SessionSaved = True
This flag is cleared when the form first opens, but is set to True pretty much anytime a subordinate record changes. The NamedItem form’s overridden AddRecord and EditRecord functions check for this flag before returning to the calling form.
If (Me.DialogResult = Windows.Forms.DialogResult.OK) Or _
   (SessionSaved = True) Then Return ActiveID Else Return −1
There’s lots of other interesting code in the NamedItem form. But at nearly 1,400 lines (not counting the related designer code), I’ll have to let you investigate it on your own.
OK, take a breath. That was a lot of code to go through. But if you run the program now, you won’t see any difference at all. We still need to connect all of the record editors to the main form. They all connect through the LinkLabel controls on the main form’s Administration panel (PanelAdmin). We need to add 12 LinkClicked event handlers to access all of the new and various forms. Go ahead and add them now to the MainForm class.
INSERT SNIPPET
Insert Chapter 12, Snippet Item 8.
Each of the LinkClicked event handlers is almost a mirror image of the other, except for a few object instance names here and there. Here’s the code that handles a click on the Publisher link label:
Private Sub AdminLinkPublishers_LinkClicked( _
      ByVal sender As System.Object, ByVal e As _
      System.Windows.Forms.LinkLabelLinkClickedEventArgs) _
      Handles AdminLinkPublishers.LinkClicked
   ' ----- Make sure the user is allowed to do this.
   If (SecurityProfile(LibrarySecurity.ManagePublishers) = _
         False) Then
      MsgBox(NotAuthorizedMessage, MsgBoxStyle.OkOnly Or _
         MsgBoxStyle.Exclamation, ProgramTitle)
      Return
   End If

   ' ----- Let the user edit the list of publishers.
   ListEditRecords.ManageRecords(New Library.Publisher)
   ListEditRecords = Nothing
End Sub
After doing a quick security check, the code calls up the standard ListEditRecords form, passing it an instance of the record editor it is to use.
There are still a few inactive links on the Administration panel that we’ll enable in later chapters.
The program is now ready to run with all of its new features in place. Since we added only administrative features, you must click the Login button in the upper-right corner of the main form before gaining access to the Administration panel and its features. Unless you changed it, your login username is “admin” with no password.
Although you can now run the program and access all of the record editors, you won’t be able to add new item copies until you set a default location. To set the location:
Add at least one location through the Locations link on the Administration panel.
Obtain the ID number of the
CodeLocationrecord you want to be the default. You can use SQL Server Management Studio Express’s query features to access the records in this table. If this is the first time you’ve added records to theCodeLocationtable, the first item you add will have an ID value of1.Back in the Library program, edit the
SystemValuetable through the System Values link on the Administration panel.Add or modify the “DefaultLocation” system value, setting its value to the ID number of the default location record.
Alternatively, you can update the DefaultLocation record in the SystemValue table directly using SQL Server Management Studio Express. If the ID of the location to use is 1, use this SQL statement to make the change:
UPDATE SystemValue
   SET ValueData = '1'
   WHERE ValueName = 'DefaultLocation'
In a future chapter, we’ll add a more user-friendly method to update this default location.
Speaking of user-friendly, we’re about to enter the not-user-friendly but logic-friendly world of text structured data: XML.