Because computers are computers and people are people, they generally have different requirements when it comes to getting their data into a usable format. XML is an attempt to arrange data in a structure that is usable for both people and software.
XML has really come into vogue in recent years, but its roots are quite old. It’s derived from SGML (Standard Generalized Markup Language), as is HTML (cousins!). SGML in turn came from GML (Generalized Markup Language), a “metalanguage” (a language that describes another language) designed by IBM back in the 1960s. So, blame IBM if you want to, but either way, you will come in regular contact with XML as you develop .NET applications.
I might as well tell you right from the start: either you will love XML, or you will hate it, but probably both. It’s a strange beast, this XML, as you would expect from any acronym that takes letters from the middle of the words it represents (“eXtensible Markup Language”). XML represents an alphabet of data manipulation technologies, an alphabet which strangely has seven Xs. But enough of the teasing; let’s extend our understanding of this basic .NET technology.
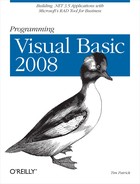
XML is nothing more than a data format that is both human-readable and machine-readable. Have you ever tried to open a Microsoft Word document with Notepad? Good luck (see Figure 13-1). Although you can usually sift out the main text of the document, most of what you see is gobbledygook. That’s because it is in a proprietary binary format. It’s proprietary because, frankly, you shouldn’t be poking your fingers in there. That’s what Microsoft Word is for. And it’s binary because you can store a lot of information conveniently in a little bit of disk space. With such a file, I can store my data any way I choose. If fact, I can write my data out willy-nilly, and not have to get permission from anyone, because it’s mine, mine, all mine.
Binary files are great for storing any kind of data: numbers, strings, base-64 encrypted images, streams of networking data chatter, anything. The problem is that unless you know the exact structure you used to write it out, there is little chance of ever getting the data back. This is good if your goal is secrecy, but if you ever need to share that data with another person or program, or worse yet, debug the output from your errant program, you’re in for a tough time. If one little byte gets messed up, the whole file might be useless.
There are, of course, other ways to store your data. For files that store records of data, tab-delimited and CSV (comma-separated value) files provide a convenient transfer medium, in a more human-friendly format. For instance, consider this data from Microsoft’s sample “Northwind Traders” database, stored as comma-separated values:
ProductID,ProductName,SupplierID,Category,UnitPrice,Available
"1","Chai","652","Beverages","$18.00","Yes"
"2","Chang","9874","Beverages","$19.00","No"
"3","Aniseed Syrup","9874","Condiments","On Sale","Yes"
Now that’s better. This data is pretty easy to understand. Each piece of data is grouped by commas, and the first row indicates what each column contains. And the best part is that many programs already know how to read files in this format. If you save this data in a text file with a .csv extension, and open it in Microsoft Excel, the data automatically appears in columns.
But it could be better. For instance, what do those “652” and “9874” values refer to anyway? And is it correct that the unit price of Aniseed Syrup is “On Sale?” Sure, I can load this data into my program, but can I do anything with it? At least it’s an easy read for both people and computer programs, and isn’t that what I said XML was all about?
Well, yes. Although XML includes rules and features that make it more flexible than your average text datafile, it’s not that different. For all the hype, XML is just a way of storing data. Any of the fancy-schmancy XML traits discussed in this chapter could be performed easily with data stored in simpler text or binary proprietary formats. In fact, it is often quicker and more convenient to develop using a proprietary format, because your data will contain exactly and only what you need, without any fluff.
That being said, XML does include many aspects that make it a strong contender when considering a data format:
- It’s straightforward to read
Each data element includes a type of title. Good titles make for good reading.
- It’s easy to process
All data includes starting and ending tags, so a program can process the data without much effort. And one bad element won’t necessarily ruin the whole file.
- It’s flexible
You can store any type of data in XML. It is just a text file, after all. If you have a certain XML file format used in version 1 of your program, and you add features to it in version 2, you can do it in a way that still allows version 1 programs to use version 2 files without breaking.
- It’s self-describing
XML includes several features that let you describe the content of a given XML file. Two of the most popular are DTD (Document Type Definition) and XSD (XML Schema Definition). You use these tools to indicate exactly what you expect your datafile to contain. Additionally, XML allows you to embed comments in the content without impacting the actual data.
- It’s self-verifying
Tools are available, including tools in .NET, which can confirm the integrity and format of an XML file by comparing the content to the associated DTD or XSD. This lets you verify a file before you even process it.
- It’s an open standard
XML has gained widespread acceptance, even across divergent computer platforms.
- It’s built into .NET
This is going to be the biggest reason for using it. In fact, you won’t be able to get away from XML in .NET, even if you try. It’s everywhere.
But there’s bad news, too:
- It’s bulky
XML content contains a lot of repetitive structural information, and generally lots of whitespace. You could abbreviate many of the structure elements, and remove all the whitespace (XML doesn’t require it), but that would remove the human-readable aspects of the data. Some platforms, such as cell phone browsers, like to keep data small. XML is anything but small.
- It’s text
Wait a minute, this is a good thing—most of the time. Sometimes you just need to store binary data, such as pictures. You can’t really store true binary data in an XML file without breaking one of the basic rules about XML: text only! Often, binary data is encoded in a text-like format, such as base-64 (which uses readable characters to store binary data).
- It’s inefficient
This comes from having data in a verbose semi-human-readable format, rather than in a terse, compact binary form. It simply takes longer for a computer to scan text looking for matching angle brackets than it does to move a few bytes directly from a lump of binary data into a location in memory.
- It’s human-readable
There are not many secrets in an XML file. And although you could encrypt the data elements in the file, or the entire file for that matter, that would kind of defeat the purpose of using XML.
- It’s machine-readable
If you are expecting the average Joe to pick up an XML printout and read it in his easy chair, think again. XML is not appropriate for every type of datafile.
- It’s not immune to errors
As I keep repeating, XML is just a text file. If you open it in Notepad and let your five-year-old pound on the keyboard, the content will have problems. XML is not a panacea; it’s just a useful file format.
Before we look at some actual XML, you need to know The Rule. You must obey The Rule with every piece of XML text you write.
That’s it. Don’t forget it. Obey it. Live it. I’ll explain what it means later.
There’s no better way to learn about XML than to start looking at it. If you’ve never used XML, but you’ve written some HTML, this should look somewhat familiar.
Here’s a simple chunk of XML for you to enjoy:
<?xml version="1.0"?>
<hello>
   <there>
      <!-- Finally, real data here. -->
      <world target="everyone">think XML</world>
      <totalCount>694.34</totalCount>
      <goodbye />
   </there>
</hello>
Hey, I didn’t say it was going to be interesting. As I mentioned before, it’s just data, but it is useful data, and here’s why:
- It’s obviously XML
This is clear from the first line, which always starts with
<?xml. . . . This line also indicates the XML version number, which tells XML processing routines (parsers) to adjust behavior if needed. That’s foresight.- It’s structured
XML is a hierarchical data structure. That is, you can have data elements embedded inside other data elements to any depth you want. Every element is bounded by a set of tags. In this sample, the tags are
hello,there,world,totalCount, andgoodbye. Tags always appear inside <angle brackets>, and always appear in pairs, as in<hello>...</hello>. (This is where The Rule, “If you open it, close it,” comes in.) Don’t forget the/just before the tag name in the closing bracket. This syntax lets you organize your data into specifically arranged named units. For tag pairs that have nothing in between them, you can use the shortened syntax<tagname/>, as I did with thegoodbyetag. By the way, XML tags are case-sensitive, so type carefully.- It’s readable
It’s human-readable, thanks to all the whitespace, although you could remove it all and still have XML. It’s also computer-readable because of the consistent use of tags.
- It’s a single unit of data
All XML files have a single root element in which all other elements must appear. In the sample,
<hello>is the root element. Once that element is closed (through its ending tag) you can’t add any additional elements. Nope. Nada.- It’s got comments
See that
<!--...-->line? That’s a comment. You can stick comments here and there just like they were free-floating tags.- It’s got attributes
XML supports two varieties of data: real data and attributes. Real data values come between the innermost tag pairs, as with
think XMLand694.34in the sample. Attributes provide extended information about the tags themselves. I included an attribute namedtargetin theworldelement. The content of all attributes must be in quotes. I could have made this attribute a subelement instead, and a lot of people do. There is disagreement among programmers as to when data should be an element or an attribute. Let your conscience be your guide.
So, there you have it—some clean, clear XML data.
Let’s see what that comma-delimited data from Northwind Traders that I listed previously could look like in XML.
<?xml version="1.0"?>
<productList>
   <supplier ID="652" fullName="Beverages R Us">
      <product ID="1" available="Yes">
         <productName>Chai</productName>
         <category>Beverages</category>
         <unitPrice>18.00</unitPrice>
      </product>
   </supplier>
   <supplier ID="9874" fullName="We Sell Food">
      <product ID="2" available="No">
         <productName>Chang</productName>
         <category>Beverages</category>
         <unitPrice>19.00</unitPrice>
      </product>
      <product ID="3" available="Yes" onSale="true">
         <productName>Aniseed Syrup</productName>
         <category>Condiments</category>
         <unitPrice>12.00</unitPrice>
      </product>
   </supplier>
</productList>
Moving the data to XML has greatly increased the size of the content. But with an increase in size comes an increase in processing value. I was immediately able to get some benefit from the hierarchical structure of XML. In the original data, supplier was just another column. But in the XML version, all the data is now grouped into supplier sections, which makes sense (at least, if that is how I was planning to use the data).
You can also see that I followed The Rule. Every opening tag has a matching closing tag. Whatever you do, don’t forget The Rule.
Now, you’re saying to yourself, “Tim, I could have grouped the data by supplier once I loaded the comma-delimited data into my program.” And to that I say, “You’re right.” I told you that XML was just another data format. By itself, the XML content is not all that sexy. It’s really the tools that you use with your XML data that make it zoom. Because XML uses a consistent yet generic structure to manage data, it was a snap to develop tools that could process consistent yet generic data in ways that look interesting and specific.
One of the tools used with XML is XSLT, which stands for XSL Transformations (XSL stands for eXtensible Stylesheet Language). XSLT is a hard-to-use scripting language that lets you transform some XML data into whatever other data or output format you want. It’s just one of a handful of XSL-related languages created to manipulate XML data in complex ways. Ready for some hands-on XSL fun? Take the useful chunk of XML listed previously (the <productList> sample), and replace the first ?xml line with the following two lines:
<?xml version="1.0"?>
<?xml-stylesheet type="text/xsl" href="hello.xsl"?>
Save all of that beautiful XML text to a file on your desktop as hello.xml. Next, put the following XSLT script into another file on your desktop named hello.xsl. (Notice that I broke one line with a special marker so that the content could fit in this book. Please don’t really break the comma-separated list on that line in the file.)
<?xml version="1.0"?>
<xsl:stylesheet
      xmlns:xsl="http://www.w3.org/1999/XSL/Transform"
      version="1.0">
   <xsl:template match="/">
     <xsl:text>
     ProductID,ProductName,SupplierID,Category,
     UnitPrice,Available
     </xsl:text>
     <BR/>
     <xsl:apply-templates/>
   </xsl:template>
   <xsl:template match="supplier">
     <xsl:variable name="supID" select="@ID"/>
     <xsl:for-each select="product">
       "<xsl:value-of select="@ID"/>",
       "<xsl:value-of select="productName"/>",
       "<xsl:value-of select="$supID"/>",
       "<xsl:value-of select="category"/>",
       "<xsl:choose>
         <xsl:when test="@onSale='true'">On Sale</xsl:when>
         <xsl:otherwise>
           $<xsl:value-of select="unitPrice"/>
         </xsl:otherwise>
       </xsl:choose>",
       "<xsl:value-of select="@available"/>"
       <BR/>
     </xsl:for-each>
   </xsl:template>
</xsl:stylesheet>
UnitPrice,Available
</xsl:text>
<BR/>
<xsl:apply-templates/>
</xsl:template>
<xsl:template match="supplier">
<xsl:variable name="supID" select="@ID"/>
<xsl:for-each select="product">
"<xsl:value-of select="@ID"/>",
"<xsl:value-of select="productName"/>",
"<xsl:value-of select="$supID"/>",
"<xsl:value-of select="category"/>",
"<xsl:choose>
<xsl:when test="@onSale='true'">On Sale</xsl:when>
<xsl:otherwise>
$<xsl:value-of select="unitPrice"/>
</xsl:otherwise>
</xsl:choose>",
"<xsl:value-of select="@available"/>"
<BR/>
</xsl:for-each>
</xsl:template>
</xsl:stylesheet>I told you it was hard to use, and even harder to look at. OK, now for the show. I have Internet Explorer installed on my system, but this should work with most current browsers. Open the hello.xml file in your browser, and voilà, the following beautifully formatted text should appear:
ProductID,ProductName,SupplierID,Category,UnitPrice,Available
"1","Chai","652","Beverages","$18.00","Yes"
"2","Chang","9874","Beverages","$19.00","No"
"3","Aniseed Syrup","9874","Condiments","On Sale","Yes"
Now that’s more like it. XML and XSLT together have made this advance in data technology possible. (I did cheat a little in this example. You will notice the <BR/> entries in the XSLT script that don’t appear in the final output. I added these just to make it look right in your browser.) But seriously, although I was able to generate a comma-separated data set with XSLT, more common tasks for XSLT include generating nicely formatted HTML based on XML data, or generating a new XML document with a specific alternative view of the original data. How does it work? Basically, the <xsl:template> elements tell the parser to look for tags in the XML document that match some pattern (such as “supplier”). When it finds a match, it applies everything inside the <xsl:template> tags to that matching XML tag and its contents. The pattern specified in the “match” attributes uses an XML technology called XPath, a system to generically search for matching tags within your XML document.
Sounds confusing? Well, it is, and don’t get me started on how long it took to write that short little XSLT script. XSLT scripting is, blissfully, beyond the scope of this book. Of course, tools are available to make the job easier. But XSLT is useful only if the XML data it manipulates is correct. You could write an XSL Transformation to report on data inconsistencies found in an XML document, but it won’t work if some of the tags in your document are misspelled or arranged in an inconsistent manner. For that, you need another advancement in XML technology: XSD.
XSD (XML Structure Definitions) lets you define the schema—the “language” or “vocabulary”—of your particular XML document. Remember, XML is a wide-open generic standard; you can define the tags any way you want and nobody will care, at least until you have to process the tags with your software. If they aren’t correct, your processing will likely fail. XSD lets you define the rules that your XML document must follow if it is to be considered a valid document for your purposes. (DTD, or Document Type Definition, is a similar, though older, technology. It’s widely support by XML tools, but it is not as flexible as XSD. There are also other schema definition languages similar to XSD, but since XSD is built right into .NET, we’ll focus on that.)
XSD schemas are every bit as endearing as XSLT scripts. Let’s create an XSD for our original sample <productList> XML listed previously. First, we need to change the top of the XML to let it know that an XSD schema file is available. Change this:
<?xml version="1.0"?>
<productList>
to this:
<?xml version="1.0"?>
<productList xmlns="SimpleProductList"
      xmlns:xsi="http://www.w3.org/2001/XMLSchema-instance"
      xsi:noNamespaceSchemaLocation="hello.xsd">
These directives tell the XML parser to look in hello.xsd for the schema. They also define a namespace; more on that later. The hello.xsd file contains the following schema:
<xs:schema xmlns:xs="http://www.w3.org/2001/XMLSchema"
    targetNamespace="SimpleProductList">
  <xs:element name="productList" type="ProductListType"/>

  <xs:complexType name="ProductListType">
    <xs:sequence>
      <xs:element name="supplier" type="SupplierType"
        maxOccurs="unbounded"/>
    </xs:sequence>
  </xs:complexType>

  <xs:complexType name="SupplierType">
    <xs:sequence>
      <xs:element name="product" type="ProductType"
        maxOccurs="unbounded"/>
    </xs:sequence>
    <xs:attribute name="ID" type="xs:integer"/>
    <xs:attribute name="fullName" type="xs:string"/>
  </xs:complexType>

  <xs:complexType name="ProductType">
    <xs:sequence>
      <xs:element name="productName" type="xs:string"/>
      <xs:element name="category" type="xs:string"/>
      <xs:element name="unitPrice" type="xs:decimal"/>
    </xs:sequence>
    <xs:attribute name="ID" type="xs:integer"/>
    <xs:attribute name="available" type="YesOrNoType"/>
    <xs:attribute name="onSale" type="xs:boolean"/>
  </xs:complexType>
  <xs:simpleType name="YesOrNoType">
    <xs:restriction base="xs:string">
      <xs:enumeration value="Yes"/>
      <xs:enumeration value="No"/>
    </xs:restriction>
  </xs:simpleType>
</xs:schema>
It looks nasty, doesn’t it? Actually, it’s more straightforward than XSLT. Basically, the schema says that for each element (or “tag” or “node”) in my XML document, here are the subelements and attributes they contain, and the data type of each of them. You can even create your own pseudodata types (actually, limiting factors on existing data types), as I did with the YesOrNoType data type, which limits the related value to the strings Yes and No.
You can look at the XML file with the attached XSD schema in your browser, but it wouldn’t be all that interesting. It just shows you the XML. But schemas will be useful when you need to assess the quality of XML data coming into your software applications from external sources.
The product list XML shown earlier is nice, but someone else could come up with a product list document that is just as nice, but with different naming and formatting rules. For instance, someone might create a document that looks like this:
<?xml version="1.0"?>
<allProducts>
   <vendor ID="652" vendorName="Beverages R Us">
      <item ID="1" available="Yes">
         <itemName>Chai</itemName>
         <group>Beverages</group>
         <priceEach>18.00</priceEach>
      </item>
   </vendor>
</allProducts>
All of the data is the same, but the tags are different. Such a document would be incompatible with software written to work with our original document. Running the document through our XSD would quickly tell us that we have a bogus data set, but it would be nicer if something told us that from the start. Enter namespaces. Namespaces provide a convenient method to say, “This particular tag in the XML document uses this XSD-defined language.” Notice the start of the XSD schema shown previously:
<xs:schema xmlns:xs="http://www.w3.org/2001/XMLSchema">
This line sets up a namespace named xs by using the xmlns attribute. (The :xs part tells XML what you want to call your namespace.) The value of the attribute is a Uniform Resource Identifier (URI), just a unique value that you are sure no one else is going to use. Typically, you use a web site address for your own company; the web site doesn’t have to exist. You could even put your phone number there, just as long as it is unique.
The most common way to use a namespace is to prefix the relevant tags in your XML document with the new namespace name, as in “xs:schema” instead of just “schema.” This tells the parser, “If you are checking my syntax against an XSD schema, use the one that I defined for the xs namespace.” You can also use a “default” namespace for a given element and all its descendants by including the xmlns attribute in the outermost element. Then all elements within that outermost element will use the specified namespace. I used this method in one of the preceding examples:
<productList xmlns="SimpleProductList"...
For basic XML files that will only be used by your program, you may not need to bother with namespaces. They really come in handy when you are creating XML data that uses some publicly published standard. There are also instances where a single XML file might contain data related to two or more distinct uses of XML. In this case, different parts of your XML file could refer to different namespaces.
As with other parts of the XML world, XSD and namespaces are not all that easy to use, but they are flexible and powerful. As usual, there are tools, including tools in Visual Studio, which let you build all of this without having to think about the details.
As I keep saying, XML is just data, and if your program and data don’t understand each other, you might as well go back to chisel and stone. XML and its related technologies provide a method to help ensure that your data is ready to use in your application.
Visual Basic includes two primary methods for working with XML content: the old way and the new way. The old way uses classes from the System.Xml namespace, and provides traditional object-based access to XML tags, attributes, and data. The new way, introduced in the 2008 release, uses classes in the System.Xml.Linq namespace, and provides access to XML content directly within the syntax of Visual Basic source code. I’ll discuss both methods in this chapter, starting with the old way.
Since XML is no fun to manage as a big chunk of text, .NET includes several classes that manage XML data. All of these tools appear in the System.Xml namespace and its subordinate namespaces:
System.XmlThe main collection of old-way XML-related classes.
System.Xml.LinqClasses that integrate XML with LINQ technologies. This is the new way that I’m going to talk about later.
System.Xml.SchemaClasses that create and use XSD schemas.
System.Xml.SerializationClasses that read and write XML documents via a standard .NET stream.
System.Xml.XPathClasses that implement the XPath technology used to search XML documents.
System.Xml.XslClasses that enable XSL Transformations.
The features included in each class tie pretty closely to the structure of XML and related technologies such as XSD and XSLT.
The System.Xml namespace includes the most basic classes you will use to manage XML data. An XmlDocument object is the in-memory view of your actual XML document:
Dim myData As New System.Xml.XmlDocument
Your document is made up of declarations (that <?xml...?> thing at the top), data elements (all the specific tags in your document), attributes (inside each starting element tag), and comments. These are represented by the XmlDeclaration, XmlElement, XmlAttribute, and XmlComment classes, respectively. Together, these four main units of your document are called nodes, represented generically by the XmlNode class. (The four specific classes all inherit from the more basic XmlNode class.) When you build an XML document by hand in memory, you use the individual classes such as XmlElement. Later on, when you need to scan through an existing document, it is easier to use the generic XmlNode class.
Let’s build a subset of our sample XML product data.
<?xml version="1.0"?>
<productList>
   <!-- We currently sell these items. -->
   <supplier ID="652" fullName="Beverages R Us">
      <product ID="1" available="Yes">
         <productName>Chai</productName>
         <category>Beverages</category>
         <unitPrice>18.00</unitPrice>
      </product>
   </supplier>
</productList>
Declare all the variables you will use, and then use them.
Dim products As XmlDocument
Dim prodDeclare As XmlDeclaration
Dim rootSet As XmlElement
Dim supplier As XmlElement
Dim product As XmlElement
Dim productValue As XmlElement
Dim comment As XmlComment

' ----- Create the document with a valid declaration.
products = New XmlDocument
prodDeclare = products.CreateXmlDeclaration("1.0", _
    Nothing, String.Empty)
products.InsertBefore(prodDeclare, products.DocumentElement)

' ----- Create the root element, <productList>.
rootSet = products.CreateElement("productList")
products.InsertAfter(rootSet, prodDeclare)

' ----- Add a nice comment.
comment = products.CreateComment( _
   " We currently sell these items. ")
rootSet.AppendChild(comment)

' ------ Create the supplier element, <supplier>.
'        Include the attributes.
supplier = products.CreateElement("supplier")
supplier.SetAttribute("ID", "652")
supplier.SetAttribute("fullName", "Beverages R Us")
rootSet.AppendChild(supplier)

' ----- Create the product element, <product>, with the
'       subordinate data values.
product = products.CreateElement("product")
product.SetAttribute("ID", "1")
product.SetAttribute("available", "yes")
supplier.AppendChild(product)

productValue = products.CreateElement("productName")
productValue.InnerText = "Chai"
product.AppendChild(productValue)

productValue = products.CreateElement("category")
productValue.InnerText = "Beverages"
product.AppendChild(productValue)

productValue = products.CreateElement("unitPrice")
productValue.InnerText = "18.00"
product.AppendChild(productValue)
It really works, too. To prove it, put this code in the Click event of a button, and end it with the following line:
products.Save("c:products.xml")Run the program and view the c:products.xml file to see the XML product data. There are many different ways to use the XML classes to create an XML document in memory. For instance, although I used the SetAttribute method to add attributes to the supplier and product nodes, I could have created separate attribute objects, and appended them onto these nodes, just like I did for the main elements.
Dim attrData As XmlAttribute
attrData = products.CreateAttribute("ID")
attrData.Value = "652"
supplier.SetAttributeNode(attrData)
So, this is nice and all, but what if you already have some XML in a file, and you just want to load it into an XmlDocument object? Simply use the XmlDocument object’s Load method.
Dim products As XmlDocument
products = New XmlDocument
products.Load("c:products.xml")
For those instances where you just want to read or write some XML from or to a file, and you don’t care much about manipulating it in memory, the XmlTextReader and XmlTextWriter classes let you quickly read and write XML data via a text stream. But if you are going to do things with the XML data in your program, the Load and Save methods of the XmlDocument object are a better choice.
In our sample data, all of the products appear in supplier groups. If we just want a list of products, regardless of supplier, we ask the XmlDocument object to supply that data via an XmlNodeList object.
Dim justProducts As XmlNodeList
Dim oneProduct As XmlNode

' ----- First, get the list.
justProducts = products.GetElementsByTagName("product")

' ----- Then do something with them.
For Each oneProduct In justProducts
    ' ----- Put interesting code here.
Next oneProduct
MsgBox("Processed " & justProducts.Count.ToString(  ) & _
    " product(s).")
For a more complex selection of nodes within the document, the System.Xml.XPath namespace implements the XPath searching language, which gives you increased flexibility in locating items. The Visual Studio documentation describes the methods and searching syntax used with these classes.
An XmlDocument object can hold any type of random yet valid XML content, but you can also verify the document against an XSD schema. If your XML document refers to an XSD schema, includes a DTD, or uses XDR (XML Data Reduced schemas, similar to XSD), an XmlReader, when configured with the appropriate XmlReaderSettings, will properly compare your XML data against the defined rules, and throw an exception if there’s a problem.
Dim products As New XmlDocument
Dim xmlRead As XmlTextReader
Dim withVerify As New XmlReaderSettings
Dim xmlReadGood As XmlReader

' ----- Open the XML file and process schemas
'       referenced within the content.
withVerify.ValidationType = ValidationType.Schema
xmlRead = New XmlTextReader("c:	empproducts.xml")
xmlReadGood = XmlReader.Create(xmlRead, withVerify)

' ----- Load content, or throw exception on
'       validation failure.
products.Load(xmlReadGood)

' ----- Clean up.
xmlReadGood.Close(  )
xmlRead.Close( )XSL Transformations are no more difficult than any of the other manipulations of XML. Just as there are many ways to get XML source data (from a file, building it by hand with XmlDocument, etc.), there are many ways to transform the data. If you just want to go from input file to output file, the following code provides a quick and efficient method. It uses a System.Xml.Xsl.XslCompiledTransform instance to perform the magic.
' ----- Above: Imports System.Xml.Xsl
Dim xslTrans As XslCompiledTransform

' ----- Open the XSL file as a transformation.
xslTrans = New XslCompiledTransform(  )
xslTrans.Load("c:convert.xsl")

' ----- Convert and save the output.
xslTrans.Transform("c:input.xml", "c:output.txt")When Visual Basic first came out, no one had even heard of XML. But now it’s everywhere. It’s like that black oozing stuff that bonds with Peter Parker in Spiderman 3, but without all the creepy special effects. And now in Visual Basic 2008, XML is part of the language syntax itself. When will it end?
It turns out that making XML part of the language is pretty cool. In the old-way section a few pages ago, I showed you some code that created the XML product list for “Chai.” The XML content was 11 lines long, but it took nearly 50 lines of source code to produce it. But you can build that same XML content using the new way in pretty close to the final 11 lines.
Dim chaiItem As System.Xml.Linq.XDocument = _
   <?xml version="1.0"?>
   <productList>
      <!-- We currently sell these items. -->
      <supplier ID="652" fullName="Beverages R Us">
         <product ID="1" available="Yes">
            <productName>Chai</productName>
            <category>Beverages</category>
            <unitPrice>18.00</unitPrice>
         </product>
      </supplier>
   </productList>
How about that! Except for the first declaration line, the content is identical to the final XML. The new XML Literals feature makes building XML documents a snap. The content gets stored in the new XDocument object, part of the System.Xml.Linq namespace. If you want to store just a section of XML instead of the entire document, use the XElement class instead.
Dim productSection As System.Xml.Linq.XElement = _
   <product ID="1" available="Yes">
      <productName>Chai</productName>
      <category>Beverages</category>
      <unitPrice>18.00</unitPrice>
   </product>
If you have type inference enabled in your program (Option Infer On), you don’t even need to tell Visual Basic whether it’s an XElement or an XDocument.
Dim productSection = _
   <product ID="1" available="Yes">
      <productName>Chai</productName>
      <category>Beverages</category>
      <unitPrice>18.00</unitPrice>
   </product>
Just like the XmlDocument class, the XDocument class includes Load and Save methods to manage file-based XML.
Including XML in your source code is amazing stuff, but it will stay amazing only if you always sell Chai for $18.00 per unit. Real XML content is usually going to come from variable data. And despite the XML “Literal” name, XML Literals can include nonliteral variable content through embedded XML expressions. Whenever you want to add data from a variable or expression to your XML text, you use the special <%= and %> symbols to offset your custom data.
Dim productID As Integer = 1
Dim productName As String = "Chai"
Dim productCategory As String = "Beverage"
Dim productPrice As Decimal = 18@
Dim isAvailable As Boolean = True

Dim productSection = _
   <product ID=<%= productID %>
      available=<%= Format(isAvailable, "Yes/No") %>>
      <productName><%= productName %></productName>
      <category><%= productCategory %></category>
      <unitPrice><%= productPrice %></unitPrice>
   </product>
Of course, to generate an entire catalog of products, you’re going to be doing a lot of typing. In Chapter 17, I’ll introduce some additional ways to embed XML expressions with entire tables of data.
Earlier in the chapter, in “Finding Needles and Haystacks,” I showed you how you could access specific sections of old-style XML documents. The new-style XML objects also include ways to scan and access portions of the XML tree. These are called XML axis properties, and they come bundled up in three syntax-friendly varieties:
- Child-member axis
You can access an immediate child tag of any
XElementby using the child’s name as a member of the parent object, enclosing the child’s name in a set of angle brackets:childElement = parentElement.<
childName>- Descendent-member axis
A variation of the child-member axis syntax lets you access named members at any depth within a parent element. Instead of using just a single dot (
.) between the parent and child names, use three dots:setOfElements = parentElement...<
descendentName>- Attribute axis
Access any attribute of an element by treating the attribute name as a member name, prefixing the attribute name with the
@character:attributeValue = parentElement.@
attributeName
The following block of code scans through the product list we designed early in the chapter, displaying the ID number and name of each product on the console:
For Each oneProduct In allProducts...<product>
   Console.WriteLine(oneProduct.@ID & ": " & _
      oneProduct.<productName>.Value)
Next oneProduct
This code uses all three axis styles. The For Each...Next loop scans through all matching <product> entries by using a descendent-member axis. In each matching product element, the code accesses the ID attribute using an attribute axis, and gets the name of the product using a child-member axis, along with the Value property of the returned child element. The output looks like this:
1: Chai
2: Chang
3: Aniseed Syrup
For more advanced ways of scanning through XML content and selecting child elements based on complex criteria, see Chapter 17.
As with the old way of managing XML, the new way lets you include namespaces in your XML content. To add an XML namespace prefix, simply include it in the content as you would in any other XML scenario.
Dim foodItems = _
   <?xml version="1.0"?>
   <menu:items xmlns:menu="http://www.timaki.com/menu">
      <menu:item>
        <menu:name>Pizza</menu:name>
        <menu:price>12.99</menu:price>
      </menu:item>
      <menu:item>
        <menu:name>Breadsticks</menu:name>
        <menu:price>1.99</menu:price>
      </menu:item>
   </menu:items>
You can also define the namespace, the xmlns part, by using a variation of the Visual Basic Imports statement.
Imports <xmlns:menu="http://www.timaki.com/menu">
...later...
Dim foodItems = _
   <?xml version="1.0"?>
   <menu:items>
   ...and so on...
Visual Basic will still insert the xmlns definition at the right place in the XML content. It’s actually stored as a distinct XNamespace object within the XDocument or XElement. To generate an XNamespace object for your own use, Visual Basic includes a new GetXmlNamespace function.
Dim justTheNamespace = GetXmlNamespace(menu)
There are a lot of useful features in the various System.Xml namespaces, and you can manage complex data in very effective ways. It’s not always the most efficient way to manage data, but if you have structured hierarchical data, it may be the most direct and clearest method.
Although XML lurks everywhere in the .NET Framework, and in all applications written using .NET, you could actually write large and interesting applications without looking at a single line of XML content. Even if your application needs to interact with XML content, the new XML features included in Visual Basic make managing XML as easy as typing the content directly into Notepad. Wait a minute, that’s not easy or fun. But it’s a lot better than piecing the content together through string concatenation.
XML is a very useful and flexible data format that is here to stay. Although it will always lack the speed of more compact data standards, its benefits are numerous. There has been talk of introducing a “binary XML” format as a standard, although nothing concrete has come of it yet. If binary XML does become a standard, you will likely continue to use the same classes and methods introduced in this chapter, with the possible addition of an OutputFormat (“Text” or “Binary”) property.
The administrator of the Library system will want to see statistics and information at a glance, or run various reports that provide meaningful summary or detail views of system data. Although as a programmer I could try to add every conceivable type of report that the user may need, I have learned from experience that this is not possible. Users always want the moon, usually in the form of some weird esoteric report that I know they will use once and never look at again (although they will call once a year asking for the same report to be written again). I don’t like recompiling and rereleasing the entire application every time a user needs a new report. Instead, I keep the reports outside the application, stored as separate programs. Then, from one form in the main application, I make all of those external reports available in a nice convenient list.
To implement this generic feature, I use a report configuration file, a simple XML file that contains information on the available reports, and how to run them. I want my selection list to have indented items so that I can visibly group reports for convenience. To do this, I will make my XML file into an unlimited depth hierarchy, with each level representing a further level of displayed indent. For instance, let’s say I wanted the following outline of reports (with report group titles in bold):
- Detail Reports
Daily Report
- Monthly Reports
Monthly Value
Monthly Inventory
- Summary Reports
Inventory Summary
The XML configuration would follow this structure:
<Group name="Detail Reports">
   <Item name="Daily Report"/>
   <Group name="Monthly Reports">
      <Item name="Monthly Value"/>
      <Item name="Monthly Inventory"/>
   </Group>
</Group>
<Group name="SummaryReports">
   <Item name="Inventory Summary"/>
</Group>
Of course, this is greatly simplified (not to mention noncompliant) XML. In addition to the hierarchy, I also want to include support for a variety of reporting methods. To keep things simple, the Library Project will include three types of reports:
- Built-in reports
The application includes a limited number of reports that are permanently built into the main application (assembly). The reports are numbered, starting from 1, and at this time I have five reports in mind. The designer of the XML configuration file can choose to include these in the display of reports or not by simply including or not including them in the file. In the absence of a configuration file, these reports will appear in the list by default. In addition to the report number (1 to 5), each entry has a display text and a long description.
- Application reports
These reports are separate and distinct EXE files, and are started via standard application initiation methods. Each entry includes a display text, the full path to the application, optional arguments, a flag to pass the identity of the user initiating the report, and a long description.
- URL reports
These reports are simple calls to web pages, or any other valid URL. For instance, you could include a report entry that does a “mailto:” to the local organization’s help desk. Each entry includes the display text, the URL itself, and a long description.
The project activities in this chapter involve both coding and documentation of the new external resource (the XML file format).
PROJECT ACCESS
Load the Chapter 13 (Before) Code project, either through the New Project templates or by accessing the project directly from the installation directory. To see the code in its final form, load Chapter 13 (After) Code instead.
First, let’s add clear documentation on the structure of the XML configuration file. There is no easy way to communicate the structure of an XML file to an ordinary user. Although such documentation is a requirement, hopefully the application will also include a tool to let an administrator build the configuration file. Such a program, sadly, is not included in this book’s project. It is left as an exercise for the reader. (I always wanted to say that.)
The library application can be configured to run any number of reports through the Reports form. The list of available reports is managed through an XML report configuration file, a file containing “groups” and “items.” All items are reports, and appear within a group. You can nest groups within groups to any depth, and the list of reports displayed in the Library program will indent each subordinate group to help the user see the organization of the reports. There is no limit to the nesting of groups.
The root element of the XML file must be named <reportList>, and it may contain any number of <reportGroup> and <reportItem> data elements:
<reportItem>: Represents a single report entry. This entry has one required attribute, and up to five subordinate data elements depending on the setting of the attribute:type(attribute): Set to one of the following values:built-in: Run one of the built-in programs. This type of report uses the<displayText>,<reportPath>, and<description>data elements.program: Runs a separate EXE program. This type of report uses the<displayText>,<reportPath>,<reportArgs>,<reportFlags>, and<description>data elements.url: Starts a URL, such as a web page or a “mailto” email to a recipient address. This type of report uses the<displayText>,<reportPath>, and<description>data elements.
<displayText>: A short name or description for this report, as it will appear in the list of report choices. This element is required for all types of reports.<reportPath>: The full path, URL, or number of the report, depending on the type of report. For program (EXE) reports, this is the full UNC or driver letter-based path to the report, without additional arguments. For built-in reports, this is a report number, from 1 to 5 (values and their meanings are listed later in this section). For URL reports, this is the actual URL, as in "http://mysite.com/myreport.aspx" or "mailto:[email protected].” This element is required for all types of reports.<reportArgs>: For program (EXE) reports, this entry includes any command-line arguments to be included when running the program. This element is valid only for program (EXE) reports, and is always optional.<reportFlags>: For program (EXE) reports, this entry indicates the optional flags that should be appended to the application command as arguments. At this time, the only flag is theUflag. When this element is set toU, the argument-uuseridis appended to the command string (whereuseridis the user’s login ID, from the database fieldUserName.LoginID). This element is valid only for program (EXE) reports, and is always optional.<description>: This is a longer, verbose description of the report, up to about 200 characters, which will appear on the Report form when the user selects the report from the list. This description should assist the user in selecting the right report. This element is valid for all types of reports, but is always optional.
<reportGroup>: Represents a category group, used to visibly group and indent reports in the display list. This element must contain exactly one<displayText>element, but may contain any number of<reportItem>or<reportGroup>elements:<displayText>: A short name or description for this group, as it will appear in the list of report choices. This element is required.
When using the “built-in” report type, the
<reportPath>element is set to one of the following integer values:1—Items Checked Out Report
2—Items Overdue Report
3—Items Missing Report
4—Fines Owed by Patrons Report
5—Library Database Statistics Report
This technical description appears in the Technical Resource Kit document, originally developed in Chapter 4.
With .NET’s ability to store whole objects as ListBox items, we can create a custom class that contains all the information needed to select and run a report from the list of reports. This class is fairly simple, with nothing but basic public fields, plus an overridden ToString function, used by the ListBox control to properly display each list item.
In the Library Project, add a new class file named ReportItem.vb through the Project → Add Class menu command. Add the following enumeration to the file, but add it outside the Class...End Class boundaries. This enumeration indicates what type of entry each list item represents.
INSERT SNIPPET
Insert Chapter 13, Snippet Item 1.
Public Enum ReportItemEnum
   ' ----- The type of item in the report select list.
   GroupLabel = 0
   BuiltInCheckedOut = 1
   BuiltInOverdue = 2
   BuiltInMissing = 3
   BuiltInFinesOwed = 4
   BuiltInStatistics = 5
   ExeProgram = 6
   UrlProgram = 7
End Enum
To this same file, add the members of the ReportItem class. This class contains all the information we need to run reports loaded from the configuration file.
INSERT SNIPPET
Insert Chapter 13, Snippet Item 2.
' ----- Instance of report selection items used
'       in the ReportSelect form.
Public ItemType As ReportItemEnum
Public Indent As Integer     ' Indent level. Starts with 0.
Public DisplayText As String
Public ReportPath As String  ' ExeProgram / UrlProgram only
Public ReportArgs As String  ' ExeProgram only
Public Description As String

Public Overrides Function ToString(  ) As String
   ' ----- Display an indented string. Prepend with spaces.
   Return StrDup(Indent * 5, " ") & DisplayText
End Function
Librarians and administrators use the Select Report form (see Figure 13-2) to view reports. The form includes a ListBox control that displays all reports and report groups, a Run button that starts a report, and a Close button that returns the user to the main form. A label displays the full description of a report, when available, just below the ListBox.

Add a new form file named ReportSelect.vb through the Project → Add Windows Form menu command. Add the controls and settings as listed in Table 13-1.
Table 13-1. Controls and settings for the Report form
Control/form | Type | Settings |
|---|---|---|
|
|
|
|
|
|
|
|
|
|
|
|
|
|
|
|
|
|
|
|
|
Adjust the tab order of the new controls by selecting the form, and then using the View → Tab Order menu command.
Although the administrator has probably given useful names to each report, the terseness of each report name may still confuse the user. Each report includes an optional full description. As the user selects reports from the list, an event handler updates the FullDescription label just below the main list. Add this event handler member to the class.
INSERT SNIPPET
Insert Chapter 13, Snippet Item 3.
Private Sub AllReports_SelectedIndexChanged( _
      ByVal sender As Object, ByVal e As System.EventArgs) _
      Handles AllReports.SelectedIndexChanged
   ' ----- Display a description of the report, if available.
   Dim reportEntry As Library.ReportItem

   ' ----- Clear any previous description.
   FullDescription.Text = "No report selected."
   If (AllReports.SelectedIndex <> −1) Then
      ' ----- Locate the content and display it.
      reportEntry = CType(AllReports.SelectedItem, _
         Library.ReportItem)
      FullDescription.Text = reportEntry.Description
   End If
End SubThe RefreshReportList method loads the data from the report configuration file and processes the results. Eventually, the location of this file will be recorded in the application’s configuration file, but we won’t be adding that until a later chapter. For now, let’s put in a hardcoded test file location, and mark it for later update. I opted to use the old-style XML objects for this code because the new-style XML features we need to make the code easy to write won’t be introduced until a later chapter.
INSERT SNIPPET
Insert Chapter 13, Snippet Item 4.
Private Sub RefreshReportList(  )
   ' ----- Load in the list of available reports.
   Dim configFile As String
   Dim configData As Xml.XmlDocument
   Dim reportEntry As ReportItem
   Dim counter As Integer

   On Error GoTo ErrorHandler

   ' ----- Clear the existing list.
   AllReports.Items.Clear(  )

   ' ----- Get the location of the configuration file.
   ' TODO: Load this from the application's configuration.
   '       For now, just hardcode the value.
   configFile = "c:ReportConfig.txt"

   ' ----- Load the configuration file.
   If (configFile <> "") Then
      If (System.IO.File.Exists(configFile)) Then
         ' ----- Load in the file.
         configData = New Xml.XmlDocument
         configData.Load(configFile)

         ' ----- Process the configuration file.
         LoadReportGroup(configData.DocumentElement, 0)
      End If
   End If

   ' ----- If the configuration file resulted in no reports
   '       appearing in the list, add the default reports.
   If (AllReports.Items.Count = 0) Then
      For counter = 1 To _
            CInt(ReportItemEnum.BuiltInStatistics)
         ' ----- Build the report entry.
         reportEntry = New ReportItem
         reportEntry.Indent = 0
         reportEntry.ItemType = CType(counter, ReportItemEnum)
         Select Case reportEntry.ItemType
            Case ReportItemEnum.BuiltInCheckedOut
               reportEntry.DisplayText = "Items Checked Out"
            Case ReportItemEnum.BuiltInOverdue
               reportEntry.DisplayText = "Items Overdue"
            Case ReportItemEnum.BuiltInMissing
               reportEntry.DisplayText = "Items Missing"
            Case ReportItemEnum.BuiltInFinesOwed
               reportEntry.DisplayText = "Patron Fines Owed"
            Case ReportItemEnum.BuiltInStatistics
               reportEntry.DisplayText = "Database Statistics"
         End Select

         ' ----- Add the report entry to the list.
         AllReports.Items.Add(reportEntry)
      Next counter
   End If
   Return

ErrorHandler:
   GeneralError("ReportSelect.RefreshReportList", _
      Err.GetException(  ))
   Resume Next
End Sub
Because the report configuration file allows nested report groups to any level, we need to use a recursive routine to repeatedly descend to each successive level. The LoadReportGroup routine, called by RefreshReportList, adds all report items and report groups within a starting report group. It’s initially called from the reference point of the root <reportList> element. Each time it finds a child <reportGroup> element, it calls itself again, but this time starting from the reference point of the child <reportGroup> element.
INSERT SNIPPET
Insert Chapter 13, Snippet Item 5.
Private Sub LoadReportGroup(ByVal groupNode As Xml.XmlNode, _
      ByVal indentLevel As Integer)
   ' ----- Add the groups and items at this level,
   '       and recurse as needed.
   Dim scanNode As Xml.XmlNode
   Dim detailNode As Xml.XmlNode
   Dim reportEntry As ReportItem

   ' ----- Process each item or group.
   For Each scanNode In groupNode.ChildNodes
      ' ----- Build a content item for the list.
      reportEntry = New ReportItem
      reportEntry.Indent = indentLevel

      ' ----- Get the display name.
      detailNode = scanNode.SelectSingleNode("displayText")
      If (detailNode Is Nothing) Then Continue For
      reportEntry.DisplayText = Trim(detailNode.InnerText)

      If (scanNode.Name = "reportGroup") Then
         ' ----- Start a new display group.
         reportEntry.ItemType = ReportItemEnum.GroupLabel
         AllReports.Items.Add(reportEntry)

         ' ----- Recurse to child items.
         LoadReportGroup(scanNode, indentLevel + 1)
      ElseIf (scanNode.Name = "reportItem") Then
         ' ----- This is an item. Record its location.
         detailNode = scanNode.SelectSingleNode("reportPath")
         If Not (detailNode Is Nothing) Then _
            reportEntry.ReportPath = _
            Trim(detailNode.InnerText)

         ' ----- Get any command-line arguments.
         detailNode = scanNode.SelectSingleNode("reportArgs")
         If Not (detailNode Is Nothing) Then _
            reportEntry.ReportArgs = _
            Trim(detailNode.InnerText)

         ' ----- Get any item-specific flags.
         detailNode = scanNode.SelectSingleNode("reportFlags")
         If Not (detailNode Is Nothing) Then
            ' ---- "U" adds "-u loginid" to the command.
            If (InStr(UCase(detailNode.InnerText), "U") > 0) _
               And (LoggedInUserName <> "") Then _
               reportEntry.ReportArgs = _
               Trim(reportEntry.ReportArgs & " -u " & _
               LoggedInUserName)
         End If

         ' ----- Store the full description.
         detailNode = scanNode.SelectSingleNode("description")
         If Not (detailNode Is Nothing) Then _
            reportEntry.Description = _
            Trim(detailNode.InnerText)

         ' ----- So, what type of entry is it?
         If (scanNode.Attributes("type").Value = _
               "built-in") Then
            ' ----- Built-in program. Check for valid ID.
            If (IsNumeric(reportEntry.ReportPath) = False) Or _
               (Val(reportEntry.ReportPath) < 1) Or _
               (Val(reportEntry.ReportPath) > _
               CInt(ReportItemEnum.BuiltInStatistics)) Then _
               Continue For
            reportEntry.ItemType = CType(CInt( _
               reportEntry.ReportPath), ReportItemEnum)
            AllReports.Items.Add(reportEntry)
         ElseIf (scanNode.Attributes("type").Value = _
               "program") Then
            ' ----- EXE program-based report.
            If (reportEntry.ReportPath = "") Then Continue For
            reportEntry.ItemType = ReportItemEnum.ExeProgram
            AllReports.Items.Add(reportEntry)
         ElseIf (scanNode.Attributes("type").Value = _
               "url") Then
            ' ----- URL-based report.
            If (reportEntry.ReportPath = "") Then Continue For
            reportEntry.ItemType = ReportItemEnum.UrlProgram
            AllReports.Items.Add(reportEntry)
         End If
      End If
   Next scanNode
   Return

ErrorHandler:
   GeneralError("ReportSelect.LoadReportGroup", _
      Err.GetException(  ))
   Resume Next
End Sub
Add the form’s Load event, which loads in the content from the configuration file.
INSERT SNIPPET
Insert Chapter 13, Snippet Item 6.
Private Sub ReportSelect_Load(ByVal sender As Object, _
      ByVal e As System.EventArgs) Handles MyBase.Load
   ' ----- Display the list of reports.
   RefreshReportList(  )
End SubNow that all of the groups and items appear in the list, we have to run the actual reports. The ActRun button’s Click event handles this duty. For now, we will just add the framework to support the calling of each report. The built-in reports will be added in Chapter 21.
INSERT SNIPPET
Insert Chapter 13, Snippet Item 7.
Private Sub ActRun_Click(ByVal sender As System.Object, _
      ByVal e As System.EventArgs) Handles ActRun.Click
   ' ----- Run the selected report.
   Dim reportEntry As Library.ReportItem

   On Error GoTo ErrorHandler

   ' ----- Make sure a report is selected.
   If (AllReports.SelectedIndex = −1) Then
      MsgBox("Please select a report from the list.", _
         MsgBoxStyle.OKOnly Or MsgBoxStyle.Exclamation, _
         ProgramTitle)
      Return
   End If

   ' ----- Different code for each type of entry.
   reportEntry = CType(AllReports.SelectedItem, _
      Library.ReportItem)
   Me.Cursor = Windows.Forms.Cursors.WaitCursor
   Select Case reportEntry.ItemType
      Case ReportItemEnum.GroupLabel
         ' ----- No report for group entries.
         MsgBox("Please select a report from the list.", _
            MsgBoxStyle.OKOnly Or MsgBoxStyle.Exclamation, _
            ProgramTitle)
      Case ReportItemEnum.BuiltInCheckedOut
         ' ----- Items Checked Out
         ' TODO: Write BasicReportCheckedOut(  )
      Case ReportItemEnum.BuiltInOverdue
         ' ----- Items Overdue
         ' TODO: Write BasicReportOverdue(  )
      Case ReportItemEnum.BuiltInMissing
         ' ----- Items Missing
         ' TODO: Write BasicReportMissing(  )
      Case ReportItemEnum.BuiltInFinesOwed
         ' ----- Fines Owed by Patrons
         ' TODO: Write BasicReportFines(  )
      Case ReportItemEnum.BuiltInStatistics
         ' ----- Library Database Statistics
         ' TODO: Write BasicReportStatistics(  )
      Case ReportItemEnum.ExeProgram
         ' ----- Start a program.
         Process.Start("""" & reportEntry.ReportPath & _
            """ " & reportEntry.ReportArgs)
      Case ReportItemEnum.UrlProgram
         ' ----- Start a URL.
         Process.Start(reportEntry.ReportPath)
   End Select
   Me.Cursor = Windows.Forms.Cursors.Default
   Return

ErrorHandler:
   GeneralError("ReportSelect.ActRun_Click", _
      Err.GetException(  ))
   Resume Next
End Sub
For external reports, the event handler calls the Process.Start method. This amazing method accepts either a standard command-line expression, or any valid URL or web page address.
To make the reports available to the user, we must enable a link to the report form from the main form. We included a distinct panel on that form just for printing reports. The ActDoReports button on that panel triggers a call to the new report selection form. Create a new event handler for the ActDoReports button and add the following code.
INSERT SNIPPET
Insert Chapter 13, Snippet Item 8.
' ----- Show the reports form.
ReportSelect.ShowDialog(  )
Now that we have a firm grasp on the world of XML, we’ll let Visual Basic do all the hard work of manipulating it for application configuration purposes.