When Microsoft released its original version of MS-DOS, it included printing features that supported the then-available printers: chisel and stone. Fortunately, printing has come a long way since then. These days, advanced color laser printers and even “paperless” printing systems (such as Adobe Acrobat and XPS) provide printer support that rivals that of professional four-color offset printing facilities.
Although the .NET Framework does not replace the print spooler system built into each copy of Windows, it makes it greatly accessible. As you’ll read in this chapter, a printer is now treated like any other .NET drawing surface. The statements you use to draw on a form or control can be copied and pasted directly into your printing code.
As I mentioned in Chapter 18, Windows Presentation Foundation (WPF) includes features that let you generate XPS files, designed for eventual WYSIWYG printing. I will not be discussing that technology in this chapter since the XPS files are actually an interim step between your printing code and the physical printer. The GDI+ based printing techniques shown in this chapter provide for more direct integration between your code and the printer.
This chapter provides a general discussion of .NET printing support. A discussion of report printing appears in the next chapter. If you are reading this chapter in its electronic format through the Safari publishing system, you can still rush right out and plunk down the funds for a hardcopy version of this book. Having that tactile response from the surface of the page should get you in the mood for this chapter’s discussion of ink and paper.
Printers are a lot like people. Oh, I don’t mean that they are cantankerous, or that they quickly run out of ink. Like the people of the world, printers speak many different languages. At the basic end of the language scale, some printers simply output the characters they receive. Others add “escape sequences,” special combinations of characters that enable enhanced features such as font selection and double-wide text. At the complex end of the scale are PostScript and XPS, full-scale printer languages with commands that are somewhat similar to those in GDI+.
It would be every programmer’s worst nightmare to adjust application code so that it targets all likely printers that a user may have. Each new printer language would mean another bout of development and testing. And printer makers are just giddy enough to come up with new language variations on a monthly basis.
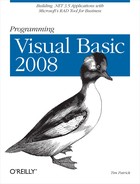
Fortunately, Windows implements a system of printer-specific drivers that shield the developer from most printer variations. These drivers all speak a common language—let’s call it “Printish”—which the driver translates into the printer’s native tongue. As developers, we need only design software that speaks Printish.
The .NET Framework’s printing system adds yet another level of language translation. .NET programs do not directly communicate with the printer drivers. Instead, they use GDI+ commands—the same commands used for screen updates—to output content to an in-memory printer canvas. The framework then converts these commands to Printish and sends the output on to the appropriate printer driver, and finally to the printer. Figure 20-1 shows a summary of the steps involved in .NET printing.
Having both screen and printer output generated through identical GDI+ commands means that I can make this a really short chapter, referring you back to Chapter 18 for details. But it also means that there needs to be a canvas—a System.Drawing.Graphics object—where the printer-specific GDI+ commands target their output. The System.Drawing.Printing.PrintDocument class provides you with the output canvas you need for both ordinary printing and “print preview” output. There are three ways to use the PrintDocument class:
Add a
PrintDocumentcontrol to a form from the Windows Forms toolbox. This control appears by default in the toolbox’s Printing section. Assign its properties and respond to its events as with any other control.Create a field-level instance of the
PrintDocumentclass. Include theWith Eventsclause in the definition to get event management.Create a local instance of
PrintDocument, and connect any events usingAddHandler.
These are standard methods in .NET, but having a control variation makes the class that much more convenient. We’ll get into the actual printing code a little later.
Four other printer-specific controls are available for Windows Forms projects:
PageSetupDialogThis control presents a standard Windows printer settings dialog that lets the user configure a specific print job, or all print jobs for the application. The control’s
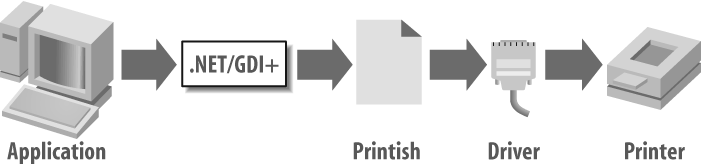
ShowDialogmethod displays the form shown in Figure 20-2. The control also exposes properties related to the user’s selection. ItsPageSettingsmember exposes specific user preferences as defined on the form, and thePrinterSettingsmember identifies the selected printer and its properties. You can retain these members and later assign them to other printer-specific classes that include similar members.PrintDialogFigure 20-3 shows this control’s dialog, the standard dialog that appears in most programs when the user selects the File → Print menu command. This control also exposes a
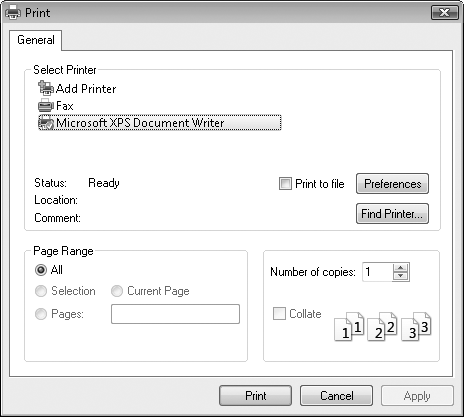
PrinterSettingsmember used to assign or retrieve the selected printer and related options.PrintPreviewDialogThis control’s dialog displays a preview of your printed document to the user. It includes standard preview presentation features, including zoom level and a pages-to-see-at-once control. The included Print button sends the preview content to the default printer (without prompting for printer selection). This control directly interacts with your
PrintDocumentinstance, which drives the actual display content. Figure 20-4 shows the Print Preview dialog, although with no page-specific content.PrintPreviewControlThe
PrintPreviewDialogcontrol includes basic preview management features (such as the zoom feature) that meet the needs of most applications. Unfortunately, that control is a sealed black box, and you cannot easily add your own custom features to it, or remove features that you don’t want. ThePrintPreviewControlcontrol provides an alternative interface that lets you fully customize the print preview experience. Instead of a full dialog, it implements just the page-display portion of the form. You must implement all toolbars and other features, and link their functionality with the preview control. I won’t be discussing this control in this chapter. If you’re interested in using this advanced control, you can read an article I wrote about print preview a few years ago.[5]

Before you print, you need to know which printer your user wants to target for the output. You may also need to know about available features of the printer, such as whether it supports color. If you used to be a Visual Basic 6.0 developer, you were accustomed to the convenient Printers collection. The absence of that collection in Visual Basic 2008 means that we must use more indirect means to access the printers.
The System.Drawing.Printing.PrinterSettings class includes a shared InstalledPrinters string collection that lists the path to each configured printer. You can assign any of these strings to the PrinterSettings' PrinterName member, making the specific printer available within the application. The following code chunk lets the user select from the list of printers, and displays some basic information about the selected printer:
Private Sub Form1_Load(ByVal sender As System.Object, _
      ByVal e As System.EventArgs) Handles MyBase.Load
   ' ----- Display the list of printers.
   Dim scanPrinter As String

   For Each scanPrinter In Drawing.Printing. _
         PrinterSettings.InstalledPrinters
      ListBox1.Items.Add(scanPrinter)
   Next scanPrinter
End Sub

Private Sub Button1_Click(ByVal sender As System.Object, _
      ByVal e As System.EventArgs) Handles Button1.Click
   ' ----- Display information about the selected printer.
   Dim selectedPrinter As Drawing.Printing.PrinterSettings

   If (ListBox1.SelectedIndex = −1) Then Return
   selectedPrinter = New Drawing.Printing.PrinterSettings(  )
   selectedPrinter.PrinterName = ListBox1.Text
   MsgBox(selectedPrinter.ToString)
End SubEarlier we saw that many Windows components work together to generate your printed output. Within your .NET code, you will also use many components (classes) to drive the printing process. Four main steps are involved (at least directly) in printing a document from your code:
Create an instance of a
PrintDocumentclass (or add it as a control to your form).Set the
PrintDocument’s various printer settings, either by using aPrintDialog(or related) class/control, or by using the default or manual settings.Add an event handler for the
PrintDocument’sPrintPageevent. This event is called once for each page, and receives aSystem.Drawing.Graphicsobject for the printer canvas. Your event handler code prints a single page, and updates a flag telling the document whether there are more pages to come.Call the
PrintDocument’sPrintmethod to start the ball rolling.
Let’s try a little code to see how this printing beast eats. Or prints. Or whatever it does. How about a simple program that prints a five-page document on the user’s selected printer? The output will be a large single-digit page number, perfect for the Sesame Street set. First, let’s create a new Windows Forms application, and add a single button to Form1 named ActPrint. We’ll also add a PrintDocument control (named CountingDoc), and a PrintDialog control (named UserPrinter). Figure 20-5 shows the form and its supporting controls.

These controls implement the first two steps of our four-step printing process. Next, we’ll add the source code.
Public Class Form1
   Private WhichPage As Integer

   Private Sub ActPrint_Click(ByVal sender As System.Object, _
         ByVal e As System.EventArgs) Handles ActPrint.Click
      ' ----- Prompt the user for printer settings, and
      '       start printing.
      UserPrinter.Document = CountingDoc
      If (UserPrinter.ShowDialog(  ) = _
         Windows.Forms.DialogResult.OK) Then _
         CountingDoc.Print(  )
   End Sub

   Private Sub CountingDoc_BeginPrint(ByVal sender As Object, _
         ByVal e As System.Drawing.Printing.PrintEventArgs) _
         Handles CountingDoc.BeginPrint
      ' ----- Start the counting over.
      WhichPage = 1
   End Sub

   Private Sub CountingDoc_PrintPage(ByVal sender As Object, _
         ByVal e As System.Drawing.Printing. _
         PrintPageEventArgs) Handles CountingDoc.PrintPage
      ' ----- Print a single page.
      Dim hugeFont As Font
      Dim centeredText As StringFormat
      ' ----- Let's go overboard on the font: 256 points!
      hugeFont = New Font("Arial", 256)

      ' ----- Center the text on the page.
      centeredText = New StringFormat(  )
      centeredText.Alignment = StringAlignment.Center
      centeredText.LineAlignment = StringAlignment.Center

      ' ----- Print the number.
      e.Graphics.DrawString(CStr(WhichPage), hugeFont, _
         Brushes.Black, e.MarginBounds, centeredText)

      ' ----- Draw the page margins to make it clear where
      '       they are.
      e.Graphics.DrawRectangle(Pens.Blue, e.MarginBounds)

      ' ----- Limit the output to five pages.
      WhichPage += 1
      If (WhichPage <= 5) Then e.HasMorePages = True _
         Else e.HasMorePages = False
   End Sub
End Class
This code implements steps 3 (ActPrint_Click) and 4 (CountingDoc_PrintPage). The ActPrint button’s Click event handler links the document and the Print dialog so that they both refer to the same settings. It then prompts the user to select a printer and various options through the ShowDialog call. If the user clicks the OK button on that dialog, it triggers a call to the document’s Print method.
The action then moves to the events of the PrintDocument instance. I’ve implemented two of the events: a BeginPrint event handler that performs some initialization, and a PrintPage event handler that does the hard work. (Other events include EndPrint, used to clean up when printing is complete, and QueryPageSettings, where you can change the orientation and settings of each page of the document.) Actually, it’s not all that hard, especially since we saw similar code in Chapter 18. The biggest difference is the amount of space available on a printed page, allowing us to play with fonts in the hundreds of point sizes.
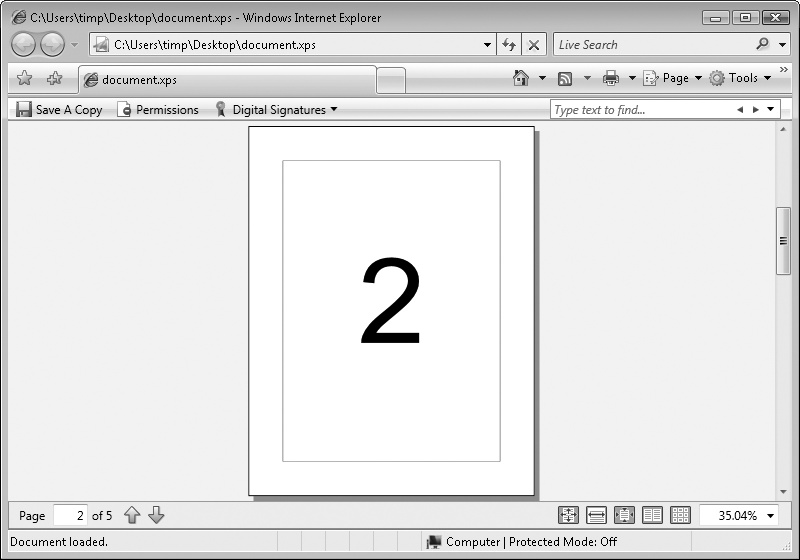
Figure 20-6 shows page 2 of the output from this program. I printed to the pseudo-printer installed for capturing print jobs as XPS documents. You can see in the bottom-left corner that it did properly record five output pages.
Adding a print preview interface is so easy, you should probably ask your boss for a really hard project to do first, and then come back when you’re worn out. Let’s build on our simple number-printing application, adding a new Button control named ActPreview. We will also add a PrintPreviewDialog control named UserPreview. Once these are in place, add the following preview button Click event handler:
Private Sub ActPreview_Click(ByVal sender As System.Object, _
ByVal e As System.EventArgs) Handles ActPreview.Click
' ----- Display a preview of the document.
UserPreview.Document = CountingDoc
UserPreview.ShowDialog( )
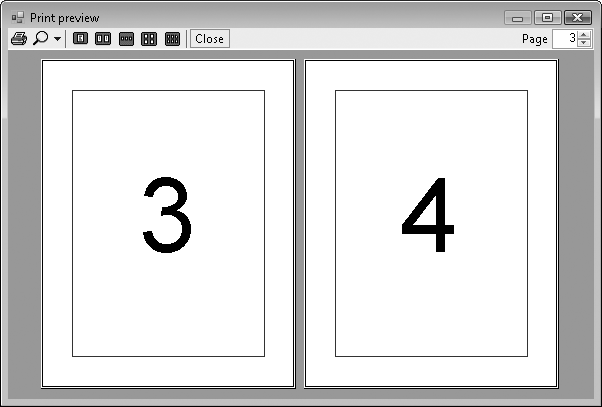
End SubHey, that’s even simpler than the code that initiates printing to a real printer, even though print preview technology seems to be more complex than plain printing. There almost ought to be a law against code that simple. Fortunately, there’s not. Figure 20-7 shows the preview window, after using the two-pages-at-once toolbar button.
Let’s dwell just a little longer on how simple that code was. I can accept that the PrintPreviewDialog class includes a lot of amazing code for previewing printed output. But the remarkable part of the code is that we didn’t have to rewrite the custom GDI+ drawing logic. The same set of GDI+ statements now drives the preview display and the actual output. All we had to do was assign the PrintDocument object to the correct dialog control.
During the printing (or preview) process, the PrintDocument’s PrintPage event handler gets called once for each output page. But here’s the tricky thing: when the PrintPage handler was called the first time, it was not to print “page 1” of the document, but to print “the first page in need of printing,” whatever its page number. Search all you want through the properties of the PrintDocument class, but you will never find a PageNumber property. The PrintDocument class does not know about the page numbers in your document, and—despite all of the nice things it does for you—it does not care. All it knows is that you have a bunch of pages to print, and it will call your PrintPage event handler until you say “enough!”
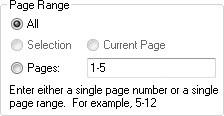
If you turn back to Figure 20-3, you’ll see that the Print dialog includes a Page Range section, although most of its controls are disabled by default. The PrintDialog control includes three Boolean properties that let you enable specific controls in that section: AllowCurrentPage, AllowSomePages, and AllowSelection. Setting any of these properties to True enables the matching option control. Later, after the user has made a choice, you can query the PrintDocument object’s PrinterSettings.PrintRange property to determine which choice it is.
Let’s add code that enables page range selection. We’ll still limit the allowed pages to just those numbered one to five, but the user will be able to choose a subrange within that set. Return to the Click event handler for the ActPrint button, and insert a few new lines of code (the ones in bold):
Private Sub ActPrint_Click(ByVal sender As System.Object, _
      ByVal e As System.EventArgs) Handles ActPrint.Click
   ' ----- Prompt the user for printer settings, and
   '       start printing.
   UserPrinter.Document = CountingDoc

   UserPrinter.AllowSomePages = True
   CountingDoc.PrinterSettings.MinimumPage = 1
   CountingDoc.PrinterSettings.MaximumPage = 5
   CountingDoc.PrinterSettings.FromPage = 1
   CountingDoc.PrinterSettings.ToPage = 5

   If (UserPrinter.ShowDialog(  ) = _
      Windows.Forms.DialogResult.OK) Then _
      CountingDoc.Print(  )
End Sub
When the user clicks on the Print button this time, the Print Range section of the dialog has enabled the Pages field, and it’s already filled in with the minimum and maximum pages in the range “1–5” (see Figure 20-8).
If the user adjusts this field to “1–6,” an error occurs stating that the valid range is somewhere within “1–5” only. But whether the user selects All Pages or 1–5 or 1–4 or 2–3 or Current Page or Selection, the PrintPage event handler will be called in exactly the same manner. In fact, the handler will be called dozens, even hundreds, of times until you tell it to stop. The user’s selection impacts the PrinterSettings.PrintRange property and some other properties, but it does not directly impact the print process. It is up to you to alter the print behavior based on these settings.
Let’s pretend that the user entered a print range of 2–3. We cannot let the PrintDocument fire the PrintPage event for all five pages because, even if we generated output for only pages 2 and 3, we would still get three other blank pages out of the printer. What we want is to have the event fire only twice, once for page 2 and once for page 3. We’ll need to adjust the use of the WhichPage class-level tracking variable to compensate for the indicated range. First, let’s change the BeginPrint handler to use the correct starting page number.
Private Sub CountingDoc_BeginPrint(ByVal sender As Object, _
      ByVal e As System.Drawing.Printing.PrintEventArgs) _
      Handles CountingDoc.BeginPrint
   ' ----- Start the counting over.
   WhichPage = CountingDoc.PrinterSettings.FromPage
End Sub
In the PrintPage event handler, we must modify the code that determines when to quit the print process.
WhichPage += 1
If (WhichPage <= CountingDoc.PrinterSettings.ToPage) _
   Then e.HasMorePages = True Else e.HasMorePages = False
Since the print preview code shares the same document settings, we need to adjust the preview code to force it to always print all pages.
Private Sub ActPreview_Click(ByVal sender As System.Object, _
      ByVal e As System.EventArgs) Handles ActPreview.Click
   ' ----- Display a preview of the document.
   UserPreview.Document = CountingDoc
   CountingDoc.PrinterSettings.PrintRange = _
      Printing.PrintRange.AllPages
   UserPreview.ShowDialog(  )
End Sub
If you run the program and adjust the print range, you should get just the pages you requested. I’ve placed a copy of this program in the book’s installation directory. You’ll find it in the Print Preview Test subdirectory.
Using GDI+ to generate printed pages is pretty straightforward. For complex pages, you may have to do a lot of positioning and measuring of text strings and whatnot, but it all boils down to “draw this text or this shape at this position.”
Sadly, not all printers support the application-to-printer-via-GDI-and-Printish way of doing things. This is especially true of printers used to print thermal credit card receipts at your favorite pizza place. Although some of these printers may have Windows drivers, they are really designed for direct communication with an application via their special “escape sequence” language. For such printers, you need to write directly to the printer in “raw” mode, where you control exactly which characters get sent to the printer. (Actually, you don’t have to go directly to the printer. You can still write to the printer’s queue, and let Windows manage the scheduling of the print job.)
It is with even more sadness that I must inform you of .NET’s lack of raw printer support. Although a DLL is included with Windows that enables this direct printing method, a managed .NET wrapper for it does not ship with the framework. You, and other overburdened programmers everywhere, must take up the charge yourselves.
Well, it’s not all that bad. Microsoft and other developers have published code that maps the unmanaged DLL calls to managed equivalents. We’ll be using a variation of some of this code in the Library Project in this chapter to support the printing of checkout slips, paper receipts that let a patron know which items were just checked out and when they are all due back.
I recommend that you peruse the printer-specific classes and controls discussed in this chapter. They include many properties that let you fine-tune the output of your printed page based on the user’s specified settings. For instance, I promised you earlier in the chapter that you could discover whether a printer supported color. The PrinterSettings.SupportsColor property gives you a straight-up yes or no answer to this feature question. If you know that a printer does not support color, you can adjust your PrintPage code to present the page content in a slightly different format.
As advertised, this chapter’s project focuses on the printing of checkout and fine-payment receipts. But we’ll also add all of the code that lets patrons and librarians check in and check out books and other library items.
PROJECT ACCESS
Load the Chapter 20 (Before) Code project, either through the New Project templates or by accessing the project directly from the installation directory. To see the code in its final form, load Chapter 20 (After) Code instead.
In the interest of frank and honest discussion, I must tell you that I didn’t come up with the basic code for raw printing in this section. Oh, some of the code is mine, both stylistically and imaginatively. But I didn’t figure out all of the links between the application and the winspool.drv file. That code originally came from Microsoft Knowledge Base article number 322090, which describes raw printing support from .NET applications. It uses a feature of .NET known as “interop” that allows .NET code to “interoperate” with older unmanaged COM-based components and applications.
Boy, am I glad that I got that off my chest. I mean, if anyone thought I was the one who came up with the code you are about to see, there would be angry mobs storming my house nightly, and general turmoil in the streets. The code, contained in the RawPrinterHelper class, is just plain ugly. Well, there’s no sense in postponing it any longer. Create a new class named RawPrinterHelper.vb, and use the following code for its definition.
INSERT SNIPPET
Insert Chapter 20, Snippet Item 1.
Imports System.Runtime.InteropServices

Public Class RawPrinterHelper
   ' ----- The code in this class is based on Microsoft
   '       knowledge base article number 322090.
   '       Web: http://support.microsoft.com/?id=322090

   ' ----- Structure and API declarations.
   <StructLayout(LayoutKind.Sequential, _
   CharSet:=CharSet.Unicode)> _
   Private Structure DOCINFOW
      <MarshalAs(UnmanagedType.LPWStr)> _
         Public pDocName As String
      <MarshalAs(UnmanagedType.LPWStr)> _
         Public pOutputFile As String
      <MarshalAs(UnmanagedType.LPWStr)> _
         Public pDataType As String
   End Structure

   <DllImport("winspool.Drv", EntryPoint:="OpenPrinterW", _
      SetLastError:=True, CharSet:=CharSet.Unicode, _
      ExactSpelling:=True, _
      CallingConvention:=CallingConvention.StdCall)> _
   Private Shared Function OpenPrinter(ByVal src As String, _
      ByRef hPrinter As IntPtr, ByVal pd As Long) As Boolean
   End Function

   <DllImport("winspool.Drv", EntryPoint:="ClosePrinter", _
      SetLastError:=True, CharSet:=CharSet.Unicode, _
      ExactSpelling:=True, _
      CallingConvention:=CallingConvention.StdCall)> _
   Private Shared Function ClosePrinter( _
      ByVal hPrinter As IntPtr) As Boolean
   End Function

   <DllImport("winspool.Drv", EntryPoint:="StartDocPrinterW", _
      SetLastError:=True, CharSet:=CharSet.Unicode, _
      ExactSpelling:=True, _
      CallingConvention:=CallingConvention.StdCall)> _
   Private Shared Function StartDocPrinter( _
      ByVal hPrinter As IntPtr, ByVal level As Int32, _
      ByRef pDI As DOCINFOW) As Boolean
   End Function

   <DllImport("winspool.Drv", EntryPoint:="EndDocPrinter", _
      SetLastError:=True, CharSet:=CharSet.Unicode, _
      ExactSpelling:=True, _
      CallingConvention:=CallingConvention.StdCall)> _
   Private Shared Function EndDocPrinter( _
      ByVal hPrinter As IntPtr) As Boolean
   End Function

   <DllImport("winspool.Drv", EntryPoint:="StartPagePrinter", _
      SetLastError:=True, CharSet:=CharSet.Unicode, _
      ExactSpelling:=True, _
      CallingConvention:=CallingConvention.StdCall)> _
   Private Shared Function StartPagePrinter( _
      ByVal hPrinter As IntPtr) As Boolean
   End Function

   <DllImport("winspool.Drv", EntryPoint:="EndPagePrinter", _
      SetLastError:=True, CharSet:=CharSet.Unicode, _
      ExactSpelling:=True, _
      CallingConvention:=CallingConvention.StdCall)> _
   Private Shared Function EndPagePrinter( _
      ByVal hPrinter As IntPtr) As Boolean
   End Function

   <DllImport("winspool.Drv", EntryPoint:="WritePrinter", _
      SetLastError:=True, CharSet:=CharSet.Unicode, _
      ExactSpelling:=True, _
      CallingConvention:=CallingConvention.StdCall)> _
   Private Shared Function WritePrinter( _
      ByVal hPrinter As IntPtr, ByVal pBytes As IntPtr, _
      ByVal dwCount As Int32, ByRef dwWritten As Int32) _
      As Boolean
   End Function

   Public Shared Function SendStringToPrinter( _
         ByVal targetPrinter As String, _
         ByVal stringContent As String, _
         ByVal documentTitle As String) As Boolean
      ' ----- Send an array of bytes to a printer queue.
      '       Return True on success.
      Dim printerHandle As IntPtr
      Dim errorCode As Int32
      Dim docDetail As DOCINFOW = Nothing
      Dim bytesWritten As Int32
      Dim printSuccess As Boolean
      Dim contentBytes As IntPtr
      Dim contentSize As Int32
      On Error Resume Next

      ' ----- Set up the identity of this document.
      With docDetail
         .pDocName = documentTitle
         .pDataType = "RAW"
      End With

      ' ----- Convert the string to ANSI text.
      contentSize = stringContent.Length(  )
      contentBytes = Marshal.StringToCoTaskMemAnsi( _
         stringContent)

      ' ----- Open the printer and print the document.
      printSuccess = False
      If OpenPrinter(targetPrinter, printerHandle, 0) Then
         If StartDocPrinter(printerHandle, 1, docDetail) Then
            If StartPagePrinter(printerHandle) Then
               ' ----- Send the content to the printer.
               printSuccess = WritePrinter(printerHandle, _
                  contentBytes, contentSize, bytesWritten)
               EndPagePrinter(printerHandle)
            End If
            EndDocPrinter(printerHandle)
         End If
         ClosePrinter(printerHandle)
      End If

      ' ----- GetLastError may provide information on the
      '       last error. For now, just ignore it.
      If (printSuccess = False) Then errorCode = _
         Marshal.GetLastWin32Error(  )

      ' ----- Free up unused memory.
      Marshal.FreeCoTaskMem(contentBytes)

      ' ----- Complete.
      Return printSuccess
   End Function
End Class
Although ugly, the code is relatively clear-cut. The SendStringToPrinter method prepares a string for printing by forcing it to a standard ANSI format. It then uses the functions in the winspool.drv library to open a new print job, and send the prepared content to it. There’s a whole lot of “marshalling” going on in the code through members of the Marshal class. Since winspool.drv is an unmanaged library, all data must be shuttled indirectly between the managed Library application and the unmanaged winspool.drv library.
Now that we have a convenient class that will send any raw content to any specific printer, let’s add some code to use it. First, we need to add a helper class for a portion of the ticket printing. Create a new class file named CheckedOutItem.vb, and replace its empty class template with the following code.
INSERT SNIPPET
Insert Chapter 20, Snippet Item 2.
Public Class CheckedOutItem
   ' ----- Used to store the details of each checked-out
   '       item on the main form, although it also supports
   '       receipt printing.
   Public ItemTitle As String
   Public CopyNumber As Integer
   Public Barcode As String
   Public DueDate As Date
End Class
We’ll use this class to convey the details to be printed on the receipt when checking out items. Speaking of ticket printing, let’s add the class that does the actual printing. Create a new module file (not a class) named TicketPrinting.vb. Replace its empty module definition with the snippet code.
INSERT SNIPPET
Insert Chapter 20, Snippet Item 3.
The code includes three methods that drive printing: PrintCheckoutTicket, PrintBalanceTicket, and PrintPaymentTicket. These methods are called from other parts of the application when it’s time to present a printed ticket to the user. The TicketPrinting module also includes a few other methods that support these three primary methods. Since these three methods are somewhat similar in structure, let’s just look at PrintCheckoutTicket.
Public Sub PrintCheckoutTicket(ByVal patronID As Integer, _
      ByVal checkedOutItems As ListBox)
   ' ----- Print out a ticket of what the patron checked
   '       out. The supplied ListBox control contains
   '       objects of type CheckedOutItem.
   Dim ticketWidth As Integer
   Dim ticketText As System.Text.StringBuilder
   Dim counter As Integer
   Dim patronFines As Decimal
   Dim itemDetail As CheckedOutItem

   On Error GoTo ErrorHandler
   ' ----- Ignore if there is nothing to print.
   If (patronID = −1) Or (checkedOutItems.Items.Count = 0) _
      Then Return

   ' ----- Get the width of the ticket.
   ticketWidth = My.Settings.ReceiptWidth
   If (ticketWidth <= 0) Then ticketWidth = 40

   ' ----- Build the heading.
   ticketText = GetTicketHeader(patronID, ticketWidth)
   If (ticketText Is Nothing) Then Return

   ' ----- Process each checked-out item.
   For counter = 0 To checkedOutItems.Items.Count - 1
      ' ----- Extract the detail from the list.
      itemDetail = CType(checkedOutItems.Items(counter), _
         CheckedOutItem)

      ' ----- Add the item name.
      ticketText.AppendLine(Left(itemDetail.ItemTitle, _
         ticketWidth))

      ' ----- Add the bar code number and due date.
      ticketText.AppendLine(LeftAndRightText( _
         itemDetail.Barcode, "Due: " & _
         Format(itemDetail.DueDate, "MMM d, yyyy"), _
         ticketWidth))
      ticketText.AppendLine(  )
   Next counter

   ' ----- If there are fines due, print them here.
   patronFines = CalculatePatronFines(patronID)
   If (patronFines > 0@) Then
      ticketText.AppendLine("Fines Due: " & _
         Format(patronFines, "Currency"))
      ticketText.AppendLine(  )
   End If

   ' ----- Add the bottom display text.
   ticketText.Append(GetTicketFooter(ticketWidth))

   ' ----- Send the ticket to the printer.
   RawPrinterHelper.SendStringToPrinter( _
      My.Settings.ReceiptPrinter, _
      ticketText.ToString(  ), "Checkout Receipt")
   Return

ErrorHandler:
   GeneralError("TicketPrinting.PrintCheckoutTicket", _
      Err.GetException(  ))
   Return
End Sub
The code builds a string (actually a StringBuilder) of display content, adding details about each checked-out item to a string buffer. Then it calls SendStringToPrinter to send the content to the configured receipt printer (My.Settings.ReceiptPrinter).
We’ll add the code that calls PrintCheckoutTicket later. Right now, let’s add code that calls the two other methods. When the Payment Record form closes, we want to automatically print a receipt of all payments made while the form was open. Add the following code to the PatronRecord.ActClose_Click event handler, just before the code already found in that handler.
INSERT SNIPPET
Insert Chapter 20, Snippet Item 4.
' ----- Print out a ticket if needed.
If (SessionPayments.Count > 0) Then _
   PrintPaymentTicket(ActivePatronID, SessionPayments)
SessionPayments.Clear(  )
SessionPayments = Nothing
Then, add some code to the ActBalanceTicket_Click event handler, also in the PatronRecord class, that prints a balance ticket when the user requests it.
INSERT SNIPPET
Insert Chapter 20, Snippet Item 5.
' ----- Print a ticket of all balances.
PrintBalanceTicket(ActivePatronID, Fines)
The Library Project prints three types of bar codes: (1) item bar codes that you can stick on books, CDs, and anything else that can be checked out or managed by the system; (2) patron bar codes that can be made into patron identification cards; and (3) miscellaneous bar codes that a library can use for any other purpose. All three bar code types are printed through the new BarcodePrint form. Figure 20-9 shows the controls included on this form.

I’ve already added this form to the project, including its code. Here’s the code for the Preview button, which should look familiar after I beat its concepts into you throughout this chapter.
Private Sub ActPreview_Click(ByVal sender As System.Object, _
      ByVal e As System.EventArgs) Handles ActPreview.Click
   ' ----- The user wants to preview the labels.
   On Error Resume Next
   ' ----- Make sure the user supplied valid data.
   If (VerifyFields(  ) = False) Then Return

   ' ----- Load in all of the page-specific details to be
   '       used in printing.
   If (LoadPageDetails(  ) = False) Then Return

   ' ----- Create the preview dialog.
   Me.Cursor = Windows.Forms.Cursors.WaitCursor
   PageSoFar = 0
   PreviewMode = True
   BarcodeDoc = New System.Drawing.Printing.PrintDocument

   ' ----- Display the preview.
   BarcodePreview.Document = BarcodeDoc
   BarcodePreview.ShowDialog(  )
   BarcodeDoc = Nothing
   Me.Cursor = Windows.Forms.Cursors.Default
End Sub
The Print button’s code is almost exactly the same, but it uses a PrintDialog instance instead of PrintPreviewDialog. It also keeps track of the final printed bar code number so that it can help avoid overlaps the next time they are printed.
The BarcodeDoc_PrintPage event handler does the actual bar code printing. Its code combines the BarcodeLabel.PreviewArea_Paint and BarcodePage.PreviewArea_Paint event handlers into one glorious printing machine.
To enable use of the bar code printing form, add the following statements to the ActReportsBarcode_Click event handler in the MainForm class.
INSERT SNIPPET
Insert Chapter 20, Snippet Item 6.
' ----- Make sure the user is allowed to do this.
If (SecurityProfile(LibrarySecurity. _
      ManageBarcodeTemplates) = False) Then
   MsgBox(NotAuthorizedMessage, MsgBoxStyle.OkOnly Or _
      MsgBoxStyle.Exclamation, ProgramTitle)
   Return
End If

' ----- Show the bar code label printing form.
Call (New BarcodePrint).ShowDialog( )For a library patron, the only thing more important than checking items out and in is being able to read those items. The Library Project won’t help anyone with that, but it will do that check-in, checkout transaction thing through the code we add in this chapter. Let’s start by adding the renewal code for currently checked-out items. The Renew button on the Patron Record form initiates the process. Add the code to the PatronRecord.ActRenewItemsOut_Click event handler that does the renewal.
INSERT SNIPPET
Insert Chapter 20, Snippet Item 7.
The code does some calculations to determine the new due date (avoiding holidays), and then updates the database in a transaction.
TransactionBegin(  )

' ----- Update the record.
sqlText = "UPDATE PatronCopy SET DueDate = " & _
   DBDate(dueDate) & ", Renewal = " & renewsSoFar & _
   " WHERE ID = " & itemDetail.DetailID
ExecuteSQL(sqlText)

' ----- Update the patron record.
sqlText = "UPDATE Patron SET LastActivity = GETDATE(  ) " & _
   "WHERE ID = " & ActivePatronID
ExecuteSQL(sqlText)

TransactionCommit(  )
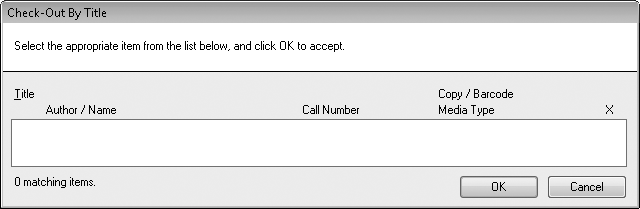
If a library adds bar code labels to all of its items, check-in and checkout will be via a bar code reader. But a very small library using the program may not have the staff time available to bar code everything on the shelves. Therefore, the Library Project needs to support check-in and checkout by title. During checkout or check-in, the user enters either a bar code or a title (partial or complete). Non-numeric entries are assumed to be titles, and initiate a title search. The new CheckLookup.vb form, pictured in Figure 20-10, displays all matches for the entered title.
Although the fields on the form initially indicate that they are for checkout only, the form does double duty, altering its visage for check-in purposes. Additionally, check-in listings are limited to only those items already checked out.
I’ve already added this form to the project, along with its source code. Most of the code queries the database for matching library items and displays the results using an owner draw listbox. It is a subset of the code found in the ItemLookup.vb form. The only real difference between check-in and checkout occurs in the PerformLookup method. This code block starts to build the main item selection SQL command, and then ends it with these statements:
If (asCheckIn) Then sqlText &= " AND IC.ID IN" _
   Else sqlText &= " AND IC.ID NOT IN"
sqlText &= " (SELECT ItemCopy FROM PatronCopy " & _
   "WHERE Returned = 0)"
So, the difference is “IN” versus “NOT IN.”
The CheckItemByTitle function is the main interface to the form’s logic.
Public Function CheckItemByTitle(ByVal CheckIn As Boolean, _
   ByVal searchText As String) As Integer
You pass this function the user-supplied title (searchText) and a flag indicating check-in or checkout, and it returns the ItemCopy.ID database field for the selected library item.
All of the remaining changes in this chapter occur in the MainForm class, so let’s go there now. The UpdateDisplayForUser method adjusts the main form’s features when an administrator logs in or out. One feature we didn’t take into account before is the administrator-defined ability for patrons to check out their own items without librarian assistance. To support that feature, we need to change some of the code in the UpdateDisplayForUser method. About 10 lines into the code, in the conditional section that sets up the display for patrons, you’ll find these four lines:
LabelTasks.Visible = False
LineTasks.Visible = False
PicCheckOut.Visible = False
ActCheckOut.Visible = False
Replace these four lines with the following code.
INSERT SNIPPET
Insert Chapter 20, Snippet Item 8.
' ----- See if patrons can check out items by themselves.
Dim userCanCheckOut As Boolean = _
   CBool(Val(GetSystemValue("PatronCheckOut")))

LabelTasks.Visible = userCanCheckOut
LineTasks.Visible = userCanCheckOut
PicCheckOut.Visible = userCanCheckOut
ActCheckOut.Visible = userCanCheckOut
We also need to add similar security-related code to the TaskCheckOut method. Here are the first few lines of code from that method:
' ----- Update the display.
AllPanelsInvisible(  )
If (SecurityProfile(LibrarySecurity.CheckOutItems)) Then _
   PanelCheckOut.Visible = True
Replace these lines with the following code.
INSERT SNIPPET
Insert Chapter 20, Snippet Item 9.
' ----- Check Out mode.
Dim userCanCheckOut As Boolean

' ----- See if patrons can check out items by themselves.
userCanCheckOut = CBool(Val(GetSystemValue("PatronCheckOut")))

' ----- Update the display.
AllPanelsInvisible(  )
If (userCanCheckOut Or _
   SecurityProfile(LibrarySecurity.CheckOutItems)) Then _
   PanelCheckOut.Visible = True
The actual checkout of items occurs on the main form itself. First, a patron is identified, and then the items to check out get processed. Let’s add a class-level variable to MainForm to keep track of the patron. And as long as we’re adding definitions, we’ll also add two constants that refer to images stored in the MainForm.StatusImages control. These constants will be used in some check-in-related code added a little later. Add the following code to the start of the class definition.
INSERT SNIPPET
Insert Chapter 20, Snippet Item 10.
Private ActiveCheckOutPatron As Integer = −1

Private Const StatusImageBad As Integer = 0
Private Const StatusImageGood As Integer = 1
When the user identifies the patron to use for checkout, and then starts checking items out, the last step is a click of the Finish button, indicating the end of the checkout process for that patron. (Skip ahead to Figure 20-11 if you want to see the Finish button now.) However, there is nothing to stop the user from jumping to another part of the program, or from exiting the program completely, without first clicking the Finish button. We must anticipate this rude behavior so typical of software users. To ensure that checkout completes properly, we will add some code to three places in MainForm that should catch any such discourteous actions by the user. Add the following code to the start of these three methods: (1) the MainForm_FormClosing event handler; (2) the ShowLoginForm method; and (3) the AllPanelsInvisible method.
INSERT SNIPPET
Insert Chapter 20, Snippet Item 11 three times.
' ----- Finish the in-process check-out if needed.
If (ActiveCheckOutPatron <> −1) Then _
   ActFinishCheckOut.PerformClick(  )
All of the checkout code (except for the code in the CheckLookup.vb form) appears in the main form’s class. Checkout is one of the eight main display panels accessed through this form (see Figure 20-11).

Here’s the process for checking out items from the checkout panel:
The user clicks the Patron button and identifies the patron who will check out items.
The user enters the title or bar code for each item to check out, and clicks the Check Out button for each one.
The user clicks the Finish button when checkout is complete.
Let’s add the code for each of these three buttons. First, add code to the ActCheckOutPatron_Click event handler.
INSERT SNIPPET
Insert Chapter 20, Snippet Item 12.
This code prompts the user for patron selection, and displays the remaining fields if successful. Here’s the part of the code that does the prompting:
' ----- Get the ID of the patron.
patronID = (New PatronAccess).SelectPatron(  )
If (patronID = −1) Then Return

' ----- Get the patron name.
sqlText = "SELECT FirstName + ' ' + LastName FROM Patron " & _
   "WHERE ID = " & patronID
patronName = CStr(ExecuteSQLReturn(sqlText))

' ----- Is this patron active?
sqlText = "SELECT Active FROM Patron WHERE ID = " & patronID
If (CBool(ExecuteSQLReturn(sqlText)) = False) Then
   MsgBox("Patron '" & patronName & _
      "' is marked as inactive.", MsgBoxStyle.OkOnly Or _
      MsgBoxStyle.Exclamation, ProgramTitle)
   Return
End If
Add code to the ActDoCheckOut_Click event handler, which processes each item through the Check Out button.
INSERT SNIPPET
Insert Chapter 20, Snippet Item 13.
As I mentioned before, this code differentiates between numeric entry (bar codes) and other entries (titles).
If (IsNumeric(Trim(CheckOutBarcode.Text))) Then
   ' ----- Probably a bar code supplied. Get the related ID.
   sqlText = "SELECT ID FROM ItemCopy WHERE Barcode = " & _
      DBText(Trim(CheckOutBarcode.Text))
   copyID = DBGetInteger(ExecuteSQLReturn(sqlText))
   If (copyID = 0) Then
      ' ----- Invalid bar code.
      MsgBox("Bar code not found.", MsgBoxStyle.OkOnly Or _
         MsgBoxStyle.Exclamation, ProgramTitle)
      CheckOutBarcode.Focus(  )
      CheckOutBarcode.SelectAll(  )
      Return
   End If
Else
   ' ----- Lookup by title.
   copyID = (New CheckLookup).CheckItemByTitle(False, _
      Trim(CheckOutBarcode.Text))
   If (copyID = −1) Then Return
End If
Eventually, after verifying that the item is available for patron use, the code checks out the item by updating the relevant records in the database.
TransactionBegin(  )

' ----- Update patron copy record.
sqlText = "INSERT INTO PatronCopy (Patron, ItemCopy, " & _
   "CheckOut, Renewal, DueDate, Returned, Missing, " & _
   "Fine, Paid) VALUES (" & ActiveCheckOutPatron & ", " & _
   copyID & ", " & DBDate(Today) & ", 0, " & _
   DBDate(untilDate) & ", 0, 0, 0, 0)"
ExecuteSQL(sqlText)

' ----- Update the patron record.
sqlText = "UPDATE Patron SET LastActivity = GETDATE(  ) " & _
   "WHERE ID = " & ActiveCheckOutPatron
ExecuteSQL(sqlText)

TransactionCommit(  )
The last of the three buttons is the Finish button. Add code to the ActFinishCheckOut_Click event handler.
INSERT SNIPPET
Insert Chapter 20, Snippet Item 14.
This code simply resets the display fields in preparation for the next patron checkout.
The listbox on the checkout panel needs to display two columns of data: (1) the due date; and (2) details of the item, such as title and bar code. These values were added to the list using the CheckedOutItem class we added a little earlier in the chapter. Add code to the CheckedOutItems_DrawItem event handler.
INSERT SNIPPET
Insert Chapter 20, Snippet Item 15.
Checking in items is much simpler since we don’t need to first identify the patron. The bar code or title of the check-in item is sufficient to complete all processing. Figure 20-12 shows the check-in panel.

This panel includes a date indicating when the item will be checked in. Normally, that’s today, but if library items are turned in through a nighttime repository after business hours, the librarian might want to adjust the date to “Yesterday,” just in case any of these items were turned in before midnight. Let’s add some code so that the panel indicates “Today” or “Yesterday” or some other day when the date changes. Add the following code to the CheckedInDate_ValueChanged event handler.
INSERT SNIPPET
Insert Chapter 20, Snippet Item 16.
' ----- Adjust the day in the display.
Select Case DateDiff(DateInterval.Day, _
      CheckInDate.Value, Today)
   Case 0    ' ----- Today
      CheckInDay.Text = "Today"
      CheckInDay.BackColor = SystemColors.Control
      CheckInDay.ForeColor = SystemColors.ControlText
   Case 1    ' ----- Yesterday
      CheckInDay.Text = "Yesterday"
      CheckInDay.BackColor = Color.Red
      CheckInDay.ForeColor = Color.White
   Case Else ' ----- X days ago
      CheckInDay.Text = DateDiff(DateInterval.Day, _
      CheckInDate.Value, Today) & " days ago"
      CheckInDay.BackColor = Color.Red
      CheckInDay.ForeColor = Color.White
End Select
The actual check-in occurs when the user enters a bar code or title in the text field, and clicks the Check In button. Add code to the ActDoCheckIn_Click event handler.
INSERT SNIPPET
Insert Chapter 20, Snippet Item 17.
After performing some lookups and confirmation checks, the code checks in the item through database updates.
' ----- Do the check-in in a transaction.
TransactionBegin(  )

' ----- Update patron copy record.
sqlText = "UPDATE PatronCopy SET CheckIn = " & _
   DBDate(CheckInDate.Value) & _
   ", Returned = 1 WHERE ID = " & patronCopyID
ExecuteSQL(sqlText)
' ----- Update the patron record.
sqlText = "UPDATE Patron SET LastActivity = " & _
   "GETDATE(  ) WHERE ID = " & patronID
ExecuteSQL(sqlText)

TransactionCommit(  )
That’s it for the check-in and checkout procedures, and all ticket printing. It’s pretty good code, but not yet perfect. What we haven’t yet added is code to properly process fines on items before they are checked in, or as they are adjusted in other ways. We will postpone this logic until Chapter 22. Until then, let’s look at another application printing feature: reports.
[5] You can find the article referenced on my web site, http://www.timaki.com, in the Articles section.