6.2 What Is Digital Image Processing?
Digital photography is a popular way to produce photographs. Indeed, it sometimes seems as if almost everyone has either a camera on their cell phone or a digital camera, or both, as well as software that can organize and manipulate photographs. In this chapter, we consider digital images and many of the techniques that can be used to modify and enhance them.
Digital image processing refers to the process of using algorithms to edit and manipulate digital images. A digital image is a collection of small, discrete picture elements called pixels. These pixels are organized in a two-dimensional grid and represent the smallest amount of picture information that can be referenced. If you look closely at an image, you may notice that pixels sometimes appear as small “dots.” More pixels in your image mean more detail or higher resolution.
Digital cameras are often rated according to how much resolution they provide. Typically, resolution is expressed as a number of megapixels. One megapixel means that the picture you take is composed of 1 million pixels. A 20-megapixel camera is capable of taking a picture composed of as many as 20 million pixels.
6.2.1 The RGB Color Model
Each pixel in the digital image has a single color. Its specific color depends on a formula that mixes various amounts of the colors red, green, and blue. Defining colors as a combination of red, green, and blue is often referred to as the RGB color model.
The amount of each color component in a pixel is referred to as its intensity. Intensities range from a minimum of 0 to a maximum of 255. For example, a color with 255 red intensity, 0 green intensity, and 255 blue intensity will be purple (or magenta). Black has zero intensity for all color components, whereas white has full color intensity, 255, for all three elements. TABLE 6.1 shows some common RGB color combinations.
TABLE 6.1 Red, Green, and Blue Intensities for Some Common Colors |
|---|
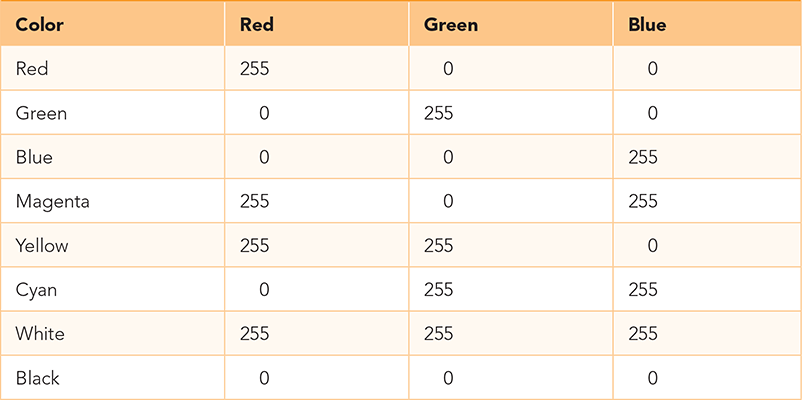 |
An interesting fact arises when you consider how many colors are possible using the RGB color model. With each of the three colors having 256 intensity levels, there are 2563 = 16,777,216 different combinations of red, green, and blue intensities.
6.2.2 The cImage Module
To manipulate images, we will use a group of objects found in our cImage module. (See “Installing the Required Software” in Appendix A for instructions on downloading and installing cImage.py.) This module contains objects that allow us to construct and manipulate pixels. We can also construct an image from a file or create a blank image that we can fill in later. In addition, we can create windows where images can be displayed.
The Pixel Object
Images are collections of pixels. To represent a pixel, we need a way to collect the red, green, and blue components of its color. The Pixel object provides a constructor and methods that allow us to create and manipulate the color components of pixels. TABLE 6.2 shows the constructor and methods provided by the Pixel object, and SESSION 6.1 shows them in action. The constructor requires the three color components; it returns a reference to a Pixel object that can be accessed or modified. We can extract the color intensities using the getRed, getGreen, and getBlue methods. Similarly, we can modify the individual components within a pixel using the setRed, setGreen, and setBlue methods.
TABLE 6.2 The |
||
|---|---|---|
| Method Name | Example Use | Explanation |
Pixel(r, g, b) |
p = Pixel(25, 200, 143) |
Create a pixel with color component intensities of 25 red, 200 green, and 143 blue. |
getRed() |
r = p.getRed() |
Return the red component intensity. |
getGreen() |
g = p.getGreen() |
Return the green component intensity. |
getBlue() |
b = p.getBlue() |
Return the blue component intensity. |
setRed(r) |
p.setRed(100) |
Set the red component intensity to 100. |
setGreen(g) |
p.setGreen(45) |
Set the green component intensity to 45. |
setBlue(b) |
p.setBlue(87) |
Set the blue component intensity to 87. |
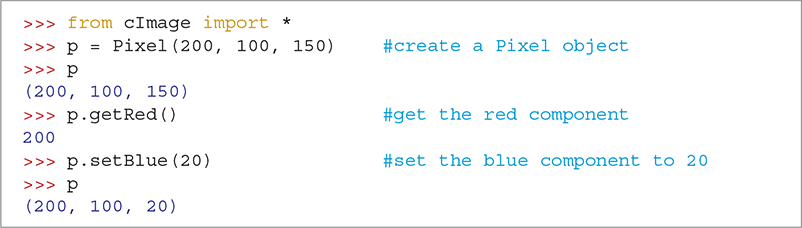
SESSION 6.1 Creating and using a pixel
The ImageWin Object
Before creating images, we will create a window that can be used to display our images. The ImageWin object provides a constructor that produces a window with a title, width, and height. When a window is constructed, it is shown immediately. The following code produces an empty window that is 600 pixels wide and 400 pixels high:

TABLE 6.3 shows additional methods for the ImageWin object. Note that the getMouse method returns a coordinate position within the window itself and is not related to any particular image that might be displayed within the window.
TABLE 6.3 The |
||
|---|---|---|
| Method Name | Example Use | Explanation |
ImageWin(title, width, height) |
myWin = ImageWin("Pictures", 800, 600) |
Create a window to display images that are 800 pixels wide and 600 pixels high with the title “Pictures.” |
exitOnClick() |
myWin.exitOnClick() |
Close the image window, and exit when the mouse is clicked. |
getMouse() |
pos = myWin.getMouse() |
Wait for a mouse click and then return an (x, y) tuple representing the (col, row) of the mouse click in the window. |
Now that we have a window, we need to create images to display. The cImage module provides two kinds of image objects: FileImage and EmptyImage. These objects allow us to create and manipulate images, and they give us simple access to the pixels in each image. TABLE 6.4 shows the two constructors for creating images, as well as other methods that are provided by both objects.
TABLE 6.4 |
||
|---|---|---|
| Method Name | Example Use | Explanation |
FileImage(filename) |
im = FileImage ("pic.gif") |
Create an image object from a file named pic.gif. |
EmptyImage(width, height) |
im = EmptyImage(300, 200) |
Create an empty image that is 300 pixels wide and 200 pixels high. |
getWidth() |
w = im.getWidth() |
Return the width of the image in pixels. |
getHeight() |
h = im.getHeight() |
Return the height of the image in pixels. |
getPixel(col, row) |
p = im.getPixel(150, 100) |
Return the pixel from row 100, column 150. |
setPixel(col, row, Pixel) |
im.setPixel(150, 100, Pixel(255, 255, 255)) |
Set the pixel at row 100, column 150 to be white. |
setPosition(col, row) |
im.setPosition(20, 30) |
Position the top-left corner of the image at (column 20, row 30) in the window. |
draw(ImageWin) |
im.draw(myWin) |
Draw the image im in the myWin image window. It will default to the upper-left corner. |
save(fileName) |
im.save(fileName) |
Save the image to a file. |
The FileImage Object
The FileImage object is an image that is constructed from files such as those that are created by digital cameras or that reside on web pages. For this chapter, we are using an image named butterfly.png. SESSION 6.2 shows that the FileImage constructor needs only the name of the image file. It converts the image stored in that file to an image object. In this case, butterfly is the reference to that object.

SESSION 6.2 Creating and showing a file image
We can use the draw method to ask the image object to show itself in an image window. The default positioning is to place the image in the upper-left corner of the window. FIGURE 6.1 shows the result.
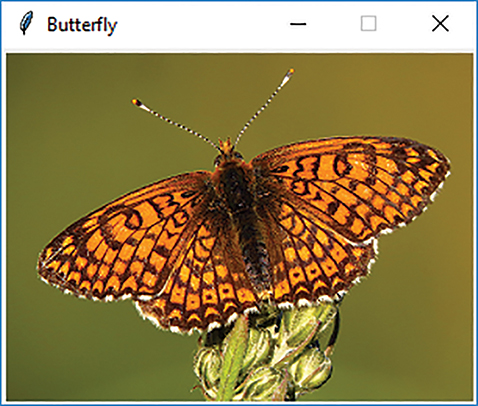
FIGURE 6.1 Drawing an image in a window. (Original image: © Luka Hercigonja/Shutterstock.)
As noted earlier, an image is a two-dimensional grid of pixel values. Each small square in FIGURE 6.2 represents a pixel that can take on any one of the millions of colors in the RGB color model. We can access information about our specific image by using the getWidth and getHeight methods (see SESSION 6.3). The image in Figure 6.1 is 300 pixels across and 224 pixels from top to bottom. Rows are numbered from 0 to 1 less than the height of the image. Columns are numbered from 0 to 1 less than the width.
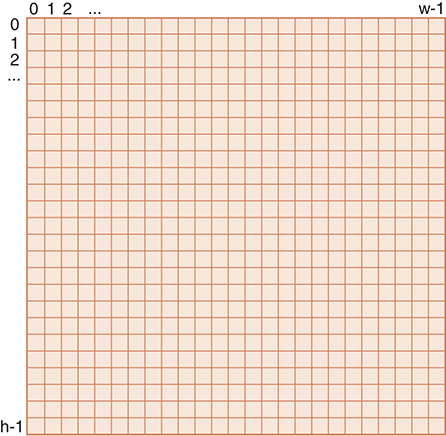
FIGURE 6.2 Details of an image.

SESSION 6.3 Accessing information about an image
We can access a particular pixel by using the getPixel method. To use getPixel, we must provide the location of the pixel of interest. The location will be a pair of values, one specifying the column and one specifying the row. Each unique column–row pair provides access to a single pixel.
In the example, we are accessing the pixel located at column 124, row 165. In other words, this pixel is 125 pixels from the left and 166 pixels from the top—remember that we start counting at 0. The value that is returned in our example shows the red, green, and blue components of the Pixel at that location in our image.
The EmptyImage Object
We often want to build a new image in a pixel-by-pixel manner starting with a “blank” image. Using the EmptyImage constructor, we can create an image that has a specific width and height but where each pixel is void of color. In other words, each Pixel object has the value (0, 0, 0) or “black.” The statements in SESSION 6.4 create an empty image with all black pixels.

SESSION 6.4 Creating and displaying an empty image
As an example to show the basic use of the image methods, we will construct an image that starts out empty and then is filled with white pixels at specific locations. SESSION 6.5 begins by creating a window and an empty image that is sized to fit the window. To create a line of white pixels, we use a loop variable i and iterate over the range of the image height (from 0 to 299). We can call the setPixel method using the value of i for both column and row with a pixel called whitePixel that has been created with a combination of red, green, and blue components, each set to 255. We draw the image in the window as shown in FIGURE 6.3. Finally, we save the image to a file using the save method.
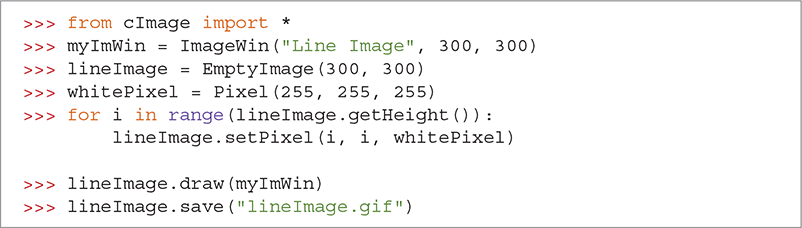
SESSION 6.5 Using EmptyImage
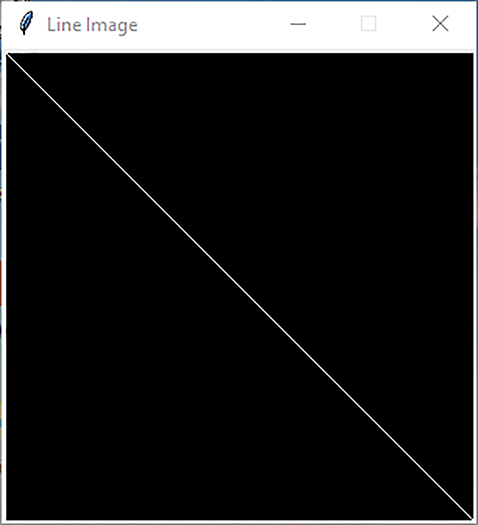
FIGURE 6.3 Creating a white diagonal line.
© 2001–2019 Python Software Foundation. All Rights Reserved.