
In this chapter
Although developing database-driven web applications is great, it’s likely that at some point you will want to do something with the data other than just display it on a web page. Whether it’s understanding how many customers you have, how many orders you have processed, how many posts have been added to your forum, or a host of other data-related questions, you can often answer them by generating a report. Tools such as Crystal Reports and Active Reports generate nicely formatted reports complete with charts and graphs.
The difficulty, however, is creating dynamic reports that are easily incorporated into a web page. Luckily, Macromedia has addressed that point of pain in the new version of ColdFusion and has added a wealth of reporting capabilities to the application.
One of the most important aspects of developing reports is the form that specifies what criteria should be retrieved from the database. In the past, web developers have had to rely on HTML forms to create an interface that enables the user to select report criteria. The problem with HTML forms, however, is that they are very limited in their capabilities and aren’t really suited for selections that require multiple steps.
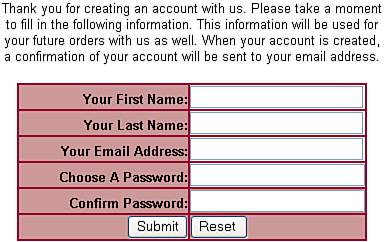
For instance, suppose that Retro’s Cycles decided to add eCommerce to their website and that they want their customers to be able to create a profile that stores their shipping information and payment information so that they don’t have to fill in their information every time they return to the site. Using traditional HTML forms to accomplish this, several forms would be necessary. The first, shown in Figure 19.1, enables the user to input user information and shipping information.
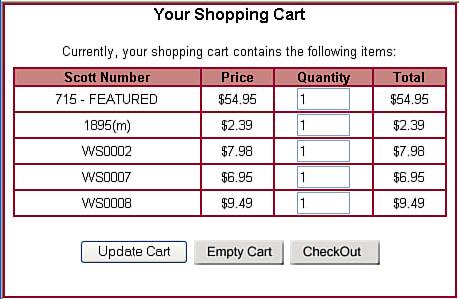
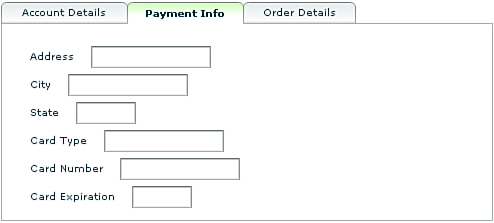
Next, a second form would be necessary to collect information about payment information, similar to the one shown in Figure 19.2.
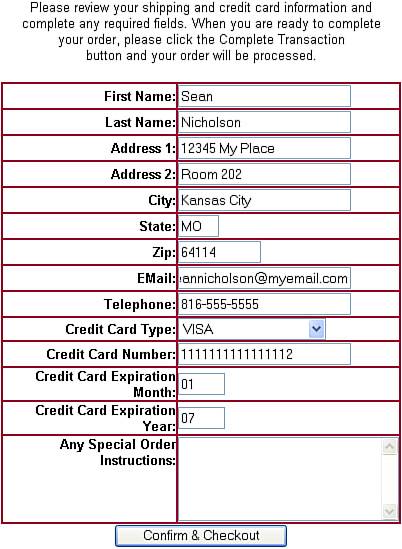
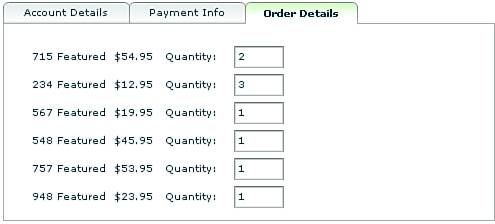
Finally, a third form would be necessary that enables the customer to enter details about the current order, such as the one in Figure 19.3.
As a result, there are now three forms on three different pages, which increases the possibility that something could go wrong on one of the pages.
Note
Although you could group all these form fields into one long form, this makes the interface difficult to use for your visitors. Think of what would happen if they completed all the information and then, while completing the last field, something happened such as a browser crash. All the time they spent filling in the long form is now wasted because they have to start over from scratch.
For this reason, it’s a wise idea to create forms that are short and save segments of data prior to moving on to the next step. That way, if something happens, customers can return and pick up where they left off, having only lost a small portion of their data.
So what’s the solution to the problems presented with traditional HTML forms? Flash forms! ColdFusion now allows you to develop forms in the Flash format that enable you to create tabbed views of forms, enable your visitors to save their progress while filling out a form, and give you much more flexibility in controlling how your forms look to your customers.
Using the <CFFORM> tag and the Flash format, you can create a single rich media form that provides the same functionality as the HTML forms I previously mentioned, using a tabbed layout. These forms can be created within Dreamweaver’s code view or with a simple text editor. As shown in Figure 19.4, the first tab of the form allows the visitor to enter personal information.
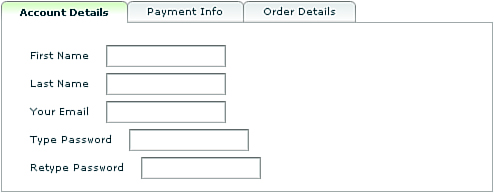
Notice that the form allows users to save their customer information before moving on to the next tab if they choose. The second tab (see Figure 19.5) allows customers to enter their payment information and again, allows them to save their information.
Finally, the third tab (see Figure 19.6) enables them to review any orders they have submitted and the status of those orders.
As you can see, the Flash-formatted form offers a wider variety of options and functionality over the traditional HTML forms. So how do you create Flash forms in ColdFusion? It’s easy because the Flash content is generated automatically, without requiring you to write complex code.
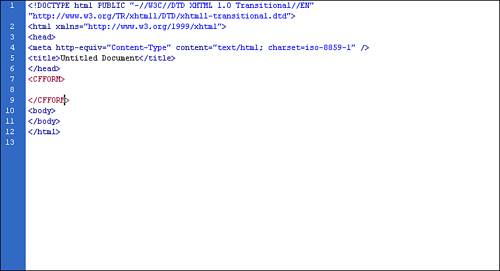
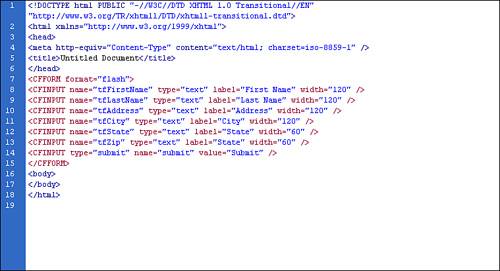
The first step in creating a Flash form is to use the <CFFORM> tag to create a ColdFusion form, as shown in Figure 19.7.
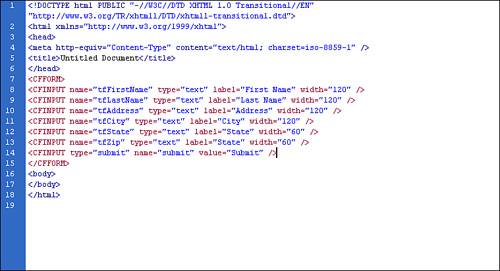
Next, add any input types that you want, such as first name, last name, address, and so on, using the <CFINPUT> tag. The fields in Figure 19.8 are all text fields and are named tfFirstName, tfLastName, tfAddress, tfCity, tfState, and tfZip. There is also a single input button.
Next, change the format of the form to the Flash format, as shown in Figure 19.9 and presto! you have a Flash form.
Suppose that you wanted to follow the example discussed earlier and provide additional functionality with tabs. Adding a tab to your form is as simple as adding the form fields you want to display on the second tab, creating a tabNavigator group, and then creating form groups with the <cfformgroup> tag.
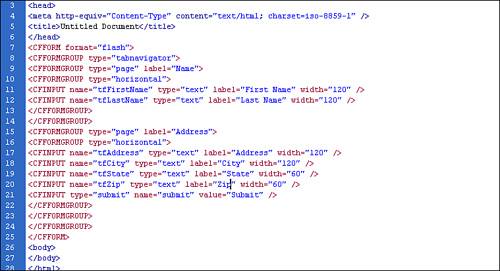
As shown in Figure 19.10, ColdFusion MX 7 enables you to group form elements into groups. The first group you need to establish is the tabNavigator group. This group type establishes that you are going to use multiple tabs in your form.

Next, you need to create additional groups that contain the specific inputs for each tab (see Figure 19.11). For each group you create with the <cfformgroup> tag, a new tab is created. In addition, the label assigned to the group is what is displayed in the tab.
With the basic form in place, you can then add functionality such as adding the information to a database, sending emails to administrators or staff, or retrieving and displaying content in a report format.
Now that your visitors can use Flash forms to submit limiting criteria, they should be able to choose what data they would like to retrieve from your database. You can represent the results of their data requests either numerically or graphically by using the ColdFusion MX 7 Report Engine. Before your visitors can see the report, however, you need to develop a report template that contains a header, footer, and the appropriate data labels and data placeholders.
The tool that Macromedia has developed for building reports is called the ColdFusion Report Builder (see Figure 19.12). This tool doesn’t come installed with ColdFusion, but is available on the Macromedia website at http://www.macromedia.com/software/coldfusion/reporting/.

Note
At the time of publishing, the Report Builder was available for only the Windows operating system.
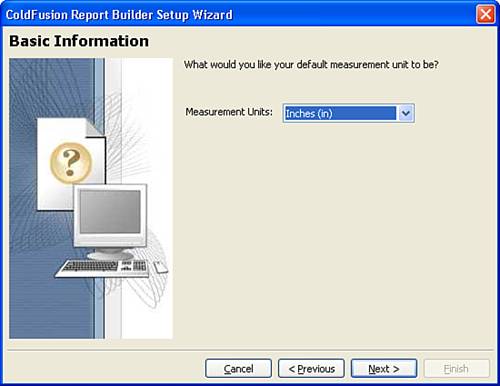
Before you can begin building your new reports, you need to configure the Report Builder. After you run the Report Builder for the first time, you are asked to indicate what you want your default measurement for page layout to be (see Figure 19.13). Choose the measurement with which you’re most comfortable for tasks such as page layout.
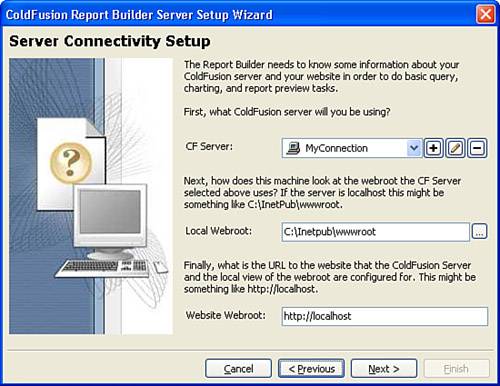
Next, you need to add a CF Server and indicate where your local web pages are stored (see Figure 19.14).
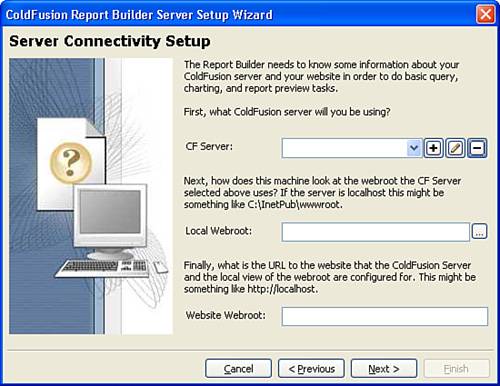
To add a CF server, simply click the plus sign and complete the details for the server to which you want to connect. Be sure to type the correct RDS username and password to avoid authentication issues (see Figure 19.15).
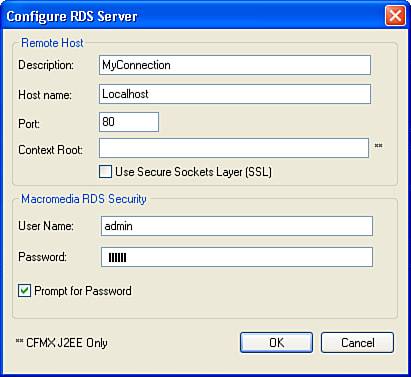
Tip
To use the Report Builder, you need the ColdFusion server to be running the RDS Security service. If you installed ColdFusion on your local machine, but did not configure RDS, you need to configure it via the ColdFusion Administrator before you can work with the Report Builder application.
Next, type or browse to the local web root and ensure that the website web root field is correct (see Figure 19.16). When the values are correct, move on to the next step and complete the setup wizard.
After downloading and configuring the Report Builder, you can easily create reports and subreports by using the two wizards that are included in the application:
Report Creation Wizard
Server Setup Wizard
As you become more and more adept at creating reports, you can skip the wizards and create completely custom reports based on the blank report, your data, and input submitted by the visitor. To give you an introduction to the application, we give you a look at the Report Creation Wizard and its functionality.
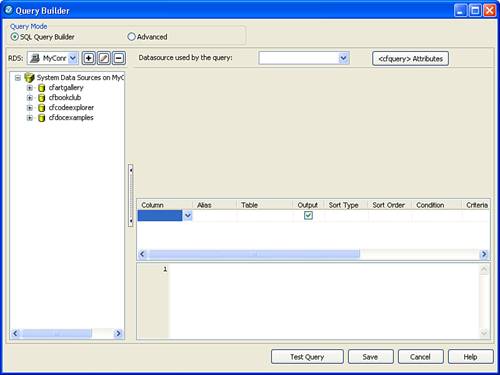
The first step in using the wizard to create a report is to develop a SQL query that draws the correct data from the database, creating a recordset that you can use to display in the report. Click the Query Builder button and choose a database, table, and selection criteria for the data that is to be used in the report. The SQL query in Figure 19.17 would retrieve all the records in the Inventory database.
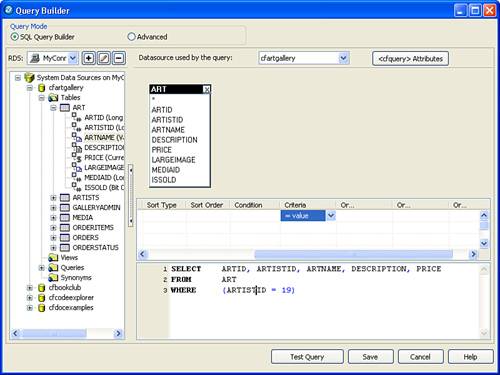
You can refine your data by using conditional variables to limit the results. For instance, if you had developed a form that allowed visitors to choose the make of a motorcycle they wanted to view, the contents of that form field might be passed as a form value called “Make.” The query in Figure 19.18 shows how the SQL query can be limited with this variable.
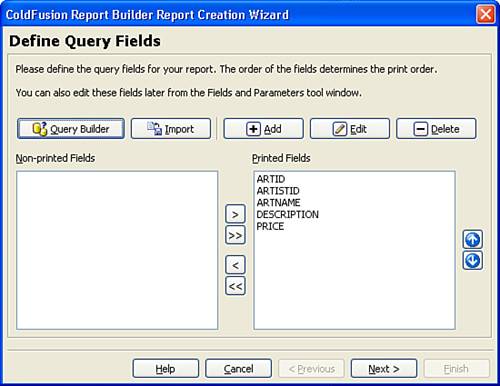
After you have developed your query, click the Save button to return to the Report Creation Wizard. The wizard now displays the columns you chose to retrieve from the database (see Figure 19.19) and enables you to choose which will actually be visible in the report.
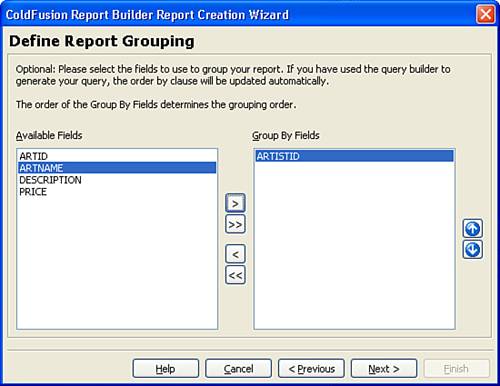
In the next dialog within the wizard, you can choose how to group the records retrieved by your SQL query (see Figure 19.20). Groupings generally help the reader of the report easily compare the data that is being displayed. For instance, if Retro’s Cycles had four Honda Super Hawk motorcycles for sale, you could group the data by Model and the person reviewing the report could easily compare the attributes of the four Super Hawks.
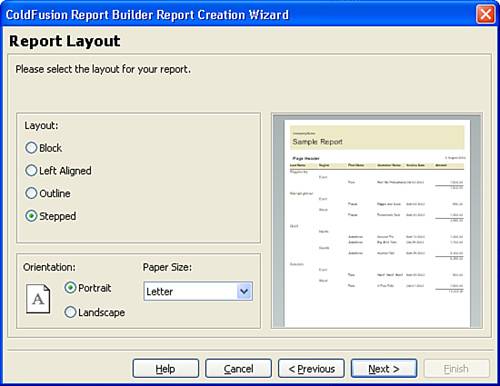
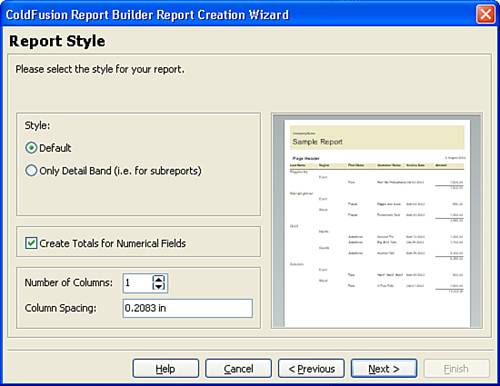
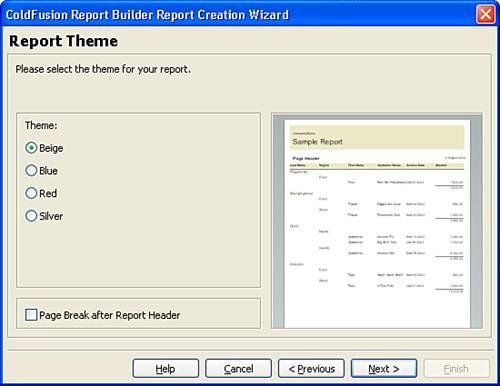
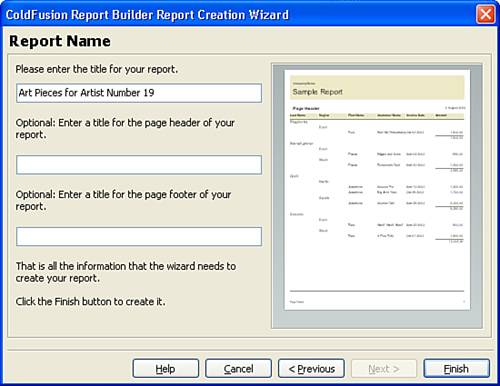
Following through the rest of the wizard, you can customize your report’s layout (see Figure 19.21), style (see Figure 19.22), theme (see Figure 19.23), and name (see Figure 19.24).
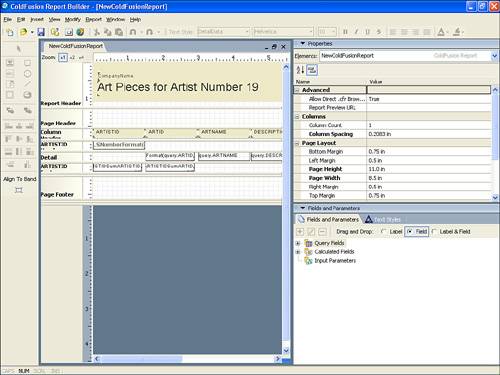
With those elements in place you can now build the report. As shown in Figure 19.25, the complete report enables you to further customize any of the report elements, data placeholders, and layout options within the report.
The last step to creating your custom report is to save the report file. Each report is saved with a .cfr extension that the ColdFusion server can interpret. As you’ll see in a minute, this single CFR page can then be displayed in a variety of different formats.
Tip
For a great walkthrough on using custom input parameters in reports, check out Ben Forta’s tutorial at http://macromedia.breezecentral.com/p99229136/.
ColdFusion MX 7 not only enables you to create stunning, dynamic reports based on your database content, but it also enables you to provide these reports to your users in a variety of formats. In fact, you can display the same report in multiple formats in a snap. After you create a report, just add the appropriate tag to your web page and ColdFusion does the rest.
One of the most popular formats for displaying reports via a web browser is the Adobe Portable Document Format (PDF). This file format enables you to package a document in a single file that can be emailed, stored on disk, or displayed on your website with the free Adobe Acrobat Reader application that is available via Adobe’s website.
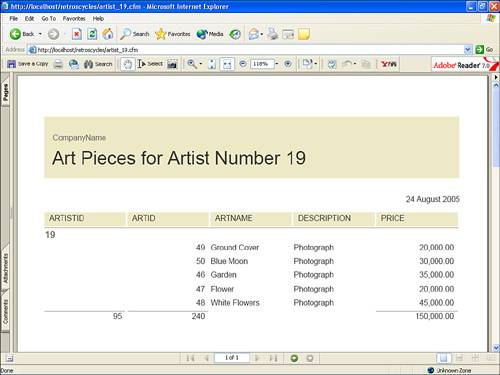
To create a report that uses the PDF format, all you need to do is add the <cfreport> tag to your page and set the format to PDF. For instance, the following code would call a report named retros_customers.cfr:
<cfreport template = "artist_19.cfr" format = "PDF"></cfreport>
Note
When you specify the template location for your report, the filename is relative to your site’s web root.
That’s it! Just save your page and view it in your browser (see Figure 19.26).
Before we move on to the next format, it would probably be good to mention the various attributes that you can add to the cfreport tag when generating reports:
Name—. Enables you to specify the name of a ColdFusion variable that holds report output.Filename—. Used instead of the Name attribute, it enables you to specify a filename that will contain the report after it is generated.Query—. Enables you to specify a SQL query if one has not been embedded in the report.Overwrite—. Specifies whether or not files that already exist can be overwritten.Encryption—. Used for PDF reports only, this attribute can be set to 128-bit, 40-bit, or none.Ownerpassword—. Enables you to set a password for owners on a PDF report.Userpassword—. Enables you to set a password for users on a PDF report.Permissions—. Specifies eight different permission levels for PDF reports (AllowPrinting, AllowModifyContents, AllowCopy, AllowModifyAnnotations, AllowFillIn, AllowScreenReaders, AllowAssembly, andAllowDegradedPrinting).
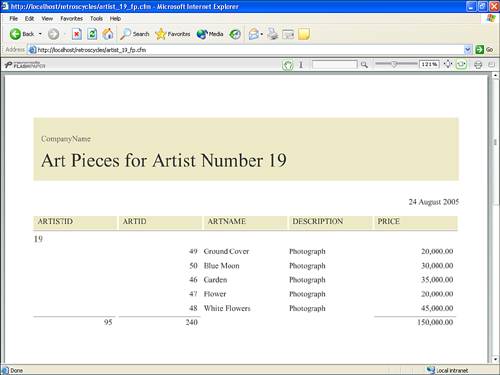
Another option for creating reports in ColdFusion is the FlashPaper format developed by Macromedia. This format converts your document into a Flash movie that can be viewed with the Macromedia Flash Player. Creating a FlashPaper report is just as easy as creating one in the PDF format. Just use exactly the same code you used for the PDF format and adjust the format attribute:
<cfreport template = "retros_customers.cfr" format = "FlashPaper"></cfreport>
Again, view the document in your browser and the Flash Player renders the report (see Figure 19.27).
The final format that the ColdFusion Report Generator is able to create is the Microsoft Excel format (see Figure 19.28). Where the PDF and FlashPaper reports are generally read-only, the Excel format offers access to data, and reports can be saved and edited offline. As with FlashPaper and PDF, generating an Excel report is as simple as adjusting the format attribute:
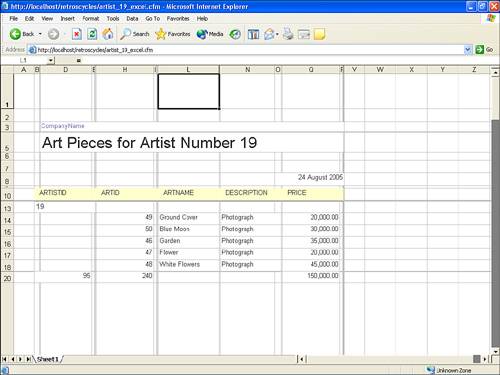
<cfreport template = "retros_customers.cfr" format = "Excel"></cfreport>
Be aware, however, that there are some limitations as to how well your formatting will be retained in the Excel format. Objects such as images and charts may not render properly, and numeric data that contains special characters such as commas, percent signs, and dollar signs might cause issues in the generation of the report.
Printing web pages has been a problem since the beginning of the web itself. Because a computer monitor is wider than it is tall, developing pages for the screen often results in pages that print off the edge of standard paper because it is taller than it is wide. To address the issue, web developers have come up with scripts that parse text, secondary printable page templates, and a host of other tricks, but most of them take quite a bit of time and energy to create.
With the new ColdFusion MX 7, Macromedia has created a quick, easy way to make any web page printable with the introduction of the new <cfdocument> tag. This tag renders any text or images located inside the tag in the PDF or FlashPaper formats and enables you to control page aspects such as orientation, page size, headers, footers, and formatting options.
So with the addition of one simple tag, you can now avoid the hassle of making printable pages, and ensure that your pages will be just as readable offline as they are online. You can implement application of the <cfdocument> tag by using it like this:
<cfdocument format = "PDF">
Hello World!
<img src="my_image.gif">
</cfreport>
To adjust the properties of the resulting document, you can use the following attributes:
Format—. Determines whether the output will be PDF or FlashPaper format.MarginTop—. Sets the top margin for the output document. Default is .5 inches.MarginBottom—. Sets the bottom margin for the output document. Default is .5 inches.MarginLeft—. Sets the left margin for the output document. Default is .5 inches.MarginRight—. Sets the right margin for the output document. Default is .5 inches.BackgroundVisible—. Determines whether the web page’s background color or image is printed.Orientation—. Specifies landscape or portrait. Default is portrait.PageType—. Specifies one of nine different output file types: letter, legal, A4, A5, B4, B5, B4-JIS, B5-JIS, and custom.PageWidth—. Used with the custom page type, enables you to set a custom page width.PageHeight—. Used with the custom page type, enables you to set a custom page height.Encryption—. In the PDF format, this attribute enables you to choose from 128-bit, 40-bit, or no encryption.OwnerPassword—. When encryption is enabled, this tag sets an owner password.UserPassword—. When encryption is enabled, this tag sets a user password.Unit—. Determines whether your numeric attributes are measured in inches or centimeters.FontEmbed—. Embeds the fonts within the document for accurate rendering.Overwrite—. Determines whether existing files with the same name can be overwritten.Name—. Saves the result content to a ColdFusion variable that can be used later in the document.
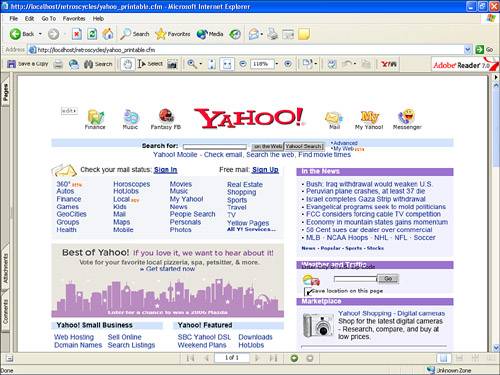
After you have the tag in place and the attributes set, implementing the printable document is easy. Use code similar to this:
<cfhttp url="http://www.yahoo.com" method="get" resolveURL="true">
<cfdocument format="PDF">
   <cfoutput>#cfhttp.filecontent#</cfoutput>
</cfdocument>
The <cfhttp> tag specifies the URL to obtain and the <cfoutput> tag renders the page content to a PDF document (see Figure 19.29).
As you can see, ColdFusion continues to grow in its capabilities. Being able to generate stunning reports and printer-friendly web pages is certainly one of the application’s biggest steps in continuing to establish the ColdFusion platform as the most user-friendly and adaptable platforms on the market.
I can’t seem to find the Report Builder functionality you mention in the ColdFusion Administrator. Am I missing something?
The ColdFusion Report Generator is not included with ColdFusion MX 7 and must be downloaded and installed separately. You can download the executable at http://www.macromedia.com/software/coldfusion/reporting/.
I don’t see the Mac version of the Report Builder executable. Is there a place to download it?
No. At this point Macromedia has released the Report Builder for only the Windows platform.
My report is extremely slow to load. What can I do to speed up the report’s build time?
The first step is to limit your SQL query to only those fields that are absolutely necessary to the report. Adding fields to the recordset that will not be used in the report is a waste of server resources and a waste of time waiting for the report to load.
When generating reports, the ColdFusion Report Builder enables you to select as many fields into your SQL query as you would like. It then enables you to choose which of those fields you would actually like to display in the report. You therefore might be tempted to simply select every field from the database into your query and then filter out what you don’t want to see with the Report Builder.
Be cautious in this approach. Remember that each time your page or report loads, the recordset is built. This means that if your database has 50 fields and 5,000 records, your SQL query will have to draw 25,000 pieces of data from the database. If, however, you determined that you wanted to display only 5 of those fields, your SQL query has to return only 2,500 pieces of data—which decreases the amount of time it takes for your report to load.
So before you ever begin developing your SQL query, take some time to determine which fields you really need and which can be left alone to conserve load times.