
In this chapter
When you are familiar with the Contribute workspace and have created a connection to your website, the next aspect of Contribute you should take a look at is the administration features. Although Contribute is a relatively simple program to use, Macromedia includes powerful administrative functions that enable you to control who has access to what pages via Contribute, what functions they can perform, and whether or not Contribute maintains copies of past pages to accommodate rollbacks. To start a closer look at the administrative features, select Edit, Administer Websites, Website Name from the menu bar.
The main idea behind Contribute is to distribute the workload of editing and maintaining the content of a website. To accomplish that goal, you need to ensure that other content providers and editors have access to the pages. On the other hand, you want to keep unauthorized users from accessing the pages and ensure that those who are allowed to edit can make changes to the site only when appropriate.
By default, Contribute has three user levels:
Administrator—. Administrators have full control over the site including access to the administrative features. Administrators can make changes to pages and publish those changes immediately.
Publisher—. Publishers do not have access to the administrative features, but can edit and publish changes at will.
Writer—. Writers can make changes to content, but cannot publish them. Instead, writers must send their pages to a Publisher or Administrator to have that person review the changes and publish them if appropriate.
The Users and Roles category in the Administer Website dialog box, shown in Figure 32.1, enables you to view who is currently assigned to the various roles within your site. In addition, this category provides functionality to define custom roles, edit existing roles, and allow other users access to the site.
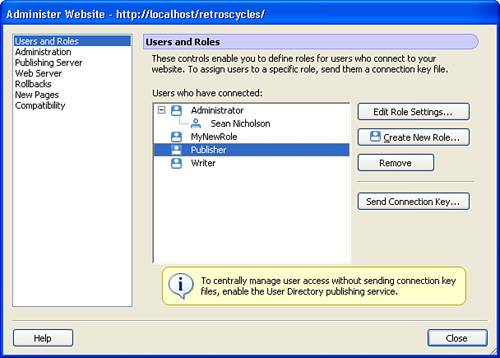
Figure 32.1. The Users and Roles category enables you to manage your users and their authority levels.
By selecting an existing role and clicking the Edit Role Settings button in the Administer Website dialog box, you can access the various settings that control what someone assigned to that role can and can’t do in the site.
Tip
Adjusting the settings for a user role affects every user who is assigned to that role. Before making changes to the default groups, be sure that everyone in that particular role will be able to continue working as expected after the changes are applied.
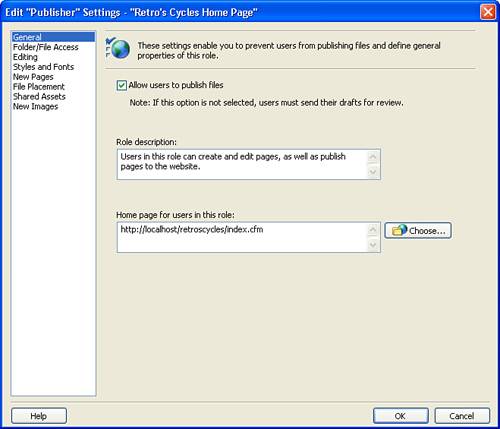
The General category of the Edit Settings dialog box (see Figure 32.2) is where you determine whether or not users in that role can publish files. In addition, you can create a role description to help other administrators when assigning roles. You can also establish the default home page for users assigned to this role.
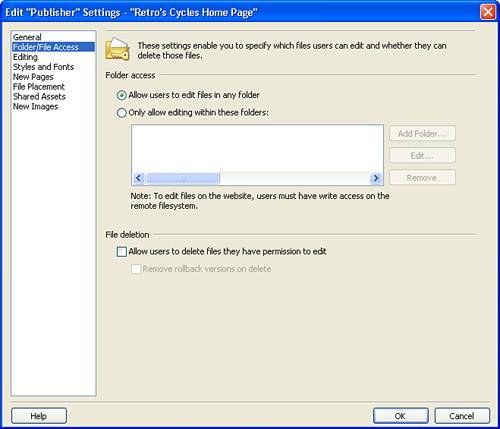
The File/Folder Access category (see Figure 32.3) lets you specify which files and folders can be accessed by users assigned to this role. This is helpful when working with an organization where individual departments edit their own sections of a site. This category also enables you to determine whether users in this role can delete files from the site.
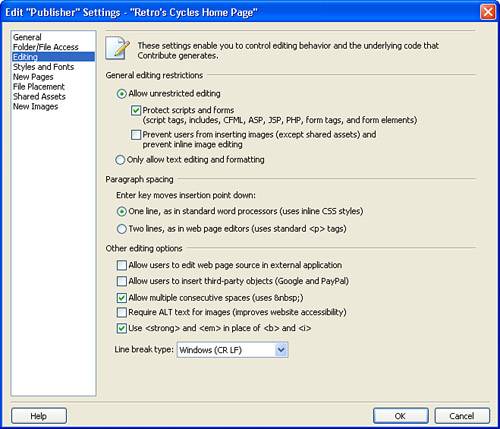
In the Editing category, shown in Figure 32.4, you can clearly define what page elements a user is allowed to edit. For instance, by adjusting this category, you can determine whether users can make changes to form elements and custom scripts, decide whether users can insert images, and even implement rules such as requiring <ALT> text for images.
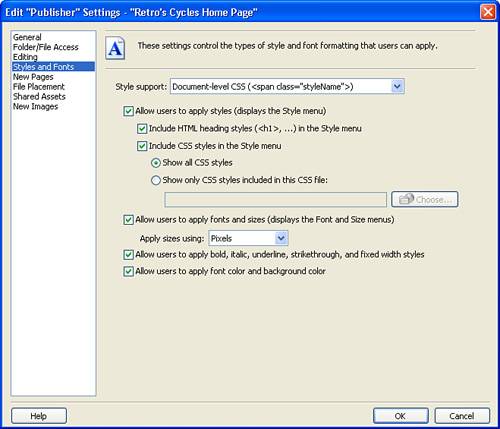
The way that font styles are applied to the pages of the site can be adjusted in the Styles and Fonts category. The Styles and Fonts category, shown in Figure 32.5, enables you to specify whether styles or the <Font> tag is used to assign a font face to text. In addition, you can determine whether or not the various text styling tools such as the Styles and Font and Size drop-down menus, as well as the bold and italic buttons, are available to the user in the Contribute toolbar.
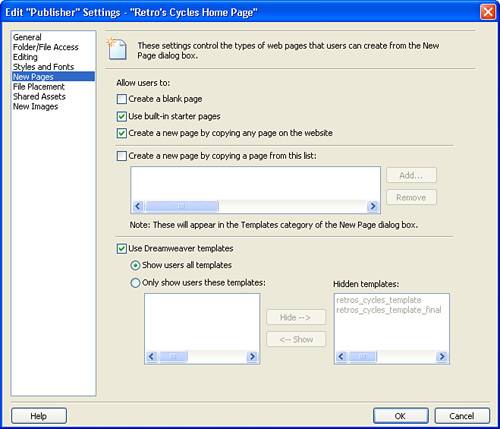
The New Pages category, shown in Figure 32.6, is used to determine whether or not the user group is allowed to create new pages within the site and by what means. In addition, you can use this category to maintain the continuity of your page layout by requiring that new pages be based on a copy of a specific page or Dreamweaver template.
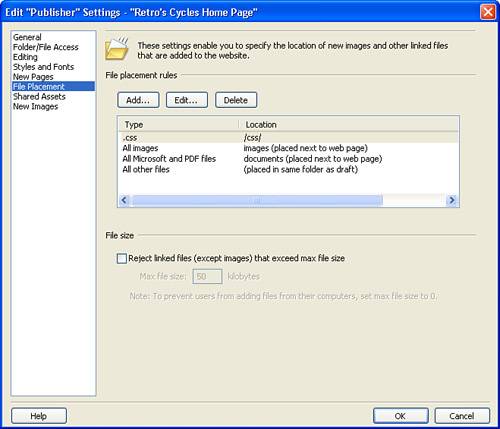
The File Placement category, shown in Figure 32.7, enables you to specify where certain types of files are to be located within the site. For instance, when a user inserts a file from a website into a page, Contribute makes a copy of that image and places it in the local site. This category specifies where Contribute should place that copy. This category also controls the placement of PDF and FlashPaper files that are generated from within Contribute. In addition, if you want to restrict whether content editors can add files such as PDF documents or Word documents to the site, you can choose to reject linked files that exceed a specific file size.
The Shared Assets category, shown in Figure 32.8, gives users access to objects such as images, Flash movies, and Dreamweaver library items. When items are added to the list, users can quickly access them and add them to their pages by using Contribute’s shared assets list.
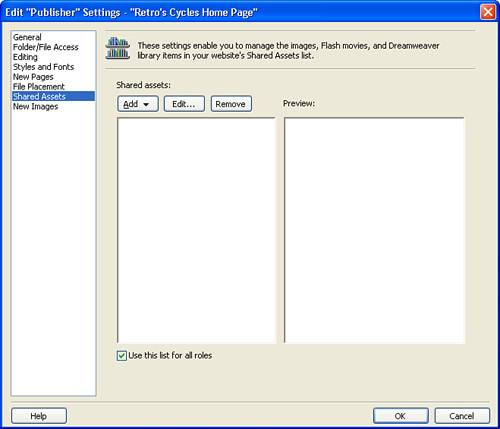
Figure 32.8. The Shared Assets dialog box enables you to edit the list of images and objects that are available to all users via the shared assets list.
Note
Only the assets listed in the Shared Assets category are available to that specific role. If you want to restrict access to an asset, you need to ensure that it does not exist in the list of shared assets for the specific role.
Tip
The Shared Assets list can be a very useful tool for site administrators who want to give their users quick access to specific images and objects within the site. When an image is added to the list, all users can drop the image into their pages when needed, requiring less work on their part than having to search for the appropriate graphic on their computers or on another website.
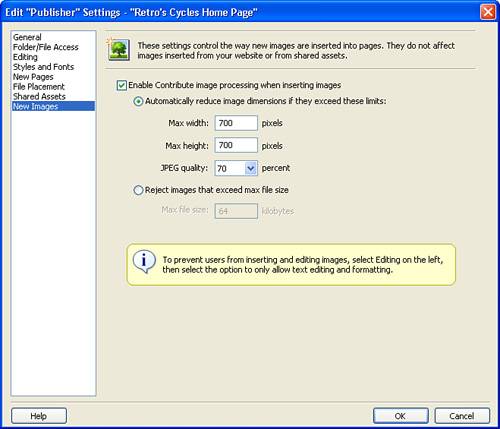
The last category of settings for a specific role is the New Images category, shown in Figure 32.9. In this category, you can enable or disable the built-in image processing tool within Contribute that enables users to easily resize images and adjust for quality levels. In addition, you can maintain controls over bandwidth usage and download times by limiting the size of images that can be placed into a page.
One of the great features of Contribute is the capability to define custom editing roles to fit the needs of your client or organization. To create a new role, copy an existing role and then add or remove restrictions based on the appropriate editing levels of the users who will be members of the group.
The first step in creating a new role is to click the Create New Role button in the Users and Roles section of the Administer Website dialog. Contribute asks you on which existing role you would like to base the new role and to provide a name for the new role (see Figure 32.10). The new role is then added to the list of roles and you can edit the role settings to meet your needs.

As mentioned in the previous chapter, the easiest way for a user to create a connection to a website is to click on a connection key sent via email. The administrator of the site is in charge of sending these connection keys and does so by clicking the Send Connection Key button in the Users and Roles category of the Administer Website dialog box.
When the button is clicked, Contribute starts the Connection Key Wizard, shown in Figure 32.11, which begins by asking whether the current connection settings are appropriate for the target user. The connection settings that are sent include how the user accesses the site, the path to the site folder, and other necessary connection information such as FTP site and username/password. If everyone in your workgroup accesses the site in the same way (such as via a network drive), the standard connection settings are usually fine. If, however, your workgroup members access the site in different ways (for example, some via a network drive and some via FTP), then you need to customize the connection settings.
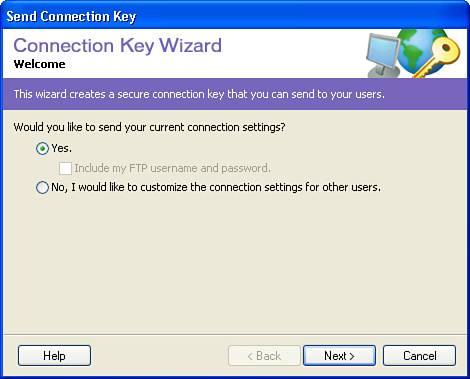
Figure 32.11. The Connection Key Wizard helps you send a connection key to a user that grants access to the site.
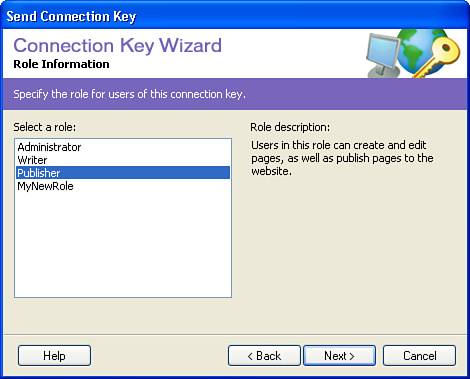
The next step in the wizard asks you to specify what role the user should be assigned. From this dialog, you can choose from the existing roles, including any custom roles that you have created (see Figure 32.12).
Note
Each connection key that you create is valid for only a specific role. Therefore, you need to send one connection key to your publishers and another to your writers.
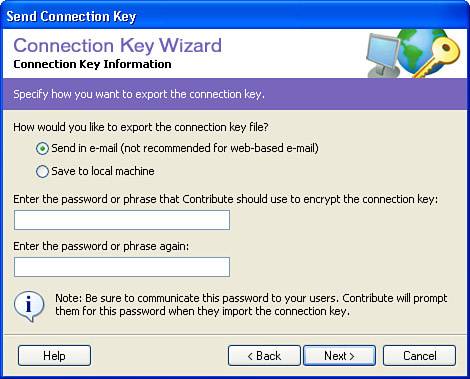
When you have chosen a role, the next step is to determine whether the connection key will be sent via email or placed on the local machine (see Figure 32.13). If the user will be making edits on a different machine, emailing the key is the best method.
Tip
Pay close attention to the warning to not send connection keys to web-based email accounts. Some web-based accounts add code to the connection key, rendering it useless. For details on the issue, check out the Macromedia tech note about this topic at http://www.macromedia.com/go/tn_18734.
In addition to choosing the delivery method, you need to type a password or phrase to be used as the base of the key encryption. After the connection key is sent to the user, you need to communicate the password or phrase so that the user can activate the key.
The final step in the wizard is to confirm the information and click Done. When the wizard is completed, an email is generated from your default mail client, which can then be sent to the user.
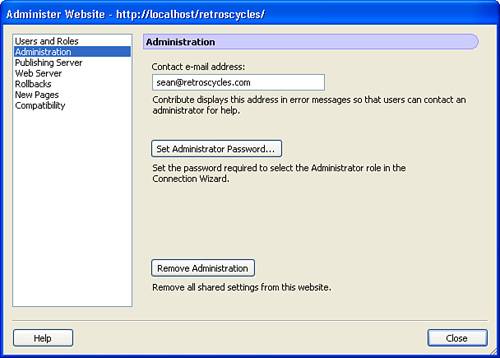
The Administration category of the Administer Websites dialog box, shown in Figure 32.14, enables you to select the contact email address for the primary administrator of the site, as well as set an administrative password. If necessary, this category also enables you to remove all administration settings from the site.
If your client or organization uses a network infrastructure that uses LDAP or Active Directory to manage user accounts, you can leverage either of those services to manage access to Contribute sites as well. Contribute 3.1 offers an optional service called Publishing Services that, when installed, enables you to assign roles to network user accounts. Publishing Services can be enabled via the Publishing Services category of the Administer Website dialog box (see Figure 32.15). If you use this option, you no longer need to create user accounts in Contribute. Instead, you assign roles to users from the LDAP or Active Directory.
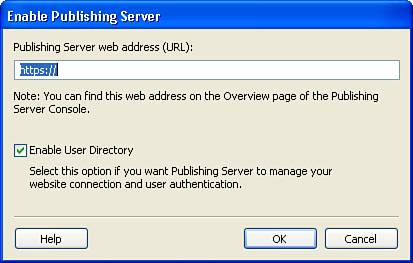
Figure 32.15. The Enable Publishing Server dialog box allows you to enable the services and manage users from a network user directory.
To enable Publishing Services, Contribute requires that the services be installed on a Java Application server that is accessible across the network. After the Publishing Services are enabled, Contribute is capable of performing additional services such as logging website errors and emailing administrators and publishers when writers create drafts that require their attention.
Tip
For complete details on the installation and configuration of Contribute’s Publishing Services, take a look at the Publishing Services home page located at http://www.macromedia.com/software/webpublishingsystem/cps/.
The Web Server category of the Administer Website dialog box enables you to configure Contribute settings that affect how the application interacts with your Web Server application. If you use multiple addresses to access your site, you can add them to the list using the Web Addresses tab shown in Figure 32.16. Contribute enables your users to edit the pages using any of the addresses in the list.
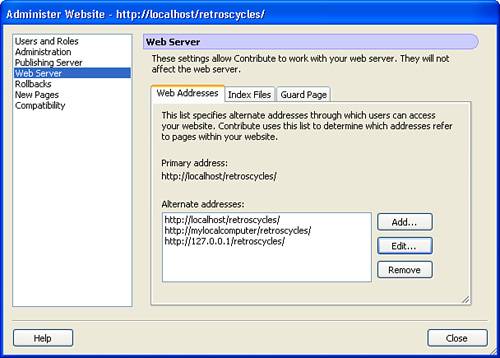
Figure 32.16. The Web Addresses tab lets you add any additional URLs that you use to access the site.
The Index Files tab, shown in Figure 32.17, enables you to indicate which filenames and extensions should be considered index files to be displayed by the web server as the default page in a directory.
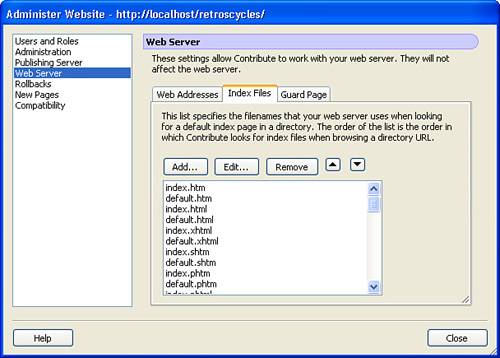
Figure 32.17. The Index Files tab enables you to indicate what files and extensions should be treated as index pages.
Finally, the Guard Page tab, shown in Figure 32.18, lets you specify a page that restricts access to files placed in administrative folders. This keeps intruders from viewing the contents of folders such as the _mm and MMWIP folders, which store drafts of documents and administrative alerts regarding the status of those drafts. This guard page serves as the index page for a folder, letting visitors know that they are not allowed to view the files contained in a specific folder.
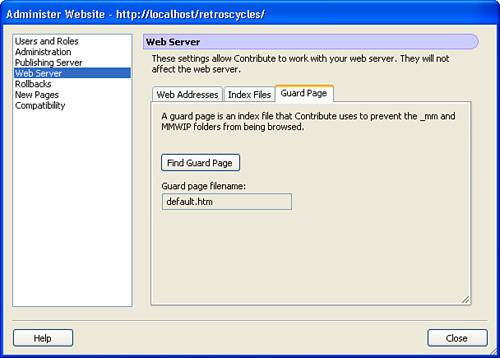
Figure 32.18. The Guard Page tab allows you to specify the filename of the guard page that prevents directory indexing.
Tip
To ensure that unauthorized users cannot access the _mm and MMWIP folders, be sure to create a default.htm page (or whatever you set for your guard file page name) and place a copy of the page in each of these folders. The page can either be blank or contain text that lets the visitor know access is restricted to the contents of the folder.
Rollbacks are saved copies of previous versions of a page that enable you to return a page to a state prior to the last published version. Basically, they serve as backups in case something goes wrong in the publishing process or the content that is published is incorrect. The Rollbacks category of the Administer Website dialog box (see Figure 32.19) enables you to turn rollbacks on or off, as well as indicate how many versions of a page should be maintained if rollbacks are enabled.
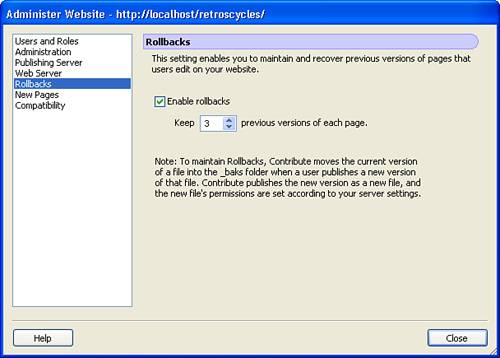
Figure 32.19. In the Rollbacks category you can choose whether or not Contribute maintains previous versions of pages that are edited.
Note
About the only drawback to enabling rollbacks is the fact that the backups require storage space. However, setting rollbacks to a reasonable level, such as three levels back, shouldn’t require a substantial amount of space unless you work in a large corporate environment where major page changes are made on a frequent basis. If your organization has a comprehensive backup plan, it is probably a good idea for you to discuss the level of rollbacks allowed to ensure that your workgroup can return pages to a previous state if necessary.
The New Pages category, shown in Figure 32.20, enables you to establish the default page encoding for your site, as well as the default file extension. Depending on what platform you use to develop your site (such as HTML, ASP, ColdFusion, and so on) you need to adjust the extension so that new pages automatically reflect the correct platform.
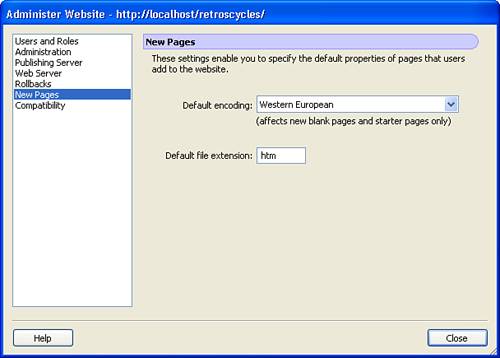
Figure 32.20. The New Pages category enables you to establish the default encoding and file extension for any new pages.
Note
For more details on document encoding, check out the World Wide Web Consortium (W3C) discussion on the topic at http://www.w3.org/TR/REC-html40/charset.html.
The Compatibility category, shown in Figure 32.21, lets you choose between the Transition Mode or the Compatibility Mode.
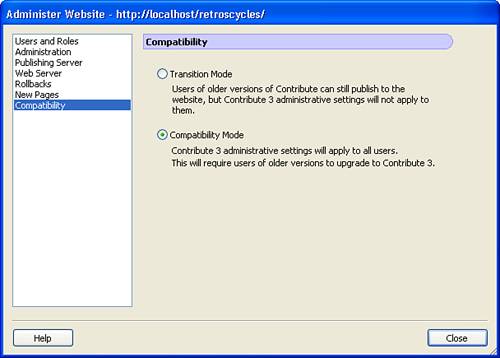
Figure 32.21. The Compatibility category enables you to choose between Transition Mode and Compatibility Mode.
If you have users who will be accessing your site with Contribute 1 or Contribute 2, you need to run in Transition Mode because some features in Contribute 3 are not compatible with the earlier versions. If, however, all your users are running on Contribute 3, you should select Compatibility Mode to take full advantage of all the features available in Contribute 3.
My users are receiving permission errors when they try to publish a page. Where do I adjust their permissions in Contribute?
Read/Write access to a folder is not something that is controlled from within Contribute. A user who wants to publish a document must have the correct authorization level in Contribute to begin the publishing process. However, if an attempt to publish a page results in a permissions-related error, it usually means that the user doesn’t have permission to write to the folder on the server. This type of permission must be set on the server at the folder level.
I changed the FTP password for the site and now my users are complaining that they can’t access the site. How do I resolve this?
Most likely, what has happened is that the users who can’t access the site haven’t closed Contribute since the password was changed. Have them close Contribute and open it back up. They should then be able to access the site via FTP once again. If the password to the FTP site is changed while they have a session open, Contribute continues sending the previous password, which results in errors. When they close Contribute, the updated password is transmitted and they can reconnect properly.
I have WebDAV set up on my local network to track versions of files. Can I use it to track changes in Contribute as well?
No. Contribute does not work with versioning software such as Visual SourceSafe and WebDAV. To track versions of pages in Contribute, enable the rollback feature.
A couple of settings in the Administrative section of Contribute should be set up if a connection key is ever sent to a user. First, be sure that you create an administrator password that follows the strong password guidelines. This means that the password should contain a mixture of upper- and lowercase alphabetic characters, numeric characters, and special characters. In addition, try to avoid words that you can find in the dictionary. Instead, find a representation of a phrase that you can easily remember. For instance, a good example is something such as the phrase “My mother loves me today,” which can be turned into Mmlmt_352. When changing an administrative password, you need to know what the old password was, so keep track of that information.
Second, be sure that the administrative contact email is set to a valid email address that is monitored. This email address is available to all the Contribute users as the contact for issues regarding the site. Therefore, it needs to be monitored so that someone can address user issues in a timely manner.
Finally, unless you absolutely do not have the space available, consider turning on the rollback feature. This feature is basically the undo feature within Contribute and will save you a lot of grief should something go wrong in the publishing process.