
In this chapter
With the site proposal and wireframes in hand, imagine that you successfully proposed the site design and the client liked your ideas. With the green light to move forward, the next step is to begin laying out the actual site template and adding functionality.
In this chapter, you’ll use Fireworks to create some stylized artwork for Retro’s Cycles and then use that artwork to develop a web page template that you can export for use later on in the Dreamweaver section.
The first step in creating the site template is to build a base document with the appropriate size and background color. This base document serves as the canvas and, after it is created, you can begin adding the elements that define your web page.
Open Fireworks.
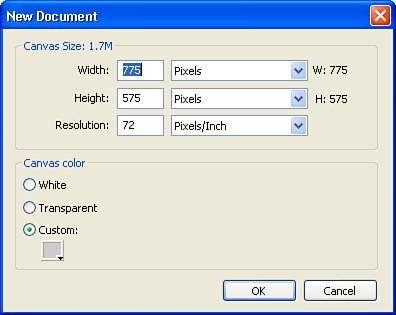
Choose File, New from the menu bar to create a new document. Choose to create a canvas that has a width of 775 pixels and a height of 575 pixels and set the canvas color to gray by clicking the Custom radio button, clicking the Color Picker, and choosing the gray value of #CCCCCC (see Figure 7.1).
Note
When designing a web page in Fireworks, you need to have a pretty good idea what page size you’re going to be using. When you export the images to HTML, Fireworks creates a set of tables and these tables have fixed widths. This means that your tables do not grow or shrink to fit the monitor resolution of each individual visitor. If you want your site to do this, you have to take some extra steps while working with the HTML pages in Dreamweaver to convert the pixel-based table sizes to percentage-based.
Next, select the Rectangle tool and draw a rectangle on the canvas. It doesn’t matter how big or small or where it is positioned, because you’ll adjust those aspects in the following steps.
With the rectangle selected, set the fill color to black by selecting the Color Picker and choosing a black box or by typing #000000 in the upper field.
Set the stroke color of the rectangle to #0000FF by selecting the stroke Color Picker and typing the value. As shown in Figure 7.2, you should now have a rectangle with a blue outline on your canvas.
Adjust the X and Y positions of the rectangle to 0 and 0 by typing those values in the Property inspector.
Note
When adjusting the values of a rectangle numerically, be sure to position X and Y values of the rectangle at 0 and 0 before adjusting the height and width properties. If you don’t position the rectangle at 0 and 0, Fireworks automatically adjusts the height and width to be the height and width of the canvas.
Set the Rectangle width to 700 and the height to 550 by typing those values in the W and H fields in the Property inspector.
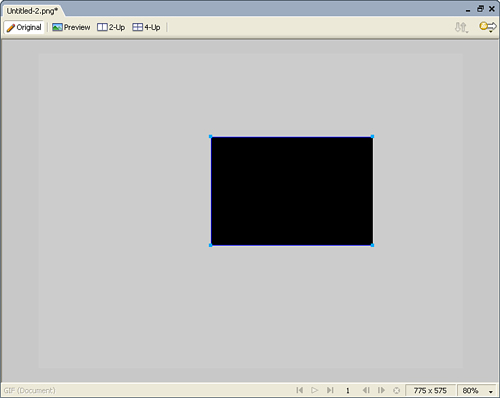
Adjust the X and Y positions to 130 and 130 by typing those values and set the rectangle roundness to 20 by adjusting the slider on the Property inspector.
Finally, set the stroke width of the rectangle to 2 and adjust the stroke category to Soft Rounded in the Basic set. You should now have a rounded, blue divider on your page that looks like Figure 7.3.
Save the page to your local hard drive and name the file
retros_cycle_template.png.
The next step in developing your web template is creating a custom graphic that will be located on each page of the site and adding some custom filters to modify the image colors.
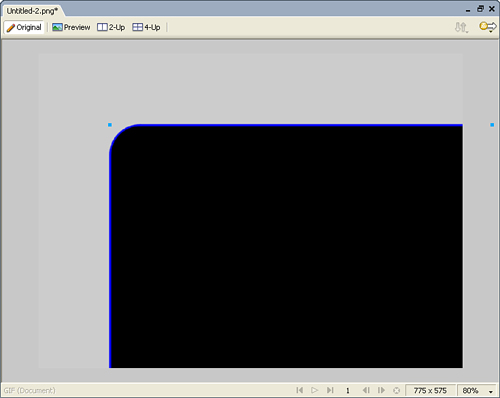
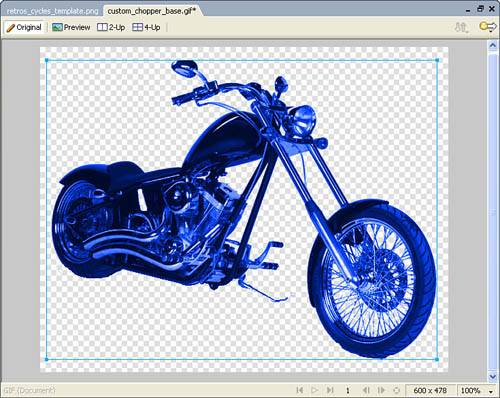
Download and extract the Fireworks files from the companion website. Browse to the Fireworks folder and open
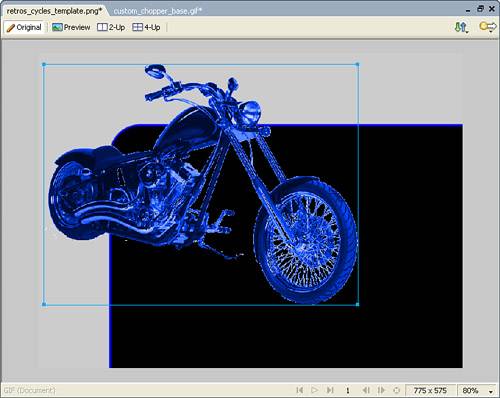
custom_chopper_base.gifin Fireworks. This file contains the image of a motorcycle with a transparent background (see Figure 7.4).Select the motorcycle by clicking anywhere on it and choose Filters, Adjust Color, Hue/Saturation from the menu bar.
In the Hue/Saturation box, set the Hue to 225, the Saturation to 100, and the Lightness to 0. Check the Colorize check box and click OK. This changes the motorcycle color from black to blue (see Figure 7.5).
Select the motorcycle and choose Edit, Copy (Ctrl+C or Cmd-C) from the menu bar.
Switch over to the
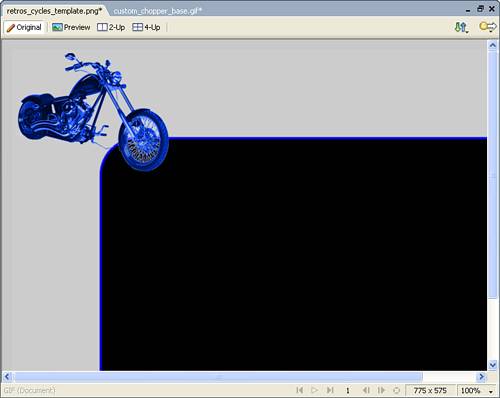
retros_cycle_template.pngfile by clicking the tab for the document. From the menu bar, choose Edit, Paste and the blue motorcycle is added to your page (see Figure 7.6). Don’t worry that the image looks a little rough.To smooth out the edges of the image, select the motorcycle and choose Filters, Blur, Blur from the menu. Fireworks blurs the images slightly by blending the pixel colors together.
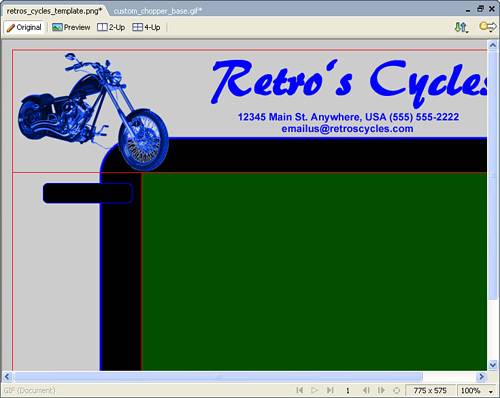
Next, resize the motorcycle by selecting it and typing 225 in the W: field and 174 in the H: field. Reposition the image by typing 5 in the X: field and 5 in the Y: field. As you can see in Figure 7.7, the motorcycle has been properly placed in the page.

Although most of the copy text for the web pages will be added later, when you edit the site in Dreamweaver, there are some text elements that you should add in Fireworks. Because text added via HTML is displayed with the system fonts, you can’t be absolutely positive that any fonts beyond those that come with the operating system will display properly. If you use a font in your pages that isn’t available to a visitor, the visitor’s system adjusts and uses a font that is similar. This means that you can’t control how your site is displayed on every machine.
To avoid this, you can use Fireworks to embed the text in an image. Because the text in the image doesn’t rely on the font being present on the user’s machine, you can be confident that it will display correctly every time. In the case of this client, we’ll add the company name, location, and contact information at the top of the site.
In the
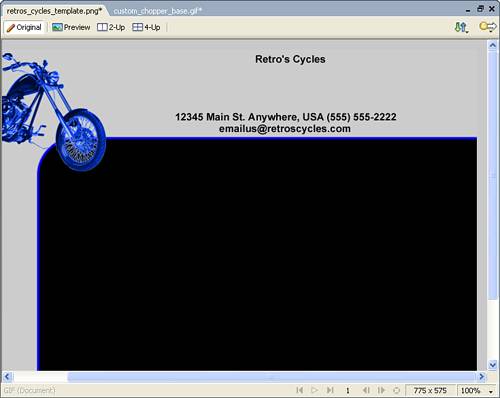
retros_cycles_templatefile, select the Text tool and draw a text block above the blue dividing line and to the right of the motorcycle. Again, it doesn’t matter how big it is or where it is located because you can adjust those properties later.In the text block, type
Retro's Cycles. Create a second text box and type12345 Main St Anywhere, USA (555)555-2222.Create a third text block and type
[email protected].Select the first text block that you created. Click on the resize handle in any corner of the text block and adjust the height and width of the text block so that the width is 508 and the height is 79.
Next, adjust the positioning of the text block by typing
247in the X: field in the Property inspector and5in the Y: field.Following the same procedures, select the second text block and set the width to
508, the height to79, the X: position to 247, and the Y: position to90.Do the same for the third text block and set the width to
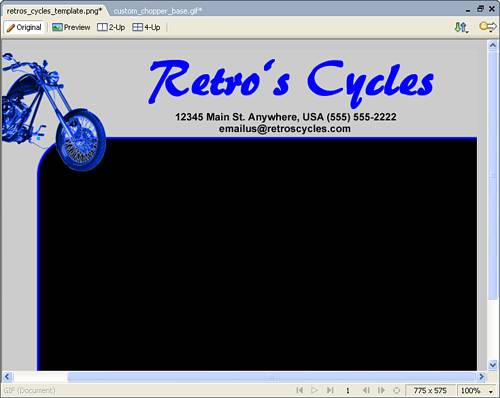
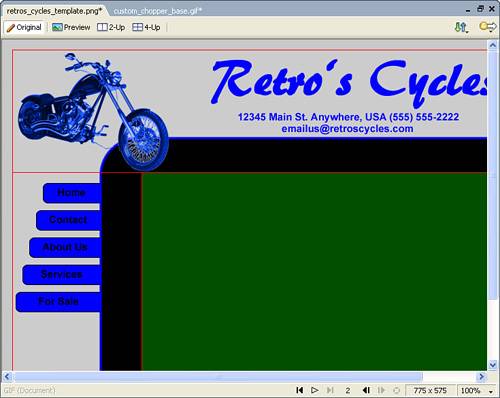
494, the height to19, the X: position to246, and the Y: position to107. You should now have three text blocks positioned in the page’s header section (see Figure 7.8).Next, select the text in the first text box and set the font size to a size that fits well on the page. Adjust the font style to bold and choose any font type that you would like. Change the color of the font to
#0000FF. The font in Figure 7.9 is Brush Flash.Select the text in the second text block and adjust the font so that it is Arial, 15, bold, and has a color of
#000FF. Do the same for the third text block (see Figure 7.10).

At this point, the document is starting to look like a web page, but with the exception of the text reference to an email address, there isn’t any functionality that would actually allow this document to perform as a web page. To change that, you need to establish those regions of the page that will contain copy text/images and those that will contain navigation elements.
If you review the wireframe you created to present to the client, you’ll see that the left side of the blue dividing line is supposed to contain navigation buttons, and the large section below and to the right of the dividing line will contain the copy and images for the site.
Creating the region that will contain the copy and images is simply a matter of creating a placeholder region. You can do this by slicing out the region in which you want to be able to add text in Dreamweaver.
In the
retros_cycles_templatedocument, choose the Slice tool from the toolbar and draw a square in the area to the right and below the blue divider. Again, don’t worry about the size or location of the slice.Using the Property inspector, set the X position to
190, the Y position to180, the width of the slice to585, and the height to395. You should now see a slice area that marks the text/images region (see Figure 7.11).
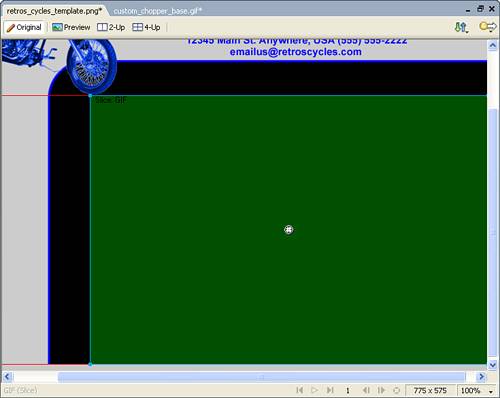
After you export the page to HTML and open it in Fireworks, this region will be represented by a large, black image. All you have to do is delete the image from your web page and the area that is left will be usable for text and images.
The next step to adding web elements to the document is adding navigation buttons. The five navigation buttons that the client has requested are Home, Contact, About Us, Services, and For Sale. Not only can you add these to the page, but you can use Fireworks to make them rollover buttons that change when the visitor rolls a mouse over them.
In the
retros_cycles_templatedocument, choose the Rectangle tool and draw a rectangle in the area to the left of the blue divider. Set the rectangle width to132, the height to30, the X position at45, and the Y position at196.Next, set the fill color of the rectangle to
#000000and the stroke color to#0000FF.Set the Rectangle roundness to
50. You should now have a blue, rounded rectangle on the page (see Figure 7.12).With the rectangle selected, choose Edit, Copy (Ctrl+C or Cmd-C) and Edit, Paste (Ctrl+C or Cmd-V) to create a duplicate of the rectangle. The duplicate is selected automatically after it is pasted onto the canvas.
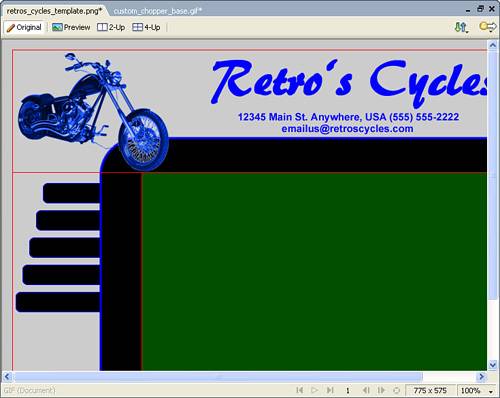
Adjust the location properties of the new rectangle so that the X position is
35and the Y position is236.Create three additional duplicates with the first having an X position of
25and a Y position of276, the second having an X position of15and a Y position of316, and the third having an X position of5and a Y position of356.Select each of the rectangles by holding the Shift key and clicking on each one. From the menu bar, choose Modify, Arrange, Send To Back or using the Ctrl+Shift+Down Arrow keyboard command. This moves the rectangles behind the blue divider and gives the illusion that they are attached (see Figure 7.13).
The next step to creating your navigation buttons is to add text. Select the Text tool and draw a text block that stretches across the full width of the top button. In the text block, type
Homeand adjust the text so that it is Arial, 15, and has a color of#0000FF. Center the text in the rectangle by clicking the Center Alignment button on the Property inspector.Repeat this step to create the Contact, About Us, Services, and For Sale buttons, as shown in Figure 7.14.
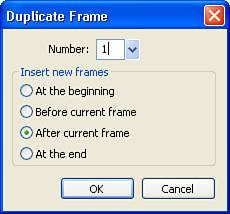
Next, you need to create the rollover states for your buttons. Open the Frames panel (Window, Frames) and open the upper-right Options menu. Choose Duplicate Frame from the menu.
In the Duplicate Frame dialog box (see Figure 7.15), choose 1 frame, After Current Frame, and click OK.
In the Frames panel, there are now two frames. Frame 1 shows what the page will look like normally and Frame 2 displays what the page will look like while a mouse is rolled over specific areas. Because you haven’t made any changes to Frame 2, they both are identical. To create the over state for each button, you need to modify it in Frame 2.
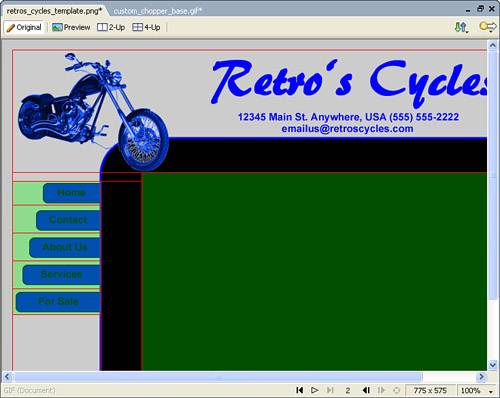
In the Frames panel, select Frame 2. Select all the navigation buttons on the stage by holding the Shift key and clicking on each of them. Change their fill color to
#0000FFand their stroke to#000000.Next, select each of the text blocks and change the text color to
#000000. This creates the buttons’ rollover state (see Figure 7.16).With the rollover states in place, the last step is to create slices that indicate what aspects of the page should change and then to apply the rollover behavior.
Select the Slice tool from the toolbar and draw a slice around the Home button. In the Property inspector, set the width of the slice to
130, the height to35, the X position to0, and the Y position to193. Name the slice sliHome by typing the value in the upper-left field of the Property inspector.Create a second slice for the Contact button with a width of
130, height of41, X position of0, and the Y position of228. Name the slice sliContact by typing the value in the upper-left field of the Property inspector.Create a third slice for the About Us button with a width of
130, height of41, X position of0, and the Y position of269. Name the slice sliAboutUs by typing the value in the upper-left field of the Property inspector.Create a fourth slice for the Services button with a width of
130, height of41, X position of0, and the Y position of310. Name the slice sliServices by typing the value in the upper-left field of the Property inspector.Create a fifth slice for the For Sale button with a width of
130, height of38, X position of0, and the Y position of351. Name the slice sliForSale by typing the value in the upper-left field of the Property inspector.

As shown in Figure 7.17, you now have five slices that indicate that these areas should be treated differently when the document is exported to HTML.
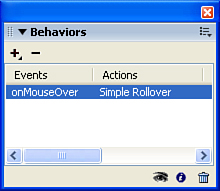
Open the Behaviors panel by choosing Window, Behaviors.
Choose the Pointer tool from the menu bar and select the slice for the Home button. On the Behaviors panel, click the plus sign and choose Simple Rollover from the menu. The Behaviors panel now indicates that there is a rollover behavior assigned to the slice (see Figure 7.18).
In the Property inspector, type
index.cfmin the Link field. When the document is exported to HTML, a hyperlink is created automatically to theindex.cfmpage.Following the same steps, apply the Simple Rollover behavior to each of the other buttons and link them to
contact.cfm, aboutus.cfm, services.cfm, andforsale.cfm.
With all the navigation links in place, you’re ready to export the document to an HTML format that you can edit in Dreamweaver.
From the menu bar, choose File, Image Preview.
In the Image Preview dialog box, be sure that GIF is the selected format and click Export (see Figure 7.19).
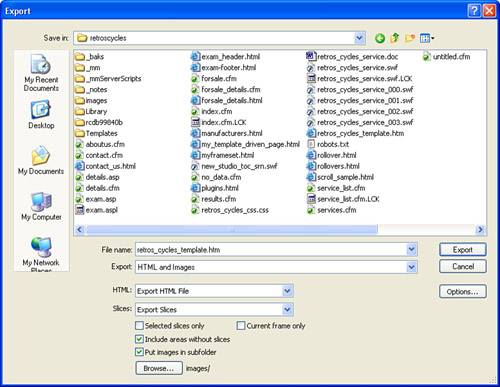
In the Export dialog box, choose to Export HTML and Images. In the warning box that pops up, click OK.
Name the file
retros_cycles_template.htmand choose Export Slices from the Slices drop-down (see Figure 7.20).Check the box that allows you to place images in a subfolder. By default the folder is named
images, and that’s what we’ll keep.In the Save In drop-down, navigate to a folder where you can store the images and HTML files. If you have IIS set up on your machine, the easiest place would be
c:Inetpubwwwroot
etroscycles
. If the folder doesn’t exist, create one.Click the Export button.
To view the resulting HTML page, open your browser and navigate to the page. If you put your files in the
retroscyclesfolder, navigate to http://localhost/retrocycles/retros_cycles_template.htm. You should be able to roll your mouse over any of the navigation buttons and they should change state.

See how easy that was? You just created a simple template for a website using just a few of the many tools available to you in Fireworks. The next step is to take a look at Flash and the tools available for creating rich media elements that can be included in the site.
One or more of my rollovers don’t work. What did I do wrong?
A couple things might have gone wrong. First, be sure that you created the second frame and that it has the modified navigation images for the over state. Second, check that you applied the Simple Rollover behavior to each of the navigation images.
My rollovers work in reverse. What did I do?
When you created the second set of images for the navigation buttons, you did it in Frame 1 instead of Frame 2. To fix this, open the Frames panel and drag Frame 2 so it is above Frame 1. Re-export the document using the same settings and everything should work correctly.
Everything works fine, but I noticed that my images and HTML page were dumped in the same directory. Is this right?
Nope. Go back through the export process and check the check box that places images in a subfolder.
If you have used Dreamweaver previously or have heard anything about Dreamweaver, you might be wondering why on Earth anyone would create web pages in Fireworks, as opposed to Dreamweaver. Believe me, I used to think the same thing.
That was until I was challenged with developing my first “graphics-heavy” website. Each page on the site had a photograph of a car, and when you rolled over specific areas of the car, various images and text blocks around the site changed. I originally started out in Dreamweaver and developed each individual graphic, but creating the correct table sizes and getting the images to match up perfectly in Dreamweaver was extremely time consuming. Then a colleague showed me how to use the slice tools in Fireworks, and I realized that in minutes I could accomplish in Fireworks what I had spent hours doing in Dreamweaver.
Now when the development of a site involves a lot of graphic manipulation and JavaScript rollovers, I seriously consider whether it would be better to first lay out the site in Fireworks and then move into Dreamweaver. Sometimes it is...sometimes it isn’t. In the end, it will be a decision you will have to make, but knowing what Fireworks can do should aid you in your decision.