
In this chapter
Although two projects are never exactly alike, similar page elements or objects often can be applied to multiple sites. For instance, if you develop a script that verifies that the user has completed the required fields of a form, it’s likely that you could reuse that same code (with slight modifications, of course) down the road on another project. With that in mind, Macromedia has built several features into Dreamweaver that enable you to save objects and code that can be reused within the same site or on other projects.
In addition, several tools within Dreamweaver help you keep track of your ever-increasing assortment of HTML pages, images, links, color schemes, templates, Flash, and multimedia. As the number of sites that you manage grows, it becomes harder and harder to keep everything organized. Even if you organize your sites well with folders for images, multimedia, and style sheets, you’ll soon find the need to add folders for navigational images, movies, or articles relating to a particular section of your site. Navigating to these separate folders time after time during the development process can become tedious and fraught with opportunities for mistakes—which can lead to broken links.
Links and color schemes present different challenges, of course. These items aren’t stored in files, so you can’t just navigate the folders of your site to find the link you used on one page or that exact color of blue you used on another. If the same color scheme isn’t used from page to page, site consistency is lost. Templates can solve the color consistency issue to some extent, as can Cascading Style Sheets (CSS), but they certainly don’t completely solve the problem.
Enter Dreamweaver’s Assets panel (see Figure 24.1). Dreamweaver stores every major element of a site in a cache and makes those elements available to every page in the site. The Assets panel is a complement to the Files panel, and therefore they’re both docked in the same Files panel group. The Files panel lists the tangible files for the site. The Assets panel lists the intangibles—the colors, URLs, templates, images, and multimedia used on the site’s pages.
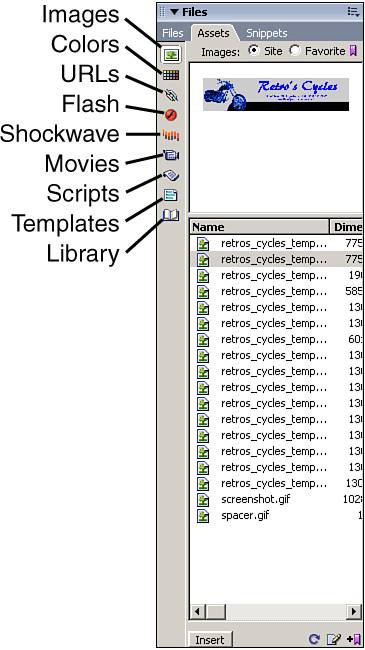
The Assets panel might not recognize every asset type, but it does recognize many of the most common ones. The left side of the Assets panel has a column of buttons that let you choose the category of assets to display—Images, Colors, URLs, Flash, Shockwave, Movies, Scripts, Templates, and Library. The right side of the panel lists the assets within the selected category. A preview version of a selected asset is displayed above the list.
Unfortunately, Dreamweaver doesn’t track assets such as audio files, Adobe Acrobat PDFs, or Java applets. Also, be aware that although the Movies category might recognize and include assets such as Windows Media movies, you can’t preview them in the Assets panel.
The Assets panel has two different views, which you can toggle between by using the two radio buttons at the top of the panel. The Site list provides a complete list of all the assets in every folder and page of the site. The Favorites list displays only the assets you choose to put there (see Figure 24.2). If you create a well-planned Favorites list for your site, you’ll have the colors, URLs, and other elements that you use frequently readily available, while still having convenient access to the less-used assets from the Site list.
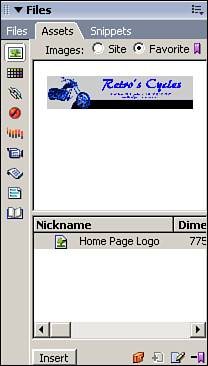
Figure 24.2. The Favorites list contains only assets you select, creating a specialized list of your most frequently used assets.
To add an asset to the Favorites list, choose the asset from the Site list and then click the Add to Favorites icon at the bottom of the panel.
You can also add images and media files to the Favorites list by right-clicking on the object in the Site view and then choosing Add to Favorites from the context menu.
Assets added to the Favorites list remain on the list unless you manually remove them. Even if you delete the item from your computer and refresh or re-create the site cache to update the Assets panel, the Favorites list remains the same. Therefore, you need to keep a close eye on your Favorites list and periodically go through and remove assets that no longer exist. To remove an asset from this list, select it and then click the Remove from Favorites button.
Even when you’re using the Favorites list, it’s easy to become overwhelmed with assets, particularly on a large site. An advantage the Favorites list has over the Site list is that it enables you to organize assets into groups called Favorites folders.
Favorites folders can be useful for organizing and quickly locating images you want to use together on your pages. For example, when developing the site for Retro’s Cycles, you might have images of the various motorcycles for use within the site. If you group these into Favorites folders, you’ll know exactly where to look to find the images you seek. If you really want to keep your favorites organized, you can even nest Favorites folders.
To create a Favorites folder, switch to the Favorites view in the Assets panel and then click the New Favorites Folder button at the bottom of the panel. Give the folder a name and you’re ready to begin adding assets to the folder by either dragging and dropping them from your pages or creating them directly in the folders.
When adding assets to your site, you need to be aware of some of the specific purposes and limitations that go along with the various asset types that Dreamweaver tracks.
The Images category lists every image file that you’ve placed within your local site, even if you’ve not yet used them on a page. Whenever you refresh or re-create the site list, Dreamweaver searches the root site folder as well as all subfolders and adds the GIF, JPEG, and PNG formatted files it finds to the list of available assets.
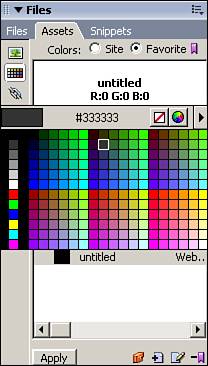
The Colors category lists all colors that have been used for text, backgrounds, or links on any page within the site. Again, when you rebuild the asset cache, all colors that have been used are added to the site for future reference and reuse. Dreamweaver does not include colors from images or media files, so the colors used in your Flash SWF or Fireworks PNG files are not included in the Assets list. If you have a color that you have not used in a page, but want to include as an asset in your site, you can manually add it to the panel by switching to the Favorites view, clicking the New Color button, and using the color picker to select the color from either the swatch (see Figure 24.3) or an area of the page.
Just as Dreamweaver tracks the colors and images that you use in your pages, it also tracks the links you create to pages outside of your site. It scans your documents for hyperlinks and includes all references to HTTP, FTP, Gopher, HTTPS, JavaScript, and email. Keep in mind, however, that links to documents within your own site are not included in the URLs section of the Asset panel.
As with colors, you can create new URLs directly in the Favorites list by choosing the Favorites view, selecting the URLs category, and clicking the New URL button at the bottom of the panel. In the Add URL dialog box (see Figure 24.4), type the full URL, give it a nickname, and click the OK button.

Figure 24.4. Enter a URL and nickname for the new asset. The nickname can be used as the source text for the link when inserted into a document.
The URL’s nickname simply provides an easy reference for where the URL points. For instance, if you create a link to http://www.macromedia.com/cfusion/knowledgebase/index.cfm?id=tn_16563, you might create a nickname called Dreamweaver Sessions to help you remember that the URL links to a tech tip article that discusses how to create a session variable.
If your site contains Macromedia Flash (SWF) files, they’ll be listed in the Flash category of the Assets panel. This list also includes Flash buttons or text objects that you create in Dreamweaver. The Assets panel also enables you to preview your Flash content. When one of these assets is selected, a small Play button appears in the upper-right corner of the preview area. Most likely, you will need to resize the Assets panel to view the entire Flash movie. Another way to preview the movie is to double-click the file in the Assets list, which opens and plays the Flash Movie in a new browser window.
This category shows all movies created in the Macromedia Shockwave format. As with Flash movies, Shockwave files can be previewed in the preview area or with a standalone QuickTime player.
If your site has any movies in the MPEG or QuickTime format, they are displayed in the Movies category. As with Flash and Shockwave movies, you can preview them in the Assets panel or the standalone QuickTime player. Movies created in the Windows Video (WMV) and RealMedia formats are also included in the Assets panel, but they cannot be previewed.
JavaScript and VBScript files are listed in the Scripts category—as long as they are named with the proper extension. The Assets panel contains only scripts in files with JS or VBS extensions. Scripts contained within HTML files aren’t listed. For quick preview reference, the text of the script file is displayed in the preview pane when you select the asset.
When a script asset is inserted into a document, a <script src="file://...> tag is created with the src attribute containing a link to the script file.
This category lists Dreamweaver template (DWT) files. A template is a document you can use to provide a standardized layout for your pages. Templates are among the few assets you can create from the Site list. The creation and use of templates is covered in more detail later in the book.
Library assets are elements you want to use in multiple pages. A Library item is created from an object such as an image or even a full navigation bar. After it is created, you can include the Library item, rather than the original object, in your pages. The reason for doing this is evident when it comes time to update the object. Rather than having to make the update on every page that includes the object, you can simply update the Library item and the changes replicate automatically throughout every page that contains that Library reference.
Of course, the real power of the Assets panel is in its capability to streamline your development time. You can insert most types of assets directly into a document by dragging them from the Assets panel to the Design view of the Document window or by using the Insert button at the bottom of the panel. In the Colors and Templates categories, the Insert button changes to the Apply button.
Keep in mind that the asset is added to the page at the insertion point. In the case of colors, text typed after the insertion point appears in the selected color. When you insert a URL asset, the destination path of the URL appears as the source for the link; the source text can, of course, be modified if you would rather display alternate text.
For assets such as URLs and colors, you can also apply them to selected text in Design view by highlighting the appropriate text, selecting the asset in the Assets panel, and clicking the Apply button.
To apply scripts to the head of the page, select View, Head Content; then drag the script from the Assets panel into the Head Content area of the Document window.
The Assets panel requires regular maintenance to retain its value. As the site evolves, so do the assets, but the Assets panel lacks the capability to automatically keep up with its listings. Assets themselves might need to be updated. And, finally, it might be useful to for a site to share assets already listed on another site. In addition, as mentioned previously, you need to update your Favorites lists manually because Dreamweaver does not automatically remove assets that have been relocated or deleted from your workstation.
Because Dreamweaver integrates so easily with Fireworks and Flash, with the click of a button you can start editing objects that were initially created outside of Dreamweaver. To edit an asset, either double-click it in the Assets panel or select the asset and click the Edit button. If the asset was created within Dreamweaver (such as a script), you can edit it directly in Dreamweaver. Otherwise, the application to use is determined by the settings in the Dreamweaver Preferences tool. If you want to use a different application than the default, select Edit, Preferences and select the File Types/Editors category. Then add the application you want to use to edit that file type. Keep in mind, however, that because Fireworks and Flash are so tightly integrated with Dreamweaver, keeping them as your default editors for graphics and rich media is generally the fastest and easiest way to work.
Assets that don’t reside in physical files, but are scanned from your documents instead—such as URLs and colors—can be edited only in the Favorites list.
Often assets are useful across multiple sites. However, for an asset to be available, it must first be copied to the Favorites list of the new site. To make an asset available to another site, right-click on the asset in the Assets panel of the site that currently has the asset, choose Copy to Site, and select the name of the site to which you want to copy it.
The process of developing and maintaining websites often consists of reusing the same code elements again and again. Rather than retyping that code for each page, you can store the code in a snippet and then reuse and customize it when you need to use it again. For those Dreamweaver users who are used to writing their own scripts and functions, this is a very useful feature that can be leveraged to create your own personal code library.
Snippets are managed via the Snippets panel in the Files panel group. By default, Dreamweaver ships with a number of snippets that might be useful. For instance, if you want to add a drop-down menu to a form that contains the months of the year, simply expand the Form Elements folder in the Snippets panel and then expand the Dropdown Menus subfolder. You can then drag the Months, 1–12 snippet into any form on your page (see Figure 24.5) without writing a single line of code or building a drop-down menu with the Dreamweaver interface.

You can create new folders and subfolders for organizing your own snippets by clicking the New Snippet Folder button at the bottom of the Snippets panel.
Creating a snippet is a relatively easy process. However, creating a snippet the right way takes a little more effort, but is worth the extra energy in the long run. When I speak about the “right way” to create a snippet, I mean you should take into account that you might not be the only person to ever view your snippet, so the snippet should include detailed commenting that describes what the snippet is supposed to do.
For instance, suppose that you want to create a new JavaScript snippet that validates that two form fields are not left blank. Start the process by clicking the New Snippet button on the Snippets panel. In the Snippet dialog box (see Figure 24.6), type the name of the snippet and be sure the name is something that clearly defines the nature of the code and the language in which it was developed. For instance, JS-FormValidation would be a good name for this form validation code.
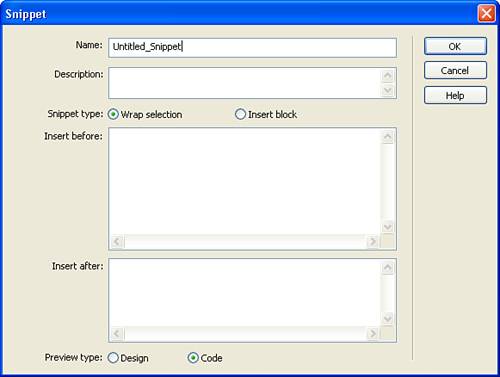
The next step in defining the snippet is to type a description of how the code works. Remember, the more detailed you are in the description, the more easily someone else can understand what the code is intended to do. So, instead of typing a short description such as “performs form validation,” you might try typing a description such as: “This JavaScript snippet checks the values entered into form fields. If the value of the form is null, then the script pops a notice to the end user to complete the field and returns a false value to the form function that calls the snippet.”
The next step in creating the snippet is to choose how the snippet code will be inserted into your overall code. If you choose Insert Block, the entire code block that you type is inserted into your page code when you apply the snippet. If, however, you choose Wrap Selection, Dreamweaver can apply the code before the insertion point and after the insertion point if necessary. For instance, if you select an image, Dreamweaver can place <a href=“http://www.mysite.com”> before the object and </a> after the object, creating an effective hyperlink.
The third step is to actually type the code. If you have not already typed the code into a page, you can enter the code in the appropriate field or fields (in the case of a wrapped snippet). Otherwise, select the code in the Code view prior to clicking the New Snippet button and Dreamweaver automatically assumes that you want to create a snippet based on the selected code and populates this field with the selected code.
When creating your snippets, be sure to include comments that detail who created the snippet, what the snippet does, any variables that need to be assigned, and so on. This is where creating a snippet the correct way comes into play. The more documentation your snippet has, the more likely someone else will be able to understand easily what the code does, and the more portable the code becomes. This becomes important when colleagues ask you whether you have authored any code that could help them out with a project. If you properly document your snippets, you can send them the snippet and the comments will help them understand how to apply the code and how it is expected to function. For instance, using the previous example to create a snippet that adds a hyperlink to an image, the code inserted before the image would be
<a href="http://www.mysite.com">
However, the following code adds a comment to further explain how the snippet works:
<!-- The following line of code adds the preliminary
HREF tag and URL to add a hyerlink to an object. -->
<a href="http://www.mysite.com">
In addition, a comment should also be included with the code that follows the image, such as:
<!-- The following line of code closes the HREF tag -->
</a>
The final step in creating a snippet is to choose in which format the snippet will be displayed when it is previewed. Code that produces a visible object in the Design view (such as a drop-down menu or an image) can be set to Design so that the object rather than the code can be previewed. Code that performs strictly behind the scenes (such as form validation or complex calculations) should be set to Code so that the preview pane displays only the code.
As mentioned previously, Dreamweaver comes with several folders containing useful snippets. For organizational purposes, feel free to reorganize the entire snippets folder to make it easy for you to find snippets quickly and easily. You can drag and drop folders from within the Snippets folder just as you do in the Windows or Mac operating systems. You can also create new snippets folders by clicking the New Snippets Folder button at the bottom of the Snippets panel.
After you have created a snippet, reusing it is as simple as dragging it and dropping it into the design or code view. You can also place your cursor at the appropriate insertion point and click the Insert button at the bottom of the Snippets panel. Another helpful feature that is worth mentioning is that Dreamweaver stores a record of the most recent snippets that you have used. You can access this feature and insert recently used snippets by choosing Insert, Recent Snippets from the menu bar.
Although snippets enable you to reuse code over and over, and assets provide you with easy access to the various objects within your site, Dreamweaver contains an additional tool that enables you to reuse entire portions of a page that you have created. This tool, known as the Library, provides a place to store commonly used page elements for reuse throughout your entire site. For instance, you can store the entire header for your site in the Library and have each page reference that single Library item. Then, when you make a change to the Library item, all instances of that object within your site are automatically updated. This makes it extremely easy to make site-wide updates.
Just think—you can create a Library item that adds a copyright notice to the bottom of each page in your site. Then, you can update the single Library instance of the notice once a year and the entire site is updated.
When you create your first Library item, Dreamweaver generates a Library folder in your local site. This folder contains all the Library items for the site, each of which is identifiable by its .lbi extension.
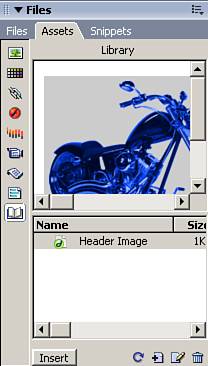
Although you can edit Library files directly in this folder, the best place to work with Library items is in the Library category of the Assets panel (see Figure 24.7). In this panel, you can create and edit Library items, insert them into pages, and even copy them to another site’s library. You can use the horizontal slider to view additional information about the Library item such as size and the path to the Library file.
Creating a Library item in Dreamweaver is extremely easy. Simply add any object or element to the Design view of a page and select it. Next, choose the Library category in the Assets panel and click the New Library Item button (see Figure 24.8). Dreamweaver then creates a Library item based on the selected object and allows you to name it accordingly.
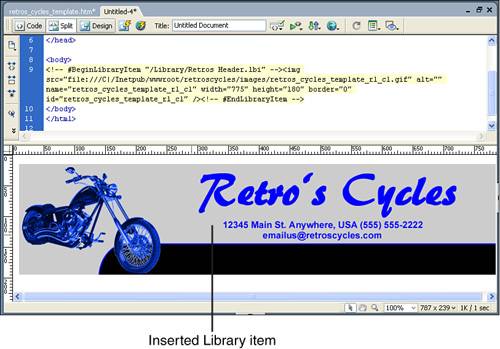
After the Library item is created, you can apply it to any page by dragging and dropping it into the Design view or by placing your cursor at the appropriate insertion point and clicking the Insert button at the bottom of the Assets panel. When the Library item is inserted, the item is surrounded by markup code (see Figure 24.9) that indicates the path to the Library file, much like a server-side include.
As mentioned earlier, the main advantage of the Library is that modifications made to an item are updated site-wide. To edit an existing Library item, select the item in the Assets panel and click the Edit button at the bottom of the panel. Make the appropriate changes to the .lbi file that is opened and click the Save button. When you save the .lbi file, you are prompted to update all pages in the site that contain an instance of the item (see Figure 24.10). If you Click the Update button, Dreamweaver automatically updates the dependent pages.
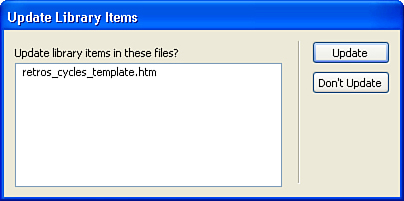
Figure 24.10. When you save changes to a Library item, you’re prompted to update all instances of the item throughout the site.
If you don’t update pages at this point, later you can use Modify, Library, Update Current Page or Update Pages. If you choose to update, the Update Pages dialog box appears (see Figure 24.11). You can also use this opportunity to update the remainder of the site’s Library and template instances by choosing Update Site from the Assets panel’s menu.
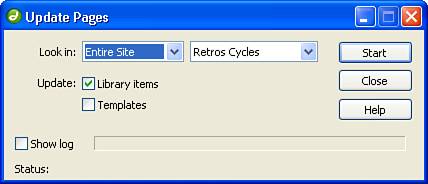
Figure 24.11. The Update Pages dialog box is used to update both Library items and templates used in the site.
Caution
When editing Library items, you can’t use Cascading Style Sheets (CSS) or timelines. These features insert code into the head section of the page. Library items can insert a consecutive block of code into only the body of the document.
Note
You can’t include style rules in a Library item; however, you can include class attributes. When a Library item is inserted, it assumes the styles set for that class in the attached internal or external style sheet, thus assuming the appearance of the rest of the site. Be sure, however, that the style sheet is attached or referenced, or the Library item cannot take on the correct styles.
When a Library item is updated, all markup between the comment tags is modified to reflect the changes. In templates, certain regions can be locked so you don’t inadvertently modify pieces of the template.
Library items, however, have no such constraints. Changing the content of the inserted Library item doesn’t break the link to the Library. However, if you manually modify the content of the Library item within the document—for example, adding content to a table that was inserted as a Library item—those changes are lost if and when the Library item is updated. If you don’t want your changes to be overridden, you need to detach the inserted Library item from the source, as described in the following section.
If you have an instance of a Library item that you don’t want to be updated when the original item is updated, you can detach it from the original and preserve it in its current state. To detach an instance of a Library item from the Library, you need to break the link between the document and the item by selecting the instance of the item and clicking the Detach from Original button in the Property inspector (see Figure 24.12).
Figure 24.12. When the Library item is detached, the reference code that pointed to the Library item is removed from the page and the actual page code is inserted.
Before Dreamweaver detaches the item, a confirmation dialog box informs you that any future updates to the Library item won’t be reflected in this instance (see Figure 24.13). If you Click the OK button, the item is detached and the corresponding markup removed in the code.
Deleting Library items is even easier than creating them. To delete a Library item, select the Library item to be deleted and click the Delete button at the bottom of the Assets panel. Although the item is deleted from the Library, the instances of the item in your site are not removed. Instead, they are detached from the original and remain intact in your web pages.
Caution
The delete process is irreversible. After a Library item is deleted, it is removed from the hard drive. Even though the original image that was used as a basis for the Library item may remain within the site and can still be referenced in your pages, the specific Library code that Dreamweaver created to reference the Library object is deleted.
When you create a Library item out of content that contains Dreamweaver behaviors, the elements and event handlers are copied, but the associated JavaScript is not. Remember: The Library item can’t update content that resides in the HTML head tag.
Fortunately, though, when you insert a Library item into a document, Dreamweaver is smart enough to know to add the appropriate JavaScript functions. If those functions are already in the head, Dreamweaver knows not to duplicate them.
Tip
Library items can be copied to another site in the same manner as any other asset on the Assets panel. Select the Library item (Command-click) [right-click] and select Copy to Site from the context menu. A pop-out menu lists all the defined sites to which you can copy the Library item. If this is the first Library item being added to the other site, Dreamweaver creates a Library folder in the local site.
I’m getting so much stuff in my Assets panel that I can no longer remember what’s what. Is there an easy way to keep things straight?
One of the more useful features of the Favorites list is the capability it gives you to nickname your assets. Rather than have an asset appear in the list as “http://www.scooterpuzzles.com,” you can nickname the asset as “Lu’s Custom Paint for Motorcycles,” which should jog your memory more easily.
To change an asset’s nickname, be certain you’re in the Favorites view, select the asset, and then select Edit Nickname from the context menu. You can also edit the Nickname by single-clicking the current nickname twice. After entering the nickname, press (Return) [Enter] or click elsewhere in the Assets panel. The actual filename, color, or URL still appears in the Value column of the Favorites list, and the preview display remains unchanged.
I deleted a Library item and then realized I need it again. What can I do?
If you accidentally delete a Library item, your only recourse is to re-create it from one of its instances in a document. To do this, select an instance of the Library item and click the Recreate button in the Property inspector.
If there aren’t any instances of the Library item in your site—which could occur if you made the original instance editable and either didn’t create any other instances or made all those instances editable as well—you must create a new Library item from scratch.
If I want to edit a photo in my favorite photo editor instead of the default editor, can I do that?
Certainly. The easiest way is to right-click on the image and then choose Edit With, Browse from the context menu. You can then browse to the executable for your editing software. When you use another photo editor, Dreamweaver remembers it and stores it in the Edit With submenu so you can easily reference it at a later time.
It’s happened to the best of us. You write a complex piece of code to perform a special function and it works beautifully. A while down the road, you find yourself needing the same functionality and you can’t seem to remember which page it was that performed the function, so you spend valuable development time racking your brain to find the code. This scenario is the exact reason why it’s so important to take advantage of the snippets functionality of Dreamweaver. By adding the custom code you create to the snippets library, you end up creating your own customized code library that is organized to fit your needs.
I spent a half hour a few weeks ago searching for a chunk of VBScript code that I had created to convert MS SQL Timestamp fields into epoch numbers (the number of seconds since 01/01/1970). I needed the function to interface one of my web applications with a help desk application and couldn’t seem to remember where and when I used the function. After spending quite a bit of time searching (and wishing that I had created a snippet), I finally found the code and immediately placed it into my code library.
No matter how obscure the code, no matter how tied to a specific client or website it might seem to be, it’s still a great idea to add all your custom code to the snippets panel for future reference.
Tip
Don’t worry that your code library will be limited to use on a single computer. With Dreamweaver, you can export your site settings and the snippets that go with it by choosing Site, Export from the main menu. After you export the site to a single file, you can transport that file to a new computer and import the site by choosing Site, Manage Sites from the main menu and then clicking the Import button.