
In this chapter
When creating web pages, you can choose from among several options to select a design layout. Probably the most popular method currently in use is using tables to design pages. By using tables, you have a good level of control over where and how your content is displayed, and you can use either relative or fixed table, column, and cell widths to adjust for various screen resolutions. The difficulty of tables appears when you start to nest tables on multiple levels. Spacing tables and adjusting relative properties can get difficult as the number of nested tables increases.
Another option that has been losing some popularity is designing with frames. The attractive element of using frames is that content in one frame doesn’t have to be reloaded and can stay static while content in another frame changes. This has traditionally been used in situations where the navigation bar was loaded into a static frame while the content frame changed as navigation links were clicked. Frames, however, can be difficult to manage and present additional issues with things such as getting your site correctly listed in search engines.
The third and latest design format involves designing with layers. Layers are tag-driven objects created to give developers complete control over where their content is displayed and how it relates to other objects on the page. The major difference is that layers enable you to think along not only the X and Y axes, but on the Z-axis as well. This means that you can stack layers on top of each other to create the perception of depth. The downside to layers, however, is that they are not fully supported in earlier browsers. This means that if your site might be accessed by a visitor with an older browser, the site may not render properly. If, however, you’re developing in an environment where you are sure of the browser being used to access the pages (such as in a corporate intranet setting), layers can offer quite a bit of enhanced functionality beyond what tables offer.
Note
When developing with layers, one thing you need to consider is the possible browser versions your audience might be using. Versions of Internet Explorer and Netscape earlier than version 4.0 can’t display layers and 4.0 browsers don’t render them consistently. With that in mind, if your target audience might be using older browsers, you should consider a table-based or frame-based design.
Using tables is really the tried and true method for giving your pages a solid structure. Table structures are supported by all major browsers, they are relatively straightforward to develop, and Dreamweaver makes it really simple to create and nest tables.
To create a table, open a new document and choose Insert, Table from the menu bar. In the Table dialog box, shown in Figure 26.1, you can choose how many rows and columns you want to include in the basic table. Don’t worry if you don’t know exactly what your table is going to look like; you can always add more rows and/or columns later.
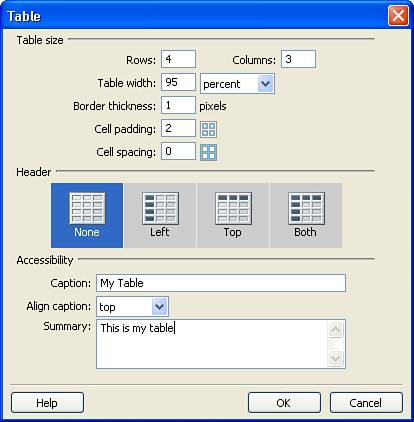
In addition to the number of columns and rows, you can also adjust the table width, border thickness, cell padding, and cell spacing. The table width can be set to a static measurement in pixels or can be a percentage relative to the size of the browser. The border thickness is a simple numeric value, as are the cell padding and cell spacing. The cell padding refers to how much room you want between the content of a cell and the interior wall of that cell. Cell spacing, on the other hand, refers to the distance between the cells themselves.
You can also use the Table dialog to establish whether or not your table will have a header column, header row, both, or none by clicking the appropriate layout.
Finally, you can set accessibility options for your table by providing a caption, caption alignment, and summary of the table and its contents. The accessibility elements are becoming more important as more and more people with disabilities are using the web. By completing these fields, you ensure that everyone can enjoy your content.
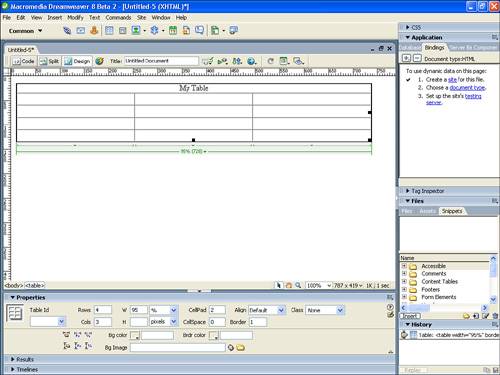
After you have finished setting the table properties, click OK and Dreamweaver constructs the table for you and inserts it into your page, as shown in Figure 26.2. You can customize your table and its layout by selecting the element you want to modify and using the Property inspector.
For instance, to modify the properties of the entire table, click just outside the outer border to select it. After it is selected, the Property inspector provides access to similar properties offered by the Table dialog box, along with added features such as border color, background image, and background color (see Figure 26.3).

Figure 26.3. The Property inspector enables you to adjust the various properties of the table and its elements.
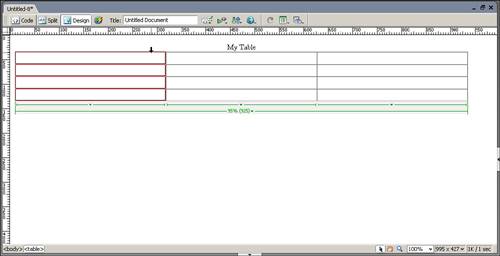
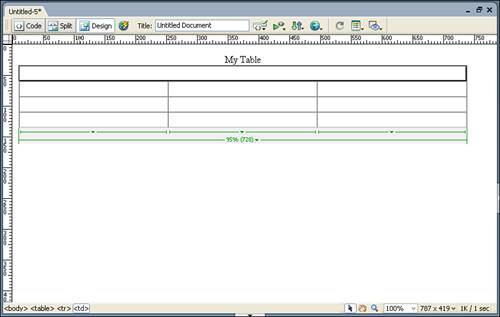
If you want to adjust an element of the table such as a column, row, or cell, you can do that as well. Select columns by clicking on the topmost border of the column. The entire column is highlighted after it is selected (see Figure 26.4).
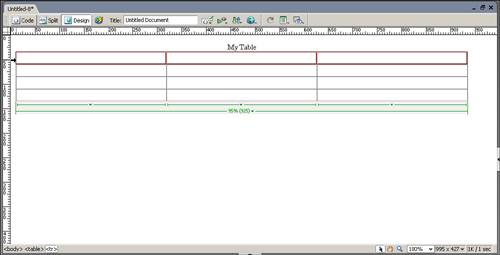
Rows are selected in a similar manner: Click the leftmost border of the row or place your cursor inside any cell within the row and select the leftmost <tr> tag in the tag selector (see Figure 26.5).
To select cells, place your cursor inside the cell and click the rightmost <td> tag in the tag selector. When the cell is selected, the cell border is darkened (see Figure 26.6).
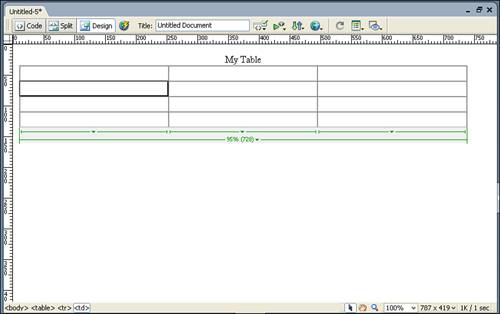
After the element is selected, you can adjust properties such as height, width, alignment, text styles, background color, and several others. You can also join elements together by selecting multiple items and clicking the Merge button on the Property inspector. Merging cells, shown in Figure 26.7, is an easy way to adjust your table layout to meet your design needs.
Dreamweaver also provides developers a second tool for generating tables, known as Layout mode. This environment is usually more comfortable for users who have a graphic design or page layout background, because it involves drawing the table as you want it, rather than letting Dreamweaver build it and then adjusting the properties after it is placed in the page.
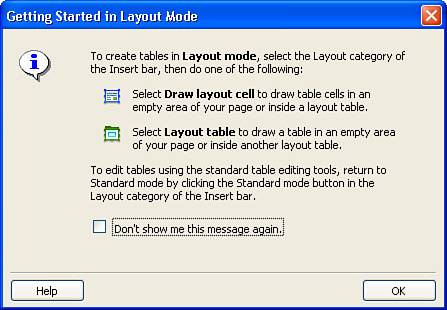
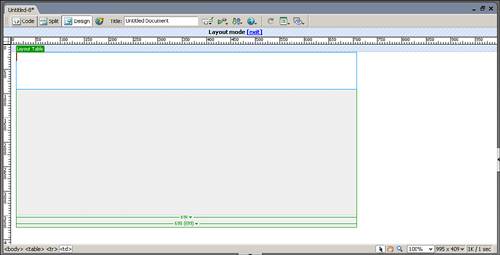
To switch to the Layout mode, choose View, Table Mode, Layout Mode from the menu bar. As shown in Figure 26.8, Dreamweaver alerts you to some of the tools that are useful in this mode. Click OK to close the box.
One other thing you might have noticed about Layout mode is that Dreamweaver also activates the Insert toolbar (see Figure 26.9), if it isn’t already open. The Insert toolbar gives you access to the tools necessary for using this mode.
Figure 26.9. The Insert toolbar in Layout mode provides access to the tools necessary to create tables.
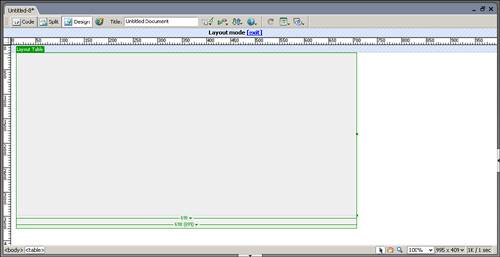
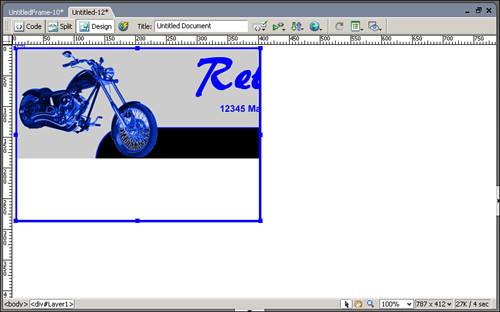
Drawing Layout tables is simple if you have ever used a graphics program. Basically, it’s the same action as if you were to draw a rectangle on your page with a mouse. Just click the Layout Table button on the Insert bar and then draw a rectangle on your page that represents the outer borders of your table. The result is a rectangle drawn in your page, as shown in Figure 26.10.
After your table is in place, the next step is to create the cells that are located within the table. The process of creating cells is almost identical to the process of creating the table, except that you’ll be drawing inside the table boundaries.
To draw a cell within your table, just click the Draw Layout Cell button on the Insert bar and then draw your cell inside the table (see Figure 26.11).
Be careful, however, about how many cells you draw and the layout design you choose. What appears to be a straightforward layout of columns and rows can quickly turn into a mess of nested tables, unnecessary spacer images, and tables that don’t render properly in older browsers. To help avoid this, draw out a page plan on paper that indicates what the page structure should look like. Next, when creating your tables, be sure to follow the page plan carefully to ensure that your tables are as clean as possible and will render correctly.
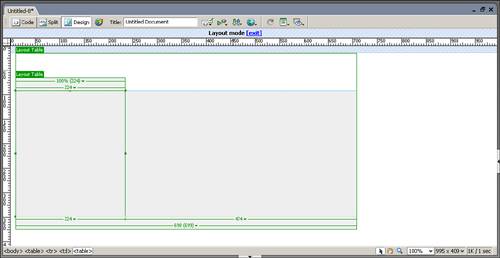
Nesting tables refers to the process of placing a table inside another table, and it is just as easy in Layout mode as simply drawing a new table. As shown in Figure 26.12, you can select the Layout Table button in the Insert bar, place the cursor inside the first table, draw the shape of the second table, and Dreamweaver then nests the second inside the first.
Take care, however, that you don’t attempt to draw the second table on top of an existing cell. Dreamweaver does not allow you to draw a second, nested table when it would be placed on top of an existing cell.
Note
Nesting cells in Standard mode is just as easy as nesting them in Layout or Expanded mode. Just place your cursor in the cell where you want to nest the table and choose Insert, Table from the menu bar. After you specify the settings for the table and click OK, the second table is nested within the first.
When using the Layout Mode to create tables, it’s sometimes difficult to work with tables that have been drawn close to one another. In addition, the borders between the tables and cells are extremely light, so they are difficult to see. To address this issue, Dreamweaver includes an Expanded mode (see Figure 26.13), which makes it much easier to select tables and table objects and to visualize the relationships between the page objects. To switch to the Expanded mode, click the Expanded button on the Insert toolbar.

Regardless of which mode you use to insert your tables, the common element among all the modes is that the Property inspector allows you complete control over the various attributes of your tables, rows, columns, and cells. For the most part, the Property inspector, shown in Figure 26.14, remains the same for all table objects.

Figure 26.14. The Property inspector allows you full control over your table and table object attributes.
Although most of the elements of controlling table attributes via the Property inspector are straightforward, a couple of items should be pointed out. First are the Merge Cells and Split Cells buttons in the lower-left corner of the inspector. The Merge Cells button takes all selected cells and makes them one cell. This is a really cool tool that can help you avoid having to use nested tables. The Split Cells button does the opposite: It takes a single cell and splits it into as many columns or rows as you indicate.
A second element in the Property inspector that you should be aware of is the No Wrap check box. Usually, when text exceeds the specified width of a cell, column, or table, Dreamweaver wraps the text to the next line and expands the size of the row. When the No Wrap check box is checked, however, Dreamweaver ignores the width limitations set in the W field and expands the table to fit the text—no matter how long it is. Wrapping is on by default.
Just when you have developed that perfect table layout that does exactly what your site needs is usually when you discover that something has to change. For example, a client may suddenly decide to use images that stretch the table design beyond its limitations. Luckily, Dreamweaver makes it relatively easy to go back and adjust your designs, either by selecting the appropriate item or items in the table and using the Property inspector to make numeric adjustments, or by placing your cursor on the gridlines within the table and adjusting the size of your rows vertically or adjusting your columns horizontally. If you choose the latter method, just place your cursor over the gridline that you want to move and Dreamweaver changes the cursor (see Figure 26.15) to show that you can adjust the line by clicking on it and dragging.
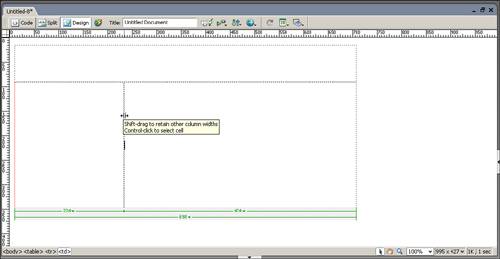
Figure 26.15. When you place your cursor over a gridline within a table, it changes to indicate that you can drag the line to adjust the row or column size.
After your table structure has been created and the appropriate sizes set, adding content is a snap. Simply place your cursor in the cell where you want to add the text, image, or media displayed and choose the appropriate command to insert it (or simply type away). Keep in mind, however, that if you insert an image or media object that is larger than the height or width restrictions of a table, row, column, or cell, the table will expand beyond its limitations to accommodate the object. This means you need to carefully consider what sizes and types of images and media you might be inserting into your pages before you complete your table design. Believe me, it is frustrating to have to rebuild your table design when you realize that it won’t accommodate an image or media object.
After your content is in place, keep in mind that you can apply styles to entire columns and rows by clicking on them and then choosing the style from the Style drop-down in the Property inspector.
Using frames to create website designs has decreased in popularity over the last few years, especially because early search engine technology had difficulties “seeing” into frames and indexing their content. There are still some very good uses, however, for frames-based sites, so Dreamweaver continues support for them.
I ran into an instance recently that was well suited for the use of frames. It involved the creation of an eLearning module for a client (see Figure 26.16). The client wanted timed exams and wanted each employee to be able to keep an eye on the time left during the exam. The perfect solution was to create a frameset that displayed a timer in the top frame and the eLearning question in the bottom. Because employees were submitting the test answers in the bottom frame, the page visible in the bottom frame could change as needed without the top frame ever having to reload. The solution worked out great and is still in use.
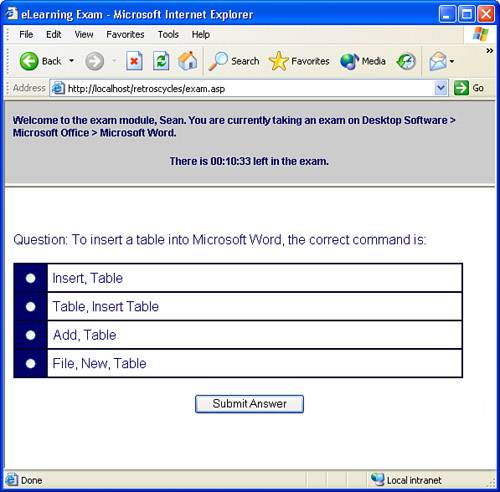
Figure 26.16. An example of a web application that benefits from frames. The top frame displays the timer and never reloads; the bottom frame displays the exam question.
The fundamental element of a site design that relies on frames is called the frameset. A frameset is an HTML document that contains the information about each individual frame within the site and their positions in the layout. The frameset document itself doesn’t contain any actual content, but it plays a key role in determining how the content stored in the frame pages is displayed. For instance, if you were to develop an eLearning application similar to the one in Figure 26.15, you would need a single frameset that consisted of two frames. The code for the frameset might look something like this:
<frameset rows="80,*" frameborder="no" border="0" framspacing="0">
    <frame src="timer.asp" name="timerFrame" scrolling="No" |
    noresize="noresize" id="timerFrame" title="timerFrame"/>
    <frame src="examp.asp" name="examFrame" id="examFrame" title="examFrame"/>
</frameset>
This simple frameset contains a top frame called timerFrame that displays the timer.asp page. The frame height is set to 80 pixels. The user cannot resize the top frame and the scrollbars are deactivated. The bottom frame is called examFrame and occupies the rest of the available browser height. It does allow for scrolling when the content extends beyond the limitation of the frame.
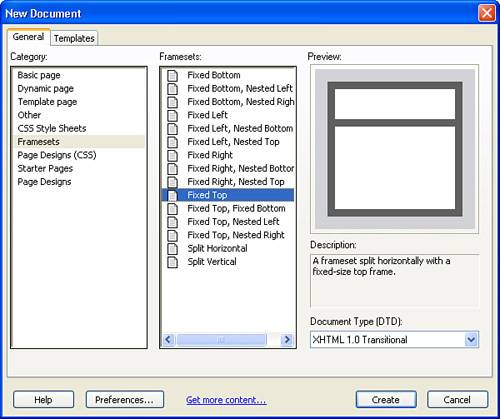
So, how would you create this frameset? Begin by choosing File, New from Dreamweaver’s main menu. In the New Document dialog box, shown in Figure 26.17, select the Framesets category, choose Fixed Top from the available framesets, and click Create.
Note
Dreamweaver 8 offers a wide range of preconfigured framesets to choose from. These templates can be configured easily to fit any custom needs you might have.
Because each frame in the frameset needs to have a title, Dreamweaver opens the Frame Tag Accessibility Attributes dialog box (see Figure 26.18) and asks you to specify a title. For the mainFrame, type examFrame in the Title field.
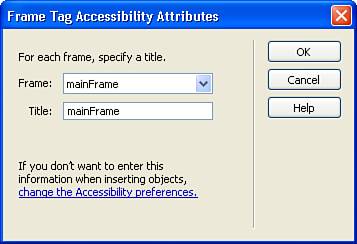
Next, select topFrame from the Frame drop-down menu and type timerFrame for the name. Click OK to create a frameset.
The final step to creating your frameset is to save it. To save the Frameset HTML document, choose File, Save Frameset As from the menu bar. Choose a location and name for the frameset in the Save As dialog box and click Save. Notice that when the frameset is selected, the tab at the top of the document displays the name of the frameset.
Place your cursor in the top frame and you’ll note that the tab changes to UntitledFrame. The top frame is treated as an entirely separate HTML page from the frameset itself and needs to be saved. From the menu bar, choose File, Save and save the top frame. Finally, save the bottom frame in the same manner.
Tip
When naming your frame, it’s extremely important to use names that tell you what the frame does. Using generic names such as “frame1” or “myframe” doesn’t really help when you are trying to determine which frame to link to. More specific names such as “rightnavFrame” or “timerFrame” are much more likely to help you know what the file does.
With your frameset in place and saved, you’re ready to make any customized adjustments to the predefined frameset. The easiest way to do this is via the Frames panel and the Property inspector. To open the Frames panel, choose Window, Frames from the menu bar. The Frames panel, shown in Figure 26.19, displays your current frame configuration and provides you with an easy way to select the appropriate frame for adjustment.
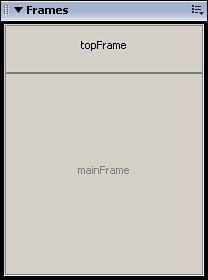
Figure 26.19. The Frames panel provides a way to view and select the various frames in your frameset.
You may have noticed in the Frames panel that your frames are still named topFrame and mainFrame, even though you specified new names for accessibility reasons. To adjust these values, click on the appropriate frame in the Frames panel and then type a new name in the Frame Name field of the Property inspector. Again, name the top frame timerFrame and the bottom frame examFrame.
Now, suppose that you wanted to increase the size of your top frame from 80 pixels to 100 pixels. Your first instinct might be to select the timerFrame in the Frames panel and make the height adjustment in the Property inspector. Unfortunately, as shown in Figure 26.20, you would be surprised to find that there is no height adjustment in the Property inspector when a single frame is selected.

Figure 26.20. The Property inspector does not display a height value when a single frame is selected.
Instead, the frameset actually controls those values, so you would need to click on the outermost border of the frameset from within the Frames panel. This selects the entire frameset and enables you to adjust the values of the individual frames via the Property inspector (see Figure 26.21).

Figure 26.21. When the frameset is selected, you can adjust additional properties of the individual frames.
To adjust the height of the top frame, click on the top frame in the Property inspector and type 100 for the value in the Row field. Press Enter or click anywhere in the page and Dreamweaver updates the design view. Before your change becomes permanent, however, you need to save the changes to the frameset. With the frameset selected in the Frames panel, choose File, Save Frameset from the menu bar.
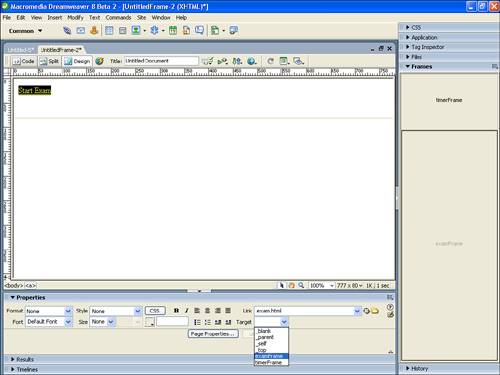
With your frame structure in place, adding content just means typing away or adding images, Flash movies, or any other object that you might add in any other web page. The biggest difference comes when you want to create images or hyperlinks that, when clicked, change the contents of a different frame. So, for instance, suppose that you want to create a link in the top frame that says “Start Exam,” and this link is supposed to load the exam page in the bottom frame.
To create this link, place your cursor in the top frame and type Start Exam. Select the text and type exam.html in the Link field of the Property inspector. Pretty straightforward process of creating a hyperlink, right? The only problem is that if someone clicks this link, the exam.html page is going to load in the top frame, rather than the bottom frame.
To fix this, you have to tell Dreamweaver to add code that indicates that the page should open in the bottom frame. To do this, choose examFrame from the Target drop-down menu (shown in Figure 26.22). That’s it! Save the pages and the frameset, and the top link automatically opens the exam.html page in the bottom frame.
Other than that, you can basically create each HTML page in each frame as if it were a normal web page, using tables, layers, and even subframes (although I would really recommend against that unless you really need them).
Now that you are comfortable with building a page layout with tables or frames, let’s add one more tool to your toolbox. Layers are a third design tool, and they provide you with the most flexibility of any of the three. Using layers, you can “draw” out your design in a manner similar to that you would use in the Table Layout view, except that with layers you can lay objects on top of one another, creating a “layering” effect.
The only downside to the use of layers is that some older browsers (Netscape in particular) aren’t capable of rendering layers correctly. When an older browser tries to render layers, it fails miserably and your entire design is compromised. For this reason, layers haven’t supplanted tables as the most popular method of page design. As browser support grows, however, layers will play an important role in adding the third dimension of depth to web pages.
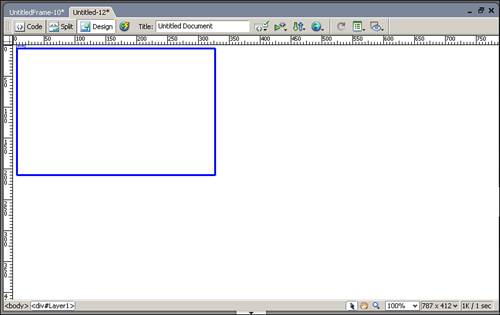
Creating a layer is very easy. Open any page and ensure that the Insert toolbar is visible by choosing Windows, Insert. On the Insert toolbar click the Standard mode and then click the Draw Layer button. Dreamweaver turns the cursor into a crosshair that enables you to click anywhere in the page and drag the cursor to create a square or rectangular layer. After you let go of the mouse button, the layer is created in your page (see Figure 26.23).
After the layer has been added to the page, you can view and manage that layer via the Layers panel, located in the CSS panel group and shown in Figure 26.24.
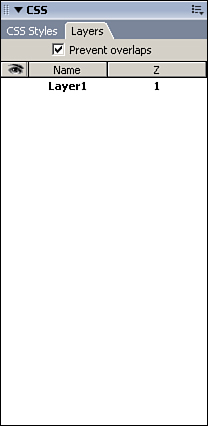
Using the Layers panel, you can select, hide, rename, and even choose the order in which your layers are stacked.
To rename a layer, double-click on the layer name in the Layers panel and the layer name becomes an editable text field. Type your new name, press the Enter key, and the new name is applied to the layer.
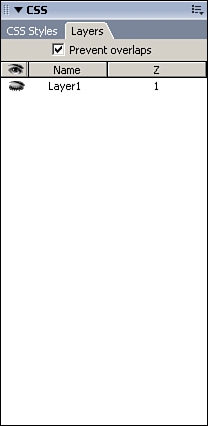
If you are working on your page design and need to work on layers that are stacked on top of one another, a handy tool is the visibility icon in the Layers panel, indicated by an eye. Clicking in the visibility column next to any layer adds an icon that looks like a shut eye and hides the layer (see Figure 26.25). Clicking the icon again changes the icon to an open eye and makes the layer visible again.
If you are going to use layers to create objects that overlap one another, you need to be sure that the stacking order is correct. To adjust the stacking order, go to the Layers panel, click the number in the Z column, and type a new value. Keep in mind that if you make a layer invisible, its stacking order doesn’t matter.
To select a layer, click on it in the Design view or the Layers panel. After the layer is selected, the Property inspector displays the attributes for the layer that can be adjusted, including the left and top positions of the layer and the height and width. With these four attributes, you can fix the layer at any point in the page.
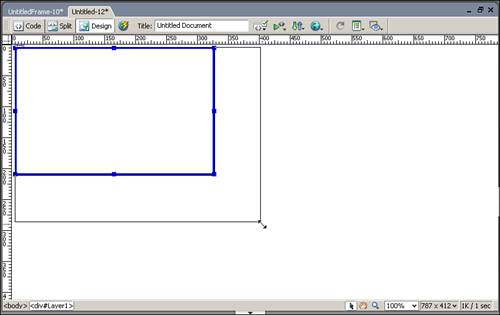
You can also resize or move a layer by using your mouse. To move a layer, click and hold the handle in the top-left corner of the layer and move the layer to its destination. If you want to resize the layer with the mouse, click on any of the handles in the corners or sides of the layer and click and drag. As shown in Figure 26.26, clicking on a corner handle resizes the height and width of the layer proportionally.
You can add content to layers just as if you were adding it directly to the page. Text can be typed in layers, images can be inserted, and media such as Flash movies and videos can be added as well. One consideration when designing with layers, however, concerns images. Unlike tables that expand to fit the size of the image, layers give you full control over how the layer behaves when the content is larger than the layer. This is done by setting the value of the Overflow field in the Property inspector. When the Overflow field is set to Visible, a set of scroll bars enables you to scroll to see the rest of the image. If, however, the Overflow field is set to Hidden, then any portion of the image that is not displayed in the layer is inaccessible.
For instance, suppose you place an image in your layer that is larger than the height and width properties of the layer. By default, the layer uses the Visible setting and is resized to fit the size of the object. If, however, you don’t want the layer resized, you can use the Hidden value, which makes it appear that the image has been cropped to the size of the layer, as shown in Figure 26.27.
Tip
The Hidden value is particularly useful when you are displaying a series of different images in a layer and the images are all slightly different sizes. To make sure that each image displays correctly, set the size of the placeholder image to be the size of the smallest image in the series. Then the layer displays only the portion of each image that fits in the layer.
The third Overflow setting you can control is Scroll. This setting acts similar to the Hidden value, with the exception that scrollbars are added to the layer so that the user can scroll to see the rest of the image (see Figure 26.28).
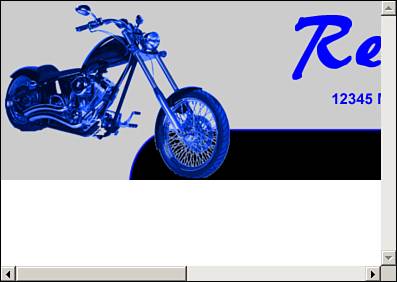
Figure 26.28. The Scroll value hides any part of the image that doesn’t fit within the layer, but also gives scrollbars so the rest of the image can be viewed.
The final Overflow setting is the Auto setting. Auto behaves like the Scroll setting except that the scrollbars are visible only if they are necessary.
This chapter has talked about the pros and cons of using tables, frames, and layers for developing your website layout. If you recall, tables are reliable because all browsers tend to render tables the same. Layers, on the other hand, become problematic when it comes to rendering them in older browsers. For development, though, layers are easy to use and draw, whereas tables can get cumbersome—especially when it comes to nesting tables. So which do you choose? How about both?
Dreamweaver offers a great tool that enables you to convert either your layers to tables or your layers to a table. This enables you to design in whichever layout method you prefer and then convert your pages to the other presentation method later on down the road.
To convert layers to tables, save your page and then choose Modify, Convert, Layers to Table. The Convert Layers to Table dialog box (see Figure 26.29) enables you to decide whether you prefer the most accurate method of conversion or that which creates the smallest file size. If you choose to create the smallest, Dreamweaver removes cells that are empty and are smaller than a specific pixel size, which you can choose.

In addition, you can select whether or not to use transparent GIFs, whether you want the resulting table centered on the page, and a host of additional layout options.
The Convert Tables to Layers dialog box (see Figure 26.30) offers the same layout options, which determine whether, during the process, Dreamweaver prevents layers from overlapping, automatically opens the Layers panel, shows the design grid, and snaps the layers to that grid.
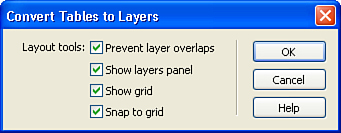
Figure 26.30. The Covert Tables to Layers dialog box allows you to configure how the layout will be displayed.
If you opt to use one of these methods, be aware that Dreamweaver does a great job, but it’s not always 100% faithful to your original design. In some cases, you need to do some tweaking to the pages to ensure that your design behaves as expected.
Is there a limit to how many levels of nesting I can have in my table structure?
Theoretically, there is no limit to the number of tables you can nest. Realistically, however, you need to really re-examine your page layout if you are nesting tables beyond four levels. As you nest tables, more and more code is added to your pages, causing the size of your final file to grow. This growth affects download speeds and can even cause some older browsers to lock up. For these reasons, keep your table nesting simple and try to keep it to four or fewer levels.
Does the choice of tables versus layers affect my site’s chances of being listed in the search engines?
Yes. If search engine placement is of concern to you, you need to be aware of the way that search engine spiders treat tables. Generally, the spiders read the content of your pages from left to right. So if you have a web page that contains a table with three columns, and the text the search engine is looking for is in the middle column, the spider reads the leftmost column and uses that information to index your site. Because spiders don’t usually read the entire page, it’s possible that the only information on which it will base your page rank is the content in the first column. Obviously, this is a problem because your content is in the middle column. Because spiders read only a limited number of lines of your code, it’s possible that the spider will never read your content.
Using layers, however, can increase the chances that the spider will read your content because layers produce significantly less code than nested tables, so the spider gets to read more of your site code.
Speaking of search engines, I am using layers for my design and I’m thinking about placing a hidden layer at the top of my page that contains the indexing information I want the spider to read. Is this a good idea?
No. And not only is it not a good idea, it may get your pages added to the search engine’s blacklist. The major search engine companies have made it very clear that they expect the spider to see exactly the same thing that the visitor sees. If the spider is seeing something different, the spider is being tricked and this opens the door to fraud. To keep this from happening, search engines look for sites that have layers hidden or positioned off the screen and, if they determine that the use of these layers is fraudulent, they blacklist the site from being indexed.
The use of tables and layers has been a hotly contested subject on web development forums over the last few years. Those in the tables camp have rallied around the battle call of “Some browsers don’t support layers, so we don’t want to alienate visitors.” Those in the layers camp have returned fire with “Tables produce bloated code and are meant to display only tabular data.” On a rare occasion, however, someone steps in and suggests the use of both in design, leaving the two sides scratching their heads. Why can’t we use both in our designs to overcome the weaknesses of both? The answer is...we can.
The trick here is to leverage the consistency of tables while reducing their use to a point that it won’t bloat our code. In addition, we can reduce the possibility that older browsers will completely destroy our layers by nesting them inside tables to ensure that even if they are rendered improperly, they will at least be placed in the correct general location and won’t leave our visitors wondering what went wrong in the layout.
An excellent example of the combination of tables and layers can be found at http://developer.apple.com/internet/webcontent/bestwebdev.html. This article provides a solid example of how to blend layers and tables to produce a consistently placed footer row, without excess code.