
In this chapter
The newest application in the Macromedia Studio is Contribute 3.1. Contribute is a content management tool that enables those with little or no understanding of HTML to create and edit content stored in web pages. Using an intuitive browser interface, Contribute makes it easy for just about anyone who understands the basic concepts of a web browser and a word processor to make page updates.
From a web developer’s point of view, Contribute can be a huge time saver because it enables you to delegate the content management aspect of website maintenance to others, freeing you up to build web applications.
Take a moment to look at the Contribute environment before getting into the nuts and bolts of connecting to a site, editing content, and managing pages.
The Contribute environment is geared toward nontechnical users, so it is straightforward and simple to use. The environment is based on the web browser concept and enables users to navigate through the pages of their sites by clicking on hyperlinks, as well as using the traditional buttons and toolbars found in the most popular browsers. In addition, Contribute adds a set of panels that provide supplemental information for navigating pages and using Contribute.
On startup, Contribute displays the start page shown in Figure 31.1. The start page provides quick links to sites you have configured and to tutorials for assistance in using Contribute.
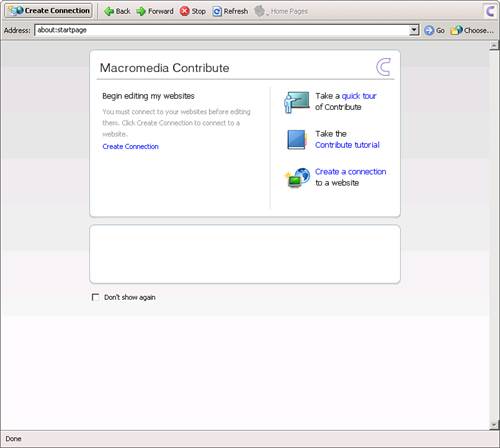
Just as you can with the start pages in the other Studio applications, you can disable the start page by checking the Don’t Show Again check box.
Similar to the other Studio applications, the Contribute menu bar offers access to all the various tools and functions that can be used to configure Contribute or manage your web pages. In addition to containing some items that are common to the other Studio applications, Contribute’s menu bar also includes a couple of items that are unique to Contribute. The menu categories in Contribute 3.1 are as follows:
File Menu—. Enables you to perform document-related actions such as save, publish, preview in browser, and print.
Edit Menu—. Enables you to perform common editing tasks such as cut, copy, and paste, as well as create connections to Contribute websites and set program preferences.
View Menu—. Enables you to choose which page elements are visible in the workspace, as well as perform browser-related functionality such as back and forward.
Bookmarks Menu—. Enables you to bookmark pages within your site for quick access and editing.
Insert Menu—. Enables you to insert elements such as tables, hyperlinks, images, and rich media content. Also provides access to eCommerce tools via PayPal.
Format Menu—. Provides access to editing tools for text, images, and page properties.
Table Menu—. Enables you to insert and adjust tables placed in your web pages.
Help Menu—. Provides access to common help functionality as well as the Contribute Support Center.
The Contribute sidebar, shown in Figure 31.2, provides access to two different panels, each of which can be minimized individually.

The following panels are located in the sidebar:
Pages panel—. Provides access to page information as well as one-click access to recently edited pages.
How Do I panel—. Provides quick access to help topics and step-by-step instructions for common tasks.
Although the sidebar provides easy access to help topics for novice users, it also takes up valuable real estate. To close the sidebar, choose View, Sidebar from the menu bar. This command toggles the sidebar on and off.
The majority of the Contribute environment is dominated by the Browser/Edit workspace (see Figure 31.3), which enables you to navigate the pages in your configured sites and edit their content in a single, easy-to-use interface.
The Contribute toolbar, located at the top of the workspace, contains task-oriented buttons that enable you to either browse or edit the pages in the site. When a page is not being edited, the Contribute toolbar displays buttons that focus on the navigation of the pages, such as Back, Forward, Stop, and Refresh. In addition, the address of the current page is displayed in the Address bar (see Figure 31.4).
When the Edit Page button is clicked, the Contribute bar changes to display buttons that assist with the various editing and save functions (see Figure 31.5).
Figure 31.5. When a page is being edited, the Contribute toolbar changes to display common editing tasks.
Switching between browsing and editing mode is done with a single click of a button. When in browsing mode, clicking the Edit Page button switches the workspace to editing mode. When in editing mode, clicking the Cancel button switches you back to browsing mode, after first confirming that any changes made to the draft will be lost unless saved.
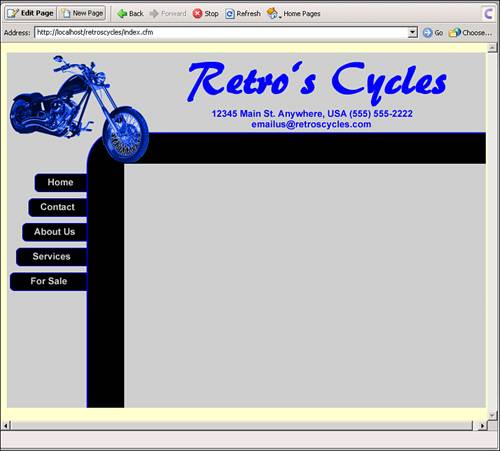
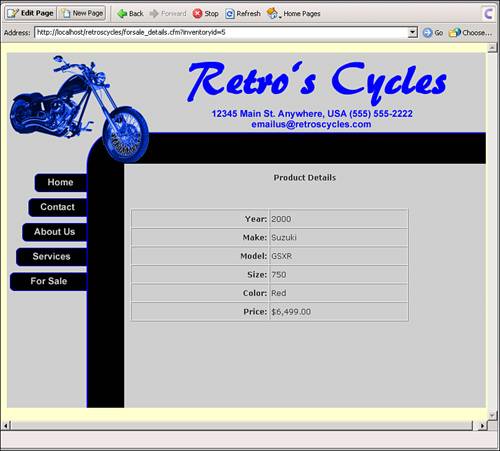
The Contribute workspace serves as both a browser and inline editor to make editing pages as simple as possible. Content editors can use the browser mode to find the page they want to edit and then switch to edit mode to make adjustments to that page. When in browser mode, the workspace renders the page just as the most popular browsers do (see Figure 31.6).
When the content editor switches to edit mode, however, the page becomes an editable document. If the page is based on a Dreamweaver template, the editable regions are indicated and the template regions remain locked, as shown in Figure 31.7.
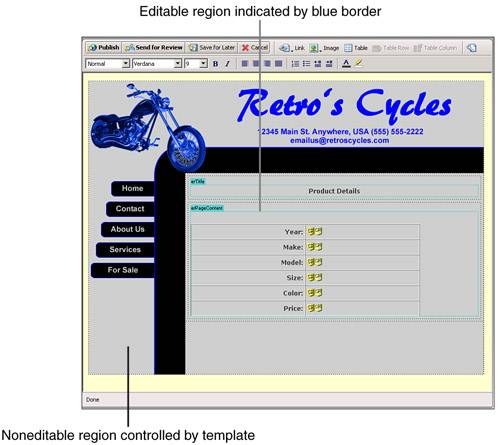
Figure 31.7. The Contribute workspace adjusts based on whether a document is being viewed or edited.
Note
If you open a page that is located in a site that is not configured for use in Contribute, the page is displayed in the workspace and you can make edits to it, but Contribute allows you to save it as only a draft. Until the site is configured for use in Contribute, you cannot publish the changes.
The first step in configuring Contribute is to connect to an existing website. However, before you create a connection to the site, the administrator of that site has to send you the proper authentication information. The administrator might send this information in the form of a Website Connection Key sent to you via email, or he might give you the user ID, password, and other appropriate connection information required to set up the connection. Without the Connection Key, you can’t publish pages to the site from your workstation.
If the administrator sends a connection key, setting up the site is as simple as double-clicking on the key file. When activated, the key file automatically configures the site settings in your copy of Contribute and you are ready to edit pages. If, however, the administrator chooses to just send configuration information, you have to manually create a connection to the site. Keep in mind that you don’t need anything other than your copy of Contribute and the connection information to edit pages. When you have these two elements, you’re ready to begin editing and publishing.
If you are the site’s administrator, the process of creating a connection is started by choosing Edit, My Connections from the menu bar. In the My Connections dialog box, shown in Figure 31.8, click the Create button to start the wizard.

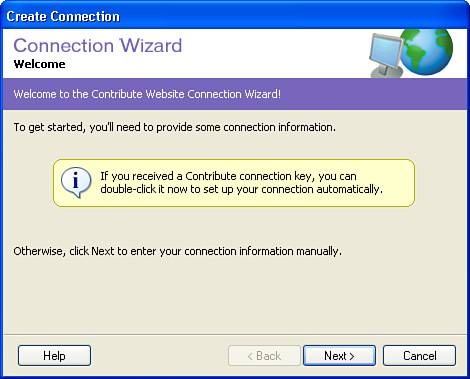
Contribute’s Connection Wizard (see Figure 31.9) is a step-by-step guide for entering the appropriate information for connecting to a site. The Connection Wizard’s welcome screen reminds you that clicking on a Connection Key accomplishes the same results as stepping through the wizard.
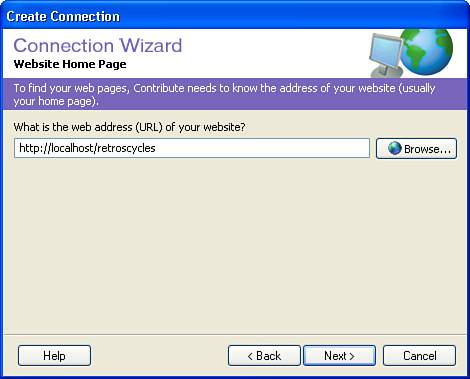
The next step is to input the URL of the root for your website, as shown in Figure 31.10. This enables Contribute to locate the pages of your site and manage new links created via Contribute.
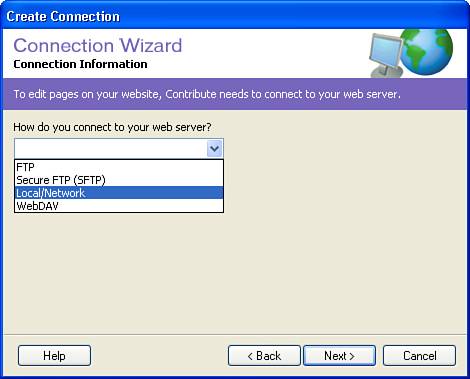
The wizard also enables you to select from a variety of connection options (see Figure 31.11). FTP is the most popular option for sites hosted remotely, whereas Local/Network is the usual option for those working in a networked environment.
In the next step, you are asked to enter your name and email address to help Contribute identify which changes were made by you (see Figure 31.12). The username and email address are stored for each site user to ensure that all changes to the site can be tracked.
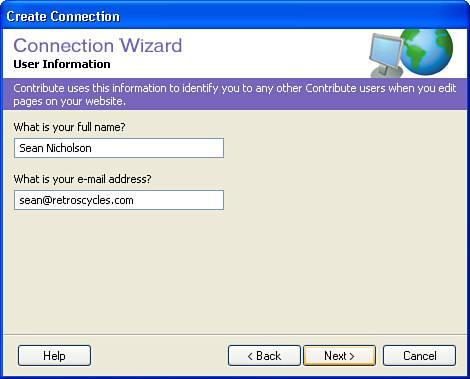
Figure 31.12. By storing the name and email of each user, Contribute attributes site changes to the appropriate user.
After you enter your name and email, you need to choose the role that you will perform in managing the site. By default, Contribute offers the roles of Administrator, Writer, or Publisher (see Figure 31.13). After the site is created, however, Administrators can create and configure additional roles based on their needs.
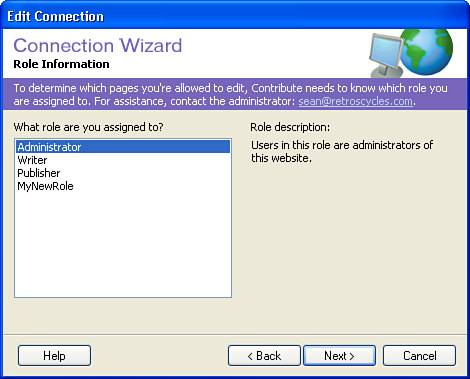
The three default roles offered by Contribute have the following attributes:
Administrator—. Able to create new roles, modify existing roles, add users to the site, and send connection information to those users.
Publisher—. Able to create, edit, and publish pages to the site.
Publisher—. Able to create and edit pages, but does not have the authorization to publish pages.
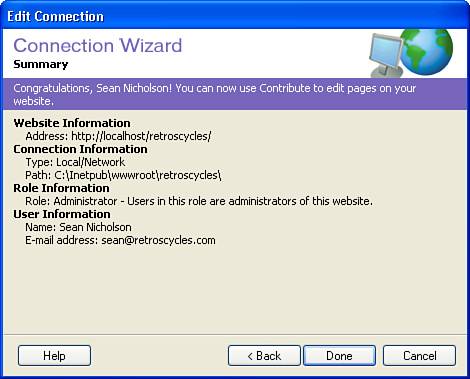
After you have completed all the necessary information, Contribute enables you to review your entries and either accept them or proceed backward through the steps in the wizard to make any needed adjustments (see Figure 31.14).
Upon completion of the wizard, the My Connections dialog box displays the site you created. From the My Connections dialog, you can edit, rename, disable, administer, and even delete connections to sites.
Contribute not only enables you to manage the content stored inside your pages, but to add and remove files from your site as well.
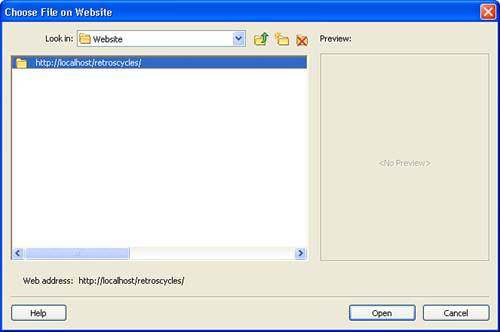
The easiest way to find a page in your site is to navigate to it with the browser interface. At times, however, you cannot navigate to a page that you have created, so Contribute offers the Choose button located on the Contribute toolbar. Clicking the Choose button brings up the Choose File on Website dialog box, which enables you to browse to a file located in the site (see Figure 31.15). If you know the URL of the page, you can also type it directly into the Address bar.
As your site becomes more popular and/or you identify new content that needs to be included, you’ll want to expand by adding new pages. Contribute enables you to not only add blank pages, but also derive pages from an existing layout by either copying an existing page or by building a new page based on a Dreamweaver template. Choose File, New Page from the menu bar or click the New Page button on the Contribute bar to open the New Page dialog box, shown in Figure 31.16, and select from the various options.
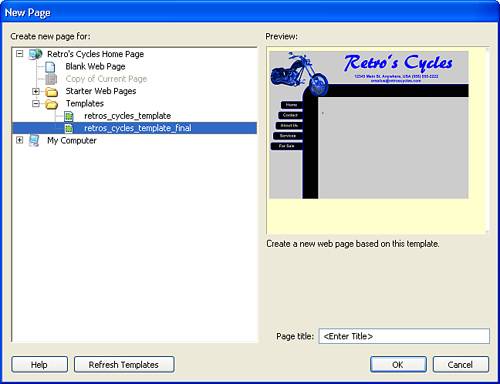
Figure 31.16. The New Page dialog box enables you to spawn blank pages, copies of pages, or even pages based on Dreamweaver templates.
After you add a new title for the page and click OK, Contribute automatically opens the new page in edit mode, allowing you to add new content (see Figure 31.17).

Removing pages from your site is also a relatively simple process in Contribute. The first step is to either navigate to the page or open the page by selecting it with the Choose button. When the page is visible in the browser, select File, Actions, Delete Page. You are prompted to confirm that you want to permanently remove the page from your site (see Figure 31.18).
When you click OK, the page is deleted and no longer accessible via your site.
Caution
Before deleting a page, double check to be sure that no other pages in the site link to it. This helps you avoid broken links on your site.
Tip
If you want to keep certain users from deleting files, you can restrict their access to times when they’re defining the settings for their roles. See Chapter 32, “Administering Contribute 3,” for more information about the creation and restriction of different roles.
Content management is really where Contribute’s strengths lie. In developing Contribute, Macromedia has created a simple, easy-to-use application that allows anyone who is comfortable with a word processor to add and edit content without having to understand HTML and other coding languages. The types of content that can be included in Contribute-generated pages include text, images, tables, hyperlinks, and even rich media content such as Flash movies. Best of all, your content editors don’t have to worry about causing problems with your page design because you can restrict to which areas of the design they have access by basing your pages on Dreamweaver templates.
Using Dreamweaver templates to create your Contribute pages doesn’t require any extra steps or configuration. When you create a connection to the site, Contribute scans the folder structure and, if present, recognizes the Templates folder as the location for Dreamweaver templates. All files located in that folder that use the .dwt extension are treated as Dreamweaver templates, and Contribute adheres to the various editable regions that were established when the template was created.
Editing text in Contribute is very similar to editing text in many of today’s popular word processor applications. Simply place your cursor in the appropriate region to add content by typing. In addition, the formatting tools available on the Contribute toolbar (see Figure 31.19) enable you to apply styles, select font face, color, and size, and apply bold and italics. In addition, you can apply formatting to paragraphs of text by using the various align and indent buttons, as well as create numbered and bulleted lists.
Contribute also enables you to copy and paste text from many of the major word processors while retaining as much of the formatting and text style as possible.
Note
Although Contribute does a great job of formatting text that is copied and pasted from word processors, maintaining font appearance is often a challenge. If the font used in the document is not one of the standard fonts available to web pages (Arial, Courier, Geneva, Times New Roman, and Verdana), then Contribute adjusts the font to the default font for the web page. In addition, custom text effects such as shadows, embossing, or outlining do not display in Contribute.
Adding images to a page in Contribute is a snap as well. Just click the Insert Image button on the Contribute toolbar and select whether to add the image from your computer or from another website. When adding the image from the images folder of your site, Contribute creates a relative link to the image based on the location of the image compared to the page and the directory structure of the site.
If, however, you choose to insert the image from another website, Contribute creates a copy of the image from the other website and places it in your site’s images folder. The link to the image then points to the local copy.
Note
When linking to an image on a website, the site must be one configured within Contribute. Contribute does not accommodate linking to images stored on external websites.
Depending on which option you choose, Contribute presents you with a different dialog box to locate your image. The Select Image dialog box, shown in Figure 31.20, is activated when you choose to insert an image from the images folder of your local site. Using this dialog box, you can navigate to the file, select it, and click Select. The image is then inserted into your page.
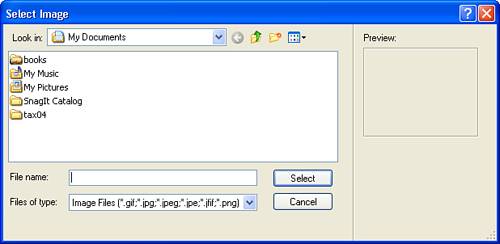
Figure 31.20. The Select Image dialog box enables you to navigate to an image located within your site.
Inserting an image from a website, however, activates the Choose Image on Website dialog box (see Figure 31.21), where you can navigate to the images folder of another Contribute site.

Figure 31.21. The Choose Image on Website dialog box enables you to link to an image stored in another website.
After an image has been added to the page, selecting it activates a new set of tools on the Contribute toolbar, as shown in Figure 31.22. These tools enable you to scale, rotate, and crop the image from within Contribute, as well as sharpen the image and adjust the shading.

In addition, double-clicking on the image opens the Image Properties dialog box, shown in Figure 31.23, which enables you to adjust a variety of attributes.

Figure 31.23. In the Image Properties dialog box you can adjust the display attributes of any image inserted into a page.
Note
Adjusting the attributes of an image does not modify the image itself. Therefore, inserting a large image into your page and changing the attributes so it appears smaller does not affect the image’s actual file size. If you need to resize an image, it’s best to edit the image with Fireworks first and then insert it into your page.
Using Contribute to add tables to a document is simple as well. A content editor can place the cursor at the desired insertion point and click the Table button on the toolbar to activate the Insert Table dialog box, shown in Figure 31.24, to quickly add a table to a page.

The dialog box enables you to adjust the number of rows and columns in the table, as well as specify the table width, border attributes, and cell padding and spacing. In addition, you can choose whether to indicate a particular row or column as a header by shading it differently from the rest.
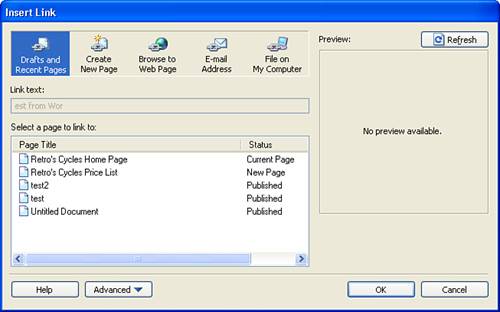
Contribute can help you create a variety of hyperlinks to items such as pages within your site, email addresses, and even files located on your computer. Click the Link button on the Contribute toolbar and choose from the various link types. The Insert Link dialog box helps you locate the resource and apply any attributes that are specific to that type of link (see Figure 31.25).
After your page content has been edited and the appropriate page elements added, Contribute offers a variety of options for saving the changes. Rather than simply save the page changes and have the page become live immediately, you can choose from the following options:
Publish—. When you click the Publish button on the Contribute toolbar, the changes are immediately visible to site visitors. When a page has been published successfully, Contribute notifies you that of the success by displaying the notice shown in Figure 31.26.
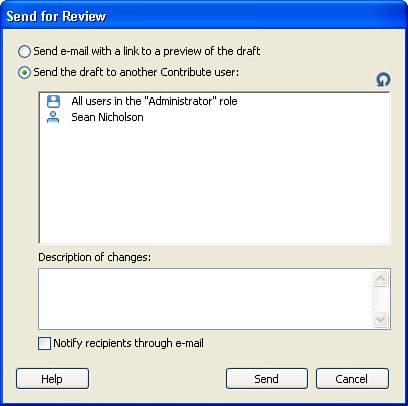
Send for Review—. Sending the page for review enables you to either send a link to the page to someone via email or send an actual draft of the page to another Contribute user. When you choose this option, the Send for Review dialog box, shown in Figure 31.27, lets you designate the reviewer and add an additional description of the changes to the document for his or her review.
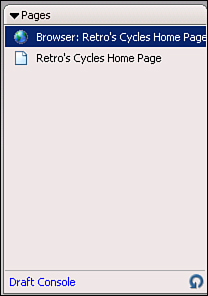
Save for Later—. This creates a draft of the page and enables you to revisit the page later to make additional edits. Saving the page for later has no effect on the actual live version of the page. When a draft is created, an entry for that draft is added to the Draft Console in the Pages panel, as shown in Figure 31.28.
Cancel—. This option allows you to cancel all changes and close the page.
As you can see, using Contribute to edit and manage pages is extremely easy. Although the program might not have the complex authoring tools contained in Dreamweaver, it provides quick, easy access to content editing features that make updating a website an easy task for just about anyone.
I am having trouble creating a connection to my server. What can I do to resolve the problems?
If your website is located on a Unix server, be sure that the URL to the site uses the proper case. For instance, ftp://ftp.retroscycles.com/mysite on a Unix server is not the same as ftp://ftp.retroscycles.com/MySite (note the differences in capitalization). To avoid possible issues like this, be sure that the case used in the URL is the same case used in naming the folder.
When installing Contribute, should I use Transition Mode or Compatibility Mode?
This depends on whether or not any of your users will be using earlier versions of Contribute. If you have users who will be using Contribute 1 or 2 to access the site, you should install using Transition Mode because of compatibility issues between Contribute 3.1 and earlier versions. If, however, all of your users are using Contribute 3.1, you should use Compatibility mode.
How can I apply a cascading style sheet in Contribute?
Contribute does not currently support linking to style sheets. Instead, when you create a new style in a document, Contribute embeds that style directly into the document.
If, however, you are using Dreamweaver templates as the base for your site, you can attach the style sheet to that template. All pages based on the template include the style sheet and those styles are available within Contribute.
No matter how long you have been developing websites or how careful you are in creating content, mistakes always occur during the process. Whether it’s a simple misspelling or a broken link, mistakes are something that can seriously affect end users, so you should do everything you can to minimize them.
For this reason, it’s always a good idea to have someone else review your work prior to publishing it. Contribute makes this process easy by making it possible to send a page to another user for review. As you create your content management system and offer your clients or co-workers the ability to generate their own content, pass this concept on to them and express how important it is that someone else review their work before it goes live on a site.
In addition, a second review of the content should be done after it has been transferred to the production server. Even if it’s just clicking through the links to ensure that they all function and reading over the content one last time, the process of checking your work can improve the end-user experience and ensure that your work is functional and accurate.