
Keep Current with Notification Center
Alerts, alarms, reminders, email—chances are you see a steady stream every day. Notification Center is High Sierra’s Grand Central Station for the information competing for your attention. Its settings control which apps can post messages to the upper-right corner of your display, as well as how those messages look. The Notification Center sidebar, which slides in from the right of your screen, gives you an overview of it all.
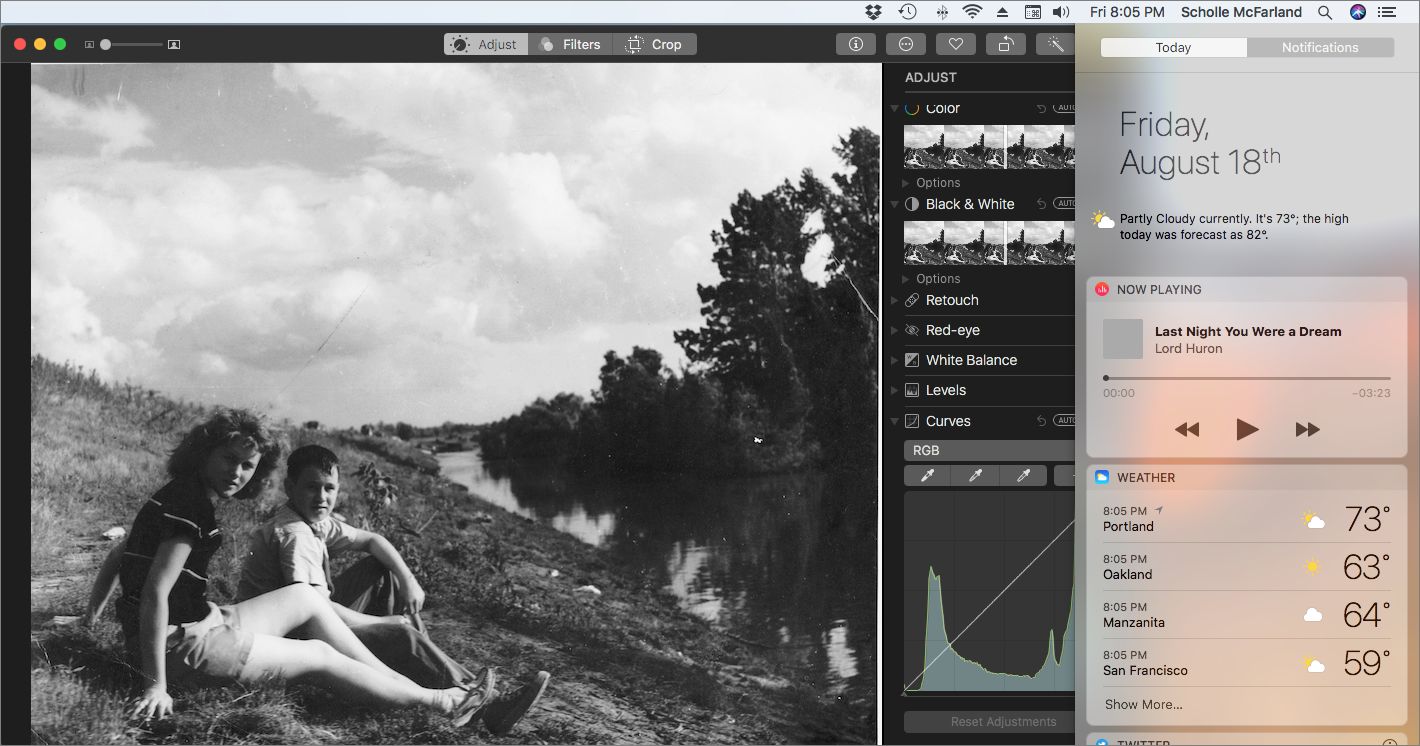
Sierra updated Notification Center’s look and integrated it with Siri, letting you pin (attach) your most-checked Twitter feeds, sports schedules, and more to it. High Sierra adds a new widget, Now Playing (Figure 47), which includes playback controls for your media, whether it’s playing through iTunes, QuickTime, or Safari.
Control Notifications’ Look
Individual notifications appear in the top-right corner of your screen. You can tweak how they appear, or whether they appear at all, on an app-by-app basis.
Go to System Preferences > Notifications and select an app from the list at the left. Now set up the way that app will notify you at the right (Figure 48).
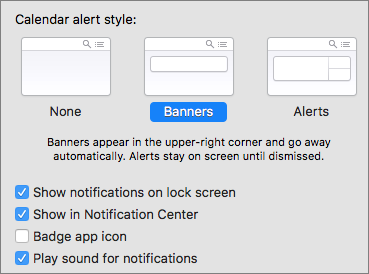
You can pick from three notification styles:
- None: Pick None and you won’t see any notifications from that app. For instance, if you’re tired of Dropbox telling you every time a shared file has been changed, this might be the setting for you.
- Banners: Banners display on your screen for a few seconds and then disappear. Select this type of alert when you don’t mind missing an app’s notifications. For example, you might like to know when Mail messages arrive, but not mind if you miss a notification when you walk away from your desk.
-
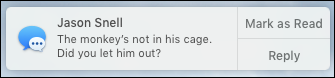
Alerts: Use this style for notifications you can’t miss. Alerts don’t go away until you do something. For instance, click Close to dismiss a Calendar alert or Snooze to dismiss the alert for 15 minutes (Figure 49).
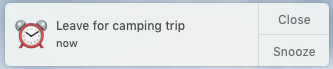
Figure 49: An alert-style notification won’t disappear until you take action. Reminders’ notifications are even more persistent. You either must click Complete or click Later and choose when to be reminded again.
Turn Off Notifications Temporarily
If you need to concentrate—for instance, when you’re taking notes in class—it can be annoying to see notifications. Option-click the Notification Center ![]() icon at the far right of the menu bar to mute notifications until tomorrow. The menu bar icon goes gray. All notifications, including calls via your iPhone, are held.
icon at the far right of the menu bar to mute notifications until tomorrow. The menu bar icon goes gray. All notifications, including calls via your iPhone, are held.
Option-click again to reactivate Notifications right away.
You can set certain hours as regular notifications-free time, too. Go to System Preferences > Notifications and select Do Not Disturb at the top of the left-hand list. At the right, check the box next to the first item (From) and specify when you want quiet—say, from 10:00 PM to 7:00 AM (Figure 50).

This can be useful if you like to watch movies (distraction-free) on your laptop before bed. By default, Notification Center already turns off notifications when your display is asleep or when you’re mirroring to TVs and projectors. You can adjust these settings, too.
When Do Not Disturb is activated, High Sierra forbids incoming phone calls via your iPhone (see Turn Your Mac into a Speakerphone). However, you can turn that feature off, or select Allow Repeated Calls to let a caller reach you if they call twice within 3 minutes.
Explore the Sidebar
To reveal the Notification Center sidebar, click its icon ![]() in the menu bar. Notification Center slides in from the edge of your screen, covering part of the Desktop. If you use a trackpad, you can use two fingers to swipe from the right side to the left to reveal the sidebar or swipe back toward the right to hide it.
in the menu bar. Notification Center slides in from the edge of your screen, covering part of the Desktop. If you use a trackpad, you can use two fingers to swipe from the right side to the left to reveal the sidebar or swipe back toward the right to hide it.
The sidebar has two views: Notifications view (next) and Today view (flip ahead to Today View).
Notifications View
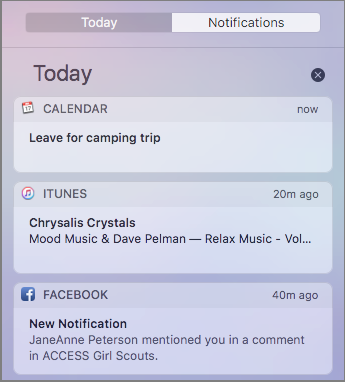
Click the Notifications button to see all notifications that you haven’t taken action on (Figure 51). Clicking one will open its app; for example, click a notification from Messages and you’ll jump straight to the message in the app.
To control what appears where in Notification Center, open System Preferences > Notifications. Or, if you’re already in the Notification Center sidebar, click the gear ![]() icon at the bottom of either view.
icon at the bottom of either view.
In the Notifications preference pane, you’ll see a list of app names to the left. A few settings you may want to investigate:
Sorting Notifications
Choose an option in the Notification Center Sort Order pop-up menu at the bottom of the Notifications pane (Figure 52).
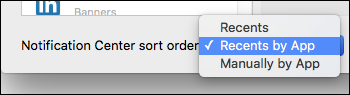
Your choices are:
- Recents: Only the most recent notifications will appear, sorted by the time they arrived.
- Recents by app: Notifications appear in order of most to least recent, grouped by app.
- Manually by app: Choose this option to determine the order apps will appear in the Notifications sidebar. On the left side of the Notifications pane, drag the listed apps into the right order.
Seeing a Preview
If you receive a Mail or Messages notification, it’s possible to also see a preview (Figure 53).
Click the app in the list at the left and then choose one of two options in the Show Message Preview pop-up menu:
- When Unlocked: To add a smidge of privacy, previews show only when you’re logged in to your user account.
- Always: Privacy, schmivacy. Previews always appear, even if you’re logged out of your Mac. (In that case, they appear on the login screen.)
Uncheck the option if you’d rather previews not appear at all.
Hide Certain Apps
Select an app in the list at the left. If you don’t want to see it in the Notification Center, deselect the Show in Notification Center checkbox.
Today View
Click the Today button at the top of the Notification Center sidebar to see an at-a-glance overview of what’s coming up, such as when your next meeting is and how many events you’ve scheduled. By default, it starts with the date and the Today widget, which includes the current weather (Figure 54).

Items in this view, called widgets, provide access to information or tools. For instance, the Calculator widget lets you perform simple calculations.
Most widgets are self-explanatory, except perhaps Social. It gives you a quick way to send status updates to social networking accounts, including Facebook, Twitter, and LinkedIn—you can set these accounts up in System Preferences > Internet Accounts. It also lets you send chat messages via the Messages app.
The new Now Playing widget offers an alternative to the iTunes widget. It provides quick access to playback controls (and sometimes a volume slider) for media in iTunes as well as QuickTime and Safari. That means you can control your Youtube.com or Netflix.com media from Notification Center, too.
The fun part is that you can customize Today view. Drag and drop widgets (click and hold the widget’s header) into the order you prefer when you’re looking at Notification Center.
Or, for more options, click the Edit button at the bottom of Today view to switch to Edit mode.
Adding a Widget
In Edit mode, a new column appears at the right with a list of available widgets, such as Calculator, Find My Friends, Social, and Stocks. Click the plus ![]() button next to a widget’s name to add it (Figure 55), or just drag it into the left-hand column. Click Done to exit Edit mode.
button next to a widget’s name to add it (Figure 55), or just drag it into the left-hand column. Click Done to exit Edit mode.

Removing a Widget
In Edit mode, a minus ![]() button appears next to the name of each widget already in your view. To remove a widget, click its minus
button appears next to the name of each widget already in your view. To remove a widget, click its minus ![]() button. Click Done to exit Edit mode.
button. Click Done to exit Edit mode.
Configuring Widgets
Many widgets can be configured (and aren’t worth much until you do).
Hover over a widget’s name in Today view and click the info ![]() button if it appears.
button if it appears.
For example, you might want to see the weather not only in your town, but also in your favorite vacation spot. (We can all dream.) Or, you might want to track the time in your biggest client’s city in addition to your own.