9
Taking Advantage of Templates
Templates are an amazing tool that can help you get a head start when you begin a new model. Most SketchUp users never get past using the default templates presented by SketchUp and do not realize how much time and energy can be saved by using the proper template. Understanding what is included in a template, how to edit templates, and when and why to use custom templates is a great way to level up your SketchUp skills. That is exactly what we will do in this chapter.
Specifically, we will be looking at the following:
- Understanding what makes up templates
- Exploring the default templates
- Deciding what templates to create
- Creating and maintaining custom templates
Technical requirements
In this chapter, you will just need access to SketchUp Pro.
Understanding what makes up templates
When you start a new model, you never really start with a new file. Any time you click New in the File menu or click on the Simple template in the Welcome to SketchUp window, you are opening a template. In fact, it would be fair to say that there is no such thing as an empty SketchUp model. If you have the SketchUp modeling screen up on your computer, even if there is no geometry, axis, or background colors, you are looking at the contents of a SketchUp file.
To dive right into this, that is all a template really is: a SketchUp file. When you start a new file, you are telling SketchUp to open up an existing SketchUp file. The difference between starting a new file via a template and using the Open command to open a file is that when you use a template, SketchUp knows that you do not want to save anything back to the template and prompts you to save it into a new file.
While clicking New from the File menu may seem to land you in a brand-new, empty SketchUp file (you did not tell it to use a template, right?) it is actually opening up your default template and presenting it to you. We will get into setting a default template later in the chapter, but for now, the important thing to understand is that you are always using templates when you start a new file.
Contents of a template
It’s easy and fair to say that a template includes everything in a SketchUp model, but we can probably drill down a little bit and look at the important parts of a model that you may want control over when starting a new model.
Simply put, a template contains the following information:
- Model info
- Styles
- Tags
- Scenes
- Components
- Geo-location
- Model contents
There are a few additional pieces of a model that a template will control, but they fall under one of the other items on the list (for example, Fog and Shadows are controlled by Styles). Let’s spend a little time looking at each of these items, how they affect a new model, and when you might want to use each in a template.
Model info
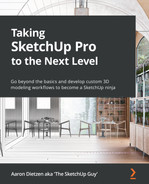
Simply put, everything that is in the Model info screen from the Windows menu is saved in a template. This is one of the pieces that make templates so powerful. Just look at all the tabs on the left side… so many settings!
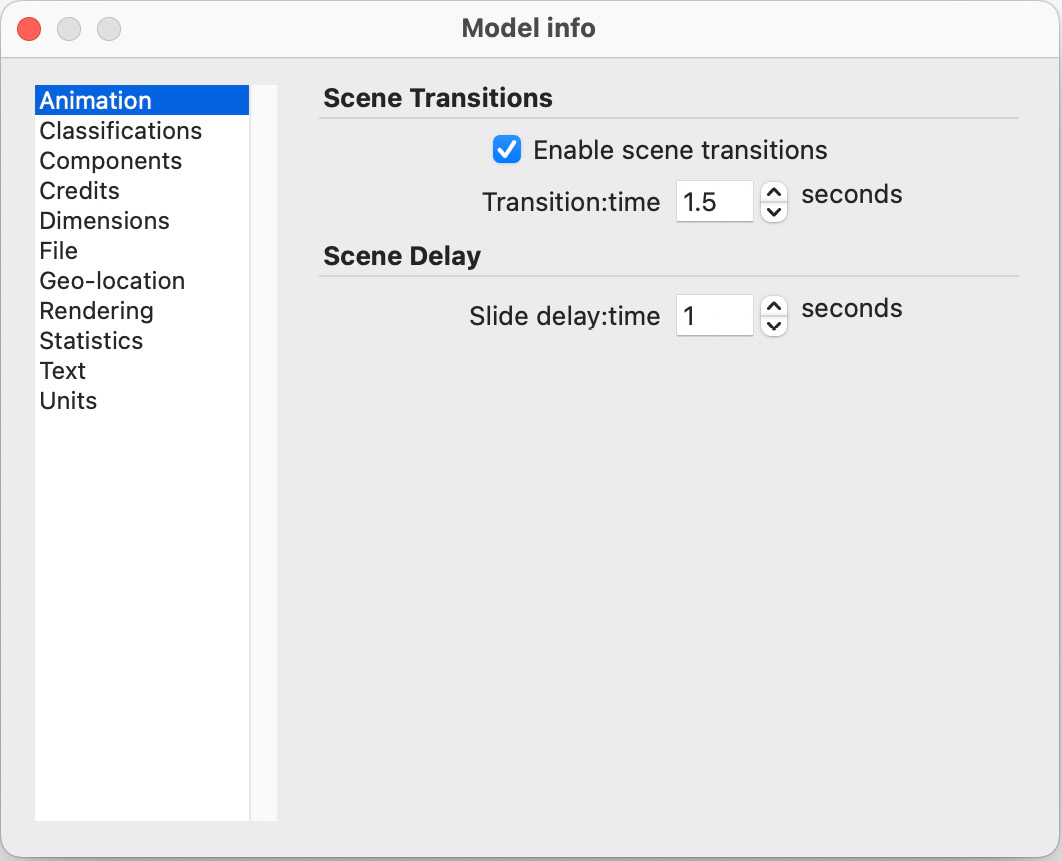
Figure 9.1 – Model info as seen in SketchUp for macOS
Some of the tabs in Model info contain settings that you may use infrequently (or maybe almost never), while others contain settings that can seriously change how you create a model! Here is a list and quick overview of the information on each tab, as well as the impact it can have on your model:
- Animation – The settings in this tab are used when running animations and also when changing from one scene to another. It is worth modifying these settings before saving a template if you do not regularly create animations or want a quicker (or no) wait time when jumping between scenes.
- Classifications – This tab allows you to import, export, or delete data schemes used for transferring data between programs. The default data schemes are Industry Foundation Class (IFC). Unless you have a workflow that sometimes has you export IFC3 and other times IFC4, you will likely not create a template because of these settings.
- Components – This tab has a few settings that change how objects are displayed in SketchUp. You can control how much the rest of the model is faded when you edit an object and whether the axis should be shown on each one. These are useful controls and something that you will probably set once, based on personal preference, before saving your first template.
- Credits – This tab allows you to mark your model with your information. This is great if you plan to share this model via 3D Warehouse (more on 3D Warehouse in Chapter 12, Using 3D Warehouse and Extension Warehouse) or any other file sharing process. Once again, a setting that you should set before you create a template.
- Dimensions – This tab has control of on-screen dimensions. This is a great tool that will allow you to make dimensions appear the way you like and should be modified before you save your template.
- File – This tab contains basic information about the model. If you do fill this information in, then you will probably want to do so on a file-by-file basis, and not as a part of a template.
- Geo-location – This tab includes information about the real-world location of this model. Setting this information and then saving it into a model will cause the model to be placed in a specific location before you begin modeling. If you are creating models that reside in the same location regularly, then you may want to save this into your template. In truth, most models, if geo-located, exist in a unique location, so this is something you probably will not set before saving a template.
- Rendering – This tab has controls for how the model is displayed on the screen. Again, something that you can use to make your model look the way you want, before saving your template.
- Statistics – This is an incredibly useful tab that will tell you information about your current model. Since this screen will only display information about your current model, there is nothing here that will be saved into your template.
- Text – Like the information displayed on the Dimensions tab, this info controls how on-screen text will be displayed. Set the settings as you like before saving your template.
- Units – This will control what units you will use to input display while modeling. If you work in a region that requires you to work in different units, this is a time-saver, as you can set your units and save them into your template.
So, looking back, you can see that there are a lot of settings that you would not want to go into and change every time you start a new model. Setting these values once and then saving them into a template means you do not have to change them every time you start a new job.
There are a few settings that may cause you to create more than one template, as well. Units, for example, might be a reason to have multiple templates. Even with all of the other settings the same, you may end up saving two templates, depending on the work you do. Perhaps you do most of your design in feet and inches when you do building design, but you also enjoy creating smaller models of 3D printing. In this case, you may end up with one template with units set to Architectural and the other with Decimal and Millimeters selected.
Styles
When you save a file as a template, it not only saves the current, active style but any other styles saved into the file. This means you can switch between multiple styles right at the start of modeling without having to find or create them. Every style displayed in your In Model style list will be saved as a part of the template. If this was my Styles window when I saved a new template, five different styles would be available when I start a new model, as shown here:

Figure 9.2 – Current In Model styles
Remember that styles not only control how your models are drawn on the screen but also the backgrounds, watermarks, and colors that are used to show highlighted or locked objects.
Tags
Many users end up developing a workflow that depends on certain tag names. Often, users that work collaboratively will establish a standard for tag use that can be used across a large, multi-user workflow. Regardless of the reason, creating your tags can be done once and saved into your templates, as shown here:
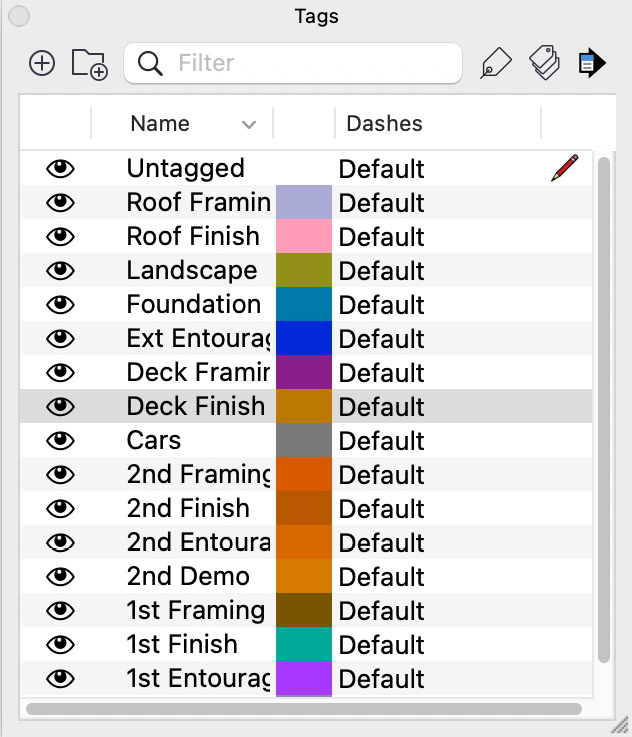
Figure 9.3 – Tag names created ahead of time and saved into a template
Even if you do not have a system that requires specific tag names, or a co-worker expecting items with specific tags, if you end up creating tags when you model, then creating them once and saving them into a template is a time saver.
Scenes
Many times, scenes are created specifically for a model. The view you need of a 1,500-square-foot home will be different from a 30,000-square-foot office building. Despite this, you can still benefit from creating and saving scenes in your template. Created scenes such as an overhead view with the camera set to Parallel Projection, or views of the model from the north, south, east, and west, can be saved into the model and updated once you have created your model, as illustrated in the following screenshot:
Figure 9.4 – Commonly used scenes created and saved into a template
Additionally, remember that scenes do not need to be tied to only a camera view. You can create working scenes that change styles, or toggle tags on or off and save them as a template, giving you a head start on working on your model.
Components
Every component created or imported into your model is saved in that file. This means it is saved into the template, as well. Remember, components do not have to be on screen to be saved. This can give you a huge leg up on modeling items that you regularly include in your work. If you model kitchens and have a set of cabinets that you like to start with, they can be saved as components in your template and dropped into a new model right at the start!
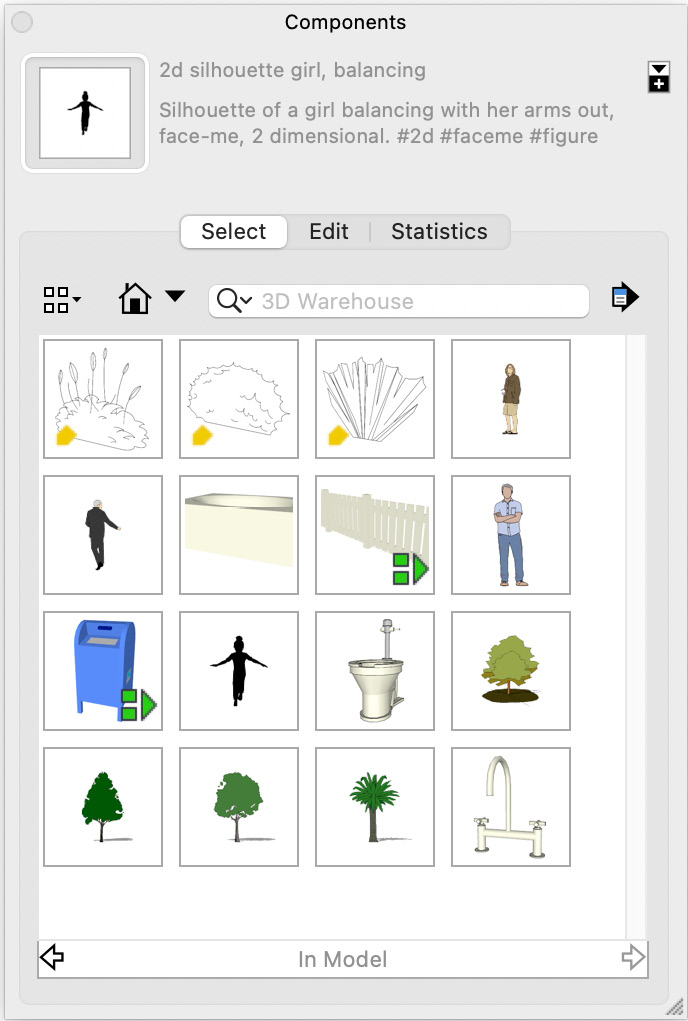
Figure 9.5 – Components saved in an empty model, thanks to a template
It is worth mentioning that since they are saved into the file, too many components can cause your template’s file size to grow. It may be worth only including the components that you know will be used in your model and not every useful component that you have come across. Too big of a template file can cause long save and load times. This is not worth it to include a bunch of components that you will not use in most of your models.
Geo-location information
Geo-locating models is an amazing function in SketchUp that allows you to place your model in a real-world location. This can mean a quick and easy reference to surrounding geometry and accurate shadows. So, why would you want to save geo-location as a part of a template?
In some cases, you may be creating multiple models that will reside close together. It is also possible that you will be creating multiple models to pitch for a project, and they all need to be placed in the same location. Regardless of the reason, should you ever need geo-location to be the same for multiple models, know that setting the geo-location before saving a template will save it as a part of the model.
Keeping Geo-Location out of Your Model
Remember (and this holds true for everything in this list) that if you do not want the geo-location to be included in your template, you will want to clear that information before you create the template. Once added to the template, there is no quick or easy way to remove it.
Model contents
You know that little two-dimensional person standing next to the origin whenever you start a new model in SketchUp? Those are called scale figures, and they exist to let you know how big something is on your modeling screen. Without them, it would be impossible to know whether a rectangle drawn on the screen was the size of a laptop or a football field.
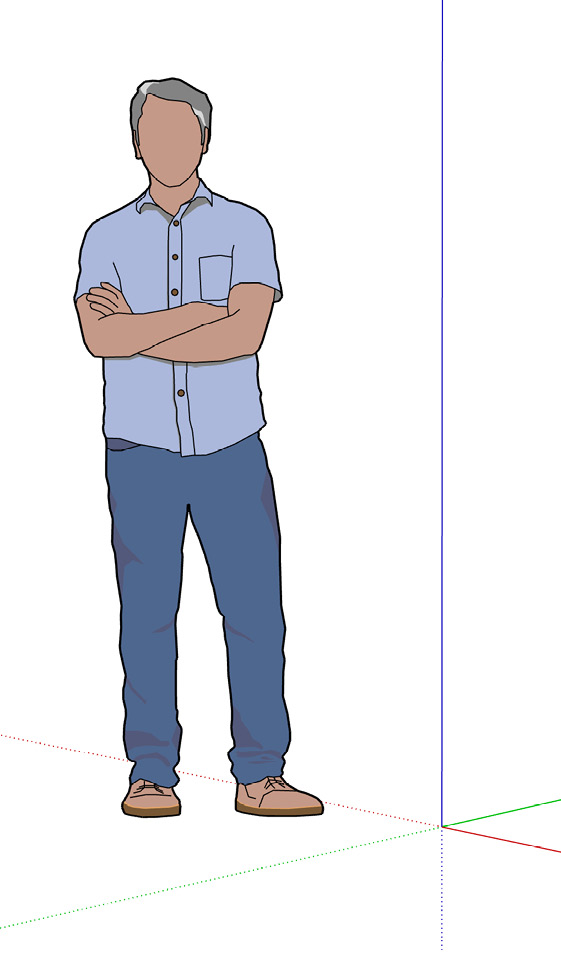
Figure 9.6 – The default template for SketchUp 2022 includes Niraj as the scale figure
In a new model, the template usually only contains the scale figure. It does not have to be limited to that though. If you want your new model to include a grid, a specific set of entourage, or even a template for a building, you just have to save it into the template that you will be starting from.
Even if nothing is on screen when a template is created, the camera location and settings are saved. This means you can have a totally empty screen, but SketchUp will remember where the camera was pointed at the time that the template was created.
Understanding everything that is saved into a template is extremely important. Once you know what is in a template, you can start to explore how to use the templates. Let’s start by looking at the default templates and see how and when we might use some of them.
Exploring the default templates
Every time you start SketchUp Pro, you have the option to start a new model using a template. On the Welcome to SketchUp window, the top section lists your most recently used templates. Clicking the More templates link to the right of the template tiles will launch a list of all the default templates:
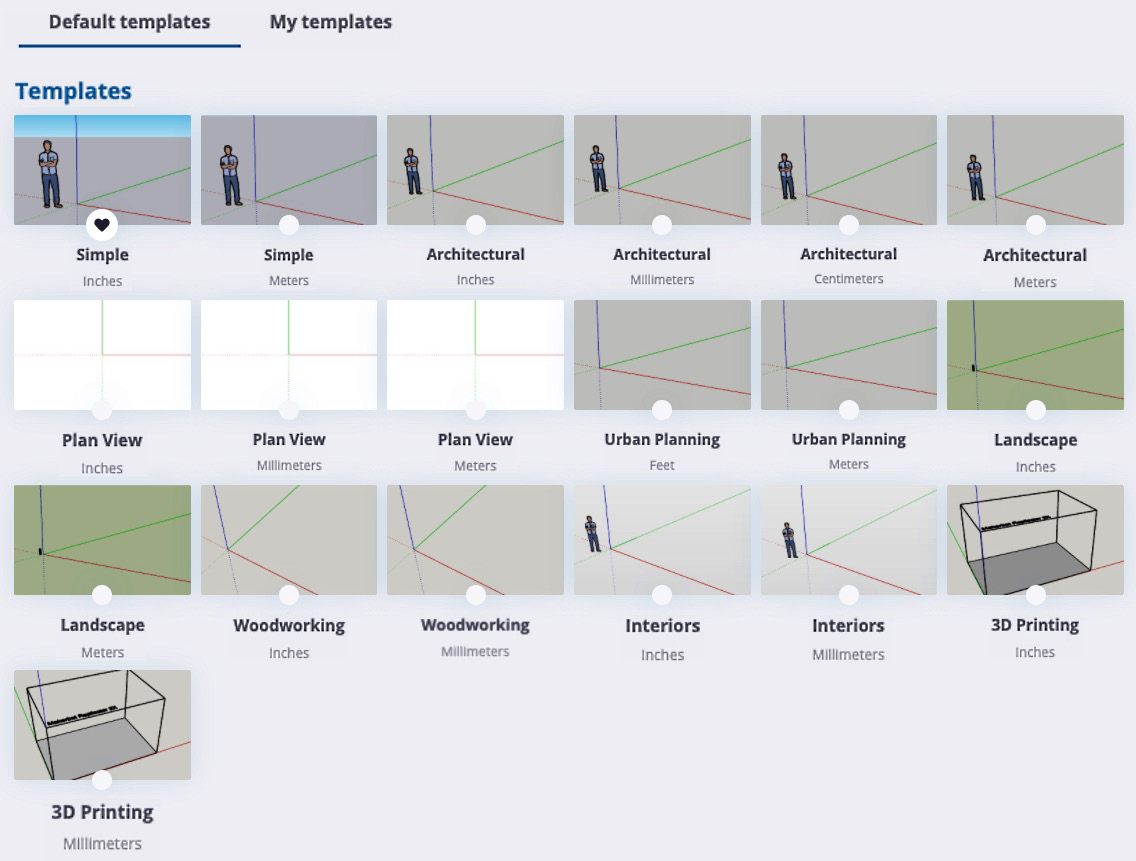
Figure 9.7 – Default templates as seen in SketchUp for Windows
As you can see in Figure 9.7, from here, you can start a new model using any of these templates.
Getting to Templates from the File Menu
If you are already in SketchUp (past the Welcome to SketchUp window) you can view templates by selecting the New from Template… option in the File menu.
SketchUp Pro 2022 comes with 19 different default templates. These are really eight different templates, offered in different default units:
- Simple – Inches or Meters
- Architectural – Inches, Millimeters, Centimeters, or Meters
- Plan View – Inches, Millimeters, or Meters
- Urban Planning – Feet or Meters
- Landscape – Inches or Meters
- Woodworking – Inches or Millimeters
- Interiors – Inches or Millimeters
- 3D Printing – Inches or Millimeters
The settings of each of these templates are the same, except for the units, so what you would see in the Architectural – Inches template will be exactly the same as the Architectural – Meters template except for the default units.
In general, these templates are set up to start you from a position where you can start modeling different model types with little to no adjustments. The titles give you an idea of the types of models intended for each template. This does not mean that you cannot start with the Architectural template and then model a planter, for example, but using the template that most closely aligns with your intended modeling can save you time and energy. Knowing what each template is set up for can help you to pick a template when you start a new model or choose a template to customize when creating your own custom templates. Let’s take an in-depth look at the templates.
Simple template
The Simple template is intended to be an all-around template that could be used for any modeling session. This template is the default template when a new version of SketchUp is installed, as shown in the following screenshot:
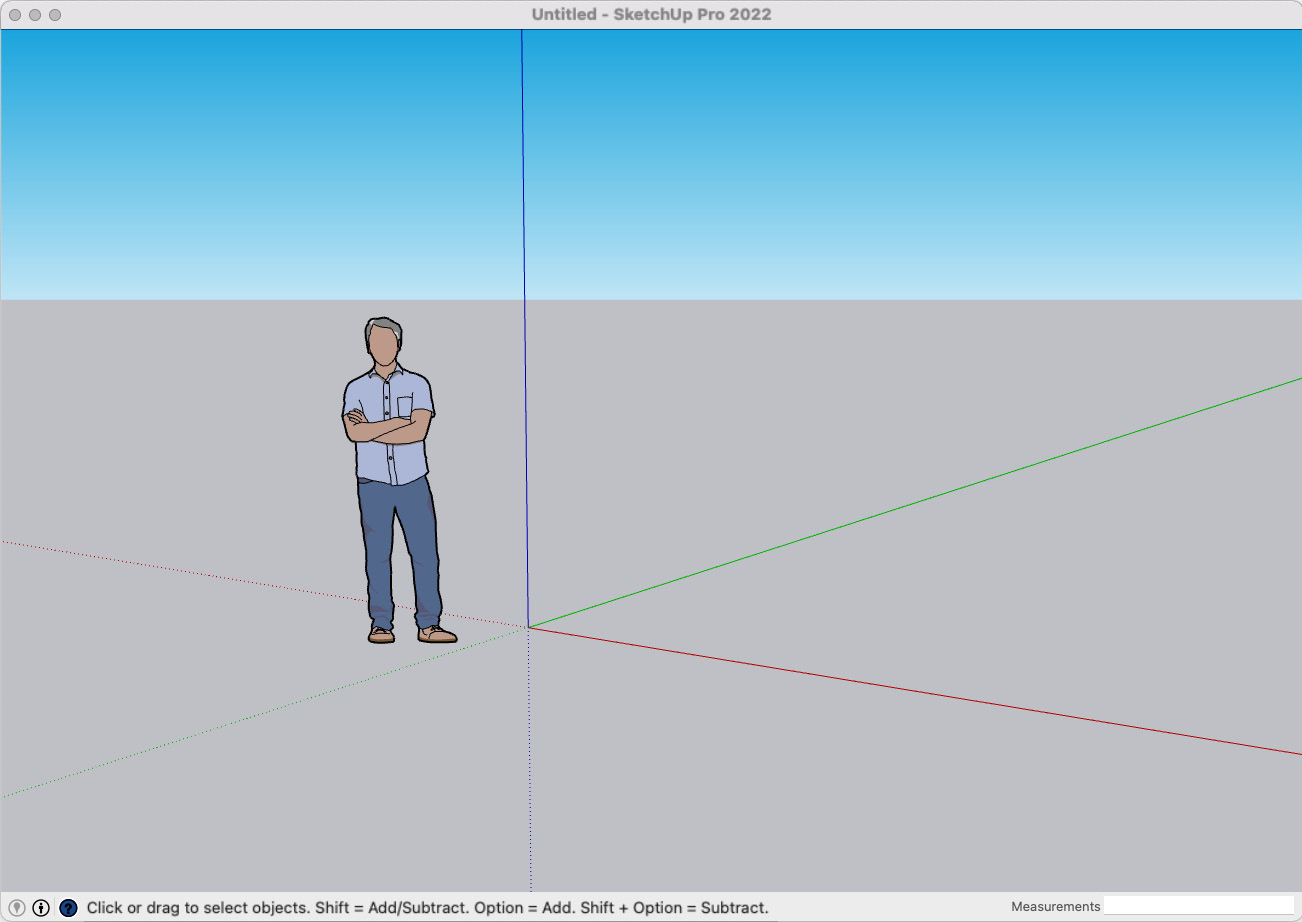
Figure 9.8 – Default template
This template was designed to be a good starting point for anyone using SketchUp. It has a neutral gray ground plane and a blue sky in the back. The camera is set to Perspective. This view is pretty easy to customize into any type of template you might want, especially if none of the other templates align with the kind of modeling you do.
Architectural template
The Architectural template was designed for anyone modeling structures in SketchUp. Here is a brand-new empty architectural file, ready for a building model!
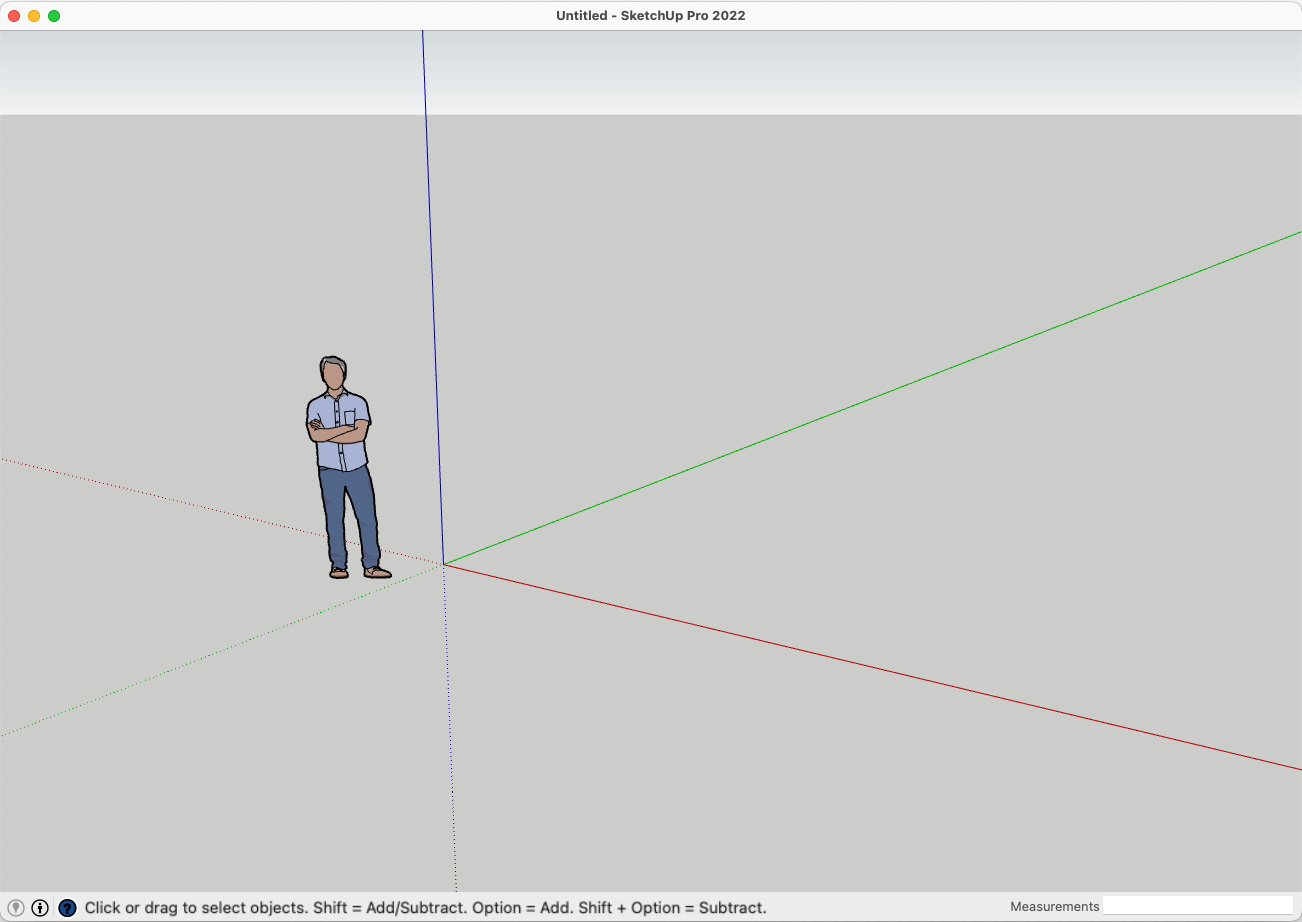
Figure 9.9 – Architectural template
The Architectural template is intended for modeling buildings, so the camera is pulled back slightly farther than in the Simple template but is still set to Perspective. The background and sky are more muted colors, drawing attention to the building being modeled rather than a vibrant background. This is the ideal template to customize if you are using SketchUp as a building design tool.
Plan View template
The Plan View template is intended for someone planning to draw flat on the ground (potentially in 2D). Take a look at this empty Plan View template:

Figure 9.10 – Plan View template
This template starts with the camera directly above the axis, looking straight down. The sky is disabled, and the background is set to pure white. Unlike the other templates, this template has nothing in the drawing area to start with (no scale figure). This can make this template a little hard to start drawing in as there is no reference for how big anything is. This is a template that you might use if you are planning to sketch a rather large 2D model. Since SketchUp is not really intended for drawing in 2D, and there is nothing about this template that makes it any better for doing so, it is not a template that I would even recommend.
Urban Planning template
The Urban Planning template is designed for an urban planner or anyone planning to model large, sprawling models. See how this empty Urban Planning template is pulled way back, ready for a large model:
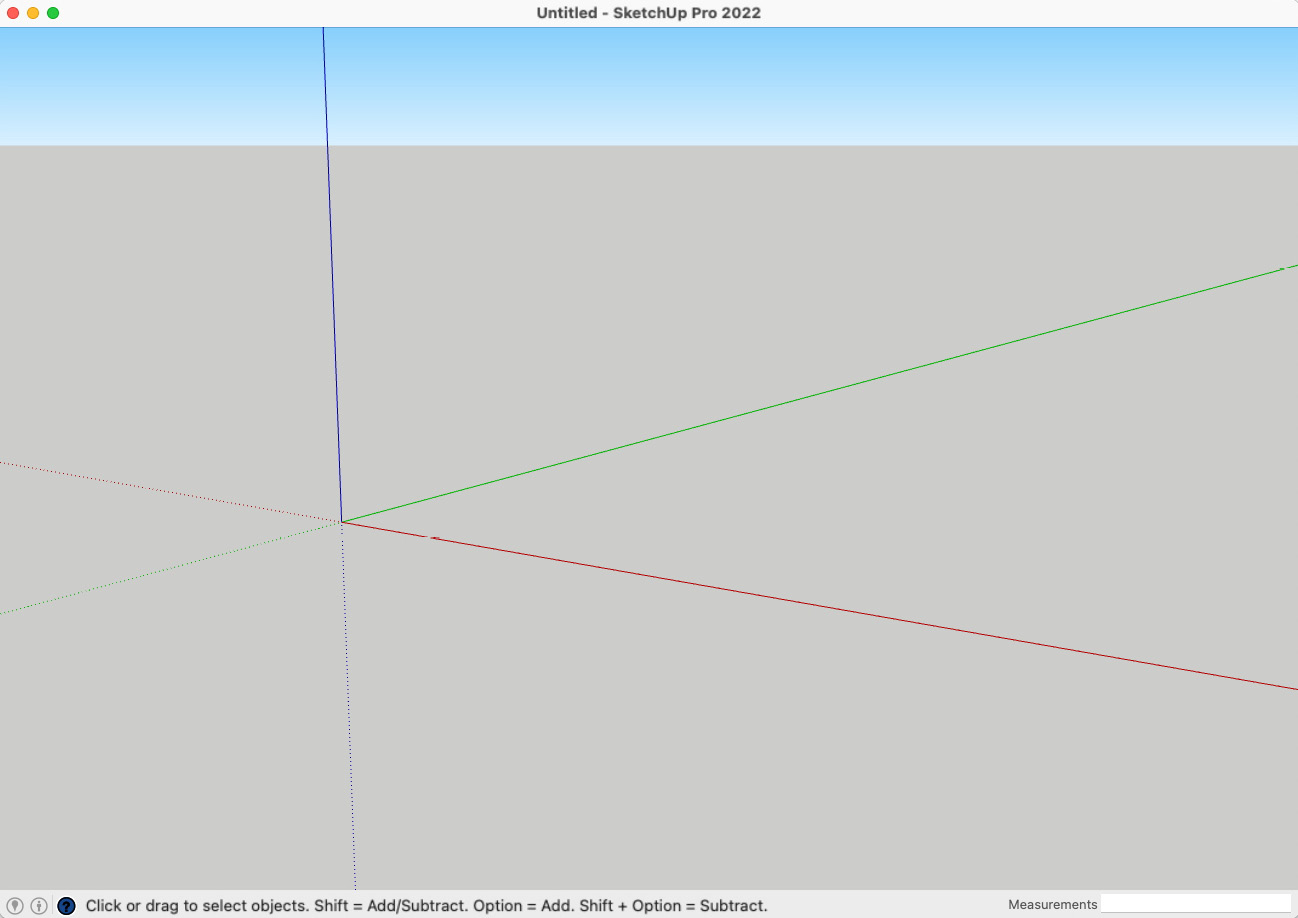
Figure 9.11 – Urban Planning template
This template has a Perspective camera at a three-quarter view pulled back quite far from the origin. The ground is set to the same neutral color as the Architectural template but with the bright blue of the Simple template. There is no scale figure in this template, and the units are only available in larger values (feet or meters). As the name implies, this template is a great starting point for someone who is doing urban planning in SketchUp.
Landscape template
The Landscape template is very similar to the Urban Planning template with a few differences. See the similarities to the Urban Planning template? Since we are talking about landscape, this template starts with a nice green background:
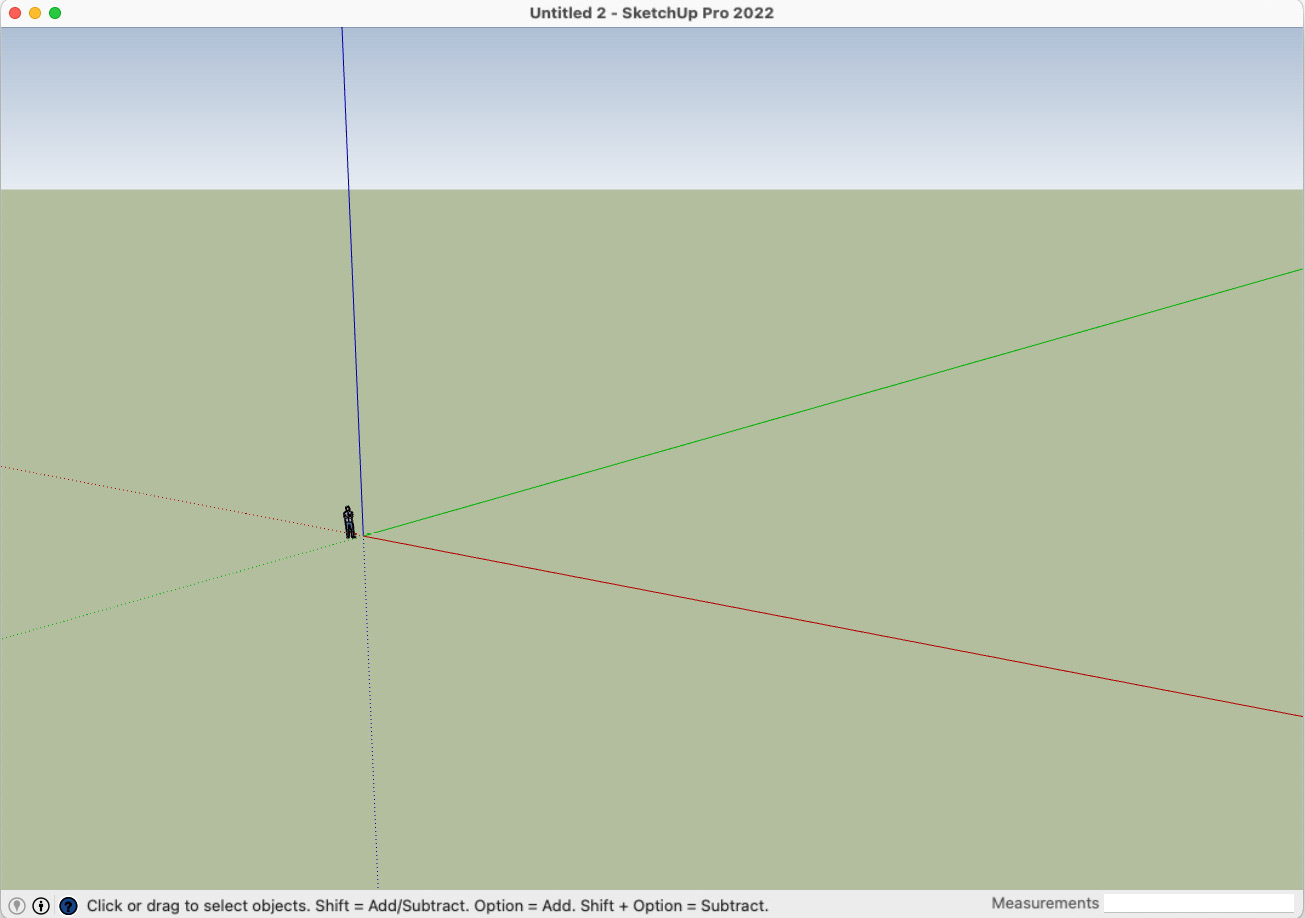
Figure 9.12 – Landscape template
This template has a camera setup like the Landscape camera but includes a green ground plane and a scale figure near the origin. This template is intended for use or customization by those planning to do landscape design in SketchUp.
Woodworking template
The Woodworking template was designed with woodworkers in mind. See how the empty Woodworking template is zoomed in, ready for a smaller model:
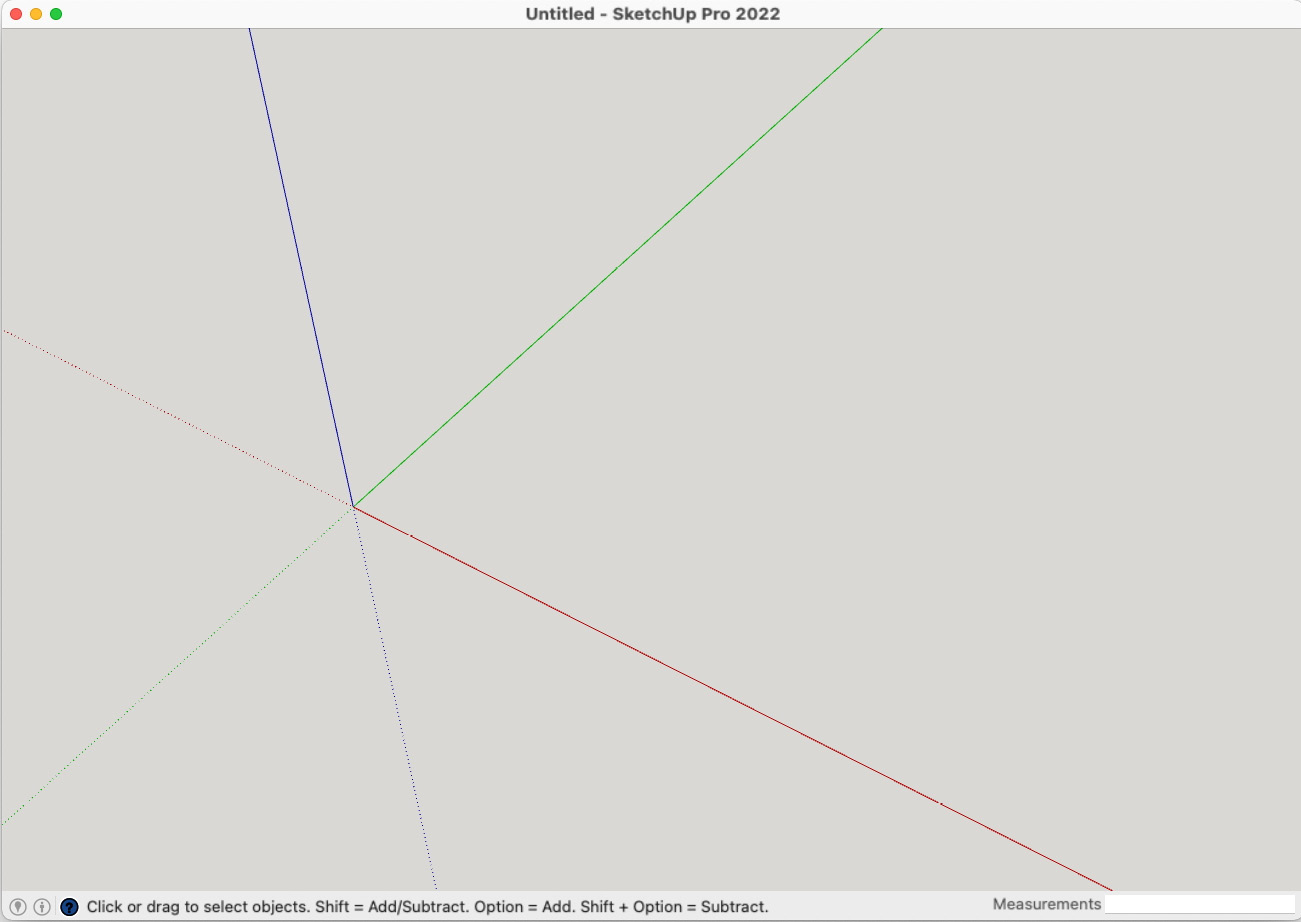
Figure 9.13 – Woodworking template
This template has a camera near the origin and no sky. The background is a neutral tan color, and it is available in units often used by woodworkers (inches and millimeters). This template is intended for use or customization by those creating woodworking or other smaller-scale models in SketchUp.
Interiors template
The Interiors template was designed for anyone designing the inside of a room or building, as shown here:
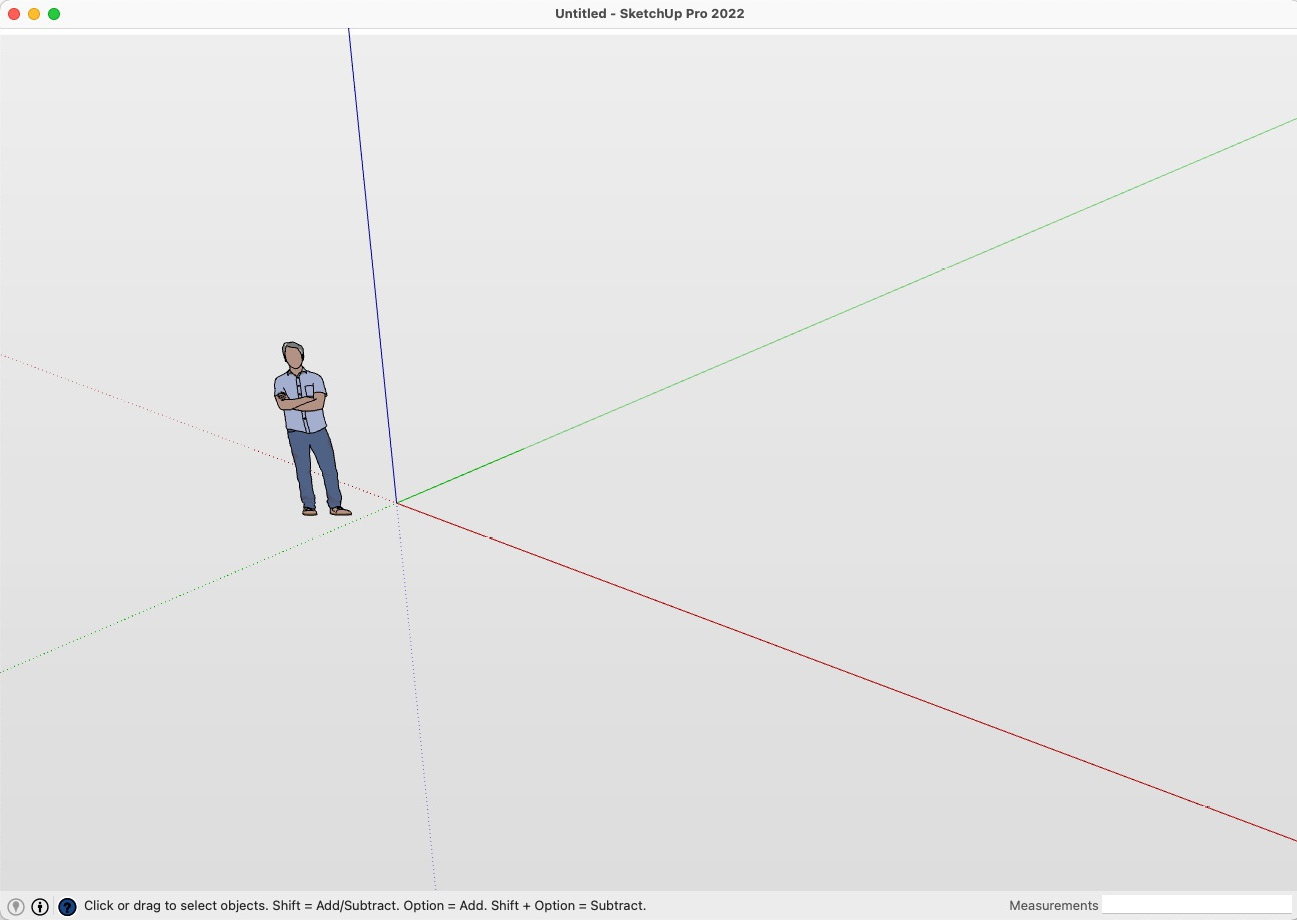
Figure 9.14 – Interiors template
This template has a camera setup similar to the Architectural template. The background is a neutral tan color, and it has a pale sky. This template is the one you may want to use or customize if you do interior or kitchen/bath design work.
3D Printing template
The 3D Printing template was designed for someone modeling with the intention of exporting to a 3D printer. Notice that the 3D Printing template is the only template that includes an item other than a scale figure:

Figure 9.15 – 3D Printing template
This template has the camera zoomed in close to the origin and has a light gray ground plane and bright blue sky. The big differentiator for this template is the 3D Printer Build Volume dynamic component at the origin. This dynamic component can be changed (right-click, Dynamic Component | Component Options) to show the exact volume of the 3D printer you are using. The aim of this template is to help 3D printers know whether their model would fit into their printer’s printable volume.
My Personal Recommendation
While this sounds great, I recommend not using this template, even if you are 3D printing. Unfortunately, the dynamic component adds a lot to the file size and can cause issues with your output if you accidentally export it along with your 3D print.
Those are your options when it comes to default templates. If there is a specific template in this list you want to use each time you start a new model, you can click the little heart icon below the thumbnail in the Templates window. Doing so will use that template when you click New from the File menu.
Now that you understand where we are starting from, let’s talk about what sort of templates you will want to create.
Deciding what templates to create
At this point in the book, you have probably picked up on the pattern and have a good idea of what this section will include. No, I am not going to tell you exactly what templates you should create and when to use them because everyone has different requirements for using SketchUp. Just like before, I am also going to ask you to look back at the work we did in Chapter 6, Knowing What You Need Out of SketchUp.
As we have seen, the whole point of templates is to give you a leg up as you start a new SketchUp model. To truly take advantage of them, we need to continue looking at what you hope to get done with SketchUp. If we look back to the lists of workflows you are interested in pursuing, you may be able to create templates based on each of these workflows. Alternatively, it is entirely possible that the default templates work for you but just need a slight change to be the ideal place for you to start a new model. Let’s dive into both ideas and see how we might go about setting up our custom templates.
Modifying default templates
There is a good chance that one of the default templates will come close to satisfying your needs. Often, new users will get in the habit of opening one of the default templates, making one or two changes, then proceeding with their modeling process. Then, the next model they start, they do the same thing!
Now, if you are okay with this practice, please go ahead and keep doing it, but if you are serious about leveling up your skills, then this is an easy place to make a change. If you find yourself doing this, take a look at what it is that you are changing. Some people erase the scale figure from the template or change it to their own. Others immediately change the background color. Others go right away into Model Info to change their units. If this is you, here are some simple steps to never have to run through this routine again!
- Start a new file as you normally would (using your preferred default template).
- Make the changes you normally make.
This is important! Run through and make all the modifications to the starting file you would throughout the entire model. If you swap out the figure and change the units at the beginning of the modeling process and usually make changes to your styles after you have done a little modeling, make those style changes right now, upfront. Make every change you normally would in this step.
- Click on Save as Template….
- Name your template and check the Set as Default Template checkbox.
That’s all there is to it! The next time you start a new file (via the Welcome to SketchUp window that pops up when you open SketchUp or by clicking New in the File menu), you will be greeted with a new file that already has all of your pre-modeling routine completed! This seems like a simple process (because it is) but it can add up to a lot of saved time and set you down the path of leveling up.
This is a great way to account for the little tweaks you may do when using a default template, but what about the times when you need a whole new template? When is it worth starting from scratch and making something that is very different from what the default templates offer? Let’s dive into that right now!
Customizing your templates
Before you dive in and start clicking Save as Template… over and over, I recommend looking back to your list of workflows (from Chapter 6, Knowing What You Need Out of SketchUp). Think about each one of these workflows and the sort of modeling space you would want to be in for each. As an example, I will grab a few workflows from my list and think about how I would create a template for each. My workflows will be as follows:
- Modeling door and window components
- Creating a library of Face Me components
- Modeling Star Wars spaceships
These three workflows will be very different from one another and require a different starting model. In some cases, it may help to start into one of these workflows and see what sort of changes you make to your starting template before you save anything.
When to Template
It may seem odd to consider going through the process of saving a custom template for certain workflows. In some cases, you may be creating a one-off model that you will not need to create ever again. In the case of the examples created previously, I would imagine that I will create at least a dozen or so models in each workflow. This more than merits the creation of templates. However, as we have seen, template creation is such an easy process, and templates are so easy to maintain, that there is not really a downside to spending the time to create a template for anything that you plan to model more than once.
Let’s take a look at how we would create templates for each of these workflows. For these examples, I will present a brief explanation of what I think my modeling needs will be for the template. I will also start every template from the Simple template. As you create templates, you might want to use a different template or another of your custom templates as the starting point to save some time.
Creating a template for modeling door and window components
A template for this type of modeling would be fairly close to a default template. It would be something that was used in 3D, and I would prefer not to show a sky. I am going to be building these components off manufacturer drawings that are in decimal inches, so I need those units as default. I also like to model with the default material, so to have the models stand out, I would like the background to be a color other than white. I also like to put dimensions on my door and windows as I create them, so it would be good to bump up the font of dimensions from the default to make them easier to read. Ideally, this will be as efficient a template as possible, so I do not want shadows or profiles, which can slow down modeling.
Based on this list of needs, I will start with the Simple template from the defaults and make the following changes:
- Disable Sky in Styles.
- Set units to Decimal and choose Inches in the Units tab of Model Info.
- Set the Background color to a pale blue color.
- Modify Dimensions in Model Info and increase the font to 18.
- Disable Profiles in Styles.
This will create a model that looks like the following:

Figure 9.16 – Newly created Doors and Windows template
Once these changes have been made, I can save this model as a template, call it Doors and Windows , and I am all set to start my new workflow!
Creating a template for modeling Face Me components
This template will be used to import and then trace full-size images of humans. Since Face Me components are modeled in 2D, this template would not start with the camera in a three-quarter view but looking straight on at the origin. The camera should even be in Parallel Projection. Since I will be drawing figures that are around human size, I can zoom in so that a 6-foot-tall image roughly fills the modeling screen. The ideal view for tracing images is in X-ray mode (so that new faces do not cover up the reference image), so that should be turned on. I also know that it is easier to trace an image with edges that stand out against the image, so the edge color should be set to yellow, rather than black.
Again, I will start with the Simple template from the defaults and make the following changes:
- Use the Front view from Standard Views in the View menu.
- Turn on Parallel Projection in View.
- Zoom in so that the default scale figure fills the screen, vertically.
- Turn on X-Ray from Face Style in the View menu.
- Set the Edge color to yellow in Styles.
This will create a model that looks like the following:
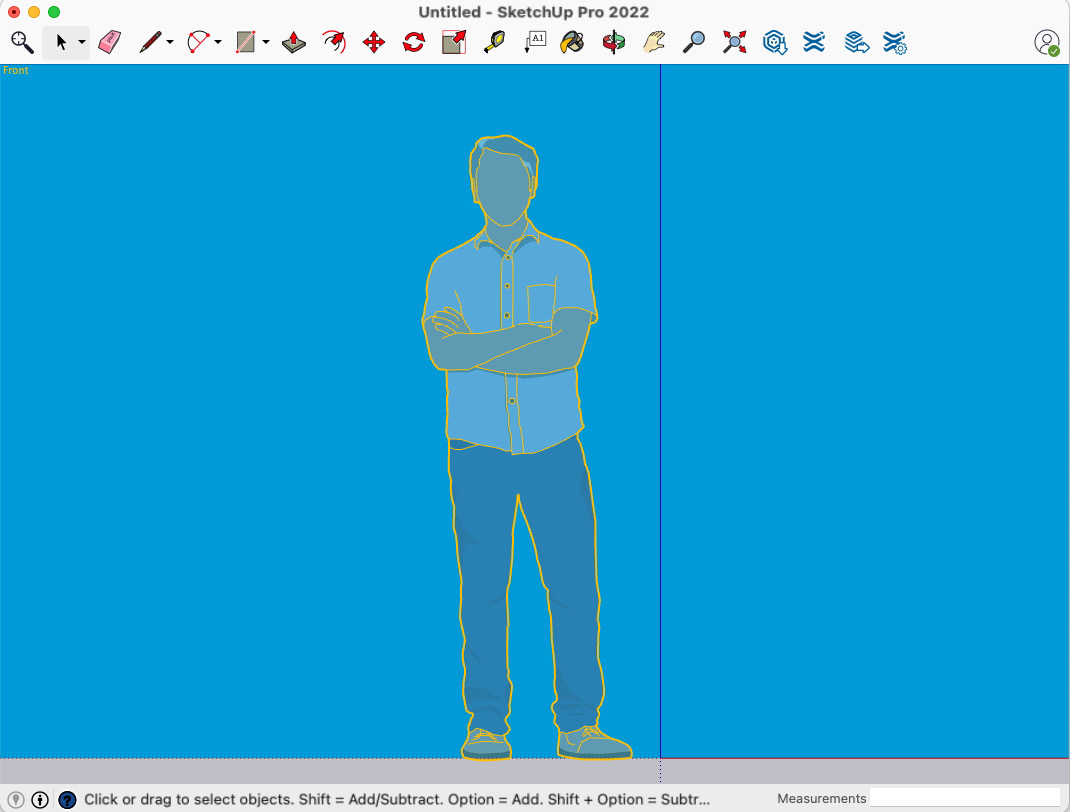
Figure 9.17 – Newly created Face Me template
Once these changes have been made, I can save this model as a template, call it Face Me, and I am all set to start creating some 2D entourage components!
Creating a template for modeling spaceships
In this workflow, I will be referencing imagery of spaceships from Star Wars. While I may end up adding textures later, I want to do most of the modeling in plain white. I need to be able to see all of the larger models, so I would like to start zoomed out. To get the feel of spaceship modeling, I would like to model against a gray background. Most of the images that I am modeling off of have dimensions referenced in decimal millimeters.
Based on this list of needs, I should probably start with the Simple template from the defaults and make the following changes:
- Set Face Type in the View menu to Monochrome.
- Zoom out so that the default scale figure is small in the lower-left corner.
- Set the Background color to a light gray color and disable Sky in Styles.
- Set units to Decimal and choose Millimeters in the Units tab of Model Info.
This will create a model that looks like the following:
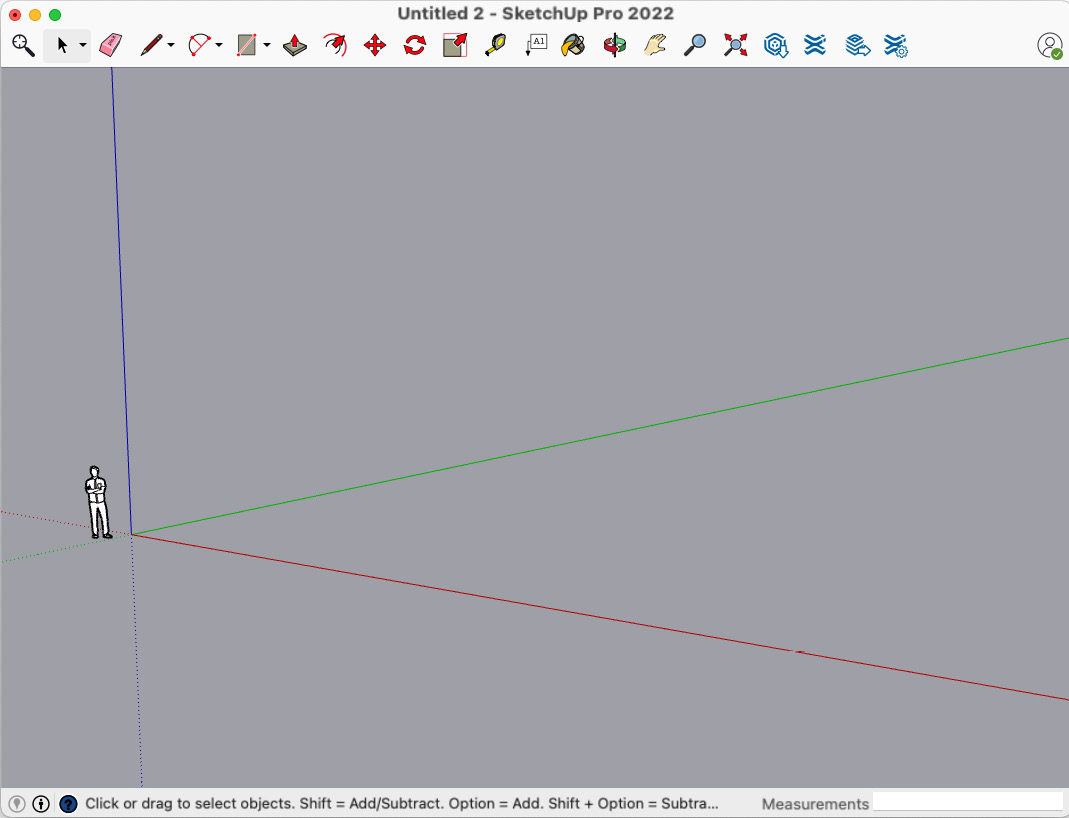
Figure 9.18 – Newly created Spaceship template
Once these changes have been made, I can save this model as a template, call it Spaceships, and I am all set to start my new workflow!
I know we did not go through these step by step, but I am hoping that the lists of changes for each template got you thinking of the steps you might take to create your own templates. The important takeaway for this section is not how I made each of these templates specifically, but the process used to break down the needs of a template for a specific modeling workflow and the changes that should be made in order to make a useful template. You can use this process to make any template. Once done, try using the template and see whether there are any changes or tweaks you need to make. Template creation can be seen as an iterative process. As your modeling workflow changes, so will your templates.
Creating templates is not a difficult process. The bigger challenge can be maintaining your templates once you start making them. It can seem like a good idea to save every model into a template as you get started, but eventually, this will leave you drowning in templates. To keep that from happening, let’s take a look at how to maintain your template collection.
Creating and maintaining custom templates
We have covered the basics of saving a template, but let’s dive just a little bit deeper and look at every field on the Save As Template screen and how and when to use them. The process for creating a template is extremely easy and is the same on SketchUp for Windows or macOS. Let’s assume that you have done everything you need to set up your template. At this point, it is time to save your file as a new template. Let’s run through the steps:
- Set up everything in the current file as you want it saved.
This is probably the most important part of creating a custom template. We already discussed how to figure out exactly what to change to create a template in the Deciding what templates to create section.
- Click File, then Save as Template….
This will bring up the Save As Template window:
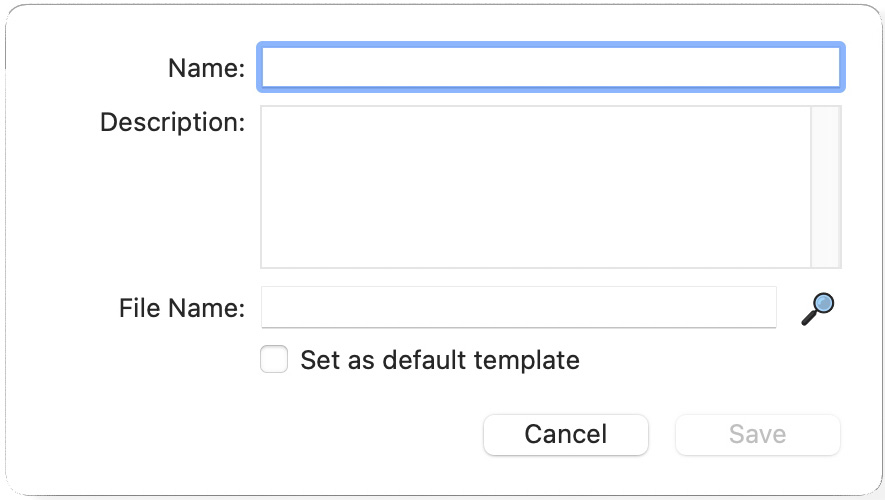
Figure 9.19 – All information for a custom template is entered in this window
- Enter a name and description of your custom template.
Notice that the name of the template file is displayed in the File Name field at the bottom of the window. By default, the filename will match the template name, but you can change it if you like.
The macOS Magnifying Glass
In the Save As Template window in SketchUp for macOS, there is a magnifying glass icon to the right of the File Name field. Clicking it will allow you to navigate folders but not change where the template is saved.
- If you want SketchUp to use this template every time you start a new file, check the Set as default template checkbox.
- Click the Save button.
- You have created a custom template!
Creating a custom template is incredibly easy, and when a user first learns the steps to create one, they often wonder, “Why don’t I have a bunch of templates?” The simple fact is that a well-thought-out template can get you started so much quicker than modifying a default template every time you start a new model. There are concerns, of course. The more templates you create, the more files you have to maintain.
On the plus side, template maintenance is not a difficult business. As you create custom templates, you will be able to see them in the same window that you open default templates from. At the top of the screen, there is an option to view Default templates or My templates. Clicking on My templates will show all of your templates:
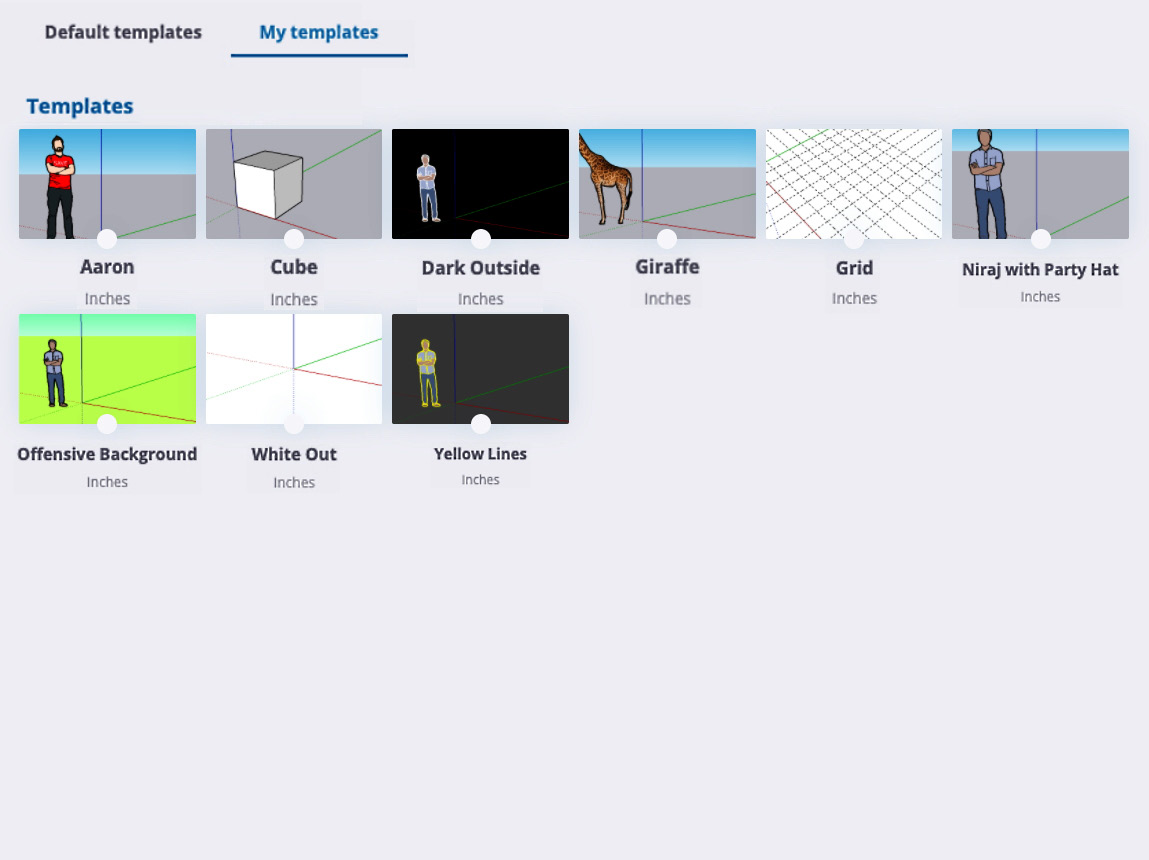
Figure 9.20 – A few custom templates visible through My templates
Viewing My templates
In order to view your custom templates, you have to have at least one custom template created and saved. The My templates option at the top of the page will only appear after you have saved at least one template.
Seeing all of the templates is great, but there are no options for modifying these templates in this window. To edit or remove any of your templates, you will have to get hands-on with your files.
Deleting and renaming templates
Choosing to use a template is as simple as clicking one of the template thumbnails when you start a new model. To delete a template from the list, you will have to remove the SketchUp file (.skp) from the template folder. To find where templates are saved, check the Files tab in the Preferences window. Preferences can be found in the Windows menu in SketchUp for Windows, and in the SketchUp menu in SketchUp for macOS. Do you notice anything different about the Templates section of the Preferences window?
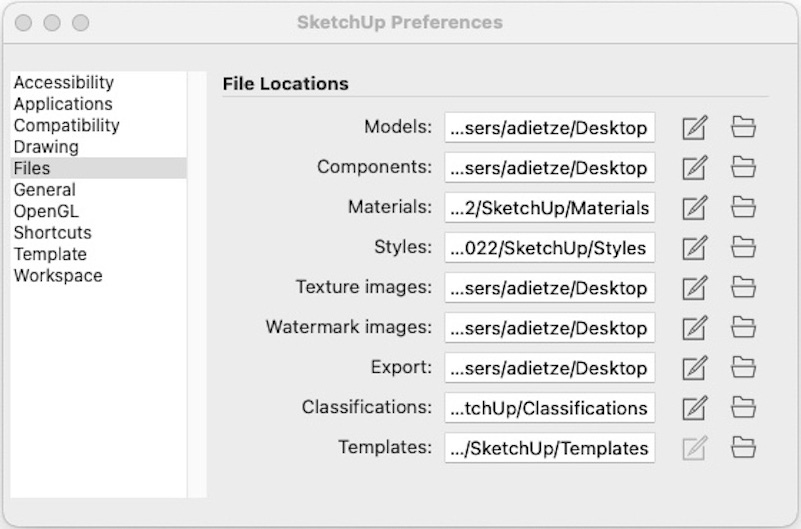
Figure 9.21 – Templates path shown at the bottom of the Files tab as seen in SketchUp for macOS
The last file path displayed is the location of your templates. As of the time of writing this book (SketchUp version 2022), this path can be viewed but not edited on either operating system.
Clicking the folder icon to the right of the Templates file path will open a window displaying the files saved there. From here, you can rename or delete templates just as you would any other file on your system. Changes made to the files in this folder will be reflected in My templates the next time you view that screen.
This brings us to the end of the chapter and should have you thinking about the templates that would benefit your workflows and help to level up your SketchUp skills!
Summary
With this, we have fully explored the power and time-saving nature of templates. Not only do you understand what each of the default templates might be used for, but you should also have an idea of how you might use them as starting points for your own custom templates. You have seen how to create templates and know how easy it is to maintain your list of custom templates. Finally, we set up a basic process for thinking about what sort of templates you might make and how to go about breaking down the needs of your workflow so that a template will save you time every time you start a new model.
Up next, we will continue to look into ways to level up your modeling speed with a dive into additional hardware options in Chapter 10, Hardware to Make You a More Efficient Modeler.