10
Hardware to Make You a More Efficient Modeler
Up until now we have spent time looking at how to use SketchUp to improve your 3D modeling skills. Practice and planning are the best possible way to get better at something. There is, however, something to be said about the tools you use, as well. I know, there is the old idiom that says, “A bad carpenter blames his tools,” and I totally agree. If you practice and learn how to do something, you should be able to do it with even the simplest of tools. However, I will make up my own idiom and say, “Level up your tools, level up your skills!” Now this may not be true in all situations, but in the case of 3D modeling in SketchUp, the right set of tools can help increase modeling speed, cut down on errors, and make you more efficient.
It is worth noting right now that nothing in this chapter is a requirement for running SketchUp. SketchUp can be run on a laptop with no peripherals at all. People do that every day. The point of this chapter is to explore the hardware options that are out there, available to you and how they may help you to become a better SketchUp user.
Just My Personal Opinions
I should also point out that I have no tie to any of the manufacturers of any of this hardware. I do not benefit from you purchasing anything recommended in this chapter. While in some cases I will relay information regarding hardware that I have heard about, I will also make recommendations for the hardware that I have used and believe will help you in your quest to level up.
In this chapter, we will be exploring five different pieces of hardware that you may want to consider:
- Mice
- Monitors
- Keyboards
- Tablets
- 3D Mice
Technical requirements
All you need for this chapter is the ability to read! You may want to look up some of this hardware, so access to a browser may be a good idea.
Mice
A good mouse is not just an option, but pretty close to being a requirement, when talking about SketchUp. Back at the beginning of the book (Chapter 1, Reviewing the Basics) we talked about why a 3-button mouse was so important when navigating in SketchUp. Yes, it is totally possible to use SketchUp with a 1-button or 2-button mouse and, yes, you can also get around with a touchpad or trackpad. Heck, if you have to, you could probably struggle through using no mouse if your computer has a touch screen, but this book is not about getting through it. This book is about getting better at using SketchUp, so I will be talking about the mice that I have seen and heard about, that make modelers better.
Basic 3-button mice
Before we dive into the multi-button, advanced-feature mice that are out there, let’s spend a few minutes talking about a basic 3-button mouse. For anyone using a touchpad or 1-button or 2-button mouse, this will be an upgrade that could make SketchUp far more usable.
You know the mouse I am talking about. These are the ones that come with a lot of computers. If you have to purchase a new one, they usually can be found for under $15 USD at stores like Best Buy or Target or even cheaper at Amazon.
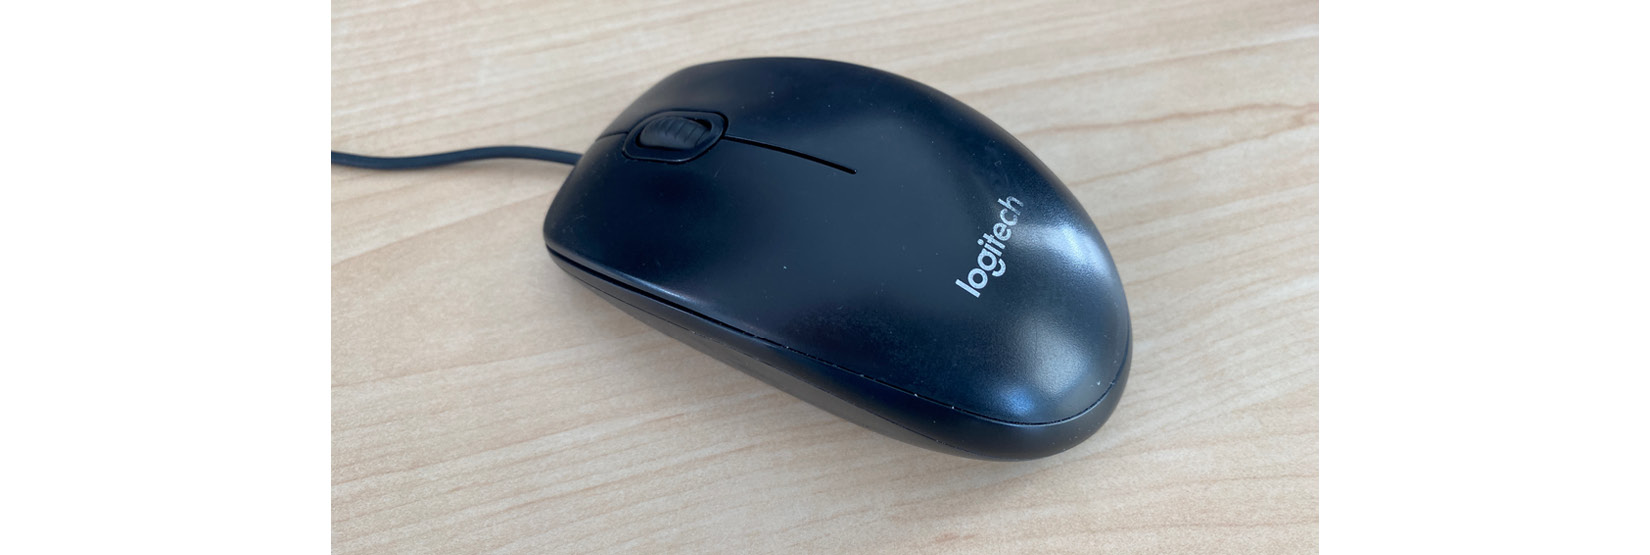
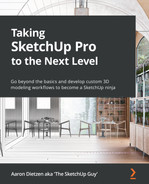
Figure 10.1 – No-frills, wired, 3-button mouse
The nice thing about these mice is the middle -button/scroll wheel. Using that to do all the orbiting and zooming means never having to run to the toolbar or rely on shortcut keys to change your view.
While we are talking about straight forward 3-button mice here, there are options. If you do any amount of travel, it’s nice not to have to deal with a USB cable on your mouse. Nowadays, even the less expensive models can be found wired or wireless. In fact, it’s pretty easy to find mice that uses Bluetooth rather than having to rely on a USB dongle. Where you can get a wired 3-button mouse for under $10 USD, you can generally find a 3-button wireless mouse for under $20 USD.
Programmable mice
If you are being serious about levelling up your SketchUp skills, it’s worth looking into a mouse with more functionality and more buttons than the basic models will offer you. While these models generally do cost more and will require additional setup, it is worth it if you are serious about becoming a better, faster, more efficient modeler.
In the world of programmable mice, there is no shortage of choice. Most of these mice offer things like additional buttons, higher-fidelity tracking, or gesture support. They may be wired, have a USB dongle or use Bluetooth. Some models designed for gaming will offer things like customizable weight, lights, or even a little fan inside intended to keep your hand cool during marathon design sessions.
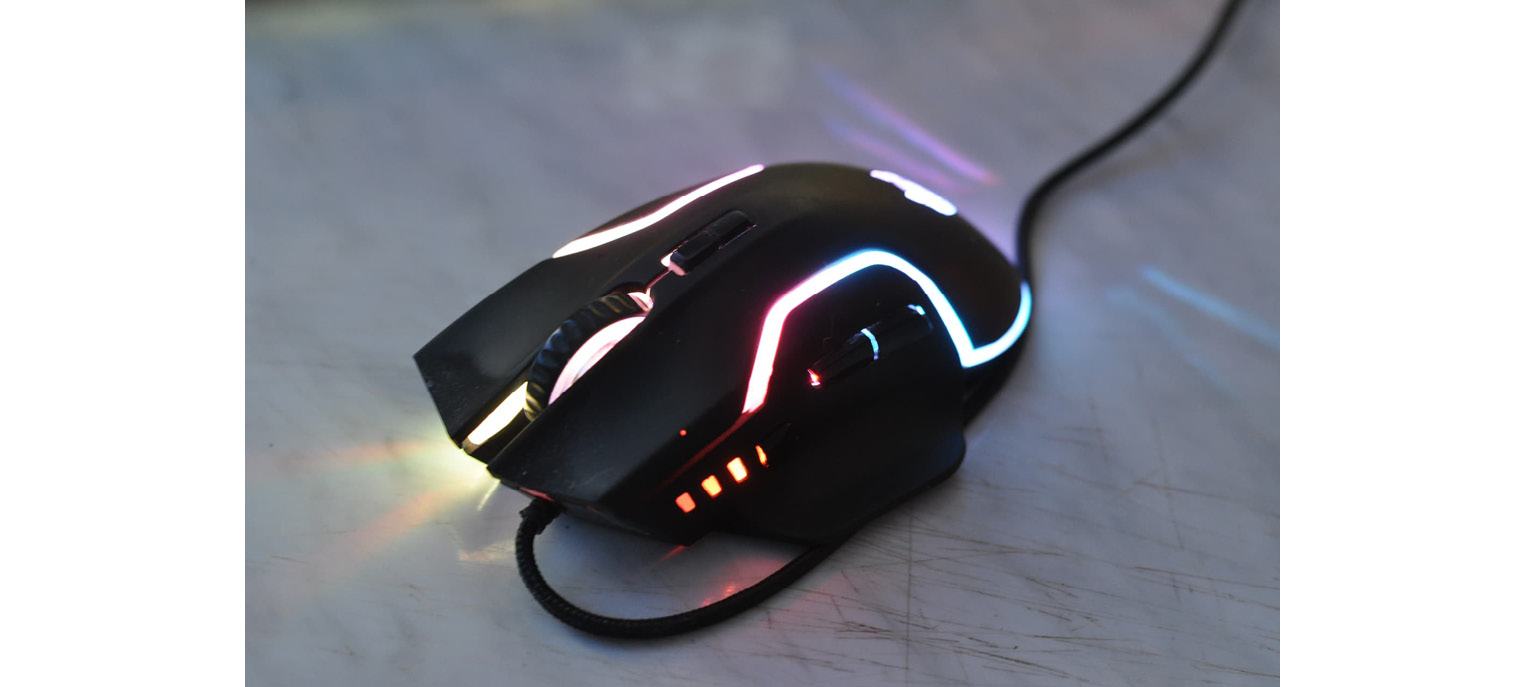
Figure 10.2 – A 7-button gaming mouse A+ Kuafu from SketchUp forum user Mihai.s
While there are a lot of options in this sort of hardware that I don’t really see as a benefit (lights, weights, and more), having additional buttons on a mouse that can be programmed to activate commands is a huge advantage. Just like it is a time and energy saver to be able to use the scroll wheel to zoom and orbit, it’s a huge benefit to be able to activate your most commonly used commands by pressing a button without having to move a finger.
Some of these mice looks and feel like a standard mouse while some get creative with their button placement. Logitech offers a line of mice with increasing capabilities that looks and feel very much the same, one to the next, but offer more and more customizability. Other mice, like the Razer Naga mice, offer up to a dozen programmable buttons on the side where your thumb sits. If you are diving into the world of customizable mice, I recommend reading online reviews or stopping by a bricks-and-mortar store where you can at least put your hand on one of these devices before you buy. It is pretty easy to spend $100 USD on a mouse, and it is a good idea to try before you buy!
Speaking of Price
To some, it can seem weird to spend $100 USD on something like a computer mouse. If you are a full-time designer, the mouse is a thing that is in your hand all day long. Aside from the computer that it is connected to, it is likely the tool that you use more than any other. If spending a little more means having the functionality that will help save you time as you design, it is worth it! If spending a few dollars more means you get a namebrand mouse with a warranty and a track record for lasting years, it is worth it!
Mouse gestures
Gestures are movements you make with your mouse to which you can assign functionality. With a certain mouse or software, holding down a button on the mouse and moving it to the right may activate the Move commands in SketchUp. Gestures are another way to save your time and energy by keeping your hand on the mouse when switching commands.
While many of the programmable mice out there will allow you to assign shortcuts to gestures through their own proprietary software, there is software out there that can be used with any mouse. In fact, if you type mouse gesture software into Google, you will get several pages that list the top options available!
Gestures are an amazing way to add customized functionality to your workflow. Think of gestures as shortcuts to your mouse! In general, the way they work is by assigning a keystroke to a movement of the mouse. So, if you were to hold down the right mouse button and slide your mouse to the right, it would be the same as hitting the R key on your keyboard. In SketchUp, hitting R will activate the Rectangle command. Things like gestures do not replace shortcut keys but make them accessible without having to move a hand to the keyboard!
While I recommend the use of mouse gestures, I have only used them as a part of the driver for my preferred mouse, so I cannot recommend a specific software for use. There are, however, more than a few options on the market. The good news is that these programs are available for free or very cheap ($10 USD). The bad news is that most of them that I came across were Windows only, so Mac users may not be able to try them.
OnScreen Keys
While speaking of software that adds to what a mouse can do, it makes sense to mention that there are software tools out there that allow you to bring up a series of on-screen keys or shortcuts via your mouse. This may be as simple as calling the default on-screen keyboard via Windows, or using the on-screen radial menus in 3Dconnexions’s driver. Again, having access to programmable keys without taking your hand off your mouse can be a huge time-saver.
Author’s recommendation
At the end of every section, I figured it would make sense to tell you what hardware I have been using or preferred. Please understand that, while I have tried out several options, my search has not been exhaustive. I do use SketchUp a lot and have found a set of peripherals that helps me and makes me an efficient modeler.
My preferred mouse is one of the MX Master mice from Logitech. I have had four mice from this line (at the time of this writing I have a MX Master 3). I have used a lot of Logitech equipment over the past few decades and have found their hardware to be well made and their software (the Logi app) as one of the better tools for customizing the functionality of a mouse.
Figure 10.3 – My grey Logitech MX Master 3
I like that it is a larger mouse and fills my hand. I also like that it is Bluetooth (no wires or dongle needed), and it can be synced to three different devices (I often run my MacBook, a Windows laptop, and use it on my iPad). The thing that drew me to it, however, is the number of shortcuts I can assign to it.
I currently have seven shortcut keys assigned to the mouse. Two (Line and Eraser) are assigned to the Forward and Back buttons that are right above the thumb rest (did I mention that there is a thumb rest? How fancy!). If I press down on the thumb rest, I enter Select mode. If I hold down on the thumb rest and gesture up, down, left, or right, I activate Push/Pull, Move, Rectangle, or Rotate. Having these, my most commonly used commands, available to me without ever lifting a finger off my mouse is a time saver that really adds up. More than that, it means that I can keep modeling without breaking my flow to switch commands.
It is one of the more expensive options out there. It retails for around $99 USD (but it can usually be found on sale). To be honest, I have never let that bother me when I consider that this mouse will last me years. In the end, it probably costs me a few cents per day to use a piece of hardware that I trust and that saved me so much time while modeling!
The mouse is probably the number one peripheral that you should consider when upgrading your equipment. As far as SketchUp goes, it is the peripheral that will be used the most. Another important peripheral to consider, is your monitor!
Monitors
Back when we were looking at setting up your workspace in Chapter 8, Customizing You User Interface, we talked a little bit about monitors. While I cannot say that I can dive quite as deep into the world of displays as I can with mice, I do have a few thoughts to share that I think are important, as far as SketchUp is concerned.
Video cards
I know, we are here to talk about monitors, but we should spend a moment or two talking about the hardware that drives the monitors. When running SketchUp, you do need a video card that is capable of fully supporting OpenGL. Most video card from Nvidia and AMD will support OpenGL in a way that keep SketchUp running smoothly. In some cases, though, on-board, or integrated video cards fall short of full support. At the same time, some newer video cards designed for high-end graphics for video games also lack in OpenGL support.
To be honest, it would probably be possible to dedicate an entire chapter to video card selection and how OpenGL works, but it would not be in the spirit of this book. I really just wanted to drop this section in to let you know that if you are planning to purchase a new computer, or add a video card to your machine, just make sure that the manufacturer has OpenGL support in the specifications. If that is the case, then you should be able to run SketchUp on additional monitors without any issues!
Laptop displays
I can already hear the arguments starting. I know that there are plenty people out there who only do 3D modeling on their big, beefy desktop computer. If that’s you, that is great and you can skip to the next section! If you are someone like me who primarily uses SketchUp on a laptop, I wanted to mention a few things about this setup.
Using the integrated laptop display as your primary display may work great for you in many cases (assuming that you have OpenGL support as mentioned in the Video cards section). However, you may, in this case, want to invest in a secondary monitor for serious modeling sessions. While you may have a beautiful, high-resolution laptop display, and may even be proud of the fact that you are running a 16” notebook, the fact is that a second display, even an inexpensive one, may give you access to a SketchUp workspace that is twice the size!
Laptops are great and getting better every day. Being able to pick up SketchUp and take it wherever you need to go to work is amazing. To be honest, compared to other 3D drawing programs, SketchUp is far less demanding and runs great on most laptops (I have seen some other drawing programs that slow to a crawl on an average laptop). Do not take anything said here to suggest that you should change machines. If you are serious about leveling up your SketchUp skills, however, you may want to consider adding an additional display to your current laptop only setup.
Picking out a monitor
When it comes to monitors, we really are spoiled for choice. In fact, monitor manufactures seem to crank out new, higher resolution monitors so quickly, it is hard to look at specific examples (the monitor on my desk is only a few years old and already discontinued. While I cannot recommend a specific monitor, I will present a few things to think about as far as monitors go:
- Resolution – SketchUp is really pretty basic as far as resolution requirements go. There is some basic anti-aliasing (the process by which a line is made to look smooth on the screen), and you have the option to control how X-ray views work, but other than that, SketchUp displays some pretty simple graphics. When it comes to the resolution that you need to display, it is possible that other programs you are running may be more important to satisfy than SketchUp. Many SketchUp users end up doing video work with the assets they create or end up in a rendering software. In either of these cases, picking out a monitor based on how it will display these programs may trump what is needed to display SketchUp.
- Size – Is bigger always better? Yeah, probably. I know that entire articles have been written about the ideal monitor size and formulas have been created to help figure out what size a monitor should be based on viewing angle and distance from screen and phase of the moon. In the case of a monitor for working in SketchUp, a larger monitor means more space for UI and a larger modeling area. This does not mean that you need a 49” curved monitor just to run SketchUp, but it doesn’t mean that monitor would not help, if you had it.
- Quantity – Here’s the big question. With modern computer and operating systems coming out of the box with the ability to drive 4+ monitors, just how many monitors should you have? Do you keep it simple and work with a single monitor, or do you go full Minority Report and cover the wall of your office with displays? Personally, I have been a fan of a dual monitor setup for as long as I can remember. I like dedicating one, primary display to the program I am using (after all, SketchUp only runs in a single window) and rely on the second monitor to display everything else. However, if I was getting into something that would benefit from running on an additional display, I may consider adding another monitor. If you do any amount of rendering, for example, you may see the benefit of adding an additional display where you could keep an eye on something like the status of renders. Really, with the how affordable monitors are recently, the number of monitors you need is most likely limited by your desk size more than anything else!
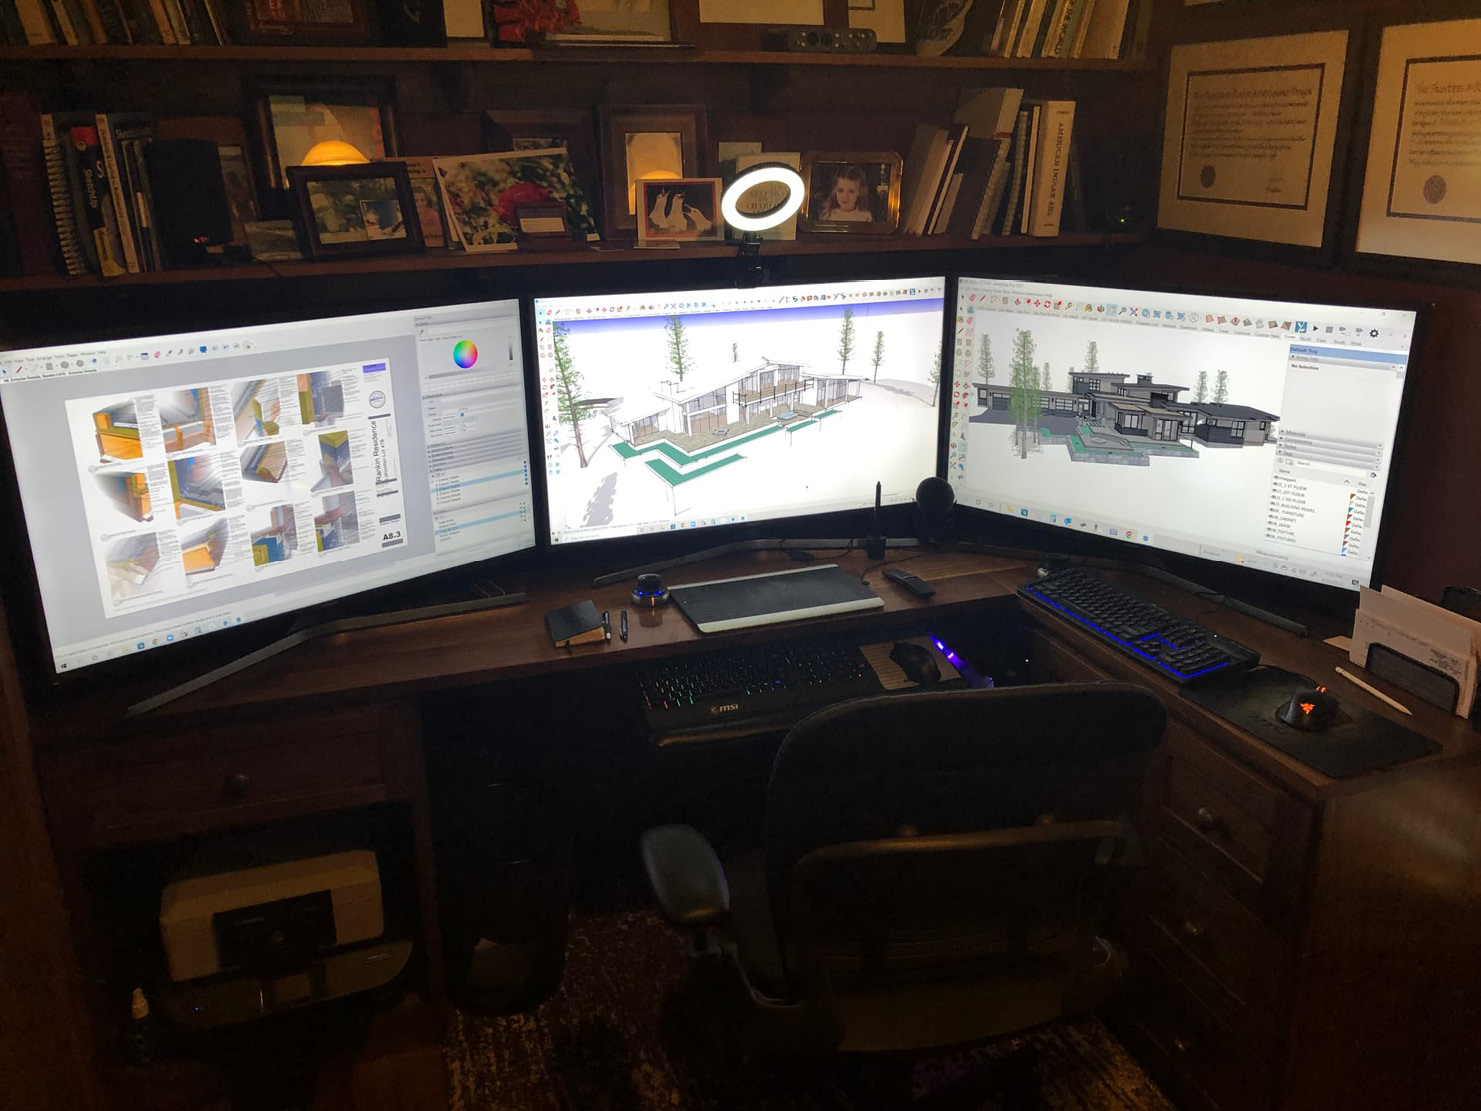
Figure 10.4 – My friend Nick Sonder shared an image of his amazing 3 monitor setup
As you consider monitors for your SketchUp setup, I would be sure to think about the other software you are running and the physical limitations of your workspace. Having a quality monitor will give you a good-looking workspace and last for a long time. It is up to you to decide how much money and desktop space you want to dedicate to monitors.
A Note About Touchscreens
I debated over including touchscreens in this section. While touchscreen technology has come a long way and is now even standard on many laptop computers, the fact is that SketchUp does not support this functionality very well. Yes, basic functionality like clicking on a menu or icon can be performed using a touchscreen, SketchUp does not leverage anything else that a touch screen offers (gestures, pinching, and likewise). Since this whole book is about what you can do to improve your SketchUp skills, it seemed like an option that did not need more than this note.
Author’s recommendation
To be honest, I keep it pretty simple in this department. I tend to work in one of three locations (home office, desk at work, and in the recording studio). Each of these locations has a secondary monitor for me to plug into. Most of these monitors are high-resolution and 24+ inches. Most, if not all my actual SketchUp design work is done on the built-in display of my MacBook. The secondary monitor is always being used and displays things like email, Messenger, reference images, or recording/streaming software. In a pinch, I can run everything with just my laptop, but I will admit that I feel less productive that way. I end up switching windows in the middle of a modeling session or running things in a smaller screen, so I can see other programs at the same time. If I really want to be productive and model the best I possibly can, I do need a secondary monitor to the side of my laptop.
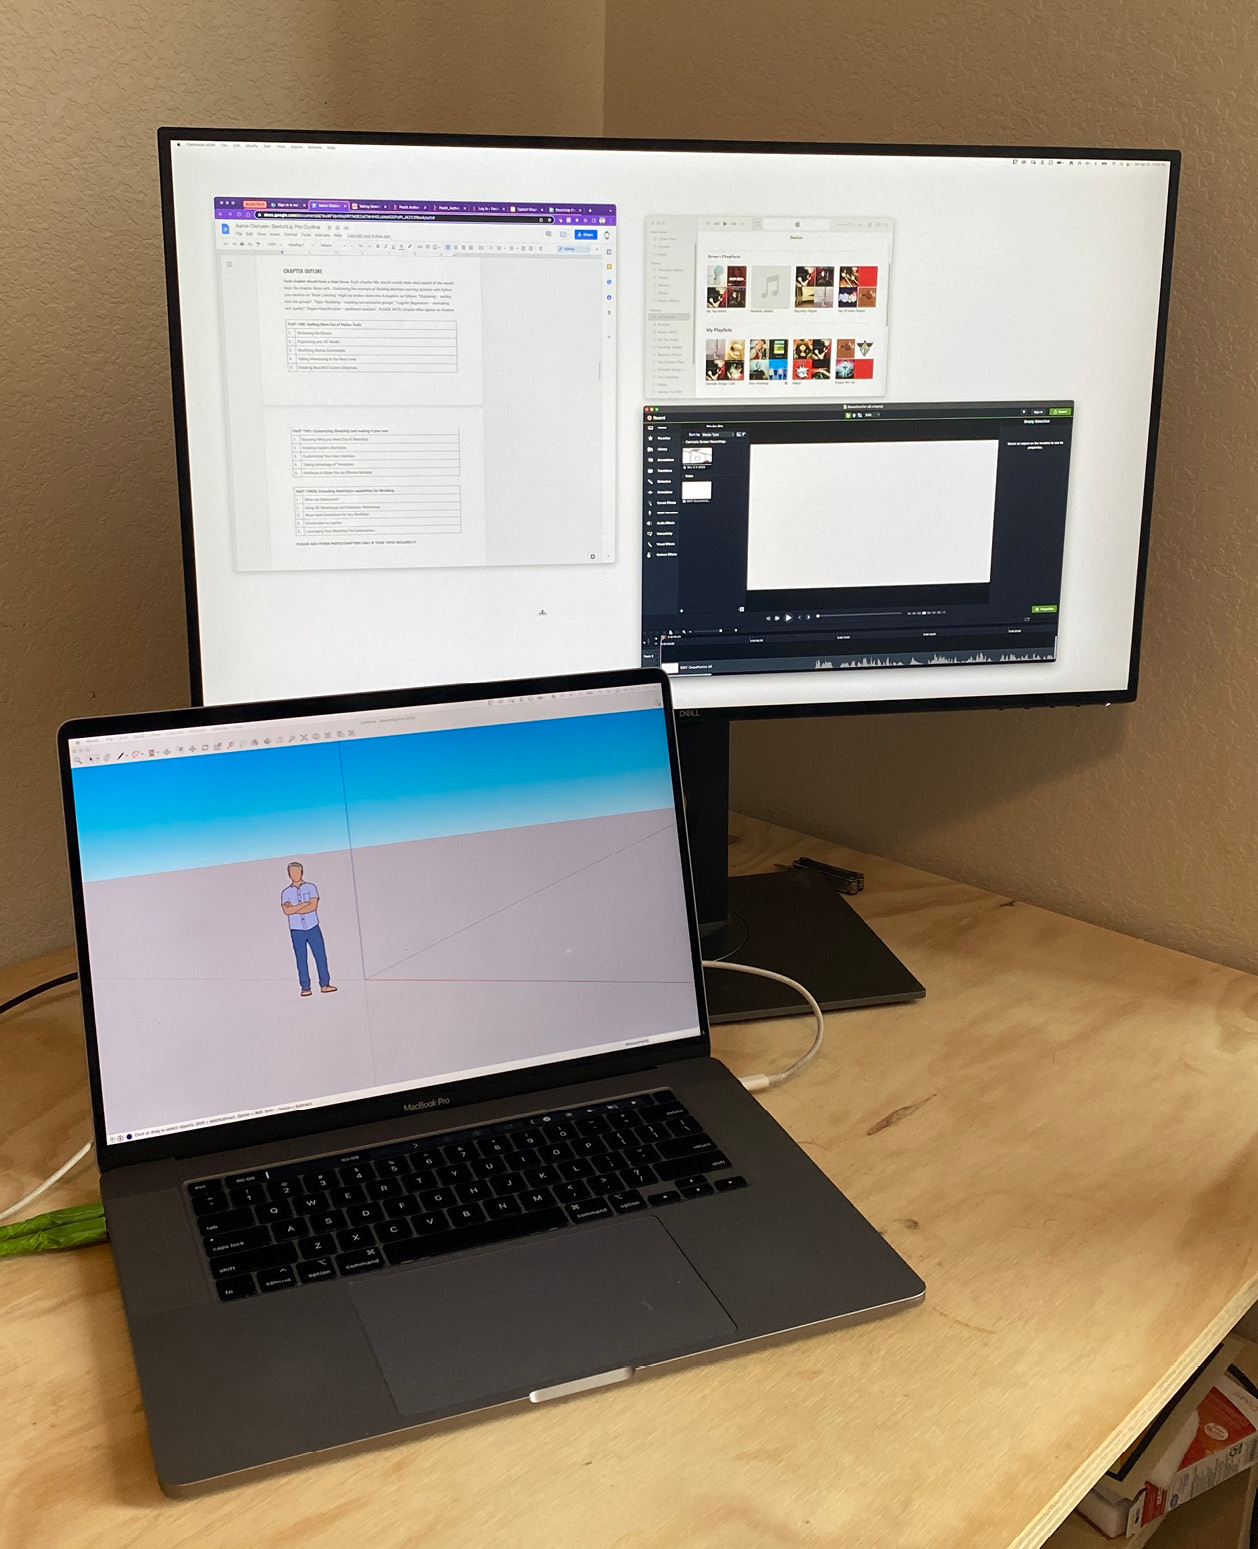
Figure 10.5 – My simple laptop and monitor setup
Displays are, of course, required to run SketchUp or any computer software. Likewise, you will, sooner or later need to have a keyboard. Are all keyboard created equal? Of course not! Let’s find out what to look for in the next section.
Keyboards
As with almost all computer programs, SketchUp Pro will require you, at some point, to use a keyboard. If you are keyboard averse, you could do a lot of your input and editing using only your mouse by using commands from the menus, but sooner or later you are going to need to name a component or enter the dimensions of a line and for that, you will need a keyboard.
For most users, the keyboard is a fairly vanilla peripheral that they do not think about upgrading while others will spend time researching the perfect keyboard or even build their own! If we really wanted to dive down the rabbit hole, we could get into things like interchangeable keycaps and mechanical versus membrane keyboards. For this book, though, we are exploring things that will help us to level up our SketchUp skills. The main area of focus will be around taking advantage of the shortcuts that we set up in Chapter 7, Creating Custom Shortcuts, and thinking about what keyboards are out there that can speed up our input.
To this end, there are three keyboard options I would like to talk about: Ten key keyboards, custom keypads, and virtual keyboards. I am assuming that whether you are using a laptop or desktop computer, you have access to some sort of keyboard. From here, let’s look at how you might be able to customize your setup with an effort to level up.
Tenkey keyboards
If you are already using a full-size keyboard, you may already have a ten key keypad on the right side of your keyboard. If you are using a laptop keyboard as your primary computer or a compact keyboard, you may not have a ten key keypad. Just in case anyone is not familiar, the ten key keypad is a rectangle of numerical keys set to the side (usually the right) of the main keyboard. These keys are setup in the same configuration as the keys on an adding machine. While these are often leveraged by people using accounting or spreadsheet input, they have their place in 3D modeling, as well.
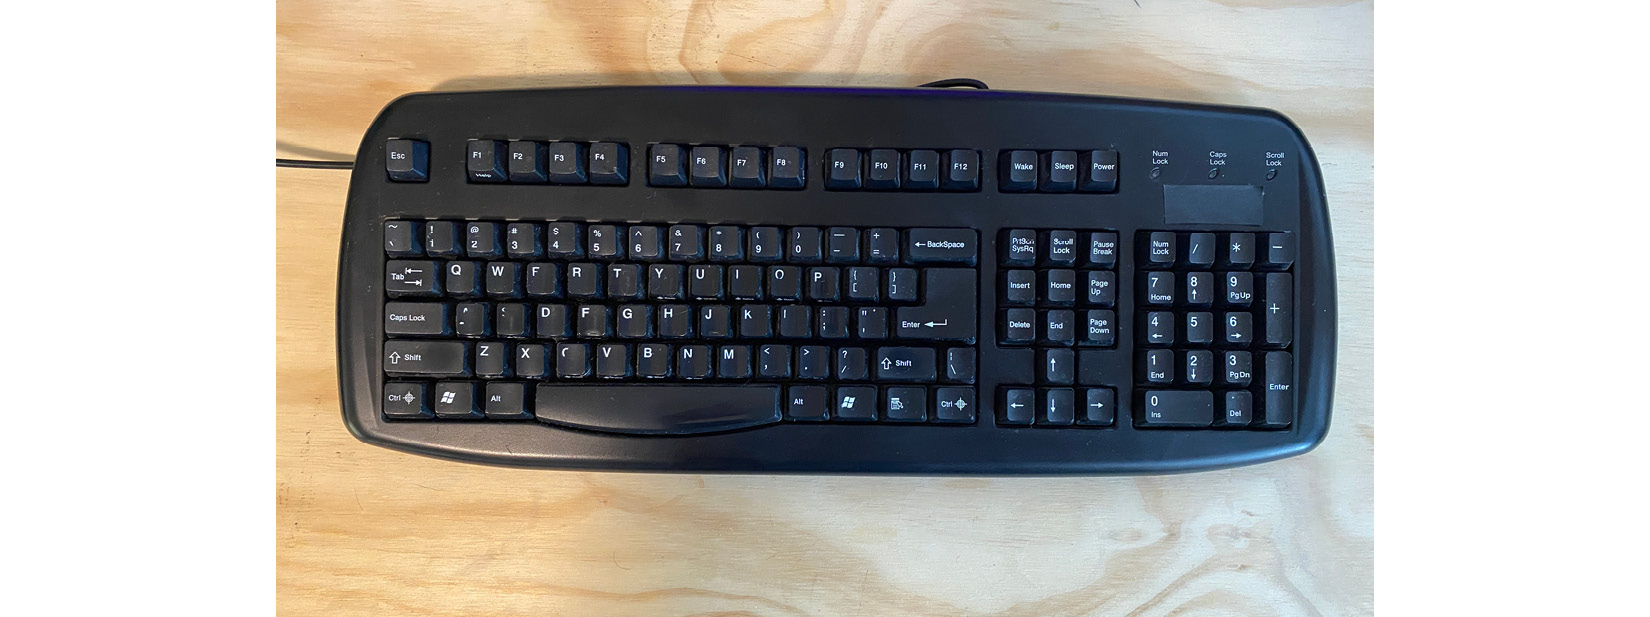
Figure 10.6 – Standard ten-key keypad on a full-size keyboard
While the rest of the keyboard is useful for using shortcuts, the ten key keypad is useful for entering dimensions. As you use SketchUp, you will be entering dimensions. This may be as you are drawing (specifying line lengths or polygon sizes) or as you are editing (specifying move lengths or scale dimensions). Depending on your setup, the ten-key keypad can save you quite a bit of time for this input. If you are right-handed, this might mean sliding your hand off the mouse to the edge of the keyboard to type numbers (while left-handers will already have their right hand on that side of the keyboard). I know, in the ideal workflow you would not have to take a hand off the mouse but think about how much quicker it is to move your hand to one spot where all of the number keys are clustered, rather than running your hand back and forth across the full length of the keyboard to find the numbers that you need.
I know, we are talking about seconds or fractions of seconds, but we are also talking about doing this dozens or hundreds of times each day. Just like when we talked about using shortcuts keys rather than menu commands, the time it takes to move your hand from your mouse over to the 1 key at the top left of your keyboard will add up, if you have to do it 30 times in a single model.
Plus, it is much easier to remember where the keys on a ten key keypad are located. Where you may have to look down at your keyboard to find the 4 key each time, there is a good chance that, with a little practice, you might be able to jump your finger right to the 4 key just by feeling the keys. If you have ever seen an accountant using an adding machine, you will know that they can input numbers for hours without once having to look at the keypad.
OK, so let’s say you are bought into the idea of trying a ten key keypad but use a laptop without one. Maybe you have a compact keyboard like an Apple Magic Keyboard or a Logitech MX Keys Mini. You can’t just add keys to your existing keyboard, right? Well, in this case, you kind of can do that. If you search ten-key keypad on Amazon, you will get a list of hundreds of keypads, both wired and wireless, that will sit right next to your existing keyboard. As a plus, they are fairly inexpensive (many options for under $30 USD), so it is something that you could try and, if you do not love it, you are not out a huge amount.
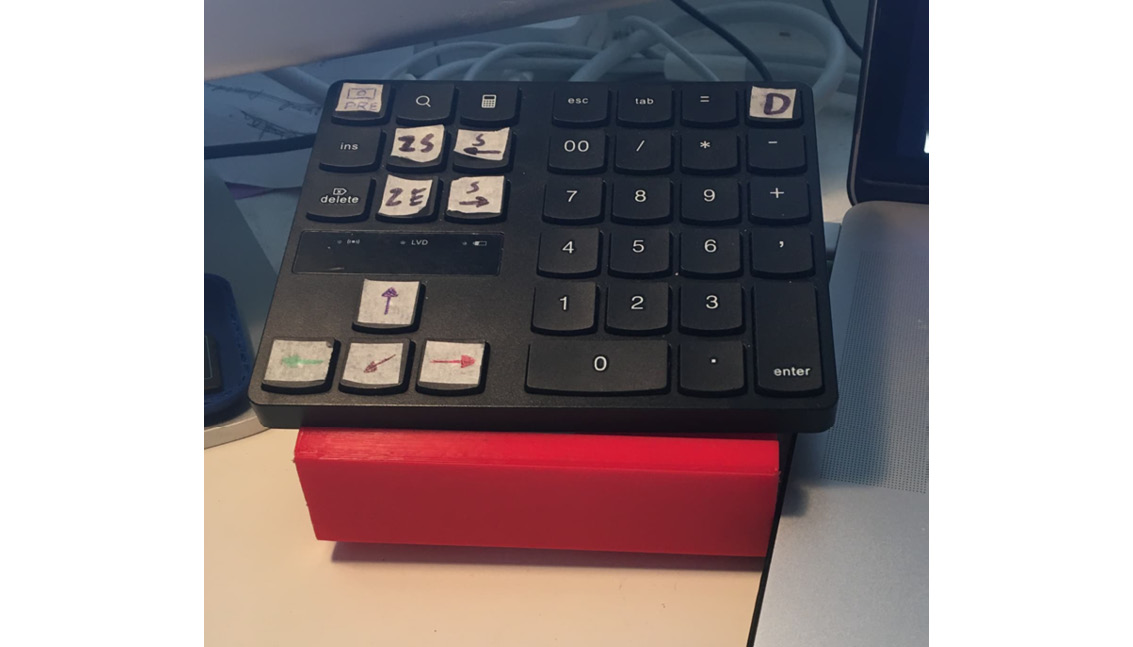
Figure 10.7 – SketchUp forum user Endlessfix sent me this image of his custom ten-key keypad
Next time you do some serious, heads down geometry modeling, keep an eye on how often you are moving your hands across the keyboard. If you have a ten-key keypad on your current keyboard and do not use it, give it a try to see if it helps. If you notice that you spend a lot of time hunting for number keys, consider picking up a cheap external ten key keypad. It may be a small effort that ends up speeding up your input and helps you to level up!
Customizable keypads
Another option to consider is a customizable keypad. With these keypads, you can program whatever keystrokes you want onto any of the keys on the device. This can mean having all of your most important shortcut keys clustered together right next to your non-mouse hand. Imagine having access to 32 of your most used commands on something like this:
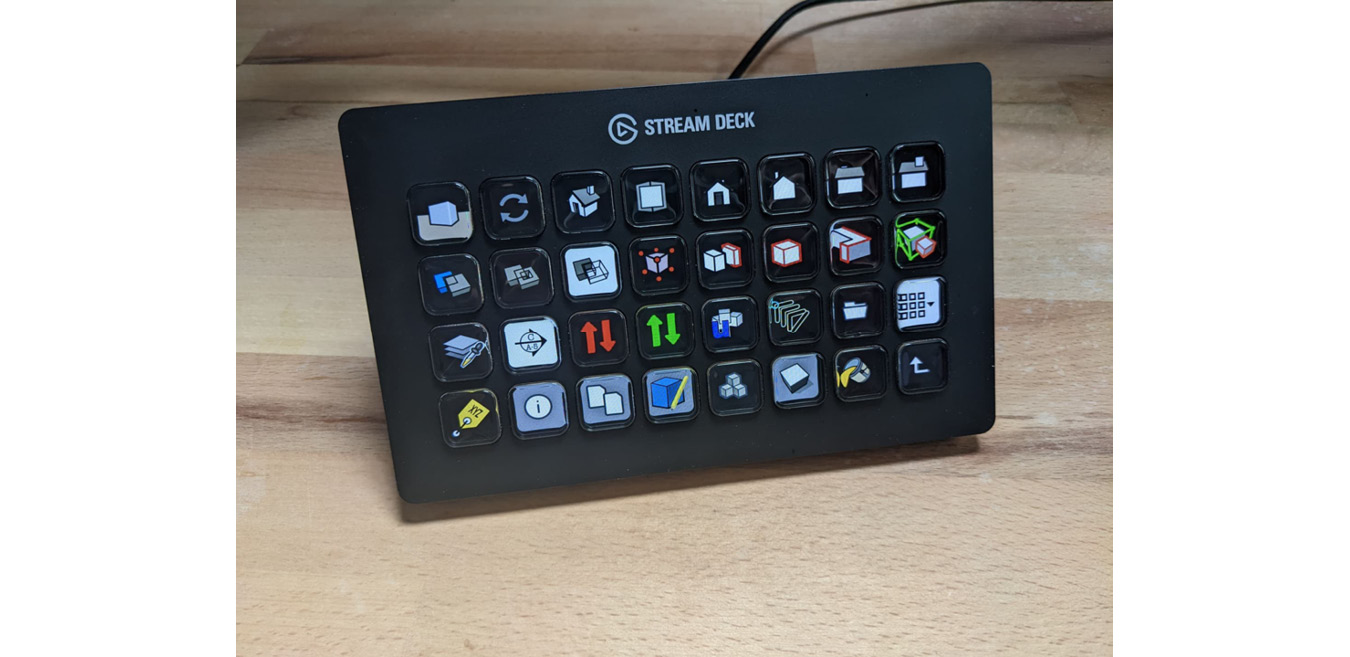
Figure 10.8 – Paul Mcalenan’s Stream Deck with SketchUp shortcuts and icons
Products like the P.I. Engineering’s X-Keys keypad or Elegato’s Stream Decks give you the ability to program any keystroke or, in some cases, macros to a single key. Many of these products even allow you to place an image on each key either through removable key caps or using small LCD screens in the keys! These keypads are amazing tools that can save you a lot of time, especially once you get used to using them. The downside is they can be expensive. A quick search on Amazon for a 24-key X-Keys keypad shows $149 USD as the starting price.
If that pill is a little too expensive to swallow, there are software options to get you a similar result. There is several keyboard-remapping software out there that will allow you to change the keys associated with a specific keyboard (to find examples of such software, you need to only type key remapping software into Google). This means you can pick up an inexpensive 10-key keypad and run a remapping software to change what keystrokes it passes to the computer. This means that the 1 key on the keypad could pass an R to your computer, turning it into the Rectangle shortcut!
If you are a tablet user, there are even tools out there that will allow you to program shortcuts keys on your tablet. If you already own a tablet, this can mean adding an app and using the hardware that you already own! Think of how cool it would be to have pictures of all your shortcuts on your existing hardware like this:
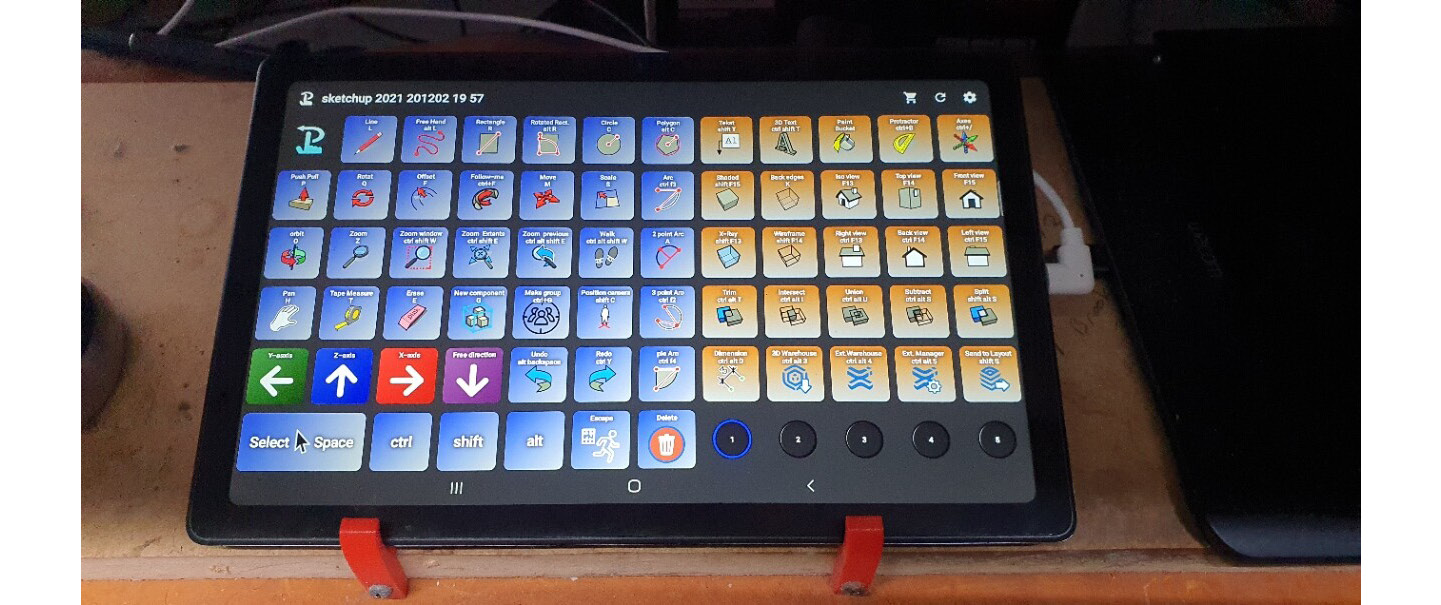
Figure 10.9 – My friend Box sent me this pic of his Android tablet running Touch Portal
This all may seem like a lot but finding the right options for a keyboard can seriously speed up your input and help you to level up. Remember back in Chapter 7, Creating Custom Shortcuts, when we did a little math to figure out how much time can be saved if you program the proper keyboard shortcuts? Imagine shaving another 30 – 50% off those numbers by not having to move your hand at all to get to your shortcuts!
Virtual keyboards
These options are amazing, but all require you to move a hand at some point. Imagine if you could do all of your numeric input without taking your hand off your mouse! This is what on-screen keyboards facilitate. If I am working on my laptop and want access to a ten-key keypad, I could always pull up something like this:
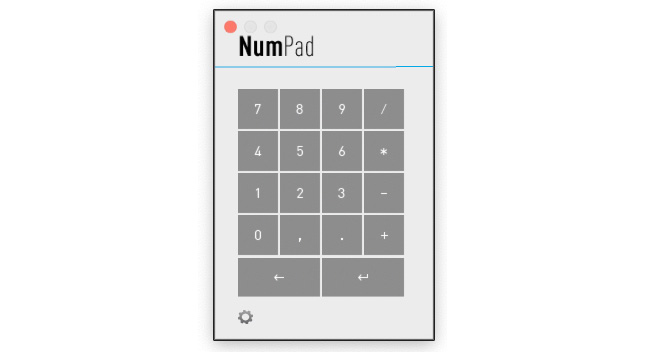
Figure 10.10 – 3Dconnexion’s on-screen Number Pad
On-screen keyboards are nothing new. In fact, Windows has been shipping with an on-screen keyboard capability since Windows 7! Both Mac OS and Windows offer some sort of virtual keyboard, natively, but there are additional options out there as well. If you do a search on Google, you will find many options out there, many of which can be downloaded for free.
Author’s recommendation
I have to be honest and say that my current keyboard game is unimpressive, at this point. Right now, I just use the keyboard on my MacBook. In the past, I have used a number of different keypads for shortcuts and for years used a Logitech ten-key keypad to do most of my input. While I cannot see myself changing my keyboard setup drastically (I travel and have a hybrid work schedule that splits my work week between home and the office), so I doubt I will add a full-size keyboard with a ten-key keypad or a separate programmable keypad. I have been thinking about adding a Bluetooth ten-key keypad that I can throw in my bag when I am on the go, but that has not been something that I have moved on, yet. Maybe it is time for me to think about leveling up!
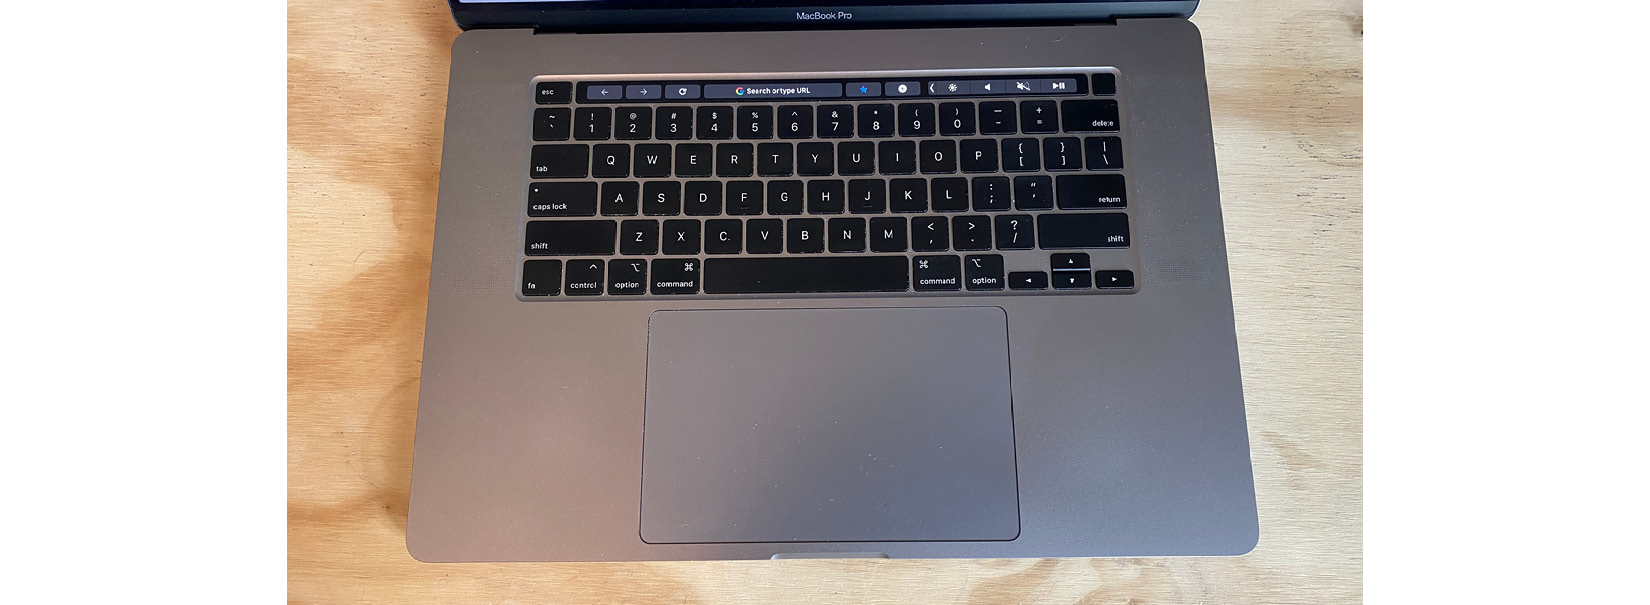
Figure 10.11 – My current lackluster keyboard setup
This was probably a lot more than you were expecting from the keyboard section for the book. I know it was for me! It was pretty cool to learn about all of the options out there for getting quick access to the keys that you use most. As an added bonus, most of these solutions can be leveraged in any other software you use, as well!
For the final two sections, we will be looking at a few hardware options that may not be something that you use at all right now. These go beyond the default mouse, keyboard, monitor setup that many of us have used for years.
Tablets
Tablets, or graphic tablets, have been around since the 1950s but available to home computer users beginning in the 1980s. The basic premise is that you can control the cursor on your computer with a pen like device resting on a flat tablet, rather than with the mouse. Over the past several decades, the graphic tablet has evolved to include the ability to sense pressure, the tilt of the pen, and some have automatic handwriting recognition. While they are incredible tools with so many benefits and options to a designer, we are, once again, going to try to narrow our focus to how they are helpful to a SketchUp user.
Advantages of a tablet
The aim of this section is not to talk you into using a graphic tablet over a mouse. It is, however, aimed at helping you to look at the options that are out there and, maybe, show you a solution that you do not know about. Despite the wide use of mice throughout the computer using world, there are a few significant advantages that graphic tablets have over them. Here are a few of them.
A more natural feel
For many humans, writing or drawing with a pen or pencil is much more natural than trying to make precise movements with a mouse. Yes, it is easy to argue that this is a matter of practice, and, given enough time, most people would be able to be just as precise with a mouse as they would be using a pen. The fact is, though, most of us learn to draw and write using some sort of drawing tool like a pencil. Think of a child learning their alphabet. More likely than not, they will be using a crayon or pencil, no mouse in sight. Given that this could be the tool of choice for the next dozen or so years, it makes sense that we are more comfortable with something like a pen on a tablet than we are with a mouse.
Ergonomics
Another thing that makes tablets very popular with people who spend a lot of time designing is the ergonomic advantage that they have over standard mice. Many people who spend a lot of time using a standard mouse (myself included) have, at some point or another, had to deal with pain caused from repetitive motion. Experts say that these ill effects are made worse by having your palm facing down (slightly twisting your forearm). Using the pen of a tablet helps to relieve some of the stress associated with this sort of repetitive strain. I know a handful of designers who started with mice but have move to a tablet for this specific reason.
You can actually test this idea fairly easily right now! Sit upright with your dominant hand (the one that runs the mouse) resting on the desk in front of you, arm bent at a 90-degree angle, palm facing down. This is the standard posture one would take to use a mouse. If you lift your hand just off the desk and move your fingers around a little bit, there is a chance you can feel some tightness in your forearm. Now, if you rotate your hand so that your thumb is facing directly up and wiggle your fingers, you may notice some relief in your forearm. This is the difference between working with a mouse and a tablet.
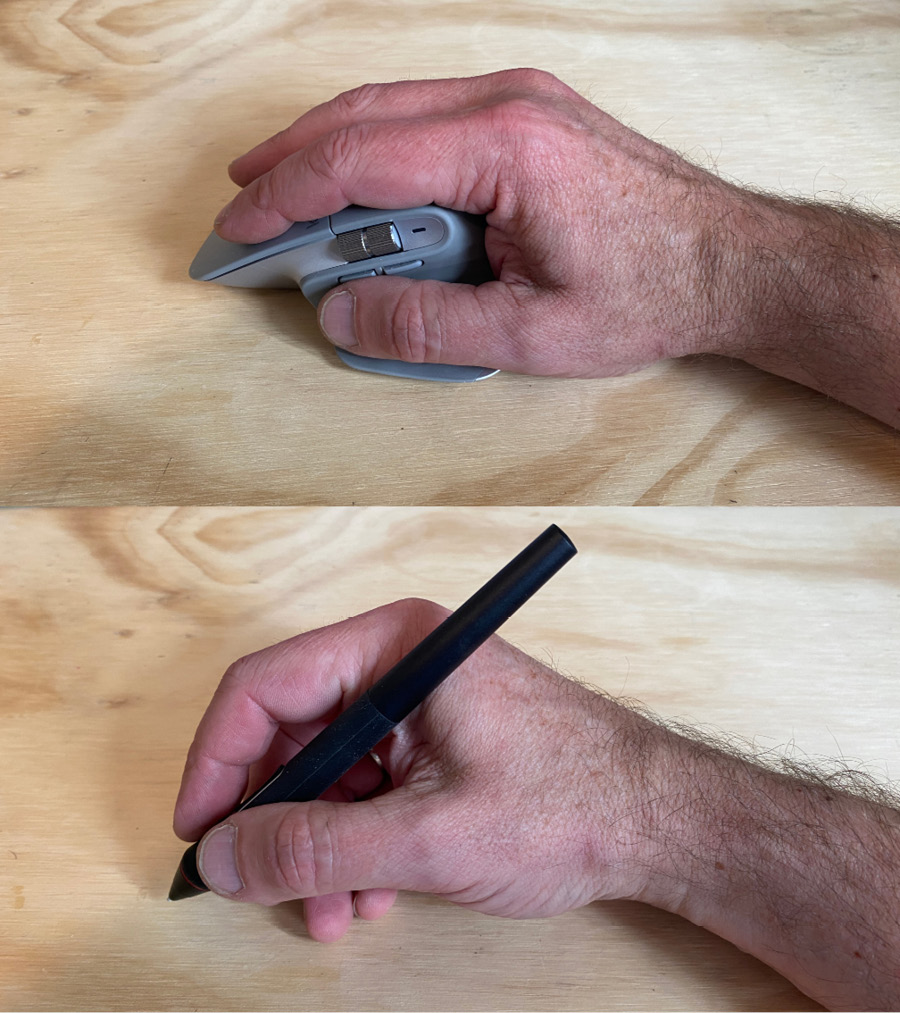
Figure 10.12 – Natural mouse hand versus natural graphic tablet pen hand
The difference is subtle, but most can feel the change. This is the slight relief that working with a tablet over a pen can offer. The difference may not be world-changing for you right now, but if you suffer from any tendonitis or repetitive strain injury in your forearm, it may be a relief!
Vertical Mice
It is worth calling out at this point that there are mice that allow you to keep your hand in this vertical position as you use them. If keeping your hand in this upright position helps, but you don’t want to make the leap to using a tablet, you may want to take a look at a mouse like the Logitech MX Vertical.
Customizability
While we did talk about mice that you can program and customize in the Mice section of this chapter, mapping custom functions is just something that comes along as a part of using a graphic tablet. Every graphic tablet that I have used has had at least three buttons that can be customized in the included driver software.
Graphic tablets are designed with the understanding that the user will have one or even two hands on the tablet. So, many compensate for that fact that the user will not have quick access to the keyboard by adding multiple programmable buttons to the tablet itself. This may be as simple as a button or two along the side of the tablet, or the tablet may have a dozen or more programmable buttons available. This is a great option for activating SketchUp shortcuts without having to take a hand off the tablet! Add to that, many pens have two or three buttons on them (most of which are also customizable) and you have a lot of options for setting up your tablet!
Disadvantages of tablets
Of course, there are downsides to using a graphic tablet (if everything was perfect, we would all be using them, right?). As with the other peripherals, I don’t want to spend a ton of time arguing the merits of each peripheral against the other, but I figured it was worth mentioning at least two issues that play against using a tablet.
Size
If you are someone who is mobile, perhaps with a laptop as your primary computer, and you need a solution that allows you to pick up and move from one workspace to another, tablets can be an issue. Now this is not a world-breaking problem. Tablets are light, generally not larger than a laptop and can even be wireless (more on the features and tablet options later in this section), but they are more work to pack up than a mouse.
If you are a “work in one place all of the time” type, a tablet will still need some consideration, as it can tend to take up more space than what a mouse will require. Again, not a huge issue, but something to consider.
Price
Just like with mice, there is a range of tablets out there. The big difference is the size of the range! While mice can be picked up for $10 USD and run up to $150, graphic tablets start at $35 USD or so, and can cost you $2500 USD or more. This can be nice for someone who wants to give a tablet a try (spending $35 USD on a tablet, using it for a month, and finding out that it is not for you, is not a huge loss), and gives you plenty of room to grow if you do like the tablet life. It is, however, across the board, a more expensive peripheral than a mouse.
Picking a tablet
There was a day not too long ago when, if you wanted a graphic tablet, your options were the line of hardware from Wacom. They did (and still do) offer a range of simple, compact graphic tablets that connect to your computer via USB up to enormous 24” graphic display tablets with touch features and dozens of programmable buttons via an external programmable control deck. Today, however, there are other manufacturers like Huion that offer a range of tablets at a more affordable price. In fact, if you search for graphic tablets, you are likely to get overwhelmed by the number of options available to you! To that end, let’s take a quick look at a few of the options you may want to consider when picking out a tablet.
Size
Any of the tablet manufacturers you see will offer a range of different size tablets. This is probably the first (and maybe most important) thing to think about when you start looking. While you may be looking for a smaller size because you travel and want something that is easy to slip into your backpack, it is important to consider the way that you use the tablet as well. Remember, you will move the pen to move the mouse, so if you want to move the mouse from one side of the screen to the other, you will need to move the pen from one side of the tablet to the other. The larger the tablet, the larger this motion will be. I personally have found that I prefer a more compact tablet that allows more cursor movement with smaller gestures.
Wired or wireless
This may be something to consider, again, if you travel with your computer. While most tablets connect to your computer via USB cable, there are more than a few available that connect wirelessly via dongle or Bluetooth. Even if you do not have a road-warrior lifestyle, you may like the simplicity of working with a wireless device. Unlike a mouse, tablets can be used in multiple positions. Many tablet users will pull the tablet onto their lap (like a drawing pad) or rotate it on their desktop to get a more natural position. This is all easier to do when you do not have to worry about a cable sticking out of the side of the device.
Display
Standard graphic or graphic display tablet? The difference is that the graphic display tablet acts as a monitor, as well as an input device. This means you are drawing directly onto the screen, rather than moving the cursor with the pen. Graphic display tablets really are amazing tools that bring another level of interactivity to design. Right now, I would say it is the way to get closest to your work possible. The downside, however, is that display tablets cost hundreds or thousands more than their non-display siblings. While I have met quite a few SketchUp designers that have purchased and use graphic display tablets, none of them use them solely for SketchUp. These devices were primarily created for use in drawing, painting, and photo-editing software, but can be used for SketchUp, as well. If you are a multitalented designer who has workflows that lap into graphic editing, then something like a graphic display tablet may be a worthwhile investment.
Pens
Many tablets have a single option for their pen. Usually a one or two-button device that may or may not need to be charged or might have batteries in it. There are, however, options out there that will offer more control or buttons. The way that a tablet works with SketchUp is fairly straightforward (SketchUp is looking for where the cursor is moved and left or right mouse clicks), but if you end up using other programs alongside SketchUp, then things like tilt-sensitivity or an airbrush-like grip may be something to consider when picking out your tablet setup.
Learning to Use a New Peripheral
Whenever you need to learn to use a new tool, it is going to take some time. If you are thinking about trying a tablet, you should plan to give yourself time to learn and get used to using it. When you first start using it, you will most like feel like you are struggling and that you are less effective than you were before. That is normal. That is learning! I personally have found that I do best when I do not give myself the option to use the “old way” and force myself to adopt the new solution. When I started using a tablet, I put my mouse away and allowed myself to only use the tablet for a full week. This was enough time to get used to using the tablet as an input device and finetune the settings so that it worked for my specific needs.
Once again, I am not trying to sell you on graphic tablets, but I have seen so many users changing to using them that I figured it was worth looking into. Tablets really are amazing input devices that are very usable and customizable.
Author’s recommendation
I do own a tablet but to be honest I do not use it that often. While I do spend a lot of time in SketchUp, I do use other programs, as well. I find that I am more likely to use my tablet in drawing and painting programs than I use in SketchUp. It’s not that I don’t like using a tablet in SketchUp, in fact, I have made a few videos about using a tablet with SketchUp and really got to the point where it felt good. I think that the reason that I don’t use the tablet more in SketchUp is the amount of time and energy I have put into customizing my mouse setup.
Having said all of this, I do use a Wacom Intuos Pro with a Wacom Pro Pen 3D. It is an amazing device that can be use wired or wireless, has eight programmable buttons and a touch ring. The pen has three buttons and feels very natural in my hand.
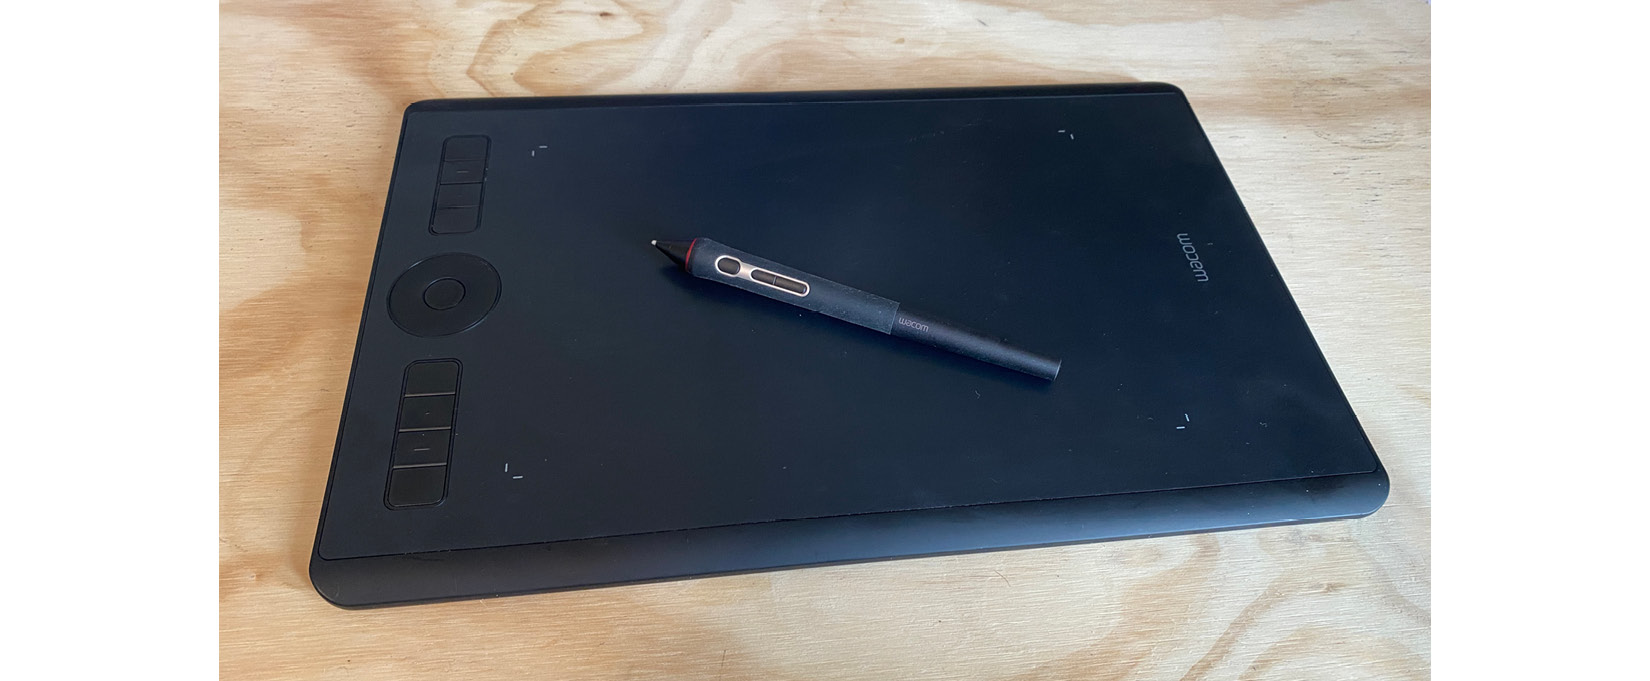
Figure 10.13 – My Wacom Intuos Pro with Pro Pan 3D
Given the chance, and if I did more graphic work, I would love to dive into the world of graphic display tablets. I have long dreamed of working on a 24-inch Wacom Cintiq. At this point, however, with my need to change workspaces and travel, and my focus on SketchUp, my Inutos Pro is the perfect tablet.
Tablets are great devices that can change the way that you interact with your computer. Another device that can do that for you is the 3D mouse and we will see how they work right now.
3D Mice
Unlike traditional mice which are used to move your cursor on the screen, a 3D mouse will move your camera through 3D space. This device is not a replacement for your regular mouse, but a piece of equipment that can work alongside it. A 3D mouse is not technically a “must have” device to run SketchUp, but more and more professional users are adding them to their standard gear for good reason. 3D mice come in different shapes and sizes, but all center around the basic functionality of a puck that can move in 6 different axes. These movements are translated into camera or model movements inside of SketchUp, allowing you to spin around a model as if you were holding it right in your hand, or flying around a model like you would in a helicopter.
Before we dive into the advantages that a 3D mouse can bring to your SketchUp game, I want to again say that I am just giving you an idea of what is available when it comes to these peripherals. I have no association with any hardware manufacturers and am only relaying my experiences with these devices. Now that is out of the way, let’s start this section by looking at the biggest advantages of using a 3D mouse in SketchUp.
Multitasking
A 3D mouse separates movement if the camera inside the SketchUp window from the input happening with the keyboard and mouse. This means freeing up the mouse in your dominant hand to just do the modeling. Rather than using the middle wheel to orbit, then zoom to get to a specific view, and then move the cursor to a toolbar to select the next command, a 3D mouse takes care of moving the camera where it is needed while you pick the next command. By taking the orbit/zoom/pan functions off the standard mouse, you are freeing up the primary mouse to just perform modeling tasks.
Smooth camera moves
I have said it before and I will say it again, SketchUp has one of the easiest solutions to move through 3D space of any 3D modeling software. Using the middle button/scroll wheel to zoom and orbit is easy to learn and incredibly efficient. it does not always, however, show very well to others. When we jump through a SketchUp model, quickly zooming into an area then orbiting around the model, we see it as a quick and efficient way to move though 3D space. To someone watching from the outside, it can be jarring and possibly a little disorienting. To the one in control of the scroll-wheel, every movement makes sense because we are expecting it. If we are presenting to someone else, it can be seen as unexpected jumps that can take away from the experience.
When presenting with a 3D mouse, the moves through the model look smooth and even. You can zoom, pan, and rotate the model all at the same time. You are spending a lot of time and energy making a model look as good as possible in SketchUp. Once it’s time to take that model and present it to someone else, doing so with a 3D mouse will allow you to smoothly move through it, making the experience as enjoyable as possible.
Customization
Just like many of the other peripherals in this chapter, 3D mice can be customized to do what you need them to do. This may mean changing the way that the puck interprets movements. choosing to have the 3D mouse, move the model or move the camera around the model. Many models also come with one or more buttons. Much like the programmable keys on a graphic tablet, these buttons can be programmed to activate shortcuts or modifier keys.
As with other peripherals, 3D mice come with a driver program that will allow you to edit all of the settings of the device. These functions can be general or tailored specifically for a single program.
Choosing a 3D mouse
While I seem to remember two or three companies that offered 3D mouse hardware a few years ago, a few minutes on Google verified that there is one manufacturer of 3D mice selling hardware as of the writing of this book: 3Dconnexion. 3Dconnexion offers a range of 3D mice of different sizes and capabilities.
At the low end (low is a relative term as the most basic 3D mouse from 3Dconnexion does cost $99 USD) is their basic SpaceMouse. This device is little more than a weighted base, a puck, and a USB cord. While 3Dconnexion does offer a wireless version as well (great for travel), the SpaceMouse is a great no-frills controller for moving in 3D space and not much else.
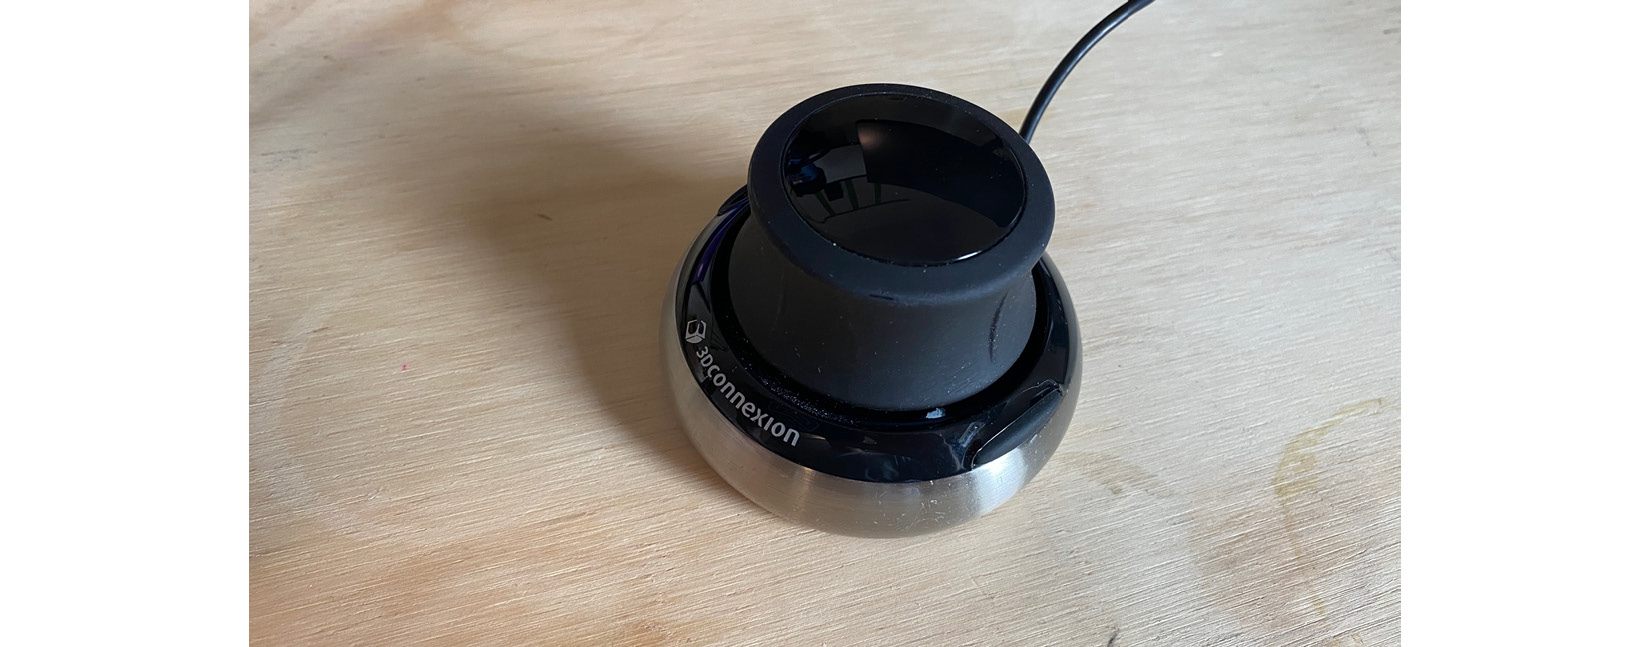
Figure 10.14 – Standard SpaceMouse
At the other end of the spectrum is the SpaceMouse Enterprise (this costing $499 USD). In addition to the puck to move through 3D space, this bigger model offers dozens of programmable shortcut keys. One of the disadvantages of using a SpaceMouse is that you have to dedicate your non-mouse hand to controlling the puck, which means taking your hand off of the keyboard. All those beautiful shortcuts you have created end up going unused unless you want to swap your hand back and forth from 3D mouse to keyboard, repeatedly.
The SpaceMouse Enterprise remedies this situation by giving you a slew of customizable buttons as well as dedicated modifier keys, and even short cuts to specific views! With a standard mouse in my right hand and a SpaceMouse Enterprise in my left, I rarely have to touch the keyboard for anything other than typing in component names or when I first save a model.
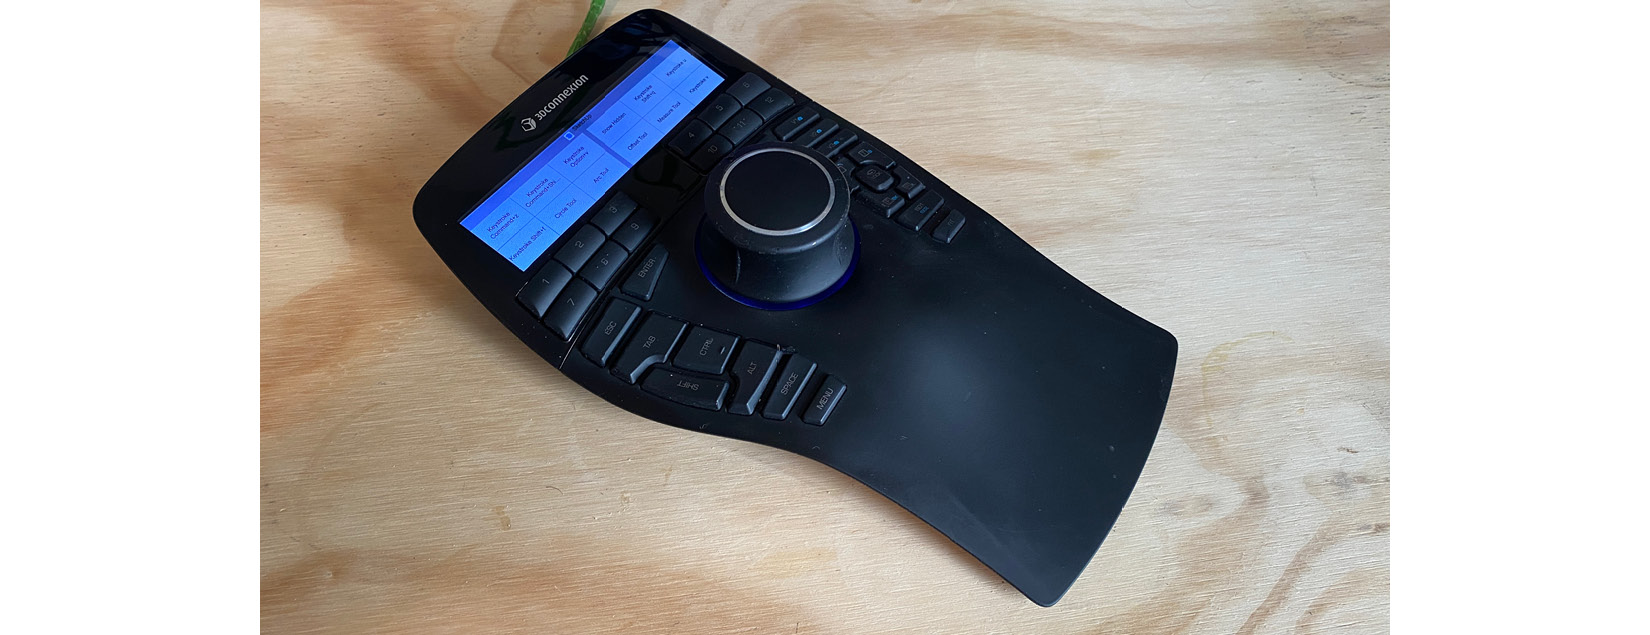
Figure 10.15 – The SpaceMouse Enterprise
3D mice are a great way to level up your SketchUp skills. They speed up design by putting the load of model navigation on your non-dominant hand and will give a serious leg up to your model presentations with smooth navigation. If you have the means to purchase such a piece of hardware, you will likely become one of the many 3D modelers out there who swear by this piece of hardware.
Committing to a 3D Mouse
If you do plan to enter the world of 3D mouse use, be forewarned that there is a learning curve. The first time someone uses a 3D mouse, they end up spinning their model off into no-man’s land or zooming right through it. It will take time to get used to using it and even more time before you become capable of smoothly swooping through your model. When I decided to learn to use a 3D mouse, I actually disabled the scroll wheel on my mouse for three days. This forced me to learn to use the 3D mouse to move through my models. At this point, I am so used to using the 3D mouse I actually feel a subtle pain any time I use SketchUp without it!
Author’s recommendation
Once again, I want to say that you do not need a 3D mouse. They are optional peripherals, and you can be an amazing SketchUp modeler without one. Having said that, I can tell you that I am a quicker modeler when I am using a 3D mouse than when I am not. When I model with my 3D mouse in front of people, they always ask how I move so smoothly though the model. My personal experience is that they do help and did bring me to a new level of ability in SketchUp.
Having said that, I actually use two different 3D mice. When I am at my desk, I use a SpaceMouse Enterprise. I love all of the programmable buttons and how I can keep my hand in one place and get to every important key while moving through the model with the puck. I also have a standard SpaceMouse that I keep in my backpack so I can plug it in if I am modeling anywhere outside the office.
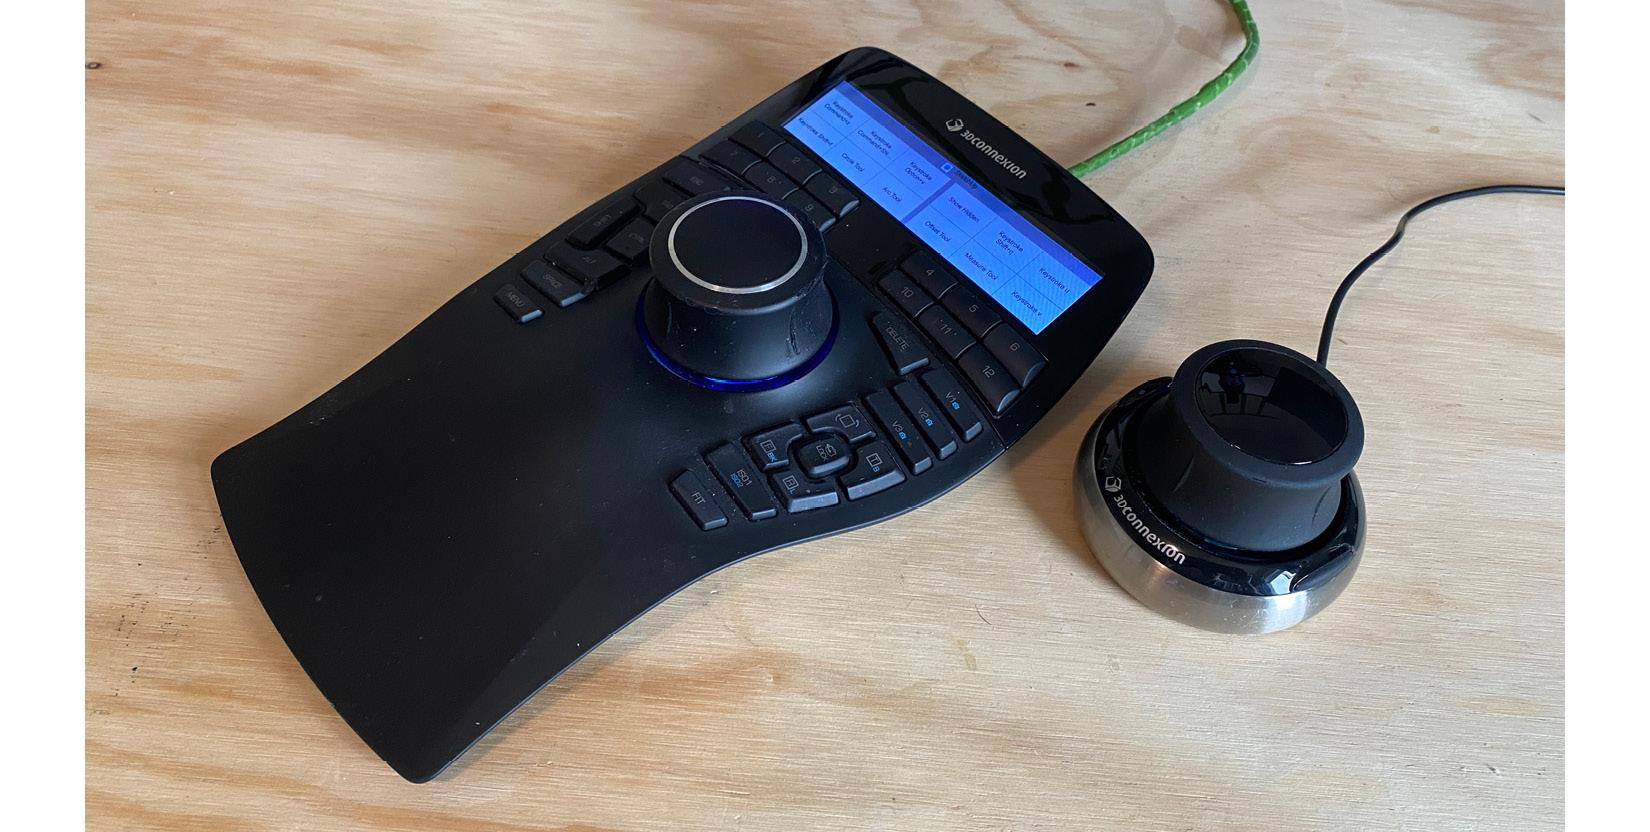
Figure 10.16 – My two 3D mice
If you feel like you have plateaued with your SketchUp growth and are looking for a way to get further than you can with a standard mouse setup, or if you find yourself presenting a lot of SketchUp models to others, a 3D mouse may be worth considering.
Summary
With that, we have looked at all of the peripherals that can be directly used with SketchUp. It is important to say again, hardware alone will not make you a better 3D modeler. Setting up your software the way you need it, and practice are the key to being a stronger 3D modeler in SketchUp. Alongside that, however, the right set of peripherals can help get you just that much more efficient than you currently are. Whether it is upgrading your standard gear like your keyboard, monitor, or mouse, or adding something like a tablet or 3D mouse, there is a possibility that the right peripheral may help you to level up your SketchUp skills.
With this, we have looked at how hardware can add to SketchUp. Up next in Chapter 11, What Are Extensions?, we will be looking at how we can add software to SketchUp that will increase your modeling capabilities and help you to level up!