Adding a Sunburst Effect

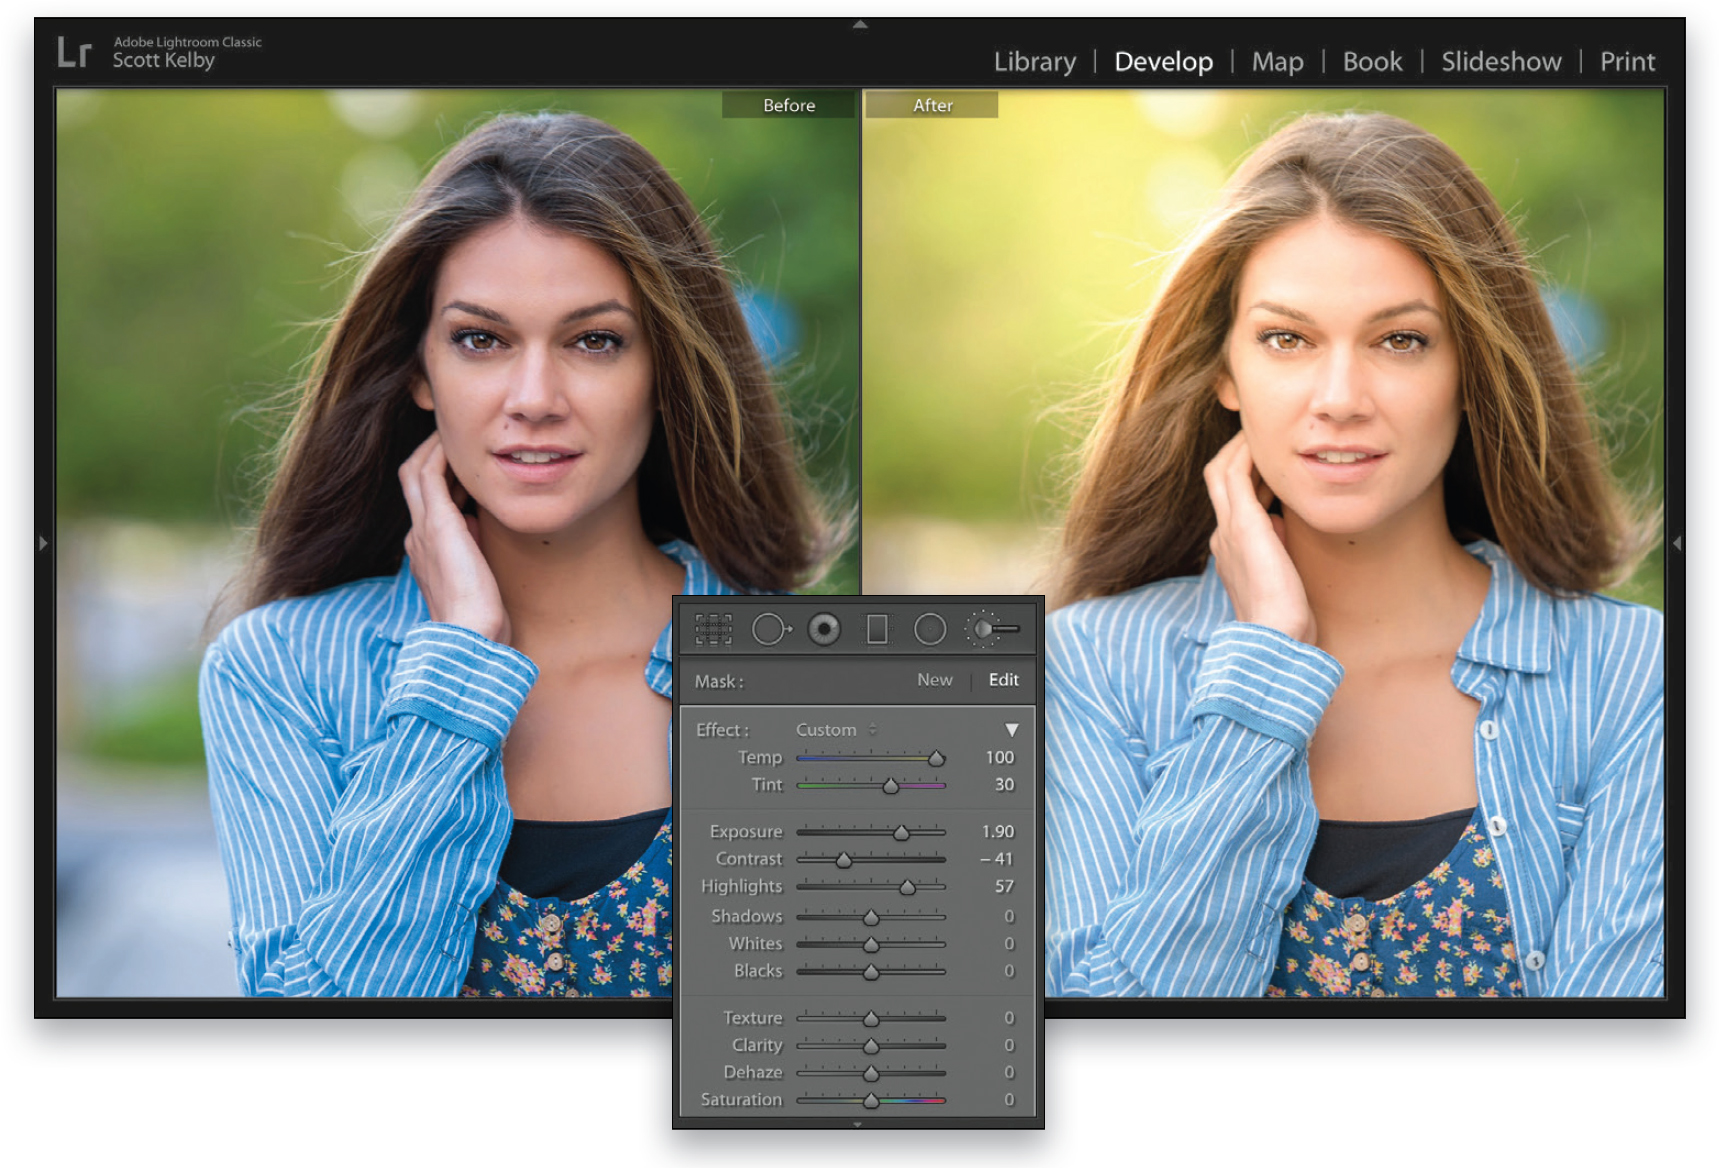
Adding a low-contrast lens flare look kinda goes against what we’ve been trying to avoid for years (lens flare), but if you haven’t been asked to apply this effect to your portraits yet, you probably will be, so it’s worth knowing. Essentially, we’re going to add a giant orange ball of soft light to our image.
In Lightroom: In the Develop module, choose the Adjustment Brush (K) from the toolbox near the top of the right side Panels area. Then, in the panel of adjustments that appears, double-click on the word “Effect” to reset all the sliders to zero. Now, drag the Temp slider all the way to the right (toward yellow) and the Tint slider to the right to 30 to give our “sun” a lot of warmth. Increase the Exposure slider to around 2.00 to brighten our sun ball, lower the Contrast to –41 to simulate how a real lens flare would wash out the contrast, and then crank up the Highlights to around 57 to help make it glow a bit by blowing out the highlights a bunch. Now, make your brush size really huge, using the Right Bracket key (]) on your keyboard, and click it once where you want your warm sunburst to appear. If it needs to be more intense, go to the top of the Adjustment Brush panel, click on New, and then click the huge brush again right over where you clicked the first time. This has kind of a doubling effect. Well, not kinda. It is a doubling effect.
In Photoshop: This works the same in Photoshop’s Camera Raw, so open the image in Camera Raw (or go under the Filter menu and choose Camera Raw Filter), and then follow the Lightroom steps above.