Removing Fly-Away Hairs along the Outside

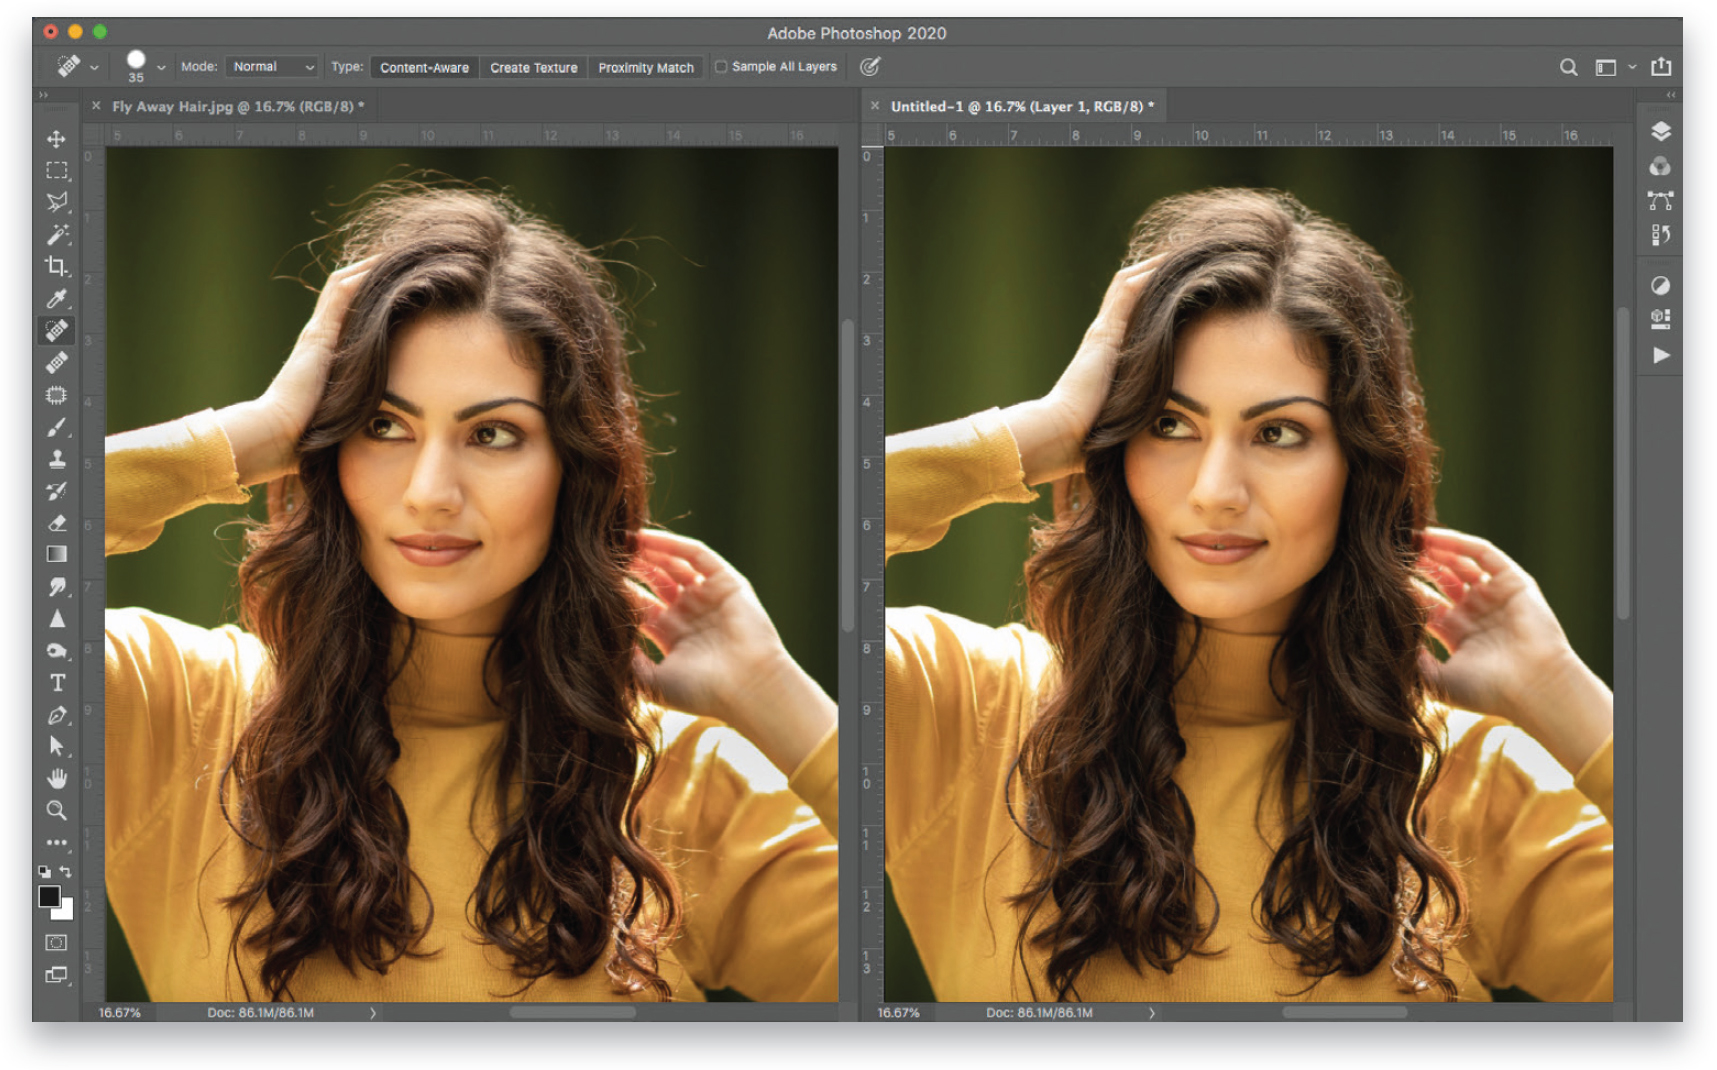
This one’s kind of tough to do in Lightroom because, generally, its Spot Removal tool doesn’t work well for removing fly-away hair, so I recommend using Photoshop instead, which makes it quick and easy. You’re going to use two tools: (1) The Spot Healing Brush tool, found over in the Toolbar on the left (J; its icon looks like a Band-Aid, with a half circle on its left). Make your brush size a little bit larger than the fly-away hair you want to remove (using the Left and Right Bracket keys on your keyboard), then start at the end of the fly-away hair and paint a stroke going back, toward the head, but stop right before you reach the main hair on the head. The reason we stop is because the Spot Healing Brush tends to smudge things when it reaches that main part of the hair. So, at that point we switch to (2) the Clone Stamp tool (S; its icon looks like a rubber stamp) because it doesn’t smudge at all. So, get that tool, choose a small soft-edged brush from the Brush Picker up in the Options Bar, press-and-hold the Option (PC: Alt) key, and then click in a clean nearby area of the background right near where you stopped with the Spot Healing Brush. Now, move your cursor over the stray hair, make your brush size just a little larger than it, then paint over that last little bit of leftover fly-away hair and the background area you sampled is cloned over it. You’ll probably wind up switching back and forth between these two tools until all the fly-away hairs are gone (as seen above on the right). By the way, you’ll find times where, for some reason, the Spot Healing Brush doesn’t smudge, so when it doesn’t, just consider that a bonus.