
Reducing Shiny Spots on the Skin

These shiny areas make your subject’s skin looks sweaty or oily or both. Here’s how to quickly reduce them, while leaving the highlights intact:
In Lightroom: In the Develop module, choose the Spot Removal tool (Q) from the toolbox near the top of the right side Panels area. Make the brush size a little larger than the shiny area you want to remove and click once on it, or paint a stroke over it, to remove it completely. If Lightroom picks a weird area to sample from, click-and-drag the second circle to a new location to choose a different area to sample from. The shine is now fully gone, but so are the highlights. We’ll bring them back by lowering the Opacity slider, in the tool’s adjustment panel, until they come back. This slider kind of works like “undo on a slider.”
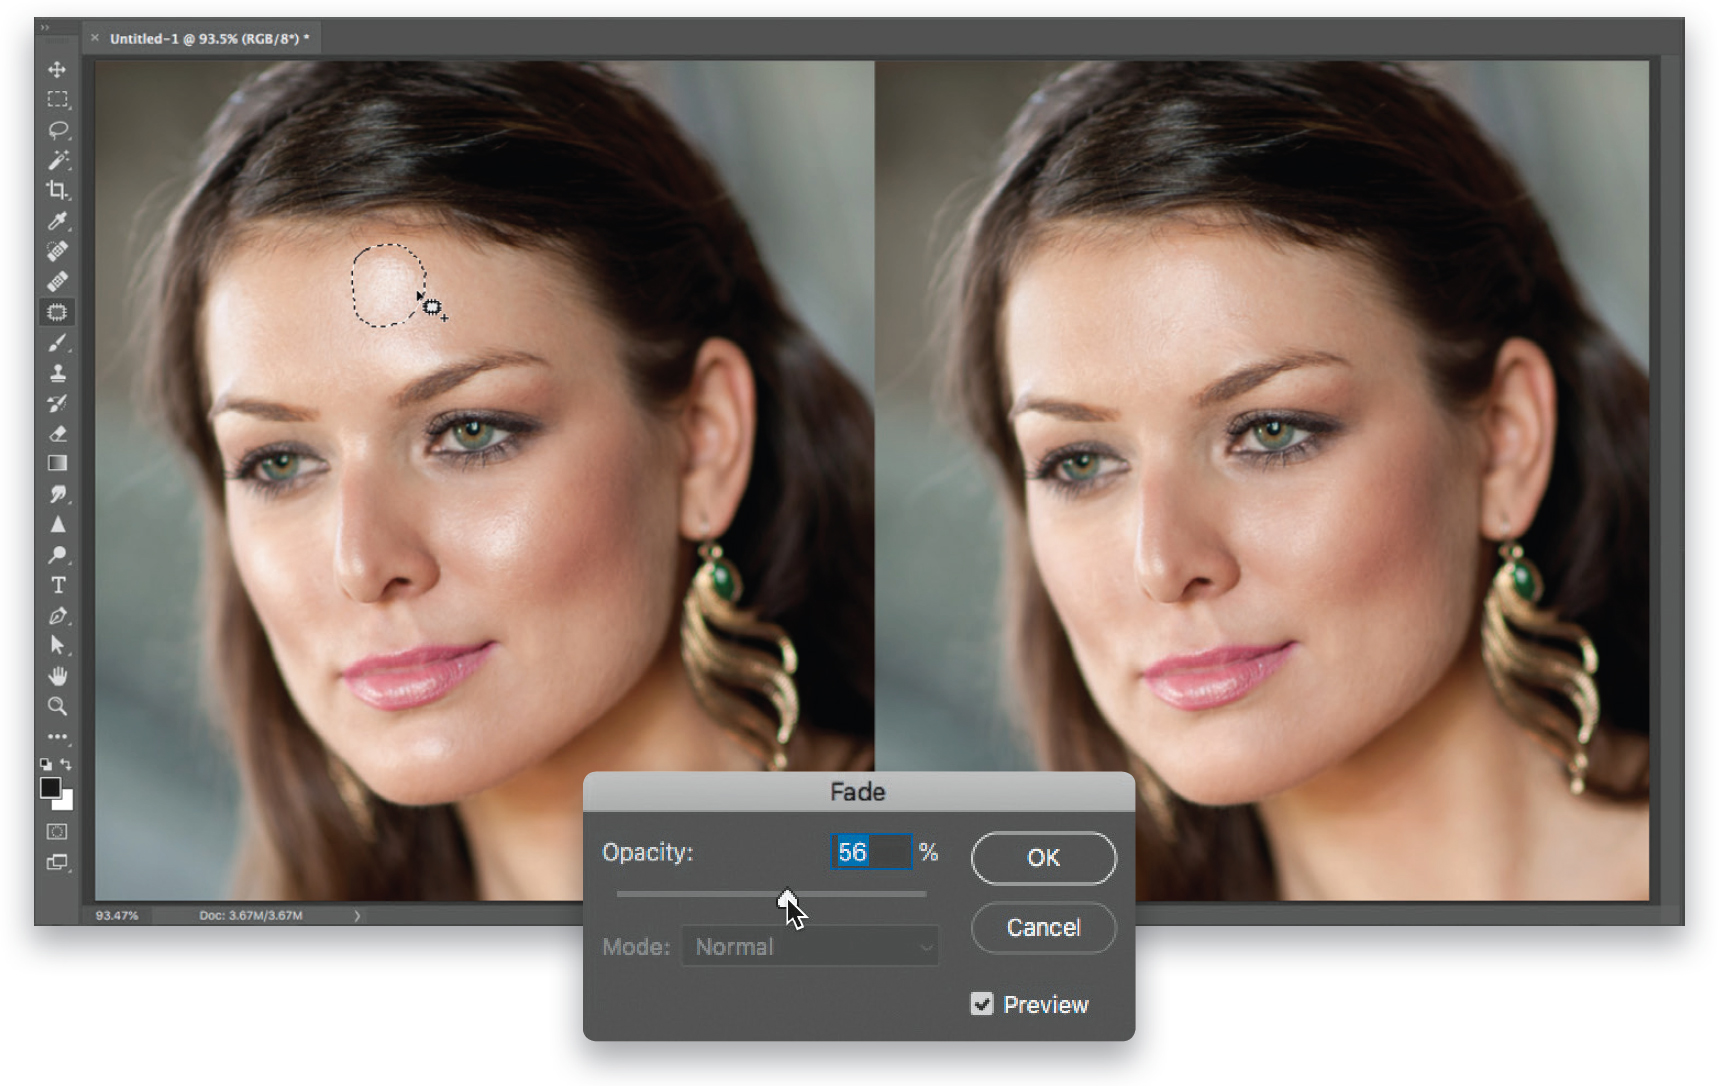
In Photoshop: Open your image, then get the Patch tool from the Toolbar on the left (or press Shift-J until you have it. You can use the Healing Brush tool instead [see the previous page], if it’s a really small shiny area) and make a loose selection around a shiny area (like you would with the Lasso tool). Now, move your cursor inside the selection, click-and-drag it to a clean nearby area, and you’ll see a preview of what the removal will look like inside your originally selected area. When it looks good, release your mouse button and the selection snaps back into place, removing the shine completely. To bring back some of the lost highlights, go under the Edit menu and choose Fade Patch Tool to bring up the Fade dialog (seen in the inset above), and then drag the Opacity slider to the left to bring back some of the highlights (it works like “undo on a slider,” so don’t drag too far left or the shine will come back).