
Content-Aware Move Tool
Perhaps this tool, introduced in Photoshop CS6, should be called the Often Jaw-Droppingly Amazing tool. It is definitely a perfect example of our ongoing “compared to the alternative” concept. This tool moves a selected area and attempts to cover up the original position—automatically. Here’s our couple again, but this time we want to move them to a different position on the photo. In the past, that would have meant moving the couple (fairly easy) and then covering up their original position (potentially very time-consuming).
The Content-Aware Move tool does it all for you, often giving results that are pretty darn amazing. And it works with layers so you can continue to tweak the pixels. To get started, in the Options bar, set the Mode to Move, the Adaptation to Medium, and make sure Sample All Layers is active (Figure 2.47).

Figure 2.47 In the Options bar, set the Mode to Move.
Then make a loose selection around the pixels you want to move/replace: in this example the couple.
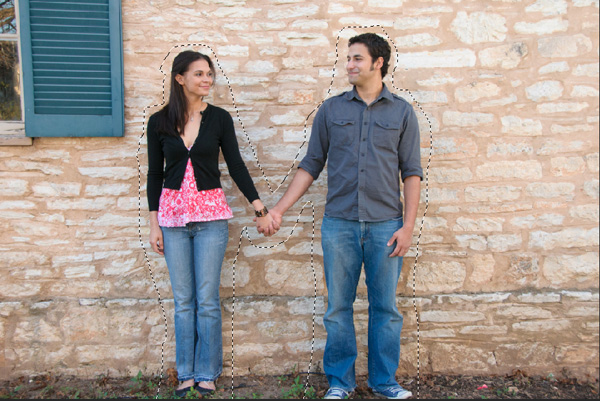
Figure 2.48 Select the elements in the photo to move.
Drag the selected pixels to the new position and let go—and wait.
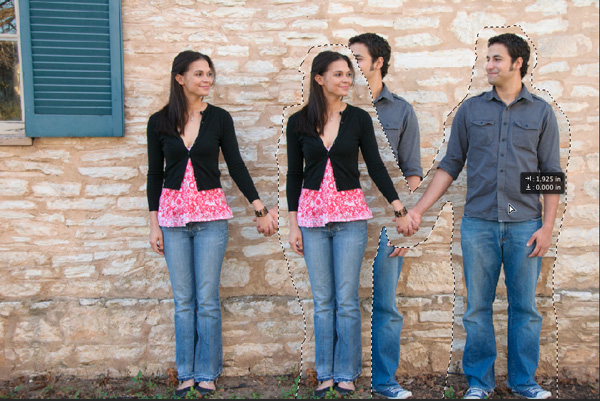
Figure 2.49 Drag the selection to a new position.
Photoshop does the rest, both moving the pixels and generating new pixels—on the blank layer—to cover up the original pixels. Here’s a look at the results, and what the layer looks like with the new position and new pixels.
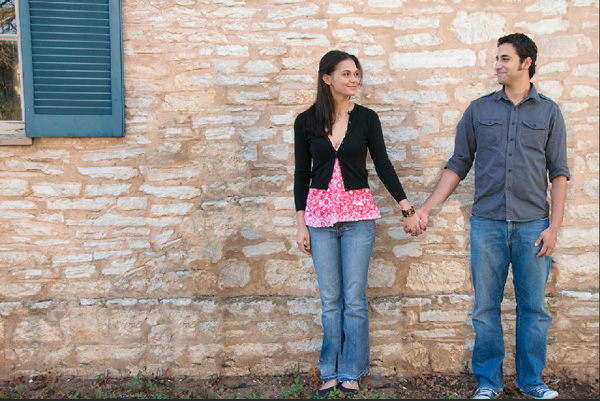
Figure 2.50 The results of a Content-Aware Move.
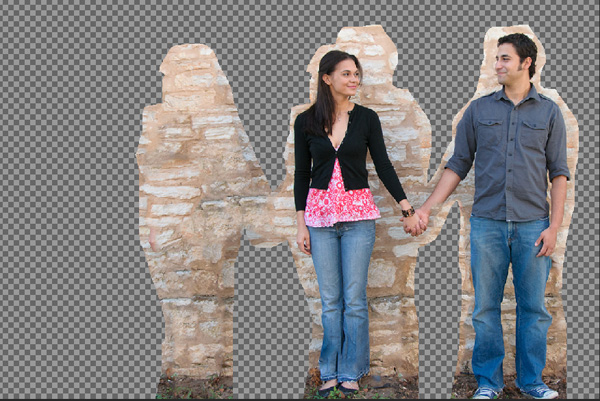
Figure 2.51 The layer with the new position and new pixels.
To show you the results, I immediately deselected everything after the Content-Aware Move tool was finished, but it’s actually best if you don’t deselect too quickly. That’s because the Content-Aware Move tool has the same Adaptation menu as the Patch tool and it works the same way: with the selection still active you can experiment with different settings to see what you get.
I wish I could tell you that it certain situations you should use certain adaptation settings, but I haven’t found that to be the case. In fact, in several instances I would have expected that a setting of Strict would be best but instead Very Loose gave the ideal results—or vice versa. So be prepared to try different adaption setting before you deselect.