
Once the server’s name and IP address are properly configured and the server isn’t going to go to sleep at just the moment when you need to transfer that one big file for the day, it’s time to install the server software. To do so, open the App Store and search for Lion Server. Click on OS X Lion Server and purchase the app.
Once the Server app is installed, it will appear in the Dock. The next step is to install the components. To do so, open the Server app from the Applications folder. When opened for the first time, Server prompts you to install the components. Click on Install to complete the OS X Server installation.
Once the components are installed, install the Server Admin tools, available on the Apple website at http://support.apple.com/kb/DL1457. The tools will download as a standard Apple package. Run the installer, selecting the default options until the package installation is complete.
Note
In some cases, you won’t actually need the Server Admin tools, but they are great for troubleshooting and many services do require them, so they should be installed as a part of the initial Lion Server setup process.
Once the Server app, its components, and the Server Admin tools are installed, you have a fully functioning server. You can then start services, configure roles that the server will fill, and use the server. But before you begin in earnest, first let’s check some settings and finish some configuration options before configuring services.
Sure, you checked the hostname. But I cannot underscore enough the importance of DNS and the name of the server. For good measure, once the server has been installed, check the hostname one more time. This doesn’t have to happen at the command line, but instead we can use the newly acquired Server application.
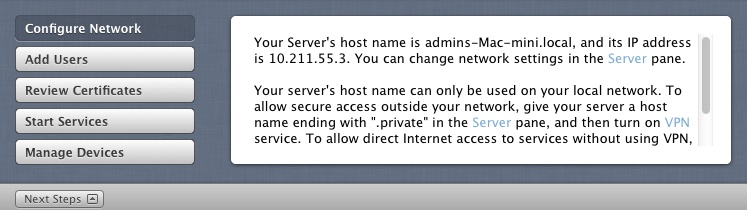
Open the Server app from the Dock (or the /Applications directory) and click on the Next Steps drawer toward the bottom of the screen if it is not already open. The first item in the list is Configure Network. Here, you want to see a message reading: Your network is configured properly. Or you can change network settings in the Server pane if the server’s name is not properly configured (Figure 2-5).
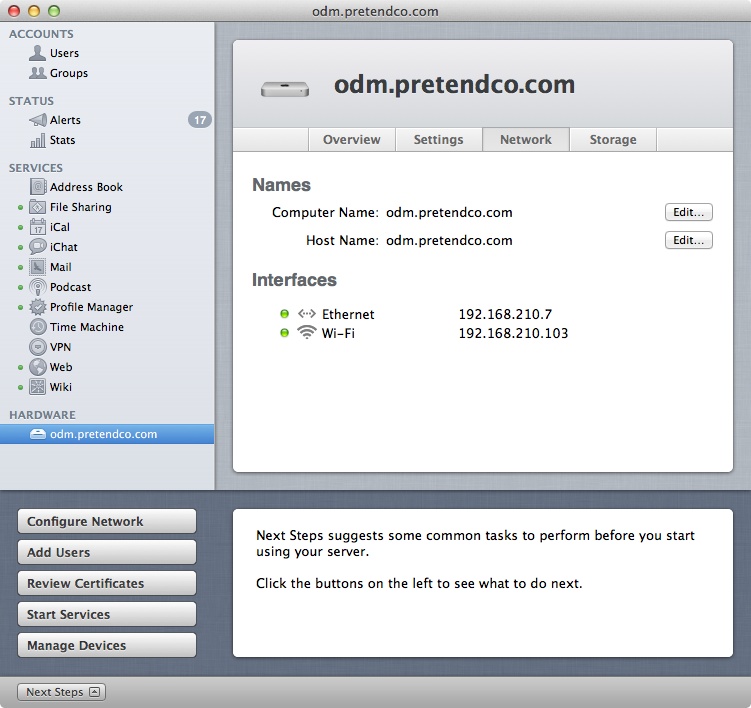
If the network is not configured properly, DNS would have been installed by default. The DNS server, configured using Server Admin rather than the Server app, is covered in Chapter 9. But if you see an entry in the DNS zones in Server Admin for the server, note that the entry is automatically generated any time that the server’s forward and reverse DNS are not in alignment with the hostname. If you wish to change the hostname at this point, rather than use scutil, click on the name of the server in the Server application’s sidebar and then click on the Network tab (Figure 2-6).
Here, clicking Edit invokes a wizard that can be used to change the name of an OS X Server. If you change the name, then it is worth noting that the SSL certificate will likely reference an invalid hostname.
SSL (Secure Sockets Layer) is a technology used to secure network traffic. Using SSL with services increases the security of those services drastically. Although not required for most services, the security benefits of SSL mean that you will want to use SSL with as many services as possible.
Each server has an SSL certificate installed during the installation of OS X Server. These certificates are self-signed and by default are fully functional with the services provided for the most part. However, in many cases, it is worthwhile to install your own new certificate, as the one that is present might not be correct (e.g., if the hostname for the server was different at the time the certificate was created). To do so, open the Server application and click on the name of the server in the HOSTNAME section of the Server sidebar.
Click on the Settings tab and then click on the Edit… button in the SSL Certificate field. At the drop-down menu, click on the cogwheel icon and then click on Manage Certificates…, as seen in Figure 2-7.

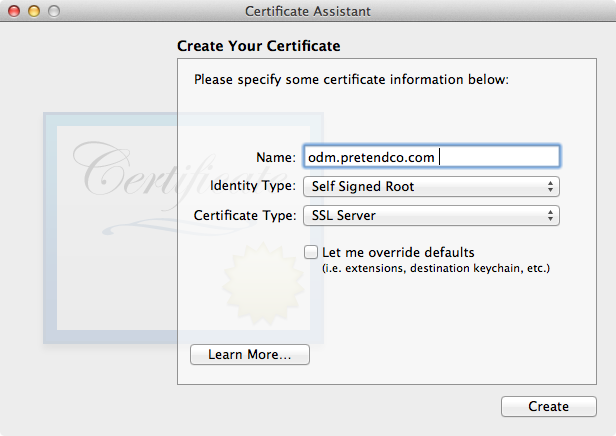
At the Manage Certificates screen, click on the plus sign (“+”) and then click on Create a Certificate Identity (unless you have purchased a certificate and you therefore have a certificate to import, then click on Import a Certificate Identity). The Certificate Assistant will then open. At the Create Your Certificate screen, provide the server’s hostname in the Name field and choose “Self-Signed Root” as the “Identity Type” and “SSL Server” as the “Certificate Type.” Also, leave the box for “Let me override defaults” unchecked and click on the Create button (Figure 2-8).
A screen will then appear asking if you want to export the certificate that was just created. Click on Always Allow here in order to allow access to the certificate.
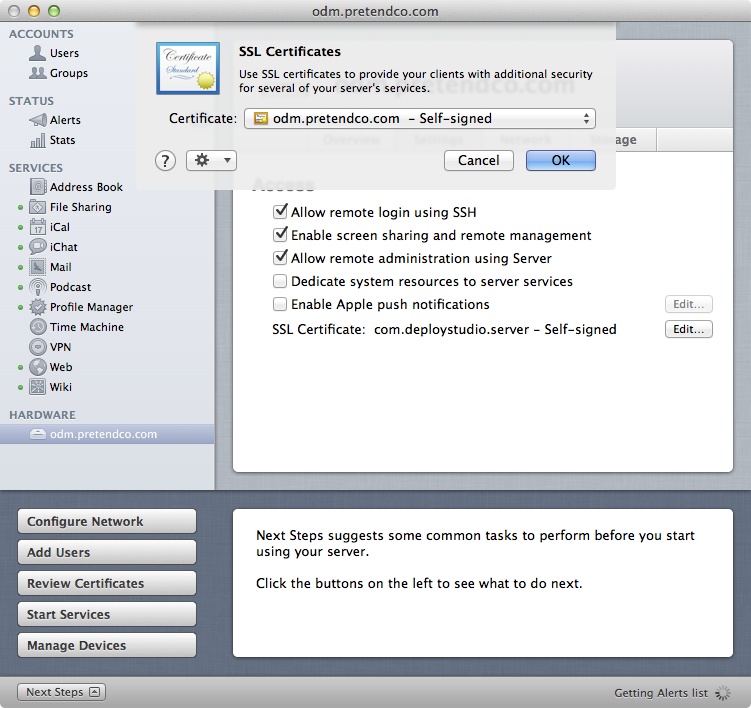
The Server app should still be at the Settings screen for the hostname. Click on Edit beside the SSL Certificate field and at the resultant screen, click on the Certificate drop-down menu and then select the newly created certificate from the list shown. Then click on the OK button to select the certificate (Figure 2-9) and then note that the configuration settings will be written to OS X Server (indicated in the lower-right corner of the screen).
Once the certificate has been installed, clients will need to trust it. If you purchased the certificate from a certificate authority (e.g., GeoTrust or Thawte), then there will likely be nothing required to do on client systems in order for them to trust it. However, if you are using a self-signed certificate, then you will need to install it on client systems. For some services, such as Mobile Device Management (MDM is covered in Chapter 9), this is part of the setup process.
The date and time is a very important aspect of OS X Servers. Kerberos, a key element of securing authentication traffic, and other areas of the system leverage the date and timestamps to generate encryption algorithms. Client systems using time that is five or more minutes off (by default) will fail when attempting to authenticate via Kerberos, and there are other problems that can arise as well. Therefore, OS X Server acts as a network time server, using the popular open source Network Time Protocol (NTP). NTP is enabled by default, a setting that can be disabled if you’d rather use Apple’s time server (set at time.apple.com from clients and servers by default) or one other than the server (e.g., if you have multiple servers).
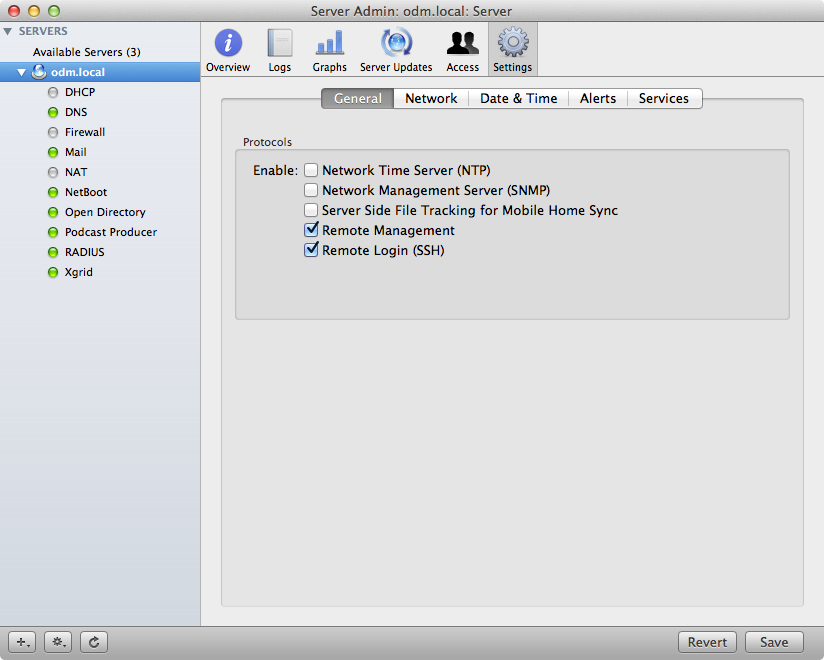
To disable NTP serving, open Server Admin (installed previously in this chapter) and click on the name of the server in the SERVERS sidebar. Then click on Settings in the Server Admin toolbar (that runs atop the screen) and uncheck the box for Network Time Server, as in Figure 2-10. The NTP services will then stop.
To change the NTP server that you are using on client computers or network servers, open System Preferences from the Apple menu and click on the Date & Time System Preference pane. Here, you will see that by default, clients automatically update their times. By default, time.apple.com is listed in the “Set date and time automatically” field. To change the settings to a local NTP server (or one on your network), enter the name or IP address of the NTP server you would like to use.
Note
There is no Save button on the System Preference screens. I usually like to click on Show All to go back to the main System Preference screen and then click Date & Time again to make sure that the setting was successfully changed.
While all OS X Servers by default run NTP services, you only need one. Therefore, in most environments, you should disable NTP on all but one (or two if you would like to cluster NTP services) of the servers and then link each of the servers and clients to the newly configured NTP server.