Creating users can be done in the Server application or using the Workgroup Manager application. When you create a user account, it can be stored in one of two places: in the local directory service (which is comprised of flat plist files stored in /var/db/dslocal/nodes/Default/users) or in the Open Directory database (by default, Lion Server does not run a shared Open Directory database when installed). We’ll describe using Open Directory later in this chapter, but the important thing to consider is that if you create users in the Server application before promoting a server to an Open Directory Master, the users will be created in the local database and will not be shared between servers and client computers. If you create users in Server after upgrading to an Open Directory Master, the users will automatically be placed in the Open Directory database.
To create a new user, open the Server application from /Applications. Then, click on the Users entry under the ACCOUNTS section of the Server sidebar. Click on the plus sign (“+”) and then provide the following information in the supplied fields (Figure 2-11):
- Full Name
The name of the user (e.g., Harry Seldon)
- Account Name
The short name of the user (e.g., hseldon)
- Email Address
The user’s email address (e.g., [email protected])
- Password
The password for the user (e.g., i<3daneel)
- Verify
Enter the password for the user again (e.g., i<3daneel)

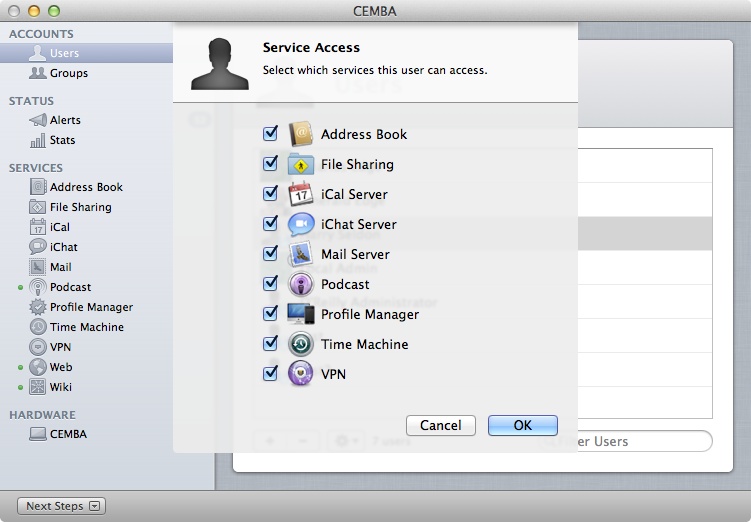
Click on the Done button when you have provided the appropriate information. Then, click on the cogwheel icon with the new account highlighted and click on Edit Access to Services. By default, all services will be enabled for the newly created user account. Here, uncheck the box for each service you do not want the user to have access to on the server (Figure 2-12).
Click the OK button once you have selected the appropriate services to complete the account setup process.
Note
There is no need to disable services that are not installed on the server, unless you are planning to host those services on another server within the same Open Directory domain.
One of the more important reasons to have users on servers is to put them in groups so that resources can be assigned to those groups. For example, when creating a file share (covered further in Chapter 3), adding multiple users to each share can be time consuming and get increasingly convoluted as time goes on and the environment becomes more complex. Instead, adding users to groups makes it easier to track access to objects, add users, and configure permissions. Whether groups exist in Open Directory or locally follows the same logic as with the user accounts. However, a local group can house Open Directory users, further complicating matters. In general, if you are going to use Open Directory accounts, it is a good idea to use Open Directory groups with them.
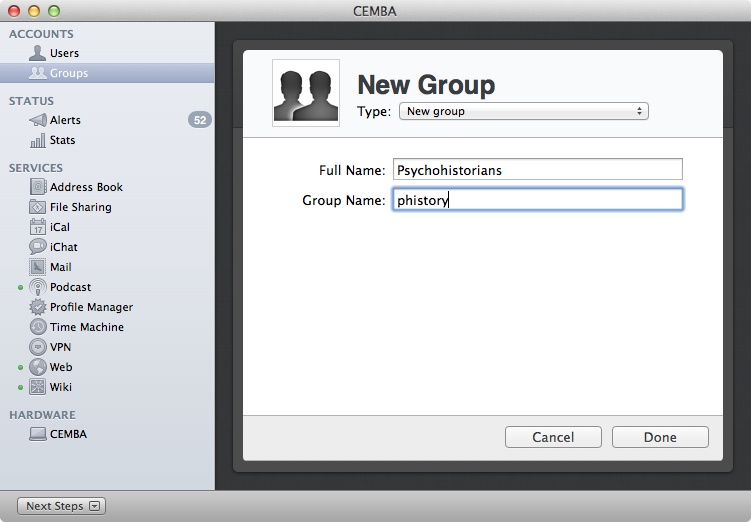
To create a group, open the Server application from /Applications. Click on the plus sign to create the new group, providing a full name and group name in the respective fields (group name is the equivalent of the user account short name field). Click on Done to create the new group (Figure 2-13).
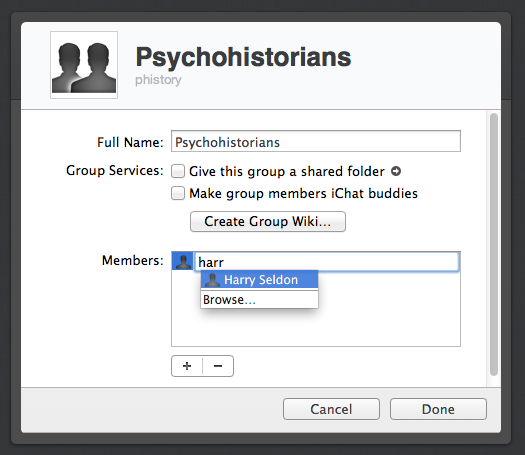
There is little reason to have a group without users in it. So let’s add some. Once the group has initially been created, click on the pencil icon and then use the Members section of the screen to add and remove members. Click on the plus sign and then type the short name of a user to add to the group. While you are typing, the field will start looking to autocomplete the user’s name, which can be seen in Figure 2-14. When the query finds the right account, click on the account name or just hit the Enter key.
Repeat the process by clicking on the plus sign for each user you wish to add to the group. When all of the members have been added, click on the Done button. Now that you have created your first group, it is worth mentioning that you can also manage users and groups with Workgroup manager, which we’ll cover in the section Using Workgroup Manager later in this chapter.