
One of the most important aspects of centralizing your data into a single system is to make sure that the server is protected. Time Machine is free and built into each and every OS X Lion computer, including OS X Server. In this section, we will look at using Time Machine to back up a server and the clients that use the server (e.g., to grab those iTunes and iPhoto libraries that are stored locally on each computer).
Time Machine is not the best backup program ever conceived. But in addition to being free, Time Machine is incredibly easy to configure. In some cases, you will outgrow Time Machine. For example, you will want to have a copy of your data on tape, which Time Machine doesn’t work with. Or you may look to perform cloud-based backups, which Time Machine isn’t engineered for. But for most companies, Time Machine will work perfectly well to back up the operating system itself.
Configuring Time Machine to back up a server is similar to using Time Machine to back up a client computer. To begin, open System Preferences from the Apple menu and then click on the Time Machine System Preference pane. As you can see in Figure 3-8, there are only three buttons in the System Preference pane. Let’s start by clicking on the Options button.

When clicked, the Options button shows a list of items to exclude from backups in the “Exclude these items from backups” section, which can be seen in Figure 3-9. Here, click on the plus sign (“+”) to add directories to those that you do not want to back up. This brings up a standard browse dialog; select any directories that you specifically do not need to back up and then click on Exclude to add directories to the list (for the purposes of this example, we’re not going to exclude any items). There are also three checkboxes on the screen. These include:
- Back up while on battery power
Continues to back up, even when the system is not connected to a power source and is running on battery power (primarily for laptops, but also useful in environments with surge protectors). This option is almost universally a good idea to enable.
- Notify after old backups are deleted
Informs users when old files are removed from the backups. This option is almost always a good idea as well.
- Lock documents after last edit
Sets the Versions setting for documents to locked after the time indicated in the field. This option is not pertinent to servers, as Versions data is saved to local computers rather than on servers.

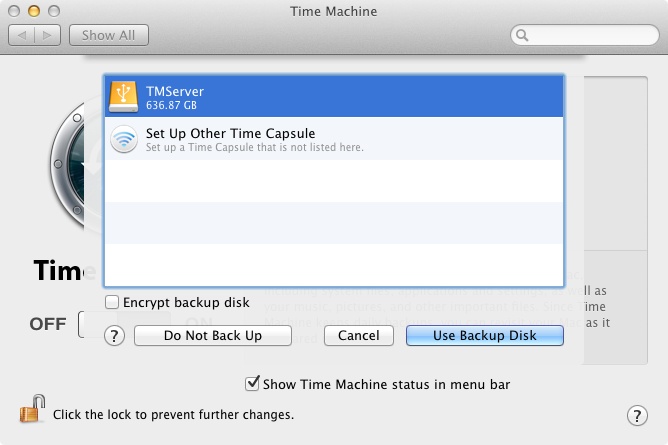
In our example, we have configured no exclusions from our backups and left all three of the checkboxes checked (Figure 3-10). Click on the Save button to configure Time Machine with the changes that best work for you. Next, click the ON button and the Select Disk option will appear. Here, simply choose the volume that you will back up to. In this example, our volume is a USB disk formatted in one partition called TMServer. Once selected, click on Use Backup Disk.
Backups will wait 120 seconds from when the Use Backup Disk button is clicked before they will start. Once started, the Apple menu for Time Machine will then show that backups are in progress and when clicked, the Time Machine System preference pane will show the oldest, the most recent, and the time the next backup is scheduled.
Once backed up, data is restored using the Time Machine application, or booting to a Recovery partition and choosing to perform a Time Machine restore (e.g., bare metal restores).
Now that there’s a solid backup of the data that is unreproducible in the event of a failure, let’s turn our attention to getting to a point where we can restore any items that are often not restorable from within Time Machine, starting with all of the usernames and passwords created on the server in Open Directory.
One way to keep a good backup of Open Directory is to export settings after setting up new accounts. Backing up Open Directory is done manually using Server Admin. Once new accounts are created in Workgroup Manager or Server, open Server Admin from /Applications/Server. Then click on the Open Directory service in the Server Admin SERVERS sidebar. Clicking Archive in the Server Admin toolbar then brings up the screen used to export the contents of Open Directory.
Click on the Choose button to bring up a standard OS X browse dialog. Here, browse to the folder that you would like to back Open Directory up to. Then click on the Archive button (Figure 3-11) to run the backup.
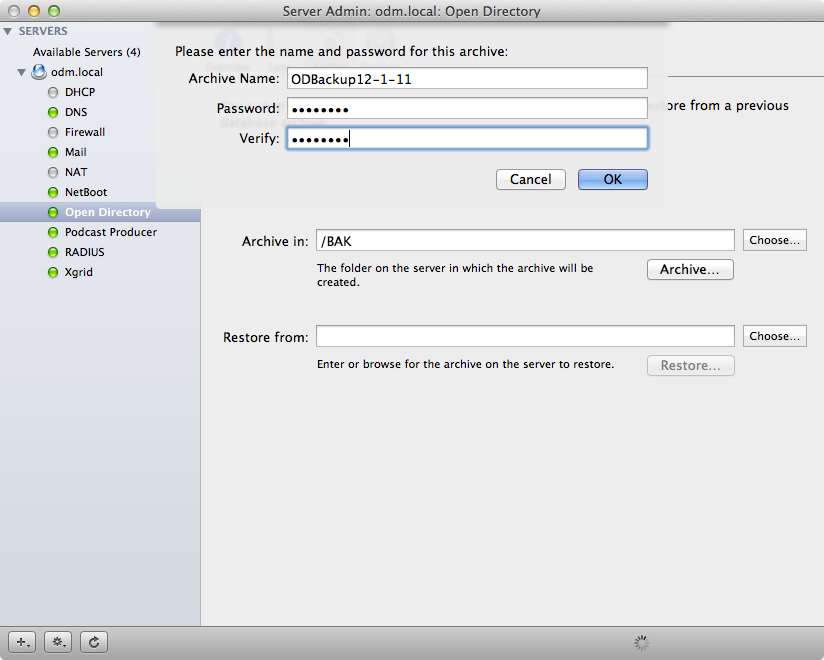
When prompted, provide a password that will be used to restore the backup when needed. Restoring backups is then performed by using the Choose button in the “Restore from” section of the Open Directory Restore screen and choosing the file, providing the same password when prompted.
Backups should always be automated. Especially if a lot of accounts are being added and removed from Open Directory, causing daily change in the Open Directory database. In order to facilitate automating the backup of Open Directory, consider using 318’s Open Directory Auto Archiver, available at http://techjournal.318.com/scripts/open-directory-auto-archiver. This package will automatically configure the server to back up Open Directory databases on a nightly basis, likely saving you considerable time scripting your own backups.
Provided that Open Directory backups are in flat files and their directory is not excluded from backups, they will then be backed up in the standard Time Machine backups for the rest of the computer.
A server can take a long time to set up. And once set up, it can take even longer to get the settings exactly as they were in the event of a crash. Time Machine is great for many things, but restoring settings for a server is not one of them, unless doing a full system restore. Therefore, it’s always a good idea to have a layered approach to backups, one layer being to restore the server to working order in the event of corruption to a service configuration. In order to do so, one must first have a backup of service settings that can be restored on a service-by-service basis.
Each service has a built-in set of command-line options used to
list, back up, and even restore the service’s settings. Service settings
can be backed up from Server Admin, using the Export -> Service
Settings item in the Server menu; however, only service settings for
services shown in Server Admin are backed up here. Services that are
configured in the Server app do not get backed up by exporting service
settings. Therefore, to back up a service’s settings, the
serveradmin command can be used. Simply run
serveradmin followed by the settings verb and then
the name of the service whose settings should get backed up. The output
of this command is then passed into a text file used to back up the
service settings using the > followed by the name
of the file to pass the settings into. For example, to back Address Book
Server settings up into a file called
addressbook.settings, use the following
command:
sudo serveradmin settings addressbook > addressbook.settings
By running this command nightly, per service, one could automate the backup of each service’s settings. But because we’re strong proponents of backing up settings and data as often as possible, and because we’re not fans of telling people they need to write scripts, we recommend using a program called SABackup to automate backing up service settings on a nightly basis.