The mail server isn’t going to be very useful unless you configure a client to access the services it hosts. The two main platforms that Lion Server is built to host mail for are iOS-based devices (e.g., iPad and iPhone) and Mac OS X clients (e.g., MacBook Air and MacBook Pro). The protocols that are hosted by the mail server are standards-compliant and are accessible by any platform, provided that platform supports IMAP and POP, both of which are standards compliant mail protocols. In this chapter, we are just looking at Apple devices as clients, but the settings we use for those are also usable on other platforms (and with other mail clients) as well. We will also be looking at using IMAP for both devices. If you will not be keeping mail on the server and wish to use POP instead, then interchanging the IMAP settings for POP settings is a fairly straightforward process.
Configuring the mail client in iOS to work with a Mac OS X Server can be done manually or by using a configuration profile. Configuration profiles are covered more fully in Chapter 9, so here we will focus on manually configuring an iOS device to work with a Lion-based mail server. To get started, open the Settings app and then tap on the Mail, Contacts, Calendars setting in the Settings sidebar. From the Mail, Contacts, Calendars, Settings tap on the option to Add Account… (as seen in Figure 6-7).
At the Add Account… screen, you will be shown a number of options. Tap on Other.
The Other screen has buttons for adding mail, LDAP, CardDAV, and CalDAV accounts. Tap Add Account… (Figure 6-8).


Enter the name of the user (as it will appear to people they send mail to), the address (which is the email address for the user), the password (which is the user’s email password entered into the Server application when the account was created) and a description (which is a note about what the account is used for), and then tap on the Next button. Chances are that the server will not allow automatic configuration of the account on the iPad. Here, you can choose between POP and IMAP accounts (as referenced earlier, we’re using IMAP). The New Account prompt would then require the following settings (seen in Figure 6-9):
- Name
The name of the user, as it should appear to people receiving mail
- Address
The user’s email address
- Description
A simple description of what the account is used for (e.g., work email)
- Incoming Mail Server
The IMAP or POP server being used
- Outgoing Mail Server
The SMTP server being used

When providing names for the mail server, make sure that you have taken into account whether the name will resolve properly whether inside the network or logging in remotely. Also, many networks block SMTP, so it is never a bad idea to have users log into the VPN in order to send mail, which allows SMTP traffic even if the other network blocks such traffic (as the data is sent through the VPN tunnel).
Tap on the Next button once the settings are entered and the account will be set up. The user can then use the Mail app on the iOS device to send and receive mail through the server.
Note
There are settings for granularly configuring how the iOS device handles mail. These are found in the Settings app under Mail, Contacts, Calendars.
Configuring the IMAP client in Lion is very similar to doing so on an iOS-based device. Open Mail and then click on the Mail menu and select Preferences… to bring up the Mail Preferences screen. Then click on Accounts and click on the plus sign (“+”). The Add Account window appears. Here, provide the full name (the name that will appear in mail sent from the user), the email address (the email address of the user being configured as provided in the Server app when the account was created), and the password.
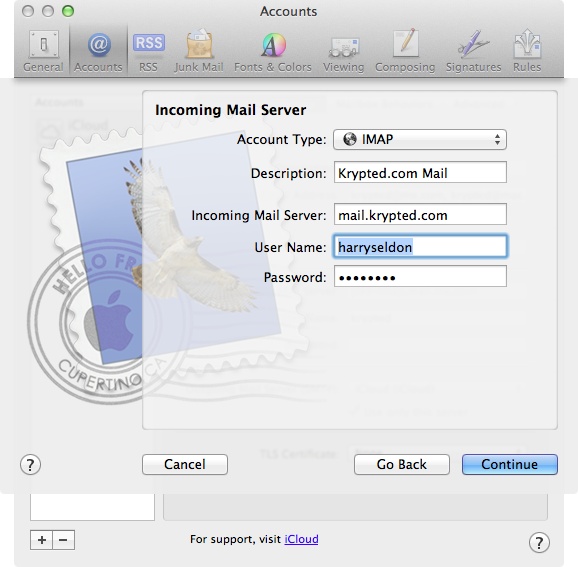
If an email autodiscover record has been created in DNS, then the account will automatically be configured. Because few domains still use these records, you will more than likely be prompted for the Incoming Mail Server screen. Here, provide the following information (as seen in Figure 6-10):
- Account Type
Select IMAP from the drop-down menu (unless you wish to use POP)
- Description
A short description about what the account is to be used for
- Incoming Mail Server
The IP address or DNS name of the email server
- User Name
The account name as provided earlier in this chapter
- Password
The password for the user’s account
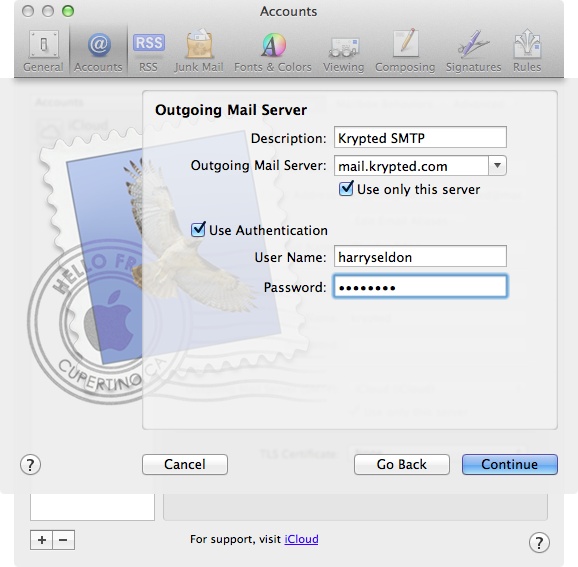
Click on the Continue button once the appropriate settings are provided and then the Incoming Mail Security screen comes up. Here, you want to use SSL if possible to keep the communications with the server as secure as possible. Click on Continue to bring up the Outgoing Mail Server screen. Here, provide a description in the Description field, the IP address or DNS name of the server in the Address field, the account name in the User Name field, and the user’s password from the Server application in the Password field, as seen in Figure 6-11.
Click on the Continue button and at the Outgoing Mail Security screen, check the box for SSL if you have a certificate available on the outgoing mail server (which is likely the same as the incoming mail server for most smaller environments). Click on Continue again and then at the Account Summary screen, check that the settings shown match those from the server, and then click the Create button. The new account will then synchronize with the mail server and if you can send and receive mail for the account, you have finished the setup process.
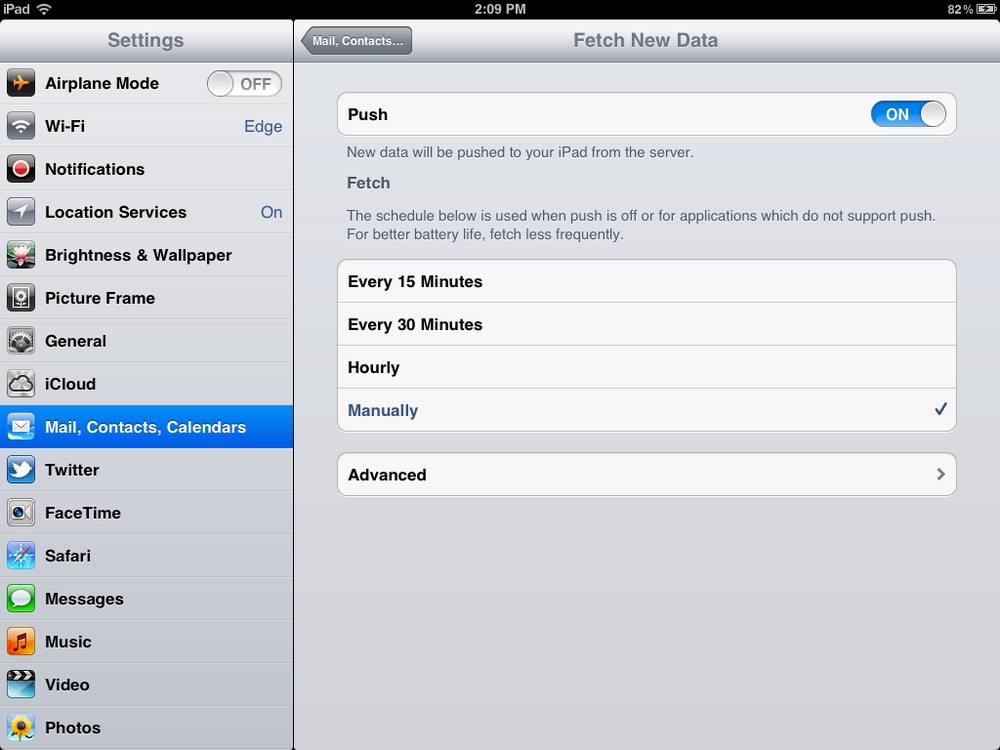
Traditional clients to servers pull information from the server. If an email is sitting on the server then the email will get synchronized on a time interval. But mobile devices (for which power consumption is critical), require a new way to interact with servers. Push notifications are different in that the mobile device doesn’t perform a pull on the server, but instead is notified by the server that there is something for the mobile device to access only when there is something new.
Setting up push with email in iOS 5 with Lion Server couldn’t be easier. To do so, open the previously configured mail account using the Mail, Contacts, Calendars option in the Settings app. Then, tap on the Fetch New Data button to bring up the Fetch New Data screen. Here, set the Push setting to On, as in Figure 6-12.
Once enabled, you will see a badge when new mail is available. In the Notification Center, accessible using the Notifications option in the Settings app, you will also have the option to more granularly configure where the notifications appear and how, as you can see in Figure 6-13.