
The previous section detailed how to get started with the freely available InstallShield LE software. While this approach can be helpful in some cases, for users of the Visual Studio Community, it is not an available option. Another consideration is for those projects where greater control of the installation process is required over what is available in Limited Edition. Finally, developers just may not want to rely on a third-party vendor for their project to be successful.
For these reasons and any that you may have, it is good to know that an alternative exists. Thanks to the freely available VS2015 Installer Projects extension provided by Microsoft, there is a way to develop your own custom installer with VS2015.
For this recipe, you can use Visual Studio Community 2015 or one of the Premium editions. If you have an existing project with an executable, you can use that with the recipe, or follow along as we create a sample one to help illustrate the concepts.
Perform the following steps to create a custom installer for your project:
- Download the Microsoft VS2015 Installer Projects extension from the Visual Studio Gallery or directly via the following URL: https://visualstudiogallery.msdn.microsoft.com/f1cc3f3e-c300-40a7-8797-c509fb8933b9.
- After installing the extension, restart VS2015.
- Create a new project that will represent the program you wish to install. If you have one of your own, feel free to use it. For the purposes of this recipe, we will create a new project using the Visual C# | Console Application template.
- To provide us with something to look at, add the following code to the existing
Mainmethod as shown:static void Main(string[] args) { Console.WriteLine("Hello Cookbook"); Console.WriteLine("Press any key to exit..."); Console.ReadKey(true); } - Build your project to ensure everything is in working order before continuing.
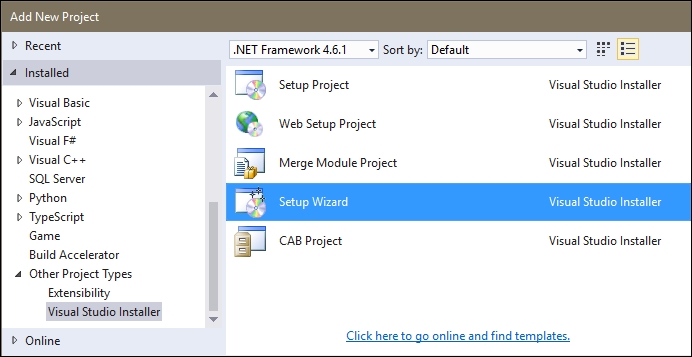
- Now we will see what the Installer Projects extension can do for us. Right-click on your solution in the Solution Explorer, and select Add | New Project. Under Other Project Types, look for the Visual Studio Installer group, as shown in the following screenshot. Select the Setup Wizard template, accepting the default project name, or using one of your own choice:
- A Setup Wizard will then appear. The first screen will be introductory, so after reading it, click on Next and proceed to the second.
- The second screen offers four available choices that correspond to the various project types that we saw in Step 6. For this recipe, choose the default option and click on Next, as shown in the following screenshot:

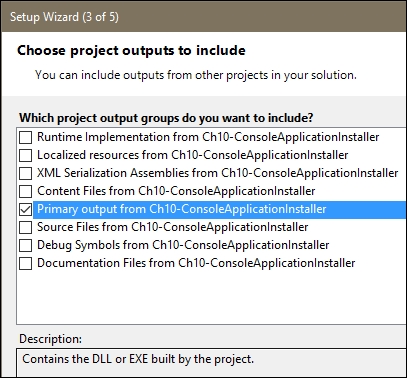
- The third screen lets us select the files or groups that should be part of the installer. For our project, we will select Primary output (which includes our project's executable) as shown in the following screenshot, and click on Next:
- The fourth screen of the wizard allows you to install any extra files that you may require for your project. For this recipe, we will proceed as is, so click on Next to continue.
- The fifth screen of the wizard provides a summary of your selections, and the opportunity to turn back and make any changes. For our recipe, we are ready to continue, so click on Finish.
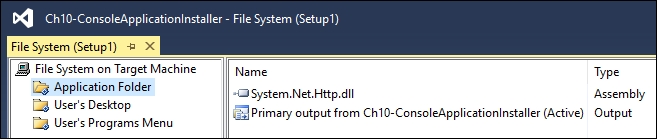
- The wizard will now create a new Setup project, and add it to your solution. A new screen appears with details about the project. The following screenshot shows the outcome of this recipe:
- While the wizard has produced a valid installer for us, there are a few more things we should configure for best results. Let's create a shortcut for our program. Click on the
User's Programs Menufolder for your Setup project, and then right-click on the right menu pane. Then select Create New Shortcut, as shown in the following screenshot: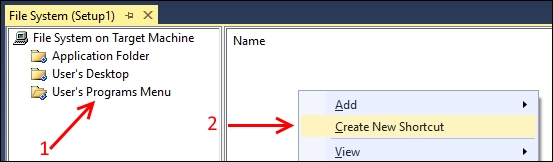
- In the resulting dialog, select Application Folder and then Primary Output…, as shown in the following screenshot. Then click on OK to proceed:

- When using an installer, it is important for the installer to be aware of the requirements for the executable that you are deploying. Since C# projects default to .NET Framework 4.6.1, let's make sure that our installer is aware of this. Right-click on the Setup project in Solution Explorer, and select Properties.
- In the project's Property Pages dialog, click on Prerequisites..., as shown in the following screenshot:
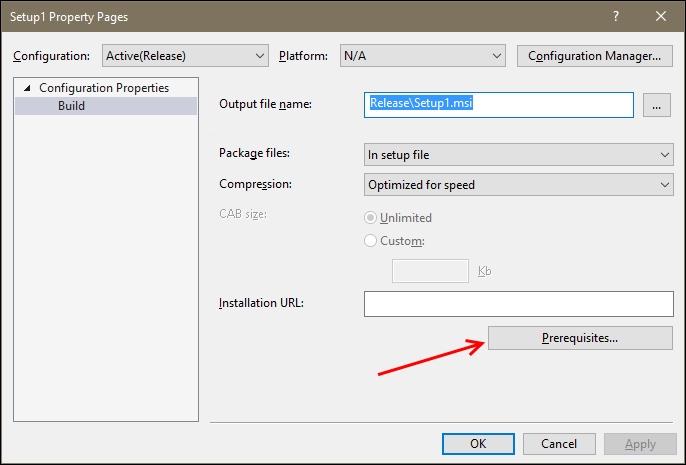
- In the Prerequisites dialog, uncheck the currently selected Microsoft .NET Framework, and instead, select the one corresponding to your project, which, in our case, is Microsoft .NET Framework 4.6.1, as shown in the following screenshot:

- After making the change in Prerequisites, click on OK to return to the Property Pages. Then click on OK again.
- Finally, double-click on the Microsoft .NET Framework under
Detected Dependenciesin the Solution Explorer. Change the Version setting to reflect the proper .NET Framework, as shown in the following screenshot: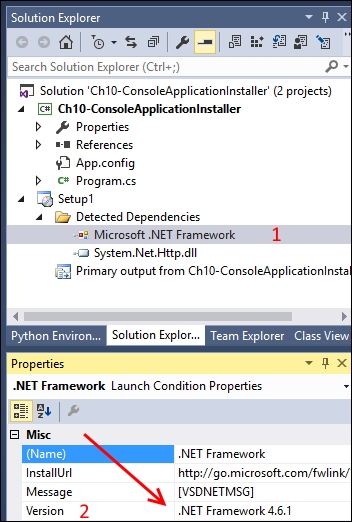
- We are now ready to see the results. Right-click on the Setup project in Solution Explorer, and select Build Solution. This creates an MSI installer file for your project.
- Right-click on the Setup project again, this time selecting Open Folder in File Explorer. File Explorer opens the directory containing the output from the Setup project. Depending on whether you selected a Debug or Release build, choose the appropriate folder. You will find the installer that you just built for your application within, ready for you to install.
The Installer Project's Setup Wizard provides a guide through the various options available to us. Thanks to the wizard, it is easy to get started with a working installer. The resulting file packages our project's application, and assists with any required files that are needed.
This extension has more than just the Setup project that we chose in this recipe. Based on the application you are developing, it is also possible to create a web application installer or redistribution packages for either a CAB file or a merge module, as shown in the screenshot accompanying Step 8.
Tip
For more information on Merge Modules, visit https://msdn.microsoft.com/en-us/library/windows/desktop/aa369820(v=vs.85).aspx on MSDN.