
E-Commerce Application Walkthrough
We'll begin by conducting a step-by-step walkthrough of the code contained in this application. If you'd like to see any of the sections we'll discuss here in their complete context, please reference the end of the chapter, where all of the code listings are given in their entirety.
Keeping Track of the Data
In this application, we use several kinds of data, and each time we need to access one, we are interfacing into a database using JDBC to a data source called "shop." This database will drive our WAP application. It includes the product catalog, shopping cart storage, and ordering information. Refer to Chapter 17, "Scheduling," for database setup parameters.
The database itself has five tables. The first one is really our session management. In this example, there is a login screen that needs to be processed. For this application, the login page will serve as our session manager. When a user reaches the login.jsp page (see Listing 18.1), the application will query a table called Vars to determine what shopping cart a user will have access to. You can see this table in Figure 18.1. From this point on, we pass this cart identification with the user to make sure we can track his session.
Figure 18.1. The Vars table contains shopping cart identification information.

A second table, called Items, is at the core of our application. It is shown in Figure 18.2. In this table we have a particular item, stock keeping units (SKUs—which are unique product numbers used in inventory tracking) for an item, a category, and pricing information. In a more complete application, this table might have inventory information or other fulfillment information.
Figure 18.2. The Items table contains pricing, category, and SKU information on various products.

The ShoppingCart_Items table stores all the data we need for cart management. In this table, we are tracking a shopping cart ID, which will be unique for each user session; the items in a particular cart (based upon Item_ID numbers from the Items table); and quantities. You can see what this table looks like in Figure 18.3.
Finally, the last two tables contain our data for a completed order. When a user "checks out" and then enters his order information, the completed order information is entered into the Orders table, seen in Figure 18.4, and corresponding entries for the ordered items are deposited into the Orders_Products table, seen in Figure 18.5.
Figure 18.3. The ShoppingCart_Items table contains shopping cart ID numbers, items, and quantities.

Figure 18.4. The Orders table contains user information for a complete order, such as address, phone number, and order ID number.

Figure 18.5. The Orders_Products table contains the confirmed list of products the customer ordered.

Preparing the Header, Data Source, and Session ID
Now that we have discussed the data model, let's start walking through the heart of this example with login.jsp, from Listing 18.1. We are now coding in JSP, so our header information needs to change a little bit because of the response type. Therefore, the header for each JSP file will contain the standard XML directive, but additionally include the following line:
<% response.setContentType("text/vnd.wap.wml"); %>
This instructs the server that the mime-type will be text/vnd.wap.wml, which is the accepted WML directive.
After we have established that, we prime our database engine, and query the database for a variable named CART from the Vars table. The goal here is to select a unique cart ID that we can establish for the user.
<%@ page import="java.sql.* >

<%
    Connection dbConn = null;
    int CartID=-1;
    ResultSet get_cart = null;

    try
    {
        Class.forName("sun.jdbc.odbc.JdbcOdbcDriver");
        dbConn = DriverManager.getConnection(
            "jdbc:odbc:shop"
            );
        Statement userStmt = dbConn.createStatement();
        get_cart = userStmt.executeQuery(
            "SELECT VALUE from Vars WHERE Name='CART'"
        );

        if (get_cart.next()) {
               CartID = get_cart.getInt("Value");
            userStmt.executeUpdate(
         "UPDATE Vars SET [Value]=[Value]+1 WHERE Name='CART'"
            );
        }
        else
        {
         CartID=1;
         userStmt.executeUpdate(
         "INSERT INTO Vars(Name, [Value]) SELECT 'CART'AS EXPR1, 2 as EXPR2"
         );
        }


    }
    catch(Exception e)
    {
        out.println("Exception!!!");
        out.println(e.getMessage());
        return;
    }

%>
In the preceding code sample, we made provisions for error checking to ensure that the Vars table contains the correct entry if you are installing this application for the first time. When the code is executed, the server will first query the table for a value, and if a value is found, it will then increment the value by executing an update statement that sets the [value] = [value] + 1. If the value is not found, we insert the variables into the Vars table and set the CartID=1 to prime the session variable.
Tip
When doing session management, two options exist for WAP devices: a cookie or a session variable. We chose a session variable because some of our tests yielded errors when we used cookies.
Note
The database we used for our implementation was a Microsoft Access database. As a result, the column value requires brackets because it is a reserved word. If you have ported this example into a different database, those brackets may be unnecessary and could cause an error.
After we complete the session variable as illustrated above, we can construct our WAP deck.
Creating a Login that Tracks the User
In this application, our login.jsp file will serve as a welcome. We give a quick advertisement and then give the user an option to go to the next card, but pass our unique CartID in the url parameters. We have now begun to track our user!
Tip
This card would be a great candidate for a timer. For the sake of simplicity, we chose to eliminate the timer, but you could create one of your own. For more information on timers, see Chapter 10, "Using Timers."
The following code snippet from Listing 18.1 shows the first WML card of the application.
<wml>
    <card id="Welcome" title="Welcome">
    <p>
        <b>Burgerworld.com</b>
        Burgers, Fries, Soda, and Computers... to go<br/>
        <a href="main.jsp?CartID=<%=CartID%>">Enter</a>
    </p>
    </card>
</wml>
When the user selects the hyperlink labeled Enter, he will navigate to the main.jsp file, passing his CartID value to that deck. You can see what this looks like in Figure 18.6.
Figure 18.6. The Burgerworld login screen shows the first card, where we start to keep track of our user's ID.

Dynamically Generating Product Catalogs
Now that the user has logged in, it is time to present him with the product catalog. In our case, we are going to dynamically generate a deck for item categories and the cards within those categories as well.
The application will select all of the categories from the database and present them as main menu choices. Then, under each category, the application will construct a card that will serve as the submenu. In this example, the submenus only go one level deep; a category can only contain items and cannot contain another category.
To accomplish this, we are going to need a few different database queries. At the top level, we will query the database for the DISTINCT item_category information from the Items table. This will form the main menu as seen in the following code sample, taken from Listing 18.2.
<%
    Connection dbConn = null;
    ResultSet get_cat = null;
    ResultSet get_products = null;
    boolean isMore = false;
    // get a connection to the database
    try
    {
        // instantiate the db driver
        Class.forName("sun.jdbc.odbc.JdbcOdbcDriver");

        // setup the connection
        dbConn = DriverManager.getConnection(
            "jdbc:odbc:shop"
            );

        // create a statement on the connection
        Statement userStmt = dbConn.createStatement();

        // issue the SQL statements
        get_cat = userStmt.executeQuery(
            "SELECT Distinct Item_Category from Items"
        );


    }
    catch(Exception e)
    {
        out.println("Exception!!!");
        out.println(e.getMessage());
        return;
        // assume no error conditions, for now
    }

%>
Tip
Dynamically generating a catalog promotes a very scalable architecture for the application. If we were to add a new category of items to the table, the category would appear on our WAP device when the user looked at the category card. Moreover, if we dynamically change the item information in any way, the entire menu will restructure itself.
Caution
The method used above does present some scalability issues. If the site is a higher- volume site, the application should take advantage of cached-queries or WAP browser cache management by expiring pages or sending cache notifications in order to minimize database load.
Now that we have the main query, called get_cat, which contains all of the unique categories, we can construct the main menu by cycling through the list of unique categories as shown in the following code sample taken from Listing 18.2. You can see what this card looks like in Figure 18.7.
<wml>
    <card id="MainMenu" title="Menu">
        <p>
            Burgerworld.com<br/>
            <%
                try
                    {
                  while (get_cat.next())
                  {
                            String Category = get_cat.getString("Item_Category");
                %>
                <a href="#<%=Category%>"><%= Category %></a><br/>
                <%
                        }
                    }
                catch(SQLException e)
                    {
                        }
            %>
            </p>
    </card>
Note
You'll notice in the preceding code that all links are going to a local reference called Category. The card with id Category will be dynamically generated with the remainder of the code.
Figure 18.7. The menu, listing Computers and Soda, has been dynamically generated from the data source.

Believe it or not, that was probably the easy part. Now, we'll repeat the preceding step, and dynamically generate product cards in the process. To do this, we will repeat the exact same query for the distinct categories, but then create a card for each one with an ID called Category as seen in the following code sample, taken from Listing 18.2.
<%
    ResultSet get_catcard = null;
    ResultSet get_Items = null;
    try
    {
        Class.forName("sun.jdbc.odbc.JdbcOdbcDriver");
        dbConn = DriverManager.getConnection(
            "jdbc:odbc:shop"
            );
        Statement userStmt = dbConn.createStatement();
        get_catcard = userStmt.executeQuery(
            "SELECT Distinct Item_Category from Items"
        );
    }
    catch(Exception e)
    {
        out.println("Exception!!!");
        out.println(e.getMessage());
        return;
    }
The query get_catcard generates a list of items in a particular category. It does this by retrieving items from the Items table whose category matches the one currently in use. The query keeps looping through the different categories, generating sublists of products, until all of the categories in the table have been queried. Assume the query get_catcard is looking at the category Sodas. It will retrieve all of the products in the Items table that are categorized as sodas. Once the query has retrieved all of the soda products, it stops, goes back, and looks for the next category. When the application finds the Burgers category, it will reinitiate the get_catcard query, finding all the different burger products in the Items table. All of those burger products will go into a sublist, which will link each product name to another location where the user can learn more about the product. You can see how we did this in the following code sample, taken from Listing 18.2.
    try
     {
        while (get_catcard.next())
         {
            String CardCategory = get_catcard.getString("Item_Category");

             try
                    {
                    Class.forName("sun.jdbc.odbc.JdbcOdbcDriver");
                    dbConn = DriverManager.getConnection(
                        "jdbc:odbc:shop"
                        );
                    Statement userStmt = dbConn.createStatement();
                    get_Items = userStmt.executeQuery(
                       "SELECT * FROM Items WHERE Item_Category='"  + CardCategory + "'"
                       );
                }
                catch(Exception e)
                {
                    out.println("Exception!!!");
                    out.println(e.getMessage());
                    return;
                }

%>
The next set of code is a little more difficult to understand. Keep in mind that in the code execution cycle, we are looping through distinct categories at this point.
Now, we are going to dynamically generate a card. The important thing to note is that the card ID corresponds to the CardCategory. Since the main menu links are linking to a particular category, we will dynamically generate cards by using the distinct category names as the card IDs, as seen in the following code sample. The card for the category Computers can be seen in Figure 18.8.
<card id="<%= CardCategory %>" title="Order <%= CardCategory%>">
<p>
<b><%= CardCategory %></b><br/>
<%
while (get_Items.next())
{
%>
<a href="orderproduct.jsp?CartID=<%=request.getParameter ("CartID")
 %>&ItemID=<%=get_Items.getString("Item_ID")%>"><%=get_Items.getString("Item_Name")%></a><br/>
<% } %>
</p>
</card>
<% }
}
catch (SQLException e)
{
}
%>
</wml>
%>&ItemID=<%=get_Items.getString("Item_ID")%>"><%=get_Items.getString("Item_Name")%></a><br/>
<% } %>
</p>
</card>
<% }
}
catch (SQLException e)
{
}
%>
</wml>
Figure 18.8. The Computers category's submenu is displayed on this dynamically generated card.

Caution
In the preceding example, we are dynamically generating an entire WAP deck. This methodology does have its risks. If we are not careful, the deck could grow to a size that exceeds a device's ability to publish it, and slow down the application. If the virtual store had many more items, it might make more sense to publish the main menu deck as a single main menu card and then have each card be dynamic but self- contained.
As we move on to the ordering stage of the application, we need to give the application some means by which to track an order's components. One other important thing to note in the preceding code sample is that we are tracking items by their unique Item ID. This will become even more apparent and critical when we order a product.
Note
When writing an e-commerce application, keeping items unique is essential from a business fulfillment perspective, but also functional from an application development perspective. Passing around complete item names could make it difficult to keep track of a long list of products.
Each product in the previous example contained a link to another WML deck called orderproduct.jsp. We could have again added this card to the main.jsp deck, but because of size limitations and presentation issues, we elected to make it another deck altogether.
Tip
When creating dynamic WML decks, it is occasionally necessary to separate decks based upon your database queries. In general, if a page is drilling down into a specific item's detail, it is not a good idea to put it in the same deck that has basic information due to query restrictions.
Showing and Storing Dynamic Product Information
Our next deck, orderproduct.jsp, is designed to provide the user with details about a particular product. In this deck we will show all of the relevant information about a particular product, and then allow the user to enter a quantity. This deck is entered via the main.jsp deck, where a user selects a category and a product. When the user arrives at the orderproduct.jsp deck, he will have passed the Item_ID for the product he wants from the Items table as a URL variable named ItemID.
To start this deck off, we are going to do a SELECT * query against the Items table to retrieve all of the item information for the selected item, as shown in the code sample below, taken from Listing 18.3.
<%
    Connection dbConn = null;
    ResultSet get_Item = null;
    // get a connection to the database
    try
    {
        // instantiate the db driver
        Class.forName("sun.jdbc.odbc.JdbcOdbcDriver");

        // setup the connection
        dbConn = DriverManager.getConnection(
            "jdbc:odbc:shop"
            );

        // create a statement on the connection
        Statement userStmt = dbConn.createStatement();

        // issue the SQL statements
        get_Item = userStmt.executeQuery(
            "SELECT * from Items where Item_ID="  + request.getParameter("ItemID")
        );
    }
    catch(Exception e)
    {
        out.println("Exception!!!");
        out.println(e.getMessage());
        return;
    }

%>
After we complete our query, we will display the data and ask the user to enter a quantity for the item. Additionally, we have established a soft key called Order that will pass along the CartID parameters and ItemID parameter via a form using the standard postfield method. This is shown in the following code sample and in Figures 18.9 and 18.10.
<wml>
    <card id="OrderIt" title="Order Product">
         <do type="accept" label="Order">
            <go href="addtocart.jsp">
              <postfield name="Quantity" value="$Quantity"/>
              <postfield name="CartID" value="<%= request.getParameter ("CartID")%>"/>
              <postfield name="ItemID" value="<%= request.getParameter ("ItemID")%>"/>
            </go>
         </do>
        <p>
<%   try
    {
            if (get_Item.next())
            {
%>
          <b><%= get_Item.getString("Item_Name")%></b><br/>
          Cost <%= get_Item.getString("Item_Cost")%><br/>
          SKU #<%= get_Item.getString("Item_SKU")%><br/>
          Quantity : <input type="text" name="Quantity" format="N*"/>

<%                  }
         }
         catch (Exception e)
         {
         }
%>
            </p>
    </card>

</wml>
Figure 18.9. This card shows the user a dynamically generated list of products in the Computer category.

Tip
By using the format="N*" in the <input> tag for the quantity, we are forcing the user to enter at least one number before the form can be submitted. Therefore, this serves as an excellent way to verify data. When there is no data entered, the device will not offer the user the Order soft key. As soon as he enters a number, the WAP device will present him with the Order soft key as the data has been validated into the N* format.
Figure 18.10. This card asks what quantity of the item the user would like to purchase.

Now that the user has entered a quantity as well as verified that he is ordering the correct prod uct, we need to send this data to a deck that will place the item in his cart. As you saw earlier, when the user enters a quantity and presses the Order soft key, we navigate to a deck called addtocart.jsp. The addtocart.jsp file takes the item identification number and cart identification number, and places it into the Shoppingcart_Items table. This is the table where we store the ordered products until the user checks out.
Tip
WAP is like any other Internet connection method; a user could theoretically shut off his WAP device at any point and "cancel" his session. Therefore, it's always a good idea to store data at multiple stages of the ordering process, in case a user aborts his session using a non-traditional exit strategy. It should further be noted that the storage of certain data may, in some countries, run counter to data protection legislation. You should ensure that your applications comply with the appropriate legislation for the region where it will be deployed.
The following code example, from Listing 18.3, shows how the application places product information into the user's shopping cart.
<%
    Connection dbConn = null;
    ResultSet get_Item = null;

    // get a connection to the database
    try
    {
        // instantiate the db driver
        Class.forName("sun.jdbc.odbc.JdbcOdbcDriver");

        // setup the connection
        dbConn = DriverManager.getConnection(
            "jdbc:odbc:shop"
            );

        // create a statement on the connection
        Statement userStmt = dbConn.createStatement();

        // issue the SQL statements
        userStmt.executeUpdate(
            "INSERT INTO ShoppingCart_Items(ShoppingCartID, Item, Quantity) SELECT " +
 request.getParameter("CartID") + " AS EXPR1, " + request.getParameter("ItemID") + " as
 EXPR2, " + request.getParameter("Quantity")
        );


    }
    catch(Exception e)
    {
        out.println("Exception!!!");
        out.println(e.getMessage());
        return;
        // assume no error conditions, for now
    }

%>
Creating a "Checkout" Procedure
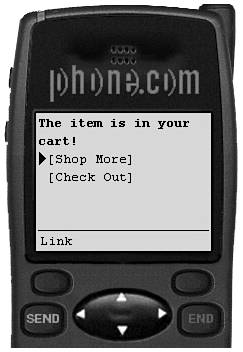
The user has now logged in and has an active cart, has chosen a category, picked an item, and entered a quantity. Now, we must offer him a choice to continue shopping or to check out and purchase the items currently stored in his shopping cart. Since we are tracking the user session via a CartID, we just need to pass the CartID back to the main.jsp page to allow the user to continue shopping. If he would rather check out, we then need to route him to the checkout.jsp deck. The following code sample, taken from Listing 18.3, does this. You can see what this card looks like in Figure 18.11.
<wml>
    <card id="OrderIt" title="Order Product">
        <p>
           <b>The item is in your cart!</b><br/>
              <a href="main.jsp?CartID=<%=request.getParameter ("CartID")%>">Shop More</a>
              <a href="checkout.jsp?CartID=<%=request.getParameter ("CartID")%>">Check Out</a>
       </p>
    </card>

</wml>
Figure 18.11. This card confirms the order and offers the user the option to continue shopping or move on to final checkout.
The checkout.jsp deck is designed to allow a user to verify his order and enter his order information, address information, and credit card data. The page then takes the user to the final deck, called finishorder.jsp. The following section, taken from Listing 18.3, executes a simple query against the database to retrieve the items that are in a cart and then displays the data in an intuitive format.
<%
    Connection dbConn = null;
    ResultSet getCart = null;

    // get a connection to the database
    try
    {
        // instantiate the db driver
        Class.forName("sun.jdbc.odbc.JdbcOdbcDriver");

        // setup the connection
        dbConn = DriverManager.getConnection(
            "jdbc:odbc:shop"
            );
        // create a statement on the connection
        Statement userStmt = dbConn.createStatement();

        // issue the SQL statements
        getCart = userStmt.executeQuery(
            "SELECT * FROM ShoppingCart_Items INNER JOIN Items ON ShoppingCart _Items
.Item=Items.Item_ID WHERE ShoppingCartID=" + request.getParameter("CartID")
        );


    }
    catch(Exception e)
    {
        out.println("Exception!!!");
        out.println(e.getMessage());
        return;
    }

%>

<wml>
    <card id="Checkout" title="Checkout">
        <p>
        <b>Your order:</b><br/>

<%   try
        {
            while (getCart.next())
            {
%>
                <%=getCart.getString("Quantity")%> : <%= getCart.getString("Item_Name")%><br/>
<%
                }
        }
        catch (Exception e)
        {
        }

%>
            <a href="#add">Continue</a>
        </p>
    </card>
<card id="add" title="Add an appointment">
    <do type="accept" label="Add">
     <go href="finishorder.jsp">
       <postfield name="address" value="$Address"/>
       <postfield name="creditcard" value="$CreditCard"/>
       <postfield name="CartID" value="<%= request.getParameter("CartID")%>"/>
     </go>
    </do>

  <p>
    <b>Order Information</b><br/>
    Address: <input type="text" name="Address"/>
    Credit Card: <input type="text" name="CreditCard" />
  </p>
</card>

</wml>
You can see the order verification that occurred in the preceding code sample in Figure 18.12. The address entry field is shown in Figure 18.13 and the credit card number entry field is shown in Figure 18.14.
Figure 18.12. This card confirms with the user which products he is about to buy.

As noted earlier, this application does not simulate any credit card verification; but such verifi cation would be required in a real-world application.
The finishorder.jsp deck is really more of a functional deck in terms of data marshalling than any of our past ones. Since we are using the ShoppingCart_Items table as an order staging zone, the user has now confirmed his order and we need to send that order to our permanent order tables, called Orders and Order_Items.
Figure 18.13. This card allows the user to enter his address, which is stored in the Orders table.

Figure 18.14. Scrolling down on the same card, users can enter their credit card information, which is also stored in the Orders table.

As we mentioned, the Order's table will hold all of the order information: name, credit card, and address. In the following code, we execute two SQL statements. The first creates the new order, and the second copies the cart's contents from the ShoppingCart_Items table to the new table called Order_Items.
<%
    Connection dbConn = null;

    // get a connection to the database
    try
    {
        // instantiate the db driver
        Class.forName("sun.jdbc.odbc.JdbcOdbcDriver");

        // setup the connection
        dbConn = DriverManager.getConnection(
            "jdbc:odbc:shop"
            );

        // create a statement on the connection
        Statement userStmt = dbConn.createStatement();

        // issue the SQL statements
        userStmt.executeUpdate(
            "INSERT INTO Orders(Username, Address, Phone, CreditCard, OrderID) SELECT
 'WEB'as EXPR1, '" + request.getParameter("Address") +  "'AS EXPR2, '555-1212'as EXPR3, '"
 + request.getParameter("CreditCard")  + "'as expr4, " + request.getParameter("CartID") + "
 as expr5"
        );

        userStmt.executeUpdate(
            "INSERT INTO Orders_Products(OrderID, ItemID, Quantity)  SELECT ShoppingCartID
, Item, Quantity FROM ShoppingCart_Items WHERE  ShoppingCartID=" + request.getParameter
("CartID")
        );


    }
    catch(Exception e)
    {
        out.println("Exception!!!");
        out.println(e.getMessage());
        return;
        // assume no error conditions, for now
    }

%>
Finally, we thank the user for his order, and offer him the option to continue to shop. You can see what this card looks like in Figure 18.15.
<wml>
    <card id="Notify" title="NotifyUser">
        <p>
            <b>Thanks for your order!</b><br/>
            <a href="login.jsp">Place a new order</a>
        </p>
    </card>
</wml>
Figure 18.15. This card thanks the user for his order, and offers him the option of placing a new order.
