
Chapter at a glance
Use
Use subfolders to organize data, page 123
Access
Access SkyDrive from File Explorer, page 127
Copy
Copy files to a new location, page 138
Personalize
Personalize your File Explorer view, page 150
IN THIS CHAPTER, YOU WILL LEARN HOW TO
You acquire all kinds of data files, including but not limited to documents, spreadsheets, pictures, presentations, videos, and executable apps. You save those files with recognizable file names in appropriate folders. For instance, you save the personal documents you create in the Documents folder. If you want to share documents, you can save them to the Public Documents folder. There are other folders beyond those related to documents, including Pictures and Public Pictures, Music and Public Music, Videos and Public Videos, and so on. As you acquire more data, you should create your own subfolders within these to expand this built-in folder system.
Tip
Always store data in related default folders, at least for now. When you run most backup apps, the default folders and the subfolders in them will be included automatically.
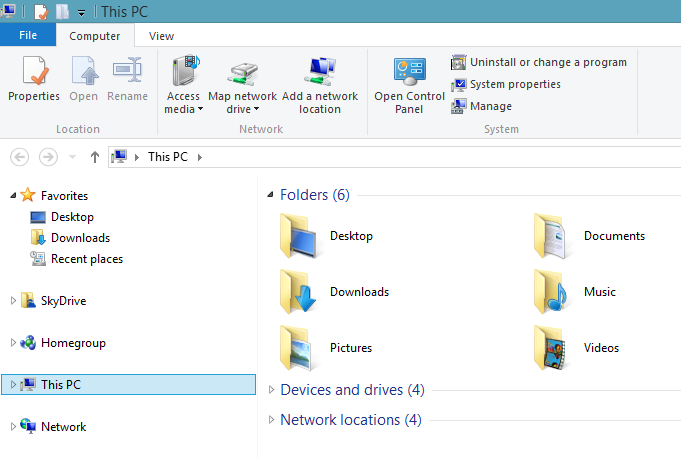
Although there are multiple ways to access the data you acquire (including from within apps), File Explorer is the most comprehensive, and is available from the desktop’s taskbar. File Explorer always opens on the desktop. By using File Explorer, you can access your data, view it in various ways, search for files and folders, and even burn files to CDs and DVDs, all from a single window.
Practice Files
Before you can complete the exercises in this chapter, you need to copy the book’s practice files to your computer. The practice files you’ll use to complete the exercises in this chapter are in the Chapter04 folder. A complete list of practice files is provided in the section “Using the practice files” in the Introduction of this book.
The first step to understanding how best to save, browse to, and organize data is to learn the differences among files, folders, and subfolders, and what types of folders Windows 8.1 already includes. With that knowledge, you can save data better and use File Explorer more effectively to locate and manage your data in the future.
Tip
File Explorer offers a ribbon for performing common tasks and a Navigation pane for locating the data you save.
The main differences among files, folders, and subfolders are as follows:
File. Any unique, stand-alone piece of data such as a single document, spreadsheet, or presentation; an executable file; a picture or video; a screen shot of a map; or an itinerary. You save files in folders.
Folder. A mechanism for grouping data, generally data that is alike in some way. Windows 8.1 has several preinstalled folders ready for you to use, including Documents, Music, Videos, Downloads, and Desktop, among others. You can create your own folders, too.
Subfolder. Folders within other folders. You create subfolders to organize your data and then you move data into those folders.


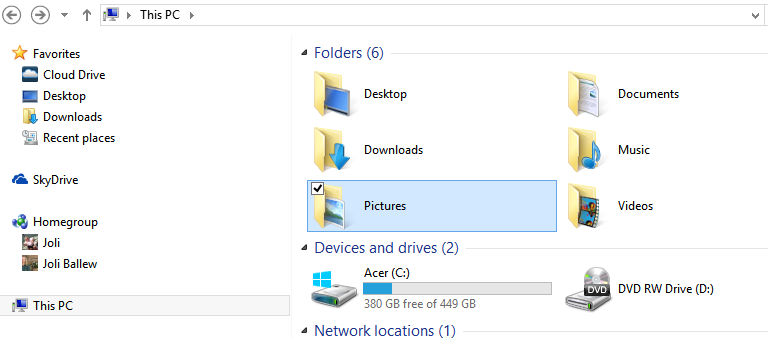
Windows 8.1 offers the following folders from File Explorer when This PC is selected; no files are stored there by default when you install Windows 8.1:
Desktop. A folder that holds the items you’ve saved to the desktop.
Documents. A folder that holds items you’ve saved here, usually documents, text files, PDFs, spreadsheets, presentations, and so on.
Downloads. A folder that holds the items that you’ve downloaded from the Internet, such as executable files.
Music. A folder in which you can save your music audio files as well as any items media apps have saved here by default. When you purchase music from the Internet, it will likely be saved here, too.
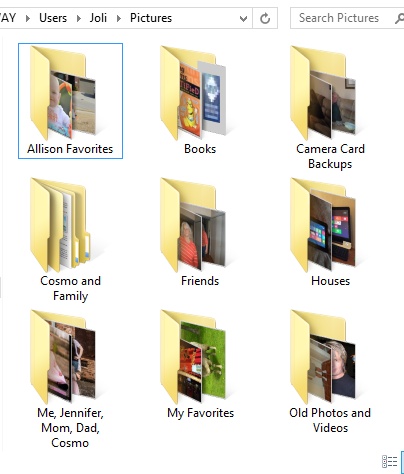
Pictures. A folder that holds your photos, preferably pictures you’ve imported from a digital camera or memory card as well as pictures you’ve acquired from the Internet, email, or other means. You will see a subfolder here named Camera Roll if your device has a built-in camera and you’ve taken at least one picture with it.
Videos. A folder in which you save primarily your video files videos. Media you acquire online might be saved here by default, as well.
Tip
There are public counterparts to Documents, Downloads, Music, Pictures, and Videos. You save data to these related Public folders when you want to share it with others who can access your computer directly or via a network. These folders are located on the computer’s hard disk, under C:Users, in the Public folder.
In this exercise, you’ll explore the folders already on your own computer by using File Explorer. What you see when you click a folder in the Navigation pane (the left pane in the File Explorer window) might include data you’ve already acquired, or you might see only the practice files that you’ve copied here while working through this book.
Set Up
Copy the practice files that are located in the Chapter04 folder to your computer. Specifically, copy the file in the PracticeMusic subfolder to your Music folder; copy the files in the PracticePictures folder to your Pictures folder; copy the files in the PracticeVideos folder to your Videos folder; copy the file in the PracticeDocuments folder to your Documents folder.
See Also
To learn how to install the practice files, refer to the section “Using the practice files” in the Introduction of this book. Also, refer to the sidebar “Copying practice files for the first time” in Chapter 3 for additional instructions.
On the Start screen, type explorer. In the results, click File Explorer.
Maximize the window if necessary. In the Navigation pane, click This PC.
The default folders are available from the Content pane.
Troubleshooting
If you do not see the Navigation pane, on the ribbon, click View, choose Navigation Pane, and then select it. (You’ll learn more about the ribbon in the section Navigating the File Explorer ribbon interface later in the chapter.)
Double-click Documents.
The Documents folder opens.
Click the Back arrow and then double-click Pictures.
Click the Back arrow and then double-click Music.
Click the Back arrow and then double-click Videos.
Tip
Notice the Favorites option in the left pane of File Explorer. You can click anything in this list to go there quickly.
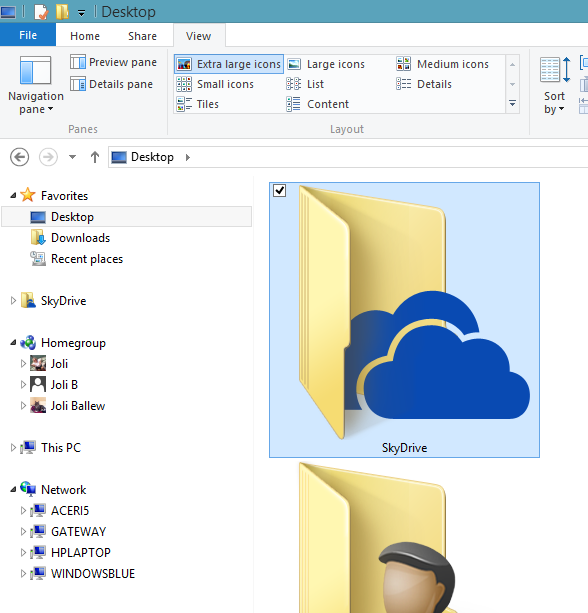
There are other options available in the Navigation pane of File Explorer beyond what’s available from This PC. Microsoft SkyDrive is one of them. You’ll learn about SkyDrive in Chapter 6 but we’ll briefly introduce it here. You’ll also see Homegroup and related options if you’ve joined a homegroup (see Chapter 13) and Network and resulting options if you have a network already configured (see Chapter 11). Because you might not yet have either, we’ll skip those for now.
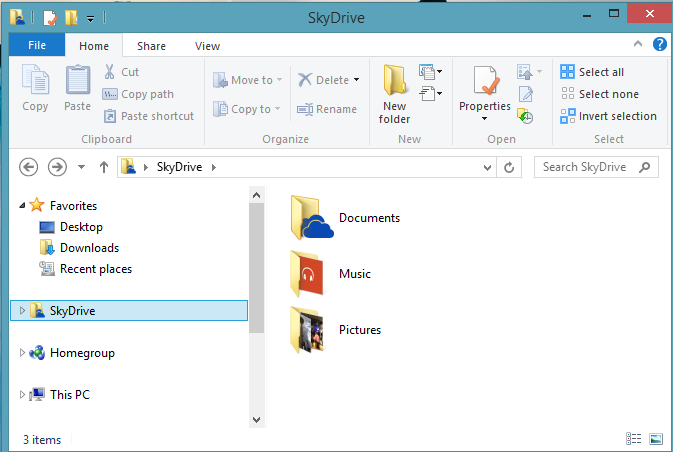
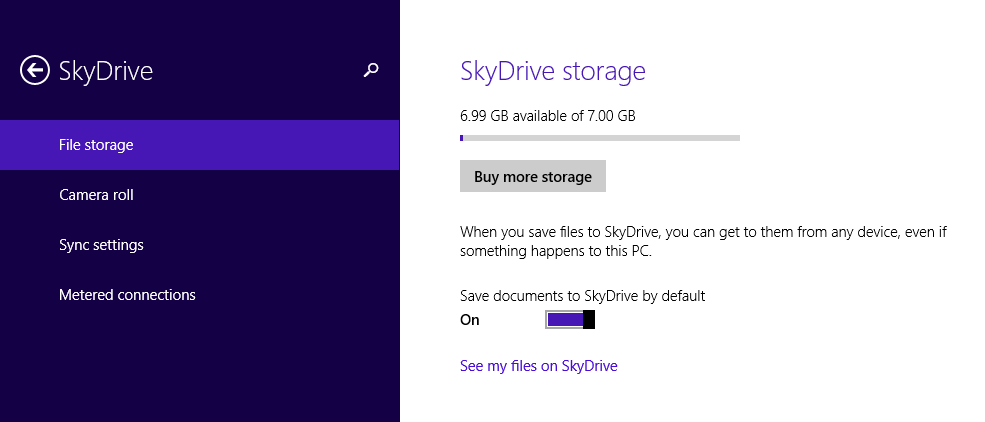
Anyone who logs on to a Windows 8–based computer with a Microsoft account has the ability to save files to SkyDrive. SkyDrive is a folder in the Navigation pane of File Explorer that offers a place to save your files on the Internet. You’ll get 7 GB of free space there, and you can use that space to back up important files or to make files accessible from any computer you can log on to that can access the Internet. On Windows 8–based computers, you can access the files you store there from the SkyDrive app; from other computers you can visit https://skydrive.live.com/ and log on to access your files.
To get a glimpse of what SkyDrive offers, in the Navigation pane, click SkyDrive to see what appears in the Content pane. What you see will depend on whether you’ve set up and/or used SkyDrive, and what configuration changes, if any, you’ve performed.
Now, while reading the rest of this chapter, think about the things you might want to save to SkyDrive. As an example, if you work on specific files from various computers, you might want to save those files to SkyDrive so that you can always access the latest version. You might want to let Windows 8.1 back up all of the photos you take with your camera here, too. You might want to save to SkyDrive by default. You can configure these options for SkyDrive from PC Settings as well as others. For now though, simply take notice that you can save files there, and consider doing so. Here are SkyDrive options from PC Settings.
Regarding libraries
Libraries were a prevalent part of Windows 7 and Windows 8. Libraries were available in the Navigation pane of File Explorer and offered access to both the personal and public folders related to the library selected. As an example, the Documents Library offered easy access to what was in both the (My) Documents folder and the Public Documents folder. You could separate the data if you wanted to, but it was not separated by default. You could also add other folders to libraries to include them. However, libraries were mostly misunderstood by users and rarely used effectively.
Libraries are still available in Windows 8.1, but they are different now. A library, by default, only offers access to the related personal folder. So, the Documents library only offers access to what is in the Documents folder (and no longer offers access to what’s also in the Public Documents folder). This is true of the other libraries (Music, Pictures, Videos).
If you still want to show a Libraries section in the Navigation pane, you can do so on the View tab, under the Navigation pane option. Just select Show libraries so that a check mark appears by it. The updated default libraries will then reappear in the Navigation pane. For more information on this, refer to the section Customizing File Explorer by using the View tab later in this chapter.
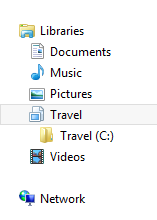
Another way to enable and incorporate libraries is to create a new folder (perhaps on the desktop) and name it (we’ll create a folder named Travel), right-click that folder and then, on the shortcut menu that appears, click Include In Library. Then, click Create New Library. After you do this, the traditional libraries will appear in the Navigation pane, as will your new library. You can continue to expand on this structure as desired.
If you upgraded to Windows 8.1 from Windows 7, you will still see the old format for libraries, meaning you’ll have access to both the personal and public folders if you opt to show Libraries in the Navigation pane. However, if you upgraded from Windows 8, or if you installed Windows 8.1 clean, you won’t.
You can open and view hundreds of kinds of files on your Windows 8–based computer. The most common sorts of files are documents, spreadsheets, presentations, music, pictures, videos, and executable files. You might occasionally work with recorded TV or specialized files from third-party apps, but for the most part, the types of files you encounter will be common ones.
You save each of these files as a specific file type. You choose the file type during the save process. (If you copy a file from another source, it already has a file type.) For example, when you save a document you’ve created by using Microsoft Word, you name the file, choose a place to save it, and select the desired file type from a list. The file type gives the file a specific extension, generally three or four letters that appear at the end of the file name (but don’t necessarily appear in the list of options). The name, place, and file type you select defines the file so that Windows 8.1 can distinguish it from other files, locate it, and offer it for viewing.
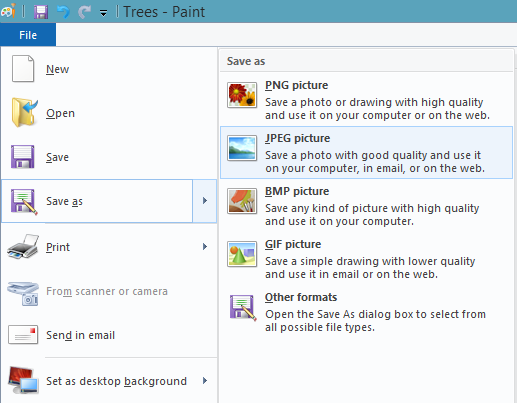
To save files effectively, you need to know a little about the choices available in apps you’ll use to create them. The list that follows shows the types of files you’ll encounter most often and their file name extensions. You have the option to select a file type when you save a file. The illustration shows the options when saving a picture file in Paint.
Tip
To show file extensions in File Explorer, on the ribbon, click the View tab, and then select File Name Extensions.
Microsoft Office files
Microsoft Word (.doc and .docx)
Microsoft Excel (.xls and .xlsx)
Microsoft PowerPoint (.ppt and .pptx)
Microsoft Publisher (.pub and .pubx)
Music files
Picture files
JPEG files (.jpg and .jpeg)
TIFF files (.tif and .tiff)
RAW files (.raw)
GIF files (.gif)
Bitmap files (.bmp)
PNG files (.png)
Video files
Windows Media files (.wm, .wmv, and .asf)
Apple QuickTime files (.mov and .qt)
AVI files (.avi)
Windows Recorded TV Show files (.wtv and .dvr-ms)
MPEG Movie files (.mp4, .mov, .m4v, .mpeg, .mpg, .mpe, .m1v, .mp2, .mpv2, .mod, .vob, and .m1v)
Motion JPEG files (.avi and .mov)
Miscellaneous
Executable files (.exe)
Microsoft Notepad (.txt)
PDF Reader (.pdf)
OpenOffice and LibreOffice (.odt, .ott, .oth, and .odm)
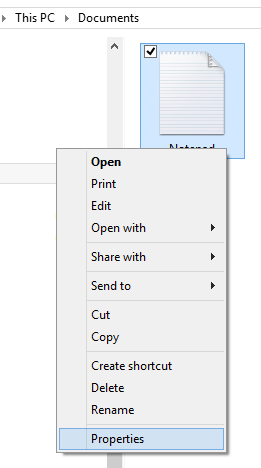
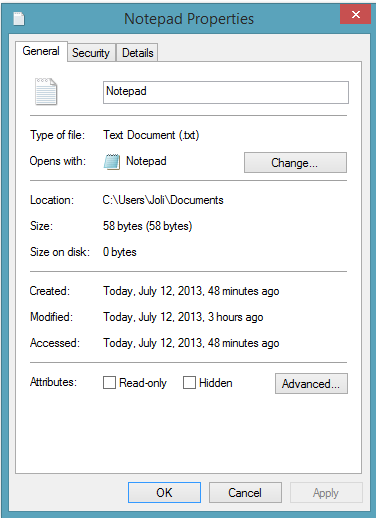
By default, file extensions are not shown in the lists you’ll peruse while searching for a file to open using File Explorer. This is true of most other methods, as well, such as opening a file from the File menu of an app like Paint or WordPad. If you are interested in knowing the file type, you can do this by viewing the file’s Properties page. The Properties page for any file offers its file extension and other information. You can open the Properties page by right-clicking the file and then, on the shortcut menu that appears choosing Properties. The Properties dialog box for any file also offers the name of the app with which the file is configured to open, the option to open the folder that contains the file, and other data and options.
Tip
The list of options you see when you right-click a file will depend on the type of file you’ve chosen. For example, if you right-click a compatible image file, the option to Set As Desktop Background is available. This option is not available when you right-click a text document or a video.
In this exercise you’ll open the Properties page for a file on your own computer and learn its file type.
Set Up
You need to have copied the practice files located in the Chapter04 folder to complete this exercise.
Open the File Explorer window by using the Windows key+E keyboard shortcut.
Click This PC and then double-click the Documents folder.
Right-click Notepad.
A shortcut menu appears.
The Properties dialog box opens.
On the General tab, note what’s listed beside Type Of File.
In this example, Text Document (.txt) is the type.
You acquire files in many ways. You might obtain picture files from a webpage or from an email. You can copy photos from a digital camera or memory card that you own. You can copy documents from a flash drive, external drive, or corporate server. Of course, you also create your own files by using word processing, spreadsheet, and presentation apps, to name a few. There are thousands of ways to acquire data.
When you get or create data, you must save it. When you save a file, you name the file, choose a place to save it, and select a file type. You will probably want to name the files descriptively, but even if you don’t (or you forget to) you can still sort files by various metadata—which is the data that describes data—that is added to them automatically, such as the date a file was created, among other things. Additionally, at least at first, you should strive to save data files in their respective default folders, too. Save personal documents to the Documents folder, personal pictures the Pictures folder, personal audio files to the Music folder, and so on. Alternatively, you could save your files to the related folder on SkyDrive. All of these options for saving are available from File Explorer.
Similarly, you should opt to save data that you’d like to share with others or access from networked devices (such as media centers) to their Public folder counterparts. For instance, you might consider saving your music files to the Public Music folder, your vacation videos to the Public Videos folder, and your favorite pictures to the Public Pictures folder, because when you do, you make those files easily accessible from any device on your network. You have to choose this option specifically, though; no data is saved to the Public folders by default. (It is possible to create a homegroup for sharing data, as is detailed in Chapter 13.)
Tip
Public folders aren’t as easy to get to as personal folders. Consider creating a shortcut for the Public folders on your desktop if you find you use those folders often.
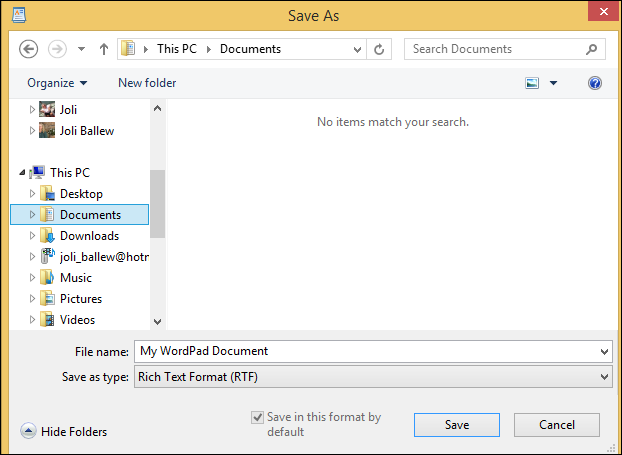
In this exercise, you’ll create a file in WordPad, save it to your personal Documents folder, and then to the Public Documents folder.
On the Start screen, start typing WordPad.
Click WordPad in the results; it should be the first entry.
Type I will save this file as a rich text document.
Click File and then click Save As. (Do not simply point to Save As; you must click it.)
In the Save As dialog box, in the File Name box, type My WordPad Document.
Verify that Rich Text Format (RTF) is selected in the Save As Type box. If necessary, click the arrow in that window to select it.
In the Navigation pane, click This PC and then double-click Documents.
Click Save.
Repeat Steps 4 and 5.
In the Navigation pane, click This PC. Scroll if necessary to the Devices and Drives section. Double-click the entry that represents your computer’s hard drive, which is generally C, double-click Users, double-click Public, and then double-click Public Documents.
Click Save.


Clean Up
In WordPad, in the upper-right corner of the window, click the Close button (the red X)to close it.
It is important to understand that the options you see in the Save As Type list depend on the app you’re using to save the file. In Notepad, if you click the arrow to open the list, you can see that you have only one option, Text Documents (*.txt). WordPad offers more, including but not limited to Open Document Text and Office Open XML Document. As you saw earlier, Paint offers completely different options, including .jpg, .bmp, and .gif. You’ll see additional options as you work with different software apps.
Troubleshooting
If you have the option of saving a file as a type already called out in this chapter (such as a .doc, .jpeg, or .gif) versus something you’ve never heard of (such as .ged), save the file by using the most universal format. That way you’ll be able to open the file in other apps, not just in the app in which you created or saved it.
You can acquire data by creating it, such as you did in the previous exercise by using WordPad. In this next exercise, though, instead of creating a document file, you’ll acquire a different type of data: picture files. As with other types of data, you’ll want to save the pictures you acquire to the appropriate folder. That folder might be the Pictures folder on SkyDrive, the Pictures folder from This PC, or the Public Pictures folder, available from the root drive, under Users and Public. When you use File Explorer to copy photos, you can be sure you know exactly where they are saved. (Some apps save by default in a folder that you might not prefer, for example.)
To work through the following exercise, you’ll need to connect a camera, camera card, or flash drive that contains pictures. You might also have a backup drive with pictures. If you don’t have this at hand, you can return here when you do. This exercise lets you see what might happen by default, and then you use File Explorer to copy the photos to the Pictures folder manually.
Troubleshooting
Most often, when you connect a device that contains photos, a message appears in the upper-right corner of the screen that prompts you to select a default action to take when such media is connected (such as opening a folder to view the files or automatically importing photos). It may also be that nothing happens, other than the device appearing in the Navigation pane in File Explorer. Sometimes, however, certain actions might occur automatically, such as an app opening offering to do things with your photos. If this happens, and you want to copy the files manually using File Explorer, close the app or opt not to choose any default action when prompted.
In this exercise, you’ll access pictures from a digital camera, memory card, or USB flash drive by using File Explorer and copy those photos to the Pictures folder on your computer.
Set Up
Cameras must be installed before they can be used to import files. To install a camera, connect it and see if it will install on its own. If it does not, run the installation file from the included CD or DVD, or get the required files from the manufacturer’s website. USB flash drives and memory cards don’t require any special setup.
Connect the device that contains the pictures to copy.
In File Explorer, in the Navigation pane, click This PC.
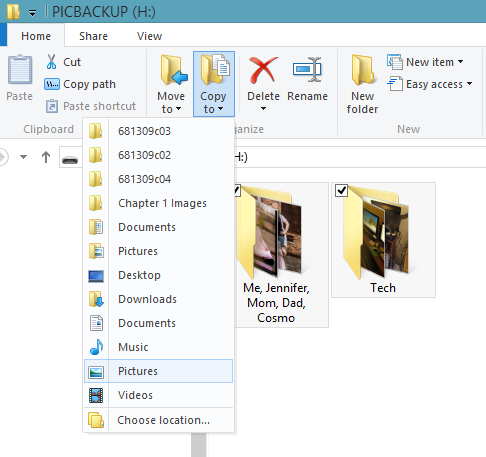
Double-click the external drive or device. Here, this is PICBACKUP (H:).
Hold down the Ctrl key and click each item to import (copy). You can select folders.
On the ribbon, click the Home tab, and then click Copy To.
Click Pictures.

File Explorer uses a graphical user interface feature called the ribbon that is becoming the defacto standard for navigation. The ribbon runs across the top of the window and is made up of several tabs. You’ve already used the ribbon to copy files and have probably noted that it presents a lot of elements. You click any tab to access the groups of related options and tools. Each time you click a new tab, the ribbon displays a different group of tools, depending on which tab you clicked. The names of the tabs are mostly intuitive and share attributes with other ribbon-enabled windows and apps.
The ribbon is a highly contextual interface. The tabs and options on the ribbon change depending on what you have selected in the Navigation pane. For example, if you click SkyDrive in the Navigation pane, you see a specific set of tabs on the ribbon that includes File, Home, Share, and View. You can see what’s on each tab by clicking it. If you click a specific item in a folder, perhaps a photo, the tabs change again. In the case of a selected photo, a new tab appears (Picture Tools Manage). If you select a video file, you will see File, Home, Share, View, and Video Tools (Play).
To understand how to use the ribbon, you must know which tabs will appear most often and what is available under these tabs. When working with folders, the following are the most common tabs you’ll encounter:
File. You use this tab to open a new File Explorer window or a command prompt, to clear history, to get help, or to access your most frequent places for storing data. For the most part, what you see under the File menu is the same no matter what you have selected in the Navigation pane.
Home. This tab presents tools to cut, copy, and paste compatible, selected data available in the window. You can also copy the file path, move or copy data, delete data, rename data, create a new folder, and select data, among other things. Options you see here will change depending on what’s selected in the folder window.
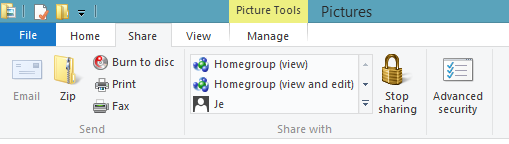
Share. Use the tools on this tab to send files in an email message, compress (zip) files, burn selected files to a CD or DVD, print, fax, and share with users in your homegroup, among other things and as applicable. (You can’t print a video you’ve selected, for instance, so Print will be dimmed in that case.)
Tip
Additional “contextual tabs” might appear, such as Picture Tools, if you select certain types of items in the open folder or library.
Use the Share tab to choose with whom to share the data, among other things.
View. Tools on the View tab make it possible for you to change how the files appear in the window (Extra Large Icons, Large Icons, Medium Icons, and so on). You might also be able to hide or show the Navigation pane, Preview pane, and Details pane; choose how to sort the data in the window; and show or hide file name extensions; among other things.
Troubleshooting
If you can’t see all the tabs, or if the items on the tabs seem condensed, maximize the File Explorer window. If you don’t see the ribbon, but instead see only tab names, at the top of the window, on the Quick Access toolbar, click the arrow, and then clear the Minimize Ribbon check box.
Manage. In varying instances a Manage tab appears, such as when you select a photo. From that tab, you can often rotate an image, set it as background, or show a slide show.

Tip
Rarely, an unexpected tab will appear or a common tab will be missing. For instance, if you click This PC in the Navigation pane, you’ll see only three tabs: File, Computer, and View. If you select a drive in the Content pane, though, another tab will appear, Drive Tools, Manage.
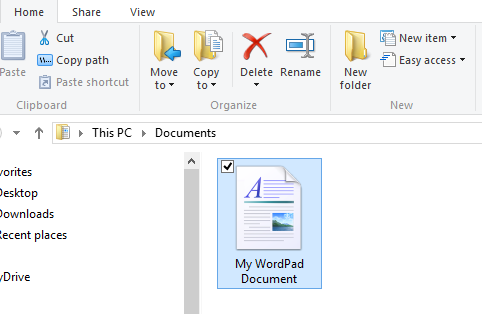
In this exercise, you’ll explore various tabs on the File Explorer ribbon and use the ribbon to delete the My WordPad Document file you created earlier in this chapter. Later, you’ll learn how to use more of the commands you see on these tabs.
Set Up
You need to have previously created the My WordPad Document file, as described earlier in this chapter, and saved it to the Documents folder.
See Also
For more information on deleting files, see the section Working with deleted files and the Recycle Bin later in this chapter.
To summarize, the ribbon offers the tools you need to perform tasks when working with files, folders, and subfolders, and the tabs are named so that you can easily determine what should be available on them. For instance, if you want to share a file by printing it, sending it by email, burning it to a CD, or even faxing it, the Share tab offers this functionality. If you want to change how you view files in File Explorer or if you’d like to sort your files, group them, or hide or view specific parts of File Explorer, the View tab offers this functionality. Don’t worry if this is all new to you; it’s pretty intuitive, and you’ll catch on quickly.
There are many ways to organize your files and folders beyond saving them in the appropriate folders and with recognizable names. One way to organize your files for the long term is to create subfolders within the existing default folders and move data into those subfolders. By using subfolders, you can easily expand the existing file system. This makes navigating your data more intuitive when using File Explorer. Windows 8.1 makes it easy to create a subfolder, and you’ll learn how to do it in the next exercise.
Tip
The best way to keep your data organized is to create folders with descriptive names and move corresponding data into them as you acquire it (as opposed to later, after the data has become a problem). Consider creating folders named Travel, Taxes, Health, Pets, and so on.
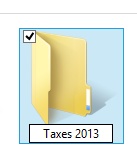
Either before or after you create subfolders and begin to move data into them, you can give those folders more recognizable names than they have now. Names such as Tax Summary 2013, Jennifer’s Wedding, or My Las Vegas Vacation 2011 are certainly understandable and better than something less descriptive (such as Taxes, Pictures, or Vacation). You can delete files you no longer need, too. Finally, if you decide to archive data that you no longer want to store on your computer, you can burn those files to a CD or DVD.
In this exercise, you’ll create a subfolder within the Pictures folder.

After you create a subfolder, it’s easy to move data into it. You can just drag files from the window to the newly created folder. This works great if the new folder and the data you want to move into it are both in the same window. However, if dragging isn’t so straightforward, you can use the Move To command on the Home tab of the ribbon.
Tip
You can select multiple, noncontiguous files by holding down the Ctrl key while you select them. To select contiguous files, hold down the Shift key, click the first of the series of files, click the last in the series to select those and all of the files in between.
In this exercise, you’ll move two files at one time from one folder to another by using the Move To command in File Explorer.
Set Up
You need the practice files located in the Chapter04 folder, as outlined in the section “Using the Practice Files” in the Introduction of this book.
Open File Explorer by using any method desired.
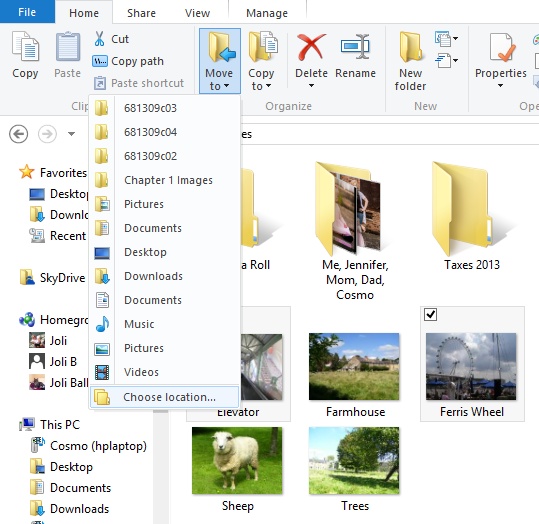
In the Navigation pane, click This PC, and then double-click Pictures.
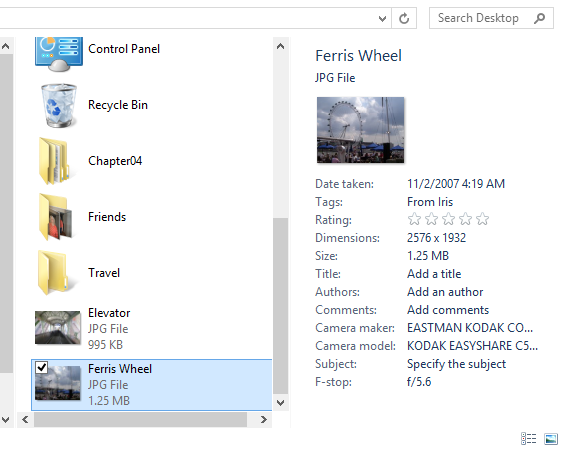
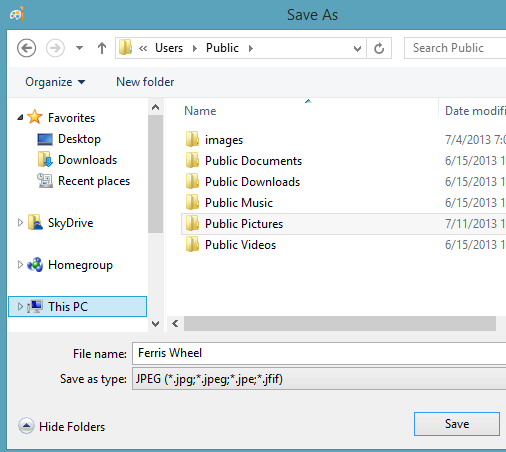
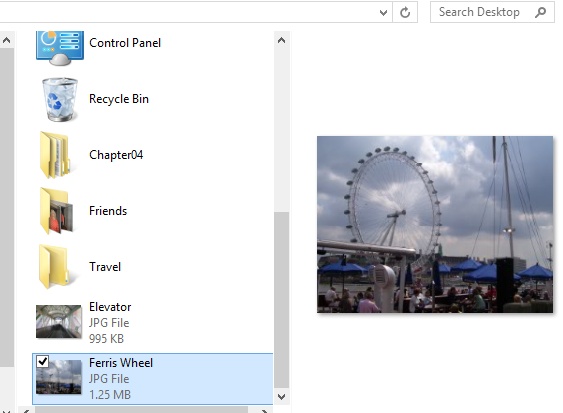
Click the Elevator file to select it (do not double-click it).
Hold down Ctrl and click Ferris Wheel (again, do not double-click it).
On the Home tab, click Move To.
Click Choose location.
In the Move Items dialog box that opens, click Desktop. (Desktop is listed under This PC in the Move Items dialog box.)
Click Move.
After you click Move, the dialog box closes, and the two files you selected are now available on the desktop

When you import pictures from a digital camera by using any of the available built-in tools, your camera software, or a photo-editing app, those imported pictures are given names. Every file must have its own name. The names given aren’t very descriptive, though. The file names applied might be a cryptic form of the date on which the photos were imported, or they might be partial names created by using tags you applied during the process, but usually they are not the names you’d apply to them, given the opportunity.
Tip
Take time to name files effectively when you acquire them so that renaming files doesn’t take you all day when you decide that it needs to be done.
Other types of files are also often named inappropriately, generally because you’re in a hurry to save them. File names such as Dad, Summary, Presentation, Taxes, and so on don’t give much information about their contents. If you find yourself opening the file to figure out what it is, the name is not descriptive enough.
Tip
The Home tab on the File Explorer ribbon offers the Rename button, which becomes available only after you select a file.
In this exercise, you’ll rename a file by using the Rename command in File Explorer.
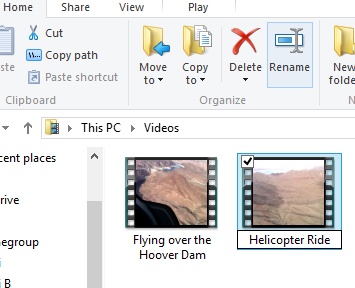
Open File Explorer by using any method desired.
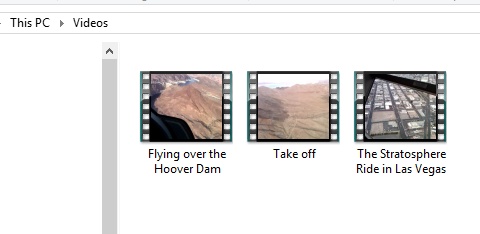
In the Navigation pane, click This PC. Double-click Videos.
Click the Take Off file to select it (do not double-click it).
On the Home tab, click Rename.
Type Helicopter Ride.
Press Enter.
Now that you have some experience with File Explorer, the ribbon, and working with files, you can use that knowledge to explore other tools that are available on the ribbon and to use those tools with less guidance. For instance, you can likely figure out how to burn a file to a CD or DVD because Burn To Disc is a command on the Share tab, provided your computer or laptop offers the required drive. Likewise, you can deduce how to print the Sheep.jpg photo by using the Print command that’s located on that same tab. In both instances, you select the desired file, click the desired command, and follow any instructions provided; for instance, you might have to insert a disc or put paper in the printer.
Some commands are less intuitive than, for example, Print. The Zip command is one of those. When you zip a file (or files), you compress it. When you compress a group of files or a single large file, it takes up less space on your hard disk. People often zip large files or groups of files before they send them as attachments to email messages to reduce the amount of time it will take the files to arrive at their destination. In the past, people zipped files because of a lack of hard disk space. (The practice files you downloaded for use with this book were zipped.)
Fax is another intuitive but odd command. It’s a little different from the others because you need access to a fax server or telephone line to actually send a fax, and most home users don’t have that access. If you already have something in place with which you can send faxes from your computer, though, the process is intuitive. If you’d like to be able to send faxes from your computer, you’ll have to perform the setup tasks that appear when you click the Fax command.
There are some tools you can now explore on your own from the Share tab. (Remember that not all options appear for all data.)
Email. Select any file (or multiple files) in a File Explorer window to activate this option. Click Email. If you’ve chosen a picture (or multiple pictures) to send in email, you’ll be prompted to choose a picture size first. After you click Email, your default email app will open, and the file(s) will be attached.
Zip. Select multiple files to compress them. After they are compressed, you can send the compressed folder (which contains the files) as an attachment to an email message. To decompress, double-click the compressed files. You can see that a file is zipped because a zipper appears on it. (The practice files you downloaded to your desktop for use with this book were in a folder that had a zipper on it.)
Burn To Disc. Select the file or files to burn (copy) to a CD or DVD. Click Burn To Disc. Insert a disc when prompted and follow any instructions to complete the copy process.
Print. Select the file or files to print and then click Print. You might be prompted to choose a printer, set printer properties, or perform other tasks, depending on your printer and current computer setup. The document might just begin to print with no other input from you. The Print command will appear dimmed if you have selected something that can’t be printed, such as a song in the Music library.
Fax. Select a file to fax. Click the Fax command. Follow any prompts to complete the fax process.
See Also
To share data with others on your network, which can involve using the various homegroup and share commands on the Share tab of File Explorer, refer to Chapter 13.
On the View tab in File Explorer, you can change how the window displays on the screen. You can hide or show the Navigation pane, change how the files appear (for example, as a detailed list or as icons), and hide files and folders you don’t use very often. You can show panes that do not currently appear, including the Preview pane and the Details pane. You can also group files in various ways, show file name extensions, and more. The best way to learn your way around these options is to show and hide these panes, show and hide files, and change how the files and folders appear in the File Explorer window.
Tip
You might not want to customize File Explorer too much right now, especially anything having to do with hiding files, folders, or the Navigation pane. If you change it too much, it won’t look like what you see in the screen shots in this book.
Here are the options you can safely explore on the View tab.
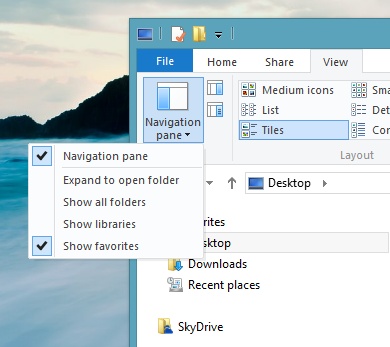
Navigation Pane. The Navigation pane is the one on the left of the File Explorer window that contains the folder list, and sections including Favorites, SkyDrive, Homegroup, This PC, and Network. To hide this pane, click an item in the Navigation Pane that also shows the Home tab (like desktop). Then, on the View tab click Navigation pane. On the list that appears, click Navigation Pane again. This hides the pane. Repeat to show the pane. Note that this is also where you show the Libraries in the Navigation pane.
Preview Pane. The Preview pane generally offers a preview of the selected file, without having to open it. Click Preview Pane to show this pane; click it again to hide it.
Details Pane. The Details pane offers comprehensive information about a file. The information offered is similar to what you’d see if you viewed the file’s Properties page. Click Details Pane to show this pane; click it again to hide it.
Layout Group Options. The options in the Layout group include Extra Large Icons, Large Icons, Medium Icons, Small Icons, List, Details, Tiles, and Content. Click each to view it and see the effect.
Sort By. You use the Sort By option to arrange data by Date, Size, Rating, and other attributes. Click Sort By and select an option, such as Date Taken, to group data differently.
Group By. By default, files and folders are listed alphabetically and in ascending order in File Explorer, but you can change that by using the Group By options. Click Group By and select any option to group by that criterion.
Item Check Boxes. Select the Item check boxes to show the check mark when items are selected. Clear the check boxes to hide these marks.
File Name Extensions. Select the File Name Extensions check box to see the extension after the file name.
Hidden Items. Select this check box to show the data you’ve previously hidden. The data you’ll see (that is currently hidden) will appear dimmed, and you can use Hide Selected Items to display the items.
Hide Selected Items. With this option, you hide items you don’t need to access regularly while leaving those items available on your computer. To hide any item, select it, and then click Hide Selected Items. The items will be hidden. To reveal them, select the Hidden Items check box (detailed in the previous bullet), select the item to reveal, and then click Hide Selected Items to display the item.
You know how to share files by using File Explorer and how to change the way you view files there. As you acquire more data, however, it will become increasingly difficult to sift through it to find what you want. One way to deal with large amounts of data is to customize what’s shown in a File Explorer window by searching for the files you want. When you do this, only the files that match criteria you set appear in the window. This is a good way to cull information when you’ve stored a lot of data.
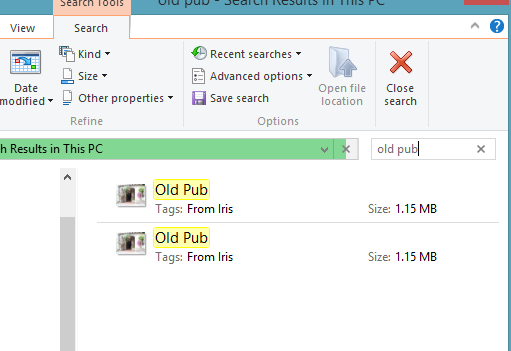
In this exercise, you’ll search for a specific file in File Explorer.
Open File Explorer by using any method desired.
In the Navigation pane, click This PC.
In the upper-right corner of the screen, in the Search This PC window, type Old Pub.
Note the results.
You learned earlier in this chapter how to delete a file (or other item) in File Explorer; you just select the item and then, on the Home tab of the ribbon, click Delete. You can select multiple items by holding down Shift or Ctrl. You might know other ways to delete a file, including right-clicking the item and then choosing Delete from the resulting contextual menu or selecting the item and pressing the Delete key. However you do it, files and folders you delete are sent to the Recycle Bin and are removed from their current positions in the folder. The Recycle Bin holds deleted files and data until you manually empty it.
In this last exercise, you’ll restore a file by using the Recycle Bin.
Set Up
You need to have completed the previous exercises in the chapter, namely creating the My WordPad Document file and then deleting it.
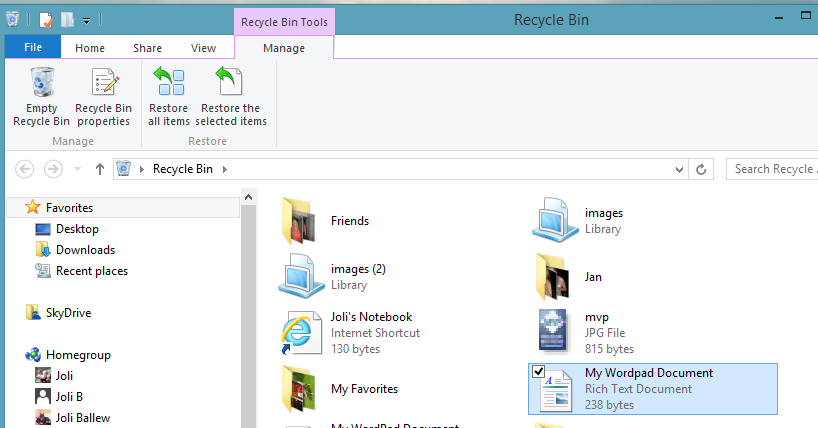
On the desktop, double-click the Recycle Bin to open it.
Locate the deleted file, My WordPad Document, and click it to select it (do not double-click it).
On the ribbon’s Recycle Bin Tools Manage tab, click Restore The Selected Item.
Return to the Documents folder to verify that the file is restored.
There are a few other things you can do while in the Recycle Bin, including emptying it. You can also restore every item that’s in there. You should make it a habit to empty the Recycle Bin two or three times a year. You do this on the Manage tab. To access this screen, on the desktop, double-click the Recycle Bin. (Note that when you empty the Recycle Bin, you will no longer be able to restore anything previously in it.)
The Recycle Bin has other tabs to explore, too. When you explore them, you’ll find familiar tools on each. For instance, on the Recycle Bin Home tab, you can delete specific files permanently, move files somewhere else, and even view the properties for a file. Likewise, on the Share tab, you can send email and burn files to a disc. On the View tab, you can change how items in the Recycle Bin appear in the window.
You save data as files, save files in folders and subfolders, and access folders from This PC in File Explorer.
Windows 8.1 comes with its own file system that includes various default folders to which you should save data, including but not limited to Documents, Public Documents, Pictures, Public Pictures, Music, Public Music, Videos, Public Videos, Downloads, and others.
File Explorer is the best way to navigate to the data you keep and offers the ribbon to help you navigate it.
You can use SkyDrive from File Explorer to save data to your SkyDrive folder in the cloud.
The tabs that you’ll use most often on the File Explore ribbon are Home, Share, and View. You use these tabs to work with the data you collect, including renaming, deleting, sending email, printing, moving, and so on.
It’s possible to customize File Explorer by hiding and showing data or culling data by searching for something specific.
You can restore deleted files from the Recycle Bin, provided that you haven’t yet emptied it since deleting the desired file.