
Chapter at a glance
Change
Change the UAC level, page 417
Work
Work with Windows Firewall, page 419
Restore
Restore Windows Firewall settings to their defaults, page 431
Use
Use Windows Defender to secure your system, page 433

IN THIS CHAPTER, YOU WILL LEARN HOW TO
Security is very important in the modern era of computers and devices. Microsoft has spent quite a bit of effort to enhance the security provided by Windows 8.1. This operating system offers improved versions of all its main security tools: User Account Control (UAC), Windows Firewall, and Windows Defender.
In this chapter, you’ll learn how the UAC works, how to tweak it, and why you should never turn it off. In addition, you’ll learn the basics of working with Windows Firewall to secure your network and Internet traffic and about the new and improved Windows Defender and how to use it to keep your system safe from viruses and spyware. Finally, you’ll learn how to improve your passwords to make it more difficult for unwanted people to use the Internet to access your Microsoft account, your email, and other important accounts.
Practice Files
You don’t need any practice files to complete the exercises in this chapter. For more information about practice file requirements, see the section “Using the practice files” In the Introduction of this book.
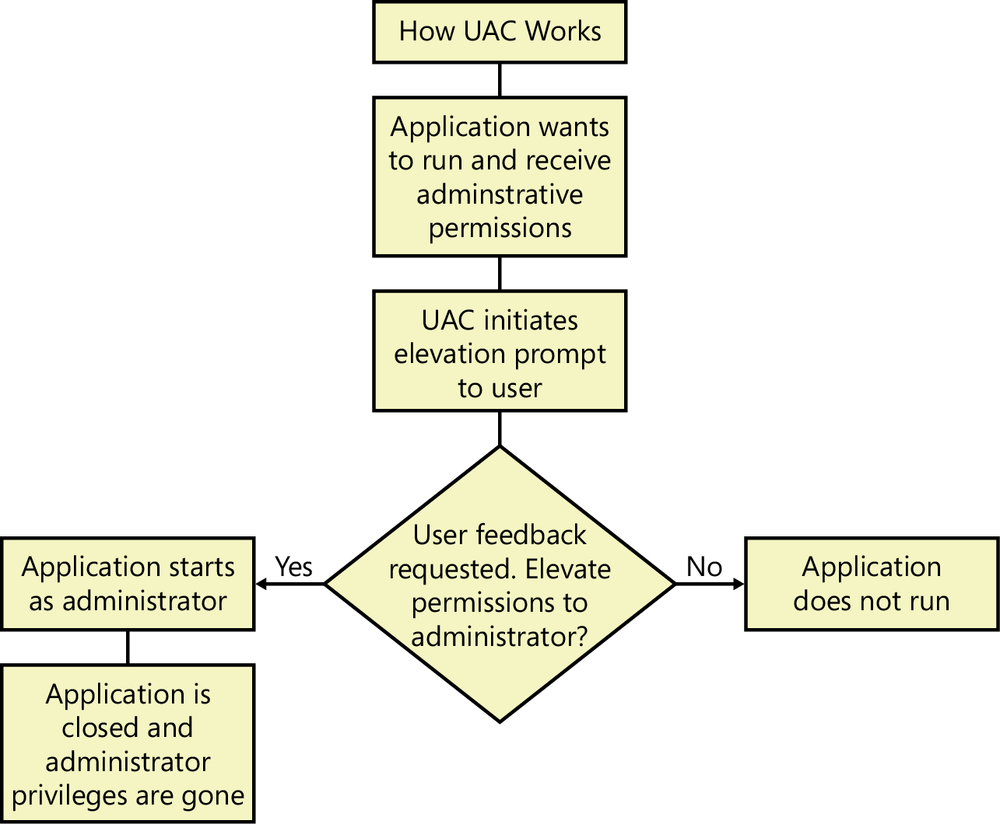
The UAC is a security feature that was introduced in Windows Vista and improved in all subsequent versions of Windows. It is present in Windows 8.1, as well, and it helps prevent unauthorized changes to your computer. These changes can be initiated by users, apps, viruses, or other types of malware. UAC ensures that these changes are made only with approval from the administrator of the computer. If these changes are not approved by the administrator, they will never be executed, and the system will remain unchanged.
Unlike in Windows XP, desktop apps in Windows 8.1 do not run with administrator permissions and consequently cannot make any automatic changes to the operating system. When a desktop app wants to make system changes such as modifications that affect other user accounts, modifications of system files and folders, or installation of new software, UAC prompts the user to ask for permission.
If the user clicks No, the changes won’t be performed. If the user clicks Yes, the app receives administrator permissions and makes the system changes it is programmed to make. These permissions will be granted until it stops running or is closed by the user. The next time it runs, it starts without receiving any administrator permissions.
To illustrate this process, the UAC algorithm is explained in the following diagram.
Many changes require administrator privileges and, depending on how UAC is configured on your computer, they can cause a UAC prompt to ask for permissions. Here are those changes:
Running a desktop app as an administrator
Changes to system-wide settings or to files in the Windows and Program Files folders
Installing and uninstalling drivers and desktop apps
Installing ActiveX controls
Changing settings to Windows Firewall
Changing UAC settings
Configuring Windows Update
Adding or removing user accounts
Configuring parental controls
Running the Task Scheduler
Restoring backed-up system files
Viewing or changing the folders and files of another user account
Changing the system date and time
If UAC is turned off, any user and any desktop app can make any of these changes without a prompt for permissions. This would make it possible viruses and other forms of malware to infect and take control of your system more easily than when UAC is turned on.
When using Windows Store apps, UAC is never triggered because, by design, these apps cannot modify any system settings or files. Therefore, UAC prompts are displayed only when working with desktop apps.
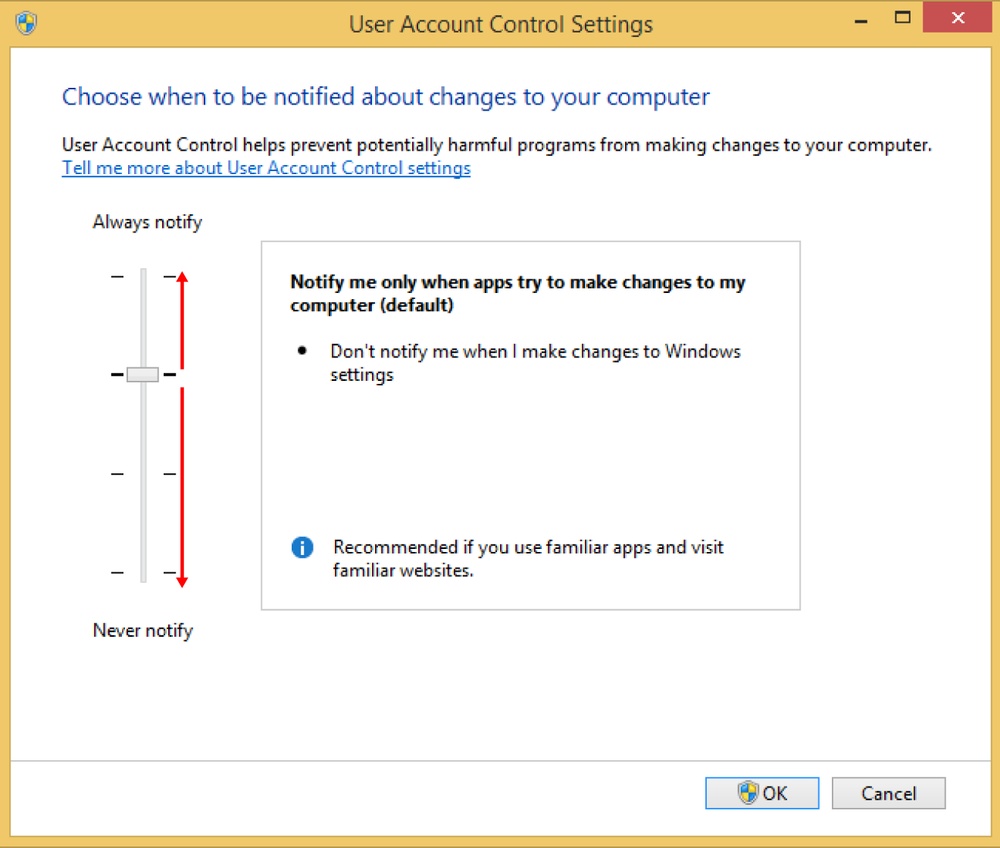
Windows 8.1 has four UAC levels from which to choose. The differences between them are described in the following.
Always Notify. At this level, you are notified before desktop apps make changes that require administrator permissions or before you or another user changes Windows settings. When a UAC prompt appears, your desktop is dimmed, and you must choose Yes or No before you can do anything else on your computer.
Security Impact: This is the most secure setting but also the most annoying. If you do not like the UAC implementation from Windows Vista, you won’t like this level either.
Notify Me Only When Apps Try To Make Changes To My Computer (Default). This is the default level; it only notifies you before desktop apps make changes to your computer that require administrator permissions. If you manually make changes to Windows, UAC doesn’t notify you. This level is less annoying because it doesn’t stop the user from making changes to the system; it only shows prompts if an app wants to make changes. When a UAC prompt appears, the desktop is dimmed, and you must choose Yes or No before you can do anything else on your computer.
Security Impact: This is less secure because malicious desktop apps can be created that simulate the keystrokes or mouse moves of a user and change Windows settings. However, if you are using a good security solution, these scenarios should never occur.
Notify Me Only When Apps Try To Make Changes To My Computer (Do Not Dim My Desktop). This level is identical to the preceding one except that when a UAC prompt appears, the desktop is not dimmed and other apps might be able to interfere with the UAC dialog box.
Security Impact: This level is even less secure because it is easier for malicious desktop apps to simulate keystrokes or mouse moves that interfere with the UAC prompt. Again, a good security solution can compensate for the slight decrease in security.
Never Notify. At this level, UAC is turned off and offers no protection against unauthorized system changes. Any user or desktop app can make system changes without any prompts for permission.
Security Impact: If you don’t have a good security solution, you are very likely to have security problems. With UAC turned off, it is easier for malicious desktop apps to infect your computer and take control of it and its settings.
Now that you know what this feature does and how it works, you’ll learn how to configure it to offer the level of security you desire. In this exercise, you’ll learn how to change the UAC level.
Important
Before changing the UAC level, review the previous section in this chapter. It is very important to understand the differences among the levels before making any changes.
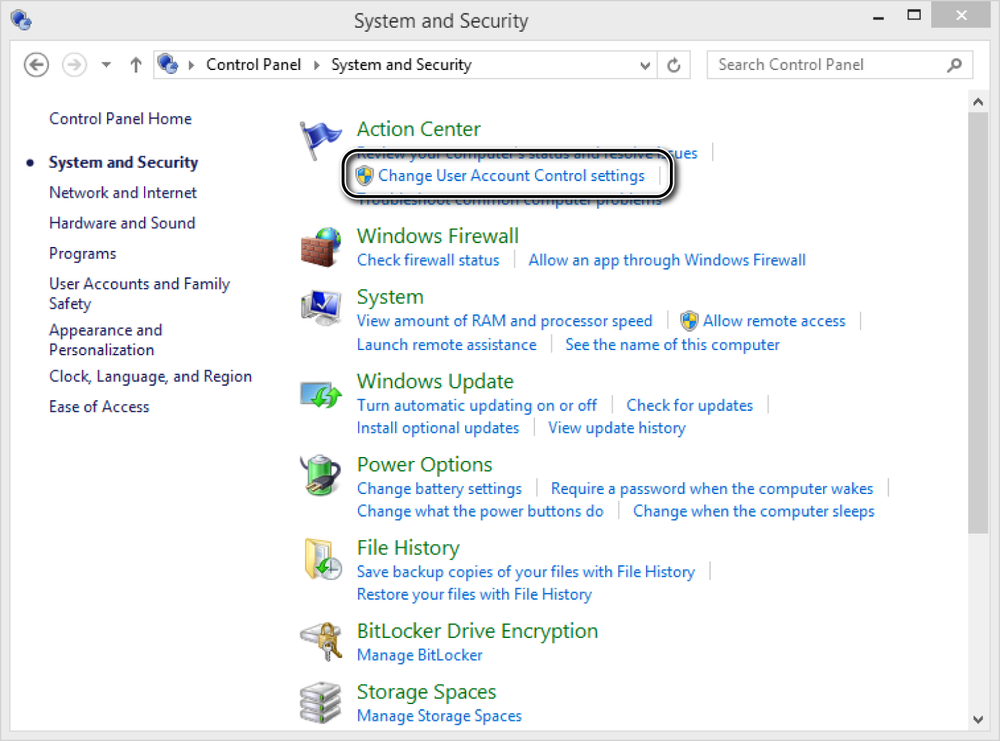
Click System And Security.
The System And Security window opens.
In the Action Center section, click Change User Account Control Settings.
Move the slider to the UAC level you want to use.
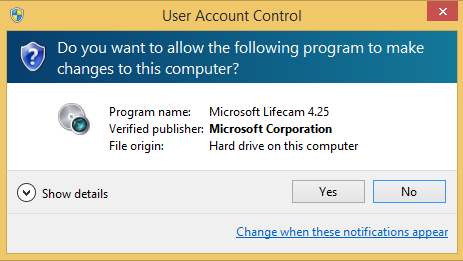
Click OK.
Depending on the UAC level set before making the change, you might receive a UAC prompt. Click Yes if you do.
The UAC is set to the level you selected and will provide you with the appropriate security level according to that choice.
Windows Firewall is a security desktop app built in to Windows that helps block unauthorized access to your computer while permitting authorized communications to and from your computer. It has been improved in each new version of Windows.
With Windows 8.1, this tool can filter both inbound and outbound traffic or set rules and exceptions, depending on the type of network to which you’re connected. If you aren’t using a third-party security suite that includes a firewall, it is highly recommended that you use Windows Firewall because it provides a good level of security.
Windows Firewall has a predefined set of rules that are applied as soon as it is turned on. By default, it allows you to do many things: browse the Internet; use instant messaging apps; connect to a homegroup; share files, folders, and devices with other computers; and so on. The rules are applied differently depending on the network profile set for your active network connection.
See Also
For more information about network profiles, see Chapter 11.
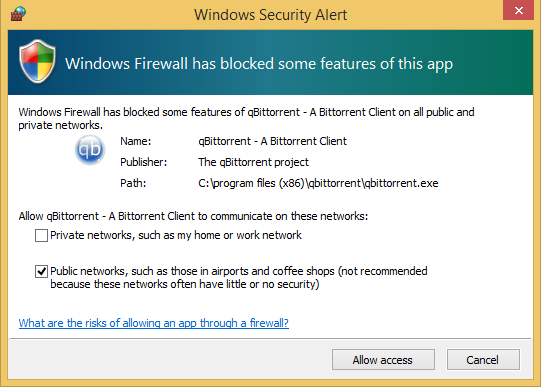
Most apps you install on your computer automatically add an exception to Windows Firewall so that they receive network and Internet access as soon as you start them. However, if they don’t add such an exception, Windows Firewall asks if you want to allow them access to the network. At this point, you receive a security alert similar to the following one, in which you are asked to select the network profiles to which you allow access for the app: private networks (such as home and work networks) or public networks (such as those in airports, coffee shops, and so on).
By default, Windows Firewall selects the check box relevant to the network you are currently using. However, you can select either of the options or both, depending on what you want to do. When you’ve decided, click Allow Access, and the desktop app is allowed to communicate on the selected type(s) of network. To block access, just click Cancel.
Important
If you do not have administrator access, you can’t set any exceptions, and the apps that do not comply with the standard set of rules are automatically blocked.
Windows Firewall is turned on by default in Windows 8.1, and it runs silently in the background as a service. It prompts you whenever you need to make a decision, and you don’t need to open it unless you want to see its status or configure it to better meet your needs.
To open Windows Firewall, on the Start screen type firewall, and then click the Windows Firewall search result. As an alternative, you can open Control Panel and click System And Security to open the System And Security window, which has all tools and configuration options available for this category.
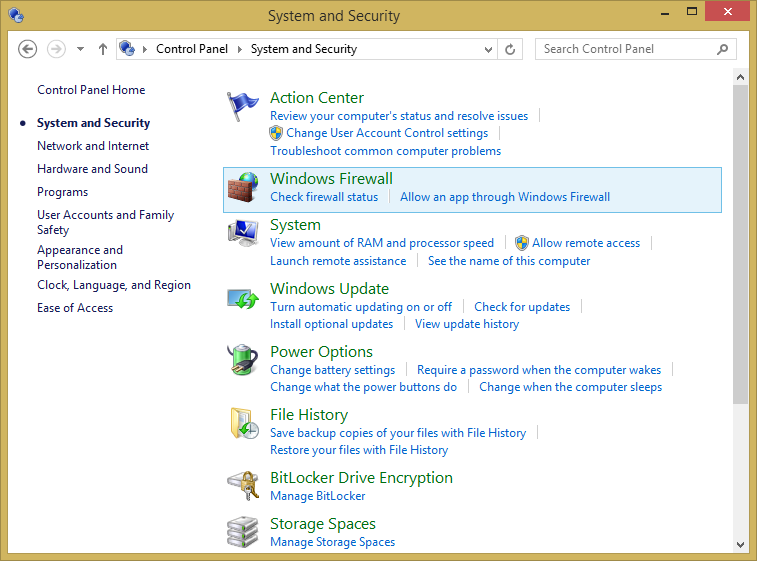
Click Windows Firewall to open the Windows Firewall desktop app. In the center of its window, you can see information about the status of your network connections and how Windows Firewall is set for each type of connection.
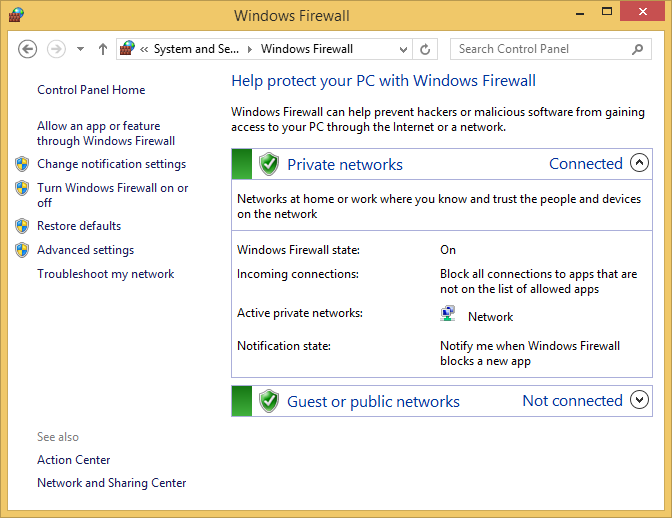
In the left column are links to different configuration options for Windows Firewall and other tools such as the Action Center.
By default, Windows Firewall is turned on for both types of network profiles, Private and Public. You can turn it on or off for one or both the network locations in the Customize Settings window.
If you choose to install a third-party security app, such as a complete Internet security suite or another firewall, it is best to disable Windows Firewall so that it doesn’t create conflicts and problems.
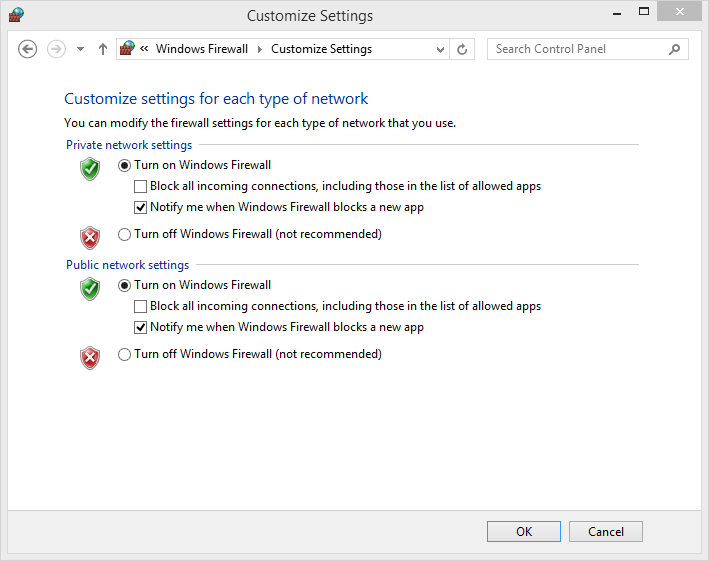
Beneath the Turn On Windows Firewall option, there are two other settings you can choose. The first is to block all incoming connections to your computer. Don’t choose this unless you want your computer to be unavailable to anyone or any app. The second is to receive notifications when Windows Firewall blocks a new app. You should select this option; otherwise, you won’t know why an app doesn’t access the network or the Internet correctly.
You can only turn Windows Firewall on or off if you are logged on as an administrator. This setting will apply to all user accounts defined on your computer. Also, if you turn off Windows Firewall, make sure your user account and others have proper security alternatives installed.
In this exercise, you’ll learn how to turn off Windows Firewall.
In the left column, click Turn Windows Firewall On Or Off.
The Customize Settings window, which shows whether the Windows Firewall is turned on, opens.
Select Turn Off Windows Firewall (Not Recommended) for both Private Network Settings and Public Network Settings.
To apply your settings, click OK.

To turn Windows Firewall on, perform the same steps. However, in step 2, you select Turn On Windows Firewall for both Private Network Settings and Public Network Settings.
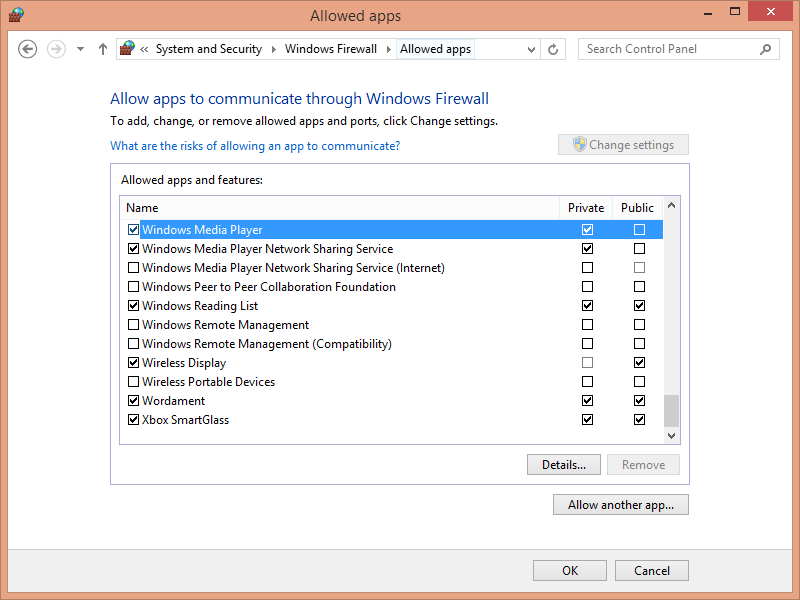
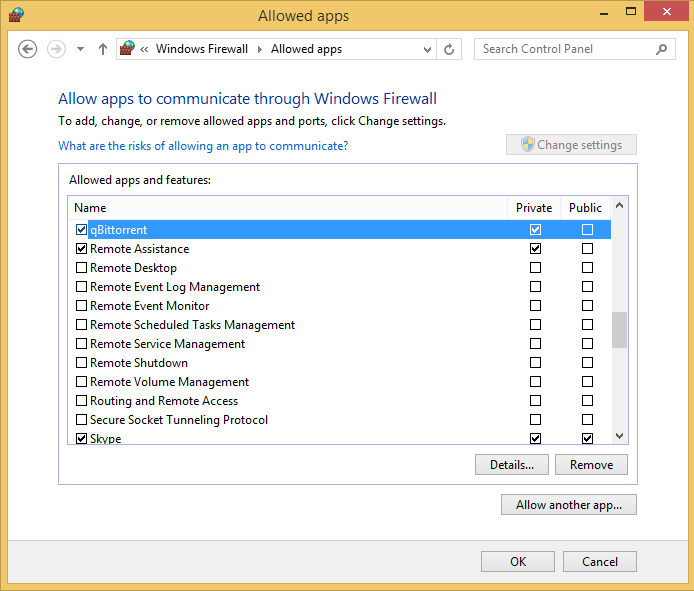
The Allowed Apps window contains all the apps that are allowed to go through Windows Firewall. By default, you cannot edit the list. Click the Change Settings button to edit the list of allowed apps. The button will then be dimmed, and you will be able to edit the list of allowed apps, programs, and features.

The check boxes for some apps are selected, indicating that the rules defined for those apps are active and used by Windows Firewall. The apps with with clear check boxes don’t have any active rules used by Windows Firewall. For those apps for which Windows Firewall is active, certain Private and Public check boxes are also selected. If a check box is selected in any of these columns, it means that the rule defined for that app is applied to the network profile that is selected. Some apps have rules for one network profile, whereas others have rules for both. The rules are active only for the network profiles that are selected.
With Windows Firewall, you can edit its communication rules so that you can permit or deny network access for certain apps or services. In this exercise, you’ll learn how to customize the list of allowed apps.
In the left column, click Allow An App Or Feature Through Windows Firewall.
The Allowed Apps window opens.
Click Change Settings.
Select the app whose permissions you want to change.
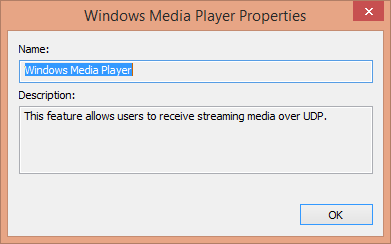
A window displaying the apps properties opens.
Read the information to confirm that this is the app whose permissions you want changed and then click OK.
Clear the Private and Public check boxes for the app to block its access to both network profiles, and then click OK.
The changes you made for the selected app are now applied.
You can easily add new apps to the list of apps allowed through Windows Firewall. In this exercise, you’ll learn how to add new apps to the allowed list.
In the left column, click the Allow An App Or Feature Through Windows Firewall.
The Allowed Apps window opens.
Click Change Settings if required.
Click Allow Another App.
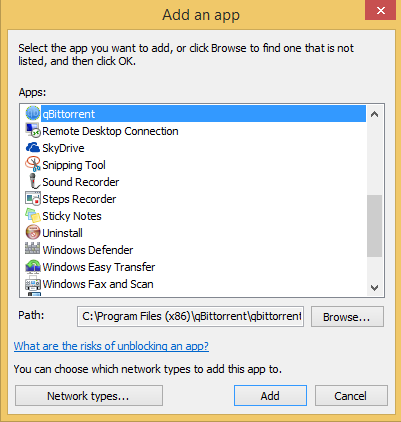
The Add An App window opens.
Select the app that you want to add and then then click Network Types.
The Choose Network Types window opens.
Select the network locations through which you want to allow the app to communicate, and then click OK.
In the Add An App window, click Add.
You return to the Allowed Apps window, in which you can see the newly added app on the list.
Click OK.

Clean Up
Repeat this procedure for all the apps you want to add and then close the Windows Firewall window.
The change is now applied to the list of active rules Windows Firewall uses.
Removing apps from the list of allowed apps through Windows Firewall or disabling access to certain types of networks is easy. Both tasks are done from the Allowed Apps window. If you want to disable a rule allowing access to a certain app or feature, simply clear the check box to the left side of its name. Windows Firewall will no longer use it.
If you only want to disable network and Internet access for an app when connected to a certain type of network profile, clear the check box in the column of that network profile. For example, if you want to prevent an app from receiving network and Internet access when you are connected to a public network, clear the check box in the Public column. If the Private column is selected for that app, it will only have access to private networks.
When removing entries from the allowed list, keep in mind that you can remove only apps and entries that were not included with Windows 8.1. For example, you cannot remove an entry about Windows Media Player because it is part of Windows 8.1, although you can remove an entry about a third-party app you installed, such as Steam or uTorrent. The entries that are included in the default configuration of Windows Firewall can only be disabled, not removed.
In this exercise, you’ll learn how to remove an app from the allowed list.
In the left column, click the Allow An App Or Feature Through Windows Firewall.
The Allowed Apps window opens.
Click Change Settings, if required.
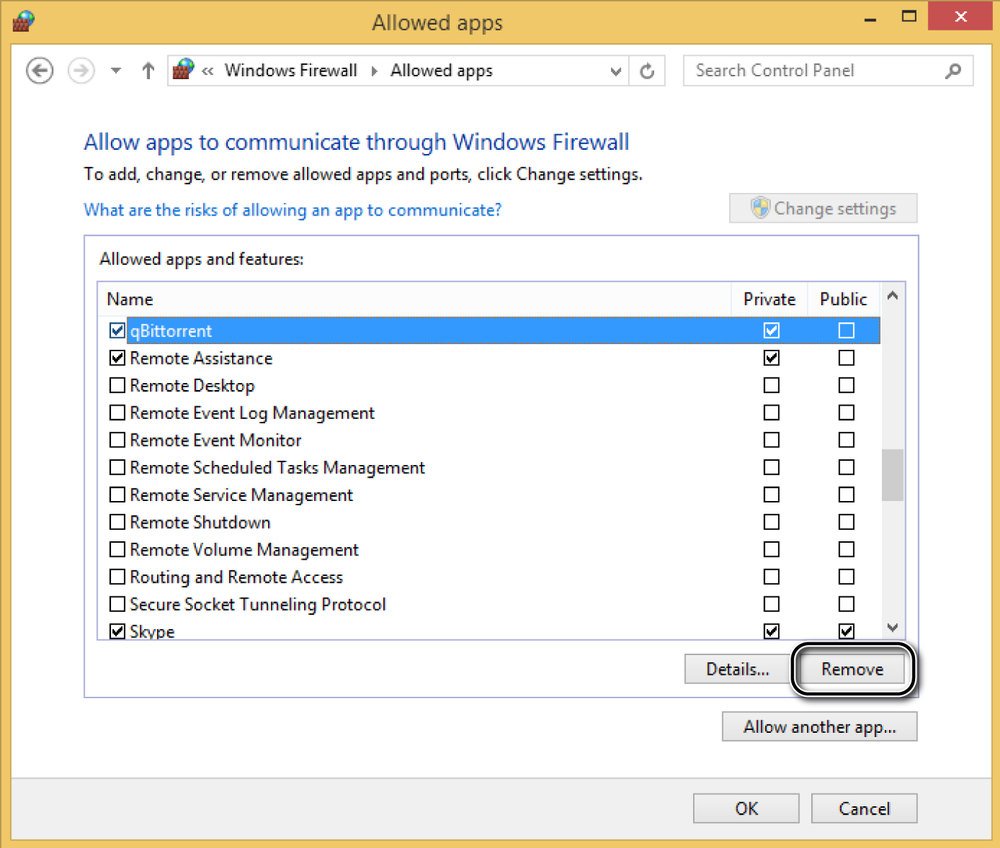
Select the app or feature that you want to remove, and then click Remove.
Click Remove.
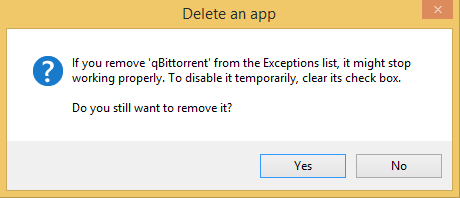
You are asked to confirm the removal.
Click Yes.
You return to the Allowed Apps window.
Click OK.
The change is now applied to the list of active rules Windows Firewall uses.
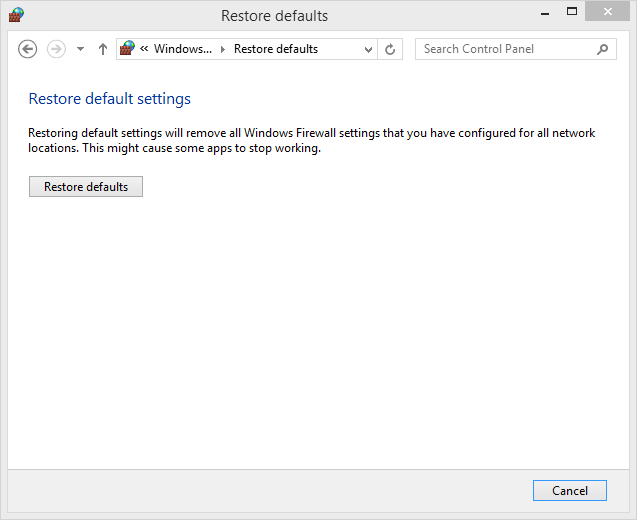
If you have used this tool for a long time and you have made many changes to its settings, the chances are good that some things might stop working. In such cases, it is best to reset all rules to the default settings and values created by Microsoft. Then, you can start from the beginning, defining the rules that you want to apply to your apps so that everything works as it should.
In this exercise, you’ll learn how to restore the default settings of Windows Firewall.
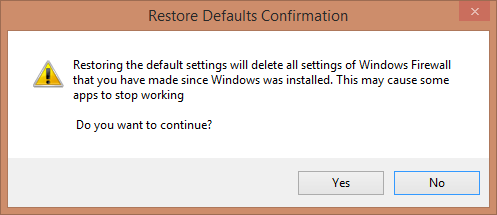
All the Windows Firewall settings you created are deleted. Everything is now reset to the initial settings and values as they were when Windows 8.1 was installed on your computer.
Windows Defender was originally a tool that provided protection only against spyware threats. Then Microsoft introduced Microsoft Security Essentials, a product that added antivirus protection. It quickly became one of the most popular free anti-malware products among Windows users. With Windows 8, Microsoft has decided to include the features initially released in Microsoft Security Essentials in the earlier Windows Defender product. In Windows 8.1, further improvements have been made to this product.
Windows Defender now provides basic anti-malware protection that will keep you safe from viruses, spyware, and other types of malware. It doesn’t compare in number of features and efficiency with most commercial security solutions, but it is one of the best free security solutions you can find for Windows. Windows Defender is turned on by default in Windows 8.1, and it can be launched by searching for the word “defender” on the Start screen and clicking the appropriate search result.
The Windows Defender interface is simple and easy to use. At the top of the window, four tabs are available:
Home. This tab shows an overview of Windows Defender: whether any threats and problems were detected, whether the real-time protection is turned on, and whether the virus and spyware definitions are up to date. On the right side, you can start a manual scan for malware; on the bottom, you can view when the last scan was made.
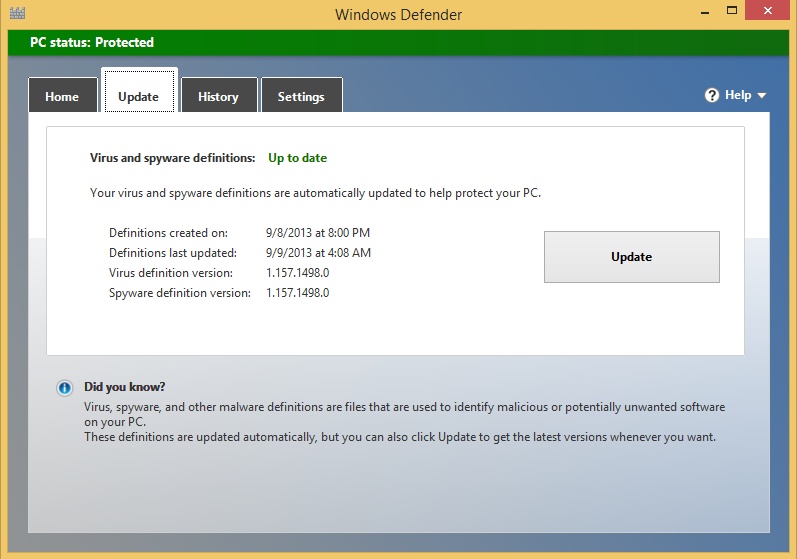
Update. This tab displays details about the latest update of definitions Windows Defender made. You can also manually start an update if the definitions are more than a day or two old.
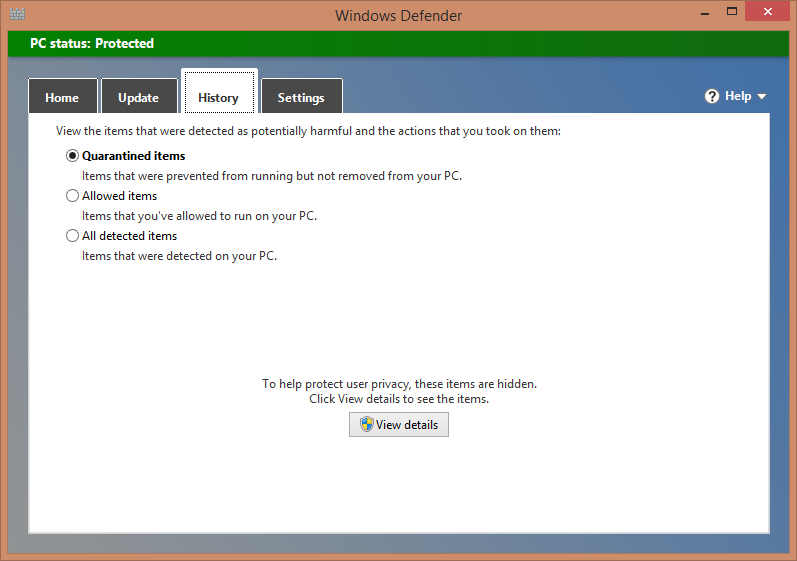
History. This tab is for viewing details about the threats Windows Defender has detected. You can view the items that were quarantined, the items that you allowed to run despite the recommendations received from Windows Defender, and all the items that were detected as malicious.
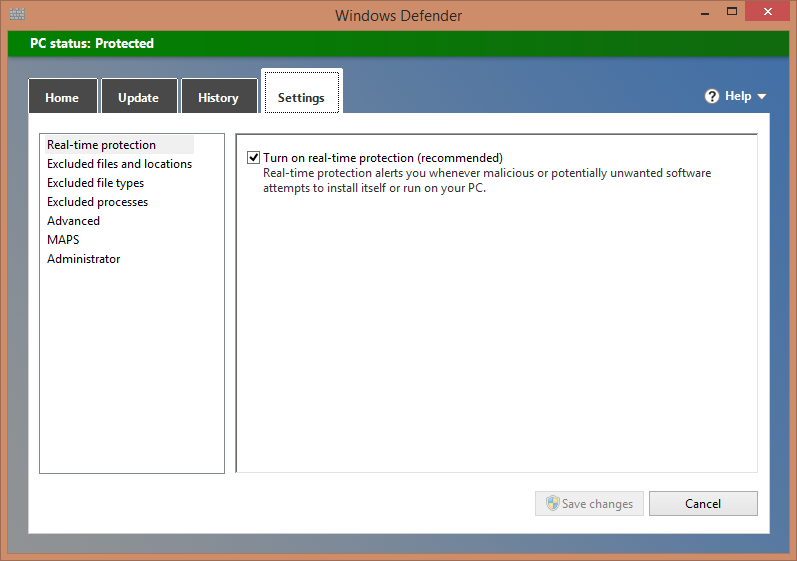
Settings. On this tab, you can customize how Windows Defender runs. You can turn on or off its real-time protection engine; exclude files, locations, or processes from being scanned; tweak more advanced settings; choose whether you want to join the Microsoft Active Protection Service; or completely disable Windows Defender.
Windows Defender automatically scans all the files and folders through which you browse. If a threat is identified, it is immediately quarantined, and you are informed of this action.
Each time you see a warning similar to the following one, Windows Defender cleaned some threats it detected.

Detected threats are automatically isolated and placed into quarantine. You can only access the items that were quarantined from Windows Defender and decide whether you want to remove them completely from your system or keep them and set Windows Defender to allow them. However, to remove them or keep them you need to have administrator permissions.
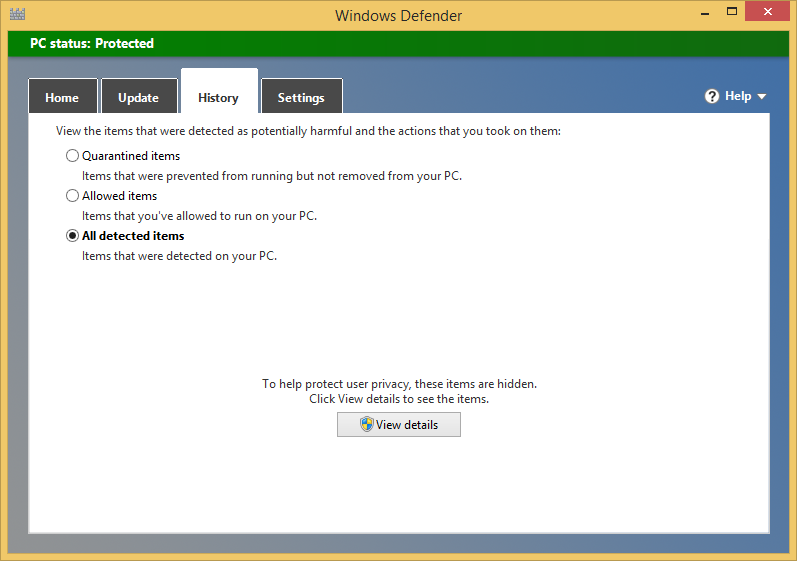
In this exercise, you’ll learn how to access the items that were detected as malicious by Windows Defender and remove them from your computer.
Click the History tab.
Choose All Detected Items.
Click View Details to see all the items that were detected as malware.
Scroll through the infected items that were detected and read the information being displayed, to learn more about them.
Click Remove All.
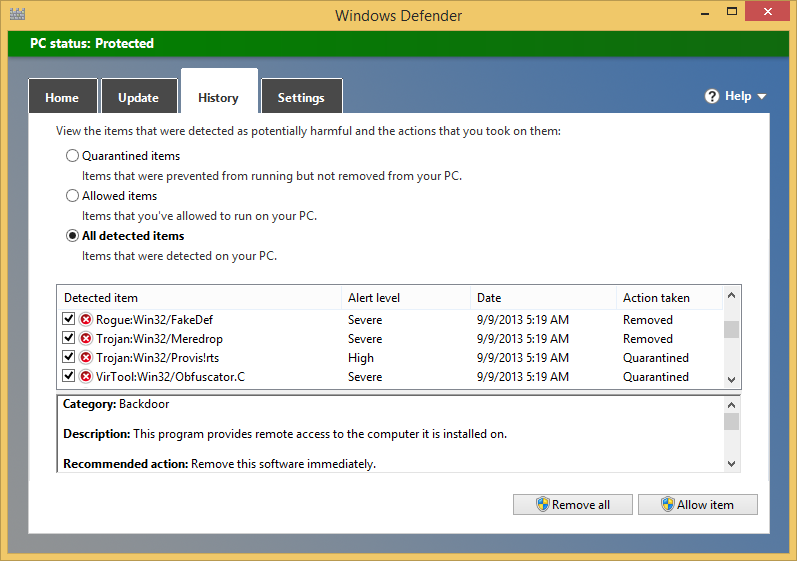
All the items that were detected as threats have now been completely removed from your computer.
Don’t ignore the warnings and recommendations from SmartScreen filter
In Chapter 5, the section Understanding the SmartScreen filter in Internet Explorer covers in detail how the SmartScreen feature included in Internet Explorer and Windows 8.1 can help prevent security problems with your computer or device.
This chapter reinforces that recommendation to consider the warning messages from SmartScreen filter.

In Windows 8.1, File Explorer also uses this feature to scan the files you are running. If you see a warning similar to the illustration that follows when trying to start a file, make sure to scan that file with Windows Defender or any other security product you have installed prior to starting it.
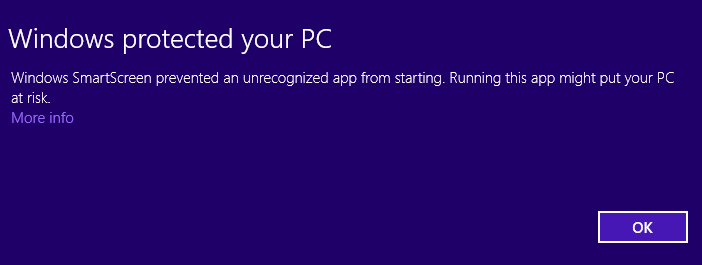
Following this recommendation will help keep your Windows system safe and secure.
No matter how good the security products you are using are, you are still vulnerable to many security problems if your habits related to password use are poor. Many people tend to use the same one-two-three passwords everywhere. This is a sure recipe for security problems, including security problems with your Microsoft account, your Facebook and Google accounts, and any other accounts. If you use the same password everywhere, a malicious user might break into a forum or social website you are using and steal your password from there. That user can then use the same password and the email address with which you registered to access more of your personal data and information from your Inbox, accounts on social networks, and so on.
To make sure it is much more difficult for unwanted parties to access your Windows-based computer, your Microsoft account, your email inbox, and any online services you are using, consider the following recommendations regarding password use.
Do not use passwords with fewer than six characters. They are especially easy to break.
Ideally, your passwords should be at least eight characters long and include letters, numbers, and special characters such as +, #, $, and so on.
Do not use the same password twice or more.
Having different passwords for different accounts can be difficult to manage, so using password management solutions such as LastPass, KeePass, or Roboform is also recommended. You can find them easily with a search on Bing. These solutions help you identify your duplicate passwords, change them to new random passwords, generate secure passwords automatically, and store them safely so that you can use them whenever needed and not lose them again.
Windows Defender together with Windows Firewall and Internet Explorer can provide a good level of security. If you are not willing or able to invest in security software, they are the best free security tools available for Windows 8.1, and you won’t need to install other free products.
However, if you want the maximum level of security possible and premium features such as anti-spam, ad blockers for your Internet browser, remote location of your computers and devices if they are stolen, the possibility to command a remote wipe of your data (if your computers and devices are stolen), and more advanced malware detection algorithms and other features, it is best to consider purchasing and installing security products provided by specialized vendors. The best way to be fully protected is to use a complete security package, generally called an Internet Security Suite. These packages include antivirus, anti-spyware, and firewall protection plus other security modules such as the ones previously mentioned.
Before making a choice, it is best to understand which options are available. To make an informed decision, it is recommend that you check the following Internet sources.
Antimalware apps for Windows (http://bit.ly/15Q3xQU). The Compatibility Center also lists the security software providers that offer solutions compatible with Windows. Search for the security product you are interested in, and you can easily view whether it is compatible with Windows 8.1.
Security for Everyone at 7 Tutorials (http://bit.ly/12jjvrs). The 7 Tutorials website provides a series of reviews for Internet security suites. The team from the website regularly tests the latest offerings from both a security and a usability perspective. The aim of the team is to highlight solutions that provide the best mix of effective security and user friendliness.
AV Comparatives (http://av-comparatives.org). This is the website of an independent security organization that regularly tests the quality of security provided by antivirus products. Its tests are very professional and evaluate all the important security aspects for an antivirus solution. If you want to know which security company has the best detection engine for viruses, this website is the place to visit.
AV Test (http://www.av-test.org). This website is run by the AV-Test GmbH company, which offers security testing and consulting services. It runs regular reviews of the latest security products on the market and publishes the results of its evaluations. Just like AV Comparatives, this website is a great destination for learning how effective the latest security offerings are.
Never turn off UAC; it’s a key feature that contributes to a good level of security on your system.
Windows Firewall filters both inbound and outbound traffic depending on the type of network to which you are connected. It is an important tool in securing your network and Internet traffic.
Windows Defender now includes both antivirus and anti-spyware protection.
Improving your password habits is a key component of a secure computing experience.