
Enable
Enable Family Safety for your child’s account, page 477
Set
Set time limits and app restrictions, page 478
Define
Define restrictions for games and apps, page 488
Create
Create restrictions for websites and downloads, page 490
IN THIS CHAPTER, YOU WILL LEARN HOW TO
Children use computers and gadgets at a very young age and for many purposes: to have fun, to learn, to communicate, socialize, and so on. In today’s world, such devices are an integral part of their life. That’s why, as a parent, it is important to educate children not only about how to use these devices and how to stay safe, but also about the implications of using them for long periods of time.
Windows 8.1 has a great feature named, Family Safety that can help parents educate children and control their computing habits. This feature makes it possible for parents to define when children can use the computer, what games they are allowed to play, which apps they are allowed to use, and what kinds of websites they can browse on the Internet.
In this chapter, you’ll learn how to turn on Family Safety for your child’s user account; how to define time limits; and how to apply restrictions for games, apps, websites, and downloads.
Practice Files
You don’t need any practice files to complete the exercises in this chapter. For more information about practice file requirements, see the section “Using the practice files” in the Introduction of this book.
Before setting up Family Safety, you need to create a standard user account with no administrator permissions for your child. If your child’s user account has administrator permissions, he or she will have all the required rights to override any controls you apply. Also, your child must have used his account at least once, so that Windows 8.1 can generate all the appropriate settings and install the default apps.
Tip
To learn more about user accounts and how to set them up, see Chapter 12.
After you have created a user account for your child, you can turn on Family Safety and configure all the limitations that can be defined (allowed websites, time limits, game, and apps ratings). At the beginning, the setting for these limitations is Off. Even if Family Safety is turned on, no limitations are defined for your child’s user account. He is free to do anything on the computer, so configure the limitations you want applied one by one. You’ll learn how to do this throughout the sections of this chapter.
In this exercise, you’ll learn how to turn on Family Safety for your child’s user account.
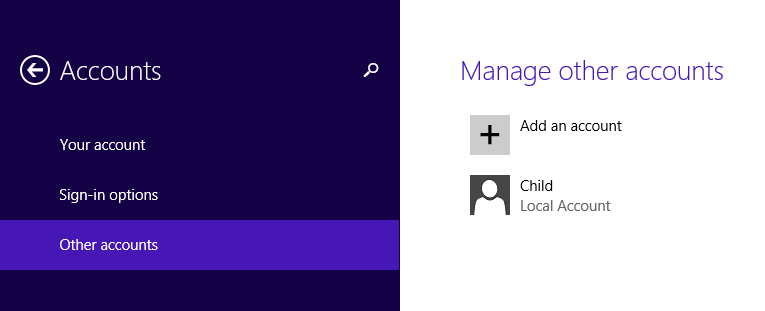
In PC Settings, click Accounts and then click Other Accounts to access the list of user accounts existing on your computer or device.
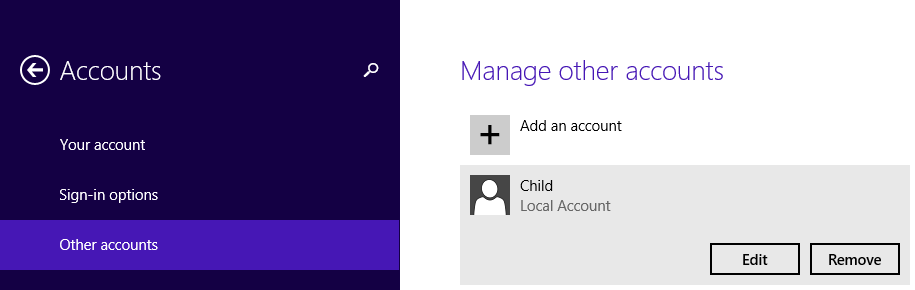
Click the user account that you set up for your child (which, for the purposes of illustration in this exercise, is named Child).
Two buttons are displayed.
Click Edit.
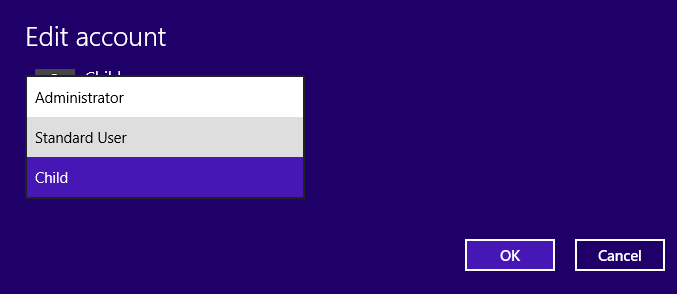
The Edit Account pane opens.
Click the Account Type list and then select Child.
Click OK.
You are returned to the Accounts section in PC Settings.

Family Safety is now turned on, using the default settings, which do not impose any restrictions.
Now that Family Safety is on, you can apply the restrictions you want. All types of restrictions are created using the new Family Safety website. You can access it from the Family Safety section in Control Panel or you can browse to https://familysafety.microsoft.com in any Internet browser of your choosing. The easiest restrictions you can define are related to the times when your child can use the computer and which apps she is allowed to use.
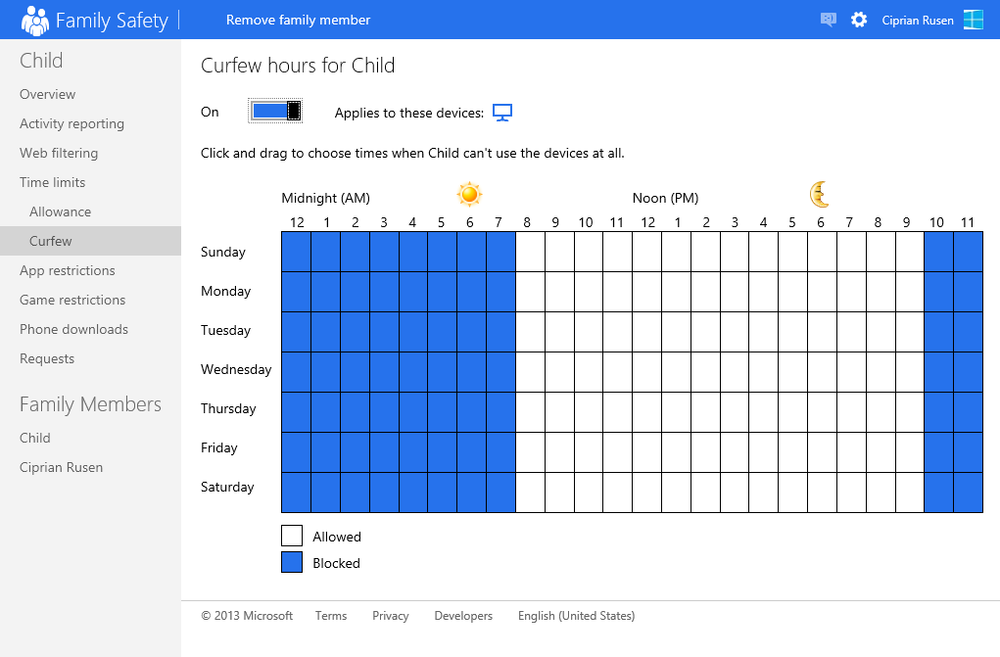
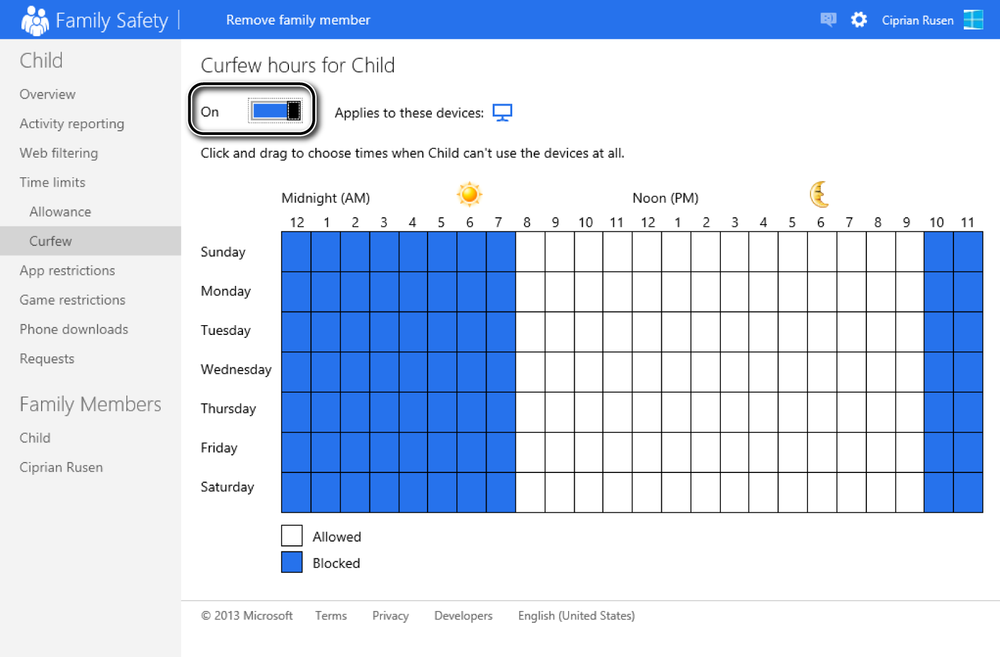
Time restrictions can be defined for each day of the week and for the hours in a day. A simple table displays the hours you want to block. When selected, all the blocked hours appear blue. The hours that appear white represent hours when computer usage is allowed. You can change a time slot from Allowed to Blocked, and vice versa, by clicking it.
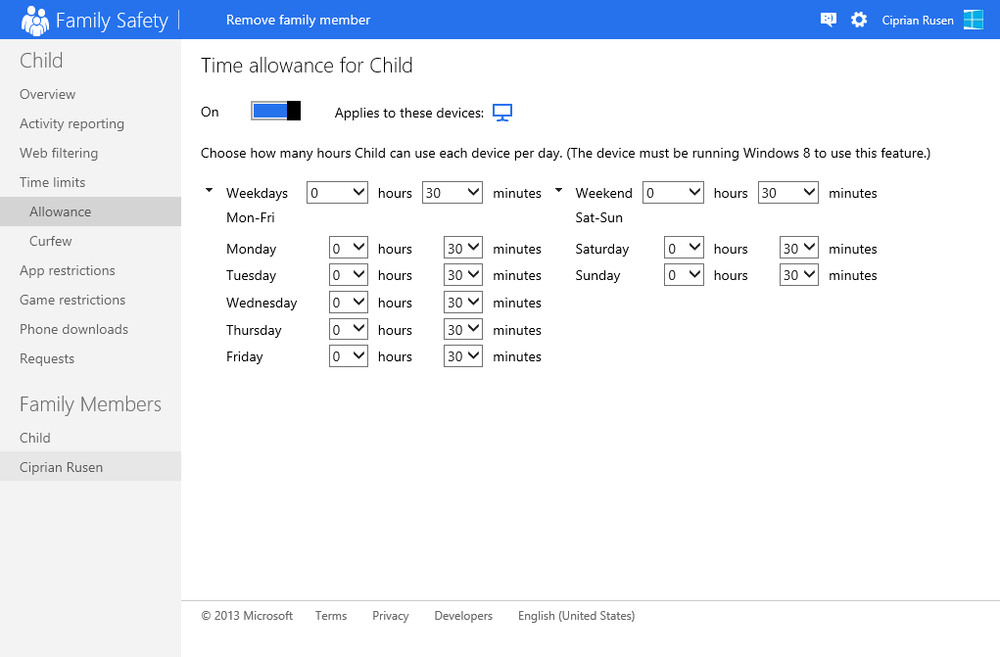
You can also set restrictions on how many hours and minutes your child is allowed to use the computer each day. You can set the restrictions independently for each day of the week or for weekdays and the weekend.
When you turn on Family Safety, no app restrictions are enforced; you need to create such restrictions and manually select which desktop apps your child is allowed to use. The list of apps is organized into folders. Expanding each folder displays the app executables that are part of it. You can allow or block each app executable individually or the whole folder with just one setting.
Note
When defining restrictions for apps, keep in mind that all the new Windows 8.1 apps that you can download from the Windows Store have a separate set of rules, different than those applied to traditional desktop apps. You will learn how to set restrictions for modern apps in the next section of this chapter.
In this exercise, you’ll learn how to set restrictions for time limits and set allowed apps. The exercise will start by setting time limits to block computer usage for your child’s user account between 10 P.M. and 7 A.M. each day. Then, you’ll allow usage of specific subset of desktop apps.
Set Up
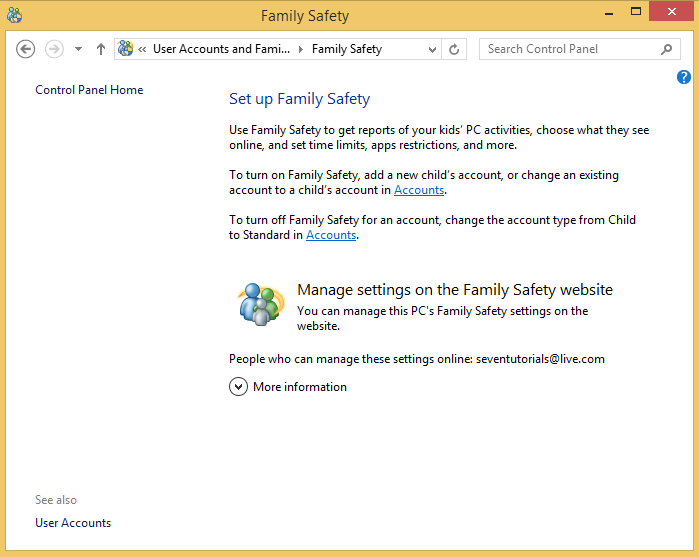
Family Safety must be turned on for your child’s user account. If it is not, follow the instructions provided in the previous section. If Family Safety is turned on, open Control Panel.
Click User Accounts And Family Safety.
Click Family Safety.
Click Manage Settings on the Family Safety website.
The Family Safety website is loaded in your default browser and you are asked to log on with your Microsoft account.
Type your Microsoft account password and click Sign In.
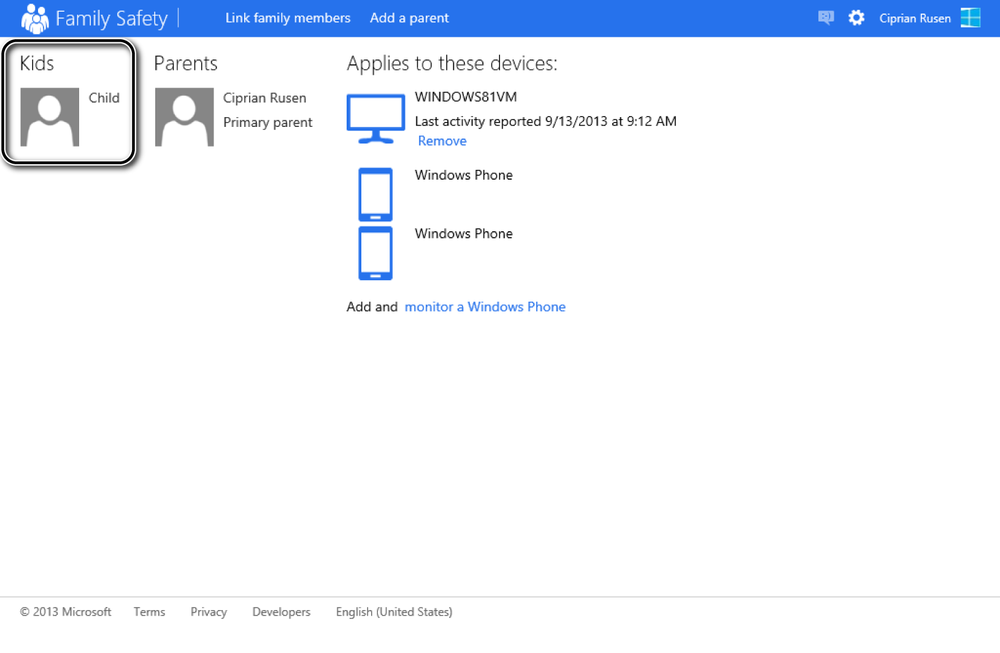
The Family Safety control panel is displayed.
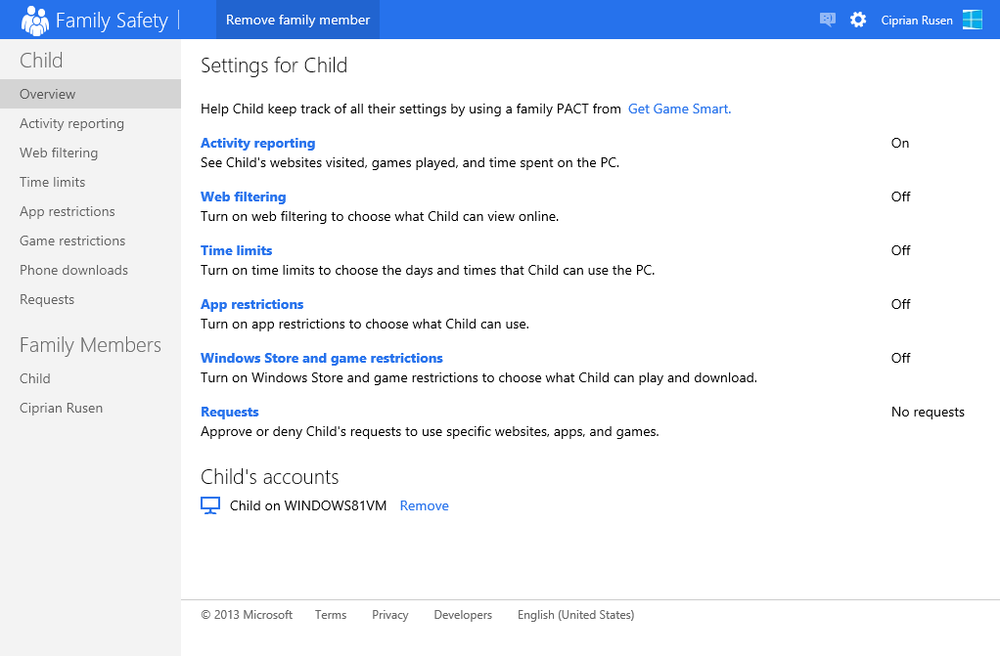
Click the user account used by your child (for this exercise the user account is called Child). The complete list of settings that can be customized, are displayed.
Click Time Limits, then click Curfew.
The Curfew settings are displayed.
Highlight the squares in the table such that your child is not allowed to use the computer each day between 10 P.M. and 7 A.M. The table should look similar to the preceding screen shot.
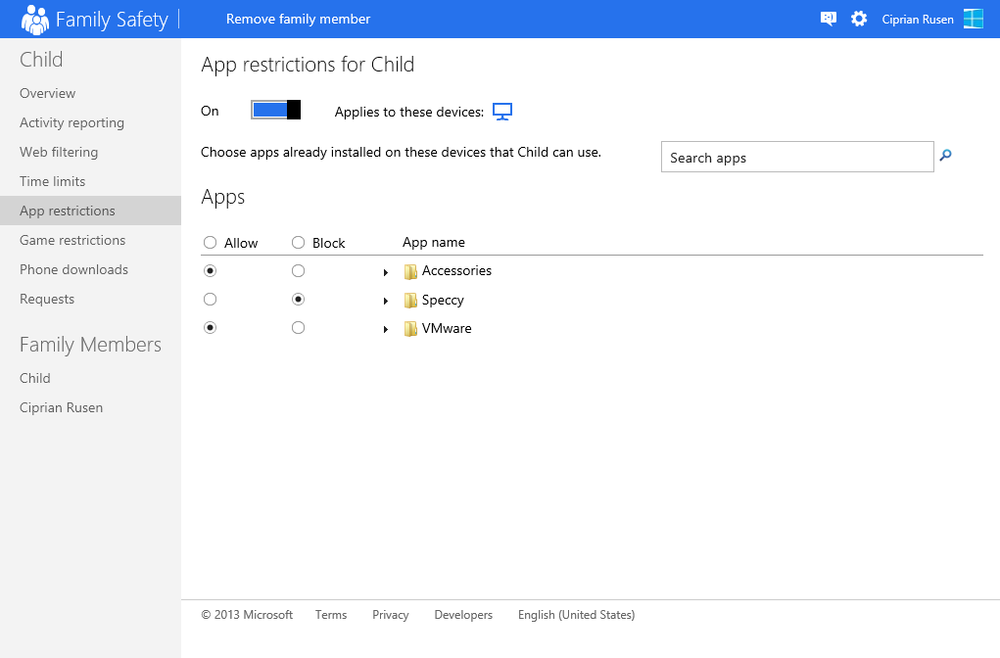
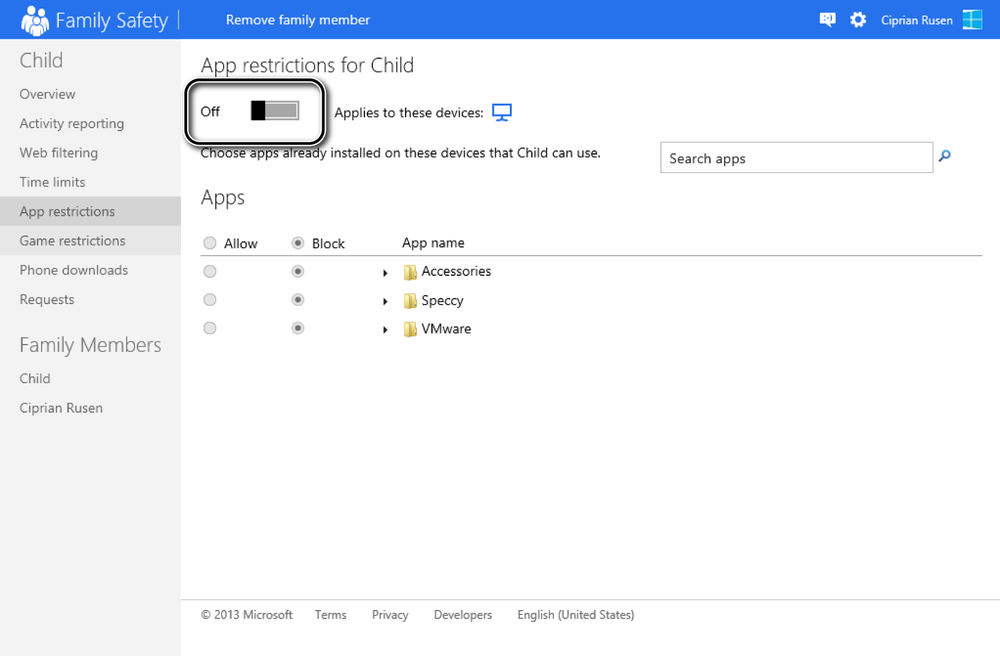
To set restrictions for apps, click App Restrictions.
Change the position of the App Restrictions switch to On.
The list of all apps installed on your computer is shown below the On switch.
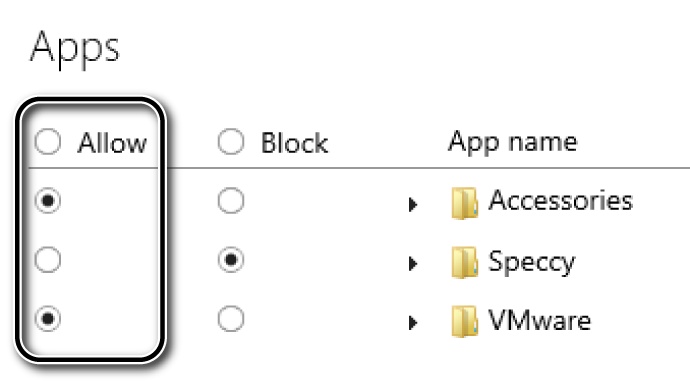
Check Allow for all the apps you want your child to use and Block for those you don’t.

Important
The tricky part about blocked apps is that Family Safety will allow some of the Windows-specific apps to run even if they are not marked as allowed (such as Calculator and Internet Explorer). However, any third-party desktop apps that are installed on the computer won’t be allowed to run on your child’s user account unless marked as allowed. In addition, when you want to allow a desktop app that uses more than one executable file while you run it, it is best to allow all its executable files, not just the main one. This helps to ensure that an app won’t fail because only some of its executable files are allowed to run.
Another control feature that you might want to use configures restrictions on the kinds of games your child can play. This can be very important, especially if he is very young. Family Safety makes it very easy to set such restrictions. All the options you need are in the Game And Windows Store Restrictions section, on the Family Safety website. These options make it possible for you to do the following:
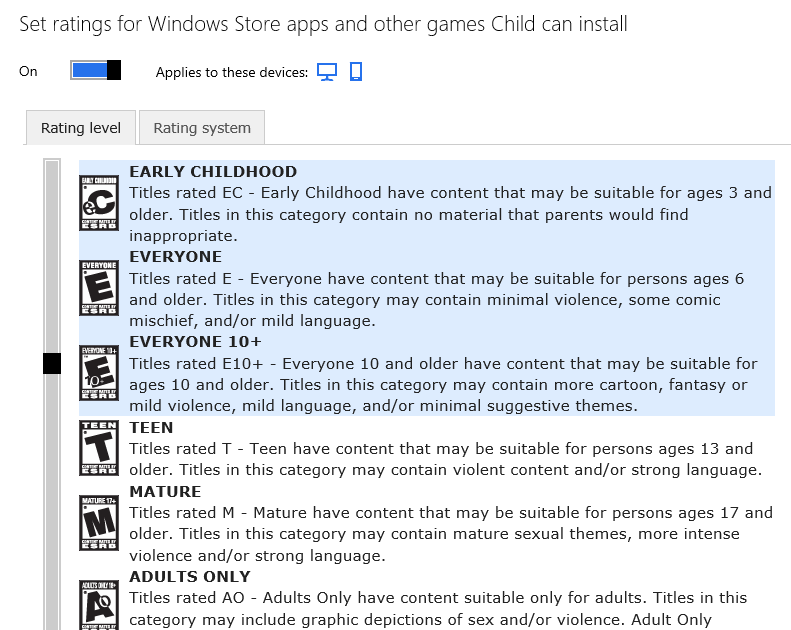
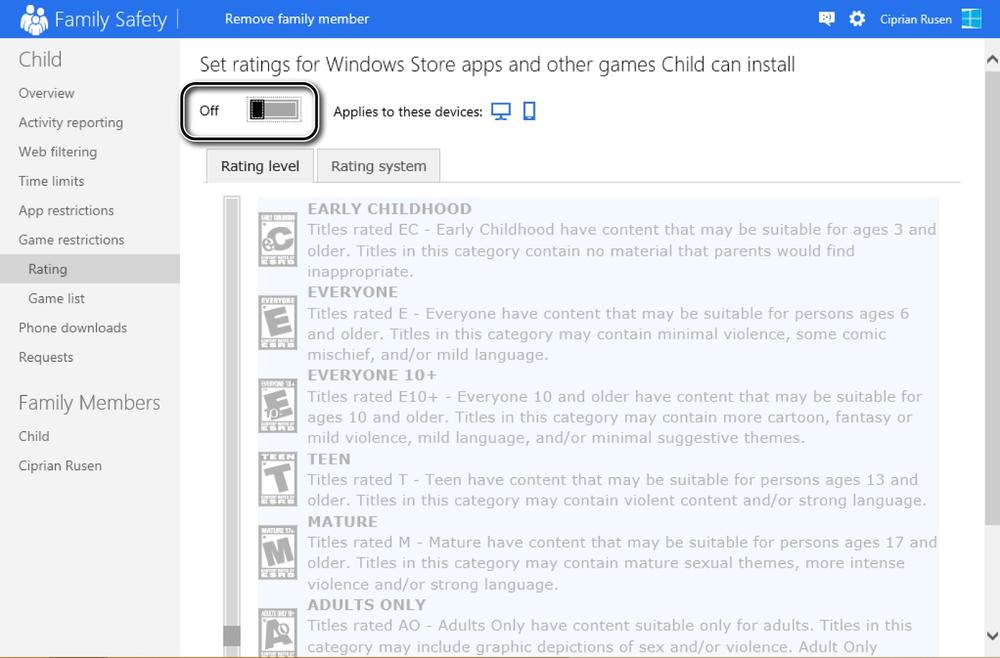
You can approve and block games based on their rating on the Entertainment Software Rating Board (ESRB), as well as other well known rating systems. You are shown a detailed description of what each rating means so that you can make an informed choice.
You can allow or block individual games and apps. The individual overrides you choose overrule other general restrictions you have set.
The restrictions you set for ratings are also applied to the apps that your child can install from the Windows Store. Apps that don’t conform to the rating you set won’t be allowed.
In this exercise, you’ll learn how to set restrictions for the games and Windows Store apps your child is allowed to play or use. You’ll allow games and apps that have a rating of up to Everyone 10+. You’ll also block your child from playing any of the individual games or Windows Store apps installed on the computer.
Set Up
Go to the Family Safety website, log on with your Microsoft account, and select your child’s user account.
In the column on the left, click Game Restrictions.
Slide the ratings switch on the top from Off to On.
The list of ratings is now editable.
Select EVERYONE 10+ to allow titles with this maximum rating.
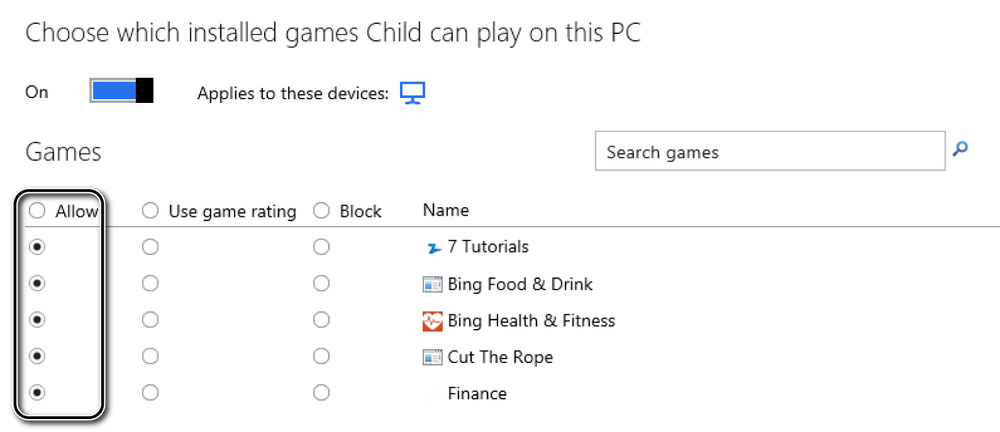
In the column on the left, in the Game Restrictions section, click Game List.
A list with the installed games and Windows 8.1 apps is shown.
Check the Allow box for the games and apps that you want to allow your child to use.
Check the Block box for the games and apps that you don’t want to your child to run.

The game and apps restrictions you have defined are now applied to your child’s user account. Before setting these restrictions, take the time to look through all the types of content that can be blocked and select all those that you consider appropriate. The preceding exercise showed only the steps involved to accomplish this and was not making recommendations for the types of content that should be blocked for a child depending on her age.
Another important feature in Family Safety is the ability to filter the websites to which your child has access. Microsoft has a large database that categorizes websites and the type of content found on them. By using just one setting, you can ensure that your child is blocked from accessing websites that are not appropriate for his age. Turning on web restrictions also turns on the SafeSearch settings found in all popular search engines such as Bing and Google. The web searches your child initiates will be filtered to prevent access to adult content of any kind.
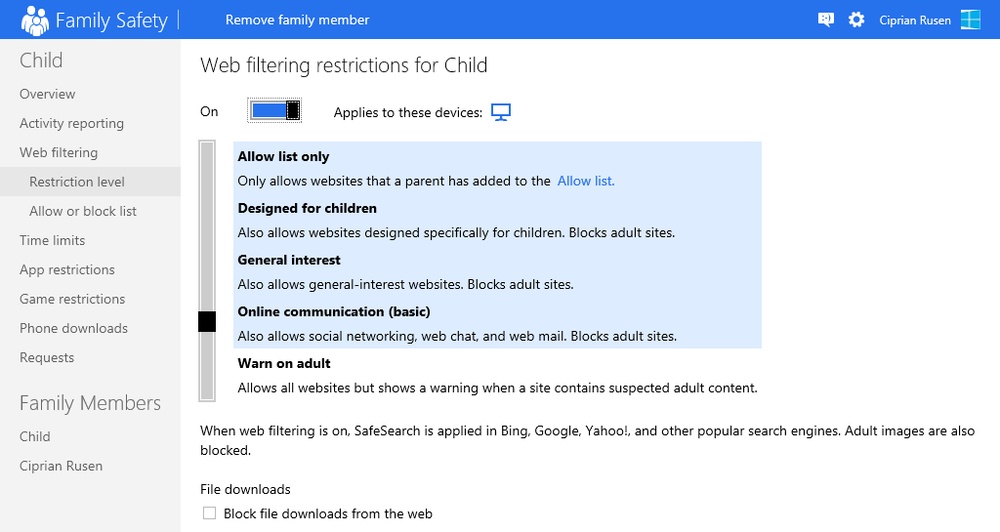
You have five restriction levels from which to choose:
Allow List Only. Your child can view only the websites you have added to the Allow List. All other sites, including adult sites, are blocked.
Designed For Children. Your child can view only websites you specifically marked as allowed as well as those with child-friendly content. Adult sites are blocked.
General Interest. Your child can view only websites you specifically marked as allowed, those with child-friendly content, and those with content of general interest. Adult sites are blocked.
Online Communication. This setting applies the same restrictions as the General Interest level, but it also allows social networking sites, web chat, and webmail. Adult sites are blocked.
Warn On Adult. Your child is allowed to view all websites but receives a warning when a site has adult content.
You can also block file downloads by selecting Block File Downloads From The Web to ensure that your child can’t download files that you do not approve.
You can also add specific websites to be allowed or blocked. As with games, these individual overrides overrule other general restrictions you have set for websites.
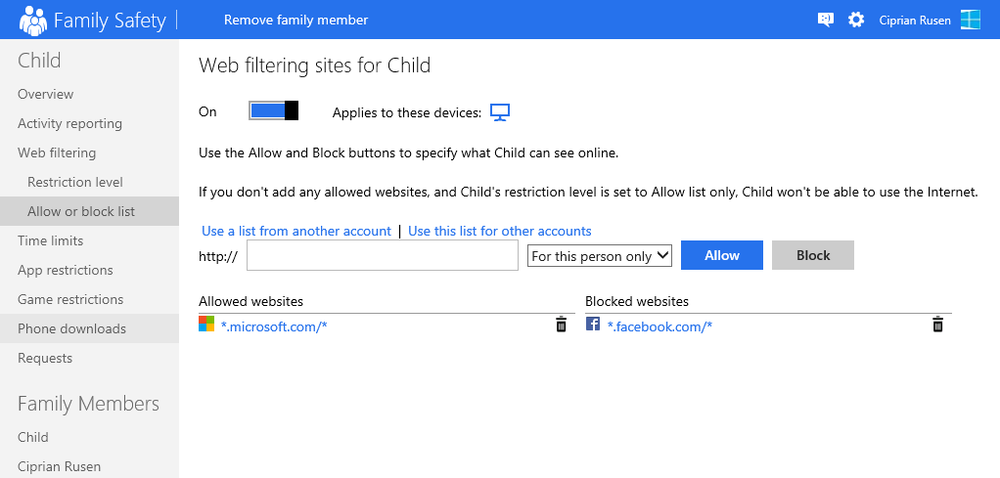
The restrictions you define are applied to all major browsers, not just Internet Explorer. For example, if your child is using Mozilla Firefox or Google Chrome instead of Internet Explorer, the restrictions will still be in force.
In this exercise, you’ll learn how to block web content automatically and how to block file downloads.
Set Up
Open the Family Safety website, log on with your Microsoft account, and select your child’s user account.
In the column on the left, click Web Filtering.
Here you set the websites your child can view.
Slide the Web Filtering switch on the top, from Off to On.
Choose General Interest.
At the bottom of the window, select Block File Downloads From The Web.


The web restrictions you have set are now applied to your child’s user account.
When your child wants to log on to the computer during a time slot that is blocked, he receives the message “Time’s up! It’s past the curfew time your parent set.”
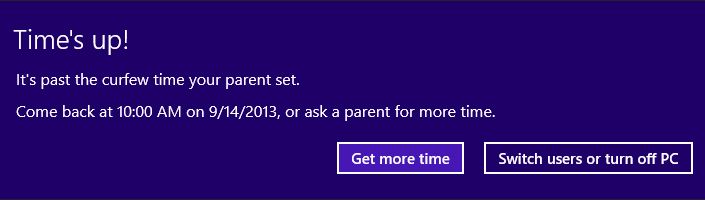
Your child cannot log on unless you set that specific time slot as allowed.
If your child tries to run a blocked app or game, a pop-up appears with the message “Blocked by Family Safety.”

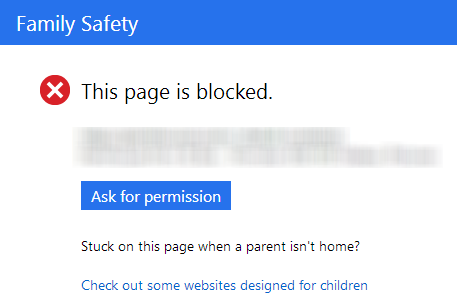
If your child tries to access a blocked website, that website will not be loaded and she is notified that “This page is blocked.”
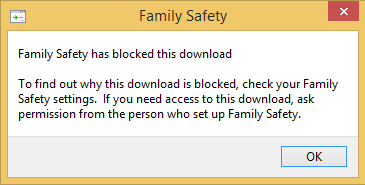
When he tries to download a file and downloads have been blocked, the message “Family Safety has blocked this download” appears. The download does not proceed. Unfortunately, this feature of Family Safety does not work well with all Internet browsers. Currently, it is guaranteed to block downloads only if you use Internet Explorer (if you have this setting turned on, of course); however, with other browsers it might not succeed at blocking all undesirable downloads.
Each time something is blocked, your child is given the chance to ask for permission and receive access. Parents can review her permission requests and approve them when appropriate. If you are at the computer, you can also type your user account password and her request is immediately approved, without you having to log on separately. However, you might want to pay attention because your child can see what keys you press on the keyboard and figure out the password.
You can view your child’s activity from the Family Safety website.
In the left column, click Activity reporting to find all the reports made available by Family Safety.
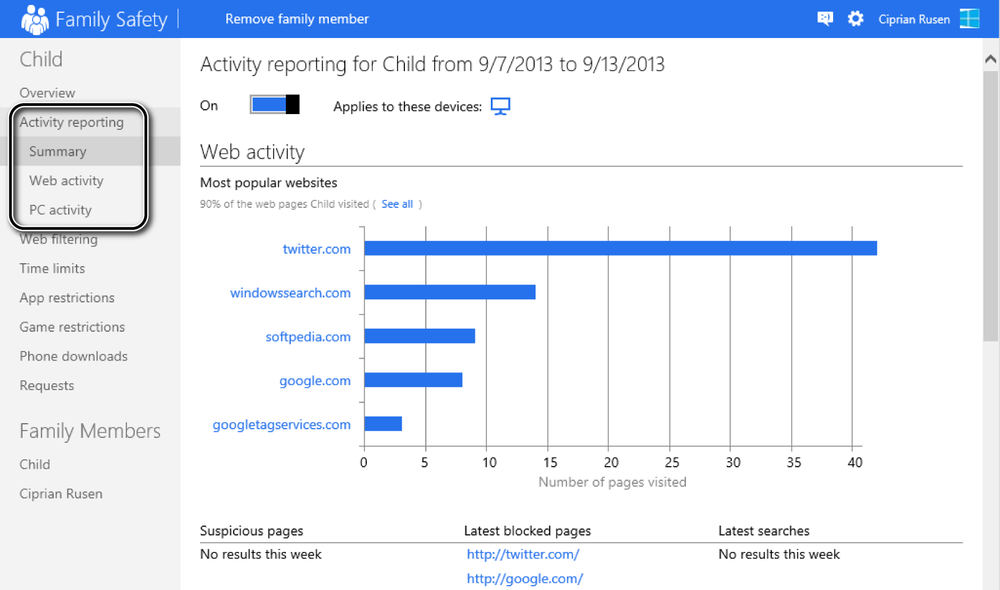
The Summary report, first displays a summary of your child’s web activity and then a summary of his PC activity.
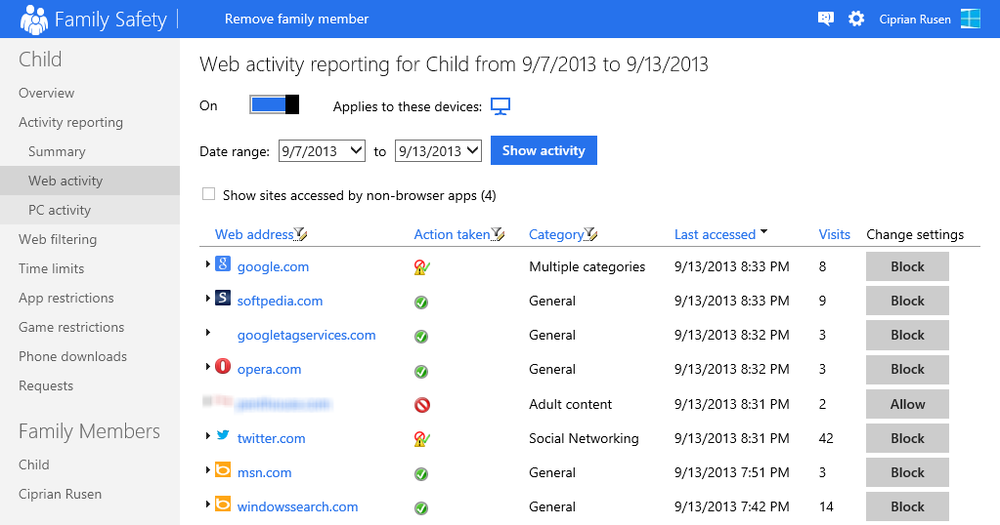
In the column on the left, access the Web Activity report to get a more detailed look into what he is doing.
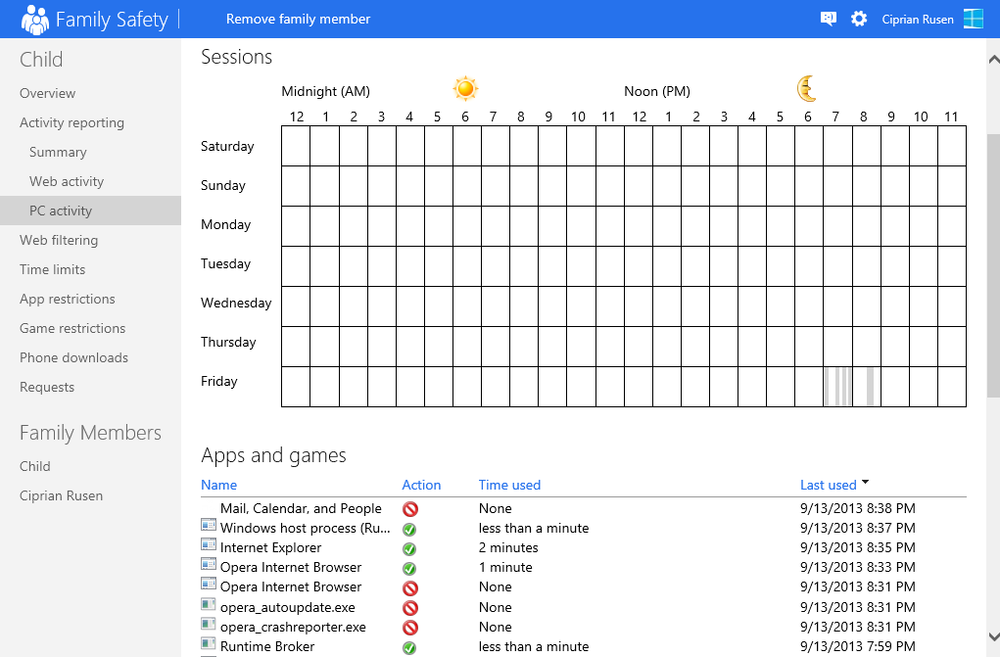
The detailed PC Activity report shares information about when your child used the computer, what apps and games he used, the last time he used them, and for how long. Then, the report shares information about the files that were downloaded from the web as well as the apps and games that he downloaded from the Windows Store.
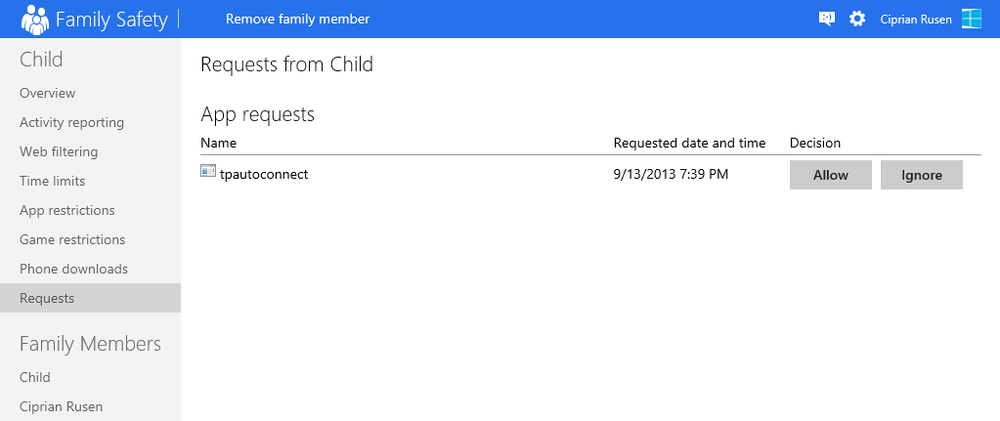
To review the requests you have received from your child and make a decision as to whether you want to approve them or not, in the left column, click Requests. The complete list of requests is displayed and you can click Allow or Ignore for each, depending on what you think is best for your child.
If your child has a Windows Phone device and a Microsoft account, you can also set restrictions for his smartphone. Almost every type of restriction in Family Safety can be applied to your child’s computer(s) and his smartphone. Also, there is a Phone Downloads section with rules that apply only to his Windows Phone device.
You can only turn on Family Safety if your child has a standard user account.
You can easily set time limits and restrictions on apps and games.
You can set restrictions for games and Windows Store apps by using their ESRB rating.
Setting restrictions on the types of websites that can be visited helps to ensure that your child doesn’t visit websites with content that is inappropriate for his age.
Your child is notified each time he tries to log on at a restricted time or run a blocked game or app.
Family Safety restrictions, activity reports, and requests are managed from the Family Safety website, which can be accessed from any browser or device.