
IN THIS APPENDIX, YOU WILL LEARN HOW TO
When you have a new computer or device, you’ll want to learn how to install Windows 8.1. In this appendix, you’ll learn how to perform a clean installation. If you want to use Windows 8.1 alongside other versions, that’s entirely possible, and this appendix presents the basics you need to know about how to create a dual-boot setup.
In addition, you’ll learn how to perform an upgrade to Windows 8.1 from an earlier version of Windows.
Practice Files
You do not need any practice files for this Appendix. A complete list of practice files is provided in the section “Using the practice files” in the Introduction of this book.
Installing Windows 8.1 is not a complicated procedure. As long as your system meets at least the minimum hardware requirements to run, you can install it yourself.
Tip
If you want to learn more about the hardware requirements of Windows 8.1, read Chapter 1.
Before you start the installation procedure, look for the activation code (also called the product key) that is required for the entire process to begin. Without it, you cannot install Windows 8.1. The code is distributed with your retail copy of Windows.
Insert the installation disc into your computer or device and boot your computer or device from it. Depending on how it is configured, you might need to edit the basic input-output system (BIOS) and change the boot order so that your system starts first from your DVD or Blu-ray drive.
Early in the installation process, you are asked to select the partition on which you want to install Windows. If you are installing it on a new computer or device, you’ll see your hard disk as one chunk of unallocated space. You must create a new partition for it. When creating the partition, keep in mind that it is best to allocate at least 25 GB for Windows to ensure that you have space for it and the apps that you will install while using it. If you plan to install many apps and games, allocate even more space.
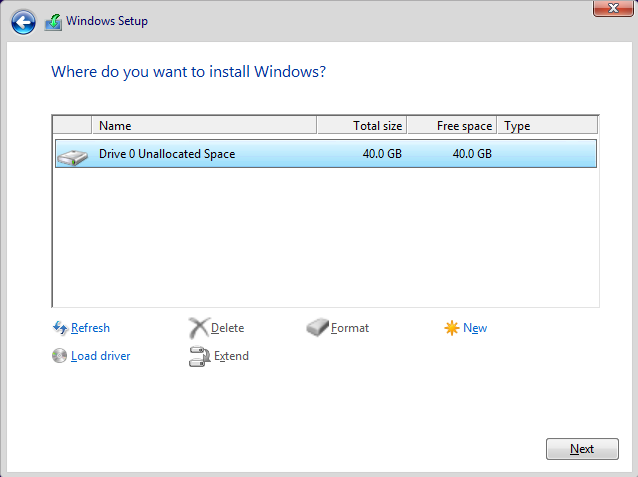
When creating this partition, Windows Setup automatically creates another partition named System Reserved, about 350 MB in size. Leave this partition untouched and don’t delete it. It stores recovery tools that will be necessary if you should encounter failures and problems.
If you have partitions, all you need to do is select the one on which you want to install Windows. It is best to format that partition so that there is no data on it, making all the space available for Windows 8.1.
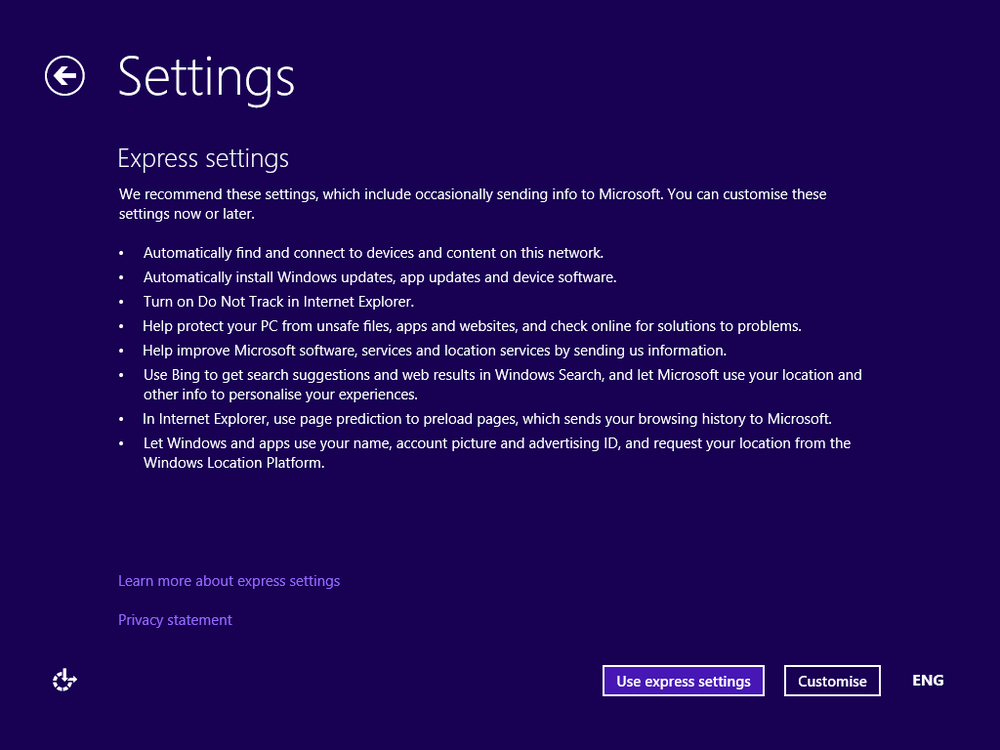
After the installation process is complete, start customizing your Windows installation. You are asked to select whether you want to use the Express Settings (the default settings) or customize your environment in detail.
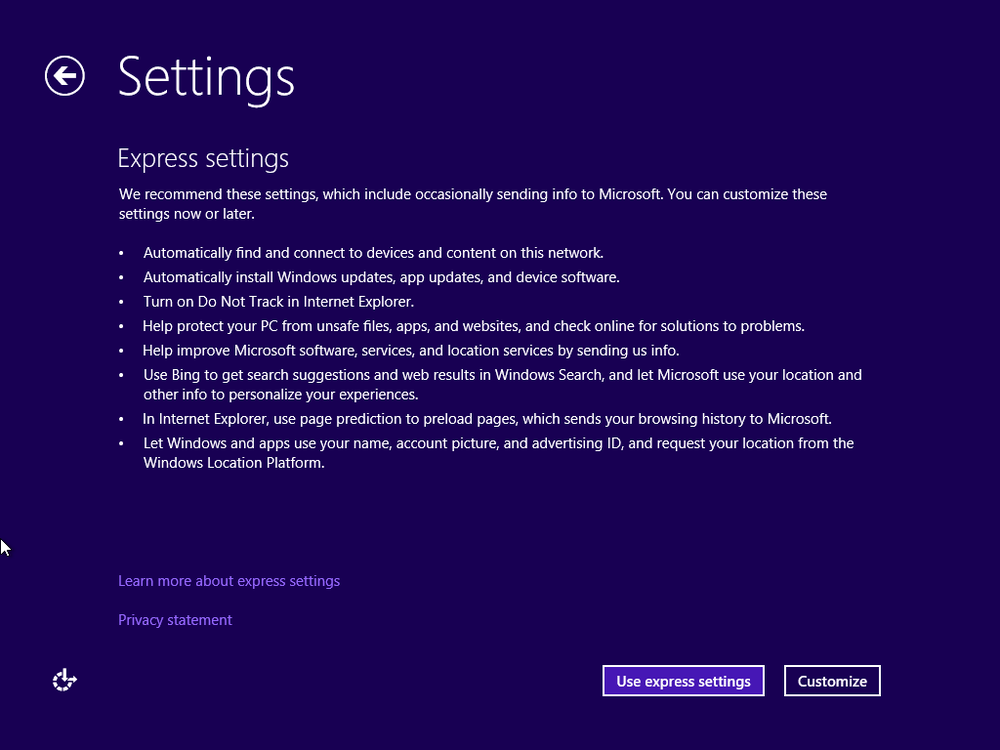
To be certain that Windows will work the way you want it to, select Customize and go through a few additional steps.
Prior to the first logon, you will be asked to enter the details of your Microsoft account (email address and password). If you do not have a Microsoft account, it is best to create one on a computer or device with an Internet connection prior to the installation process.
Tip
If you want to learn more about Microsoft account, see the section “Introducing the Microsoft account in Chapter 12.
In this exercise, you’ll learn how to install Windows 8.1 from the beginning on a new computer or device.
Set Up
Insert the Windows 8.1 installation disc into your DVD or Blu-ray reader. Start the computer or device from the disc. Depending on how your system is set up, you might need to enter your computer’s BIOS and set it to boot from the DVD or Blu-ray reader.
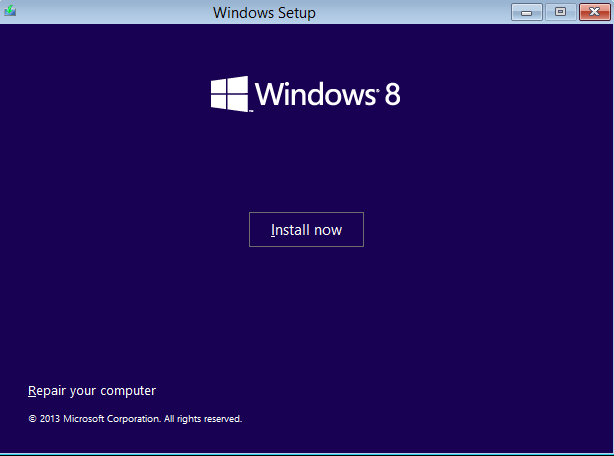
When instructed, press a key on your keyboard to start the Windows setup process.
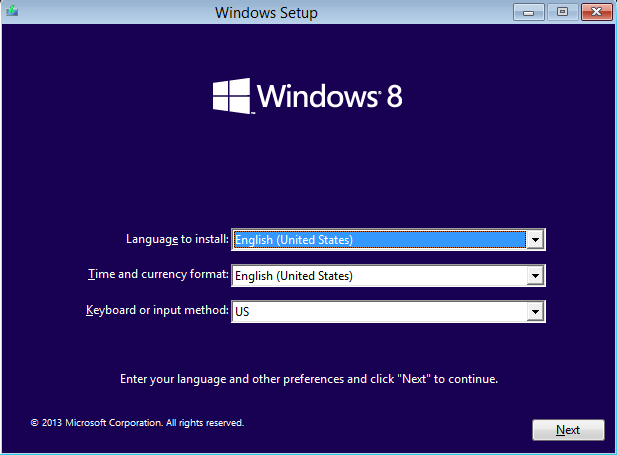
Select the language you want to install, the time and currency format you want to use, and the keyboard or input method, and then click Next.
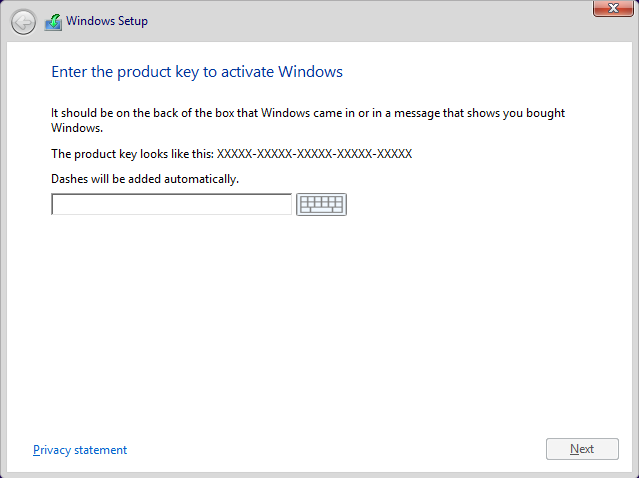
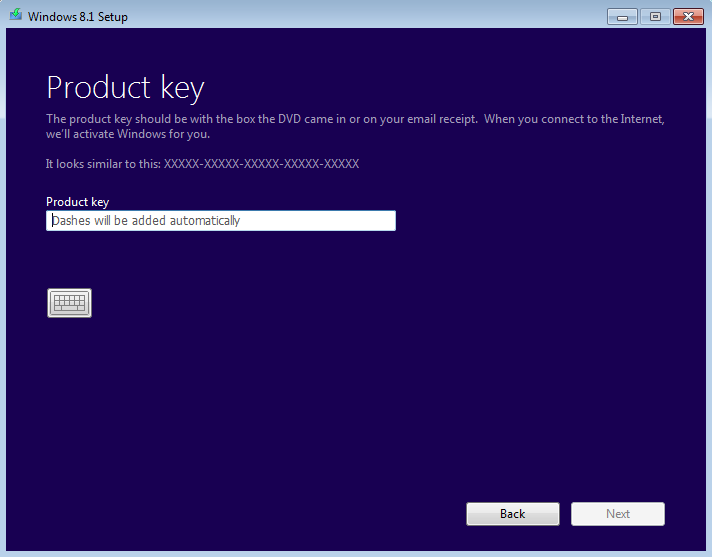
You are asked to enter the product key.
Type the product key for your Windows installation and then click Next.
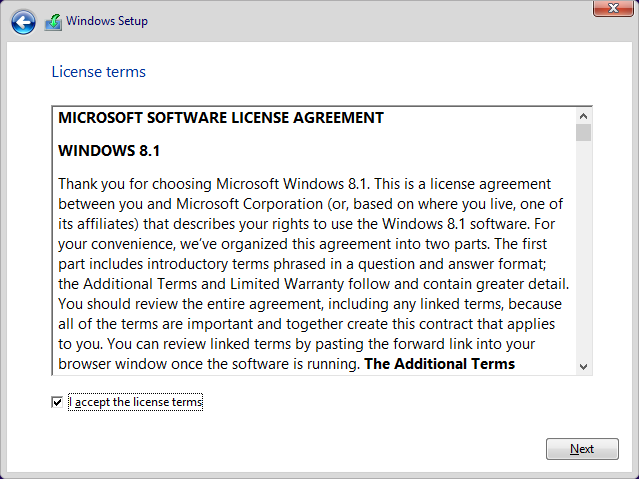
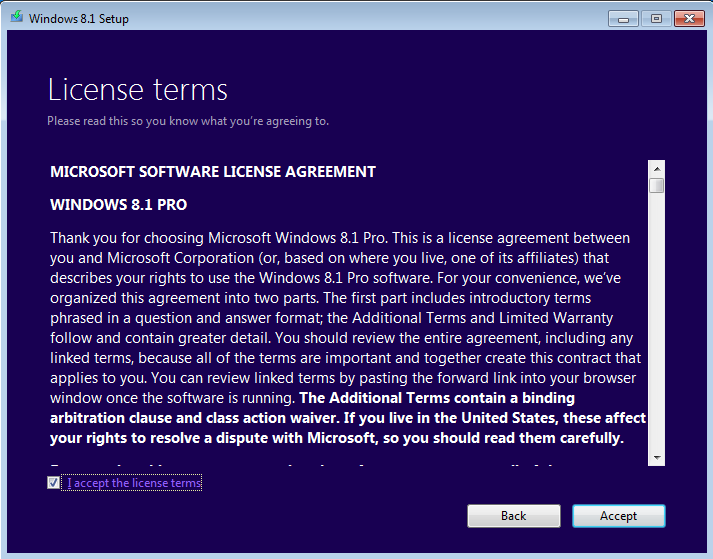
You are asked to accept the license terms.
Read the license terms, select the I Accept The License Terms check box, and then click Next.
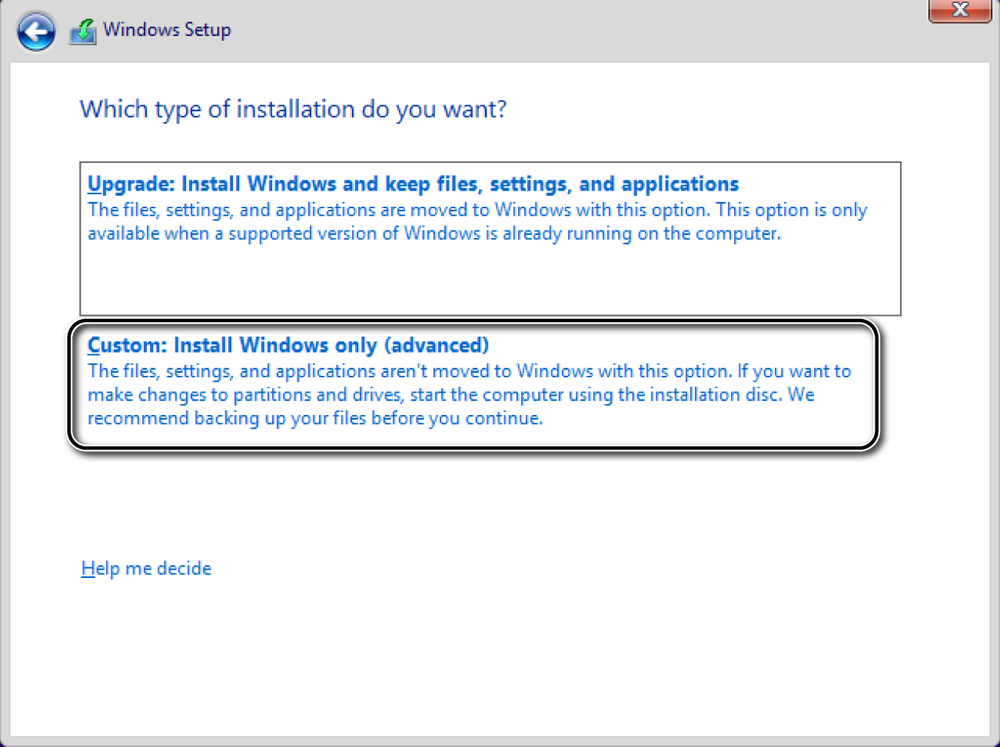
You are asked to select the type of installation you want to perform.
Click Custom: Install Windows Only (Advanced).
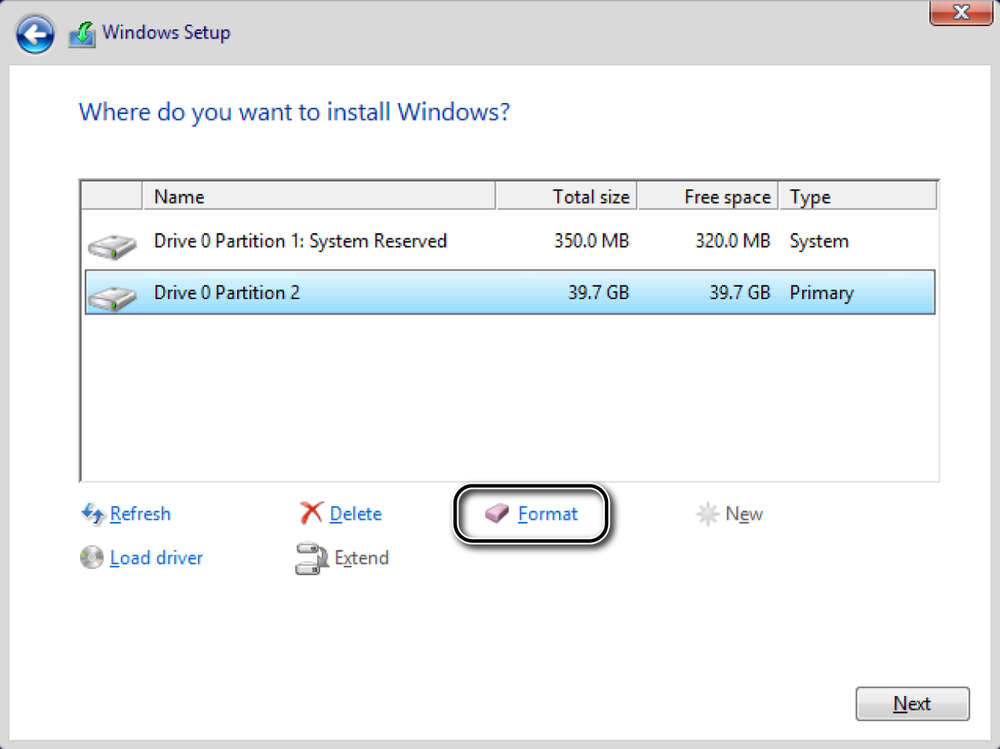
You are asked where you want to install Windows.
Click New and specify the size of the partition that will be created for Windows 8.1.
Click Apply.
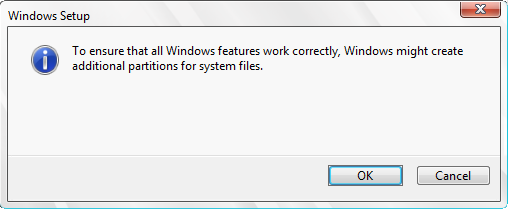
You are informed that Windows might create additional partitions for system files.
Click OK.
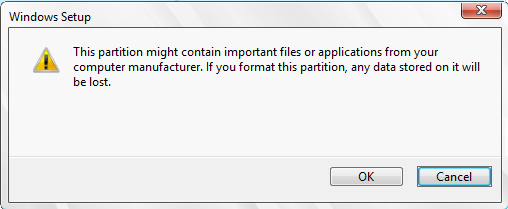
Select the partition you just created and click Format.
You are informed that all the data on this partition will be lost.
Click OK to confirm that you want the partition to be formatted.
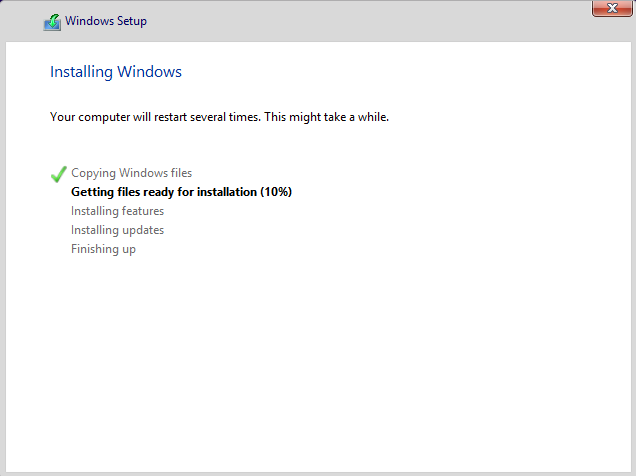
Click Next to start the installation process.
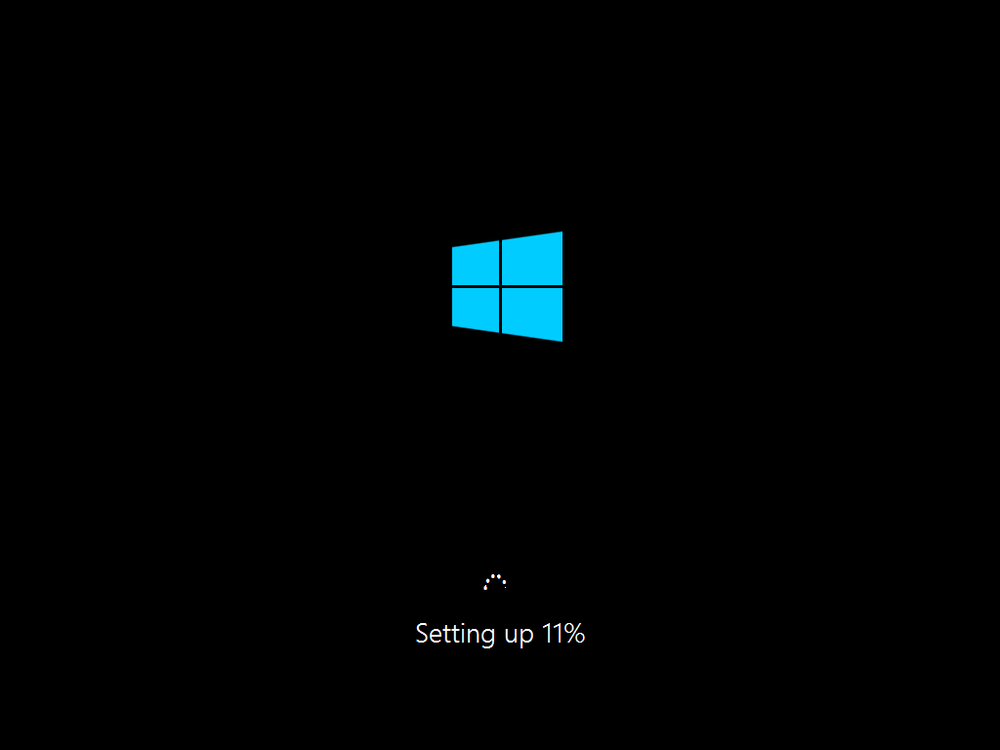
Wait for the installation process to finish and for your system to restart.
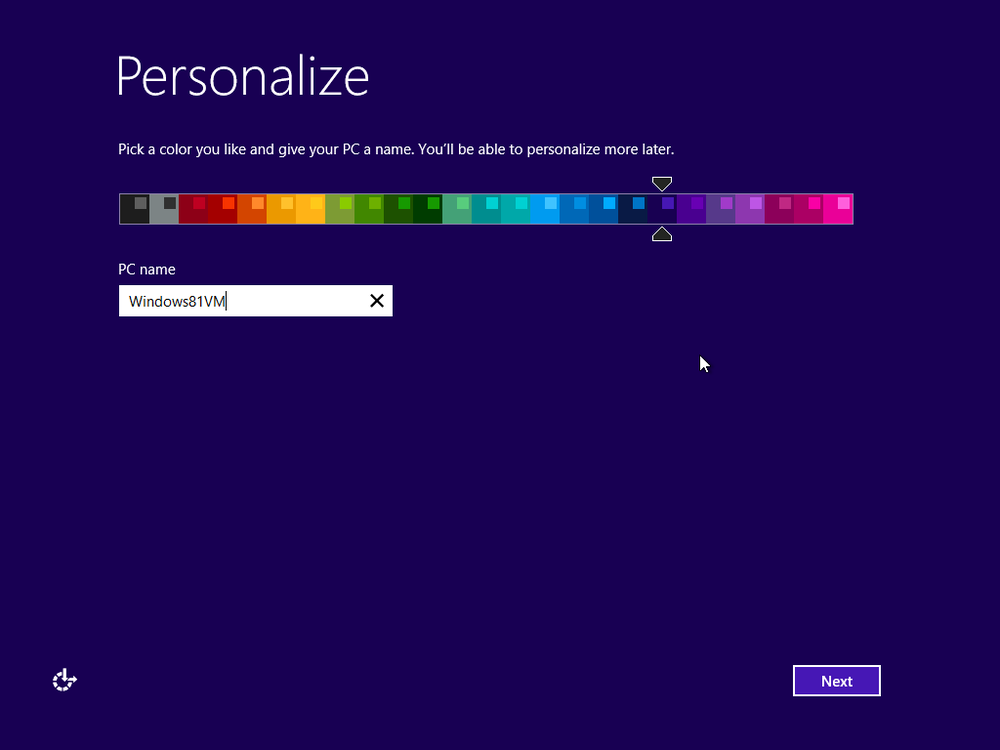
The customization process for your Windows installation begins.
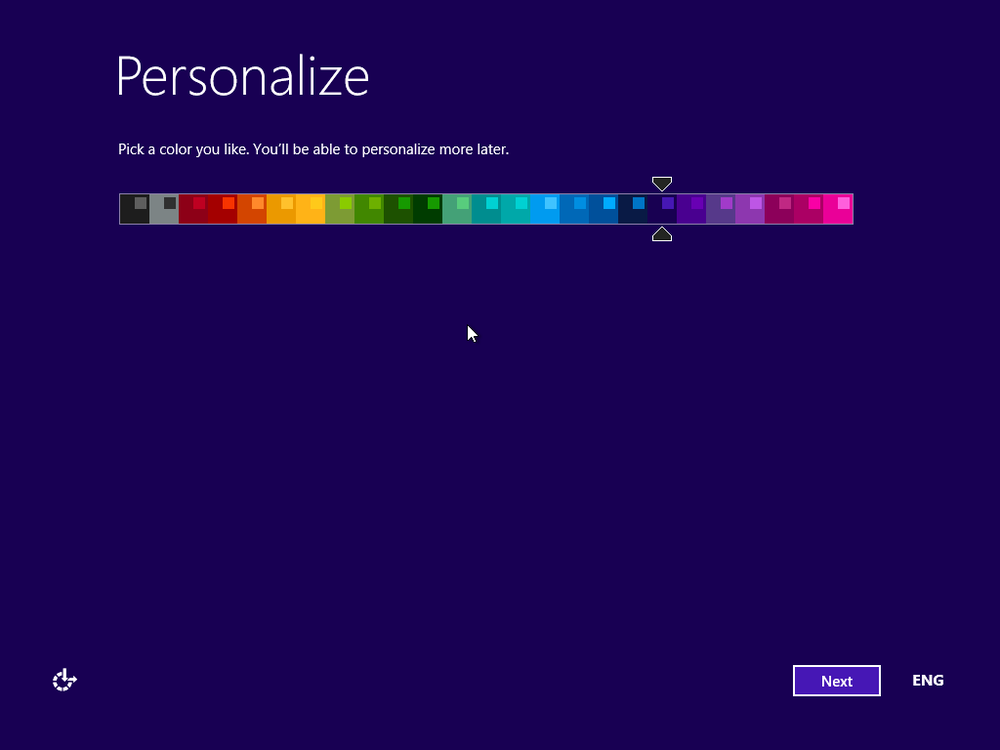
Select the color that you want to use for your Windows installation and type the name for your computer or device.
Click Next to start configuring other important settings.
Click Customize to customize the settings for Windows in detail.
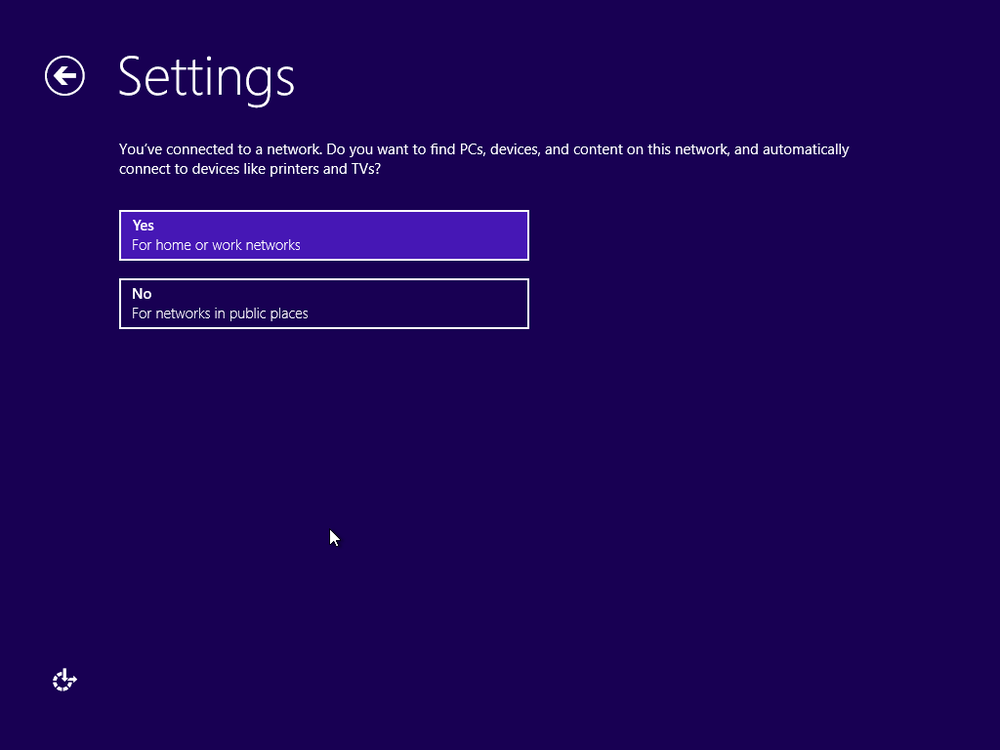
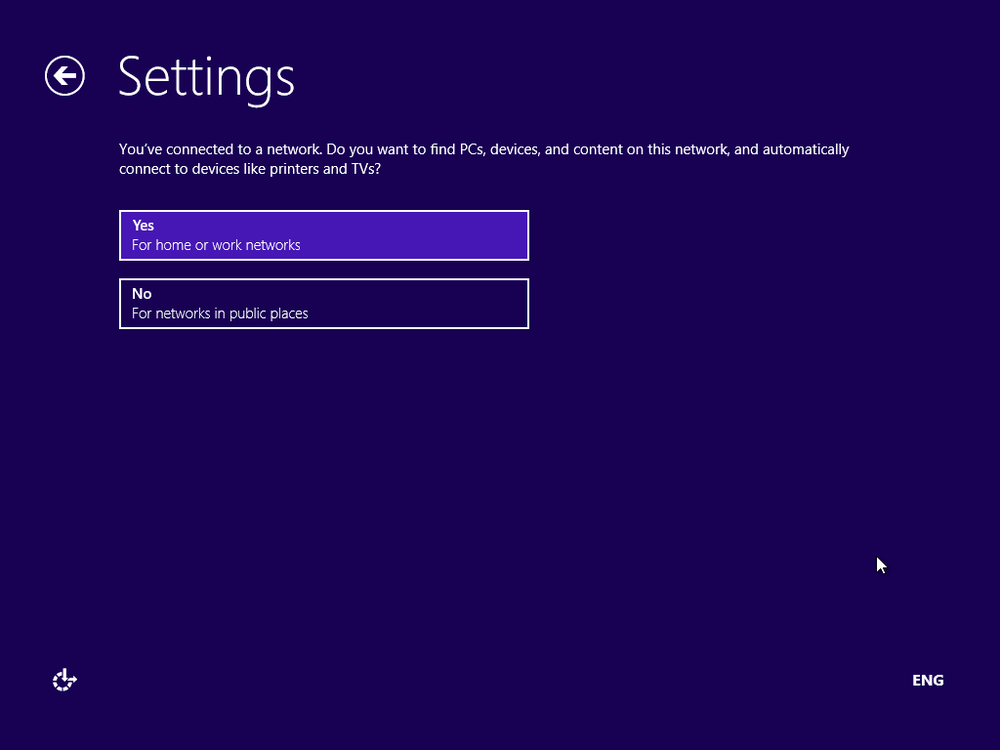
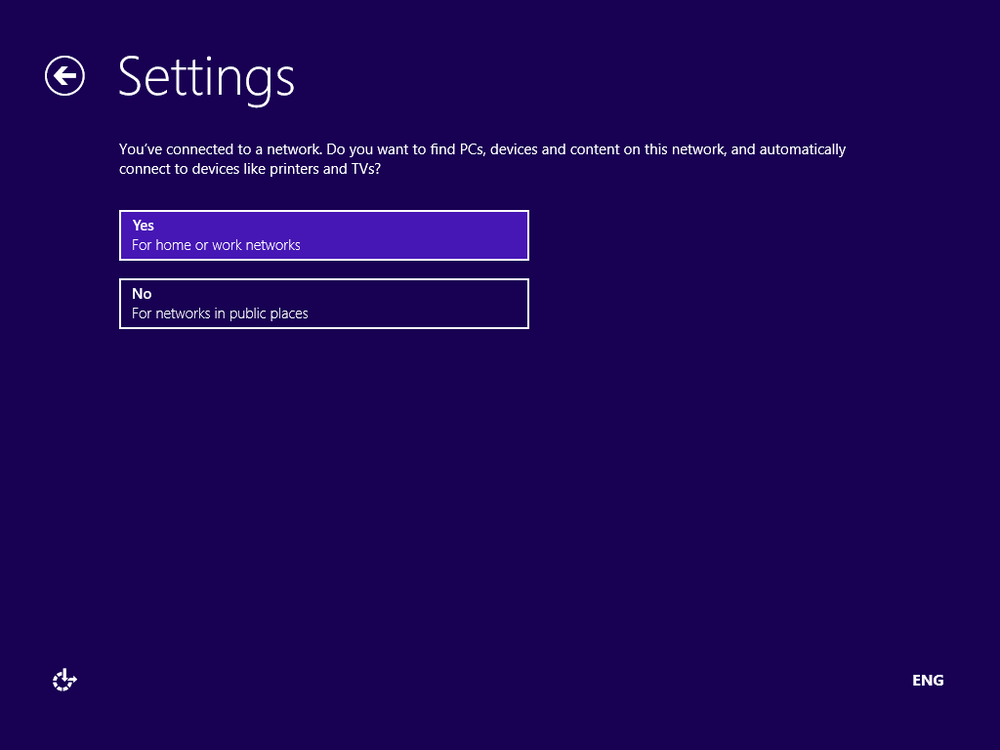
Select whether you want to find other computers, devices, and content on your network, and automatically connect to devices such as printers and TVs.
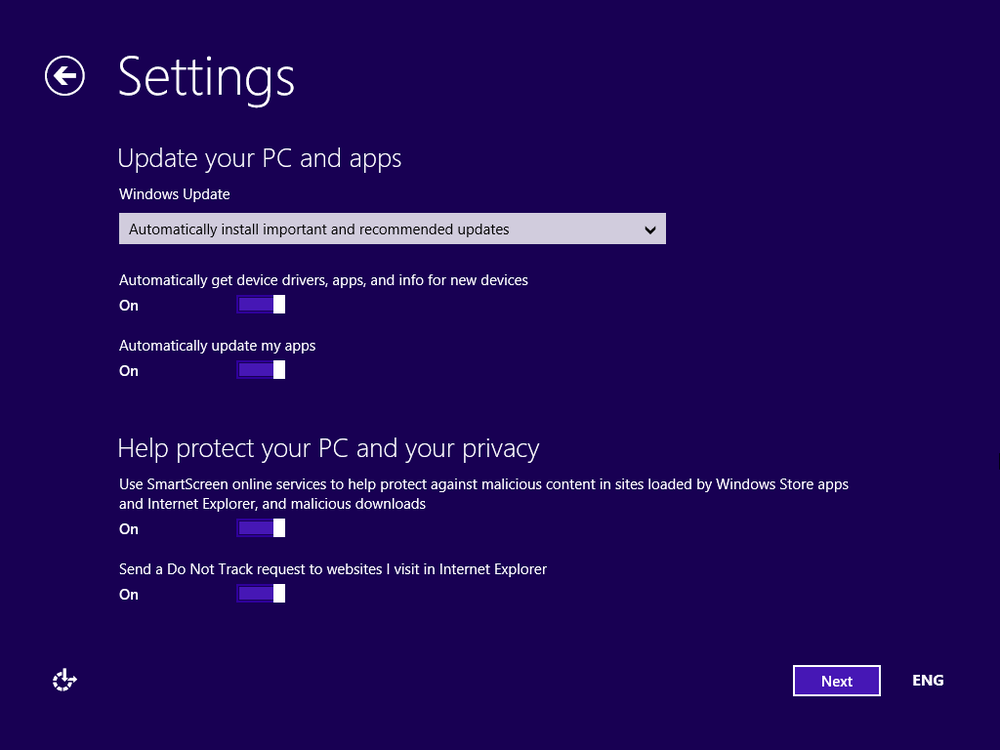
Select how you want Windows 8.1 to protect and update your computer or device by turning the relevant switches On or Off, and then click Next.
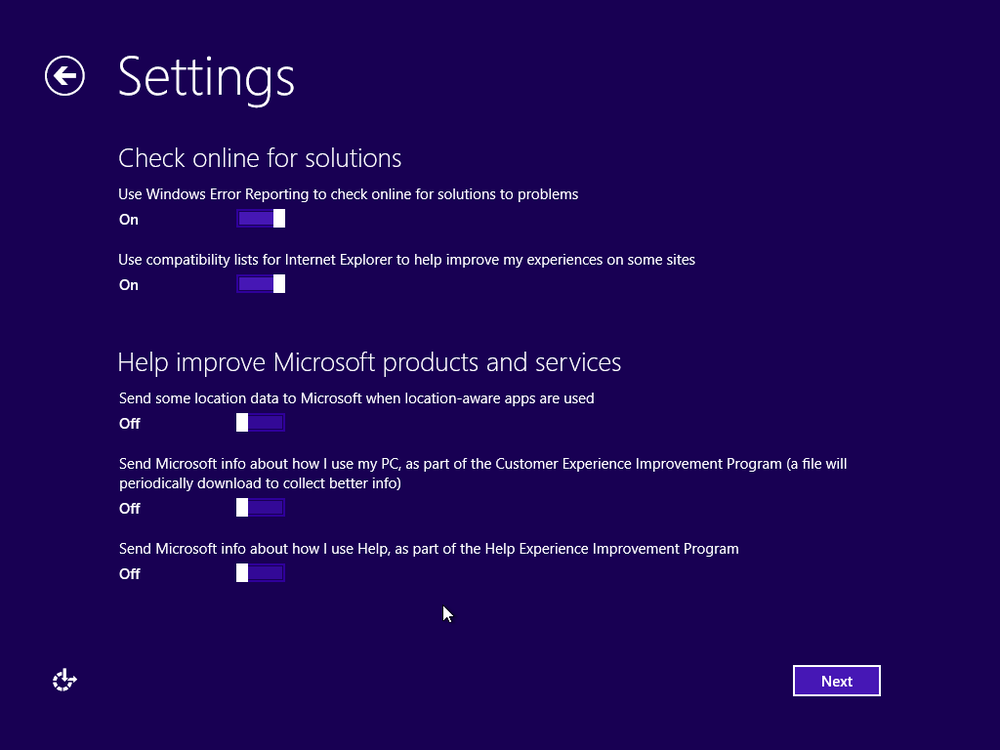
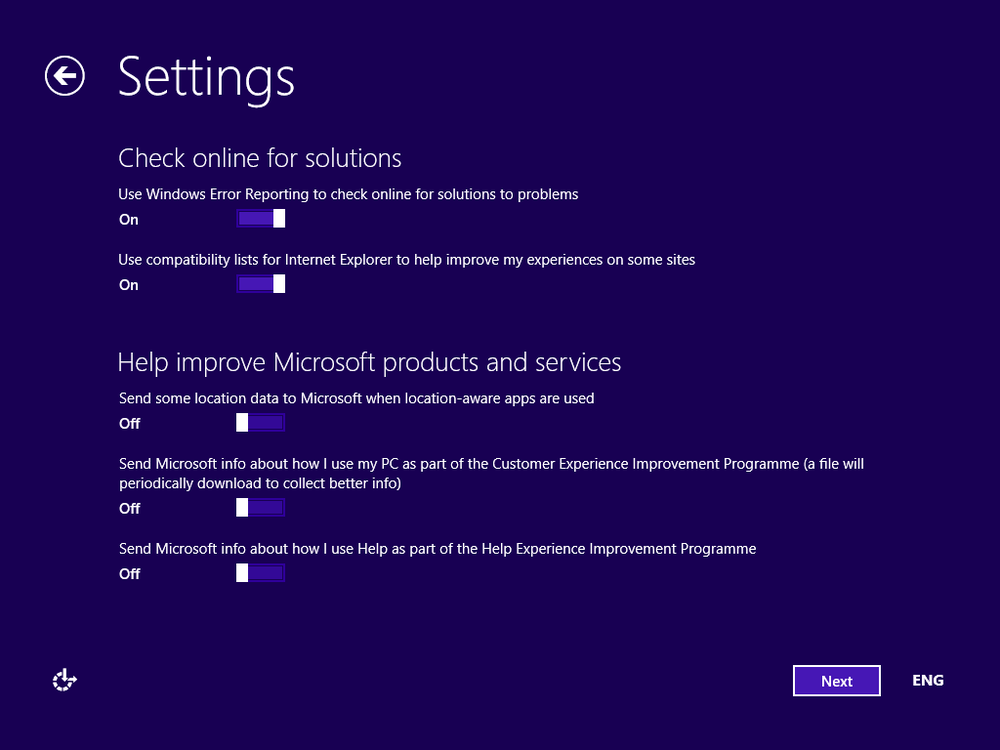
Select whether you would like to let Windows check online for solutions to problems and whether you want to send different types of information to Microsoft, and then click Next.
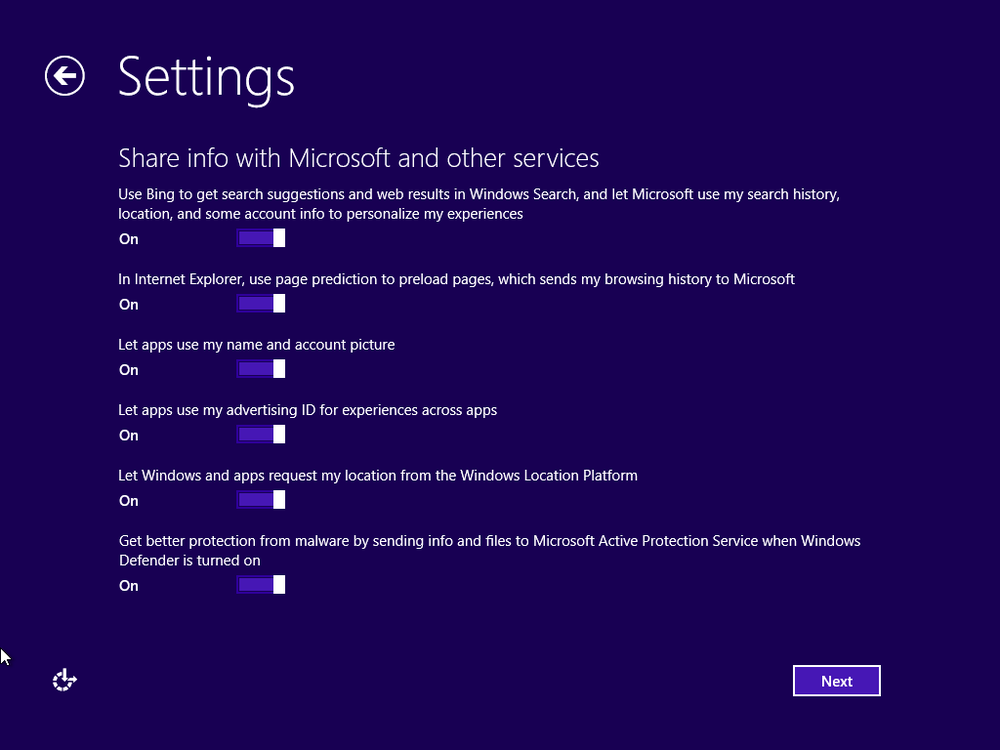
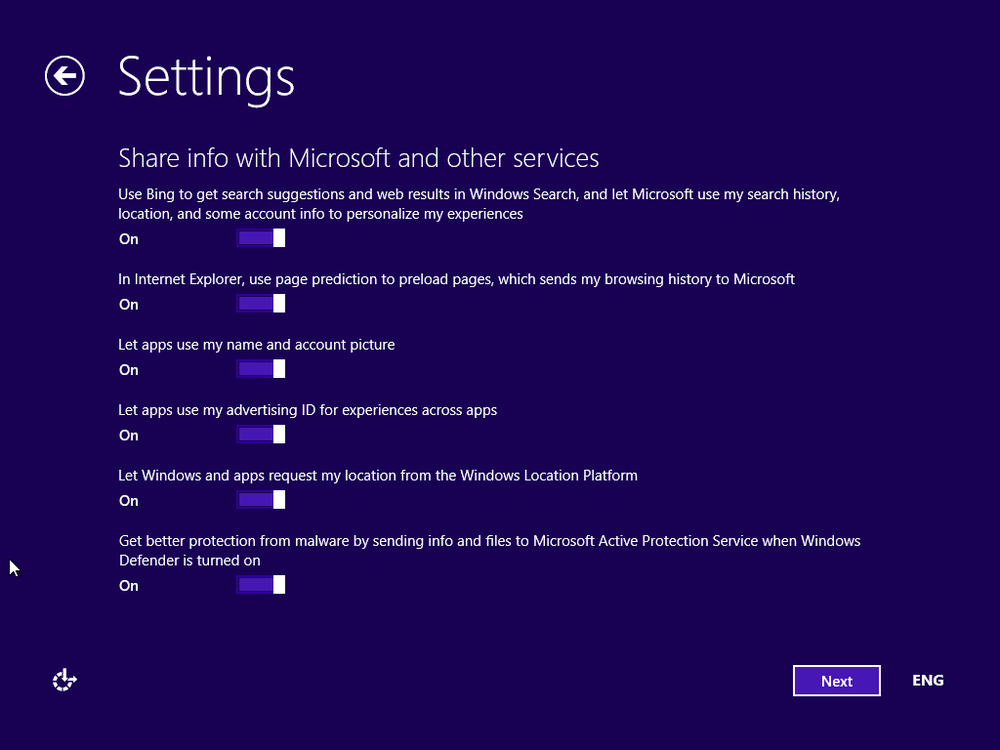
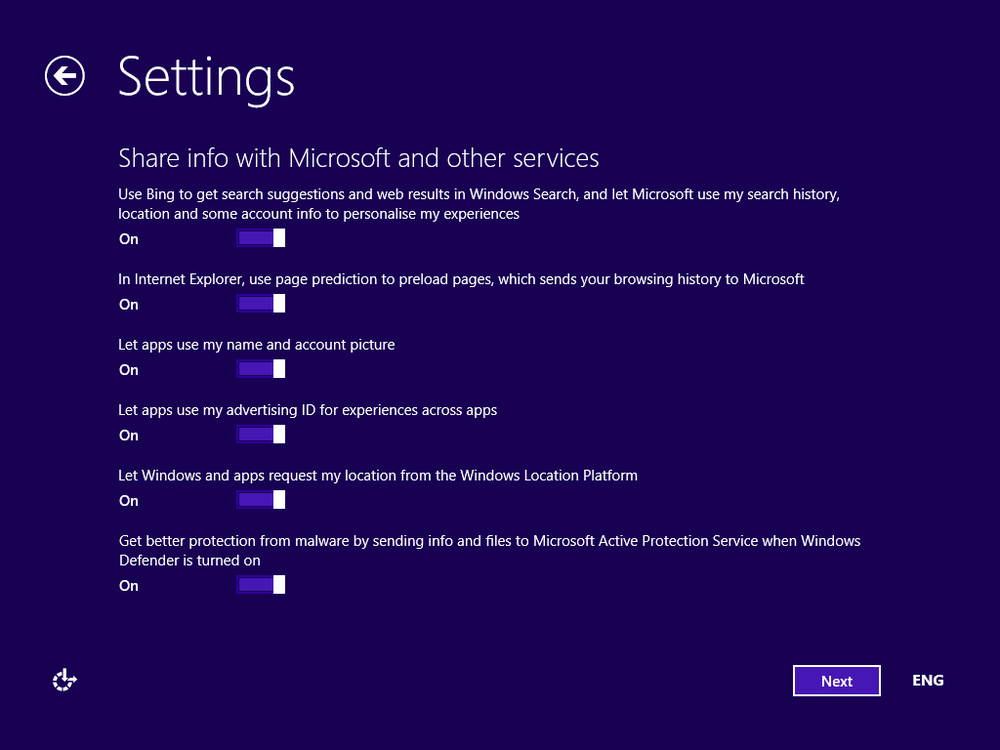
Select whether you want to share information with Microsoft and the different services existing in Windows 8.1, and then click Next.
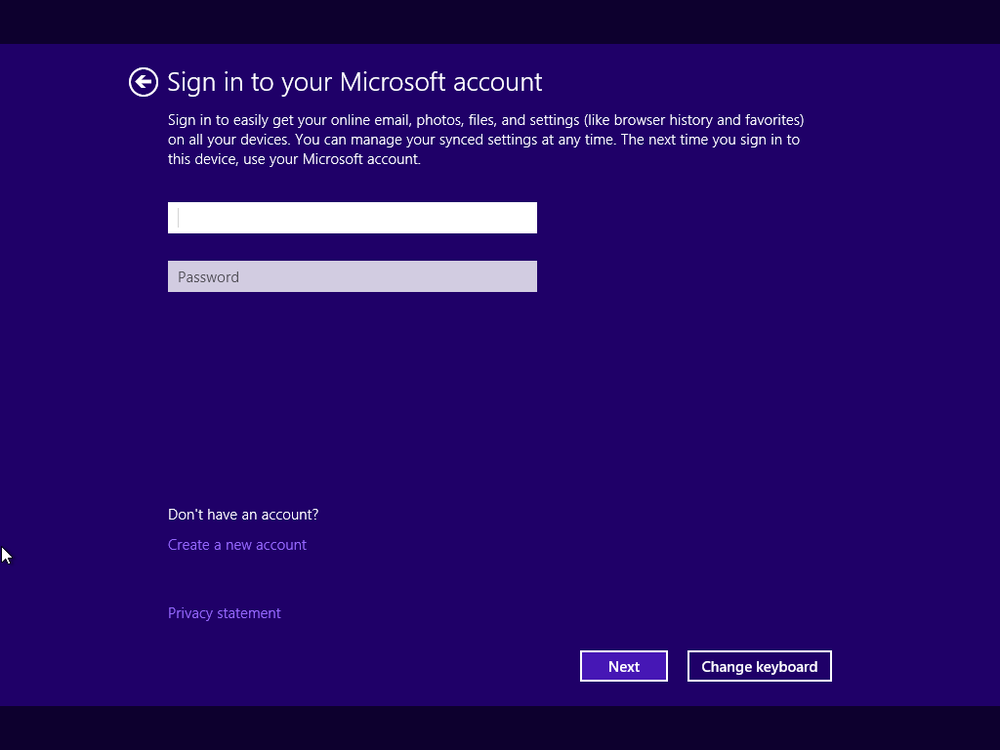
You are asked for a Microsoft account to sign in.
Important
If the Windows 8.1 setup doesn’t detect a working Internet connection, you won’t be asked to log on by using a Microsoft account. You are given the option to create a local user account. The personalization process ends here and Windows 8.1 will display a brief tutorial while it prepares for your first logon.
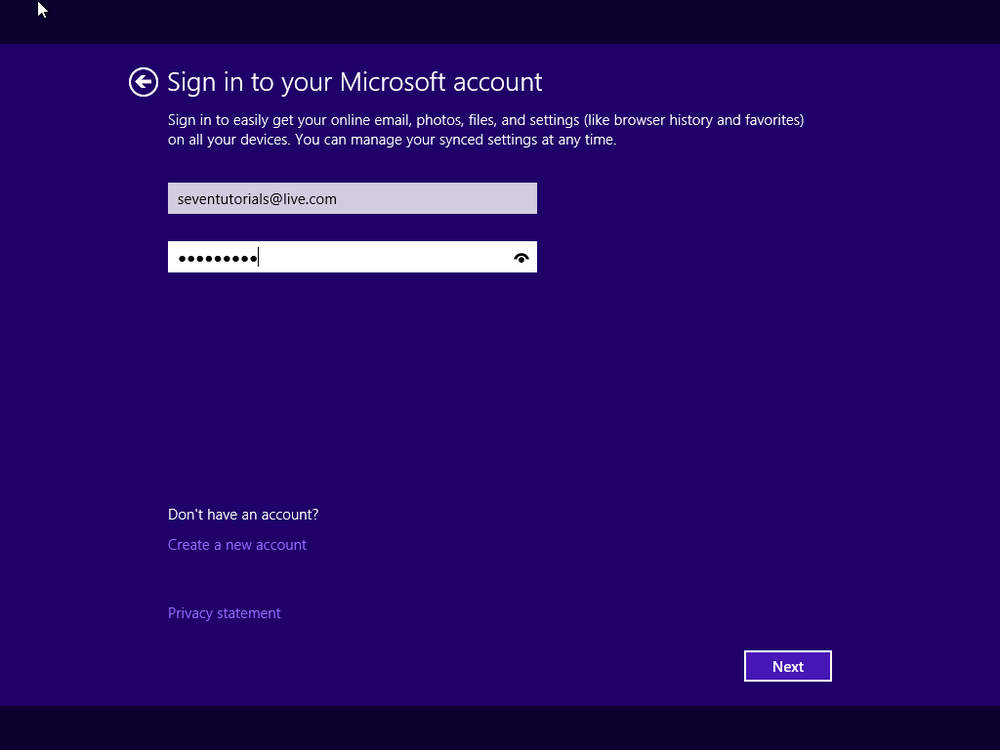
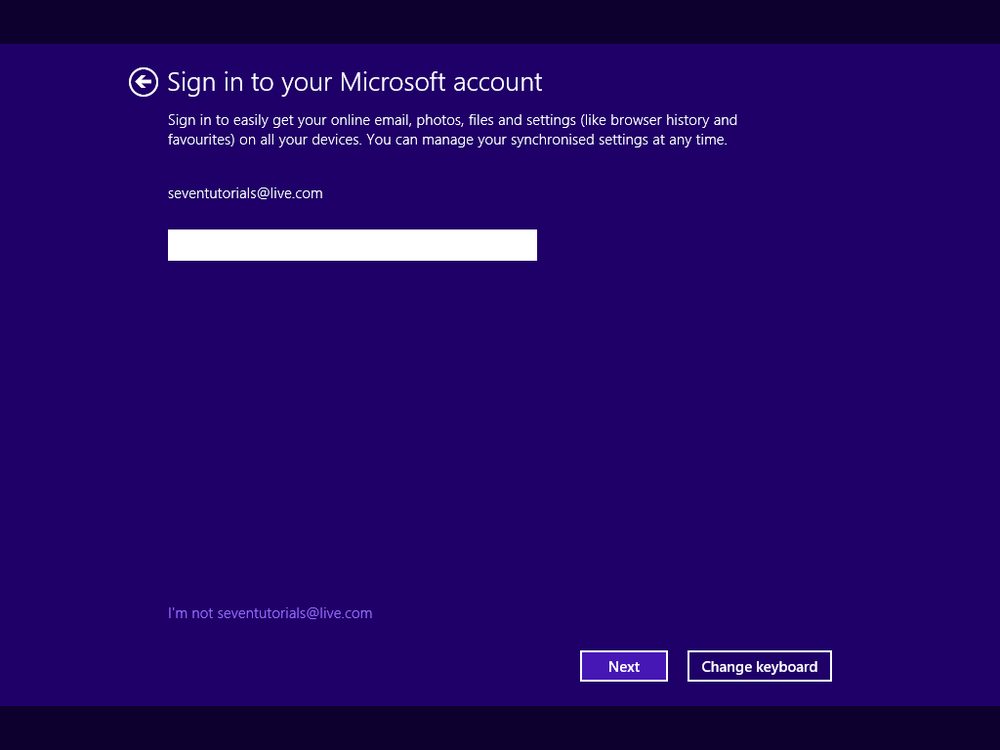
Type the email address and password for your Microsoft account and click Next.
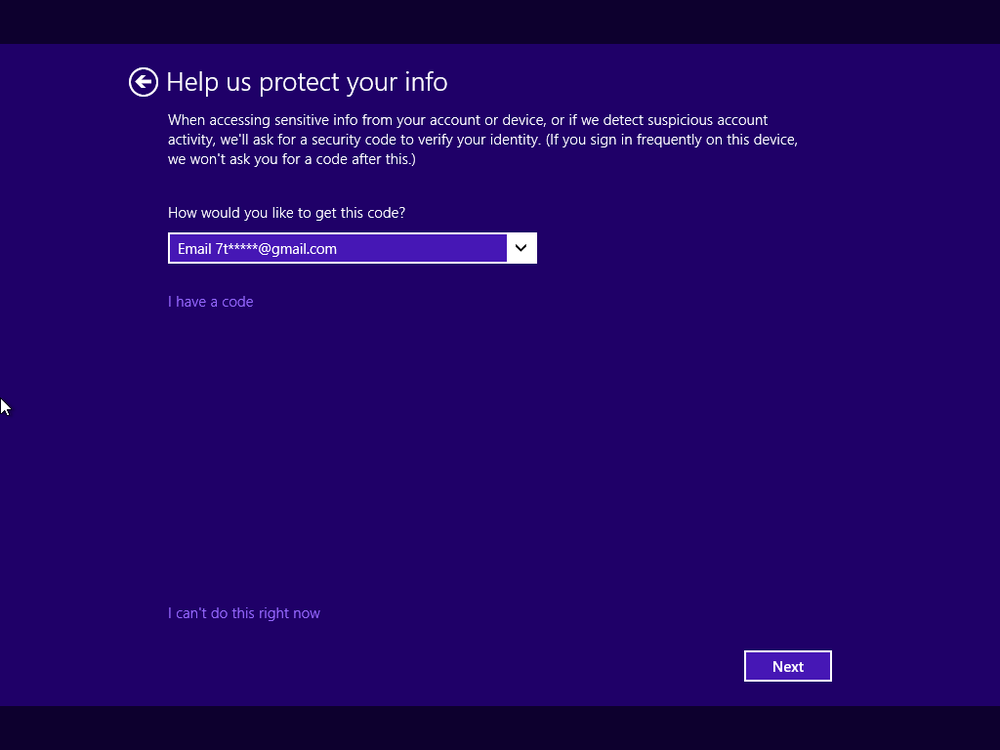
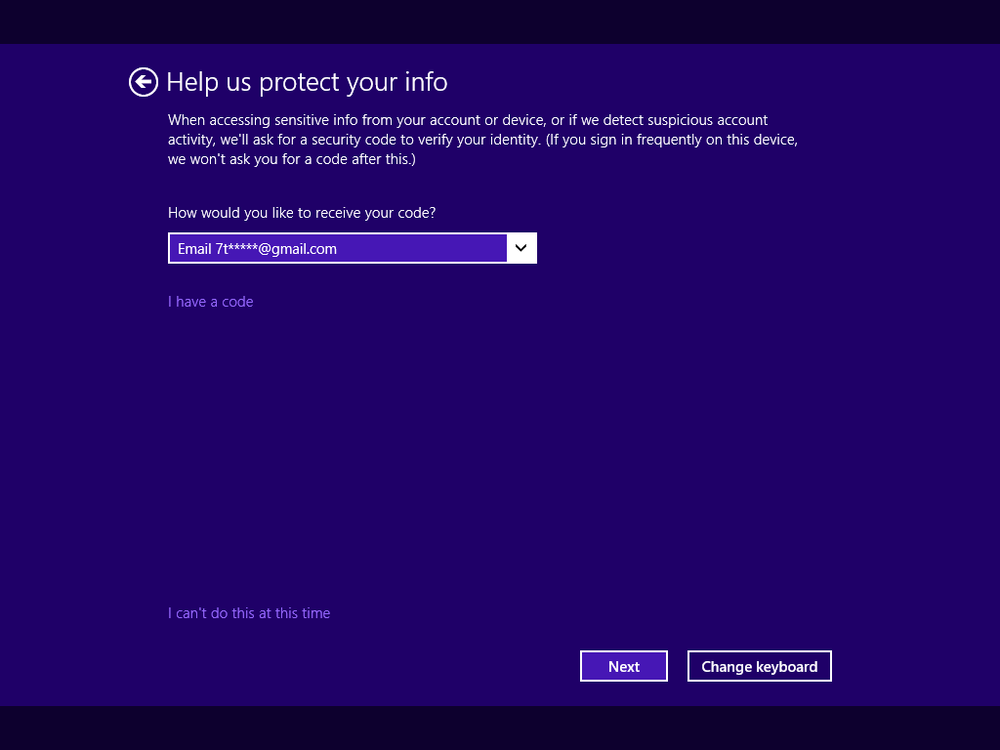
You are informed that you will need to enter a security code that is used to verify your account.
Select how you would like to receive that code: via a text message on your phone, via a phone call, or via email. Then, click Next.
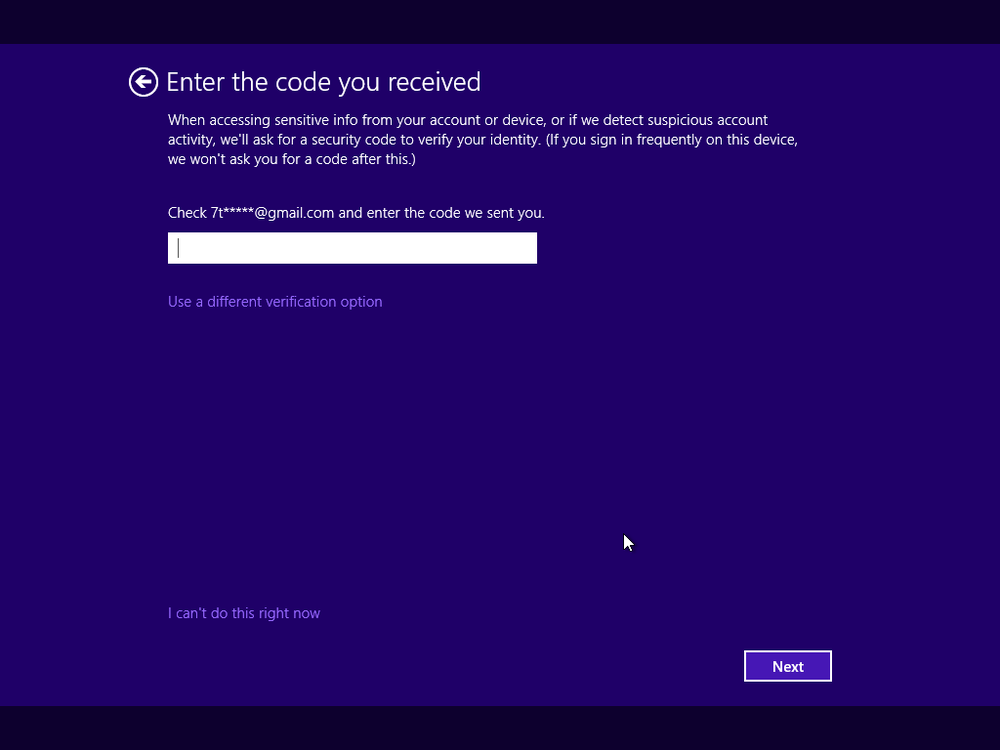
Enter the security code you just received via the method you selected and then click Next.
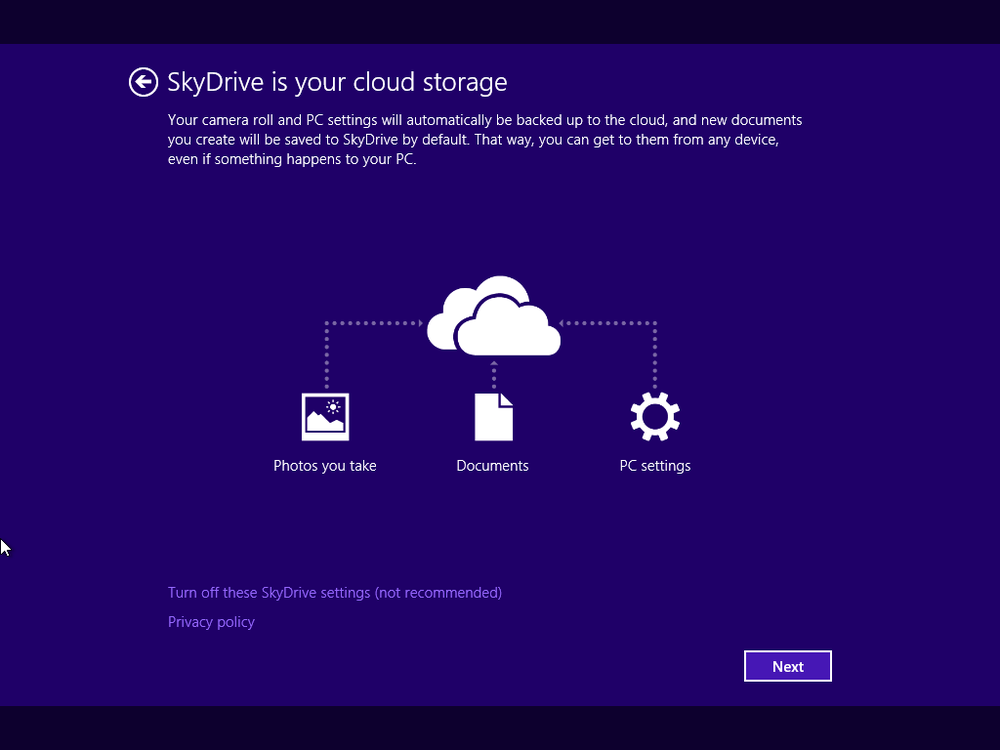
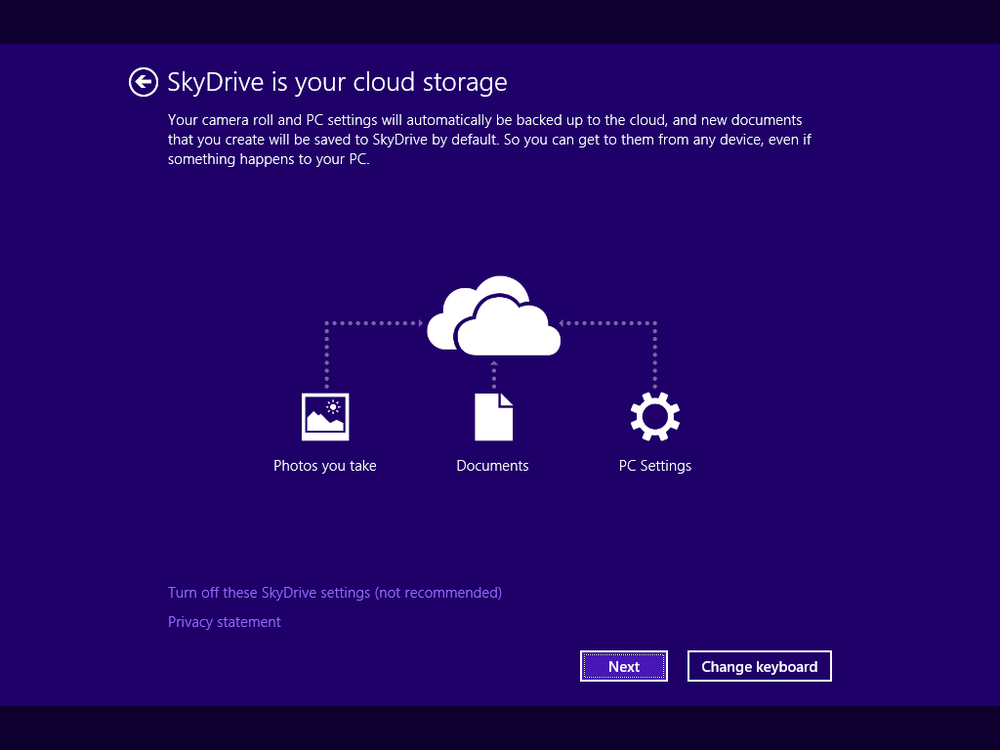
You are informed about Microsoft SkyDrive and how it is going to be used to back up your data, documents, and settings to the cloud.
Click Next and wait for Windows 8.1 to finalize the preparations for the first logon.
Note
If you previously installed Windows 8.1 on another computer or device, you won’t be shown information about SkyDrive and what it is going to back up to the cloud. Instead you are asked whether you want to set up this computer using the settings synchronized from other Windows installations you have made. Make a choice and then click Next.
While you wait for the preparations to complete, watch the tutorial about how to navigate Windows.
You are logged on to Windows 8.1 for the first time.


Clean Up
When you are logged on, don’t forget to eject the installation disc and store it in a safe location.
You can now use Windows 8.1 and all the available features. If you have used Windows 8 or Windows 8.1 on another computer or device with the same Microsoft account you used to log on, your settings from the other device are automatically migrated to this installation.
You can create a multiboot setup on your computer or device. For example, you can run Windows 8.1 alongside Windows 7 and switch between operating systems effortlessly.
Installing Windows 8.1 in a dual-boot configuration is not much different from the procedure for making a clean installation. You must have a separate partition just for Windows 8.1. After you create that, follow the steps detailed in the installation guide from the previous section. At step 7, you select the partition created just for Windows 8.1 and continue with the installation.
Windows 8.1 automatically detects the other Windows operating systems you have installed and creates the appropriate boot entries for them. When you start your computer or device, you can select the operating system into which you want to boot.
When creating a multiboot setup with multiple versions of Windows, it is best to install Windows 8.1 last. Earlier Windows versions cannot set the boot entry for Windows 8.1 correctly, because it is a newer operating system using different technologies. However, Windows 8.1 can manage the boot entries for earlier versions of Windows correctly.
If you install earlier versions of Windows after Windows 8.1, they will overwrite the Windows 8.1 boot entry and you won’t be able to access Windows 8.1. To fix this issue, you would need to use third-party solutions with which you can edit the boot loader on your computer and add back the Windows 8.1 entry. You will find many solutions online, including the popular EasyBCD utility.
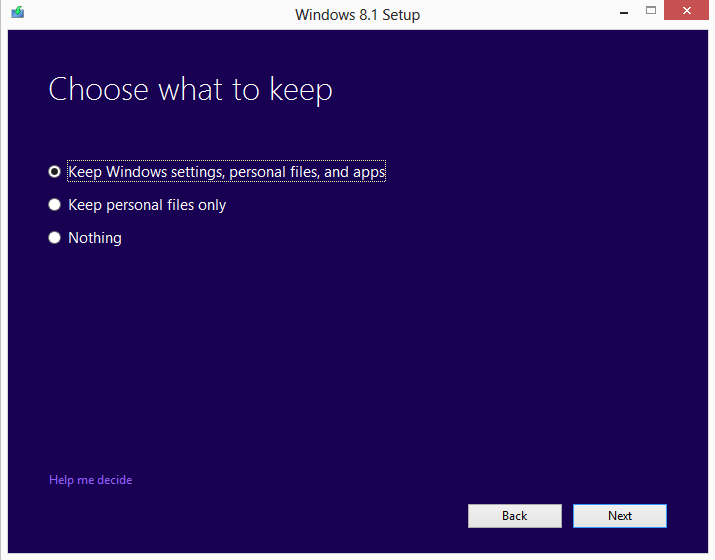
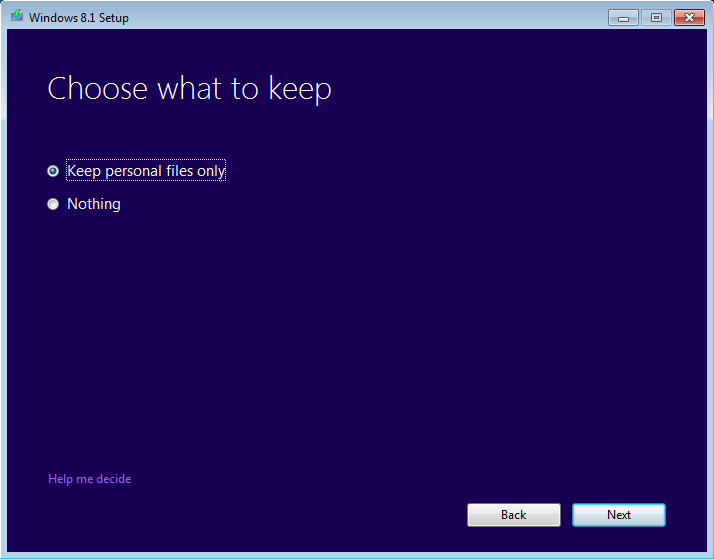
You can upgrade to Windows 8.1 from Windows 7 and Windows 8. Users of earlier versions of Windows may try to perform an upgrade and it might work, but there’s no official support from Microsoft on this. The process is similar for each of these operating systems, but there are differences when it comes to the settings, files, and apps that can be migrated to Windows 8.1. You can upgrade from Windows 7 retail editions to Windows 8.1 Pro. Although you can upgrade all retail editions of Windows 8 to Windows 8.1 Pro, you can only update the basic edition of Windows 8 to the basic edition of Windows 8.1. During the upgrade process, the Windows 8.1 setup will evaluate your system and ask you to choose what you would like to keep. The following are the possible choices:
Keep Windows Settings, Personal Files, And Apps. This is available only when you’re upgrading from Windows 8 to Windows 8.1.
Keep Personal Files Only. This is available when you’re upgrading from Windows 7 and Windows 8 to Windows 8.1.
Nothing. This is available when you’re upgrading from Windows 7 and Windows 8 to Windows 8.1.
You can also perform an upgrade from Windows 8 to Windows 8.1 via the Windows Store. If you have purchased a computer or device that had Windows 8 preinstalled, the upgrade will be available free of charge through the Windows Store. The procedure to carry it out is covered in the next section of this appendix.
If you purchased a Windows 8 installation disc, you can upgrade through the Windows Store or by using a Windows 8.1 installation disc.
You cannot upgrade volume license versions of Windows 8, Windows 8 Enterprise, and Windows 8 Enterprise Eval versions from the Windows Store. You must use media to upgrade these editions.
Finally, you must upgrade to Windows RT 8.1 from Windows RT by using the Windows Store. Media is not available for Windows RT 8.1 upgrades.
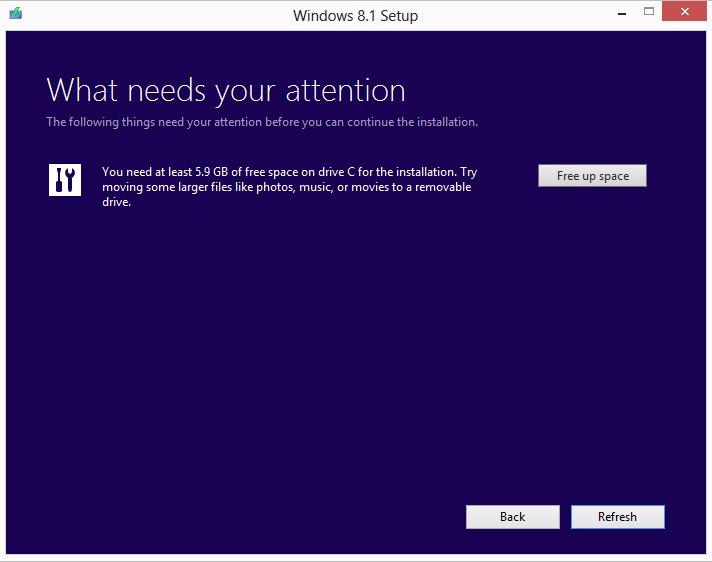
To upgrade from an earlier version of Windows to Windows 8.1, insert the Windows 8.1 installation disc into your DVD or Blu-ray drive and run the Setup.exe file. The Windows 8.1 Setup Wizard starts and guides you through all the steps. The upgrade process involves fewer steps than when installing from scratch, but more requirements must be met. For example, on the partition on which your current operating system is installed, you must have at least 5.9 GB of free space available for Windows to install itself and preserve the old operating system until the installation is done. The 5.9 GB are in addition to what the current operating system is using.
A great feature of the Upgrade Wizard is that it automatically checks to see whether all the prerequisites are met for the upgrade to continue. If they are not, the wizard presents a summary of the problems that were found and you are asked to take action prior to the upgrade procedure.
The old operating system is preserved so that if there are any problems with the upgrade you can revert to the previous Windows installation. The earlier version of Windows is removed only after the upgrade has finished successfully.
Important
One very important requirement is that you cannot upgrade from a 32-bit version of Windows to a 64-bit version of Windows 8.1 (or vice versa). If you have purchased a different version, you must perform a clean installation and move your files, settings, and apps manually.
In this exercise, you’ll learn how to upgrade from Windows 7 to Windows 8.1. The process for upgrading from Windows 8 to Windows 8.1 is similar, and you can follow almost the same steps, although some options might be different.
Set Up
Insert the Windows 8.1 installation disc into your DVD or Blu-ray drive. Open Windows Explorer and run the Setup.exe file found on the disc. If an UAC prompt is shown, allow the setup to run. Make sure you close all active apps before performing the upgrade. Also, you need to have the Windows 8.1 product key available.
Wait for the setup files to be prepared.
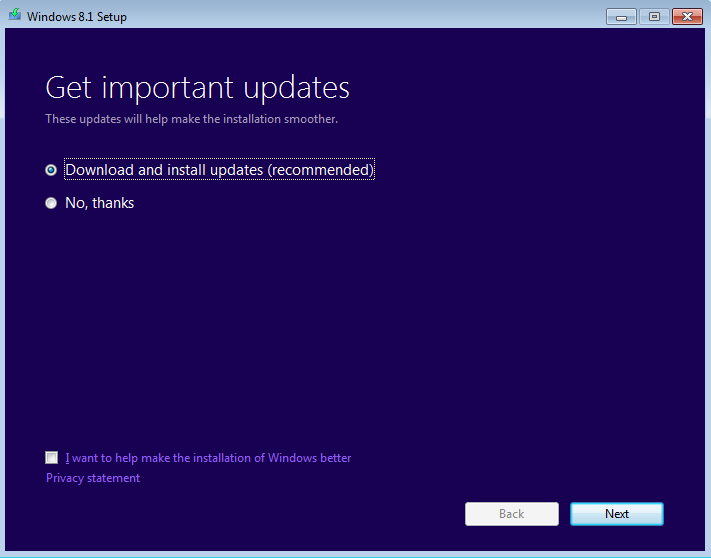
You are asked whether you want to get the latest updates during the upgrade process.
Leave Download And Install Updates selected, and click Next.
Type the Windows product key and click Next.
You are asked to accept the license terms.
Read the license terms, select the I Accept The License Terms check box, and then click Accept.
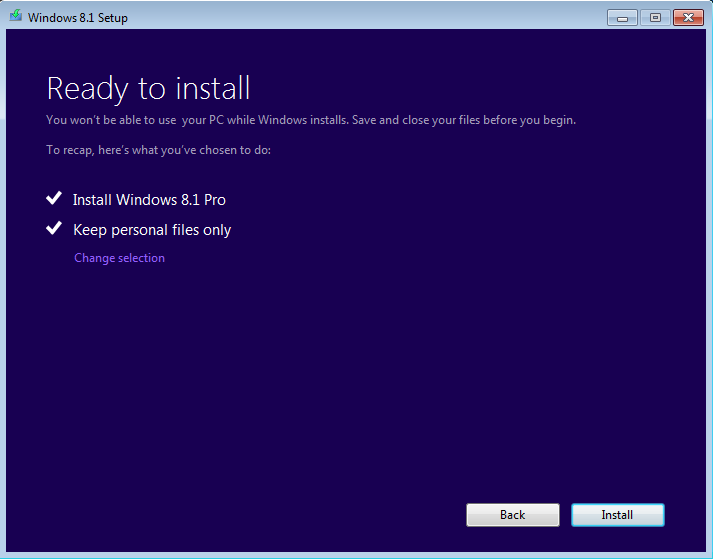
Choose what you want to keep during the upgrade process and then click Next.
A summary of what the upgrade process will do opens.
If you are ready to go ahead with the upgrade, click Install.
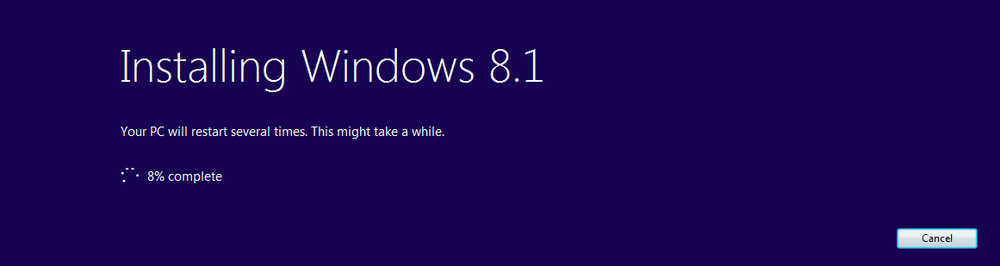
Wait for the installation process to finish.
If any problems are encountered, the previous Windows installation will be restored automatically. After several restarts, the personalization process begins.
Select the color you want to use for your Windows 8.1 installation.
Click Next to start configuring other important settings.
Click Customize to customize Windows settings in detail.
Select whether you want to find other computers, devices, and content on your network, and automatically connect to devices such as printers and TVs.
Select how you want Windows 8.1 to protect and update your computer or device by turning the relevant switches On or Off, and then click Next.
Select whether you would like to let Windows check online for solutions to problems and whether you want to send different types of information to Microsoft, and then click Next.
Select whether you want to share information with Microsoft and the different services existing in Windows 8.1, and then click Next.
To sign in, you are asked to enter the password of the user account you used in the previous version of Windows.
Type the password and then click Next.
You are asked to type your Microsoft account address and then password.
Type the email address and password for your Microsoft account and then click Next.
You are informed that you will need to enter a security code that is used to verify your account.
Select how you would like to receive that code: via a text message on your phone, via a phone call, or via email. Then, click Next.
Enter the security code you just received via the method you selected and then click Next.
You are informed about SkyDrive and that it will be used to automatically back up your data, documents, and settings to the cloud.
Click Next and wait for Windows to finalize the preparations for the first log in.
While you wait for the preparations to complete, watch the tutorial about how to navigate Windows.
You are logged on to Windows 8.1 for the first time.


Clean Up
When you are logged on, don’t forget to eject the installation disc and store it in a safe location.
The upgrade has been performed, and your files, settings, and apps have been migrated according to your settings.
Windows 8 users who have purchased their systems with Windows 8 preinstalled or have used a retail copy of Windows 8 to install on their systems, can update for free to Windows 8.1, using the Windows Store.
However, this upgrade procedure doesn’t work, for the following editions of Windows 8:
Windows 8 Enterprise
Editions of Windows 8 Pro that are installed by enterprises using KMS activation
Editions of Windows 8 that are installed using an MSDN ISO, and activated using multiple activation keys
If you’re running one of these editions, you can’t install the free update to Windows 8.1 or Windows RT 8.1 from the Windows Store. If you installed Windows 8 using an MSDN ISO, you will be able to install Windows 8.1 using a similar ISO from MSDN.
To learn if you can update to Windows 8.1, simply open the Windows Store. There you should find a big entry named Update Windows with the recommendation to update to Windows 8.1 for free.

But, even if you meet the requirements shared above, this option might still not appear. That is because there are several other conditions that must be met before you can start the update process:
You should log on with a Microsoft account. Local accounts can’t be used for the upgrade process.
You must have your Windows 8 installation up-to-date with the latest updates. If you just installed Windows 8 and you want to upgrade to Windows 8.1 without going through the many updates available for it, you can’t.
You should have 20 GB of empty space for the 64-bit edition of Windows 8.1 and 16GB of empty space for the 32-bit edition of Windows 8.1, on the partition where Windows 8 is installed. This space will be used to download and install the Windows 8.1 update. The download alone will use 3.6-4 GB of space.
Your Windows 8 installation must be activated. If it isn’t, the update won’t be available in the Windows Store.
You should back up your important files, to make sure you won’t lose them. Problems should not occur but you never know how things may start to malfunction. If you don’t know what tool to use, don’t hesitate to try the built-in File History tool we covered in Chapter 15.
If you see Update Windows entry in the Windows Store, then go ahead and follow our step by step guide.
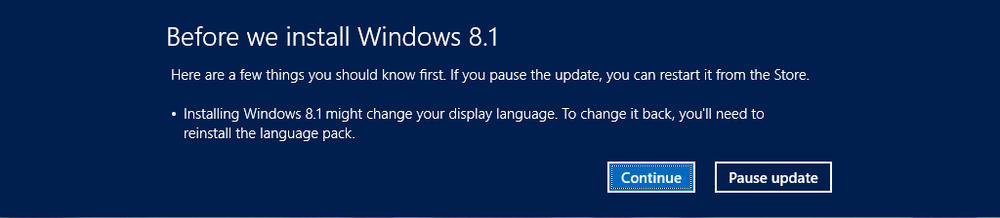
During the upgrade to Windows 8.1, if you have multiple display languages installed on your system, you will be informed that installing Windows 8.1 might change your display language. To change it back, you’ll need to reinstall the language pack. This is because Windows 8.1 has many new features that need additional translation. Therefore, the language packs from Windows 8 are incomplete and Microsoft has provided new language packs for Windows 8.1.
After the first restart, you need to arm yourself with patience. You won’t be able to use your computer for quite a while, because the upgrade process will reboot it several times and perform tasks like installing your devices, applying PC Settings, etc.
In this exercise, you’ll learn how to upgrade from Windows 8 to Windows 8.1, through the Windows Store.
Set Up
Log on with a Microsoft account with administrative permissions. Then, open the Windows Store.
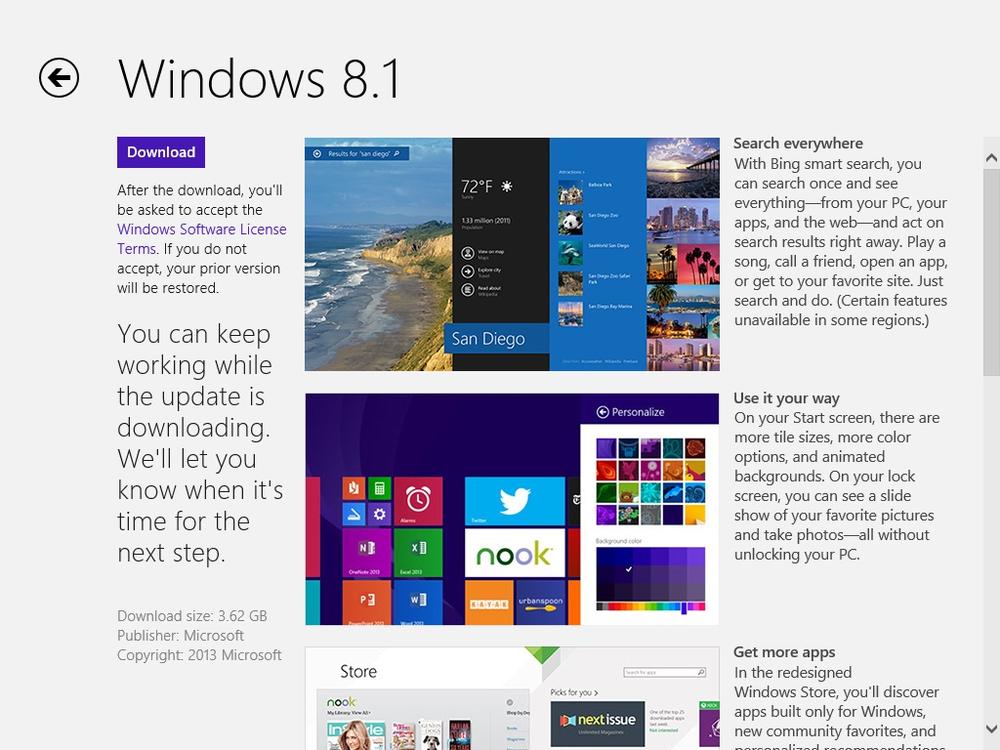
Click the Update Windows entry in the Windows Store.
You are shown information about Windows 8.1, its most important new features and the requirements that must be met before starting the upgrade process.
Click Download, so that the download and installation process begins.
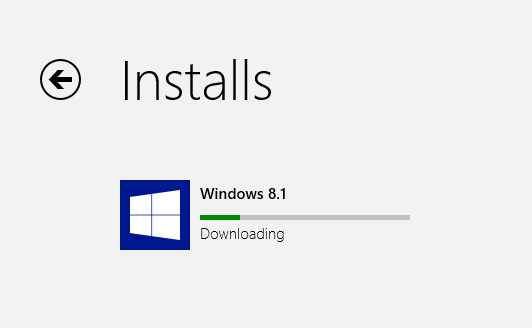
You are shown a progress indicator in the Windows Store.
You may continue to use your computer for other things while the download and installation process is performed in the background.
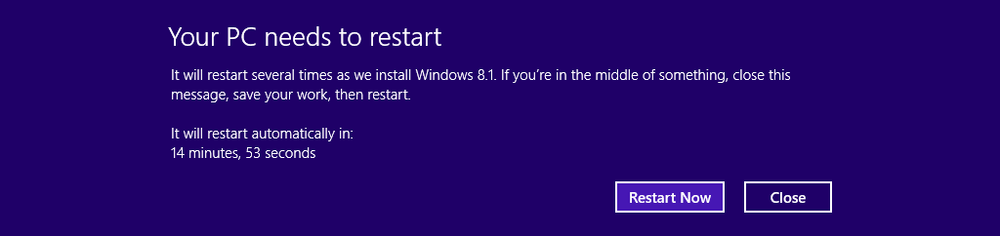
You will be prompted when it is time to restart your computer.
Close any work you have in progress and click Restart Now.
Wait for Windows to restart your computer or device and continue the installation process.
Read the license terms and click I Accept.
You are now asked to customize your Windows 8.1 installation.
Click Customize to customize Windows settings in detail.
Select whether you want to find other computers, devices, and content on your network, and automatically connect to devices such as printers and TVs.
Select how you want Windows 8.1 to protect and update your computer or device by turning the relevant switches On or Off, and then click Next.
Select whether you would like to let Windows check online for solutions to problems and whether you want to send different types of information to Microsoft, and then click Next.
Select whether you want to share information with Microsoft and the different services existing in Windows 8.1, and then click Next.
Type the password for your Microsoft account and then click Next.
You are informed that you will need to enter a security code that is used to verify your account.
Select how you would like to receive that code: via a text message on your phone, via a phone call, or via email. Then, click Next.
Enter the security code you just received via the method you selected and then click Next.
You are informed about SkyDrive and that it will be used to automatically back up your data, documents, and settings to the cloud.
Click Next and wait for Windows to finalize the preparations for the first login.
While you wait for the preparations to complete, watch the tutorial about how to navigate Windows.
You are logged on to Windows 8.1 for the first time.


Clean Up
The old Windows 8 installation is stored in the Windows.old folder, on the C drive. To remove it and free up space, it is best to use the Disk Cleanup tool. Press the Clean Up System Files button and select the old Windows installation files.
Tip
If you want to learn more about using Disk Cleanup, see the section Freeing up disk space by using Disk Cleanup in Chapter 20.
The upgrade has been performed, and your files, settings, and apps have been migrated to Windows 8.1.
Prior to installing Windows 8.1, ensure that you are aware of its system requirements and that you have a valid product key.
When creating a dual-boot setup with another version of Windows, install Windows 8.1 last.
You can upgrade to Windows 8.1 from Windows 7, and Windows 8 to Windows 8.1.
Windows 8 upgrades to Windows 8.1 can also be performed not only through installation media, but also through the Windows Store.