
Chapter at a glance
Browse
Browse SkyDrive from the SkyDrive app, page 190
Upload
Upload files to SkyDrive, page 192

Download
Download files from SkyDrive, page 196
Synchronize
Synchronize your Windows 8.1 settings, page 205
IN THIS CHAPTER, YOU WILL LEARN HOW TO
Microsoft SkyDrive is a service by which you can store your files on the Microsoft servers in the cloud. You can upload documents, pictures, and other types of files and access them from anywhere: your web browser (Internet Explorer 11, for instance), your Windows Phone, your Microsoft Xbox One and all kinds of computers and devices. By using SkyDrive, you can synchronize files among multiple devices or share some of your stored files and folders with other people. It’s useful for sharing big files with friends and family and for doing collaborative work on Microsoft Office documents. Further, synchronizing important files across devices frees you to use them whenever you need them from almost any device or computer with an Internet connection.
Windows 8.1 uses SkyDrive to synchronize your settings across the computers and devices with which you log on to your Microsoft account, so you can configure your Windows 8.1 settings on one computer and have them replicate automatically on all others that use the same Microsoft account.
The basic SkyDrive service is free to all users with a Microsoft account and includes 7 GB of space. However, paid plans are also available for people who want more storage space. The features are the same in all plans, and so is the functionality.
In this chapter, you’ll learn how to access SkyDrive, upload files to it, download files from it, access it from a web browser, configure it and synchronize your Windows 8.1 settings across multiple computers and devices.
Practice Files
The practice files you will use to complete the exercises in this chapter are in the Chapter06 practice file folder. Before you can complete the exercises in this chapter, you need to install the practice files specified in the section “Using the practice files” in the Introduction of this book to their default location.
The first time you log on to Windows 8.1 with a Microsoft account, you are asked whether you want to turn on SkyDrive and its synchronization settings.
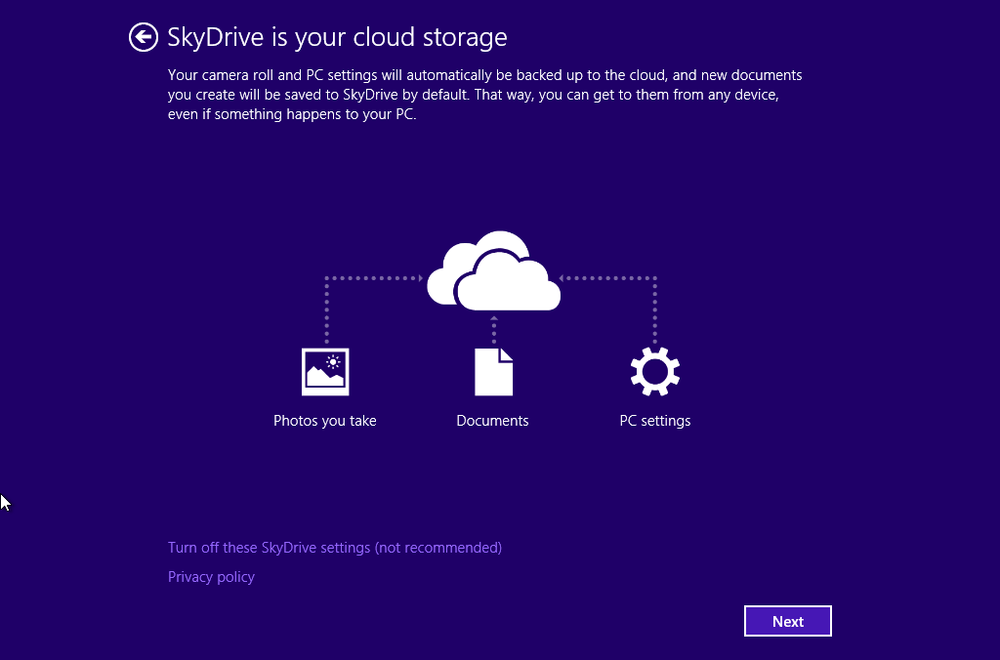
It is best to choose to use it, since this service is at the core of the Windows 8.1 computing experience. However, if you do not want to turn it on it right away, you can click Turn off These SkyDrive Settings and turn it on later, from PC Settings.
To use SkyDrive in Windows 8.1, you need a Microsoft account instead of a local account. If you try to access SkyDrive from a local account, Windows will ask you to change your account settings and add a Microsoft account.
See Also
If you want to learn more about user accounts in Windows 8.1 and how to use a Microsoft account, read Chapter 12.
To access SkyDrive, upload, download, or synchronize files and settings, you must have a working Internet connection.
After you satisfy all the prerequisites, you will see in Windows 8.1 both a SkyDrive app on the Start screen and a SkyDrive section in File Explorer. Both give you access to your SkyDrive. Any changes made in one of these locations are reflected in the other. For example, if you upload a file using the SkyDrive app, you will see that file available in the SkyDrive section in File Explorer, in the exact same folder into which you uploaded it.
See Also
If you want to learn more about File Explorer and how you can use it to browse and organize your files, read Chapter 4.
In Windows 8.1, you will find the SkyDrive folder in your User folder. This folder is placed on the disk drive where Windows is installed, in the Users folder, followed by your account name. For example, if your user account is named Ciprian and Windows 8.1 is installed on the C drive, the SkyDrive folder is at: C:UsersCiprianSkyDrive. If the default location does not suit your needs and setup, you can change it in File Explorer.
See Also
If you want to learn more about how to change the location of the SkyDrive folder, read Chapter 20.
You open the SkyDrive app from the Start screen by clicking its tile.
You can also search for the word SkyDrive and click the appropriate search result.
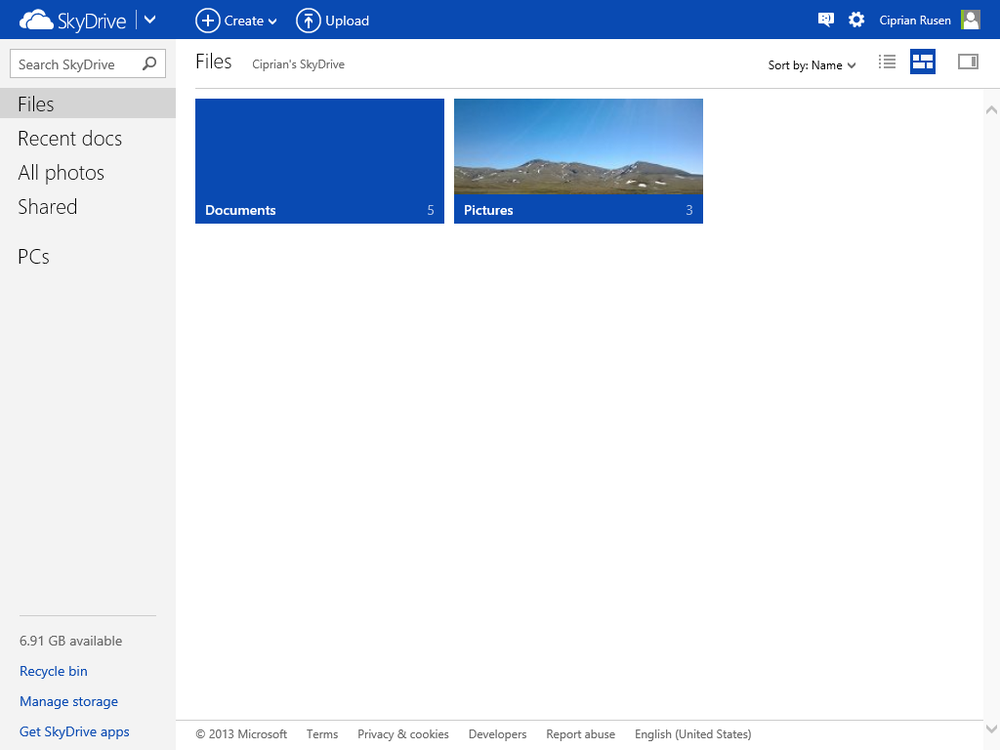
When you open SkyDrive, the app takes a few seconds to load information about the folders and files you have uploaded. For each folder, you see its name and for each file, you see an icon representative of its type, and the name of the file. For pictures, you see a preview of the file instead of an icon. In the lower-right corner of a folder or file, you might see a small icon, comprising a computer and a cloud. That icon displays only for files and folders that are physically available on your computer. It also means that you can use them when you’re offline. If you do not see this icon, it means that the folder or file is available online on your SkyDrive, and you can download it to your computer for offline access.

If you right-click a file, a contextual menu opens at the bottom of the SkyDrive app window, the file is selected, and a check mark appears in its upper-right corner.
To open a folder or a file, click it. When you open a file, SkyDrive opens it with the app that is set as the default on your computer for opening that file type. For example, Portable Document Format (PDF) files are opened by default with Reader.
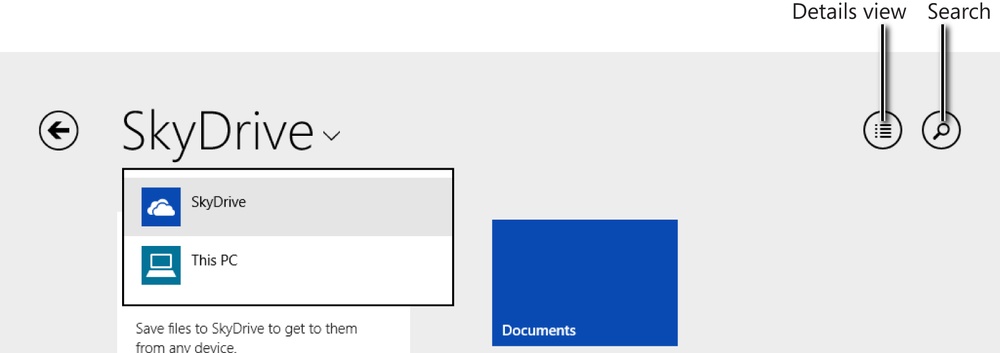
If you want to browse through different areas of SkyDrive, click SkyDrive to open a menu with the standard locations: your SkyDrive and This PC. In the upper-right of the app window are two buttons: the first is for switching to the Details View and back to the Thumbnails View (the default view for the SkyDrive app); you use the second for searching through the SkyDrive.
SkyDrive displays the files and folders available on your Skydrive, whereas This PC displays your user’s libraries, the Desktop, the Downloads folder, and devices and drives.
On the left side of the name of your SkyDrive is the Back button, which you use to go back to the previous location. When you open SkyDrive, because you haven’t opened anything, the Back button is not visible.
When you open the folders existing on the SkyDrive, you will see their names listed on the top, like a breadcrumb. There, you will always see the current folder and its parent. Clicking on its parent takes you to that location, without having to click the Back button.

The contextual menu shown at the bottom of the SkyDrive window displays useful buttons. What buttons are displayed depends on where you are in SkyDrive and what was selected. To view this menu, right click an item on your SkyDrive.

On the left side of the menu, you will see the following buttons:
Delete. This appears only if at least one file or folder is selected. A click deletes the item(s) you have selected.
Copy. This appears only if at least one file or folder is selected. A click copies the item(s) you have selected to the clipboard.
Cut. Again, this appears only if at least one file or folder is selected. A click cuts the item(s) you have selected, so that they can be moved to a different location.
Rename. This displays only when one file or folder is selected. Use this button to rename the selected file or folder.
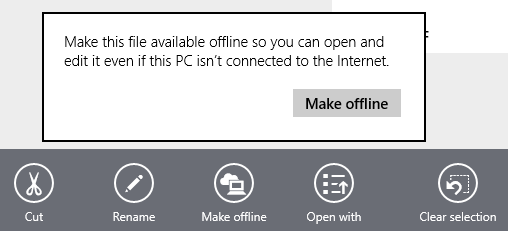
Make Offline. This button is available only when one or more files are selected. You use this button to download the selected file(s) or folder(s) to your computer. If the selected item is available for offline use, this button appears as Make Online-Only. By pressing it, SkyDrive will no longer store the selected item on your computer and make it available for offline use.
Open With. Use this button to select the app with which to open the selected file. This button is not shown when selecting folders.
On the right side of the menu, there are a few global options available:
Clear Selection. This appears only if at least one file or folder is selected. Its purpose is to clear the current selection of files or folders.
Select All. Use this to select all the items found in the current folder.
New Folder. Use this to create a new folder on the SkyDrive at the current location.
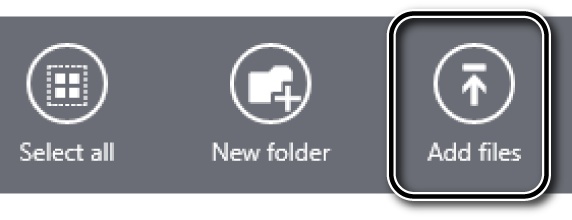
Add Files. Click this to upload new items to SkyDrive.
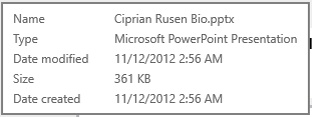
Using your mouse or finger to point to an item from SkyDrive reveals more information about it, including its name, type, and the date on which it was last modified, its size, and the people with whom it is shared.
You can see that SkyDrive is relatively easy to use. To become proficient with it, go through the next sections and exercises.
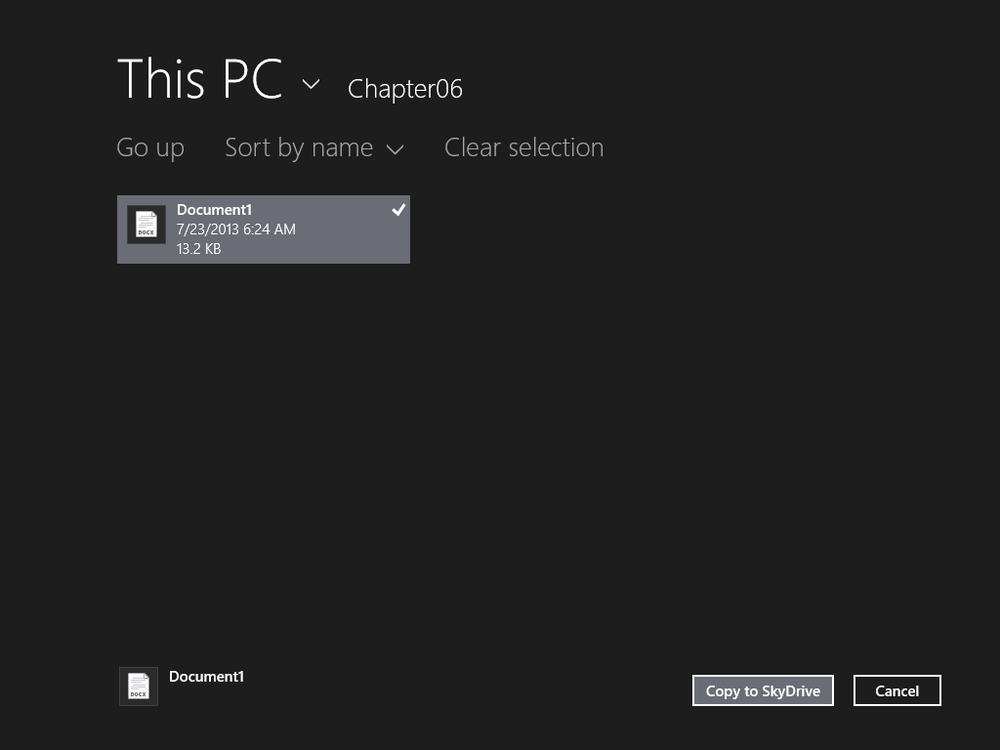
Uploading files to SkyDrive is a simple task. You can upload one or more files at one time. With the SkyDrive app, you can browse through multiple folders and select only the ones that you want uploaded. When selected, the files are shown on the bottom half of the window, in the SkyDrive list. To remove a file from that list, click or tap it.
After you select the files, click Copy To SkyDrive and wait for the upload to finish.
On SkyDrive, you can upload any type of files. However, official support is only provided for the following file types.
Documents saved as PDF files, text files, Office files of any kind, and files saved with the Open Document Format (ODF) such as those created by using LibreOffice or OpenOffice
Photos saved as JPG, JPEG, GIF, BMP, PNG, TIF, and TIFF file types
Videos saved as AVI or WMV file types
Audio files saved as WAV or MP3 file types
During the upload process, progress information is displayed in the upper-right corner of the SkyDrive app window. If you click or tap it, more information about the process appears. In this exercise, you’ll learn how to upload a file to SkyDrive by using the SkyDrive app.
Set Up
To complete this exercise, you need the Document1.docx file in the Chapter06 folder in your practice files. When this file is available, open the SkyDrive app and browse to the folder to which you want to upload the file.
Right-click somewhere in the empty space of the SkyDrive app window to open the contextual menu.
Click the Add files button to open the upload window.
Browse to where you saved the Document1.docx practice file.
Click the Document1.docx file to select it.
Click the Copy to SkyDrive button to start the upload procedure.
Wait for the upload procedure to end. It should not take more than a few seconds.

The Document1.docx practice file is now uploaded to your SkyDrive.
Downloading files with the SkyDrive app is as easy as uploading them. During the download process, the progress displays in the upper-right corner of the SkyDrive app window.
If you click the progress line, more information about the process appears. Like the upload process, you can download one file at a time or select multiple files and download them to the same location on your computer. You can also download folders.
There’s one very important thing to keep in mind, though. If you set the SkyDrive app to access all files offline via the Settings charm, there won’t be any need to download files to your computer or device. All of the files on your SkyDrive will be downloaded automatically to your Windows 8.1 computer or device and they will be available for use even if you don’t have an Internet connection available. However, to save bandwidth, by default, the SkyDrive app is set to not access all files offline.
In this exercise, you’ll learn how to download a file from SkyDrive by using the SkyDrive app. The procedure for downloading folders works the same way.
Set Up
Open the SkyDrive app and browse to the folder that contains the file that you want to download.
The file you selected is now saved on your computer in the SkyDrive folder. If you open File Explorer, click SkyDrive, and go to the folder where the file was located, you will find the file there. It is now available for you to work on it, even when an Internet connection is not available.
You can access SkyDrive from a web browser at any time. Go to https://skydrive.live.com and log on with your Microsoft account details. You now have complete access to all your files and folders stored on SkyDrive. If you logged on with your Microsoft account in Windows 8.1, and you’re using Internet Explorer as your browser, you won’t need to log on to the SkyDrive service. You are automatically logged on by Windows.
With the help of your web browser, you can download files from SkyDrive, organize them in folders and subfolders, or add new files. You can also share files and folders with others.
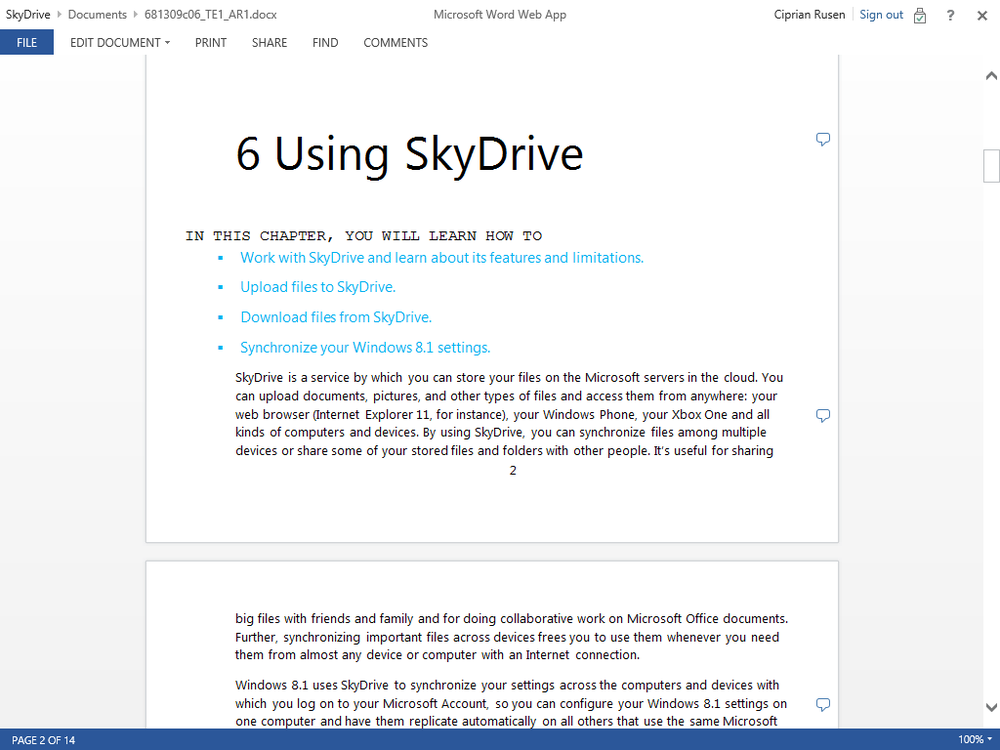
Last, you can view the pictures uploaded to SkyDrive and edit Office documents by using Microsoft Office Web Apps. They are simplified versions of Office apps with which you can view documents and perform some basic editing. They are free to use and work very well.
You can also access your SkyDrive from the Desktop. If you open File Explorer, you will find the SkyDrive section in the left pane. Double-click to open it and you can see the folders stored on your account.

You can add or remove files as you would normally when working with local files or folders. All the changes you make in the SkyDrive folder are automatically synchronized with Microsoft’s servers and available on other devices and computers via the SkyDrive service If you want to make a file available only online, right click it and select Make Available Online-Only. If there’s an online file you want to download to your computer, right click it and select Make Available Offline. If you want to set SkyDrive to store all your files on your PC so they are available also when offline, don’t forget to start the SkyDrive app, go to the Settings charm and then to Options. There you will find a switch for turning this feature On or Off.
You can share both files and folders from your SkyDrive via email, social networks such as Facebook, Twitter, and LinkedIn, and via direct links that you can copy and paste into documents and other items. You can give editing permissions to others or you can only let them view what you are sharing. You can also require everyone who accesses the shared item to sign in to be able to view it or edit it. You can find all of these settings in the Share window.
You can share in several ways, the quickest being directly from File Explorer.
In this exercise, you’ll learn how to share a folder via SkyDrive from File Explorer.
Click the SkyDrive section.
Browse to the SkyDrive folder you want to share and then click it.
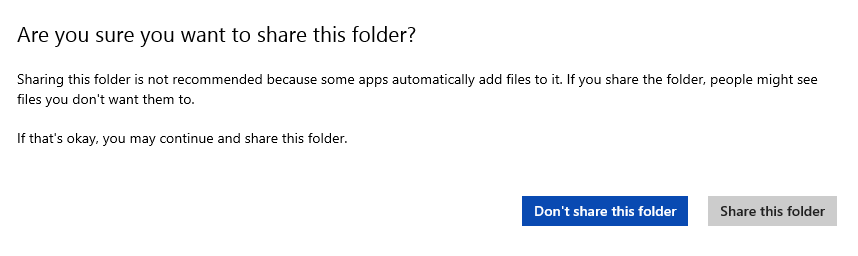
In the Share With section, click SkyDrive. Your default browser is opened and you are asked if you are sure that you want to share this folder.
Click Share This Folder.
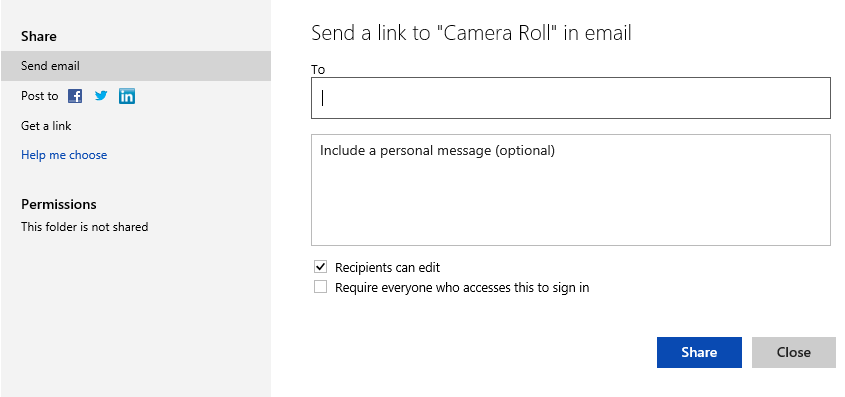
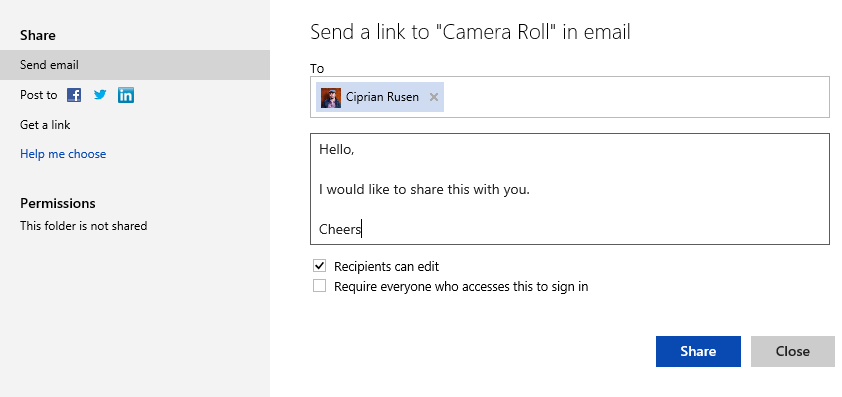
The Share window opens in your browser.
Leave the Send Email section selected and then, in the To field, type the email address of the person with whom you want to share the folder.
In the box below the To field, type a message for that person.
Set whether you will allow the recipient to edit the folder and whether you will require the recipient to sign in prior to accessing the folder.
When you’re done configuring all the settings, click Share.
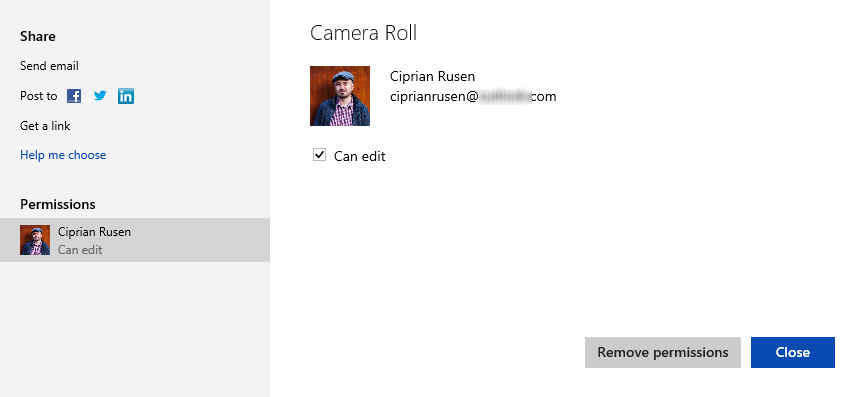
You are informed that folder is shared with the person you specified.
Click Close.

The procedure for sharing a file is the same. The only exception is that you won’t be asked whether you are sure that you want to share this folder, after step 4.
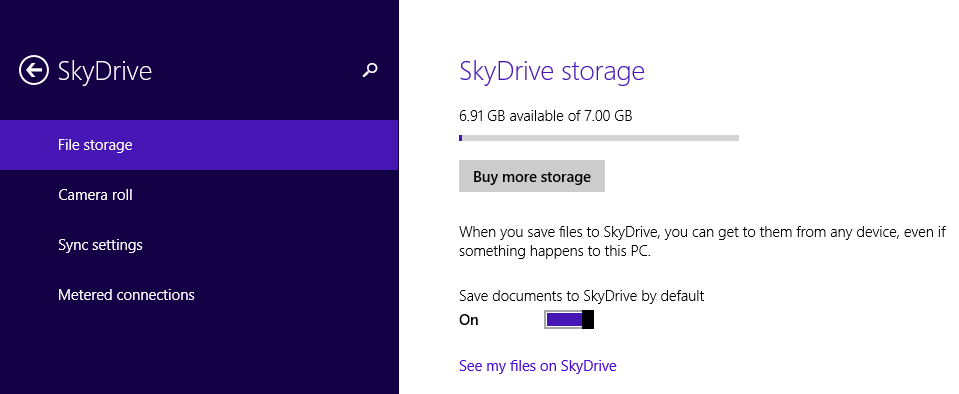
You can configure the way SkyDrive works in Windows 8.1 by using PC Settings. The SkyDrive section in PC Settings is split into four areas:
File Storage. You can view the storage space available on your SkyDrive and buy more storage when needed. You can also set whether Windows 8.1 will use SkyDrive as the default save location for your documents.
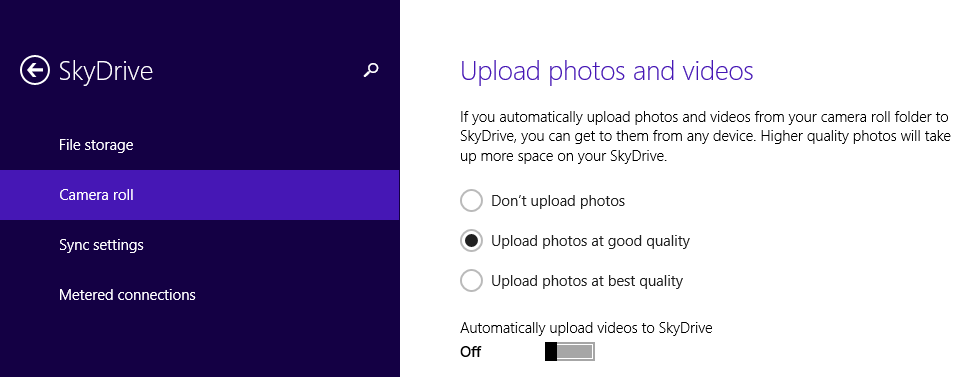
Camera Roll. Use this if you want SkyDrive to automatically upload your photos and videos from the Camera Roll folder. You can choose the quality of your uploaded photos and also you can turn on and off the option to automatically upload your videos to SkyDrive. These settings apply only to the Camera Roll folder found in your Pictures library. Other pictures and videos are not impacted by the settings found in this section. The Camera Roll folder is used by the Camera app and other similar apps from the Windows Store. Desktop apps that are capable of taking pictures or recording video do not use this folder.
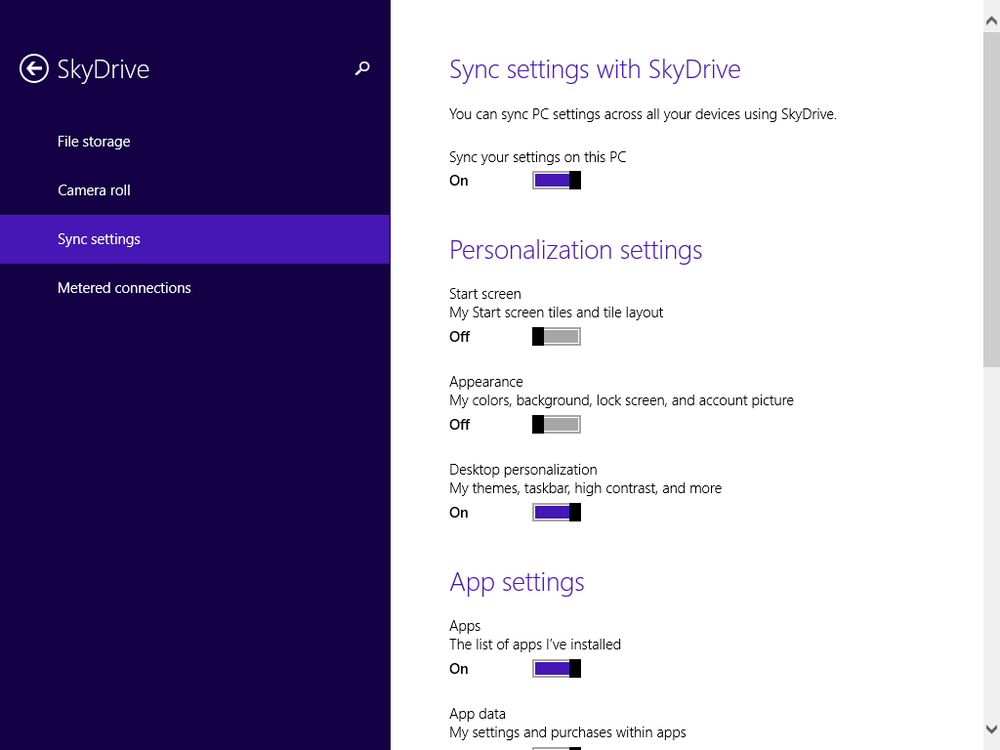
Sync Settings. Here, you can set which Windows settings are synchronized automatically via SkyDrive. To learn more on this subject, read the next section.
Metered Connections. Use this to set whether SkyDrive is allowed to use metered connections to synchronize your files and settings.
One of the greatest features of SkyDrive is that Windows 8.1 can use it to synchronize your user account settings across the computers on which your Microsoft account is used. If you make a change on one computer, it will be reflected on other computers the next time you log on.
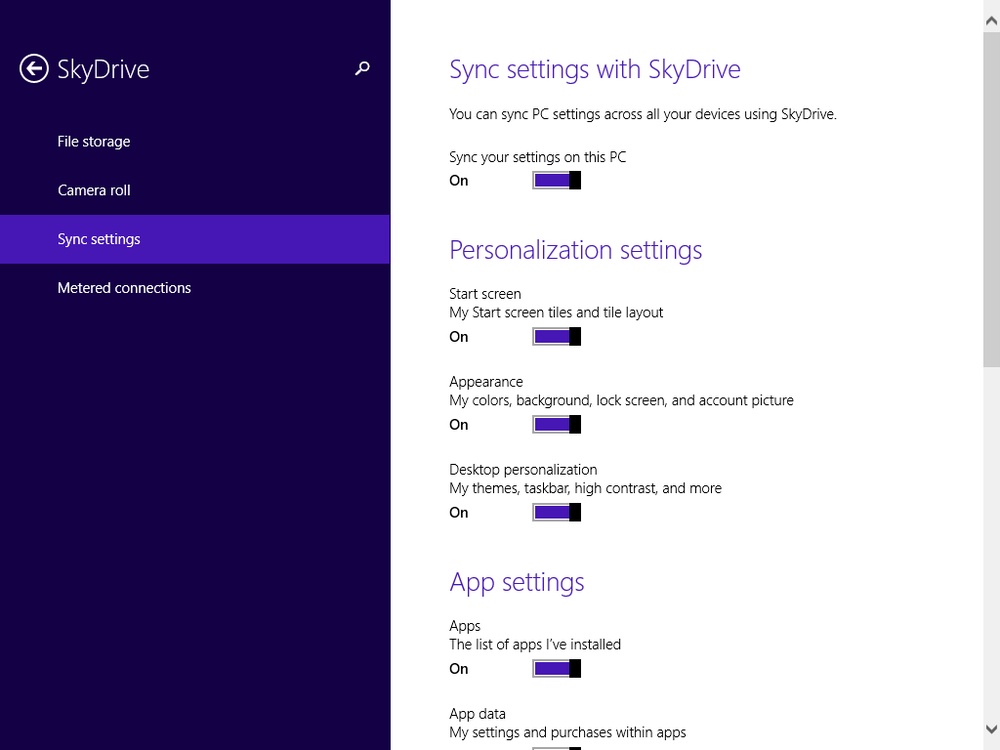
However, not all Windows 8.1 settings are synchronized, even though most of them will be. The settings that are synchronized, if you set them to be, are the following:
Your Start screen tiles and tile layout
Your desktop background, desktop colors, the lock screen, and your user account picture
The active desktop theme, high contrast, and taskbar settings
The list of Windows 8.1 apps installed on your computers and devices
Your settings and purchases within Windows Store apps
Internet Explorer Favorites, open tabs, home pages, history, and settings
The sign-in information for the homegroup, network access, some of your apps, and websites (if you are using Internet Explorer as your browser)
Your language preferences: keyboard, input methods, personal dictionary, and the display language
Ease of access settings: the narrator and the magnifier
Your printers settings, mouse and mouse cursor settings and those of File Explorer
Another great aspect of the synchronization feature is that the SkyDrive space used for storing your settings is not counted against your SkyDrive space allocation. That space is reserved for uploading the files you want.
As with other SkyDrive features, you need a Microsoft account to synchronize your settings. SkyDrive doesn’t work on local user accounts.
Also, after you log on to your computer or device by using your Microsoft account, you need to set it as trusted for your passwords to be synchronized. If you haven’t done this, you can do so from the SkyDrive section, in the Sync Settings area found in PC Settings. Just click the Verify link and follow the instructions.

In this exercise, you’ll learn how to turn on the synchronization of your Windows 8.1 settings and select what is being synced.
Click the SkyDrive section.
Click the Sync Settings area to view the available synchronization settings.
Change the switch for the items that you want to synchronize from Off to On and the other way around for those you don’t want to synchronize.
Clean Up
Close PC Settings and then repeat this procedure on all the computers that use the same Microsoft account and on which you want settings to be synchronized.
From now on, each change you make in the Windows 8.1 settings will be synchronized on all the computers on which synchronization was set up.
Using SkyDrive requires a Microsoft account and an Internet connection.
Use the SkyDrive app to browse the content of your SkyDrive and to upload, download, and view files.
You can upload or download multiple files at once to and from SkyDrive.
SkyDrive can also synchronize your settings across computers and devices with Windows 8.1.