
Chapter at a glance
Navigate
Navigate the Start screen, page 14
Use
Use the new Start button, page 14
Search
Search for anything, page 25
Switch
Switch among open apps, page 40
IN THIS CHAPTER, YOU WILL LEARN HOW TO
Microsoft released Windows 8 in the fall of 2012, and this new and innovative operating system was very different from anything Microsoft had ever offered before for use with computers and tablets. For one, it supported touch natively—encouraged it in fact—and for another, it introduced the lock screen, Start screen, and apps like Mail and People. The operating system was also designed so that it could be used on virtually any device and by any type of user. At that same time Microsoft also unveiled the Windows Store, a virtual marketplace from which you could obtain more apps created by both Microsoft and third parties. It also included access to additional stores for music, video, TV, games, and so on. In addition, Windows 8 integrated the Microsoft account, a logon option that could sync settings and personalization options across multiple devices and offered free Microsoft SkyDrive space in the cloud. There was more to it of course, and this is only a brief overview of its capabilities.
Windows 8.1 is the latest update to this operating system. Windows 8.1 includes just about everything Windows 8 did and also offers many new features and personalization options. There is a Start button for one, and there are lots of new possibilities for customizing the Start and lock screens. Many of the apps have been updated, too, and there are fresh built- in apps like Calculator and Alarms. Beyond that, there are new Search features that incorporate the Bing search engine, the option to boot directly to the desktop (bypassing the Start screen), and the capability to show four apps on the screen at once. The Camera app has been updated to include more photo and video taking and editing options. The Photos app offers new editing options, and there are hundreds of other new features in addition to these. All of these things, combined with what remains intact from Windows 8, makes Windows 8.1 easier to use and simpler to incorporate into your daily life than ever before.
The first time you press the power button on a new computer, laptop, ultrabook, or tablet running Windows 8.1, you are prompted to perform a few setup tasks. After those tasks are complete, each time you press the power button or wake the computer from sleep, the Windows 8.1 lock screen appears. You can configure the lock screen to show various notifications (such as the number of new emails you’ve received) and customize it with your own photos in the form of a slide show. The lock screen makes it possible for you to see what is happening with some apps without having to log on and access the Start screen and the related apps. If no one is logged on, the lock screen still shows the time and date, information about a laptop’s battery, and the network to which the computer is connected.
You bypass the lock screen to get to the logon options, where you select the desired user and enter a password, PIN, or picture password to gain access to the Windows 8.1 Start screen.
Tip
There are several ways to bypass the lock screen, and you’ll learn about these later in the chapter. If you’re ready now though, click once on the lock screen.
In this chapter, you’ll work through the primary setup tasks, and then you’ll learn the ways to bypass the lock screen and get to the Start screen. Once there, you’ll learn how to open apps, open desktop apps on the traditional desktop, use the new Start button, access Control Panel, use PC Settings, and safely end a computing session. Along the way, you’ll begin to personalize the computer so that it’s uniquely yours.
The first time you turn on a new computer running Windows 8.1, you are prompted to personalize the background color of the Start screen, name your device, and choose how you sign in to it, among other things. If a network is available, you can opt to connect to that, too.
Tip
If you have already set up your computer running Windows 8.1, it is possible to make changes to the choices you made using Control Panel and PC Settings if you aren’t pleased with them. You’ll learn how to access Control Panel later in this chapter, and you’ll learn about the PC Settings options here and throughout this book.
The Windows 8.1 personalization process prompts you to configure or input the following information (you might have already done this):
Background Color. You choose the background color by using a slider provided for that purpose.
PC Name. Your computer must have a name that is unique on your local area network. You can’t have spaces or special characters in the name, such as !, @, +, and so on, but you are notified if you try to input a character that is prohibited.
Network. If your computer detects a network, you are prompted to join it. If you want to join, and if it is a protected network, you must also input the password. You should connect to your local area network during setup. If you aren’t prompted to join a network during the setup process or you are unable to, but you know one is available, make sure after setup completes that you’ve either connected an Ethernet cable or enabled the wireless feature on your computer and try to join the network then.
Settings. These settings relate to how and when the computer installs updates; how Windows 8.1 protects the computer from unsafe content; whether apps can personalize the information offered through them based on your location, name, and account picture; how to share your data; and which keyboard settings to use. You can customize the available settings or use Express Settings. Often, choosing Express Settings is fine; you can always change the options later.
Microsoft account or Local User account. You choose how you want to log on to your computer. If you have a Microsoft account and you want to access the data already associated with it, such as apps you’ve acquired from the Windows Store or photos you’ve saved to SkyDrive, or you want to sync settings (such as for Microsoft Internet Explorer Favorites and desktop backgrounds) across other computers running Windows 8.1, you should acquire and/or configure your Microsoft account during this step. You must have a Microsoft account to access and make purchases from the Windows Store, use SkyDrive, and use many of the other Windows 8.1 apps. If you do not have an account or do not want to sync with your existing Microsoft account, choose a local account instead.
Password. This is the password you enter to unlock your computer. If you input a Microsoft account during setup, input the password already associated with that account. If you created a local account during setup, you can create a password for that account now. Although creating a password for a local user account is not mandatory, you should input one. Later, you can create other ways to unlock the computer, including using a picture password or a four-digit PIN (personal identification number).
Troubleshooting
You must be connected to the Internet during setup (which means you must have set up network access when prompted) to obtain a new Microsoft account. If you are having trouble with the related step, skip it and create an account after you are connected to a network. (You’ll be prompted to do this when you open an app that requires it.)
Password Hint. This comprises a few words that you type to remind you of your local account’s password if you ever forget it. Input if prompted.
Set up your PC. If applicable, you can choose an existing PC to sync your settings from, or, you can set your computer up as a new PC.
SkyDrive. If you configured a Microsoft account during the personalization process, you will be prompted to make a choice whether to use SkyDrive.
After you’ve done these things, you’ll need to wait a few minutes for Windows 8.1 to get your apps ready. The computer is ready to use when the Start screen appears.
There are three main editions of Windows 8.1 for consumers and small businesses: Windows 8.1, Windows 8.1 Pro, and Windows RT. (A Windows 8.1 Enterprise edition is available but only to customers with Enterprise licensing.) Consumers can purchase the first two from stores selling Windows 8.1. Windows RT is available on computers and tablets powered by ARM processors such as those used in today’s smartphones and tablets; as a consumer, you can’t purchase Windows RT separately and install it on your own computer or device.
Windows 8.1, Windows 8.1 Pro, and Windows 8.1 Enterprise are available in both 32-bit and 64-bit editions.
The key features (and this is a partial list) of each edition of Windows 8 are included in the following table.
Feature name | Windows 8.1 | Windows 8.1 Pro | Windows RT |
|---|---|---|---|
Upgrades from Windows 7 Starter, Home Basic, Home Premium, Windows 8 | x | x | |
Upgrades from Windows 7 Professional, Ultimate, Windows 8 Pro | x | ||
Start screen, Semantic Zoom, Live tiles | x | x | x |
Windows Store | x | x | x |
Apps (Mail, Calendar, People, Photos, SkyDrive, Music, Video, and so on) | x | x | x |
Microsoft Office RT (Word, Excel, PowerPoint, OneNote, Outlook) | x | ||
Internet Explorer 11 | x | x | x |
Device encryption | x | x | x |
Connected standby | x | x | x |
Microsoft account | x | x | x |
Desktop | x | x | x |
Installation of x86/64 desktop software | x | x | |
File Explorer | x | x | x |
Windows Defender | x | x | x |
SmartScreen | x | x | x |
Windows Update | x | x | x |
Enhanced Task Manager | x | x | x |
Switch languages on the fly (Language Packs) | x | x | x |
Better multiple monitor support | x | x | x |
Storage Spaces | x | x | |
Windows Media Player | x | x | |
Exchange ActiveSync | x | x | x |
File History | x | x | x |
ISO / VHD mount | x | x | x |
Mobile broadband features | x | x | x |
Picture password | x | x | x |
Play To | x | x | x |
Remote desktop (client) | x | x | x |
Reset and Refresh your computer or device | x | x | x |
Snap | x | x | x |
Touch and Thumb keyboard | x | x | x |
Trusted boot | x | x | x |
VPN client | x | x | x |
BitLocker and BitLocker To Go | x | ||
Boot from VHD | x | ||
Client Hyper-V | x | ||
Domain Join | x | ||
Workplace Join | x | x | x |
Group Policy | x | ||
Remote desktop (host) | x |
Windows 8.1 Enterprise provides all the features in Windows 8.1 Pro and additional features to assist with IT organization (Windows To Go, AppLocker, App Deployment, and so on). You might see this edition on a computer you use at work, but it’s likely not the edition you have installed on your personal desktop computer or laptop.
To run Windows 8.1, Microsoft recommends using a computer or device that has the following minimum requirements:
1 GHz or faster processor
1 GB RAM (32-bit) or 2 GB RAM (64-bit)
16 GB available hard disk space (32-bit) or 20 GB (64-bit)
DirectX 9 graphics device with WDDM 10 or higher driver
However, this is the bare minimum required for Windows 8.1 to run, and there are a few caveats of which you need to be aware:
Windows 8.1 apps have a minimum 1024 × 768 screen resolution. If you attempt to run the new Windows 8.1 apps with less than this resolution (for example, 800 × 600), you’ll receive an error message.
To show two Windows 8.1 apps on the screen at one time by using the Snap feature, you must have a minimum display resolution of 1366 × 768. To show three at once, you’ll need a higher resolution than that. To show four apps at one time, you’ll need a resolution of 2560 × 1440. If you have dual monitors, these statistics apply to both individually. So, with two monitors you might be able to show eight apps at one time!
Using Windows 8.1 on a single-core processor running at 1 GHz is possible but won’t be a great experience. Using at least a dual-core processor running at 1 GHz (processors that were sold from 2006 onward) is recommended. For the most part, the newer the processor, the smoother the experience.
Using the 32-bit version of Windows 8.1 on a system with 1 GB of RAM will work, but the experience won’t be great. For a smooth experience, you should have at least 2 GB of RAM, regardless of the Windows 8.1 version you are using, is recommended.
The 16 GB or 20 GB (depending on the version) of space you must have available on your hard disk is the bare minimum for installing and using Windows 8.1. If you plan to install many apps and games, having at least 25 GB or more for the partition on which Windows 8.1 is installed is recommended.
Using Windows 8.1 on solid state disks (SSDs) instead of traditional hard disks will provide a huge performance increase. You will enjoy the fastest start procedure ever experienced with a Windows operating system. Also, the apps and games will launch much faster than with traditional hard disks.
If you plan to install Windows 8.1 by yourself, read Appendix C. It provides clear, step-by-step instructions for installing and upgrading to Windows 8.1.
Windows RT often comes preinstalled on smaller, often less-powerful tablets, that run on ARM processors and offer touch navigation. Windows RT is a special case for the Windows operating system family, though. You can’t buy Windows RT on a DVD and install it yourself, and Windows RT devices come with their own edition of Microsoft Office, called Microsoft Office RT, which now comes with Outlook RT. Windows RT is a sort of pared-down version of Windows 8.1.
That said, you can do almost anything with an RT device you can do with Windows 8.1 and Windows 8.1 Pro: You can access apps, SkyDrive, use device encryption, access the Internet, get more apps from the Windows Store, and so on. However, Windows RT does have its limitations. It is not a full-fledged operating system in the sense that you might be used to. One of the notable limitations is the ability to install apps that do not come from the Windows Store. You can’t download a desktop app from the Internet or install it from a CD or DVD; all apps must come from the Windows Store. It is also limited in how you share media, and it does not come with Windows Media Player, among other things.
Important
This book was written with Windows 8.1 and Windows 8.1 Pro users in mind. You’ll see references to Windows RT here, but this book is not specifically written for it.
See Also
For more information about using a touch device, refer to Chapter 19.
The Windows 8.1 lock screen is much more functional than any lock screen you might have encountered in previous Microsoft operating systems, even Windows 8. Without unlocking your device you can view the time and date, and the lock screen shows whether you’re connected to a network. If you are using a laptop, it also shows the status of the battery. You can also view small icons for your favorite apps here (if you are logged on) so that you can see the status of those apps without leaving the lock screen. You can even choose the photos you want to view there in a slide show. There are lots of ways to bypass the lock screen and unlock the computer. After you bypass this screen, you input your password.
Tip
To access the camera (if one exists) while the lock screen is engaged, drag from the top to the bottom on the lock screen. (In contrast you can drag from bottom to top to access the log on screen.)
How you unlock the lock screen depends on the type of computer you’re using.
Traditional desktop computer. Press any key on the keyboard or click the mouse anywhere on the screen, or drag upward from the bottom of the screen. Type your password when prompted.
Traditional laptop computer. Press any key on the keyboard or click the mouse (or appropriate trackpad button) anywhere on the screen. If applicable, type your password when prompted. You can also hold down the left trackpad button and drag your cursor upward.
Touch-compatible computer or tablet. Place your finger anywhere near the middle or bottom of the screen and flick upward. If applicable, type your password when prompted.
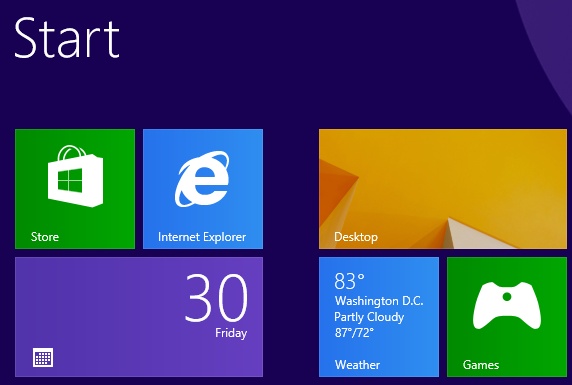
After you’ve unlocked the computer, the Start screen appears, displaying tiles. If there are more tiles than there is space on the screen, you’ll see a scroll bar across the bottom of the screen. When you move your cursor, a down arrow appears in the lower-left corner of the screen that offers access to apps that are not shown on this screen.
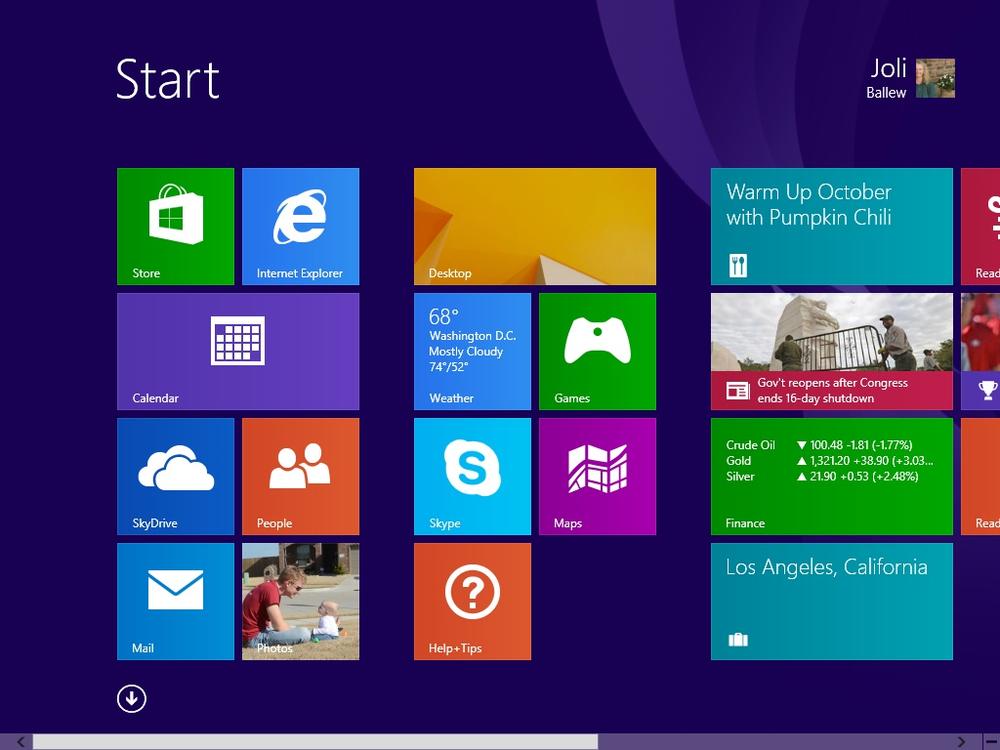
Tiles can serve many purposes. Many of the tiles open apps such as Mail, People, and Maps. All of the tiles you see in the preceding graphic are apps. Some of these tiles also offer up-to-date information for the app they represent; these are called Live tiles. You do not need to open the app to view the basic data a Live tile offers. For example, after you configure the Weather app, it can show up-to-date weather information for a city, and the Calendar app can show upcoming appointments and birthdays. This data appears on the Start screen so that you have access to it without opening the app itself. The information is dynamic and changes as the information it represents does. If you need to see more than a preview of the information, you can click the tile, and the app opens in a new screen from which you can access all its features. People, Calendar, Weather, Photos, Mail, and similar apps all do this. (You can get more apps from the Windows Store.)
See Also
For more information about buying apps, read Chapter 8.
Beyond offering access to the default apps that come with Windows 8.1 (and any you acquire from the Windows Store), the Start screen can also offer tiles for the majority of the desktop applications (desktop apps) you install yourself. You might see tiles for Microsoft Word, Microsoft Outlook, Microsoft PowerPoint, Adobe Photoshop, or other apps. Note that these are not apps like Mail and Weather. They’re called desktop apps, and they are the traditional applications with which you are likely familiar. Often you obtain these by downloading them from a website or by installing them from a CD or DVD. (In contrast, you can get apps only from the Windows Store.)
To open an app from the Start screen or Apps view, you click its tile. To open a desktop app you either click its tile on the Start screen or Apps view, or you click its shortcut on the desktop. What you see after you do this depends on what you’ve clicked; an app will open in its own screen, which will take up the entire screen, whereas a desktop app will open on the desktop. It’s important to note that you can also opt to open the traditional desktop from the Start screen. To do this, click the Desktop tile.
If you leave the Start screen and want to go back to it, tap the Windows key on your keyboard. Tablets often have a physical Windows button. Alternatively, you can position the cursor in the lower-left corner and click the Start button that appears there.
It’s likely that you will have more tiles on the Start screen than can be displayed on the viewable portion of it, so you need to know some techniques for getting to those tiles. To move around on the Start screen, you can use your mouse, keyboard, trackpad, or appropriate touch gesture. The method you choose depends on what kind of computer you have. Listed here are a few ways to move around on the Start screen (and there are others not listed here).
Scroll bar. Drag the scroll bar, which is at the bottom of the screen and appears when you move your cursor there. On a laptop with a trackpad, hold down the left mouse button while you drag across the trackpad, or position the cursor to the left or right of the scroll bar and click. On a tablet, you will see the scroll bar across the bottom when you flick left and right, but you don’t need to have your finger on it to use it. Finally, using a mouse, click to the left or right of the scroll bar to navigate with it.
Flick left and right. Place your finger on an empty area of the screen and flick from left to right or right to left to scroll through the available tiles. You can also drag your finger slowly in lieu of flicking quickly. You must have touch-compatible hardware for this to work.
Auto scroll. Use your mouse’s scroll wheel (in an up-and-down motion) to move through the tiles from left to right and right to left.
Pinch. Using touch, position two or more fingers apart from each other on the screen. Pinch inward to make all the tiles smaller, making it possible for you to see more tiles on the screen. Pinch outward for opposite results.
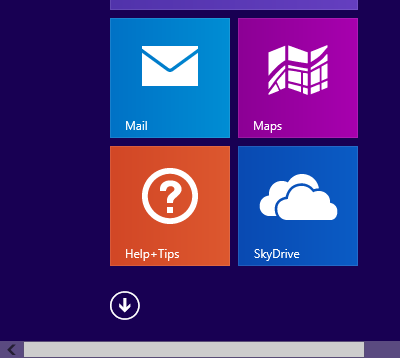
Click the down arrow. Move your mouse and in the lower-left quadrant of the screen click the down arrow that displays to access all of the available tiles.
Tip
To make everything smaller on the Start screen without using the pinch technique, position your mouse in the lower-right corner and click the – sign that appears on the right end of the scroll bar. Click anywhere other than on a tile to return the tiles to their original size.
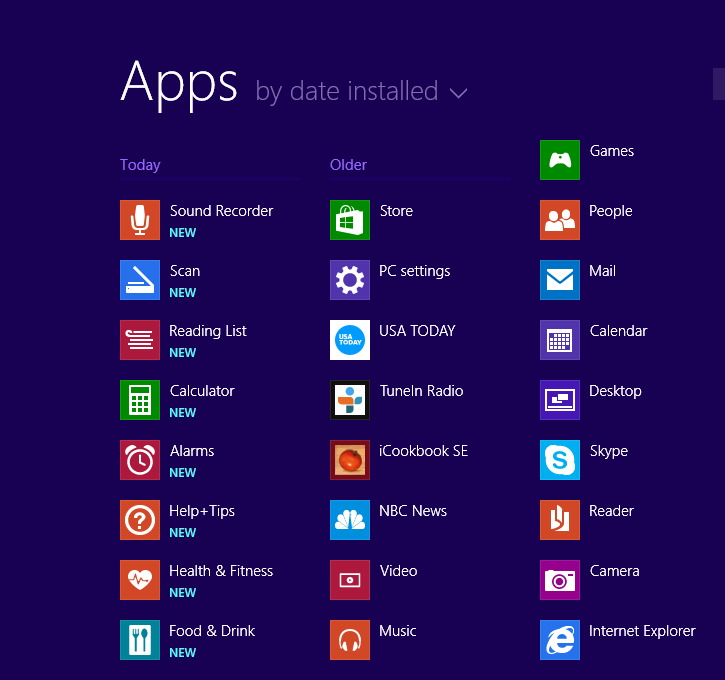
As noted in the previous bulleted list, clicking the down arrow that appears on the Start screen when you move the mouse cursor takes you to the Apps view (click the up arrow to return to the Start screen), as does flicking upward (click downward to return to the Start screen). This screen offers access to all of the available tiles.
As you might expect, if you click any tile on the Start screen or the Apps view, something opens. The desktop might open; a traditional window might open; an app might open in its own window without need of the desktop; or, a file, contact card, website, folder, or any other applicable window might open. Whatever happens, the Start screen disappears.
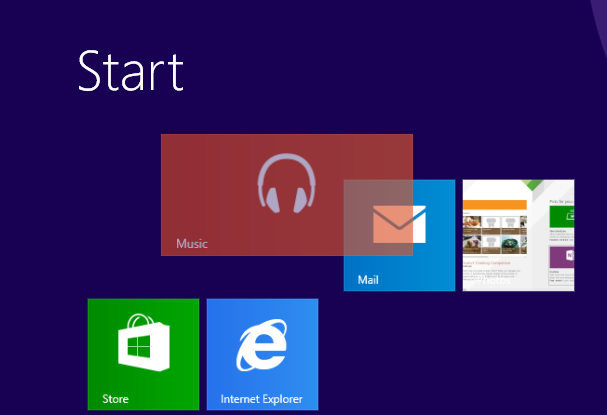
You might already know that you’ll use some apps regularly, such as Weather, Maps, SkyDrive, or Mail, simply by looking at the available tile names. You might also determine that there are some you won’t use very much, if at all (perhaps Sports or Finance). If that is the case you could reposition the tiles on the Start screen to make your most-used tiles easily accessible (or you could wait and do it later when you have more experience with the apps). As an example, if you know that you’ll use the Music app often, you might put that tile in the first position on the Start screen.
In this exercise, you’ll move a tile from its current position on the Start screen to the first position. Repeat with other tiles as desired to personalize your Start screen.
Set Up
Start your computer and unlock the lock screen. You need access to the Start screen for this exercise.
On the Start screen, locate the orange Music tile (it has headphones on it).
Click and hold the Music tile.
Drag the Music tile to the first position on the far-left side of the screen.
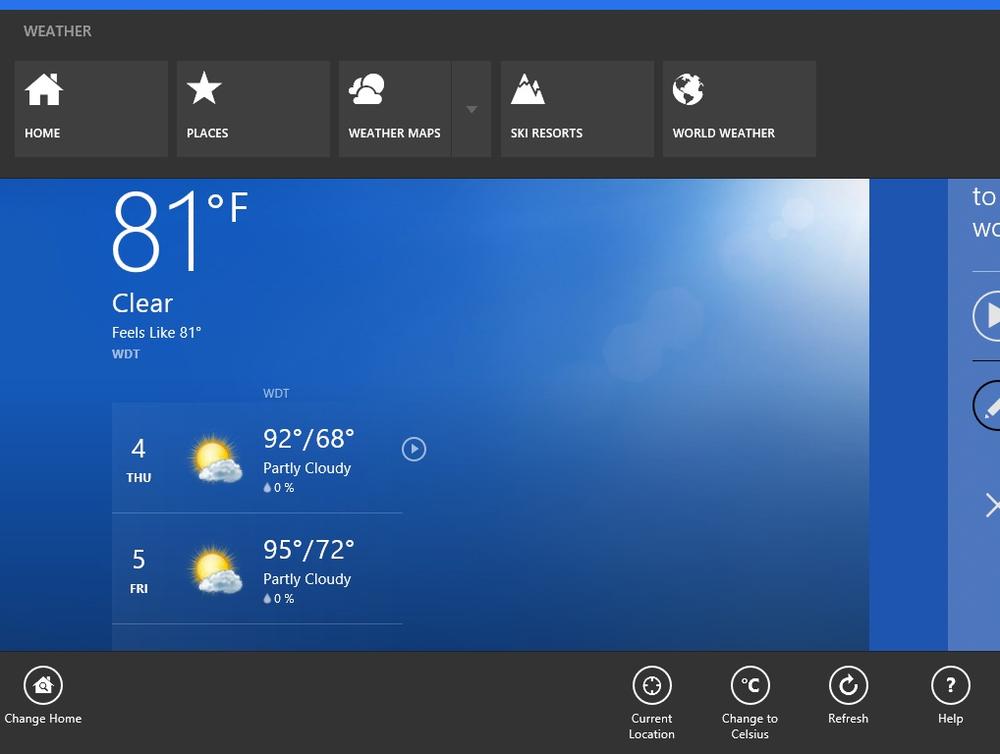
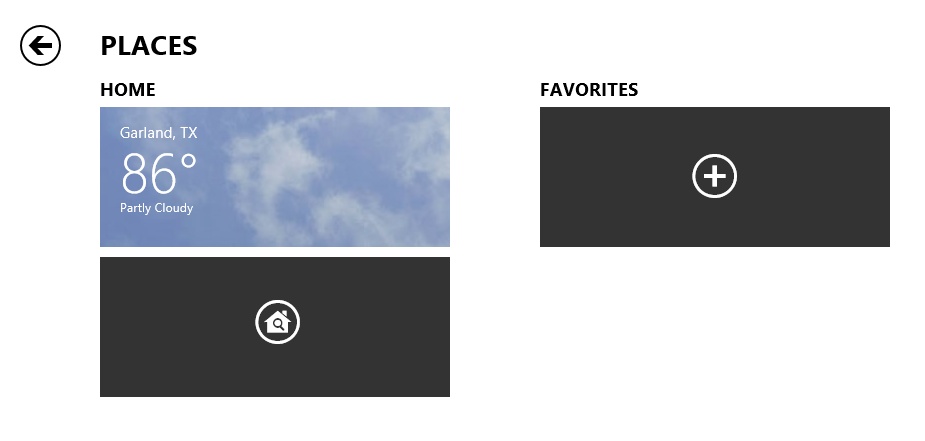
You know you can move tiles on the Start screen to another area of the screen to make those tiles more accessible. You can also personalize a few select tiles independently so that the information available on them suits your personal needs. For example, you can set your location for the Weather app (or give it permission to determine your location), and it will supply current weather information from the Start screen (provided it can get that information from the Internet). If you want to know more about the weather, you just click the app to open it. These interactive and customizable tiles are Live tiles, which mean that they are updated often with new information.
Customizing any interactive tile generally only requires you to open the app, access the customizable tools and features (called charms) with which you can change the settings, and input the desired information or make the desired choices. You might only need to click Allow, as well, to let the app learn your location.
In this exercise, you’ll personalize the interactive Weather app located on the Start screen by letting the app determine your current location and adding a secondary favorite location.
Set Up
You do not need any practice files to complete this exercise. If you aren’t on the Start screen, position your mouse in the lower-left corner of the screen and click the Start button that appears. On a tablet, press the Windows button if available.
On the Start screen, click Weather. If prompted, click Allow to let this app learn your location.
Right-click the screen to access the available settings.
Click Places.
In the Favorites section, click the + sign, and then type a city and state as applicable; if your city appears in a list, click it. Otherwise, click Add and make a selection from the results given. Repeat as desired.
Charms appear when you position your mouse in a specific area of the screen. Charms can also appear when you right-click inside an app. Software and hardware manufacturers can customize charms, so you won’t always see the same charms for every app. In the previous section, you saw the charms available for the Weather app.
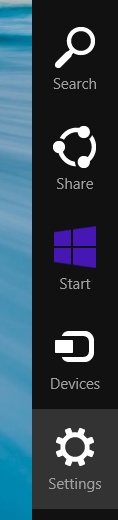
Windows 8.1 has some default charms that appear when you call on them, and their names do not change (although what you see when you click them can). To see these charms, position your mouse in the lower-right corner or upper-right corner of any screen. These are called hot corners. When you position your cursor here, the charms fly out from the right side. Charms include Settings, Devices, Start, Share, and Search.
Troubleshooting
If you are using a device without a physical keyboard or mouse, swipe inward with your finger or thumb from the middle of the right side of the screen to see the default charms. Also, the background you see behind the charms depends on what you are doing when you access them, but the charms will always be the same.

After the charms appear, their titles appear under them as you move your cursor toward them. You can show these charms while on the Start screen, the desktop, in apps, and in other windows and views. What you see when you click any charm depends on what is currently open and, if applicable, selected, when you access the charms.
When the charms are available, just click one to use it. When you click a charm (except for Start), a new pane opens and configuration options (or search or share options) appear. What you see depends on the charm you click.
The following list describes the five default charms available in Windows 8.1, from any screen, from the bottom-right or top-right hot corner.
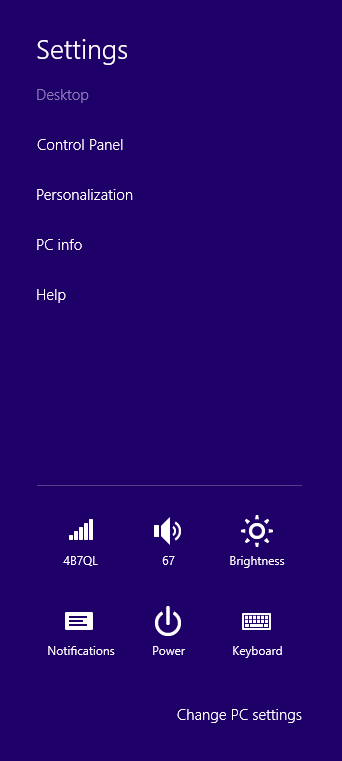
Settings. Use this charm to access PC Settings, to get information about your network, to change sound levels, to set screen brightness, to turn notifications on or off, to turn off your computer, and more. If you access this charm while in an app (perhaps Calendar), you’ll see different options at the top of the Settings pane. The following illustration shows what you see if you click the Settings charm while on the desktop.
Devices. Click this charm to access the devices that are available for use with the current app, screen, or window. For instance, you can use a second monitor if such a device is available, print, or play media.
Start. Click this charm to access the Start screen.
Share. Click this charm to access share options applicable to the current activity or open app. What you see here will differ depending on the app that’s open. Sharing using the Photos app is a common way to use the Share charm.
Search. Click this charm to open the Search pane. Use the Search window in the pane to search for anything on your computer, related settings, files, web images, and web videos. You’ll learn how to search for something next.
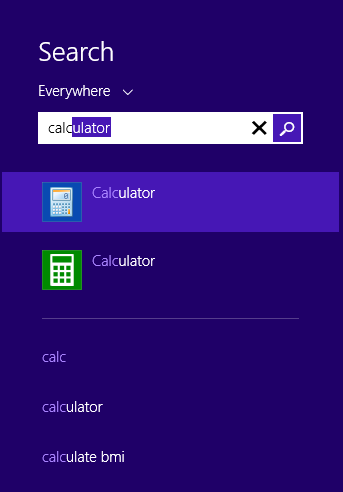
Although there are many ways to search for something on a computer running Windows 8.1, one way is to simply start typing while you are on the Start screen. When you do, the Search pane opens and whatever you’ve typed appears in the Search window, with results underneath. The results might change as you continue to type. You can also invoke Search by using the Windows key+Q keyboard shortcut or by clicking Search from the charms. If you have a touch-only tablet, flick in from the right side and tap Search (at which point the On-Screen Keyboard appears, with which you can type what you’re looking for). However you get there, when the Search pane is available and you type a few letters, results begin to appear.
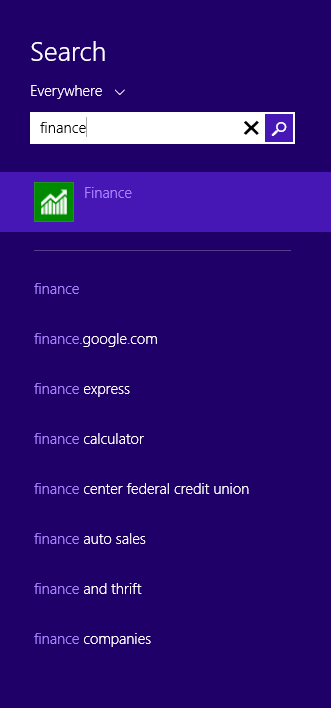
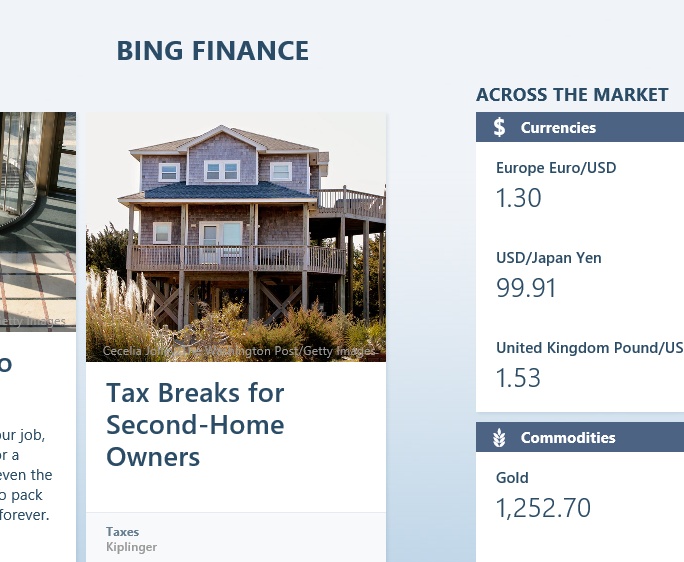
You can click any option in the list of results if you see exactly what you want, perhaps an app or a file name. You can press Enter on the keyboard or click the magnifying glass to let Windows 8.1 and Bing decide what it thinks you’re looking for. What appears in the results after allowing the search depends on that which you’re searching. If it’s a person, you’ll probably get information from Wikipedia. If you’ve typed a place, you might get directions, reviews, and store hours. If you type the name of your favorite music album, you’ll likely get results that include videos and music. In our example, pressing Enter on the keyboard causes the Finance app to open. With the results on the screen—no matter what kind of results they are—you can now scroll through the search view to see the information offered. You can click any item to see more information.
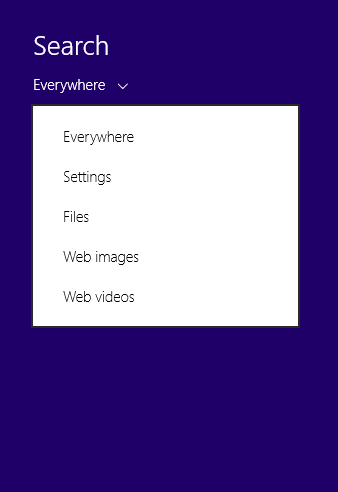
As you work with the Search feature, you’ll learn that you can narrow your search by choosing from the available options in the Search pane. By default, Everywhere is the selected setting, which means that the results will come from all of the places Search can access. You can cull the results by clicking the down arrow adjacent to Everywhere and selecting Settings, Files, Web Images, or Web Videos.
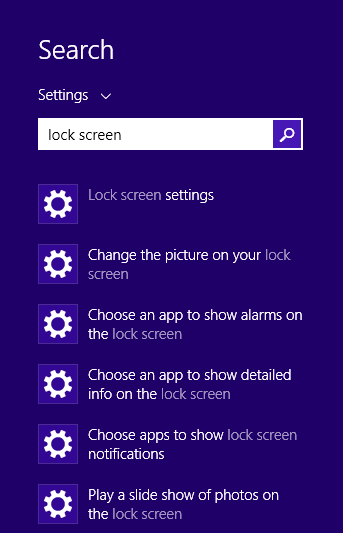
In this exercise, you’ll search Settings for the option to change the picture that appears on your computer’s lock screen.
Using any method, open the Search pane. Windows key+S is one option. Touch only users can swipe in from the right.
In the search window, type Lock Screen.
The Search pane shows results from everywhere.
Click the down arrow adjacent to Everywhere and then click Settings.
The Search pane shows results related to settings only.
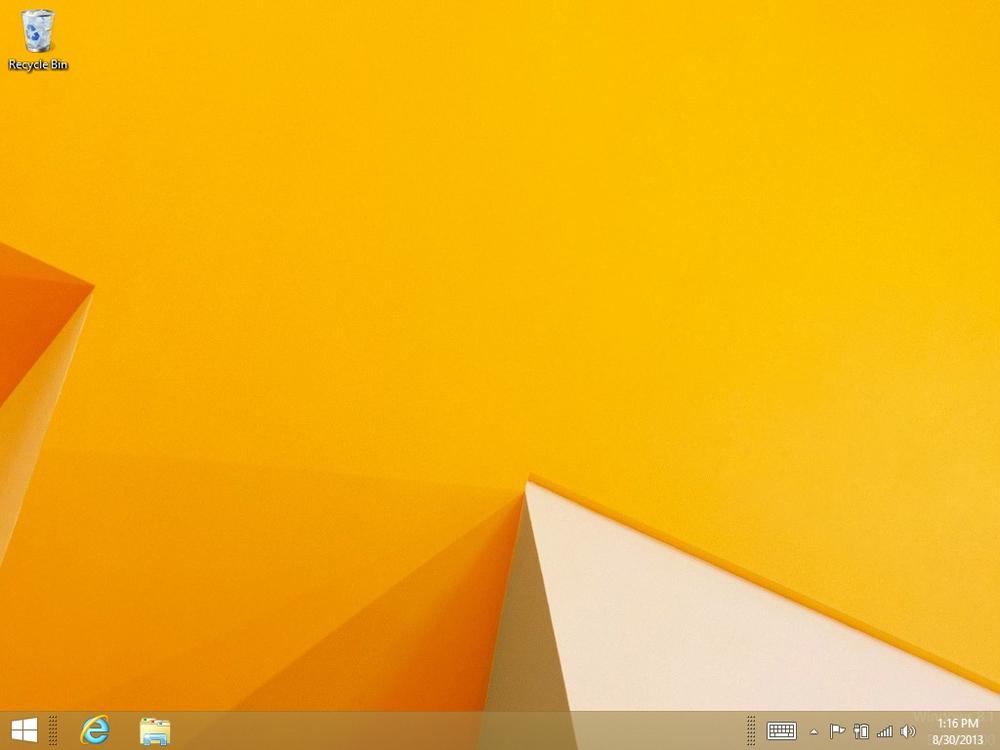
If you’ve ever used a Windows-based computer, you are familiar with the traditional desktop. This is the screen on which you see the Recycle Bin and the taskbar, and it is where you accessed your personal folders, opened and worked with files, and used Windows Explorer (which was renamed File Explorer with the release of Windows 8) when using computers running Windows 7 or anything before it. The traditional desktop is still available, it’s still called Desktop, and it’s still where you’ll do quite a bit of your work. You can access the desktop from the Start screen.
Tip
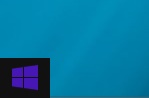
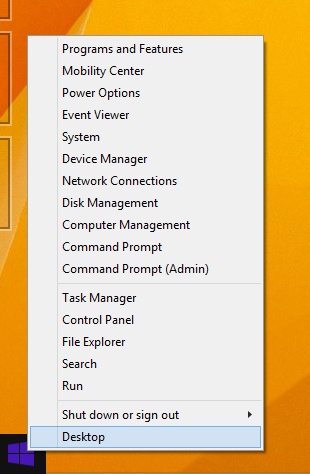
When you open the Desktop for the first time, notice the new Start button. You can click this button to return to the Start screen, and you can right-click it to access options such as Shut Down or Sign Out, Task Manager, Power Options, and others.
You can open the desktop from the Start screen by clicking the Desktop tile. You can also use the Windows key+D shortcut. In addition, if you click a desktop app’s tile or a related shortcut on the Start screen (one you might have saved there), perhaps for Word or File Explorer, the desktop will open on its own to house the app and make it available to you. After the desktop is open, you’ll see familiar elements. Look for the taskbar, the notification area, the Recycle Bin, and other recognizable essentials in this graphic.
Important
It is possible to boot your computer directly to the desktop, but we’ll suggest you don’t do that yet. We want you to experience Windows 8.1 from the Start screen, at least for a while. However, if you decide later that’s what you want, right-click the taskbar on the desktop and click Properties. You’ll find the option on the Navigation tab.
Some applications, including Microsoft Paint, Microsoft WordPad, Microsoft Notepad, and others, open on the desktop. These aren’t apps; they are desktop apps and thus need the desktop to work. When you find yourself at the desktop, by choice or necessity, you’ll see features with which you are likely already familiar. The taskbar is one of them. The taskbar is the transparent bar that spans across the bottom of the screen when the desktop is active. You can also see the Start button. You’ll learn about both here.

Let’s look at the taskbar first. The taskbar is where you access running desktop apps, manage your open windows, and access the available touch keyboard, among other things. As with previous Windows editions, a notification area on the far right offers access to various system settings, including those that correspond with available networks, system sounds, the current state of the system, and the time and date. The lower-right corner is a hot corner that brings up the five default charms when you require them.
Troubleshooting
If you don’t see the taskbar, make sure you’re on the desktop and not in an app. (Use Windows key+D to get there.) If you’re sure you are on the desktop, position the cursor at the bottom of the screen; it could be that the taskbar is hidden. It will appear when you position your cursor there.
You can personalize the taskbar by pinning icons to it for desktop apps you use often. You’ll learn to do this in an exercise later in this chapter. You can also move the taskbar by dragging it to another area of the screen (if it’s unlocked), change the size of the icons that appear on it, and rearrange the icons by dragging them to different positions. You can right-click the taskbar to add or hide toolbars, too; you might like to enable the Address or Links toolbar. Toolbars appear next to the notification area when added.
See Also
You can learn more about customizing your environment in Chapter 2.
The main purposes of the taskbar—beyond any its personalization options—are to offer immediate access to previously opened apps, files, folders, and windows; to make it easy to minimize, restore, and switch between open apps; and to navigate quickly to other areas of the computer through toolbars you add. You can click any icon on the taskbar to access the app, file, or folder it represents. For example, you can click the Internet Explorer icon to open the Internet Explorer on the desktop. You can click the Folder icon to open File Explorer.
Tip
Some applications offer both an app version and a desktop version. Internet Explorer is one of these applications. When both options exist, use the app version. If you decide later that this doesn’t offer what you need, try the desktop version.
Because you might not yet have much experience with files, folders, windows, and apps from which to draw, let’s review some taskbar basics. The following list details what the icons on the taskbar do.
Touch keyboard. You can show or hide the icon for the touch keyboard. Just right-click the taskbar, point to Toolbars, and then click Touch keyboard. Repeat to undo this action.
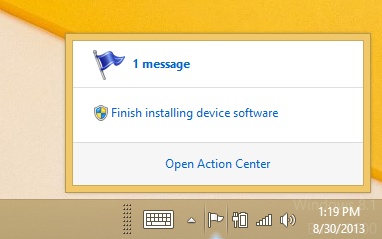
Action Center flag. Click the Action Center icon (a flag) to see whether your computer requires your attention.
Network. Click the Network icon to show the Networks pane. Click anywhere outside the pane to hide it. The Network icon sits to the left of the sound icon.
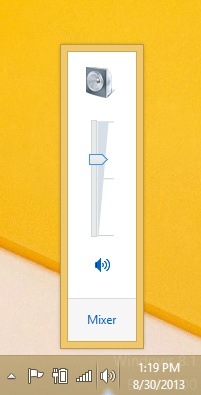
Sound. Click the sound icon and move the slider to raise or lower the volume.
Time and date. Click the time and date to show the calendar and to access the date and time settings.
Open File Explorer. Click the folder icon to open File Explorer. From there, you can navigate to any area of your computer’s hard disk.
See Also
Refer to the section Understanding the Windows 8.1 file system in Chapter 4.
As you know, you can personalize the taskbar. You’ll learn quite a bit about that later in Chapter 2, but you can sample a taste of what’s to come here.
In this exercise, you’ll pin the Calculator app to the taskbar to personalize it.
Set Up
There is no setup for this exercise. You do not need any practice files to complete this exercise. If you are not on the Start screen, click the Windows key or position the cursor in the lower-left corner of the screen and click or tap the Start button.
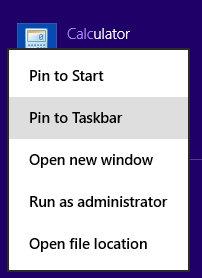
Clean Up
Click outside the Search pane to hide it. Open the Desktop to see the Calculator icon on the taskbar.
Tip
If you work on the desktop regularly, pin your favorite desktop apps to the taskbar. To unpin something from the taskbar, right-click its icon on the taskbar and choose Unpin This Program From Taskbar. You can also unpin an item from the Start screen. To do so, right-click its tile and then click Unpin From Start.
Now, let’s take a look at the Start button. The Start button offers a fast and easy way to return to the Start screen, no matter where you are. Simply click in the lower-left corner of the screen. Sometimes you’ll see a simple button, whereas other times the word “Start” will display on it.

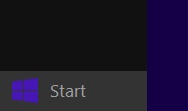
You can also right-click the Start button to access other areas of the computer and to change computer settings. You should be familiar with some of the items after reading this chapter: Search, Shut Down or Sign Out, and Desktop.
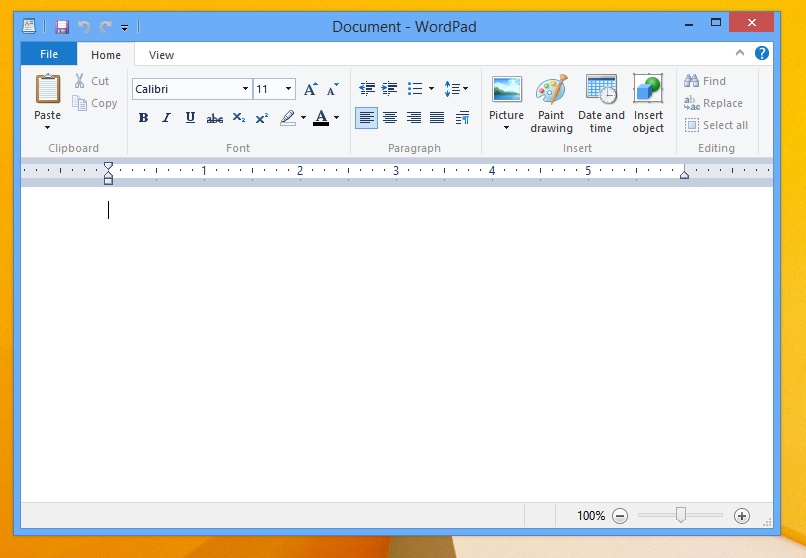
When you open a file such as a text document, the desktop appears, and a desktop app opens to make the file available. (WordPad is shown in the illustration that follows.) It might be Word, WordPad, Notepad, or something else. That app and the file are contained in a single window, and the app’s features and data are available from it. You might have a document, a web browser, and File Explorer open, all of which are available from the desktop.
Likewise, you might also have opened several apps from the Start screen. You might have opened Maps, Mail, Weather, Music, and others. These apps aren’t all available from one area such as the desktop; instead, you must switch among them by using keyboard and touch techniques. By default, only one app appears on the screen at any given time, although with the right hardware you can show up to four.
Because you’ll often have multiple apps and desktop apps open at the same time, you need to know the traditional ways of managing multiple open windows on the desktop and then how to manage multiple open desktop apps and apps.
Let’s start with the desktop. One way to manage multiple open windows on the desktop is to size them so that you can see all of them at one time. When positioned this way, you need to click only once in the window you want to use. The window you choose appears in the foreground and becomes the active window. This view isn’t always effective, though, and you’ll often need to maximize a window so that it takes up the entire screen.

Troubleshooting
If you can’t access all the features in a window, maximize the window by clicking the square in the upper-right corner.
The problem with maximizing a window so that it takes up the entire screen is that you can no longer view or easily access the other open windows. They are now behind the active window. To get to those other windows requires knowing a few tricks.
Here are the most common ways to manage multiple open windows on the desktop:
Minimize to the taskbar. You can minimize any maximized window to the taskbar. Doing so removes it from the desktop but does not close it. After it is removed (minimized), you can see the windows that were previously underneath it. One way to minimize a window is to click the respective icon on the taskbar (you may have to click it twice, once to make it the active window and the second time to minimize it); a more familiar way is to click the dash in the upper-right corner of the window. To restore the window, click its icon on the taskbar.
Close the window. Click the “X” button to close the window and exit the app. You should save your work in the window before closing it.
Shake the window to keep. To remove all but one window from the desktop and minimize the others to the taskbar, click, hold, and then shake the top of the window you’d like to keep. The other windows will fall to the taskbar.
Resize a window. You can resize a maximized window by dragging the window downward by the upper-center part of the topmost toolbar. This causes the window to be in restore mode. When it’s in restore mode, you can drag from the corners of the window to further manipulate its size.
Troubleshooting
You can’t drag from a window’s corner if the window is maximized. All desktop corners are hot corners by default, so when you position your cursor there, charms, the Start thumbnail, the last-used app, and so on appear. Even if you turn off the hot corners in PC Settings, you still can’t do it.
Snap a window to take up half the screen. You can drag from the top part of most windows to the left or right of the screen to snap it into place so that it takes up half the screen. You can also double-click when you have the double arrow at the top of a window to have the window fill to the height of the screen without changing the width.
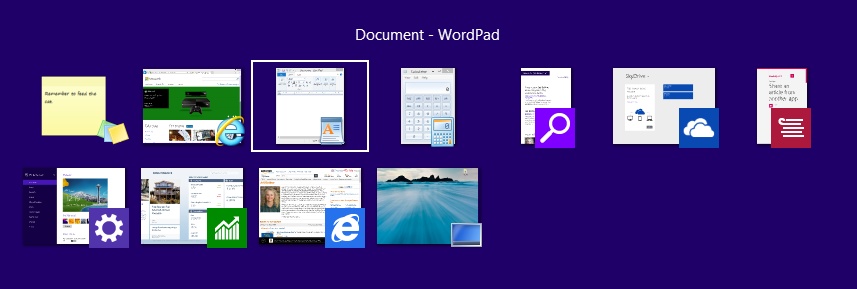
Use Flip. The Alt+Tab keyboard shortcut displays thumbnails of open apps in the center of the screen. To use this shortcut, keep the Alt key depressed and press the Tab key to flip through the available apps. When the desired thumbnail is displayed, release the Alt key to ensure that the app is active. You can also flip to apps by using this method.
Use Peek. While at the desktop, position your cursor in the lower-right corner of the taskbar. The open windows become transparent, enabling you to see the desktop underneath. If nothing happens, right-click there and then, on the shortcut menu that appears, click Peek At Desktop. (You want Peek At Desktop to have a check beside it.) Peek is disabled by default.
These are all traditional ways to work with the desktop. Many are probably not new to you, such as resizing a window or minimizing a window to the taskbar. You might have even used Flip before. There are new, novel ways to move among apps and desktop apps, though. These involve positioning your mouse in a specific area of the screen and using touch gestures on compatible devices.
Tip
It’s okay to leave lots of apps open if you want. You don’t have to open and close them continually. After they are in the background (not in use), they become inactive and use very few (if any) computer resources. They are designed so that you can leave them open and available without worrying about using too many of your computer’s resources. Alternatively, it’s best to close desktop apps when you are finished with them.
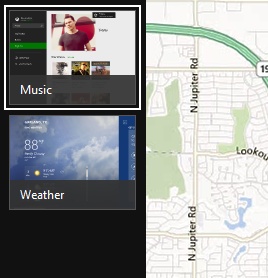
One way to move among the multiple open apps and the desktop is to use the Switch list. This list can be accessed by positioning the cursor in the upper-left corner of your computer screen and then slowly moving the cursor downward. You can also use the keyboard shortcut, Windows key+Tab. (Hold down the Windows key and press Tab as many times as needed to select the app to use.) After you have access to the list by using your mouse to access it, you can left-click, right-click, drag, and touch the thumbnail windows to perform other tasks.
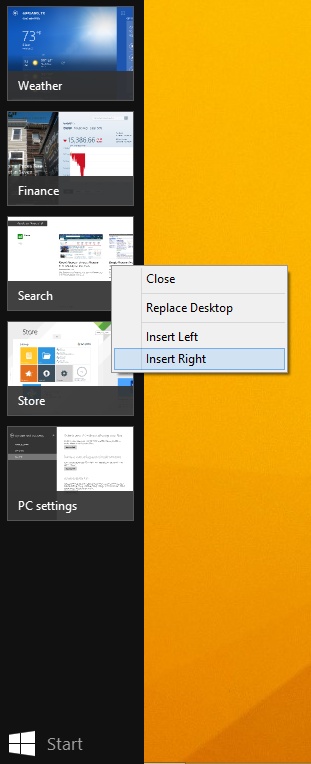
If you simply click a thumbnail in the Switch list, it opens. You have other options, though. With a mouse, you can right-click to access options to close the app or to insert it to the left side or right side of the screen. When you opt to insert an app, you can show two of them on the screen at one time. You can choose the applicable Replace option to open the selected app and move away from the item currently open. You can also drag items from the list to a specific area of the screen if your display supports a high enough screen resolution.
Troubleshooting
If you don’t see the option to Insert Left or Insert Right when you right-click an app thumbnail, or if you can’t drag and drop an app to snap it to the side of the screen when another app is open, you’ll need to change the resolution of your computer screen to 1366 × 768 or higher. If you want four apps open at once, you’ll have to set the resolution to 2560 × 1440.
In this exercise, you’ll open three apps from the Start screen and switch among them by using various techniques involving a keyboard and mouse. You will then close one app and position another to take up a half of the screen.
Set Up
There is no setup for this exercise. You do not need any practice files to complete this exercise.
Position your cursor in the lower-left corner of the screen and then, when the Start button appears, click it.
Click Weather.
Repeat to open Music and then Maps. If prompted to allow an app to use your location, click Allow.
With Maps active on the screen, on the keyboard, hold down the Windows key.
While holding down the Windows key, press Tab several times.
Different thumbnails are selected.
When the Music thumbnail is selected, release both keys.
The Music app opens.
Press and hold the Windows key and then tap the Tab key one time. Keep the Windows key depressed.
On the Switch list, right-click the Maps app. On the shortcut menu that opens, click Close.
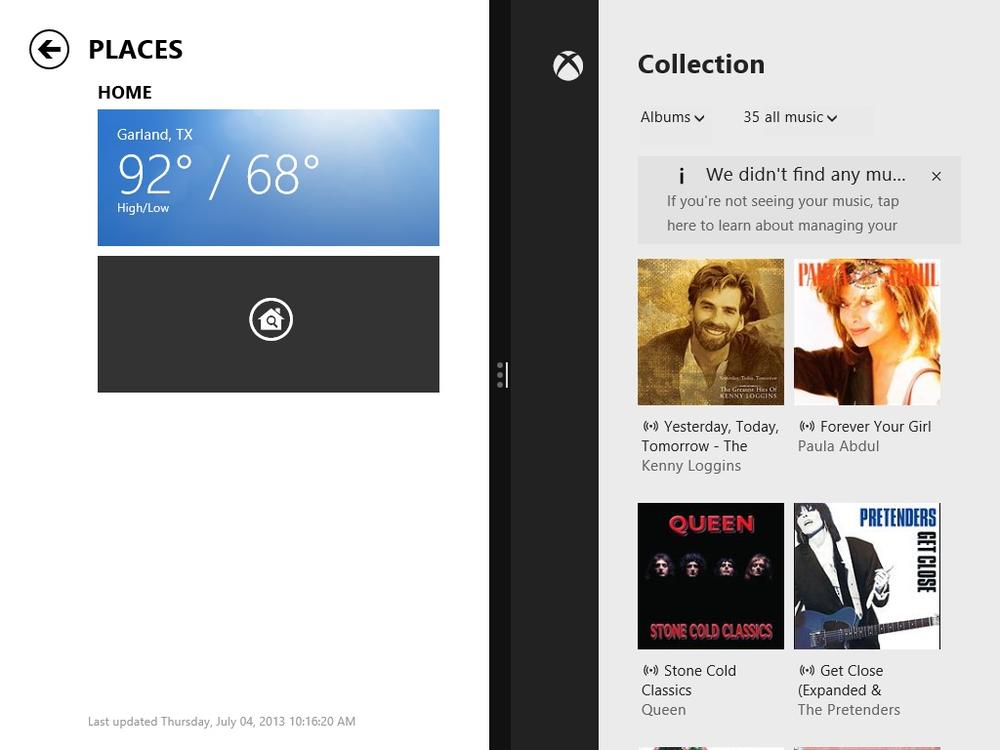
With the Music app still active and the Switch list open, drag the Weather app inward from the left side.
It snaps into place.
Tip
After an app is snapped to one side of the screen, you can use the black bar that separates them both to move it. You can configure an app to take up less than half the screen. Just click and drag.
Remember, you can access the Switch list by using only the mouse. First, position the cursor in the upper-left corner. You’ll see the last app used. You can click that to access it, or you can move the cursor down the left side, slowly, to show the entire Switch list.
Troubleshooting
If you have so many windows and apps open that Flip or the Switch list are encumbered, close windows and apps you don’t use.
If you have the option to use touch gestures, there’s another option. You can just swipe your finger inward from the left side of the screen to move from app to app. You’ll learn more about using touch in Chapter 19.
Before we move on to the final two topics in this chapter, using Control Panel and PC Settings and ending a computing session, let’s take one last look at the desktop and File Explorer. You’ll need to know the information here to manipulate File Explorer on your computer as you work through this book.
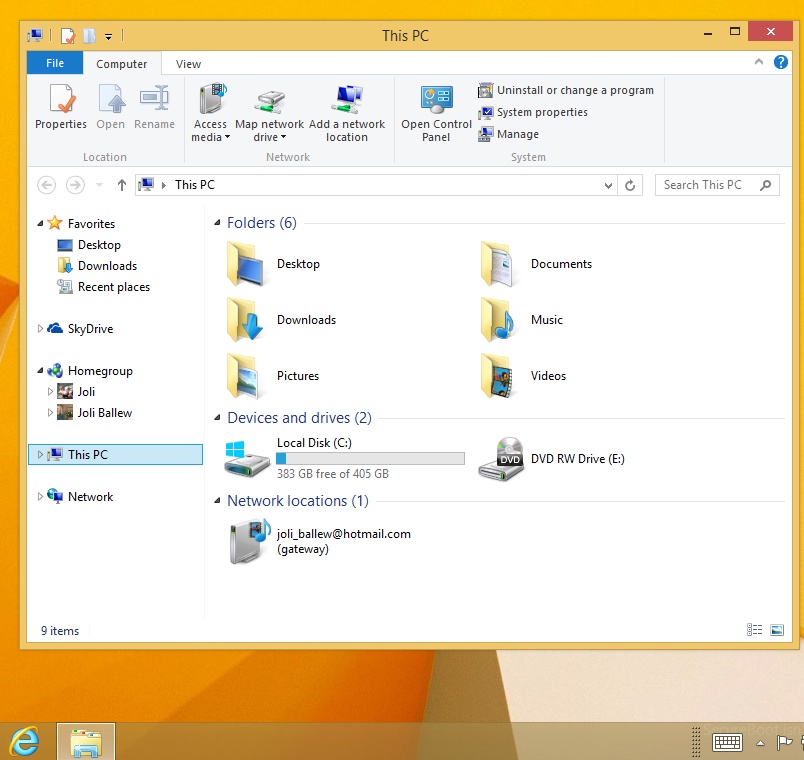
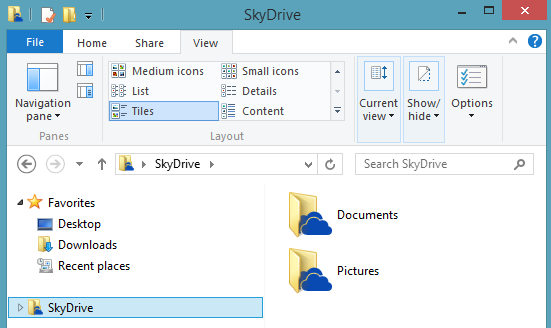
The goal of the Windows 8.1 File Explorer environment, available on the desktop, is to make finding, sharing, organizing, and working with documents, music files, pictures, videos, and other data as intuitive as possible. In addition, from File Explorer, you can easily access data stored in your HomeGroup, data on other storage devices connected to or part of your computer, and any data available to you on your network.
You access data in File Explorer by selecting the desired folder or location in the Navigation pane, on the left side of the File Explorer window, and then selecting the desired folders or file(s) in the content area on the right. With a folder or file selected, you can then use the ribbon to manage that data. The ribbon contains tabs and groups to help you perform tasks on the data you select.
Commands are organized on task-specific tabs of the ribbon and in feature-specific groups on each tab. Commands generally take the form of buttons and lists. Some appear in galleries. Some groups have related dialog boxes or task panes that contain additional commands.
Throughout this book, we discuss the commands and ribbon elements associated with the app feature being discussed. In this topic, we discuss the general appearance of the ribbon, things that affect its appearance, and ways of locating commands that aren’t visible on compact views of the ribbon.
Tip
Some older commands no longer appear on the ribbon but are still available elsewhere. You can make these commands available by adding them to the Quick Access toolbar, located just above the tabs on the ribbon by default, although it can be moved.
The ribbon you’ll see in File Explorer is dynamic, meaning that the appearance of commands on the ribbon changes as the width of the ribbon changes. A command might be displayed on the ribbon in the form of a large button, a small button, a small labeled button, or a list entry. As the width of the ribbon decreases, the size, shape, and presence of buttons on the ribbon adapt to the available space.
For example, when sufficient horizontal space is available, the buttons on the View tab of the File Explorer window are spread out, and you can see all the commands available in each group.
If you decrease the width of the ribbon, small button labels disappear and entire groups of buttons hide under one button that represents the group. Click the group button to display a list of the commands available in that group. Depending on the content of the ribbon you’re working with, you might also see small unlabeled buttons or a scroll arrow.
The width of the ribbon depends on the horizontal space available to it, which depends on the following three factors:
The width of the app window. Maximizing the app window provides the most space for ribbon elements. You can resize the app window by clicking the button in its upper-right corner or by dragging the border of a window that isn’t maximized.
Tip
On a computer running Windows 8.1, you can maximize the app window by dragging its title bar to the top of the screen.
Your screen resolution. Screen resolution is the size of your screen display expressed as pixels wide by pixels high. The greater the screen resolution, the greater the amount of information that will fit on one screen. Your screen resolution options depend on your monitor. At the time of this writing, the lowest possible screen resolution was 1024 × 768. The highest resolution depends on your monitor and your computer’s display capabilities. In the case of the ribbon, the greater the number of pixels wide (the first number), the greater the number of buttons that can be shown on the ribbon and the larger those buttons can be. On a computer running Windows 8.1, you can change your screen resolution from the Screen Resolution window of Control Panel. You set the resolution by dragging the pointer on the slider.
If you used Control Panel in an earlier Microsoft operating system, note that it is still part of Windows 8.1. Control Panel (shown in the illustration that follows) is housed in a single window where you can make changes to your computer such as adding users, changing the desktop background, and managing your network, among other things. To navigate this, you click the links, make configuration changes, and use the Back button as desired.

When Windows 8 was released in 2012, another option became available, the PC Settings hub, referred to as PC Settings. In Windows 8.1, it has been redesigned, as demonstrated in the illustration that follows. To navigate this, you click an item in the left pane and then click another entry in the results. From there you can make configuration changes. PC Settings has a back button to help you navigate it.

For the most part, we suggest that you make changes from PC Settings whenever you can. It’s easy to navigate and even easier to make configuration changes. Control Panel is more robust and offers more features, and should be used when you can’t find what you want in PC Settings.
Tip
When you want to make a change to your computer, type what you’d like to do in the Search pane (just start typing on the Start screen and this will open). Select the option from the results. Depending on what you click and what is offered, either Control Panel or the PC Settings hub will open to the desired setting option. You won’t have to know what setting is available where, or how to access it.
In this exercise, you’ll open PC Settings from the Start screen and change when your computer sleeps.
Set Up
There is no setup for this exercise. You don’t need any practice files to complete this exercise.
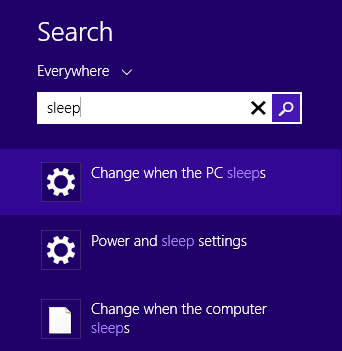
Access the Start screen and then type Sleep.
Click Change When The PC Sleeps in the results. Note the settings icon shown here. Make sure you click the result that also includes this icon.
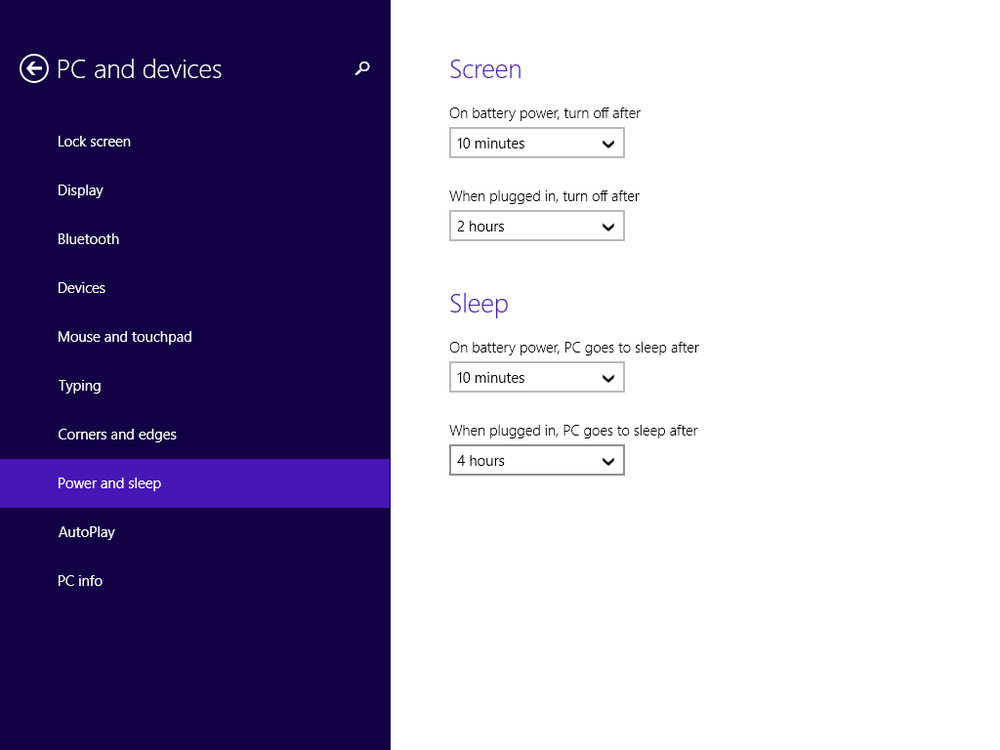
In the right pane, click the arrow under the Sleep option(s).
Use the drop-down lists in the right pane to make changes to when the computer sleeps.
The sleep options are changed.
Clean Up
Position your mouse in the upper-left corner and click the Back arrow to return to the main PC Settings hub page. Leave this open.
With a feel for how the PC Settings panes work, you can now explore the categories on the left side. It’s not important right now for you to understand every option; you’ll return to these settings many times as you work through this book. What’s important now is to explore PC Settings and get an idea of what’s available.
Here are a few category options to explore from the main PC Settings screen (the one that has PC Settings on the top). This is not a complete list, but you are encouraged to explore all of them. Click the Back arrow as applicable, when exploring.
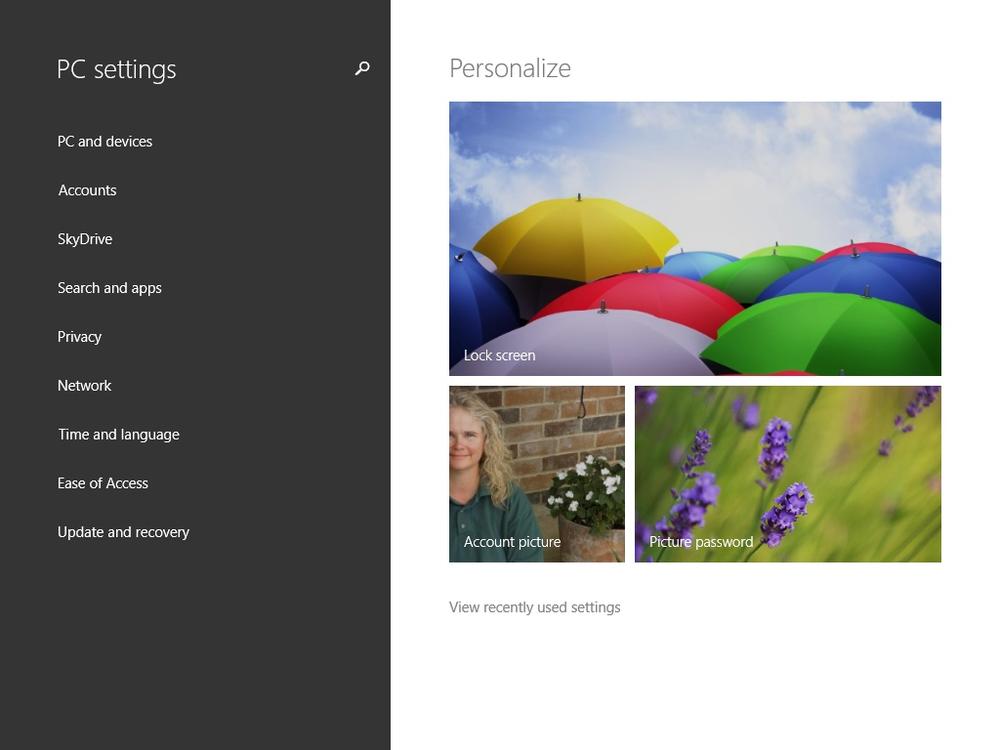
PC and Devices. Use this tab to change the lock screen background and to choose apps that appear on the lock screen with detailed status information. You can change the color of the Start screen’s background and design here, too. Beyond that, you can enable or disable Bluetooth, change settings for the display, mouse, and touchpad, turn off hot corners, change power and sleep settings, and more. (If you click this, click the Back arrow to return to the PC And Devices screen.)
Accounts. Use this tab to change your account picture and manage your login options. You can add new users here, if you are logged on as an administrator.
SkyDrive. Use this tab to view your SkyDrive storage statistics, buy more storage, choose how to use SkyDrive to sync documents and camera photos, and more.
Search and Apps. Use this tab to clear your search history, choose how and when to be notified of updated information from apps such as Calendar and Mail, to set Quiet Hours (when you should not be disturbed), to see a list of apps and how much hard disk space they require, and to set the default apps for web browsers, email, music player, and so on.
Privacy. Use this tab to configure privacy options for apps, such as if they can use your camera or microphone, learn your location, and learn your name.
Tip
Click every tab in the left pane of PC Settings now to see what’s available, but don’t make any changes beyond personalizing the lock screen, your User tile, and other nonessential areas. Click the Back arrow to return to the previous screen as applicable.
If you need access to more configuration options than those available in PC Settings, you can use Control Panel, which is just a different presentation of PC Settings with more options. You can open Control Panel from the Start screen. Just type Control Panel and then select it from the top of the list of results. (You can also right-click the Start button to access Control Panel.)
To use Control Panel, you choose the desired entry, access the areas you want to change, and make changes by selecting from the choices offered. As with PC Settings, you’ll access these options often throughout this book when the required or desired options are necessary for instruction.
When you are ready to end a computing session, you should, at the very least, secure your computer so that others can’t access it. You can do this by locking it. You can access the Lock option from the Start screen by clicking your user name. When you lock your computer you must enter a password when you are ready to use it again. When you do, the computer will be just as you left it. Lock your computer anytime you leave it unattended.
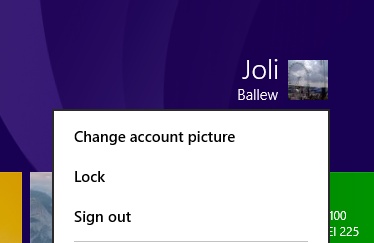
From this same menu you can sign out of your computer. When you sign out, you’ll be prompted to save any open files if applicable and you might be prompted to close open desktop apps. With that done, Windows 8.1 will close your computing session as if you were turning off the computer (but won’t turn it off). When you log on again, you’ll start a new computing session.
Keyboard Shortcut
Press Windows key+I shortcut to access the Settings charm (and thus the Power setting).
Important
If you lock your computer but don’t have a password configured to unlock it, locking it doesn’t do much good. Anyone can gain access.
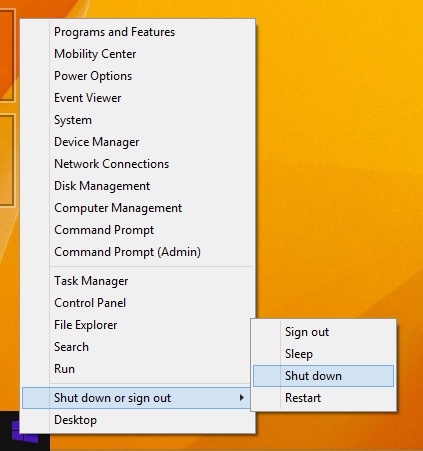
Finally, you can completely shut down your computer. You should shut down your computer when you get on an airplane, reposition a desktop computer, or when you know you won’t need your computer for some time. You can access the option to shut down the computer by right-clicking the Start button. You can also access this option by using the Settings charm, from the Power options. And finally, the option to shut down is available from the logon screen; you can shut down your computer without logging on.
Tip
Shut down your computer when you want to move it to a new location, transport it in a car or bus, or know you won’t be using it for at least two days.
In this exercise, you’ll shut down your computer.
Set Up
There is no setup for this exercise. You do not need any practice files to complete this exercise.
Position your cursor in the lower-left corner and screen.
Right-click Start.
Point to Shut Down Or Sign Out. In the submenu that opens, click Shut Down.
When you set up Windows 8.1, you have to input some information, including your user name, computer name, a password, and more.
You click or flick upward to bypass the lock screen. You can click or flick downward to access the camera, if applicable.
The Start screen contains tiles that represent apps and desktop apps and offers access to various parts of the computer, including the desktop.
Charms offer access to additional, embedded settings, features, and configuration options.
Some tiles on the Start screen are configurable and will offer up-to-date information obtained from the Internet.
The traditional desktop is available from the Start screen and is still where you will do most of your work.
There are many ways to work with multiple open windows, including Flip, the Switch list, and hot corners.
Control Panel offers access to configuration options that you can apply, including adding users and configuring networks. PC Settings offers many of these settings in a more user-friendly environment.
You can end a computing session by locking the screen, logging off, letting the computer go to sleep, or shutting it down.