
![]()
To pass the Windows Store certification requirements, developers must understand how to properly handle app activation and deactivation and how to preserve and restore both page state and application state. This chapter will provide you with the information you need to know to ensure that these tasks are handled, as well as how to enable fast app resume within your application. This chapter will wrap up with a recipe on how to launch other Windows Phone 8 apps from within your own app.
In this chapter, we will walk through the following recipes:
- 10-1. Preserve and Restore State
- 10-2. Enable Fast Application Resume Within Your App
- 10-3. Launch a Built-in Windows Phone 8 App from Your App
- 10-4. Launch Another Published App from Your App
10-1. Preserve and Restore State
Problem
The users of your application are complaining that the app experiences data loss when they launch other apps while your app is still running. When they return to the app to continue working within it, the app just relaunches the main screen, instead of the page that was last viewed.
Solution
Leverage the application and page navigation events to preserve and restore application state.
How It Works
Before understanding how to manage state using events, let’s review the application states of a Windows Phone application.
Application States
There are three states of a Windows Phone application:
- Running: This state is pretty self-explanatory. An application is running when the user launches a new instance of that application from the Windows Phone Start screen (in other words, tapping a tile, using a voice command, tapping the name in the application list, and so on) and the application is in the foreground.
- Dormant: This occurs when the application is no longer running in the foreground because the user navigated away from the app, without exiting the app itself. Some examples include tapping the Start button to return to the Start screen to launch another app, tapping the Search button, receiving a phone call, or engaging the lock screen. Note that in all of these cases, the app was not terminated by the user (in other words, the Back button was not tapped to exit the application). When an app is dormant, its application state is preserved in memory. When a dormant app is resumed, application and page states are restored automatically.
- Tombstoned: This occurs when a dormant application is terminated by the operating system because another application requires more memory to run. The operating system will tombstone up to five apps to release memory for the currently running application. A tombstoned app will have its state information preserved, but the app itself is not preserved in memory. Instead, the State dictionary of the PhoneApplicationPage object is stored. In this case, when a user navigates to an app that has been tombstoned, the developer will need to perform a little extra legwork to ensure that the app retrieves the data stored in the State dictionary to restore page state.
It is important to note that Windows Phone devices can run only one application at a time in the foreground. So, if your user is entering in data and a phone call comes in, the phone call takes over the foreground, and your application is sent to the background in a dormant state. When the user finishes the phone call, the user may end up launching other applications or performing tasks that require more memory before returning to your app. This, in turn, will cause the device operating system to tombstone your application. If you did not take the proper precautions to preserve and restore both page state and application state, your user may lose data that was being entered at the point in time that the application was interrupted.
![]() Note Application state refers to data that needs to be stored to ensure the application continues running as expected when resumed from a tombstoned state without experiencing any delays, such as an authentication key or a web service result. Page state refers to data that was modified by the user in a specific view in the application, such as changing control state or entering values in an input field.
Note Application state refers to data that needs to be stored to ensure the application continues running as expected when resumed from a tombstoned state without experiencing any delays, such as an authentication key or a web service result. Page state refers to data that was modified by the user in a specific view in the application, such as changing control state or entering values in an input field.
As a developer, the best thing you can do to mitigate against data loss is to manage page state and application state during the small window of opportunity that is made available to you by the API to prepare for the scenario where your application is tombstoned by the device’s operating system. This includes storing any unsaved data in the State dictionary, as the application is being deactivated.
It also provides you with the ability to restore page state and application state as the application is brought back to the foreground again, or reactivated. This gives the illusion to the user that your Windows Phone app was simply “minimized” while they were working within other applications. Application and page state need to be restored only when the application has been tombstoned. At this point, you’re probably wondering how you can tell when an app has been tombstoned and requires the extra work to restore both page state and application state.
The first hint is to check the IsApplicationInstancePreserved property on the ActivatedEventArgs parameter that is passed in during the Application_Activated event. Refer to the “Application Events” section later in this recipe.
Also, an app that is resumed from a tombstoned state will reconstruct the application’s page when launched, whereas a dormant app will not. Therefore, when a page constructor is called within your application, this is the point where you should check the State dictionary for your page’s view model. If the page’s view model was successfully retrieved from the State dictionary, then your app has been restored from a tombstoned state. If not, then a new instance of your application has been launched.
When you create a new Windows Phone application, the template that is used to create your Windows Phone project automatically generates Application events in the App code-behind file in your project, as listed in Table 10-1. Code is automatically generated within these events that handles the app’s initialization process, as well as loading and setting up language resources, when creating a Windows Phone App project using one of the built-in templates. Take a moment to look through the App code-behind file in a newly created Windows Phone project.
Table 10-1. Application Life-Cycle Events
| Event | Event Triggered… | Application State |
|---|---|---|
| Application_Launching (object sender, LaunchingEventArgs e) | When launching a new instance of the application (for example, tapping the app tile). | Running |
| Application_Activated (object sender, ActivatedEventArgs e) | When the user returns to a dormant or tombstoned app. Check the result of the boolean property ActivatedEventArgs.IsApplicationInstancePreserved to determine which state the app is being resumed from. A value of True indicates the app is being resumed from a dormant state. Otherwise, the app is being resumed from a tombstoned state. | Running |
| Application_Deactivated (object sender, DeactivatedEventArgs e) | Just before the app is moved from the foreground to background. Check the Reason property on the DeactivatedEventArgs parameter to determine why the app is being deactivated. It will indicate one of the following DeactivatedReason enumeration values: ApplicationAction, PowerSavingModeOn, ResourcesUnavailable, UserAction. | Dormant, but may be tombstoned by OS if needed |
| Application_Closing (object sender, ClosingEventArgs e) | Just before the application is closed. At this point, the application is no longer running. | Closed |
You can include your own code within these events to perform additional actions for any of the steps in the application’s life cycle. However, note that anything you do within these events must execute quickly. And by quickly, I mean in a few seconds or less. All application events and page navigation events that are executed, when either launching, activating, or deactivating an app, must all execute in ten seconds or less, and that’s a combined total. That means there is a very small window of opportunity for you, as the developer, to perform some housekeeping before the application is “put to sleep.” If you have long-running code that exceeds that time frame, your app will be terminated. For more tips on how to handle application state, review the article “Activation and deactivation best practices for Windows Phone” at http://msdn.microsoft.com/en-us/library/windowsphone/develop/ff817009(v=vs.105).aspx.
Preserving and Restoring Application State
To preserve application state, you may use persistent storage, such as isolated storage and/or a local database. Since we have not yet touched on these topics, we will not delve too far into this approach. Just note that you can save data to, and load data from, either of these storage methods in order to preserve application state. One example of application state would be in the implementation of a Settings page to store user preferences that control how the application will look and feel. The user’s desired settings will be loaded whenever a new instance of the application is loaded or when an application is being resumed from a tombstoned state. Refer to the recipes in Chapter 11 to learn more about data storage and retrieval.
Page Navigation Events
The Windows Phone 8 APIs provide page navigation events that can be overridden within your page’s code-behind in order to perform custom actions within your application, as listed in Table 10-2.
Table 10-2. Page Navigation Override Events
| Method | Triggered When.. | Override When.. |
|---|---|---|
| OnNavigatedTo (NavigationEventArgs) | Navigating to the current page. | You need to prepare the page on load, such as retrieving data or setting the state of visual elements in the page. |
| OnNavigatedFrom (NavigationEventArgs) | Navigating away from the current page. | You need to perform some sort of action on the page when it has become inactive. For example, you may want to save data to isolated storage or a local database. |
| OnNavigatingFrom (NavigationCancelEventArgs) | A navigation action is initiated to move away from the current page but the page is not yet inactive. Navigation may be cancelled. | You want the option to cancel the event based on navigation mode, or you want to perform other actions on the page before it becomes inactive. |
The NavigationEventArgs object contains read-only properties that provide information about the navigation request, including the target URI, the navigation mode, and whether the current application was the navigation target.
The NavigatingCancelEventArgs object provides the same information as the NavigationEventArgs class, along with two properties related to navigation cancellation: IsCancelable and Cancel.
IsCancelable is a read-only boolean property that indicates whether the current navigation request can be cancelled. Cancel is a read-write boolean property. When Cancel is set to True, the navigation request is cancelled, and the application remains on the current page.
The NavigationMode property on both NavigationEventArgs and NavigatingCancelEventArgs is an enumerated value that is set to one of the following possible values:
- Back: The current navigation request is going back to the last-visited page in the back stack.
- Forward: The current navigation request is navigating forward to a page in the call stack.
- New: The current navigation request is navigating to a new page.
- Refresh: The current navigation request is reloading the current page.
- Reset: The current navigation request is reloading the current page, but the application should also conduct checks to determine whether it is necessary to clear the back stack based on the navigation target page.
Preserving and Restoring Page State
To preserve and restore page state, simply design your application using the MVVM pattern and leverage two-way bindings to display data in your View. The controls in your View should be bound to properties in the view model. Furthermore, make your view models serializable so that they can be stored in the State dictionary of the PhoneApplicationPage object. To make a view model serializable, use the DataContract attribute on the class definition, and use the DataMember attribute on all properties that will need to be preserved. These attributes allow the class and its properties to be used in serialization and deserialization procedures by the DataContractSerializer.
Within the view model’s corresponding View (in other words, the page), override the OnNavigatedFrom event in the code-behind to store the current state of the View model in the State dictionary.
Override the OnNavigatedTo event to restore the view model from the State dictionary. Also, remember to distinguish whether the page constructor was called prior to the event’s execution. This can simply be accomplished through a boolean class-level variable that will serve as the indicator.
Let’s create a simple application where we can demonstrate the techniques discussed here.
Launch Visual Studio 2012 and create a new project, and select the Windows Phone Databound App template in the New Project dialog. Name the project ManagingState. We will simply leverage the test data that is in place in order to focus on the important details of managing both page state and application state. Therefore, we will make a few simple modifications to this project. In the DetailsPage markup, replace the TextBlock control in the ContentPanel to a TextBox control instead, as follows:
<Grid x:Name="ContentPanel" Grid.Row="1" Margin="12,0,12,0">
    <TextBox
        Text="{Binding LineThree, Mode=TwoWay}"
        TextWrapping="Wrap"
        AcceptsReturn="True" />
</Grid>
Next, modify the DetailsPage code-behind to override the OnNavigatedTo and OnNavigatedFrom events, as we discussed in the section “Preserving and Restoring Page State.” Listing 10-1 shows the full modifications.
Listing 10-1. DetailsPage Code Modifications to Preserve and Restore Page State
using System.Windows.Navigation;
using Microsoft.Phone.Controls;
using ManagingState.ViewModels;

namespace ManagingState
{
    public partial class DetailsPage : PhoneApplicationPage
    {
        private ItemViewModel itemViewModel = null;
        private bool pageReconstructed = false;

        public DetailsPage()
        {
            InitializeComponent();
            pageReconstructed = true;
        }

        protected override void OnNavigatedTo(NavigationEventArgs e)
        {
            //If the page constuctor has been called, check State dictionary for
            //the page's view model. If one exists, restore the page state.
            //If not, then this is a new instance.
            if (pageReconstructed)
            {
                if (itemViewModel == null)
                {
                    if (State.Count > 0)
                    {
                        itemViewModel = (ItemViewModel)State["ViewModel"];
                    }
                    else
                    {
                        string selectedIndex = "";
                        if (NavigationContext.QueryString.TryGetValue("selectedItem", out selectedIndex))
                        {
                            int index = int.Parse(selectedIndex);
                            itemViewModel = App.ViewModel.Items[index];
                        }
                    }
                }
                DataContext = itemViewModel;
            }

            pageReconstructed = false;
        }

        protected override void OnNavigatedFrom(System.Windows.Navigation.NavigationEventArgs e)
        {
            //If this is a back navigation, just skip over it since the page will be discarded anyway
            if (e.NavigationMode != System.Windows.Navigation.NavigationMode.Back)
            {
                //Save the ItemViewModel in the page's State dictionary.
                State["ViewModel"] = itemViewModel;
            }
        }
    }
}
Now let’s run the application to see how this code performs when put to the test.
Since preserving page state is needed only when the application is tombstoned, we need to ensure that we can force our application into a tombstoned state in the emulator. To debug tombstoning behavior within the Windows Phone emulator, you will need to enable it within your project’s debug settings. To accomplish this, right-click your project in the Solution Explorer in Visual Studio and select Properties from the context menu.
Within the Properties page, select the Debug section, and select the “Tombstone upon deactivation while debugging” check box, as depicted in Figure 10-1. Essentially, this will force your application into a tombstoned state within the emulator as soon as you move away from the app without closing it, which simplifies the testing process.

Figure 10-1. Enable tombstoning for debugging in the emulator within the Debug section of the Properties page
Next, place breakpoints on the opening brace for each of the following:
- In the App code-behind file:
- a. App constructor
- b. Application_Launching event
- c. Application_Activated event
- d. Application_Deactivated event
- In the DetailsPage code-behind file:
- a. DetailsPage constructor
- b. OnNavigatedTo event
- c. OnNavigatedFrom event
Launch the application in the Windows Phone emulator. With the breakpoints in place, take note of the application flow when the app is launched as a new instance, and then press F5 to continue with code execution as you hit each breakpoint. In this case, you would see that the App constructor and Application_Launching event were called.
When the application is loaded in the emulator, tap any item in the list to navigate to the item’s details page. The next breakpoint is then hit within the OnNavigatedTo event. Take a moment to inspect the NavigationEventArgs object, as shown in Figure 10-2.

Figure 10-2. DetailsPage OnNavigatedTo state when page is launched from the application’s main page
Press F5 to continue and allow the page to load in the emulator. Modify the text in the TextBox and then tap the Start button on the device to deactivate the application. Since we enabled tombstoning upon deactivation, this will force the application into a tombstoned state immediately.
Now, the breakpoint at OnNavigatedFrom has been hit. Once again, inspect the NavigationEventArgs before proceeding, as shown in Figure 10-3. Notice the Uri property shows that an external app is the forward navigation that is taking place.

Figure 10-3. DetailsPage OnNavigatedFrom state when user navigates away from the application
When the breakpoint stops at the Application_Deactivated event, take note of the DeactivatedEventArgs, namely, the Reason property, as shown in Figure 10-4. Press F5 to continue with the debugging.

Figure 10-4. The DeactivedEventArgs shows that the reason for application deactivation is because of user action
At this point, you should be at the Start screen of the emulator. Click the Back button to return to your application. When it loads, notice that the App constructor is executed again, but then the Application_Activated event is called this time. With the breakpoint still at the open brace of the Application_Activated event, inspect the ActivatedEventArgs. You will see that the IsApplicationInstancePreserved property is set to False, as shown in Figure 10-5. This demonstrates that the application was in fact tombstoned. Press F5 to continue running the application.

Figure 10-5. The ActivatedEventArgs shows that the application instance was not preserved, which is the case for tombstoned applications
Press F5 to continue running the application. You will notice that the next breakpoint that is hit is the DetailsPage constructor (Figure 10-6). Again, press F5 to continue application execution. When the breakpoint stops at the OnNavigatedTo event again, take a moment to inspect the NavigationEventArgs. Did you notice the difference?

Figure 10-6. NavigationEventArgs property values are different when resuming an application
The NavigationMode is now displayed as Back instead of New, and the IsNavigationInitiator is now False. At this point, you can press F10 to step through code execution to see that the View model is in fact being loaded from the State dictionary of the PhoneApplicationPage. Once you have completed stepping through the OnNavigatedTo event, the page will be loaded in the emulator. Notice that the modified text is displayed exactly as it was when you left the application.
To fully understand the difference in behavior of an application in a dormant state vs. an application in a tombstoned state, it is a good idea to uncheck the “Tombstone upon deactivation while debugging” box in the Debug section of the project’s Properties page and then run through the same tests discussed in this section, making sure to inspect the various event arguments along the way.
As we demonstrated in this recipe, the Windows Phone 8 operating system automatically preserves our application in memory when the application moves to a dormant state, which requires no extra work on our part when the application is resumed. When resuming from a tombstoned state, the implementation to preserve and restore page state is pretty straightforward. The code required is minimal within each page, as long as your application adheres to the MVVM design pattern and you ensure that your View models are serializable.
10-2. Enable Fast Application Resume Within Your App
Problem
You handled application state in your Windows Phone 8 app, but users are complaining that when they try to resume the app by tapping its pinned tile on the Start screen, it reloads the application as a new instance, and all is lost.
Solution
Modify the DefaultTask element within the application manifest to include the ApplicationPolicy attribute with a value of Resume.
How It Works
This topic requires familiarization with the concepts discussed in Recipe 10-1. If you skipped over that recipe, take the time to review it now, before continuing.
Essentially, when an application is in a dormant state and is resumed by pressing the Back button on the device to return to the app, then the application reactivates and is loaded where the user left off, with page state and data intact. However, if the user decides to resume the application by tapping the app’s pinned tile on the Start screen, for example, then the suspended instance of the application is destroyed, and a new instance is launched, causing the user to start all over again. Ideally, in this circumstance, you would prefer to have the suspended instance reactivate, because you would like the user to pick up where they left off, if possible. To accomplish this, you will need to open your application manifest in an XML editor.
Enabling Fast Resume in the Application Manifest
Within Visual Studio, right-click the application manifest file, and click Open With… in the context menu. Select the XML (Text) Editor option, and click OK. In the XML file, locate the following entry:
<Tasks>
   <DefaultTask  Name="_default" NavigationPage="MainPage.xaml" />
</Tasks>
Modify the DefaultTask element by adding the ActivationPolicy attribute and setting its value to Resume, as follows:
<Tasks>
   <DefaultTask Name="_default" NavigationPage="MainPage.xaml" ActivationPolicy="Resume"/>
</Tasks>
![]() Note Fast application resume kicks in only if there is an instance of your application sitting in a dormant state on the device. If not, it will simply load a new instance.
Note Fast application resume kicks in only if there is an instance of your application sitting in a dormant state on the device. If not, it will simply load a new instance.
Once you have added the entry in the application manifest, you also need to make some minor changes within your code to manage the application’s back stack.
Managing the Back Stack
Windows Phone apps will maintain the history of pages that the user has visited within the app in what is referred to as the back stack. This is because the user will be able to navigate back through the previously visited pages by clicking the Back button. In most cases, this is the ideal and expected behavior. However, there may be instances where this is not desired and will create an awkward experience for the user. Enabling fast resume within the application is one of those cases.
With fast application resume enabled, the system creates a new page instance for the page that is to be launched and places it on the top of the page’s existing back stack. This could provide a confusing user experience if the target page to be launched is the application’s default page. If the user was last visiting a page deeper in the application, then the user’s back stack will consist of the following when fast resume is used to launch the application:
Page 1 (the default page) ![]() Page 2
Page 2 ![]() Page 1 (new instance created during fast resume)
Page 1 (new instance created during fast resume)
In this case, if the user presses the Back button from the new instance of Page 1, the user will be returned to Page 2. Tapping the Back button a subsequent time will return the user to the original instance of Page 1. Finally, another tap of the Back button will exit the application. This is not the behavior the user is expecting. The user simply expects that pressing the Back button from the default page will exit the application. To maintain a consistent user experience upon fast resume with the target being the default page, you will need to clear the application’s back stack and load the new instance of the default page.
Another scenario that the user may encounter when using fast application resume is the expectation to return to the last-viewed page when resuming the application. By attempting to relaunch a running instance of the app by tapping a pinned tile in the Start screen or selecting the app in the installed apps list, this will in effect launch the application with the current back stack intact. In this case, you will simply cancel navigation to the target launch page so that the user is returned to the most recent page in the application back stack.
The Importance of the PhoneApplicationFrame
Similar to page navigation events that were discussed in Recipe 10-1, the PhoneApplicationFrame of the application also contains navigation events, as shown in Table 10-3. These events can be used to determine whether the current application is being launched as a new instance or whether the application is resumed from a current instance preserved in memory.
Table 10-3. PhoneApplicationFrame Navigation Events
| Method | Triggered when.. |
|---|---|
| Navigating (NavigatingCancelEventArgs) | A new navigation request is initiated. |
| Navigated (NavigationEventArgs) | The navigation target has been loaded. |
| NavigationFailed (NavigationFailedEventArgs) | An error has occurred while attempting to navigate to the target. |
| NavigationStopped (NavigationEventArgs) | The navigation has been forcibly terminated, or another instance of the navigation request has been requested, causing the current request to stop. |
Note that these events are not overridden. Instead, you will need to register event handlers for them in the usual fashion. The good news here is that when you create a new Windows Phone app from one of the built-in templates, much of the necessary code to wire up the event handlers for the PhoneApplicationFrame is already generated for you, as shown in Listing 10-2.
Clearing the Back Stack
To determine whether the back stack should be cleared, you will need to check the value of the NavigationMode property within the NavigationEventArgs object that is passed in. If the NavigationMode is set to Reset, this indicates the application is being relaunched. To clear the back stack, simply call the RemoveBackEntry method on the PhoneApplicationFrame object to remove each entry individually, until the back stack is cleared. This part is already generated in the App code-behind file when a new Windows Phone App project is created, which is also shown in Listing 10-2.
Listing 10-2. Autogenerated Code in App Code-Behind File to Initialize RootFrame, Wire Up Navigation Events, and Clear Back Stack on Reset
/// <summary>
/// Provides easy access to the root frame of the Phone Application.
/// </summary>
/// <returns>The root frame of the Phone Application.</returns>
public static PhoneApplicationFrame RootFrame { get; private set; }

private void InitializePhoneApplication()
{
    if (phoneApplicationInitialized)
        return;

    // Create the frame but don't set it as RootVisual yet; this allows the splash
    // screen to remain active until the application is ready to render.
    RootFrame = new PhoneApplicationFrame();
    RootFrame.Navigated += CompleteInitializePhoneApplication;

    // Handle navigation failures
    RootFrame.NavigationFailed += RootFrame_NavigationFailed;

    // Handle reset requests for clearing the backstack
    RootFrame.Navigated += CheckForResetNavigation;

    // Ensure we don't initialize again
    phoneApplicationInitialized = true;
}

private void CheckForResetNavigation(object sender, NavigationEventArgs e)
{
    // If the app has received a 'reset' navigation, then we need to check
    // on the next navigation to see if the page stack should be reset
    if (e.NavigationMode == NavigationMode.Reset)
        RootFrame.Navigated += ClearBackStackAfterReset;
}

private void ClearBackStackAfterReset(object sender, NavigationEventArgs e)
{
    // Unregister the event so it doesn't get called again
    RootFrame.Navigated -= ClearBackStackAfterReset;

    // Only clear the stack for 'new' (forward) and 'refresh' navigations
    if (e.NavigationMode != NavigationMode.New && e.NavigationMode != NavigationMode.Refresh)
        return;

    // For UI consistency, clear the entire page stack
    while (RootFrame.RemoveBackEntry() != null)
    {
        ; // do nothing
    }
}
Cancelling Navigation
In the case where you will want to preserve the back stack and return to the last-viewed page in the back stack rather than loading a new page, you will simply need to cancel navigation. The reason is that the page at the top of the back stack will receive the navigation events in this order: OnNavigatedTo, OnNavigatingFrom, OnNavigatedFrom. At this point, you can choose to cancel any forward navigation.
To cancel forward navigation, you will simply need to wire up the Navigating event on the RootFrame in the App code-behind file and conduct a check to determine whether the NavigationMode value is set to Reset. If it is, then we will set a class-level boolean variable to indicate that the next new navigation request must be cancelled. In this way, on the next execution of this event, we will set the Cancel property on the NavigatingCancelEventArgs parameter to True if the NavigationMode value is New. This will cancel the navigation request to the new instance of the default page and leave the current page in view, as demonstrated in Listing 10-3. This works because the RootFrame_Navigating event is triggered anytime navigation request is triggered in the app. In the case of application resume, this event is triggered once for the reset navigation, and then it is triggered a second time when it attempts to create a new instance of the default page.
Listing 10-3. Canceling Page Navigation on Application Resume
private bool cancelNewNavigation = false;

private void InitializePhoneApplication()
{
    if (phoneApplicationInitialized)
        return;

    // Create the frame but don't set it as RootVisual yet; this allows the splash
    // screen to remain active until the application is ready to render.
    RootFrame = new PhoneApplicationFrame();

    //ADDED THIS LINE
    //We need to handle the navigating event to ensure we cancel new navigation on app resume
    RootFrame.Navigating += RootFrame_Navigating;

    RootFrame.Navigated += CompleteInitializePhoneApplication;

    // Handle navigation failures
    RootFrame.NavigationFailed += RootFrame_NavigationFailed;

    // Handle reset requests for clearing the backstack
    RootFrame.Navigated += CheckForResetNavigation;

    // Ensure we don't initialize again
    phoneApplicationInitialized = true;
}

//ADDED THIS EVENT HANDLER
private void RootFrame_Navigating(object sender, NavigatingCancelEventArgs e)
{
    if (e.NavigationMode == NavigationMode.Reset)
    {
        cancelNewNavigation = true;
    }

    if (e.NavigationMode == NavigationMode.New && cancelNewNavigation)
    {
        e.Cancel = true;

        //reset the flag so that we don't block any new navigation after the app loads
        cancelNewNavigation = false;
    }
}
Load the application located in the directory Chapter 10ManagingStateWithFastResume. Once the project is loaded, open the application manifest file with the XML editor. Notice that we enabled fast resume by modifying the DefaultTask element to set its ActivationPolicy property to Resume, as was discussed in the section “Enabling Fast Resume in the Application Manifest.”
Next, drill down into the DetailsPage code-behind. Here you will notice that we added an override event, OnNavigatingFrom, to provide us with the opportunity in the app to cancel the current navigation request, as was discussed in the section “Cancelling Navigation.”
Testing in the Emulator
Before we launch the application in the emulator, place breakpoints on the opening brace for each of the following:
- In the App code-behind file:
- a. App constructor
- b. RootFrame_Navigating event
- In the MainPage code-behind file:
- a. MainPage constructor
- b. OnNavigatedTo event
- c. OnNavigatedFrom event
- In the DetailsPage code-behind file:
- a. DetailsPage constructor
- b. OnNavigatedTo event
- c. OnNavigatedFrom event
Launch the application in the Windows Phone emulator. With the breakpoints in place, take note of the application flow when the app is launched as a new instance, and then press F5 to continue with code execution as you hit each breakpoint. When the app is loaded in the emulator, tap an item in the list to load the details page for the selected item. Modify the text in the TextBox and then tap the Start button to return to the Start screen in the emulator and force the application into a dormant state.
Instead of resuming the application by pressing the Back button, go to the installed apps list in the emulator, and launch the application by selecting its entry in the apps list. When the application resumes, you will notice that the RootFrame_Navigating method is triggered twice during the resume, as we discussed earlier. The first time the event is triggered, the NavigationMode is set to Reset. At this point, the cancelNewNavigation flag is set to True. The next time this event is triggered, the NavigationMode is set to New, and its Uri is set to the MainPage. However, we forcibly cancel the navigation request so the page that is loaded upon resume is the page that was last viewed by the user before the app went into a dormant state.
As we demonstrated in this recipe, with a few simple modifications to an existing app, it is easy to enable the application to resume a previously loaded instance, even if the user launches the application through an app tile or through the installed apps list.
10-3. Launch a Built-in Windows Phone 8 App from Your App
Problem
You want to create a simple utility application that provides the user with easy access to the device’s settings, such as Wi-Fi, Bluetooth, cellular, and location settings.
Solution
Use the LaunchUriAsync method in the Windows.System.Launcher class, with the proper URI scheme, to load the desired app.
How It Works
The Windows.System.Launcher class provides two methods that allow you to launch another Windows Phone 8 application through a file or URI association, as listed in Table 10-4.
Table 10-4. Launcher Methods
| Method | Description |
|---|---|
| LaunchFileAsync(Windows.Storage.IStorageFile file) | Launches the Windows Phone 8 application that is associated with the file that is passed into the method |
| LaunchUriAsync(Uri uri) | Launches the Windows Phone 8 application that is associated with the URI scheme that is passed into the method |
Windows Phone 8 has a number of reserved file types and URI associations that are associated with a number of built-in apps, such as image files, the web browser, Bing search, and an e-mail client, to name a few. When attempting to open a file or launch an app with a reserved file type or URI association, using the methods provided in the Launcher class, the built-in Windows Phone application will load accordingly. This is a simple way to extend your application’s functionality using only a few lines of code.
When the URI specified is a web URL, for example www.stackoverflow.com, the device’s web browser will automatically load and navigate to the web address provided.
In the same respect, when the URI begins with the mailto: URI scheme, the device’s e-mail client will load and the To: field will be populated with the e-mail address that is indicated in the URI.
Since the Windows Phone 8 device settings are actually separate apps, they can be independently launched using any one of the ms-settings- series of URI schemes available, as listed in Table 10-5.
Table 10-5. Device Settings URI Schemes
| URI Scheme | Launches… |
|---|---|
| ms-settings-airplanemode: | Airplane Mode Settings |
| ms-settings-bluetooth: | Bluetooth Settings |
| ms-settings-cellular: | Cellular Settings |
| ms-settings-location: | Location Settings |
| ms-settings-lock: | Lock Screen Settings |
| ms-settings-wifi: | Wi-Fi Settings |
To launch the device’s lock screen from your application when the user taps a button, you would simply include the following code in the button’s Tap event:
bool success = await Windows.System.Launcher.LaunchUriAsync( "ms-settings-lock:");
The method will return true if the application associated with the URI scheme was launched. It will return false if a failure occurred attempting to launch the URI scheme specified. A failure will occur when the URI scheme specified is not recognized.
To view the complete list of reserved file types and URI associations for Windows Phone 8, review the MSDN article at http://msdn.microsoft.com/en-us/library/windowsphone/develop/jj207065(v=vs.105).aspx.
Now that we know how to launch a built-in Windows Phone 8 app, let’s put it into practice! Launch Visual Studio 2012, create a new Windows Phone project, and name the project MyDeviceSettingsApp.
Within the MainPage markup, add four buttons to the page, labelled Wi-Fi, Bluetooth, Cellular, and Location. Set the Tag property of each button to its related URI scheme. For example, the Wi-Fi button’s Tag property will be set as follows: Tag="ms-settings-wifi:". Refer to Listing 10-4 for the changes that were made to the ContentPanel Grid markup in the MainPage.
Listing 10-4. ContentPanel Grid in the MainPage XAML File
<Grid x:Name="ContentPanel" Grid.Row="1" Margin="12,0,12,0">
    <Grid.RowDefinitions>
        <RowDefinition />
        <RowDefinition />
    </Grid.RowDefinitions>
    <Grid.ColumnDefinitions>
        <ColumnDefinition />
        <ColumnDefinition />
    </Grid.ColumnDefinitions>
    <Button Content="Wi-Fi"
            Tag="ms-settings-wifi:"
            Tap="SettingsButton_Tap"
            Grid.Row="0" Grid.Column="0" />
    <Button Content="Bluetooth"
            Tag="ms-settings-bluetooth:"
            Tap="SettingsButton_Tap"
            Grid.Row="0" Grid.Column="1" />
    <Button Content="Cellular"
            Tag="ms-settings-cellular:"
            Tap="SettingsButton_Tap"
            Grid.Row="1" Grid.Column="0" />
    <Button Content="Location"
            Tag="ms-settings-location:"
            Tap="SettingsButton_Tap"
            Grid.Row="1" Grid.Column="1" />
</Grid>
Notice that we added a Tap event handler in each button’s markup, which will be wired up to the same event, SettingsButton_Tap. In the MainPage code-behind, add the code for the SettingsButton_Tap event handler, as shown in Listing 10-5.
Listing 10-5. Tap Event Handler for the Buttons That Will Launch an App Using a URI Association
private async void SettingsButton_Tap(object sender, System.Windows.Input.GestureEventArgs e)
{
    bool success = false;
    Button buttonTapped = (Button)sender;
    if (buttonTapped.Tag != null)
    {
        Uri uri = new Uri(buttonTapped.Tag.ToString());
        success = await Windows.System.Launcher.LaunchUriAsync(uri);
    }

    if (success == false)
    {
        MessageBox.Show("Failed to launch the app");
    }
}
Since the LaunchUriAsync method is awaitable, we used the async/await keywords here. With that in place, our application is now ready to be tested!
Testing in the Emulator
Launch the app in the emulator. When the app loads, tap a button and notice that the desired device settings app is launched accordingly. Notice that when you tap the Back button, you are returned to your application. This provides a seamless experience to the user, making it feel as though the device settings are integrated within the application.
For example, in Figure 10-7, the main page of the app simply consists of four buttons, each of which launches a built-in Windows Phone 8 app. Tapping a button launches the desired app shown on the right, in this case the Wi-Fi app. A Back button press will close the built-in app and return the user to the main page of the launcher app. That’s all there is to it!

Figure 10-7. a) Main page of My Device Settings application and b) Wi-Fi app launched from My Device Settings
As we just demonstrated, with a few lines of code, you created a simple utility application that allows your user to launch a built-in Windows Phone 8 app. To view the completed project that ships with this book, open the Windows Phone project that is contained within the Chapter 10MyDeviceSettingsApp directory.
10-4. Launch Your Published Apps from Your Current App
Problem
You want to create a one-stop launcher app that will launch any one of your published apps, if they are installed on the current device.
Solution
Leverage APIs from the Windows.Phone.Management.Deployment namespace to determine whether any of your published apps are installed on the device and to launch them.
How It Works
The Windows.Phone.Management.Deployment namespace contains the InstallManager class, which can be used to search the device for any installed applications that were developed by the current app’s publisher (that is, any apps installed under the same publisher ID as the current app). This is accomplished by executing a call to the FindPackagesForCurrentPublisher method. If any of the current publisher’s applications are installed on the device, the method will return a collection of app packages. Each app package is represented as a Windows.Application.Model.Package.
The Windows.Application.Model.Package class provides information about an application, including the date the application was installed on the device, the install location, and a token to the image on the device that is the application’s thumbnail image. Pertinent information is also available about the application through the Id property on the Package class. The Id property returns a PackageId object. Refer to Table 10-6 for the app information that can be retrieved from the PackageId class.
Table 10-6. PackageId Properties
| Property | Type | Description |
|---|---|---|
| Author | String | The name of the author. This is the value that is set in the Author field in the Packaging section within the application’s manifest file. |
| Name | String | The name of the application. This is the value that is set in the Display Name field in the Application UI section within the application’s manifest file. |
| ProductId | String | Unique product identifier. This is the value that is set in the Product ID field in the Packaging section within the application’s manifest file. |
| Publisher | String | The publisher name. This is the value that is set in the Publisher field in the Packaging section within the application’s manifest file. |
| Version | PackageVersion | Contains the Major, Minor, and Revision information of the application. This is the value that is set in the Version field in the Packaging section in the application’s manifest file. |
Additionally, the Package class contains a Launch method, which is used to launch the specified application. The Launch method accepts a single string parameter, which serves as the navigation URI to deep-link into the application. If you want to simply load the default page on application launch, pass in an empty string.
Launch Visual Studio 2012, and create a new Windows Phone Databound App project. Set the name of the project to MyAppsLauncher.
Drill down into the ViewModels folder and delete the ItemsViewModel class. As well, delete the Sample Data folder and its contents. Next, open the MainViewModel class, and modify the class as follows:
- Remove all the sample properties that were automatically generated in the class, except for IsDataLoaded.
- Add the following using directives to the class:
using Windows.ApplicationModel;
using Windows.Phone.Management.Deployment;
using System.Linq; - Add a new property called InstalledApps, which is of type ObservableCollection<Package>.
- Modify the LoadData method to load the list of installed apps published by the current app’s publisher, and exclude the current app from the list.
public void LoadData()
{
    //use Linq to exclude the current application from the selection list
    IEnumerable<Package> appPackages = InstallationManager.FindPackagesForCurrentPublisher()
        .Where(p => p.Id.Name != "MyAppsLauncher")
        .AsEnumerable<Package>();
    this.InstalledApps = new ObservableCollection<Package>(appPackages);

    this.IsDataLoaded = true;
}
Listing 10-6 shows the final code result.
Listing 10-6 MainViewModel Class
using System;
using System.Collections.ObjectModel;
using System.ComponentModel;
using MyAppsLauncher.Resources;
using System.Collections.Generic;
using Windows.ApplicationModel;
using Windows.Phone.Management.Deployment;
using System.Linq;

namespace MyAppsLauncher.ViewModels
{
    public class MainViewModel : INotifyPropertyChanged
    {
        public MainViewModel()
        {
            this.Items = new ObservableCollection<Package>();
        }

        private ObservableCollection<Package> items;
        public ObservableCollection<Package> Items
        {
            get
            {
                return items;
            }
            set
            {
                items = value;
                NotifyPropertyChanged("Items");

            }
        }

        public bool IsDataLoaded
        {
            get;
            private set;
        }

        public void LoadData()
        {
            //use Linq to exclude the current application from the selection list
            IEnumerable<Package> appPackages = InstallationManager.FindPackagesForCurrentPublisher()
                .Where(p => p.Id.Name != "MyAppsLauncher")
                .AsEnumerable<Package>();
            this.Items = new ObservableCollection<Package>(appPackages);

            this.IsDataLoaded = true;
        }

        public event PropertyChangedEventHandler PropertyChanged;
        private void NotifyPropertyChanged(String propertyName)
        {
            PropertyChangedEventHandler handler = PropertyChanged;
            if (null != handler)
            {
                handler(this, new PropertyChangedEventArgs(propertyName));
            }
        }
    }
}
Next, open the MainPage’s markup, and modify the MainLongListSelector so that its ItemSource is bound to the InstalledApps collection. Modify the DataTemplate so that its TextBlock controls display the application’s name and install date, as shown in Listing 10-7.
Listing 10-7. MainLongListsSelector Modified Markup in the MainPage.xaml File
<phone:LongListSelector
    x:Name="MainLongListSelector"
    Margin="0,0,-12,0"
    ItemsSource="{Binding InstalledApps}"
    SelectionChanged="MainLongListSelector_SelectionChanged">
    <phone:LongListSelector.ItemTemplate>
        <DataTemplate>
            <StackPanel Margin="0,0,0,17">
                <TextBlock
                    Text="{Binding Id.Name}"
                    TextWrapping="Wrap"
                    Style="{StaticResource PhoneTextExtraLargeStyle}"/>
                <TextBlock
                    Text="{Binding InstallDate, StringFormat='Installed On: {0:MM/dd/yyyy}'}"
                    TextWrapping="Wrap" Margin="12,-6,12,0"
                    Style="{StaticResource PhoneTextSubtleStyle}"/>
            </StackPanel>
        </DataTemplate>
    </phone:LongListSelector.ItemTemplate>
</phone:LongListSelector>
Drill down into the MainPage code-behind, and modify the event as shown in Listing 10-8.
Listing 10-8. Modified SelectionChanged Event in the MainPage Code-Behind
private void MainLongListSelector_SelectionChanged(object sender, SelectionChangedEventArgs e)
{
    // If selected item is null (no selection) do nothing
    if (MainLongListSelector.SelectedItem == null)
        return;

    Package appPackage = (Package)MainLongListSelector.SelectedItem;
    appPackage.Launch("");

    // Reset selected item to null (no selection)
    MainLongListSelector.SelectedItem = null;
}
Testing in the Emulator
Launch the app in the emulator. Notice when the app loads, there are no applications listed. To get some applications to show up in that list when testing in the emulator, we need to create applications using the same publisher ID that the current app is set to. Essentially, we have to fake it in the emulator. When your app gets published to the Windows Phone Store, the publisher ID will be overwritten by the publisher ID in your Windows Phone Dev Center account, which will be different from the ID that the project generates in the application manifest file. Therefore, never hard-code any checks for the generated publisher ID in your application.
To set up our emulator such that we have multiple applications installed for the same publisher ID, copy the publisher ID from this project’s application manifest file and paste it into the Publisher ID within another project’s application manifest. For this example, let’s use the project that we created in Recipe 10-3. If you skipped Recipe 10-3, you can use the completed project that shipped with this book, which is located in the Chapter 10MyDeviceSettingsApp directory. Once you have set the MyDeviceSettingsApp’s publisher ID to the same publisher ID of our current project, launch the application in the emulator. Once the main page of the application loads, stop debugging, but leave the emulator instance running.
Next, relaunch MyAppsLauncher in the emulator. Now you will notice that My Device Settings appears in the list, as shown in Figure 10-8. Tap the app name in the list, and notice that the application launches as expected! Click the Back button in the emulator to return to the current app.
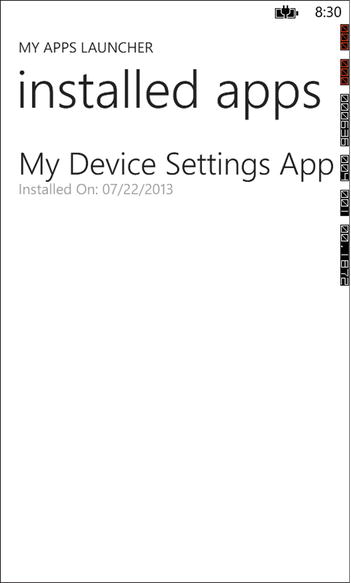
Figure 10-8. The main page of the app loads the list of installed apps by the current publisher
Similar to Recipe 10-3, we created a simple app that allows the user to launch your published apps that are installed on the device using minimal code. To view the completed project that ships with this book, open the Windows Phone project in the Chapter 10MyAppsLauncher directory.