Chapter 5. Using iWeb with .Mac
In Chapter 4, we covered how to build Web pages using .Mac’s built-in page-creation tool, HomePage (and, if you’re the adventurous sort, how to integrate custom-built pages into your site).
If you’re the proud owner of iLife ’06, however, there is another way to create and share Web pages using your .Mac account. You can go beyond the templates that HomePage provides, without having to master HTML code or a hodgepodge of software tools. That’s all thanks to iWeb, the newest member of Apple’s iLife ensemble.
While HomePage provides a quick way to get Web pages posted on your .Mac account, iWeb is a full-fledged Web-page-creation application. You can use iWeb to create completely custom Web pages (and entire sites), and the best part of it is, you can still use its built-in templates to quickly build your pages without breaking a sweat.
We’ll show you how to create pages using the iWeb templates and themes, and we’ll go over how to manage one or more sites using iWeb.
Creating Pages
iWeb is all about creating elegant Web pages easily—the Apple way, of course. While iWeb can be used to create Web pages that are hosted on your .Mac account, with just a few clicks, it can do much more than that—much of which is beyond the scope of this book.
That said, publishing a page—a beautiful page—and posting it to .Mac is a two-step affair: creating a page from one of the templates, and then clicking the Publish button to copy it to .Mac. It’s that simple.
We’ll show you how to create a basic page and upload it to your .Mac site. If you want to know how to get the most out of iWeb, you’ll need to check out a solid iLife book, such as The Macintosh iLife ‘06, by Jim Heid.
Themes and Templates
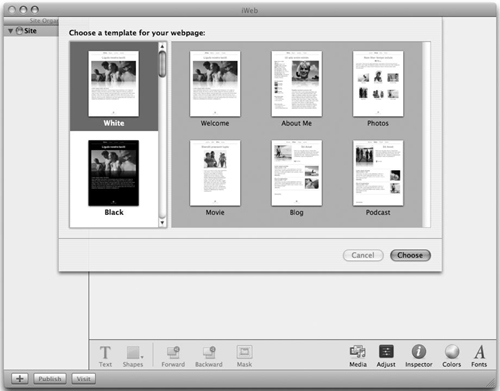
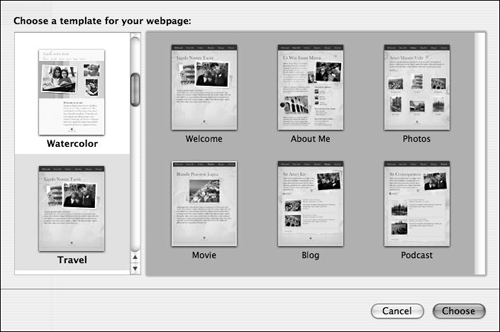
The first time you launch iWeb, it invites you to choose a template for your new Web page (Figure 5.1), but in fact, you’ll really have to do a little more than that: In the course of choosing a template, you’ll also need to choose a theme for the Web site that the page will occupy (even if the site will consist of just one lone page). Sound complicated? Don’t worry. It isn’t.
Figure 5.1. iWeb features several themes for your pages and sites (left), and six templates plus a blank page for each theme.

Each of iWeb’s professionally designed themes provides an overall “look” for your site, including a harmonious color scheme; complementary fonts for headings, body copy, and captions; and accents such as background images and picture borders. There are 18 themes to choose from, ranging from basic (“Black” and “White”) to elegant (“Formal” and “Watercolor”) to edgy with attitude (“Freestyle” and “Night Life”). Within each theme there are six templates, plus a blank page for pages with different purposes. As we’ll discuss later, if the designers’ purposes in creating the templates don’t match yours, you can tweak your pages as much as you desire.
You can browse the iWeb site themes by scrolling through the thumbnails on the left side of the “Choose a template for your webpage” window. Click a theme thumbnail to see thumbnails of the templates for the pages you can create with it (see Figure 5.1). The following are the templates within each theme:
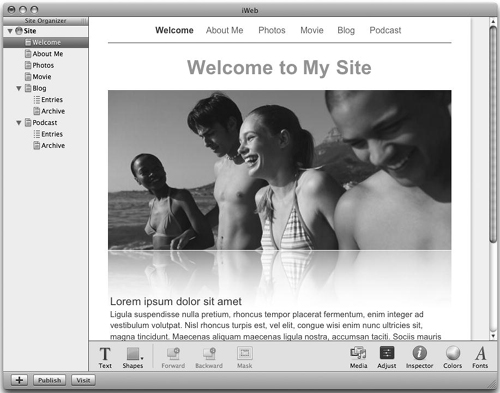
• Welcome. This template serves as an entry page to your site; each design option features a banner graphic and a big block of text (Figure 5.2).
Figure 5.2. The Welcome template serves as a lead-in to your Web site.
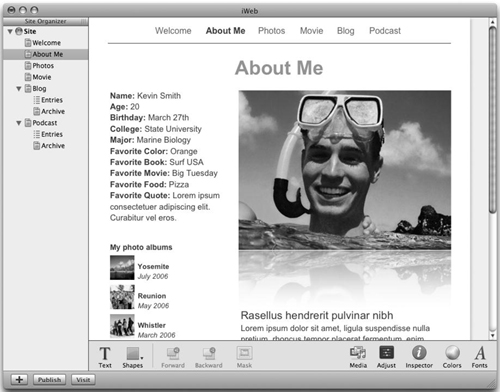
• About Me. This template provides a way of putting out your personal information (Figure 5.3).
Figure 5.3. The About Me template provides guidance for posting your personal details.
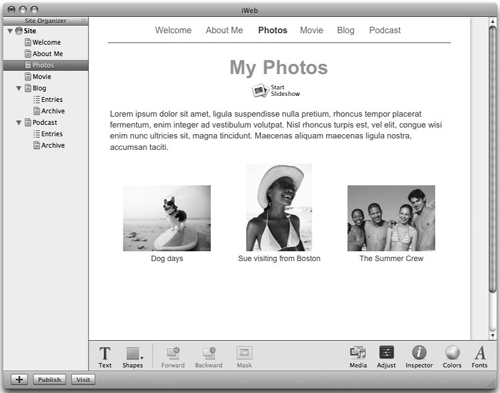
• Photos. This template makes it easy for you to build photo pages containing thumbnails (miniature photos that enlarge when clicked) and captions (Figure 5.4).
Figure 5.4. The Photos template makes it easy to post your photographs to .Mac.
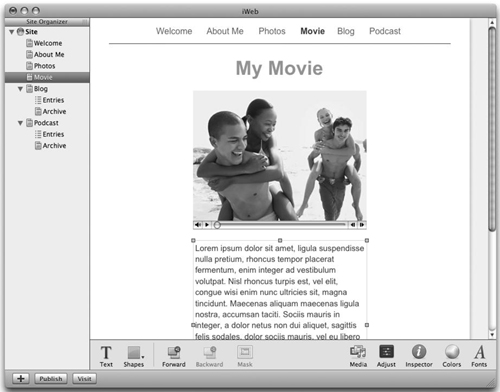
• Movie. This template provides shells for posting movie files, accompanied by explanatory text (Figure 5.5).
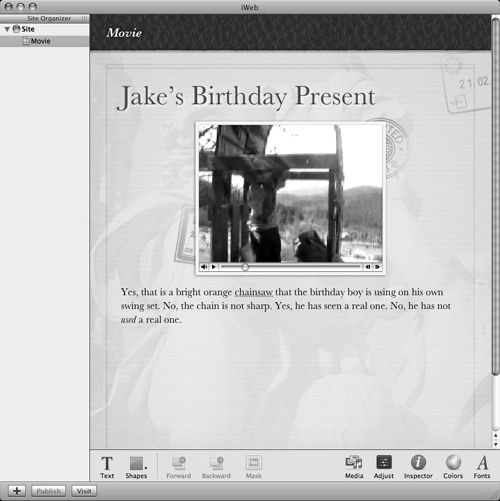
Figure 5.5. The Movie template gives you a place to post a video.
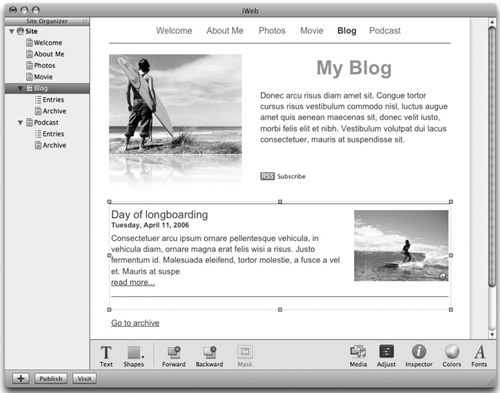
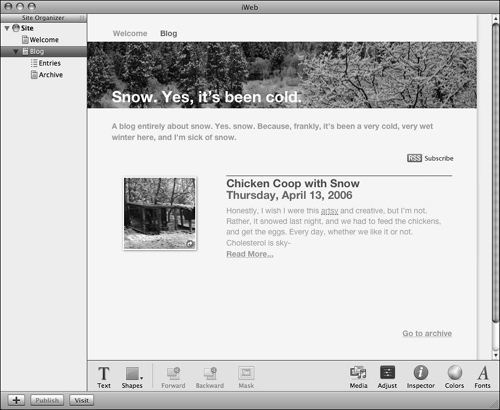
• Blog. A little tricky: This template provides a shell for a blog (short for Web log, or online journal), and each option features three separate Web-page designs: one for the blog’s homepage, one for the main-entry page, and one for an archive of all entries (Figure 5.6).
Figure 5.6. The Blog template lets you create a blog, complete with a homepage, an archive, and individual entries.
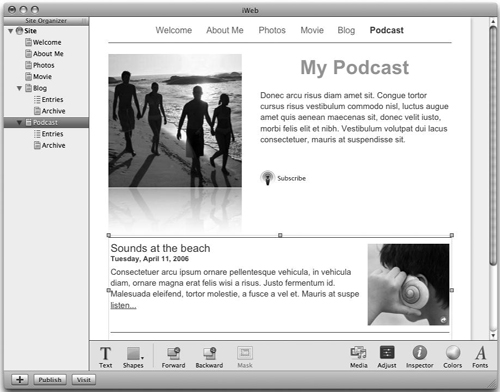
• Podcast. Designed for use in conjunction with GarageBand 3, iWeb’s companion program in the Apple iLife ’06 package, the Podcast template lets you publish your own “radio shows” to a .Mac Web site. Like the Blog template, each Podcast template consists of three page designs: one for your podcast’s homepage, one for each individual entry, and one for an archive of all podcast entries (Figure 5.7).
Figure 5.7. The Podcast template gives structure to your audio musings.
• Blank. Fairly self-explanatory, this is an empty page based on the theme design, which you can fill up with anything you choose.
Although these pages have names that imply how they should be used, they don’t have to be used this way. To a far greater extent than is possible with HomePage, iWeb lets you adapt the text and images within templates to make your pages into whatever you like. Just choose a theme and template that serves your needs, and you can customize that page however you like.
Before we get to that, let’s try creating a basic Welcome page.
Create and Upload a Web Page
- Open the iWeb application.
The iWeb interface loads, showing the “Choose a template for your webpage” dialog (Figure 5.8).
Figure 5.8. When first loaded, iWeb asks you to choose a template for the page you’re creating.
- If this dialog isn’t displayed (as will be the case once you’ve already created a page with iWeb), choose File > New Page (or press Command-N).
- In the dialog that appears, choose a theme from the column on the left (such as Black, White, or Formal), choose the Welcome template, and then click Choose (Figure 5.9).
Figure 5.9. Pick a theme and the Welcome template, and then click Choose to get started.

The template loads, complete with placeholder image and text.
- Click the Media button in the lower right corner of the window (Figure 5.10).
Figure 5.10. Click the Media button to access all of your iLife content, such as music, movies, and pictures.

The Media Browser loads (Figure 5.11).
Figure 5.11. The Media Browser lists all of the music, movies, and photos available for posting on your Web page.

- If it’s not already selected, click the Photos tab in the Media Browser window.
Your iPhoto library is displayed (Figure 5.12).
Figure 5.12. The Photos pane of the Media Browser displays all of the pictures in your iPhoto library.

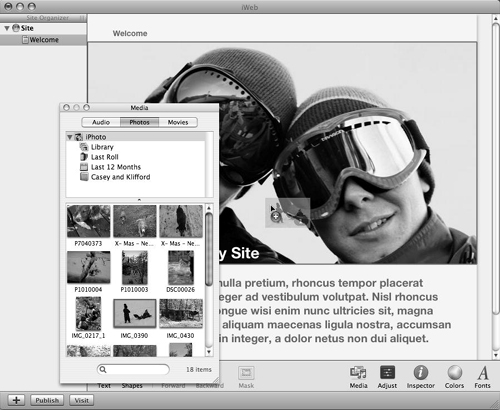
- Drag the picture you want to use from the Media Browser to the placeholder picture in the template (Figure 5.13).
Figure 5.13. To put an image on your Web page, drag it from the Media Browser to the placeholder picture.
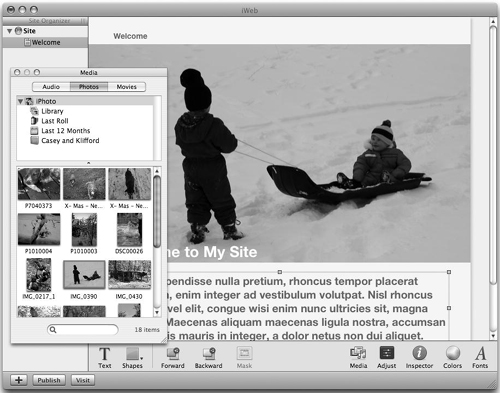
Your picture is added to the page (Figure 5.14).
Figure 5.14. When you drop a picture on the page, it takes the place of the placeholder image.
- Double-click the text block and type in the text for your page.
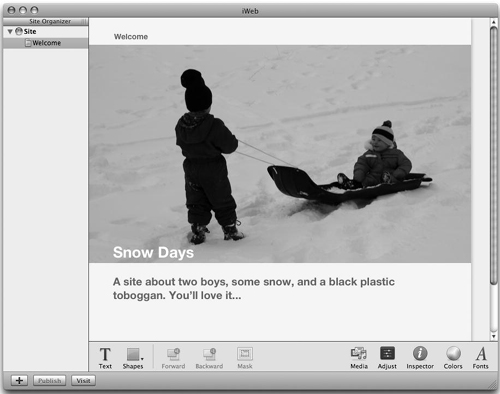
Your page is ready to go (Figure 5.15).
Figure 5.15. Once you’ve added your images and edited your text, you’re ready to publish the page to your .Mac account.
- In the lower left portion of the window, click the Publish button.
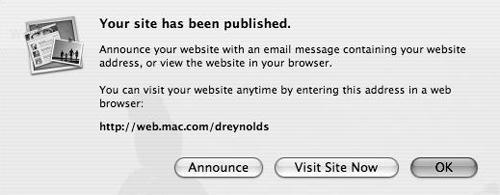
Your page is uploaded to your .Mac account, and a dialog slides down, offering three buttons: Announce, Visit Site Now, and OK (Figure 5.16).
Figure 5.16. After you’ve published a page to your .Mac account, you’re given three options: Announce, Visit Site Now, or OK. Click the button for the option you want.
- In the dialog, click one of the following buttons:
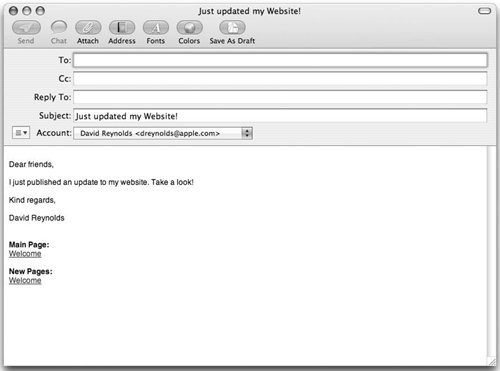
• Click Announce to automatically generate an e-mail message that you can send out to announce your new page and site (Figure 5.17).
Figure 5.17. When you click Announce, an e-mail message is automatically generated in your preferred e-mail client. You can edit it, add e-mail addresses for the people you want to send it to, and then send it.
• Click the Visit Site Now button to go directly to your new page (Figure 5.18).
Figure 5.18. When you click Visit Site Now, your newly updated site is loaded in your Web browser.

• Click the OK button to return to work in iWeb (Figure 5.19).
Figure 5.19. When you click OK after publishing a page, you are returned to iWeb where you left it.

 Tips
Tips
• When you’re working on a site that contains more than one page, clicking the Visit Site Now button takes you to that site’s homepage, not necessarily the page you’re working on. From there, follow links to the page you want to visit. The Visit button in the bottom-left corner of the iWeb window behaves the same way.
• You don’t have to use the Media Browser to add pictures to your page; it just makes the job easier. You can, in fact, drag an image from a Finder window onto your page for the same effect.
• If you’ve set up your Mac with your .Mac account information, iWeb will automatically publish to your .Mac account with a click of the Publish button.
• iWeb automatically updates the site’s navigation bar, depending on what pages are in the site, using the pages’ names. You don’t have to do a thing!
• To adjust your page to your liking (and control where the page is published), click the Inspector button to bring up the Inspector palette. (For more info on this, see sidebar, The Mysterious Inspector.)
The Mysterious Inspector
iWeb has a powerful and somewhat mysterious tool that lets you control items on the pages you create: the Inspector palette (Figure 5.20).
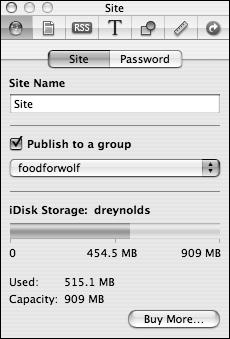
Figure 5.20. The Inspector palette lets you control everything from the title of your site to the positioning of a picture on a page. This portion of the inspector shows the site’s name, the group to which the page is published, and how much iDisk storage is left.
A complete discussion of iWeb and the Inspector is beyond the scope of this book (you’ll find it covered in The Macintosh iLife ’06, by Jim Heid). Still, it would be remiss to skip over the Inspector altogether. Consider this a brief introduction and an invitation to explore the Inspector in greater detail. To begin, click the Inspector button in the lower-right corner of the iWeb page (the one with an i on it). Then click an item on your page, and the selected item’s attributes will be loaded into the Inspector window.
The attributes governed by the Inspector vary, depending on the nature of the object you select; settings available for images differ from those for text objects or movies, for example. But generally, the Inspector controls seven aspects of your Web sites, the pages within them, and the objects embedded in those pages; each of these aspects corresponds to one of the seven buttons arranged along the top edge of the palette.
Detailing all seven buttons, and the attributes they govern for various Web-page objects, would require a chapter unto itself, but the following list highlights the main functions of each button in the Inspector window, as they appear from left to right:
• Site (blue-orb icon) lets you give your site a name, choose whether your site is published to a group, and set a password for sites published to a .Mac account. This portion of the inspector also includes a Site tab for additional control over your site.
• Page (dogeared-page icon) allows you to set a name, fill color, and size for your page, as well as to decide whether the page is included in the site’s navigation.
• Blog & Podcast (“RSS” icon) lets you choose how many excerpts (and the length of those excepts) are shown on a blog or podcast page, and lets you to specify podcast details (such as whether it requires a parental advisory and whether it should be listed in the iTunes Music Store).
• Text (capital “T” icon) provides fine-grained control over how the text on your page appears.
• Graphic (square-and-circle icon). controls image fill and stroke colors, and applies special image effects.
• Metrics (ruler icon) lets you control the exact size, rotation, and positioning of items on the page.
• Link (curved-arrow icon) permits you to quickly create hyperlinks on your pages.
Click around these buttons and study (or inspect) the attributes they govern, and before long, you’ll get a feel for how the Inspector works.
Note that the Inspector is just one of several tool palettes you’ll find in iWeb. Others include:
• Media Browser. Used extensively for many tasks detailed in this chapter, this palette lets you incorporate pictures, audio, and videos into your pages.
• Adjust Image. This palette lets you make changes to images on a page.
• Colors. This palette is used to assign colors to elements on the page. and finally;
• Fonts. This palette lets you exercise some control over the fonts on your page.
You can get at these palettes by clicking the respective buttons at the bottom of the main window, or selecting the appropriate items from the Window menu.
Create and Upload a Blog Page with iWeb
- Follow steps 1 and 2 of “To create and upload a Web page with iWeb.”
The iWeb interface loads, showing the “Choose a template for your webpage” dialog (see Figure 5.8).
- In the dialog, choose a theme from the column on the left (such as Black, White, or Formal), choose the Blog template, and then click Choose (Figure 5.21).
Figure 5.21. To create a blog page, you’ll first need to choose a theme and the Blog template in the “Choose a template for your webpage” dialog.

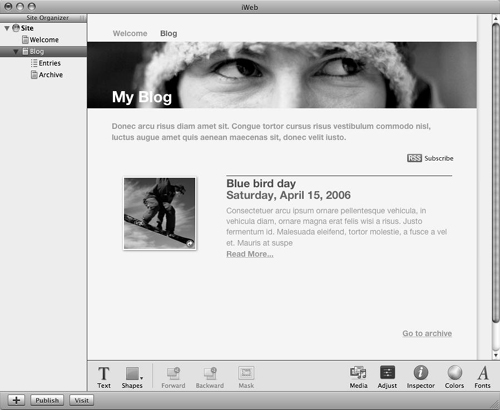
The template loads, complete with placeholder image and text (Figure 5.22).
Figure 5.22. The Blog template includes placeholder text and images, and it also puts both a main blog page and an archive page on your site, as shown in the Site Organizer column at the left of the window.

- Click the Media button in the lower-right corner of the window (Figure 5.23).
Figure 5.23. To open the Media Browser, click the Media button.

The Media Browser loads (Figure 5.24).
Figure 5.24. The Media Browser displays all of your iLife-related music, movies, and pictures.

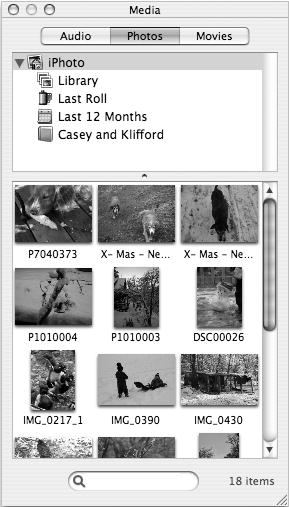
- If it’s not already selected, click the Photos tab in the Media Browser window. Your iPhoto library is displayed (Figure 5.25).
Figure 5.25. The Photos pane of the Media Browser shows your iPhoto library, complete with photo albums.

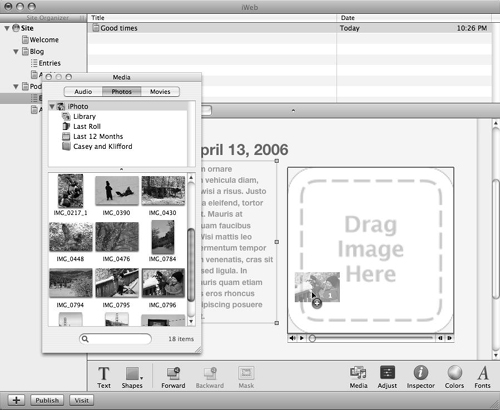
- Drag the picture you want to use from the Media Browser to the placeholder picture on the iWeb page (Figure 5.26).
Figure 5.26. When you drag an image onto your page, the pointer turns into a round green cursor with a plus (+) symbol and a number, indicating that you’re adding an image to the page, as well as how many you’re adding.

Your picture is added to the page (Figure 5.27).
Figure 5.27. After you drop an image on the page, it’s automatically added.

- Double-click the text block, and type in the text for your page.
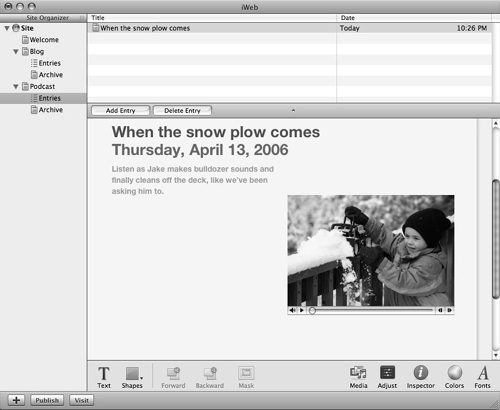
Your blog entry is ready to go (Figure 5.28).
Figure 5.28. After you add custom pictures and edit the text to your liking, your page is ready to publish to your .Mac account.

- In the Site Organizer column at the left side of the window, click the Blog item.
The main blog page loads (Figure 5.29).
Figure 5.29. When you create a blog page from a template, you also create a main blog page, which describes your blog and lists any entries. The page is preloaded with placeholder images and text.
- Repeat steps 5 and 6 for this page, customizing your main blog page (you’ll have to do this only once ...) (Figure 5.30).
Figure 5.30. After you’ve customized your page by adding your own images and text, you’re ready to publish it to your .Mac Web site.

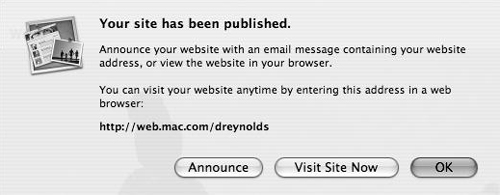
Your blog entry is uploaded to your .Mac account, the index of blog entries is updated and uploaded, the Archive page is updated and loaded, and a dialog slides down, offering three buttons: Announce, Visit Site Now, and OK.
- In the dialog, click one of the buttons:
• Click Announce to automatically generate an e-mail message that you can send out to announce your new page and site (Figure 5.31).
Figure 5.31. When you click Announce, an e-mail message is automatically generated in your preferred e-mail client. You can edit it, add e-mail addresses for the people you want to send it to, and then send it.

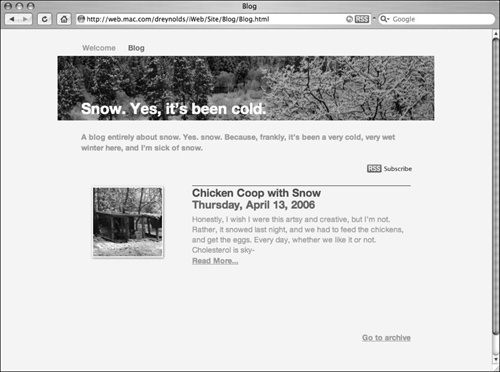
• Click the Visit Site Now button to go directly to your new page (Figure 5.32).
Figure 5.32. When you click Visit Site Now, the homepage of your newly updated site loads in your Web browser.
• Click the OK button to return to work in iWeb (Figure 5.33).
Figure 5.33. When you click OK after publishing a page, you are returned to iWeb just where you left it.
Tips
• Creating a Photos page or About Me page is basically the same process: Make a new page, drop images on the page in the image placeholders, edit the text, and click Publish. It’s that easy (except that the Photos page has more pictures).
• Your blogs automatically generate an RSS feed that others can subscribe to.
• You can change the name of your blog anytime by clicking Blog in the left-side Site Organizer column, and typing a new name when “Blog” is highlighted.
Create and Upload a Podcast Page
iWeb lets you join the monologue revolution by making it easy to post your own podcasts—“radio” shows you record as digital-audio files and post to the Web, where others can subscribe to them and get them downloaded to their computers automatically. The easiest way to do this is to use GarageBand 3, a companion to iWeb in Apple’s iLife ’06 application suite, but unfortunately detailing how is more than we can tackle in this book. If you read The Macintosh iLife ’06, by Jim Heid, you’ll get a handle on it quickly. With this task, we’ll assume that you’ve already created a podcast audio file, and that it’s in your iTunes directory.
- Follow steps 1 and 2 of “To create and upload a Web page with iWeb.”
The iWeb interface loads, showing the “Choose a template for your webpage” dialog (see Figure 5.8).
- In the dialog, choose a theme on the left (such as Black, White, or Formal), choose the Podcast template, and then click Choose (Figure 5.34).
Figure 5.34. Choose a theme for your page (on the left), click Podcast for your template, and then click Choose.

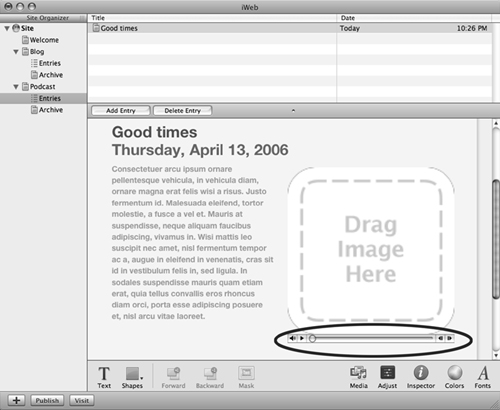
The template loads, complete with placeholder image and text (Figure 5.35).
Figure 5.35. The Podcast template contains placeholder text and images, as well as a placeholder for an audio file—the heart and soul of a podcast.

- Click the Media button in the lower right corner of the window (Figure 5.36).
Figure 5.36. Click the Media button to open the Media Browser.

The Media Browser loads (Figure 5.37).
Figure 5.37. The Media Browser provides easy access to your iLife music, pictures, and movies.

- If it’s not already selected, click the Photos tab in the Media Browser window.
Your iPhoto library is displayed (Figure 5.38).
Figure 5.38. The Photos pane of the Media Browser shows your iPhoto library, complete with photo albums.
- Drag the picture you want to use from the Media Browser to the placeholder pictures on the iWeb page (Figure 5.39).
Figure 5.39. Drag the image you want to use as the banner for your Webcast from the Media Browser window to the placeholder banner image.

Your picture is added to the page (Figure 5.40).
Figure 5.40. When it is dragged to the iWeb page, your image replaces the placeholder banner image.

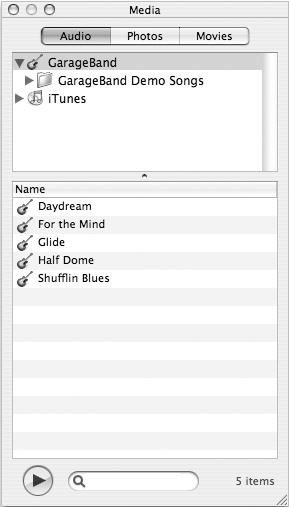
- Click the Media Browser’s Audio tab.
Your GarageBand and iTunes libraries are displayed (Figure 5.41).
Figure 5.41. The Audio pane of the Media Browser shows your GarageBand creations, including podcasts, as well as your iTunes libraries and playlists.

- Navigate to the audio file you want to use as your podcast, and drag it to the image above the audio track on the iWeb page.
The audio file is included on your podcast page (Figure 5.42).
Figure 5.42. After you drag an audio file to your page, it appears there, ready for upload (it’s the audio control below the Drag Image Here area of the window).
- If it’s not already selected, click the Photos tab in the Media Browser window.
Your iPhoto library is displayed (see Figure 5.41).
- Drag the picture you want to use from the Media Browser to the Drag Image Here placeholder (Figure 5.43).
Figure 5.43. To add an image to your now-empty image placeholder for your podcast, simply drag the image to the place that says “Drag Image Here”—simple, eh?
The picture is added to the page above the audio file (Figure 5.44).
Figure 5.44. The picture you drag onto the image placeholder is added to your podcast page.

- Double-click the text block and type in the text for your page.
Your podcast entry is ready to go (Figure 5.45).
Figure 5.45. After updating your images, text, and audio file, you’re ready to publish your page to your .Mac account.
- In the Site Organizer column at the left of the window, click the Podcast item.
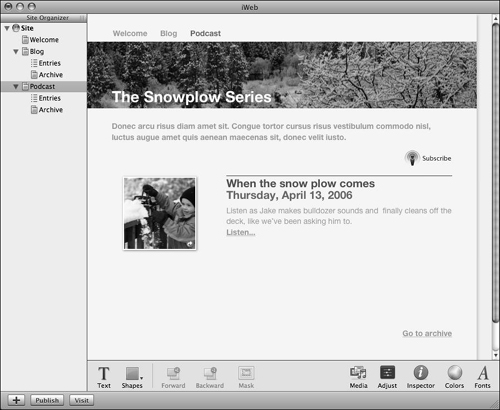
The main Podcast page loads (Figure 5.46).
Figure 5.46. Like a blog, your podcast has a main page that describes your general podcast, and lists podcast entries below it.

- Repeat steps 5 and 10 for this page, customizing your main podcast page (you’ll have to do this only once . . .).
Your podcast entry is uploaded to your .Mac account, the index of blog entries is updated and uploaded, the Archive page is updated and loaded, and a dialog slides down, offering three buttons: Announce, Visit Site Now, and OK (Figure 5.47).
Figure 5.47. After uploading your podcast page, you’re given the option of announcing it to those who are presumably interested, visiting the podcast page, or going on about your business in iWeb.
- In the dialog, click one of the following buttons:
• Click Announce to automatically generate an e-mail message that you can send out to announce your new page and site (Figure 5.48).
Figure 5.48. When you click Announce, an e-mail message is automatically generated in your preferred e-mail client. You can edit it, add e-mail addresses for the people you want to send it to, and then send it.

• Click the Visit Site Now button to go directly to your new page (Figure 5.49).
Figure 5.49. When you click Visit Site Now, your newly updated podcast index page loads in your Web browser.
• Click the OK button to return to work in iWeb (Figure 5.50).
Figure 5.50. When you click OK after publishing a page, you are returned to iWeb just where you left it.

Tip
• To submit your podcast to iTunes, choose File > Submit Podcast to iTunes, enter the requested information in the dialog that slides down, and then click Publish and Submit. This publishes the podcast to your .Mac account and submits it for publication on iTunes.
Enable Comments in iWeb
As this book was going to press, Apple released a free iWeb update, version 1.1, which added several cool new features to the program, including extra themes and templates as well as support for letting visitors search your blog and podcast sites. As with all the features of the “original” iWeb, describing every version-1.1. addition is beyond the scope of this book, but one new feature—support for reader comments on blog and podcast sites—is too cool to leave out.
Comments support lets you transform your blog or podcast from a speech to a conversation. It lets visitors respond to your posts with questions, observations, and even rebuttals. You can use comments yourself to answer your audience, and visitors can also talk among themselves about how much they admire your brilliant insights.
Here’s an overview of how to enable comments on your site, and how to get rid of them in case you’re extremely modest or the debate gets a little too heated:
To activate comments in a blog or podcast
- You can’t enable comments in a blog or podcast until the blog or podcast site exists. So if you haven’t already done so, follow the instructions in the preceding sections of this chapter to create an appropriate site.
- Open the iWeb application and highlight the name of the index, entries, or archive page for your blog or podcast (Figure 5.51). Comment activation applies globally to every page in a site, so the specific page you choose isn’t important.
Figure 5.51. The first step in enabling comments on your site is to select one of its pages (any one of them) in iWeb.

Click the Inspector button (the blue circle with “i” in the middle).
- The Inspector palette opens.
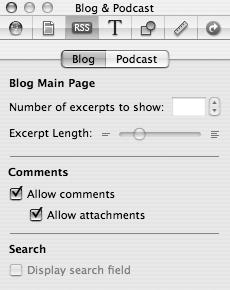
Click RSS; in the RSS pane click the Blog tab (Figure 5.52) and check the “Allow comments” box.
Figure 5.52. Locate the “Allow comments” check box by clicking the RSS button in the iWeb Inspector, and then clicking the Blog tab.

- The first time you enable comments for a blog or podcast, a confirmation dialog appears, explaining what you’re about to do (Figure 5.53).
Figure 5.53. The Allow Comments confirmation dialog makes sure you understand what you’re doing.

Check the “Don’t show again” box if you don’t want to see this reminder in the future, then click OK.
- In the Blog pane, the “Allow attachments” check box, which was grayed out when “Allow comments” was unchecked, is now available. Check it if you’d like to allow site visitors to attach images, sound clips, or other files up to 5 MB in size to their comments (Figure 5.54).
Figure 5.54. Once “Allow comments” is checked, the “Allow attachments” check box becomes accessible.
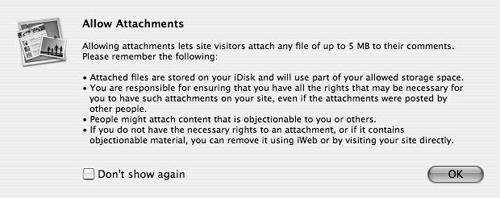
- The first time you check “Allow attachments,” a dialog appears, explaining that any attachments posted to your site will be stored on your iDisk (Figure 5.55).
Figure 5.55. If you check “Allow attachments,” iWeb displays a cautionary dialog to make sure you understand what you’ve done.
Once again, check “Don’t show again” if you don’t want to see this reminder in the future, and then click OK.
- Click the Publish button in the lower left corner of the iWeb window to re-post your site with Comments enabled, and attachments allowed if you opted for that.
To post or respond to comments
The processes of posting comments to your blog and responding to comments posted there are the same for you and your audience.
- To add and respond to comments, you must be viewing your site in a Web browser. If you’re editing the site in iWeb, click the Visit button in the lower left corner of the iWeb window. Otherwise, point your browser to your site’s index page, http://web.mac.com/membername/iWeb/sitename (replacing membername and sitename with your .Mac user name and (what else?) the site name.
Navigate to the entry with the comment you want to address and click the Add a Comment link (Figure 5.56).
Figure 5.56. To add a comment to a blog, or respond to comments made by site visitors, view the site in a browser and click the Add a Comment link.

- In the Add Comment window that appears (Figure 5.57), do the following:
Figure 5.57. The Add Comment window lets you type in your remarks, prompts you for an ID and an optional Web link, and makes you prove you’re not a spamgenerating robot (which you probably already know).
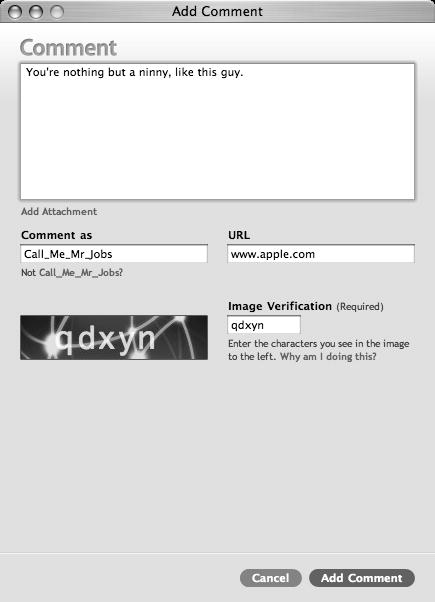
• Type your remarks in the large Comment field.
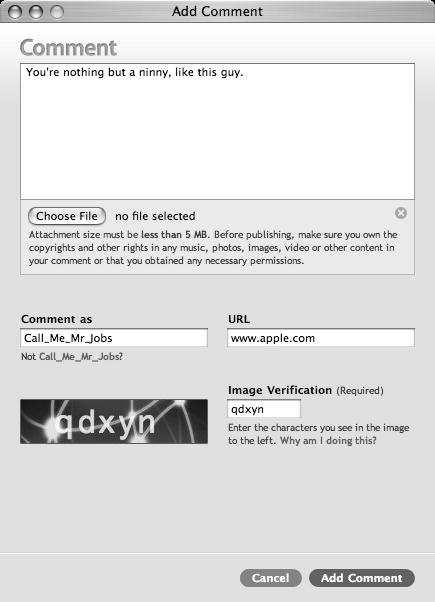
• If an Add Attachment link appears below the Comment field and you’d like to post a file (photo, audio clip, or what have you) up to 5 MB in size along with your comment, click Add Attachment and then the Choose File button (Figure 5.58).
Figure 5.58. On sites with comment attachments enabled, clicking the Add Attachment link below the Comment field exposes the Choose File button, used to select an attachment file.
• Next, enter your name (or your nom de blog) in the “Comment as” field, and optionally add a URL for your homepage or any other Web site you care to be associated with.
• Finally, type the random five-character sequence displayed in the bottom-left image into the Image Verification field to its right. This is a required test to prove you’re a human being, not an automated spam generator (which wouldn’t be able to see and read the characters).
- Click the Add Comment button to post your remarks and any attachments.
The Adding Comment progress pane appears and stays until the page and any attachments have been posted to the site (Figure 5.59).
Figure 5.59. Clicking the Add Comment button at the bottom right summons the “Adding comment” progress pane, which stays until your comment and any attachment are posted to the site.

To delete comments from your site
Maybe you’re having second thoughts about a response you posted to one of your audience members; maybe the discussion between posters is getting a tad too personal; or maybe you just want revel in your absolute power over your online domain. Whatever the case, you can remove any or all comments from your blog any time you like. Here’s how.
- Steer a Web browser to your site, by clicking click the Visit button for a relevant page in the lower left corner of the iWeb window, or by typing your site’s URL into the browser address field: http://web.mac.com/membername/iWeb/sitename (replacing membername and sitename with your .Mac user name and site name, respectively).
Navigate to the entry that houses the comment(s) you want to delete.
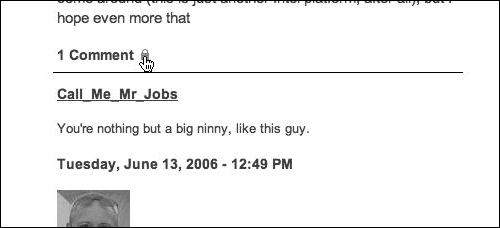
- Locate the comment counter at the bottom of the main entry on the page (which indicates that there have been some number n comments to your post) and click the padlock icon next to it (Figure 5.60).
Figure 5.60. To delete an unwanted comment, begin by clicking the padlock icon next to the commentcount listing at the foot of a blog or podcast entry.
- In the Site Owner Login screen that appears, type your .Mac member name and password into the appropriate fields (Figure 5.61).
Figure 5.61. Type your .Mac member name and account password in the Site Owner Login dialog.

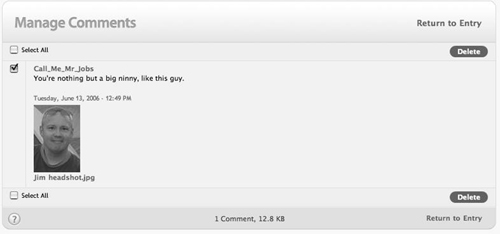
- In the Manage Comments screen that appears locate the comment(s) you want to delete.
Check the boxes to the left of the comments you want to zap and click either Delete button; there’s one at the top and another at the bottom of the window. When you’ve finished, click the Return to Entry link (Figure 5.62).
Figure 5.62. Check the boxes to the left of any comment(s) you want to remove, click either of the Delete buttons, and then click the Return to Entry Page link to go back to your site.
Tips
• If you want to delete all comments for an entry, you can select them all easily by checking one of the Select All boxes to the top left and bottom left of the Manage Comments page.
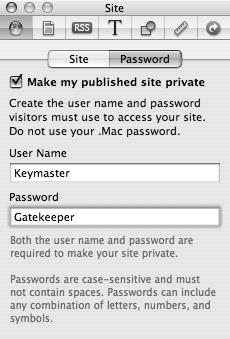
• If you find yourself having to trash nuisance posts all the time, consider password-protecting your site, so that only people you authorize can see it and post comments to it. To do so, open the site in iWeb, launch the Inspector, and click its Site button (the blue orb) and the Password tab (Figure 5.63).
Figure 5.63. You can password-protect a site by opening it in iWeb, clicking the Site button in the Inspector, clicking the Password tab, and checking Make my published site private. Add a user name and password different from your .Mac member name and password.
Create and Upload a Movie Page
- Follow steps 1 and 2 of “To create and upload a Web page with iWeb.”
The iWeb interface loads, showing the “Choose a template for your webpage” dialog (see Figure 5.8).
- In the dialog, choose a theme from the column on the left (such as Black, White, or Formal), choose the Movie template, and then click Choose (Figure 5.64).
Figure 5.64. The first step in creating a movie page is to select a theme on the left and the Movie template on the right.
The template loads, complete with placeholder image and text (Figure 5.65).
Figure 5.65. The Movie template is filled with a placeholder movie and text that you’ll replace with your own content.

- Click the Media button in the lower right corner of the window (Figure 5.66).
Figure 5.66. Click the Media button to open the Media Browser.

The Media Browser opens (Figure 5.67).
Figure 5.67. When you open the Media Browser, it may not show the media that you want to include on your page.
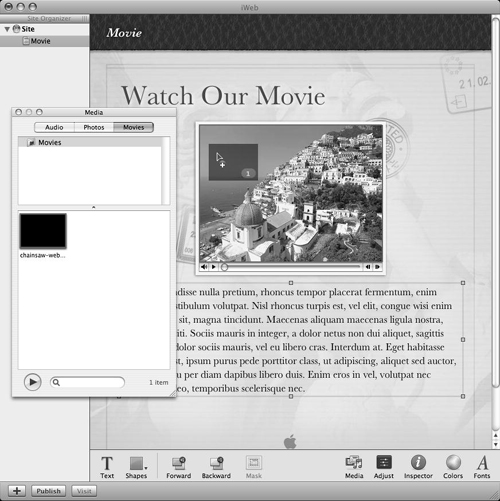
- If it’s not already selected, click the Movies tab in the Media Browser window. The contents of the Movies folder in your home folder are displayed (Figure 5.68).
Figure 5.68. The Movies pane of the Media Browser shows all movies in your Movies folder.

- Drag the movie you want to use from the inspector to the placeholder movie in the iWeb page (Figure 5.69).
Figure 5.69. To add a movie to your page, simply drag it from the Media Browser to the page.
Your movie is added to the page (Figure 5.70).
Figure 5.70. After you’ve dragged a movie to your iWeb page, it appears there, ready to be uploaded.
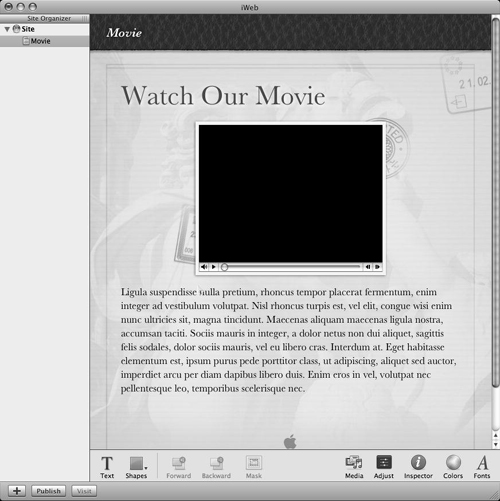
- Double-click the placeholder text blocks on the page, and type in the text you want to use.
Your movie page is ready to go (Figure 5.71).
Figure 5.71. Once you’ve added your movie and edited the text, your page is ready to publish.

- Click the Publish button.
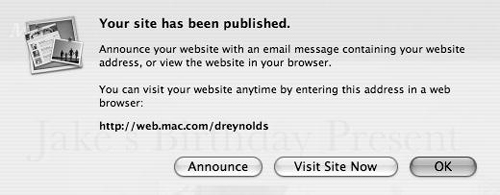
Your movie page (along with the movie itself) is uploaded to your .Mac account, and a dialog slides down, offering three buttons: Announce, Visit Site Now, and OK (Figure 5.72).
Figure 5.72. After you’ve uploaded your movie, iWeb lets you tell folks about it, visit the new page, or go back to iWeb.
- In the dialog, click one of the following buttons:
• Click Announce to automatically generate an e-mail message that you can send out to announce your new page and site (Figure 5.73).
Figure 5.73. When you click Announce, an e-mail message is automatically generated in your preferred e-mail client. You can edit it, add e-mail addresses for the people you want to send it to, and then send it.

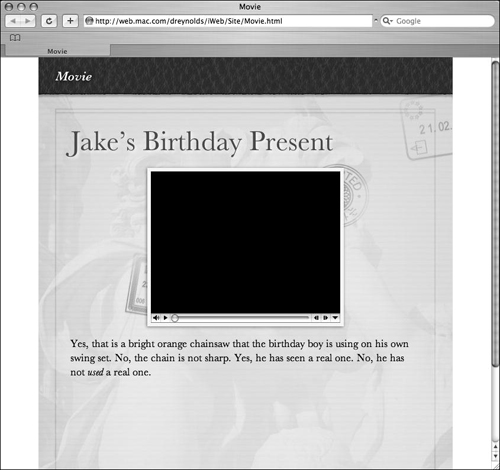
• Click the Visit Site Now button to go directly to your new page (Figure 5.74).
Figure 5.74. When you click Visit Site Now, your newly updated page is loaded in your Web browser.
• Click the OK button to return to work in iWeb (Figure 5.75).
Figure 5.75. When you click OK after publishing a page, you are returned to iWeb just where you left it.
Tips
• To see movies in the Media Browser window, create them in iMovie 3 and save them in the Movies folder.
• If you take movies with a digital still camera, you’ll find those files in iPhoto, using the Photos tab of the Media Browser.