Chapter 6. Using iPhoto with .Mac
If you’ve purchased your Mac recently (or you’ve forked over the ridiculously low price for an iLife purchase), you have iLife ’06 on your hard drive—and that means iPhoto 6. While earlier versions of iPhoto worked well with a .Mac account, iPhoto 6 takes this integration to a whole new level with two new talents: integration with iWeb, and creation of something that Apple calls Photocasts.
With iWeb integration, you can quickly create a photo page or photo-based set of blog entries without resorting to a lick of HTML—nice, even for those of you who don’t mind getting dirty with tags and a text editor.
And, with the new Photocasting features, you can publish full-size photos to albums on your .Mac account and let others subscribe to them: Using iPhoto, Safari RSS, or another RSS reader, subscribers will be shown new pictures automatically, any time you add them to an album.
Using iPhoto with iWeb
Thanks to Apple’s hard work at integrating iPhoto and iWeb, you can post two kinds of Web pages to your .Mac account using nothing but iPhoto (with iWeb in the background): a photo page, and a photo blog. Blog (short for Web log) is a fancy word for a Web page organized in a sort of diary format.
To create a photo page
- Open iPhoto 6.
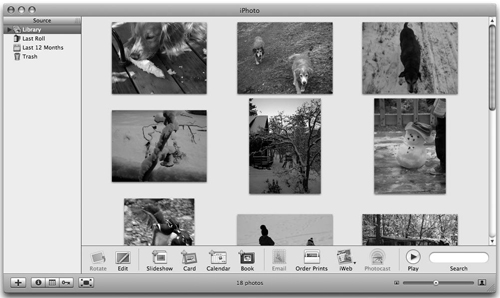
The main iPhoto interface is displayed (Figure 6.1).
Figure 6.1. iPhoto 6 lets you manage your digital photographs with ease, and it’s very well integrated with your .Mac account.
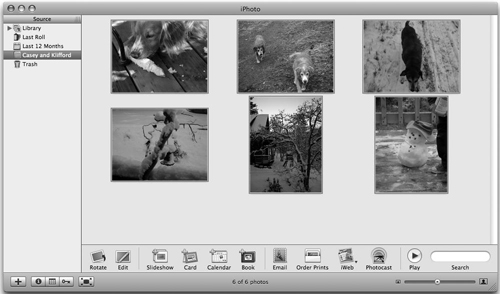
- Select the photos you want to use in the photo page and move them to their own album (Figure 6.2).
Figure 6.2. Creating a new album with just the images you want to use in your picture page isn’t absolutely required, but it helps you keep your page clean.
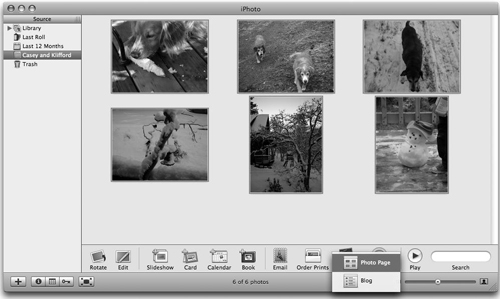
- At the bottom of the page, select Photo Page from the iWeb button menu (Figure 6.3).
Figure 6.3. From the toolbar at the bottom of the page, select Photo Page from the iWeb button menu.
iPhoto prepares the image files and then launches iWeb, which presents you with a choice of photo page templates (Figure 6.4).
Figure 6.4. After iPhoto opens, choose the template you want to use for your photo page.

- From the list to the left, pick a template that you like, and click Choose.
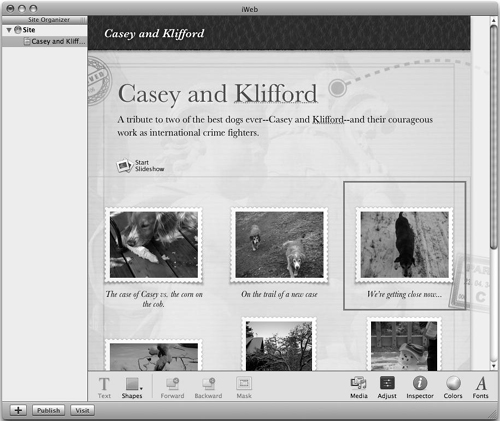
iWeb creates a page using the template, and populates it with your pictures and some placeholder text (Figure 6.5).
Figure 6.5. Your new photo page appears in iWeb, complete with the selected photos, but sporting placeholder text.

- Double-click each text block (the title, description, and caption for each picture), and type the text you want to appear on the page (Figure 6.6).
Figure 6.6. Replace the placeholder text on the page with the text you want others to see.
- In the lower left corner of the page, click the Publish button.
iWeb logs in to your .Mac account and uploads your Web page. After this is finished, you are notified that your page has been published (Figure 6.7).
Figure 6.7. The publication dialog gives you three options after publishing a page: announce it, visit it, or just go on about your business.

- Choose one of the following by clicking the appropriate button:
• Announce. Opens your e-mail program and sets up an announcement e-mail, prepopulated with the site’s URL, some sample text, and a subject.
• Visit Site Now. Takes you directly to the site you just created.
• OK. Finishes the process and returns you to iWeb.
 Tip
Tip
• You can use the iWeb Inspector to make changes to the appearance of your Photo pages. (For an overview of the Inspector, see The Mysterious Inspector sidebar in Chapter 5.)
To create a photo blog page
- Open iPhoto 6.
The main iPhoto interface is displayed (see Figure 6.1).
- Select a photo you want to use as the picture for your photo blog page, and from the iWeb button menu select Blog (Figure 6.8).
Figure 6.8. Click a photo thumbnail and select Blog from the iWeb button menu.

The photo is prepared, and iWeb launches. If you haven’t previously set up a blog in iWeb, the template-selection dialog will be displayed (Figure 6.9).
Figure 6.9. Choose a theme and template from the list presented by iWeb.

If you’ve already got an iWeb blog, you won’t see the template selection; the new page will be added as a new entry to the blog, using the design template you chose when you set up the blog. If you’ve set up more than one iWeb blog, you’ll be prompted to choose from a pop-up menu the blog to which you want to add the new page. In either of these cases, skip to step 4 below and continue.
- From the list to the left, choose a theme, and then pick a template, and click Choose. iWeb uses the template to create a separate blog entry page for each picture and populates them with placeholder text (Figure 6.10).
Figure 6.10. The blog page loads, showing the selected picture and some placeholder text.
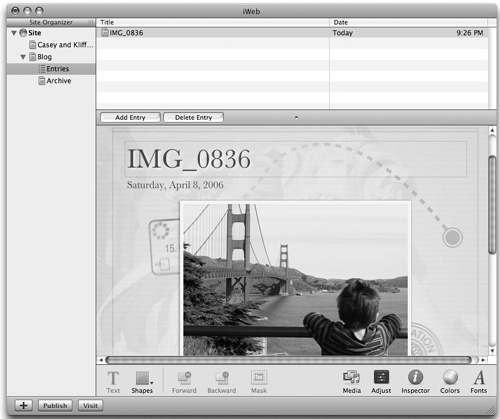
- Double-click each text block (the title, description, and caption for each picture), and type the text you want to appear on the page (Figure 6.11).
Figure 6.11. Replace the placeholder text on the page with the text you want visitors to see. Pictured here are the title and date, but there’s also a description farther down the page.

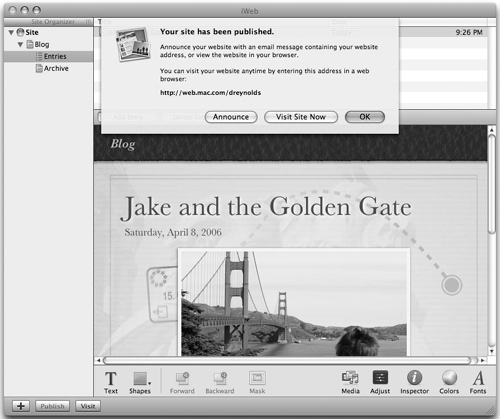
- Click the Publish button (Figure 6.12). iWeb logs in to your .Mac account and uploads your Web page. After this is finished, you are notified that your page has been published (Figure 6.13).
Figure 6.12. Click the Publish button to publish your page to your .Mac account.
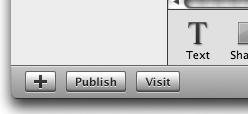
Figure 6.13. The notification dialog that opens after you publish a page gives you three options: announce the page, visit the page, or just continue working.
- Choose one of the following by clicking the appropriate button:
• Announce. Opens your e-mail program and sets up an announcement e-mail, prepopulated with the site’s URL, some sample text, and a subject.
• Visit Site Now. Takes you directly to the site you just created.
• OK. Finishes the process and returns you to iWeb.
Tips
• If you select more than one picture in iPhoto before choosing Blog from the iWeb button menu, iWeb will create a separate blog entry page for each picture. But be forewarned: It’s a lot of work to customize each page.
• You can use the iWeb Inspector to tweak the appearance of your Photo Blog pages. (For a short introduction to this formidable tool, see The Mysterious Inspector sidebar in Chapter 5.)
Working with Photocasts
iPhoto ’06 includes a pretty nifty way to share full-resolution photos using your .Mac account, and Apple has dubbed this feature Photocasting. Aside from the attempt to ride the cultural wave of podcasting, creating a Photocast is simple and pretty cool.
APhotocast uploads pictures at full resolution (or lower resolutions, if you like) from iPhoto to your .Mac account, along with an accompanying RSS file. RSS (short for Real Simple Syndication) lets others subscribe to this Photocast (either with Safari RSS or an RSS reader that handles photos). Each subscriber gets the full-size versions of those pictures right in iPhoto (or a photo-compatible RSS reader), and the subscription is updated every time you add a photo to your Photocasted album—super for fellow Mac users with iPhoto 6.
To create a Photocast
- In iPhoto 6, create an album that contains the photos you want to Photocast. The photos in the album are displayed (Figure 6.14).
Figure 6.14. To create a Photocast, you must first create an album that contains the images you want to publish.

- On the right side of the toolbar at the bottom of the page, click the Photocast button.
The Publish a Photocast dialog slides down (Figure 6.15).
Figure 6.15. The Publish a Photocast dialog lets you decide how your Photocast will behave.

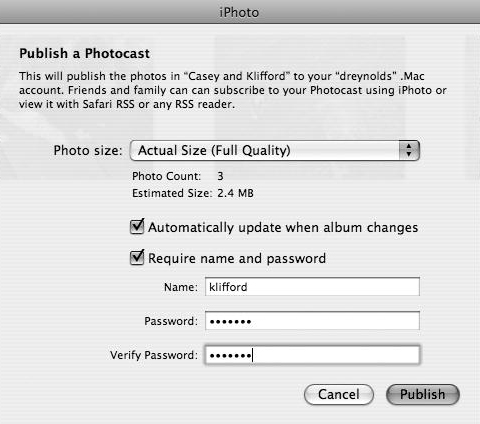
- In the Publish a Photocast dialog, do the following:
• Select a photo size (small, medium, large, or actual size) from the “Photo size” pop-up menu.
• Check the “Automatically update when album changes” box if you want the Photocast to be updated when the album is changed.
• Check the “Require name and password” box if you want the Photocast to be protected by a name and password. If you check this box, enter a name in the Name field, and enter the same password in both the Password and Verify Password fields.
The Publish a Photocast dialog is complete (Figure 6.16).
Figure 6.16. Once you’ve made the changes to the Publish a Photocast dialog, click the Publish button.
- Click the Publish button.
The photos and generated RSS file are uploaded to your .Mac account, and a dialog appears, telling you that your album has been published (Figure 6.17).
Figure 6.17. Once you’ve published your Photocast, you can choose between announcing the Photocast and going on about your business.
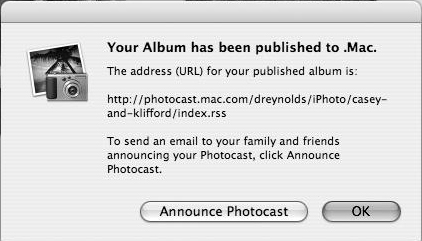
- In the dialog, choose one of the following by clicking the respective button:
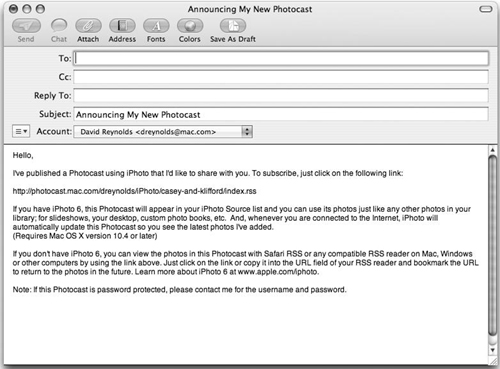
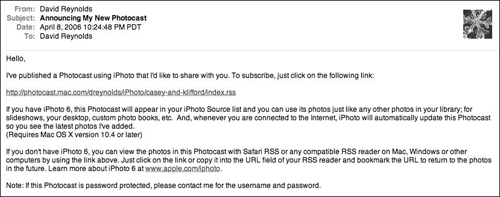
• Announce Photocast. Click this button to generate an e-mail in your e-mail program that announces your Photocast, complete with a clickable URL for subscribers (Figure 6.18).
Figure 6.18. If you choose to announce your Photocast, an e-mail message is created in your e-mail program.
• OK. This returns you to iPhoto without doing anything else.
Tip
• The URLs for these pages can be awfully long, so it’s worth looking at redirection services such as www.tinyurl.com. These services let you take a long URL and turn it into a short one for easy distribution.
To subscribe to a Photocast with iPhoto 6
- In the invitation e-mail, click the link (Figure 6.19).
Figure 6.19. If you receive a Photocast invitation e-mail, simply click the link to launch iPhoto 6.
iPhoto launches, and a dialog slides down, asking if you want to subscribe (Figure 6.20).
Figure 6.20. Once iPhoto has launched, it asks if you want to subscribe to the Photocast. Click the Subscribe button to do the deed.
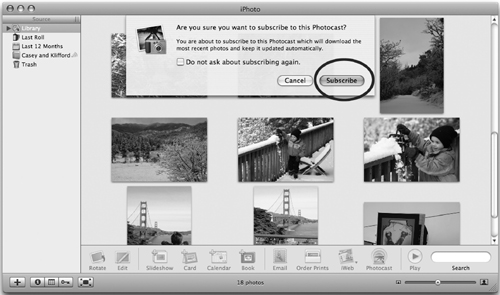
- Click the Subscribe button.
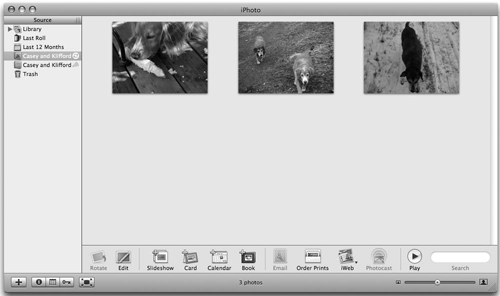
iPhoto creates an album for the Photocast and downloads the images (Figure 6.21).
Figure 6.21. Once you’ve subscribed to the Photocast, it appears as an album in your iPhoto Source list. For the curious, the album appears here twice—the first (with the circle with arrows in it) is the Photocast that’s being published; the second (with the radiating semicircles) is the subscribed Photocast. If someone subscribes to the Photocast, only the second album (and its accompanying icon) will appear.
Tips
• You (and your subscribers) don’t have to use iPhoto or Safari RSS to subscribe to a Photocast. Other RSS applications work fine as well. Simply paste the URL from the invitation into the URL field of your RSS reader and bookmark it.
• To update a Photocast manually, click the sync icon (the circle with two halfcircle arrows) next to its album icon in your iPhoto Source list. If you’ve subscribed to more than one Photocast, you’ll find a single icon that syncs all of them next to the Photocasts folder icon in the Source list.
• Deleting a Photocast is easy: Simply select the Photocasted album in iPhoto, click the Photocast button, and then click the Stop Publishing button in the dialog that slides down. The Photocast will be removed from your .Mac account.
• Don’t worry about memorizing the cumbersome URLs for your Photocasts (or stockpiling copies of the emails you send to announce them). If you need a reminder, highlight an album you’ve photocast in iPhoto’s Source list and click the Information button (the “i” in a blue circle) in the lower-left corner of the iPhoto window. The URL will be displayed, though you probably won’t be able to see all of it; you can stretch the Source window to see it all, or Option-click to copy the URL to the Clipboard.
• Besides sharing pictures with others, Photocasts provide a great way to synchronize iPhoto albums and libraries on two or more of your own Macs: Publish photos you add to one of the Macs as a Photocast and subscribe to it on your other Mac(s). Once the album you’ve subscribed to updates fully, delete it from your iPhoto Source list, but when prompted, choose to copy its contents to your local iPhoto library. Repeat with any other Macs you want to sync with, then you can Stop Publishing from the source Mac.