
Chapter 3. Using iDisk
Network storage of one kind or another has been around for decades. Back in the day, if you wanted to move files to a file server, your computer had to be connected to the same network as that file server. If your computer wasn’t physically linked to that server, you couldn’t connect—and you used the good ol’ sneakernet file transfer.
The Internet changed all that by allowing different kinds of computers running different kinds of operating systems to connect to each other around the world. Thanks to the Internet, you can access files stored online from just about anywhere.
iDisk is a .Mac utility that lets you store your files on servers maintained by Apple. These servers house files for thousands of .Mac subscribers. When one of those subscribers connects to his or her iDisk using a Mac, the iDisk appears on the Desktop as if it were a network volume on a file server sitting in a closet down the hall. Users can treat the iDisk almost as if it were a hard drive connected directly to their Macs. And you don’t have to use a Mac to do it—most Windows PCs can get at an iDisk with little trouble.
In this chapter, I’ll cover how to use your iDisk—how to connect to it, how to copy files to it, and how to use the folders stored on it.
About iDisk
Your .Mac account comes with 1 GB of online storage that you can divide between your iDisk and your .Mac Mail account. When divvying up storage capacity, however, keep in mind that your 1GB of iDisk space also serves as storage for a slew of .Mac services, including Backup, iCal, Sync, .Mac Slides Publisher, Groups, HomePage, iWeb, iPhoto, iMovie, and iCards.
In fact, your iDisk comes populated with several folders, some of which already contain files (Figure 3.1). You’ll find the folder structure familiar—it’s similar to the one in Mac OS X’s home folder. Here’s a look at what each folder is for and what’s in each one (if anything).
Figure 3.1. Your iDisk comes with several folders already on it. Some of these folders are empty, and some contain files (such as software from Apple and files you may have put there through HomePage, iWeb, Backup, or Sync).

• Backup. This folder is used by the Backup software that comes with your .Mac subscription. If you haven’t used Backup, this folder will hold just one file that explains the purpose of the folder. If you have used Backup, the files you’ve chosen to back up will be here. The folder is read-only—that is, you can view the files and download them to your hard disk, but you can’t upload anything into the folder. That’s something only Backup can do.
• Documents. This is a convenient place to hold your various documents if you need to access them online. It’s also a good place to back up important documents (although Backup can take care of this for you).
• Groups. This folder holds the files associated with any groups that you create. (See Chapter 7 for more on .Mac Groups.)
• Library. This folder may or may not exist for you, depending on whether you’ve used an application that uses .Mac. The Library folder isn’t really for your use—rather, it’s a place where applications that work with .Mac can store their own data. You can browse this folder, but since there’s nothing really useful here, it’s probably best to just leave well enough alone.
• Movies. You can store movies you want to share in this folder. Movies in this folder are available to HomePage so that you can easily create Web pages with them. If you create a movie page with iWeb, those movies are located in the Web folder instead. (HomePage is covered in Chapter 4, and Chapter 5 is all about iWeb.)
• Music. You can use the Music folder to store music. If you create a page with music or sound files using iWeb, those files are stored in the Web folder instead.
• Pictures. This folder (as its name implies) is where you store digital photos and other pictures. Pictures in this folder are made available to HomePage for publishing photo galleries and to iCards for sending custom iCards. If you create a page with photos using iWeb, those photos are stored in the Web folder instead.
• Public. The Public folder is meant for sharing files with others. You can put anything in it that you like, and others can download those files at will (depending on how you have your Public folder set up).
• Sites. The Sites folder is where you store Web pages for others to view when they connect to your .Mac Web site. When you use HomePage on .Mac, it creates HTML files and the folders to hold them here as well. If you’ve created a site using iWeb, those site pages are stored in the Sites folder nested in the Web folder.
• Software. The Software folder is divided into two parts: Apple Software and Members Only. The contents of these folders consist of downloadable bits of software, all for your use, and they don’t count toward your iDisk storage limit. The Apple Software folder has software updates and other Apple-made utilities; the Members Only folder contains special downloads for .Mac members, such as games, third-party utilities, and music. You can download from this folder, but you can’t upload to it.
• Web. The Web folder is reserved for iWeb. It contains all of the HTML files, movie files, image, files, and sound files used to create and upload a Web page using iWeb.
Connecting to Your iDisk
If you’re using Mac OS X, there are a few ways of connecting to your iDisk, depending on what version of Mac OS X you’re running. If you’re using Mac OS 9, you’ll need additional software to connect to your iDisk (see the sidebar “When David Met Goliath,” later in this chapter). Your iDisk uses a network protocol called WebDAV, which simply means that it uses some of the same kinds of connections you’d use to load a Web page in a browser. Since WebDAV is a cross-platform protocol, you can connect to your iDisk using a Macs running Mac OS X and Mac OS 9, as well as a Windows machines running Windows XP, Windows 2000, or Windows 98.
Windows XP uses an Apple-created utility to connect to an iDisk; you can download it from your .Mac account. The utility is somewhat similar to Goliath, except that it requires more work to install. Windows 2000, however, has built-in support for connecting to WebDAV-based online storage accounts (much like Mac OS X), and it does not need Goliath to do the job.
To connect to iDisk using Mac OS X v10.3 or later
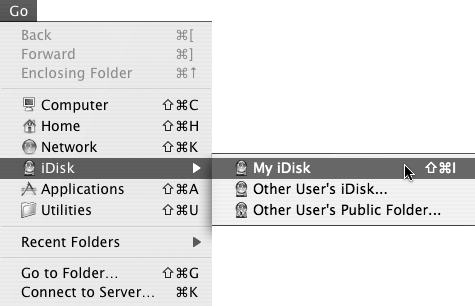
- From the Go menu, choose iDisk > My iDisk (Command-Shift-I) (Figure 3.2).
Figure 3.2. Since iDisk access is built into recent versions of Mac OS X, connecting to your iDisk is as easy as choosing Go > iDisk > My iDisk (Command-Shift-I).
If you’ve already entered your .Mac member name and password in System Preferences, your iDisk mounts automatically on your Desktop. Otherwise, the Connect To iDisk dialog opens, asking for that information (Figure 3.3).
Figure 3.3. To connect to your iDisk (if you haven’t entered your iDisk information in System Preferences), enter your .Mac member name and password, and click Connect.

- Enter your .Mac member name and password, and click Connect.
Your iDisk, which looks like a small globe with your .Mac member name underneath it, mounts on your Desktop, and you can use it like any other volume using a Finder window (Figure 3.4). The connection to your iDisk is maintained until you disconnect it or shut down your computer.
Figure 3.4. Once you’ve connected to your iDisk, you can use it as you would any other network volume. It shows up in the sidebar and on the Desktop, and you can browse it using any view—list, icon, or column.

 Tips
Tips
• You can also click the iDisk icon in the sidebar of a Finder window (Figure 3.4) to connect to your iDisk, if you’ve already entered your .Mac information in System Preferences.
• Connecting to an iDisk with a slow or high-latency Internet link can be very trying. If you’re using dial-up or satellite to get to the Internet, be sure that no one else (and no other application on your Mac) is using the connection before you connect to your iDisk.
• If you’re using a version of Mac OS X earlier than 10.3, you can still connect to your iDisk by choosing Go > iDisk and entering your .Mac member name and password. After you do that, your iDisk will mount on your Desktop.
• Remember—you remain connected to your iDisk until you disconnect or shut down. To disconnect your iDisk, drag its icon to the Trash.
When David Met Goliath
A third-party program called Goliath makes it possible for you to connect to your iDisk using Mac OS 9, which is handy if you haven’t yet upgraded to Mac OS X.
To connect to your iDisk using Mac OS 9:
- Using a Web browser, go to www.webdav.org/goliath and download Goliath, created by Tom Bednarz (Figure 3.5). The software downloads to your hard drive in the form of a compressed file. You’ll find it wherever your browser normally downloads files (often, that’s on the Desktop).
Figure 3.5. The cutely named homepage for Goliath contains links to Mac OS 9 and Mac OS X versions of the Goliath WebDAV application, as well as some valuable WebDAV information.

- Double-click the compressed Goliath file to decompress it using Allume Systems’s StuffIt Expander. Adisk-image file appears on your Desktop, or wherever you normally download files (Figure 3.6).
Figure 3.6. When you decompress Goliath, a simple disk-image file icon appears on your Desktop.

- Mount the disk image by double-clicking it, and then copy Goliath to your Mac’s Applications (Mac OS 9) folder.
- Double-click the Goliath program icon to run Goliath.
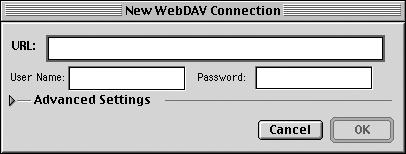
The New WebDAV Connection dialog opens and asks you to enter some WebDAV information (Figure 3.7).
Figure 3.7. You can use this dialog to make a WebDAV connection, but Goliath has a better way to connect to an iDisk.
- Click Cancel—we’ll be taking a different approach to connecting.
The dialog closes.
- From the File menu, choose Open iDisk Connection (Figure 3.8).
Figure 3.8. From Goliath’s File menu, choose Open iDisk Connection to open a connection to your iDisk.

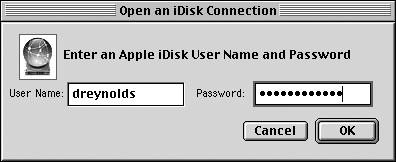
The Open an iDisk Connection dialog opens (Figure 3.9).
Figure 3.9. When you use Goliath to request an iDisk connection, you’ll be asked for your .Mac member name and password.

- Enter your .Mac member name and password (Figure 3.10).
Figure 3.10. Type your .Mac member name in the User Name field and type your password in the Password field. Click OK.
- Click OK.
Your iDisk opens in a new Goliath window that looks significantly like a Finder window (Figure 3.11).
Figure 3.11. Once you’ve made your connection using Goliath, you’re presented with an iDisk window that looks almost exactly like a Finder window.

Besides making it possible for Mac OS 9 machines to connect to an iDisk, Goliath is a slick utility developed to allow Mac OS 9 and Mac OS X users to take advantage of WebDAV online storage accounts in a friendly and Mac-like way. It’s especially good for the following:
• It allows you to connect to other WebDAV-based online storage accounts, so if you have a WebDAV-based account in addition to your iDisk, you can use the same program to access them both.
• It works very well with high-latency connections (such as satellite Internet), so if regular iDisk performance in Mac OS X seems sluggish, try using Goliath as an alternative.
To connect to iDisk using Windows XP
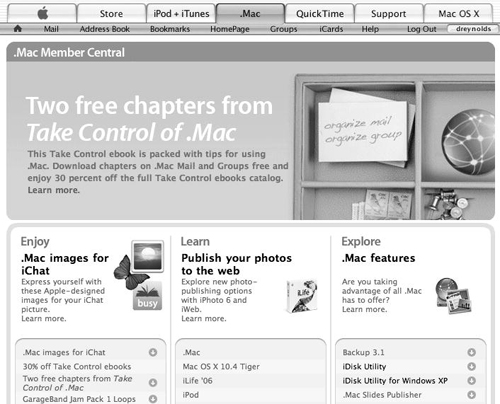
- Using a Web browser, log in to your .Mac account and download iDisk Utility for Windows XP from the Member Centeral page (iDiskUtility_WindowsXP.zip) (Figure 3.12).
Figure 3.12. iDisk Utility for Windows is available for download from the .Mac Member Central page.
The file downloads to your hard drive, but it’s compressed, so you’ll need to decompress it before you can install it.
- Unzip iDisk Utility (Figure 3.13).
Figure 3.13. Once downloaded, iDisk Utility for Windows appears in its compressed form.

The iDisk Utility installer is decompressed, and a folder that contains it appears in the location where you normally download files, ready for installation (Figure 3.14).
Figure 3.14. iDisk Utility for Windows, once uncompressed, resides in its own folder.

- Install iDisk Utility for Windows by double-clicking the iDisk Utility installer icon.
The welcome pane opens.
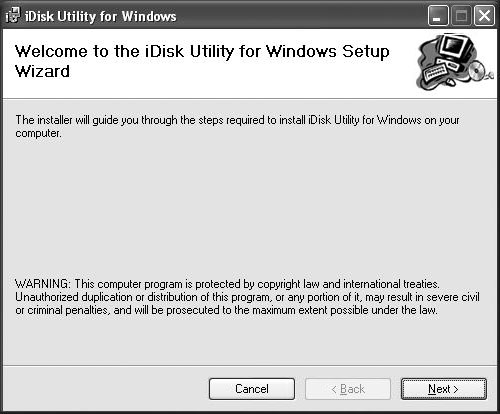
- Read the welcome message and copyright warning, and then click Next (Figure 3.15).
Figure 3.15. The first step when installing iDisk Utility for Windows XP is to read the welcome and copyright warning message.
The license agreement opens.
- After reading the license agreement, click the I Agree radio button and then click Next (Figure 3.16).
Figure 3.16. To proceed with the installation, read the license agreement and click the I Agree radio button.

- If the default installation location is acceptable, click Next (Figure 3.17). The Confirm Installation pane opens.
Figure 3.17. When installing iDisk Utility for Windows, you’re given a default installation location and the option to install it for everyone who uses the computer or just for yourself. The default settings are fine for most people; feel free to change them if you need to.

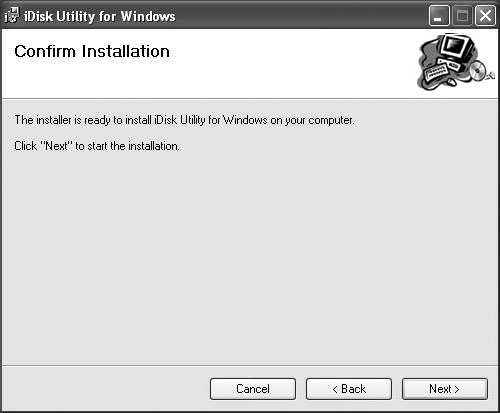
- To begin the installation, click Next (Figure 3.18).
Figure 3.18. Click Next in the Confirm Installation pane to install iDisk Utility for Windows XP.
The Installing iDisk Utility for Windows pane opens, and a progress bar shows the installation of the software. It takes only a short time—less than a minute—and you don’t have to do anything during the process.
- When the Installation Complete pane appears, click the Close button.
iDisk Utility for Windows XP has been installed and is ready to use.
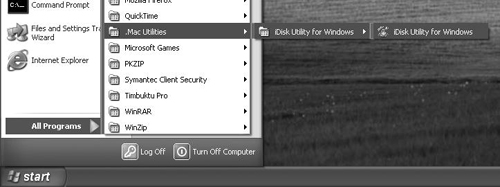
- From the Start menu, choose All Programs > .Mac Utilities > iDisk Utility for Windows > iDisk Utility for Windows (Figure 3.19).
Figure 3.19. Choose Start > All Programs > .Mac Utilities > iDisk Utility for Windows > iDisk Utilty for Windows.
iDisk Utility opens, and the iDisk Utility for XP login dialog opens (Figure 3.20).
Figure 3.20. To connect to an iDisk using iDisk Utility for Windows XP, you’ll need to enter your .Mac member name in the “iDisk account” field, enter your password in the Password field, and choose the drive to which your iDisk gets mounted.
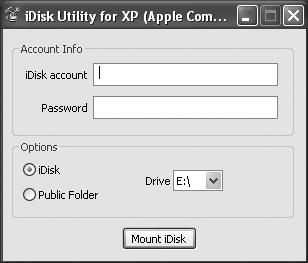
- In the “iDisk account” field, enter your .Mac member name.
- In the Password field, enter your .Mac password.
- Select the iDisk radio button.
- From the Drive pop-up menu, choose a drive to which to mount your iDisk.
- Click the Mount iDisk button.
Your iDisk is mounted as a network drive (Figure 3.21).
Figure 3.21. Once mounted, your iDisk appears like any other network drive in your My Computer window.

Tips
• Windows may give you a warning stating that it can’t identify who created the installer, but this is OK—it’s simply a security measure to keep you from installing any bad software, and if you’ve downloaded the software from Apple’s site, you’re safe. Follow the installer’s instructions.
• The first time you run the utility, Windows will tell you that iDisk Utility will modify something called the Hosts file—part of Windows that looks up servers across the Internet. This is OK.
To connect using Windows 2000
- Double-click the My Computer icon. The My Computer window opens (Figure 3.22).
Figure 3.22. In Windows 2000, you’ll need to open a new window to access the Tools menu. Here, we’ve chosen to do this from the My Computer window, but it can be done from just about any window, such as the My Documents window.

- From the Tools menu, choose Map Network Drive (Figure 3.23).
Figure 3.23. From the Tools menu in Windows 2000, choose Map Network Drive to connect to your iDisk.

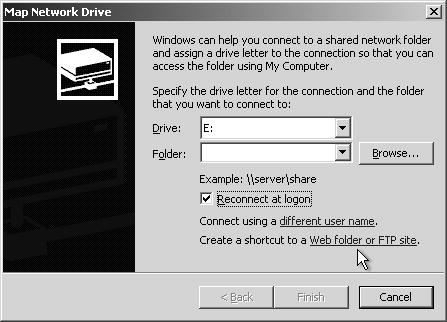
The Map Network Drive dialog opens.
- At the bottom of the dialog, click “Create a shortcut to a Web folder or FTP site” (Figure 3.24).
Figure 3.24. Near the bottom of the Map Network Drive dialog, click “Create a shortcut to a Web folder or FTP site.”
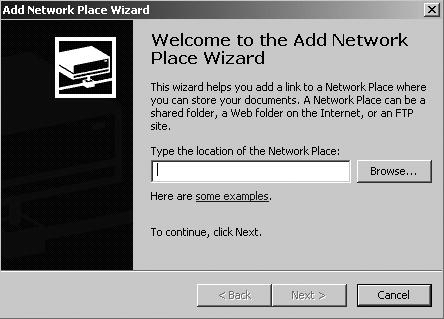
The Add Network Place Wizard dialog opens (Figure 3.25).
Figure 3.25. In the opening pane of the Add Network Place Wizard, type your iDisk URL (which looks like http://idisk.mac.com/membername, replacing membername with your .Mac member name).
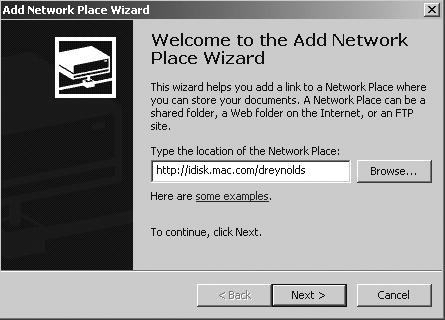
- In the field labeled “Type the location of the Network Place,” type
http://idisk.mac.com/membername(replacingmembernamewith your .Mac member name), and click Next (Figure 3.26).Figure 3.26. This is what a properly formed iDisk URL should look like. This one, of course, is the one I use to connect to my iDisk, so it won’t work so well for you.
The Enter Network Password dialog opens.
- In the “User name” and Password fields, enter your .Mac member name and password, and click OK (Figure 3.27).
Figure 3.27. To set up the connection to your iDisk, you need to provide your .Mac member name and password in the “User name” and Password fields, respectively.

The Add Network Place Wizard dialog opens, asking you to name your new Network Place—Windows fills this in for you.
- If you don’t like the Network Place name that Windows provided, type a new name for your Network Place (such as My iDisk), and click Finish (Figure 3.28).
Figure 3.28. The final thing you need to do when creating your iDisk connection is to give it a name. This is the name that will appear under the icon in your My Network Places folder.

Your iDisk opens in a new window (Figure 3.29).
Figure 3.29. When you open your iDisk in Windows, it looks very much like any other storage device, complete with files and folders.

Tips
• You can use the same steps to connect to someone else’s iDisk, provided you know his or her member name and password.
• To access your iDisk later, open My Network Places from the Windows desktop, and your saved iDisk location will appear in a new window. Double-click it to open your iDisk.
Moving Files
After you’ve mounted your iDisk, copying files to it is a breeze. Your iDisk acts like any other disk, so saving files to it and removing files from it is as easy as dragging and dropping. But since you’re connected to your iDisk via a network, copying files is likely to be slower than if you were copying them to another hard drive (unless you happen to have a mighty fat, super-low-latency pipe at your home or business).
To copy a file to your iDisk
- Mount your iDisk.
The iDisk is now available for file transfers (Figure 3.30).
Figure 3.30. Your iDisk, when mounted, looks and behaves like any other storage device.

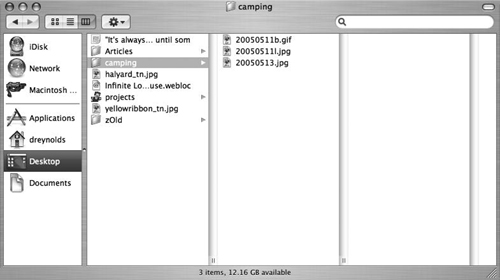
- Open a new window, navigate to the files that you want to copy to your iDisk, and select them (Figure 3.31).
Figure 3.31. You can copy files to your iDisk from just about any volume—hard drive, CD, or FireWire hard drive. In this case, we’re copying files from a camping-pictures folder on a Mac’s hard drive, although the mechanism is the same for any medium.
- Drag the selected files to the appropriate folder on your iDisk.
The selected items are copied to your iDisk.
To remove a file from your iDisk
- Mount your iDisk (see Figure 3.30).
The iDisk is now available for file transfers.
- Open the folder containing the files that you want to delete from your iDisk, and select them (Figure 3.32).
Figure 3.32. To delete files and folders from your iDisk, first find and select them.
- Do one of the following:
• Drag the selected files to the Trash (Figure 3.33).
Figure 3.33. To delete a file from your iDisk, drag it to the Trash.

• From the Finder’s File menu, choose Move to Trash (or press Command-Delete) (Figure 3.34).
Figure 3.34. You can also select Move to Trash from the Finder’s File menu to delete a file.

A dialog pops up noting that the items will be deleted immediately (Figure 3.35).
Figure 3.35. When you delete items from your iDisk, a dialog opens, asking for confirmation. Click OK.

- Click OK.
The files are removed from your iDisk.
Connecting to Your iDisk with a Browser
Thanks to a .Mac update from January 2006, you can access and download files from your iDisk using nothing but a Web browser and your childlike charm. This is a great alternative for the times when you don’t want to mount your iDisk as a network volume. Web browsers are easy to come by, and you might not want to mount the iDisk in Mac OS X or bother with downloading iDisk software for Windows.
To connect to your iDisk with a Web browser, you’ll need to use Safari 2.0.2 or later or Firefox 1.0.4 or later (on a Mac), or Internet Explorer 6 or later or Firefox 1.0.4 or later (on Windows).
To connect to iDisk using a Web browser
- Using a Web browser, go to www.mac.com.
The main .Mac page loads (Figure 3.36).
Figure 3.36. The main .Mac page prior to when you log in gives all kinds of basic information about .Mac.

- Click the Log In button in the upper right corner of the page.
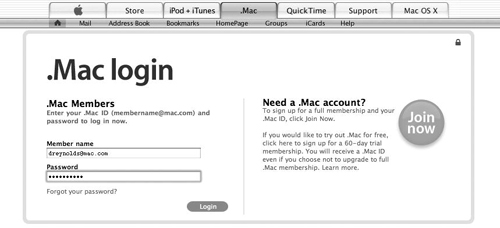
The .Mac login page loads (Figure 3.37).
Figure 3.37. Type your member name and password in the .Mac login page, and then click Login.
- In the “Member name” and Password fields, type your .Mac member name and password, and then click the Login button. The main .Mac page reloads, only this time you’re logged in (Figure 3.38).
Figure 3.38. Once you’ve logged in to .Mac, the main .Mac page loads, chock full of useful information.
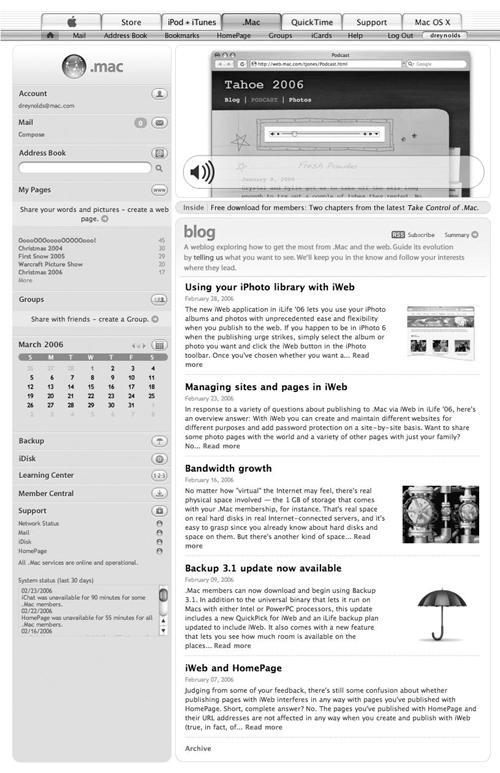
- On the left side of the page, click the iDisk link (about halfway down) (Figure 3.39).
Figure 3.39. Click the iDisk link on the left side of the page to view your iDisk contents in a browser window.

Alogin sheet slides down asking for your member name and password again (Figure 3.40).
Figure 3.40. Sometimes—but not always—you will be asked to enter your member name and password again before your iDisk loads in the browser window. (If you’ve just logged into your iDisk, you won’t be asked to verify again.)
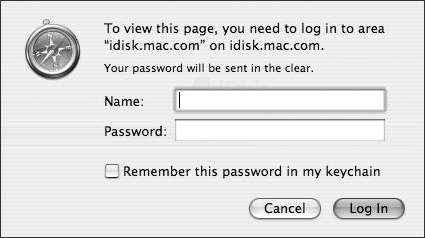
- Enter your .Mac member name and password in the Name and Password fields, and then click Log In (if asked).
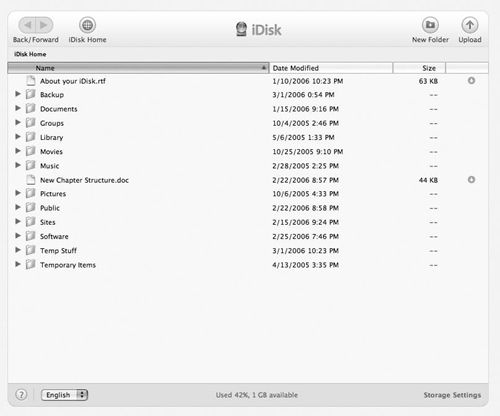
Your iDisk page loads, showing all of the files and folders there (Figure 3.41).
Figure 3.41. This Web page looks and works a lot like a Finder window in list mode, and it lists the contents of your iDisk.
Tip
• You can view and change your .Mac storage settings at any time by clicking the Storage Settings link in the bottom-right corner of the page.
To list a folder’s contents on your iDisk using a Web browser
- Follow steps 1–5 from “To connect to iDisk using a Web browser.”
Your iDisk page loads, showing all of the files and folders there (see Figure 3.41). This view of your iDisk works like a Finder window in list view, complete with disclosure triangles to the left of folders.
- Click the disclosure triangle to the left of the folder you want to open.
The contents of that folder are listed below it (Figure 3.42).
Figure 3.42. A clicked disclosure triangle turns point-downward when its folder’s contents are listed; in this case, the contents are just one file.

- Click the triangle again.
The folder returns to its closed state.
Tips
• To return to the root level of your iDisk, click the iDisk Home button at the top of the window.
• You can always see where you are on your iDisk by glancing at the path that appears below the Back/Forward buttons at the top of the page.
To open a folder on your iDisk using a Web browser
- Follow steps 1–5 from “To connect to iDisk using a Web browser.”
Your iDisk page loads, showing all of the files and folders there (see Figure 3.41). This view of your iDisk works like a Finder window in list view.
- Double-click the folder you want to open. The window reloads, listing the folder’s contents (Figure 3.43).
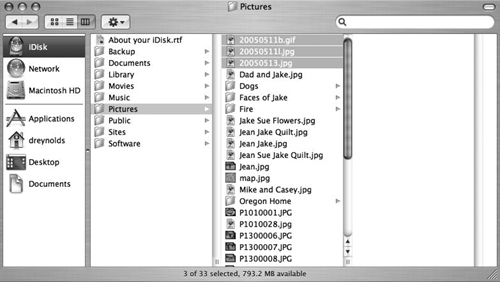
Figure 3.43. After you double-click a folder icon, the contents of that folder are listed in the window—in this case, the contents of the Pictures folder.

- Click the Back button at the top of the page (Figure 3.44).
Figure 3.44. When clicked, the Back button at the top of the page takes you back to the folder you previously opened.

The window reloads and the original folder’s contents are listed—you’ve just moved back up one level on your iDisk (see Figure 3.44).
To create a folder on your iDisk using a Web browser
- Follow steps 1–5 from “To connect to iDisk using a Web browser.”
Your iDisk page loads, showing all of the files and folders there (see Figure 3.41). This view of your iDisk works like a Finder window in list view.
- Navigate to the location on your iDisk where you want to create the folder (see “To open a folder on your iDisk using a Web browser”) (Figure 3.45).
Figure 3.45. The folder that’s currently displayed is where new folders will appear.

The window loads with the location where you’ll be creating a folder.
- Click the New Folder button in the upper right corner of the page (Figure 3.46).
Figure 3.46. Click the New Folder button in the upper-right corner to create a new folder on your iDisk.

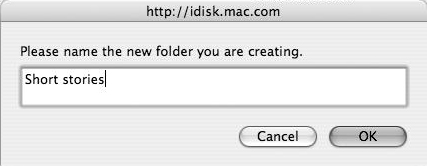
A dialog opens, asking for the name of the new folder (Figure 3.47).
Figure 3.47. Type the name of the folder you’re creating in the dialog that appears.

- Type the folder’s name and click the OK button (Figure 3.48).
Figure 3.48. Type the name of the folder and click OK.
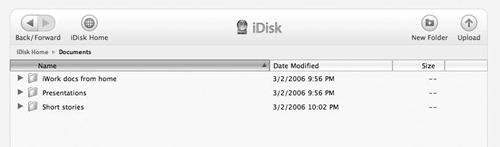
The new folder appears in your iDisk file and folder list (Figure 3.49).
Figure 3.49. The iDisk page reloads, and the new folder appears in the list.
To upload a file to your iDisk using a Web browser
- Follow steps 1–5 from “To connect to iDisk using a Web browser.”
Your iDisk page loads, showing all of the files and folders there (see Figure 3.41). This view of your iDisk works like a Finder window in list view.
- Navigate to the location on your iDisk where you want to upload the file (see “To open a folder on your iDisk using a Web browser”) (Figure 3.50).
Figure 3.50. Uploaded files will be stored in the folder that’s currently listed in the browser window.

The window loads with the location where you’ll be uploading the file.
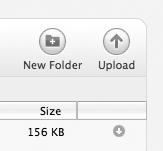
- Click the Upload button in the upper right corner of the page (Figure 3.51).
Figure 3.51. Click the Upload button to begin the process of copying a file to your iDisk.
A dialog opens with the message, “Select a file to upload” (Figure 3.52).
Figure 3.52. After you click Upload, the “Select a file to upload” dialog appears in your iDisk window. Click Choose File to proceed.

- Click the Choose File button.
A file-selection dialog appears (Figure 3.53).
Figure 3.53. Navigate to the folder that contains the file you want to upload.
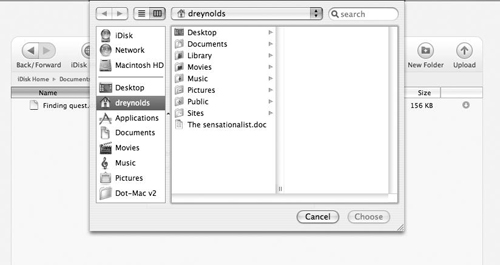
- In the file-selection dialog, navigate to the file you want to upload and click Choose (Figure 3.54).
Figure 3.54. Select the file you want to upload, and click Choose.

The filename appears to the right of the Choose File button (Figure 3.55).
Figure 3.55. Once you’ve selected the file to upload, its name appears in the “Select a file to upload” dialog. Click Upload to copy it to your iDisk.

- Click the Upload button.
The file is uploaded to your iDisk, and the window reloads, showing the file in the list (Figure 3.56)
Figure 3.56. Once uploaded, the file appears in the file list.

To download a file from your iDisk using a Web browser
- Follow steps 1–5 from “To connect to iDisk using a Web browser.”
Your iDisk page loads, showing all of the files and folders there (see Figure 3.41). This view of your iDisk works like a Finder window in list view.
- Navigate to the file you want to download (see “To open a folder on your iDisk using a Web browser”).
The window loads, listing the file to be downloaded (Figure 3.57).
Figure 3.57. You can download files (but not folders) from the currently loaded iDisk folder.

- Click the download arrow to the right of the file size (Figure 3.58).
Figure 3.58. Click the download arrow to the right of the file’s size to download the file.

The file downloads to your computer’s disk in the location where files are normally downloaded (Figure 3.59).
Figure 3.59. The downloaded file appears in the folder where files normally appear when downloaded.

Tip
• When this method is used to download a file that a Web browser can open (such as a JPEG image or HTML file), the file will load in a new browser window instead of downloading to your disk. To actually download the file once it’s loaded in the new window, use any method you would normally use to download a file in a window—drag an image to your desktop, or save a movie or sound file using the control in the QuickTime movie player bar.
Using the Public Folder
Using your iDisk’s Public folder, you can share files and folders with just about anyone who has Internet access. This Public folder is a special folder on your iDisk that others can connect to without having to use your login and password. The settings for controlling it are built into Mac OS X.
Using your System Preferences, you can set access to the Public folder to allow people to see and download files from it, but not upload to it, or to both upload and download files from it. Setting your Public folder to allow people only to download items from it, however, protects you from having someone upload objectionable material or fill up the folder with stuff you don’t want or need.
You upload files to this folder as you would any folder on your iDisk. The folder is special, however, in that items inside it can easily be downloaded by anyone who has access to your .Mac member name. If you’re sensitive about who can access your iDisk’s Public folder, you can give it a password so that only those who know the password can access it.
To set access to your public folder
- From the Apple menu, choose System Preferences.
The System Preferences window opens.
- In the Internet & Network section, click the .Mac icon (Figure 3.60).
Figure 3.60. Some of your .Mac preferences are built into Mac OS X, and you can click the .Mac icon in the main System Preferences window to access them.

The .Mac preference pane opens (Figure 3.61).
Figure 3.61. The .Mac preference pane defaults to the Account pane, which contains your .Mac member name and password, and it tells you how long you have until you need to resubscribe.

- Click the iDisk tab.
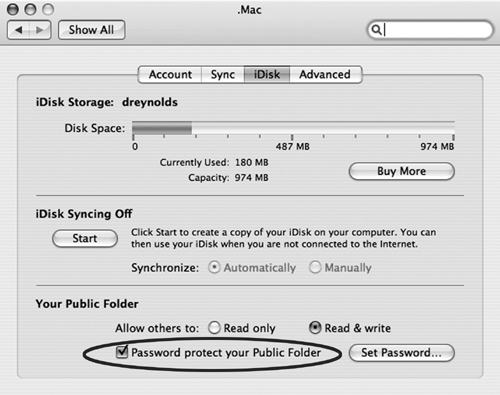
The iDisk preference pane opens (Figure 3.62).
Figure 3.62. The iDisk preference pane contains good at-a-glance information about your iDisk, including how much storage you have (and have used), whether you have iDisk synchronization turned on, whether you allow others to upload items to your Public folder, and whether that folder is password protected.

- In the Your Public Folder section, do one of the following:
• To allow users to see and download files from your Public folder but not upload to it, choose the “Read only” radio button.
• To allow users to upload and download files to and from your Public folder, choose the “Read & write” radio button.
Your Public folder is ready to be used by others according to the access privileges you’ve just set.
To password-protect your Public folder
- Follow Steps 1-3 under “To set access to your Public folder.”
- In the Your Public folder section, check the “Password protect your Public Folder” box (Figure 3.63).
Figure 3.63. Check this box to require guests to enter a password before accessing your Public folder.
A dialog slides down, asking for password information (Figure 3.64).
Figure 3.64. Set and confirm a password for your Public folder.
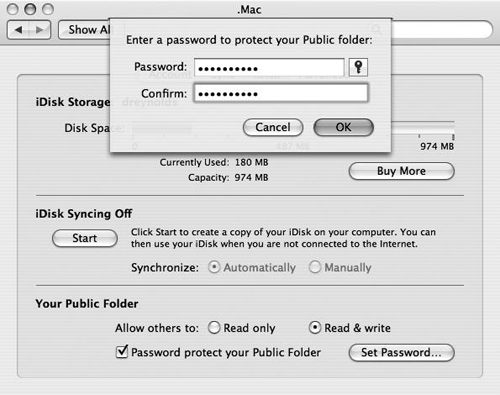
- In the Password field, type the password you want to use for your Public folder.
The text of the password will not appear, but you will see a bullet for each character you type.
- In the Confirm field, type the password a second time. This ensures that you spelled the password properly.
- Click OK.
Your Public folder is password-protected, and you are returned to the iDisk preference pane.
Tips
• Your Public folder password and your .Mac account password cannot be the same. If you need to change your Public folder password, click the Set Password button in the lower right area of the iDisk preference pane.
• Don’t give others your .Mac password—this is different from your Public folder password.
To connect to someone else’s Public folder using Mac OS X v10.3 or later
- From the Go menu, choose iDisk > Other User’s Public Folder (Figure 3.65).
Figure 3.65. To connect to someone else’s Public folder, choose Go > iDisk > Other User’s Public Folder.

The Connect To iDisk Public Folder dialog opens.
- In the “Member name” field, enter the .Mac member name for the Public folder to which you’re connecting (Figure 3.66).
Figure 3.66. Enter the member name of the Public folder to which you want to connect in the Connect To iDisk Public Folder dialog.

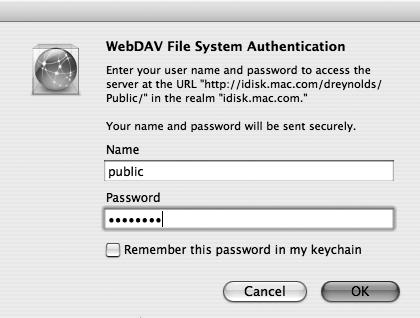
- If prompted for a password, enter one (Figure 3.67).
Figure 3.67. iDisk shows its WebDAV roots when you connect to a password-protected iDisk. Here, enter the password for the Public folder to which you want to connect (the name “public” is already filled in for you).
The Public folder is mounted on your Desktop, and you can upload and download files to and from it.
To connect to someone else’s Public folder using Windows XP
- Download and install iDisk Utility for Windows as described in steps 1–10 in “To connect to iDisk using Windows XP,” earlier in this chapter.
The iDisk Utility for XP dialog opens (Figure 3.68).
Figure 3.68. iDisk Utility for Windows XP lets you connect to Public folders as well as iDisks.

- Choose the Public Folder radio button.
- In the “iDisk account” field, enter the member name for the Public folder you want to use (Figure 3.69).
Figure 3.69. Choose the Public Folder radio button, and in the “iDisk account” field type the .Mac member name for the Public folder to which you want to connect.

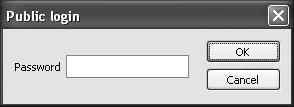
If the Public folder has a password, a dialog opens asking you to enter it (Figure 3.70). If it doesn’t, the iDisk mounts, and a message appears, letting you know that the iDisk has been mounted successfully.
Figure 3.70. The “Public login” dialog opens if the Public folder has a password.
To connect to someone else’s Public folder using Windows 2000
- Double-click the My Computer icon.
The My Computer window opens.
- From the Tools menu, choose Map Network Drive (Figure 3.71).
Figure 3.71. To begin creating a connection to a .Mac Public folder in Windows 2000, choose Map Network Drive from the Tools menu.

The Map Network Drive dialog opens.
- At the bottom of the dialog, click “Create a shortcut to a Web folder or FTP site” (Figure 3.72).
Figure 3.72. Click “Create a shortcut to a Web folder or FTP site,” which will take you to a dialog where you can type in the URL for the Public folder.

The Add Network Place Wizard dialog opens.
- In the field marked “Type the location of the Network Place,” type
http://idisk.mac.com/membername-Public?(replacingmembernamewith the .Mac member name for the Public folder you’re accessing) (Figure 3.73).Figure 3.73. To connect to a Public folder using Windows 2000, you have to type the URL of the Public folder, and then follow that with
-Public?. The URL for my Public folder is shown here as an example.
- Click Next.
If the Public folder has a password set, the Enter Network Password dialog opens.
- In the “User name” field, enter
public(Figure 3.74).Figure 3.74. Once you’ve entered a location for the Public folder, you’ll be asked for the password—if one is required.

- In the Password field, enter the password for that Public folder.
- Click OK.
The Add Network Place Wizard dialog opens, asking you to name your new Network Place.
- In the Network Place name field, type a name for your Network Place (such as Bill’s Public Folder) (Figure 3.75).
Figure 3.75. When completing the Public folder setup, you’ll be asked to name the connection. A suggested name is already entered for you—often, that’s descriptive enough for most purposes and you can just click Finish.
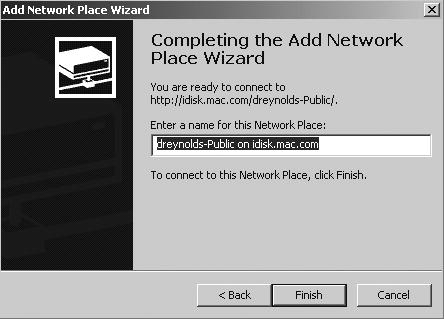
- Click Finish.
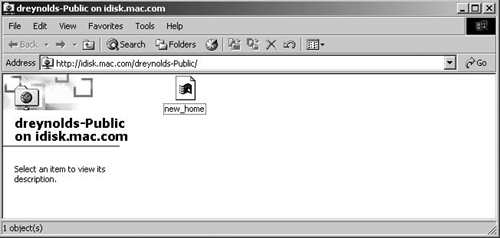
The iDisk public folder opens in a new window (Figure 3.76).
Figure 3.76. Once you’ve finished your Public folder’s connection setup, a new window opens, displaying its contents.
Tips
• Having trouble connecting? Make sure the Public folder that you’re connecting to has its permissions set properly, or you (or others) may not be able to connect—or will not be able to upload files, at least.
• A Network Place is a Windows term for a network bookmark—a quick way of connecting to a network service, such as an often-used file server.
About Storage Capacity
Through a built-in control panel, Mac OS X provides an at-a-glance measure of how much space you’ve used on your iDisk—and how much is available for you to store movies, pictures, Web pages, and other files.
Your .Mac account comes with 1 GB of online storage space, and both your iDisk and .Mac Mail count toward that 1 GB limit. By default, this storage is divided between your iDisk and your e-mail account at 512 MB each, but you have control over how that space is allocated. If you find that either your iDisk or your e-mail account needs more space, you are free to change their storage allotments.
If you’re running up against the 1 GB limit, and both your iDisk and e-mail accounts are full, you have two choices: reduce the amount of data you have stored on your .Mac account, or buy more capacity. While conservation is laudable (even storage-space conservation), sometimes the only remedy for cramped quarters is to add some room. You can increase your .Mac storage capacity to 2 GB for $49.95 per year, or 4 GB for $99.95 per year.
To check iDisk usage
- From the Apple menu, choose System Preferences.
The System Preferences window opens.
- In the Internet & Network section, click the .Mac icon.
The .Mac preference pane opens.
- Click the iDisk tab.
The iDisk preference pane opens. At the top, it displays a gauge that indicates how much iDisk space you’ve used and how much you have available (Figure 3.77). It also attaches numbers to these levels in the form of megabytes currently used and total capacity of your iDisk.
Figure 3.77. The iDisk preference pane is a handy way to see at a glance how much storage you’ve used.

Tip
• You can quickly get to the Web page to buy more iDisk storage space by clicking the Buy More button in the iDisk preference pane.
To reallocate .Mac storage
- Go to www.mac.com and log in to your .Mac account (Figure 3.78).
Figure 3.78. To make changes to your iDisk allocation, you must first log in to .Mac using a Web browser. Type your .Mac member name and password in the respective fields.

- In the upper left corner of the page, click the Account link (Figure 3.79).
Figure 3.79. Click the Account link to access your .Mac Account Settings page.

The Account Settings page opens (Figure 3.80).
Figure 3.80. Your main .Mac Account Settings page contains entry points to let you change personal information, credit card information, and password settings, and to manage accounts. It also lets you change your iDisk storage allocation.

- Click the Storage Settings button.
The Storage Settings page opens.
- From the .Mac Mail pop-up menu, choose the amount of storage you want to devote to e-mail (Figure 3.81).
Figure 3.81. You can allocate new amounts by selecting them from the .Mac Mail pop-up menu. You can also adjust how storage is allocated for any groups that you have created.
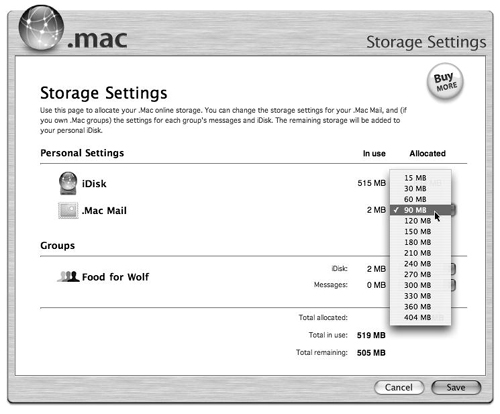
The amount allocated to your iDisk will adjust itself according to what you select for your mail to make up the total amount of storage you have available.
- Click Save.
Your e-mail and iDisk storage allotments automatically reflect the adjusted settings.
Tips
• Any groups that you’ve created are assigned a default of 30MB of storage from your iDisk storage pool, split between iDisk and messages. You can adjust this amount by choosing a new amount from the popup menu.
• The Storage Settings page shows you at a glance how much mail and iDisk storage is being used.
• The e-mail allocation can never be smaller than 15 MB, and the iDisk allocation can never be smaller than 55 MB.
Creating a Local iDisk Copy
You can set your Mac OS X preferences to make a local copy of your iDisk. This local iDisk is there even if your network is not (such as when you’re traveling with your laptop), and it lets you browse the contents of your iDisk very quickly. A local copy of your iDisk takes up space on your hard drive (roughly the same amount as the size of your iDisk), but these days, when 40 GB–plus hard drives occupy the low end of standard equipment, you won’t even miss the capacity that a full iDisk copy would take.
If you keep a local copy of your iDisk on your hard drive, you can synchronize it with your “real” iDisk via your Internet connection. To do this, you’ll choose from two options: automatic and manual.
To set up your local iDisk in Mac OS X v10.4
- From the Apple menu, choose System Preferences.
The System Preferences window opens.
- In the Internet & Network section, click the .Mac icon.
The .Mac preference pane opens.
- Click the iDisk tab.
The iDisk preference pane opens.
- In the iDisk Syncing section, click Start (Figure 3.82).
Figure 3.82. Click Start to turn on iDisk synchronization. This creates a local copy of your iDisk, which you can work with even when you’re not connected to the Internet.

Alocal copy of your iDisk is created on your Desktop, and Mac OS X attempts to synchronize the local copy with your online copy by copying files from the remote iDisk to the local iDisk (Figure 3.83).
Figure 3.83. The local copy of your iDisk sits on your Desktop, just like other volumes.

- Do one of the following (Figure 3.84):
• To set Mac OS X to periodically synchronize your iDisk copy—uploading files you’ve added, deleting ones you’ve trashed, or moving ones that you’ve moved—choose the Synchronize: Automatically radio button.
• To set Mac OS X so that it will synchronize your iDisk copy only when you tell it to do so, choose the Synchronize: Manually radio button.
Figure 3.84. When setting up a local copy of your iDisk, you’ll need to choose whether or not your iDisk is synchronized automatically.

- Close System Preferences.
Your synchronization process is complete, and your local iDisk copy is ready for use. When the disk is synchronized, newly added items will be uploaded to your Web-based iDisk. The same goes for deleted and moved items—changes are made on your Web-based iDisk when synchronization takes place.
Tip
• To manually synchronize your iDisk, click the circular arrow button to the right of the iDisk icon in the sidebar of any Finder window.
• Change whether your local iDisk is synchronized automatically or manually at any time by opening the iDisk preferences and clicking the appropriate radio button.
• Setting up a local iDisk in Mac OS X v10.3 is almost the same as setting it up in Mac OS X v10.4, except that instead of starting iDisk Syncing, you simply check a box for “Create a local copy of your iDisk.”