Chapter 12. Using Backup
One of the many perks of having a .Mac account is that you get a copy of Apple’s filebackup program—named, appropriately, Backup. With it, you can set up your system to automatically copy important files to your iDisk, to a network volume or another hard drive, or even burn them to CD or DVD.
The information on your computer—all of your e-mail messages, letters, digital photos, everything—is there because incredibly complex electronic devices and equally complex software keep everything in order. But, inevitably, something happens to one of those systems, and precious data evaporates. It happened to me personally. Twice.
Backup offers hope. Properly used, it’s a great way to ensure that you don’t lose any valuable data. Once you’ve set up a backup scheme, Backup copies the latest versions of all your files, so that if something happens to your “working” copy, you can easily restore it from the backup copy. In this chapter, I’ll show you how to set up Backup to protect your data.
And for those of you using Backup 3, a little note—although there’s a lot of Backup 2 instructions here, don’t lose heart. Although Backup 3 is more powerful to use, it’s also easier to use, and so it requires less in the way of step-by-step instructions.
Installing Backup
Backup comes in two flavors: version 3 (or 3.1 at this writing), for Mac OS X 10.3.9 and 10.4.2 or later; and version 2 (technically 2.0.2), for Mac OS X 10.2.6. If your Mac starts up using an older version of Mac OS X or Mac OS 9, you are out of luck on this one; but if you run Mac OS 9 software in Classic mode under Mac OS X 10.2 or later, you can use Backup to safeguard the files those programs create.
To use Backup, you need a .Mac account member name and password—from a paid .Mac subscription, a trial account, or an expired account (including an expired trial account). As you might expect, Backup’s features are somewhat limited for non-paid accounts: When Backup 3 is used with such an account, it cannot back up a file or folder that exceeds 100 MB in size (while there’s no size limit for paid subscriptions). When Backup 2 is used with a trial subscription or expired account, the only location where it can place backed-up files is your iDisk; backing up to hard disks and recordable CDs or DVDs requires a paid subscription. Be sure your .Mac member name and password are entered in the .Mac section of System Preferences.
Backup’s user interface is pretty basic—it asks where you want your backup files stored and shows you how much space is available there. It also lets you select what groups of files to back up, as well as add items, refresh your list, schedule backups, and eject the volume to which you’re backing up all your files.
But first you must download and install the Backup software.
To download and install Backup 3
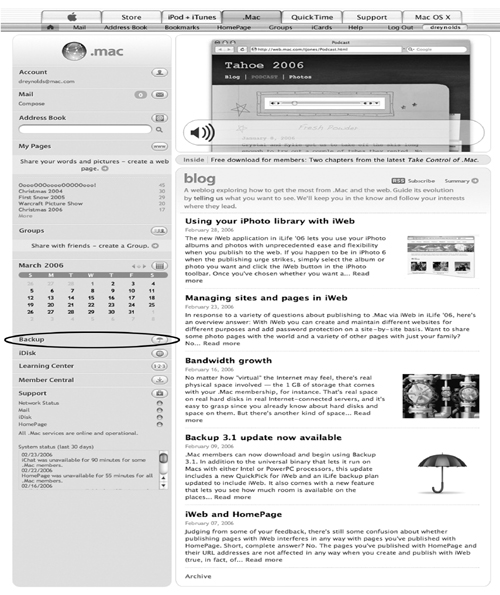
- Using a Web browser, log in to your .Mac account (Figure 12.1).
Figure 12.1. Before you can download the Backup software, you’ll need to log in to your .Mac account by entering your .Mac member name and password.

The main .Mac Web page loads.
- On the left side of the page, click Backup (Figure 12.2).
Figure 12.2. Click the Backup link from the main page to go to the Backup download and information page.
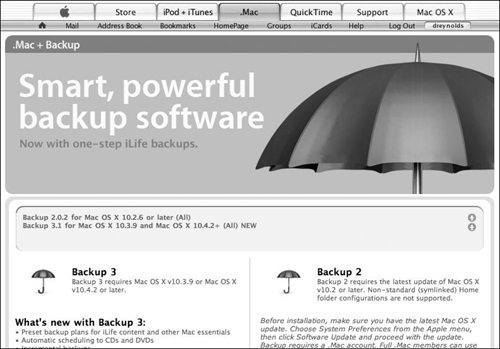
The Backup 3 page loads.
- In the main banner of the page (toward the left), click “Download Backup 3 now” (Figure 12.3).
Figure 12.3. The Backup page contains links to download the Backup software, as well as links to pages that provide in-depth information on the program.

The main Backup download page loads. Here, you’re presented with a choice of which version of Backup to download—2.0.2 or 3.1.
- If you’re using Mac OS X 10.2.6, click the link to download Backup 2.0.2. If you’re using either Mac OS X 10.3.9 or version 10.4.2 or later, click the link to download Backup 3 (Figure 12.4).
Figure 12.4. The Backup download page has download links for two versions of Backup: Backup 2 and Backup 3. Click the download link for the version appropriate to your operating system.
Backup is downloaded to your hard drive in the location to which you normally download files.
- Once the disk-image file downloads to your hard drive, mount it by double-clicking it (if it’s not automatically mounted).
The disk image mounts (Figure 12.5).
Figure 12.5. The Backup disk image contains the installer package for Backup. Double-click its icon to launch the installer.
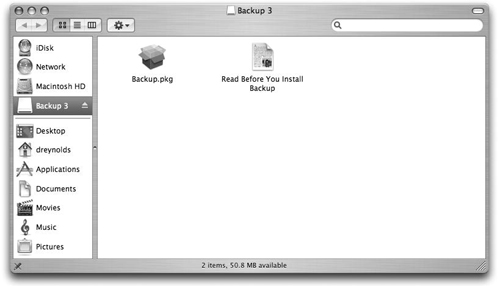
- Open the Backup disk image, and then double-click the Backup.pkg icon to launch the Backup installer.
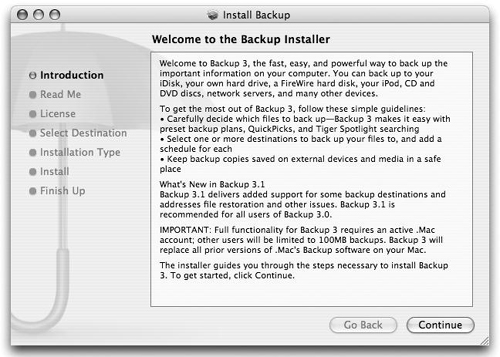
The Welcome pane appears (Figure 12.6).
Figure 12.6. The Backup installer’s Welcome pane gives you an overview of Backup. Click Continue to move on to the next step.
- Click Continue.
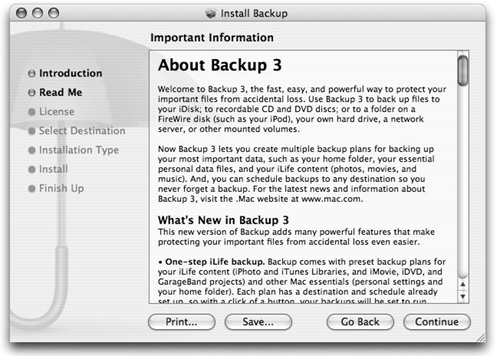
The Important Information pane opens; it contains valuable information about installing and using Backup (Figure 12.7).
Figure 12.7. The Important Information pane contains valuable information about how to install and use Backup. Read it and click Continue.
- Click Continue.
The Backup Software License Agreement pane opens (Figure 12.8).
Figure 12.8. The Backup Software License Agreement is a legal document—it’s worth reading this to see what you’re agreeing to. Click Continue to move on.

- Click Continue.
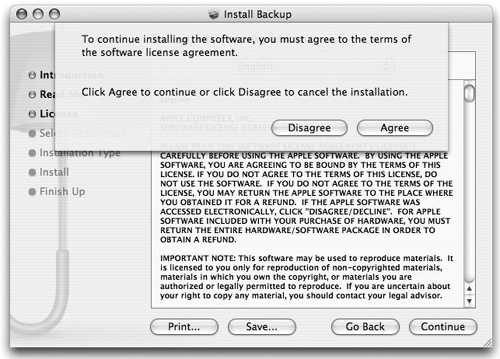
A dialog slides down, noting that in order to continue to install Backup, you must agree to the terms of the license agreement (Figure 12.9).
Figure 12.9. To continue with the installation, you must click the Agree button in the Software License Agreement pane.
- Click Agree.
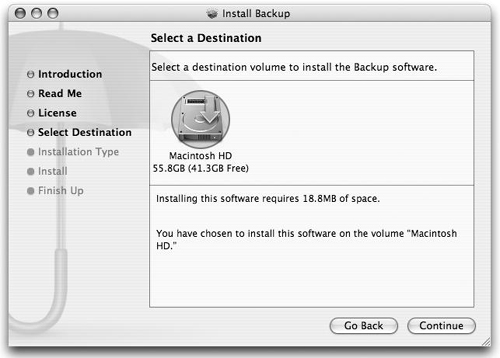
The Select a Destination pane opens; it lists all available locations where you can install Backup (Figure 12.10).
Figure 12.10. The Select a Destination pane lists all valid locations for a Backup installation. Select the one you want (usually your main hard drive) and click Continue.
- Select a destination volume and click Continue.
The Installation Type pane loads (Figure 12.11).
Figure 12.11. In the Installation Type pane, there isn’t much to do, since Backup doesn’t have any installation options. Click Install.

- Click Install.
The Authenticate dialog opens (Figure 12.12).
Figure 12.12. Before you can install Backup, you must type in your administrator password and click OK.

- Type your system password and click OK.
The installer installs Backup in the Applications folder of your hard drive and does some other housekeeping. When it’s finished, a message appears, noting that Backup has finished installing.
- Click Close (Figure 12.13).
Figure 12.13. Click the Close button to complete the installation of Backup.

Backup is now installed in your Applications folder.
 Tip
Tip
• Backup is fussier than most applications about requiring the latest, greatest update of whichever version of Mac OS X it runs under. If you’re using Backup 2 with Mac OS X 10.2 Jaguar, you must update to version 10.2.6, and if you’re using Backup 3 with Mac OS X 10.3 Panther, you must upgrade to 10.3.9. At this writing, the latest version of Backup 3 (3.1) supports versions of Mac OS X 10.4 Tiger from 10.4.2 on, but for best results with Backup in the future, keep it and your system software up to date, using the Software Update utility found in the Apple menu.
Setting Up Backup 3
Backup 3 makes it easy to set up and run multiple backups to your iDisk, to optical media, or to another hard drive.
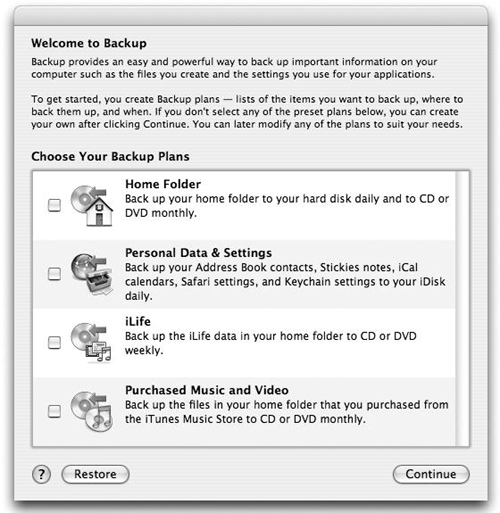
When you first open Backup 3, it presents you with a window that lists four Backup plans (Figure 12.14):
• Home Folder—Schedules daily backup of your home folder to your hard drive, as well as monthly backup to CD or DVD
• Personal Data & Settings—Backs up basic personal information (such as Address Book contacts and Safari settings) every day
• iLife—Backs up your iLife data every week to CD or DVD
• Purchased Music and Video—Backs up music and video that you’ve purchased using iTunes to a CD or DVD every month
Figure 12.14. The first time you run Backup, you’ll be asked to select one of four prebuilt Backup plans.
While you don’t have to choose one of these Backup plans, it’s probably a good idea to go with one—or with all of them.
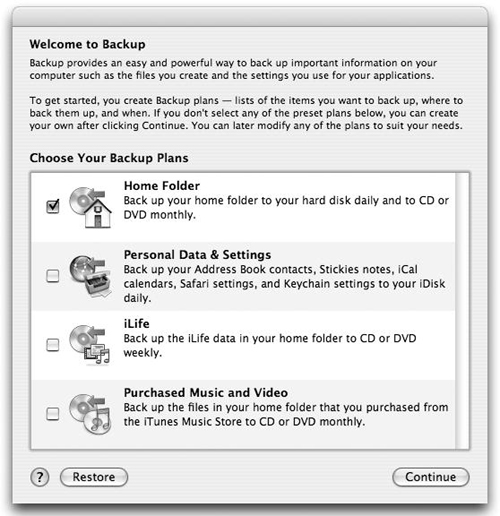
Check the box next to the plan you want to choose. A great place to start is with the Home Folder plan (Figure 12.15). Click Continue.
Figure 12.15. The Home Folder plan backs up the files in your home folder, covering most of your backup needs in one swoop.
The main Backup window opens, listing details for the plan you just created, as well as information about when the plan has run and when it’s scheduled to run again.
Tips
• A Backup plan is simply a description of what files and folders get backed up, where they get backed up, and how often they get backed up.
• Backup plans apply only to data that the user who sets up the plan has access to—mostly that user’s home folder, but any readable file is fair game. If more than one person has a user account on your Mac, each will have to set up backups to protect his or her files, and each will need his or her own .Mac account to do so.
To create a backup from a plan template
Backup includes several preconfigured templates that fill many backup needs. Here’s how to create a backup using one of these templates:
- Open the Backup application.
The main Backup window is displayed, showing any plans that have already been set up (Figure 12.16).
Figure 12.16. The main Backup window lists any existing backup plans you’ve created. Since this is the first time Backup has run, it shows only one plan: Home Folder.

- Click the plus (+) button in the lower left corner (Figure 12.17).
Figure 12.17. Click the plus button to open the plan template window.
The plan template window is displayed (Figure 12.18).
Figure 12.18. The plan template window gives you the option of choosing one of four premade templates.

- In the window, select one of the following and then click the Choose Plan button:
• Home Folder—If you want to back up the contents of your home folder (a great first choice)
• Personal Data & Settings—If you want to back up your Address Book information, iCal information, Safari settings, Stickies, or Mac OS keychains
• iLife—If you want to back up your iLife data from your home folder (including GarageBand projects, iDVD projects, iMovie projects, iPhoto library, iTunes library, and iWeb Web sites)
• Purchased Music and Video—If you want to back up the music and video you’ve purchased from the iTunes Music Store
• Custom—If you want to select a set of files and use a schedule that you set up from scratch
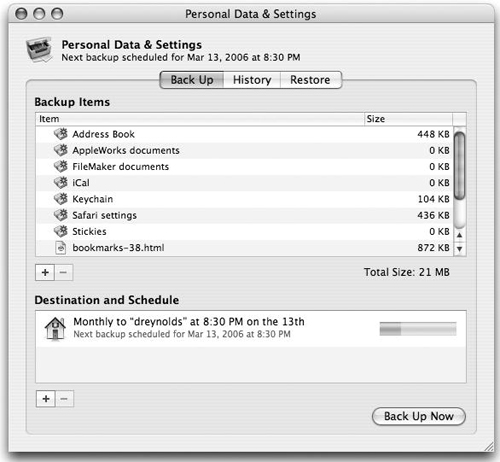
The detail window for the plan you chose is displayed (Figure 12.19).
Figure 12.19. The plan’s detail window is displayed, showing the specifics of how the backup plan will proceed.

- If you choose Custom in the Plan Template Window (see Figure 12.18) you’ll be prompted to type a name for the backup plan you’re creating.
The name appears at the top of the detail window (Figure 12.20).
Figure 12.20. If you create a Custom backup plan, you’ll be prompted to type its name in the name field of the plan’s detail window.

- To add an item to be backed up, click the plus (+) button below the Backup Items portion of the window (Figure 12.21).
Figure 12.21. Click the plus button in the lower left corner of the window to open the Choose Items to Back Up window.

The Choose Items to Back Up window appears (Figure 12.22).
Figure 12.22. The Choose Items to Back Up window contains groups of files that you can choose to have backed up.
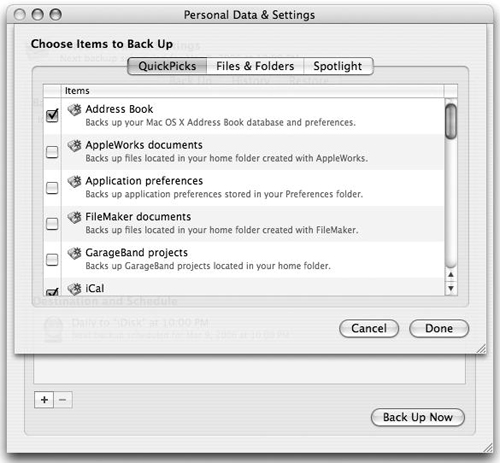
- While the Choose Items to Back Up window is open, do any or all of the following: To add QuickPicks (a backup of files by type), do the following:
• Click the QuickPicks tab to load the QuickPicks pane (if it’s not already selected).
• Check the boxes to the left of the items that you want backed up (if they’re not included in the plan) (Figure 12.23).
Figure 12.23. Check the boxes to the left of the items you want added to the Backup plan.

To add individual files and/or folders:
• Click the Files & Folders tab to load the Files & Folders pane.
• Navigate to a file or folder you want to include in the backup (if it’s not included in the original plan).
• Click the “Include this folder” radio button (Figure 12.24).
Figure 12.24. Change the settings in the Files & Folders pane to create a custom set of files to back up.

To add items via a Spotlight search:
• Click the Spotlight tab to open the Spotlight search pane.
• Type in the search term you want to use for your Spotlight search.
• Click Servers, Computer, or Home to restrict your search to the area that contains the files you want to back up.
• Select the files you want to back up.
• Click the “Include these items” radio button (Figure 12.25).
Figure 12.25. Use a Spotlight search to find files that you want backed up on a regular basis.

• Click Done.
• The selected items will be included in the next backup.
- To change the backup frequency and/or backup-file destination for a preset backup plan, double-click the contentsof the Destination and Schedule field in the detail window for the plan you’re tweaking. (If you’ve created a custom plan, click the plus (+) button beneath the Destination and Schedule field.)
The Choose a Destination and Schedule pane opens (Figure 12.26).
Figure 12.26. The Destination and Schedule pane allows you to choose where files are backed up and when the backup occurs.
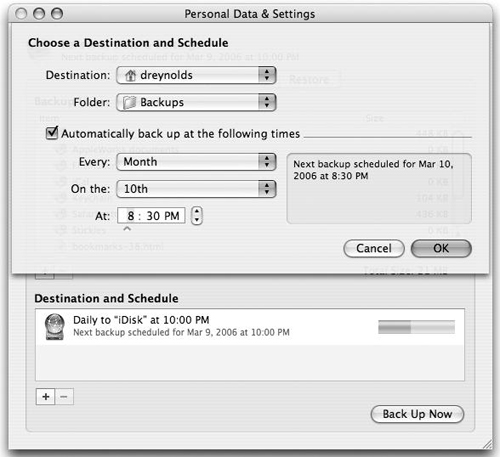
- Do the following:
• To choose the location where your backup file will be stored, select a disk, the Home folder, a network volume, or iDisk from the Destination pop-up menu.
• If you don’t want the backup located in a folder called Backups in the destination you selected, select Choose Location in the Folder pop-up menu to navigate to a preferred folder and click OK. (This option will not be enabled if you have selected iDisk or CD or DVD).
• Check the “Automatically back up at the following times” box to have the backup happen at the time indicated below the box.
• From the Every menu, select whether the backup happens every day, week, month, three months, or six months.
• If you’ve selected Week, select the day of the week from the “On the” pop-up menu.
• If you’ve selected Month, select the day of the month from the “On the” popup menu.
• In the At section, select the time when you want the backup to occur.
• Click OK.
The new schedule appears in the Destination and Schedule area of the window (Figure 12.27).
Figure 12.27. Change the settings in the window to customize where the backup is stored and when it happens.
- Close the window.
Your backup now appears in the list of scheduled backups (Figure 12.28).
Figure 12.28. Once you create a Backup plan, it appears in the main Backup window.

Tips
• Backup 3 safeguards your projects and files, but it may not protect the programs used to create them. For example, the iLife backup plan backs up your iPhoto image library (among other things), but not the iPhoto application itself, unless you create a plan that includes the application. The problem with this is that while most applications don’t mind being moved or copied, some do, and they may not work properly if restored. So if you ever need to restore an application, use its original installation disc.
• To set up a schedule and set a destination for the backup other than the preset ones, click the plus button below the Destination and Schedule label and edit the schedule.
• To delete a schedule, select it and press the Delete key.
• To perform a backup immediately, select the backup you want to execute, and then click the Back Up button at the bottom of the window.
To edit a Backup plan
- Open the Backup application.
The main Backup window is displayed, showing any plans that have already been set up (Figure 12.29).
Figure 12.29. The main Backup window displays any Backup plans you create.

- Double-click the Backup plan you want to edit.
The plan template page is displayed (Figure 12.30).
Figure 12.30. The plan template page allows you to customize your backups as you like.
- Following steps 2–11 of “To create a backup from a plan template,” make the changes that you want to the plan. After you close the window, the edited plan will be executed on the schedule you set.
To restore a backup
- Open the Backup application.
The main Backup window is displayed, showing any plans that have already been set up (see Figure 12.29).
- Select the backup you want to restore, and click the Restore button (Figure 12.31).
Figure 12.31. To restore files from a backup, select the plan you want to restore from, and click Restore.

The Restore window opens (Figure 12.32).
Figure 12.32. The Restore window displays the backups that have been made from the selected plan.
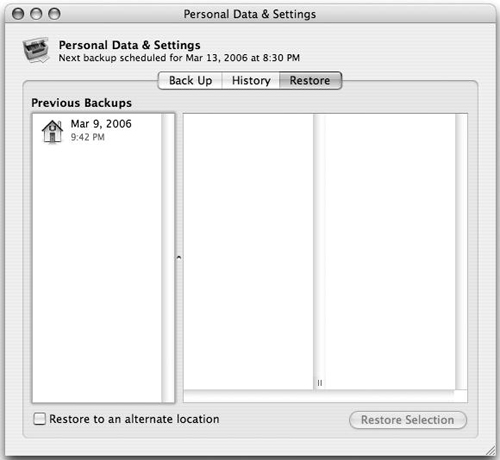
- In the Previous Backups portion of the window (on the left), select the backup that you want to restore.
The items within that backup are listed to the right of the backup name (Figure 12.33).
Figure 12.33. Items within a given backup are listed to the right of the selected backup.

- Check the boxes next to the items you want to restore, and click Restore Selection (Figure 12.34).
Figure 12.34. Check the boxes of the files you want restored, and click the Restore Selection button.

A dialog slides down, asking how you would like to handle the restoration (Figure 12.35).
Figure 12.35. When restoring files from a backup, you will be asked how you want to proceed—either by restoring only missing items or by replacing existing items with backup copies.
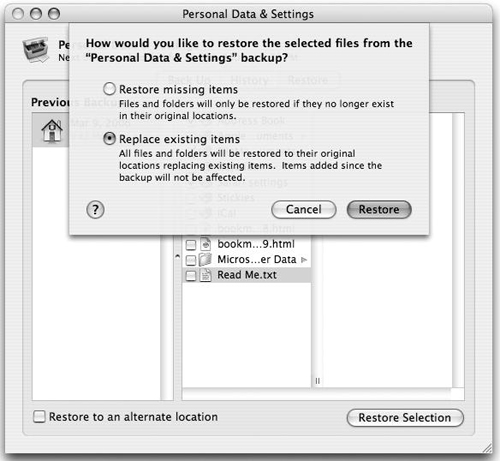
- In the dialog, select one of the following radio buttons:
• “Restore missing items” to restore only items that are no longer in their original locations
• “Replace existing items” to restore all items, whether or not they exist in the original location
Click Restore.
If you have any applications running, Backup will warn you to quit those applications before restoring the files, and the items will be restored to your Mac (Figure 12.36).
Figure 12.36. To ensure a clean backup, you will need to quit running applications before completing the restoration.

- Click Continue.
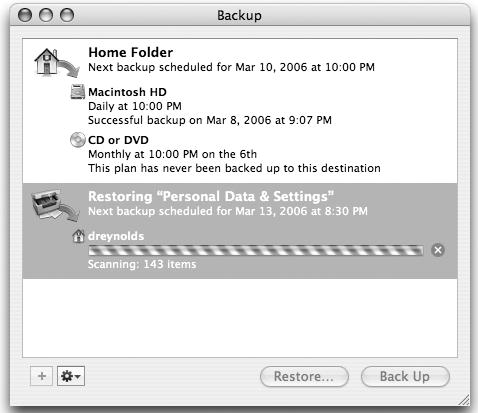
Backup goes to work restoring the files (Figure 12.37).
Figure 12.37. After you click Continue, Backup restores the files.
Tips
• To view the history of a particular backup, select the plan in the main window and then select History from the Plan window. The complete history of that backup is displayed.
• After the first backup, Backup creates incremental backups—that is, only files that have been changed get backed up. If you want to force a full backup, select the plan in the main Backup window, and then choose Full Backup from the Plan window.
Setting Up Backup 2
The general process of setting up Backup 2 to protect your important data is fairly easy, although there are a number of choices to be made during the process—mostly revolving around where you want your backups to be made.
You have three choices:
• Back up to iDisk. This creates a backup on your iDisk over your Internet connection. Choose this option if you have a high-speed Internet connection, and be sure to limit the number of files you back up, or you’ll overwhelm your iDisk.
• Back up to CD/DVD. This creates a backup on recordable CDs or DVDs using your Mac’s CD or DVD burner. Choose this option to create durable backups of your data, but remember—you’ll have to be by your Mac during the backup to provide it with blank discs.
• Back up to Drive. This creates a backup on another hard drive or network volume. Choose this option to back up your important data to another hard drive or network volume.
When you fire up Backup for the first time, you’ll be presented with its default setup. Although Backup can be set up to back up just about any files to just about any location on a schedule, it’s not set up that way when you launch it. It’s your job to customize these settings to suit your needs. Doing so is a three-step process: choosing where you want the files to be backed up, selecting which files are to be backed up, and setting up a schedule of when backups occur.
To back up to iDisk with Backup 2
- In the Applications folder, double-click the Backup icon to launch the software. Backup checks for an iDisk server as it launches. If this is the first time you’ve launched Backup, you may receive a message saying that BackupHelper wants permission to access your keychain (Figure 12.38). This is OK. If you’ve already launched Backup, go to step 3.
Figure 12.38. If this is the first time you’ve launched Backup 2, you may be asked for access to your keychain. This is OK; click Always Allow.
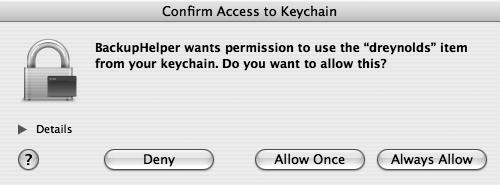
- Click Always Allow.
If this is the first time you’ve launched Backup, a dialog appears, thanking you for joining .Mac (Figure 12.39).
Figure 12.39. If this is the first time you’ve launched Backup 2, a dialog opens, thanking you for joining .Mac.
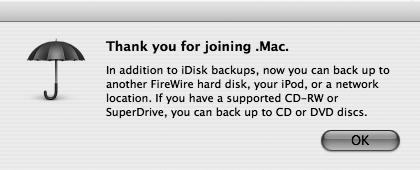
- Click OK.
Backup displays its main window (Figure 12.40).
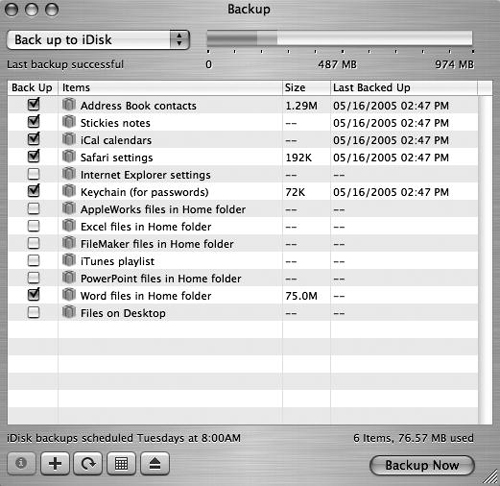
Figure 12.40. The main Backup window is a pretty simple affair. It asks where files should be backed up; it provides a graphical representation of how much space is available on your iDisk; it lists the items to be backed up; it provides some information on scheduling and file size; and it has some basic controls, including a Backup Now button.
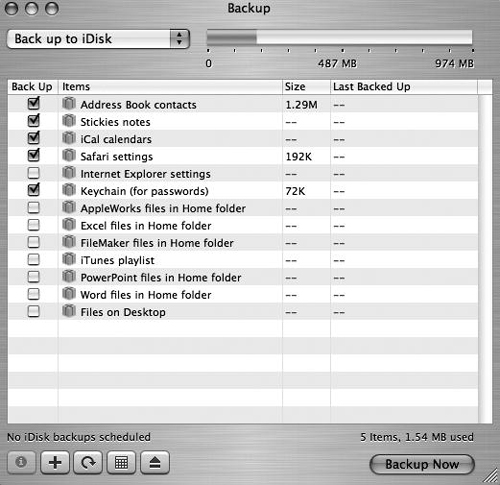
- From the pop-up menu in the upper left corner, choose Back up to iDisk (Figure 12.41).
Figure 12.41. The Backup window pop-up menu offers three backup choices: Back up to iDisk, Back up to CD/DVD, and Back up to Drive. You need to choose one of them to create a backup.

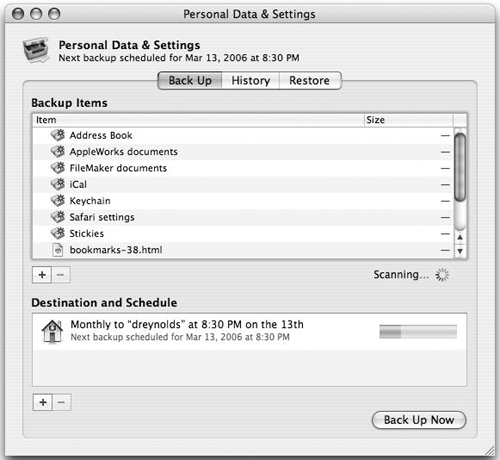
- In the Back Up column of the main window, check the boxes to the left of the items that you want to back up (Figure 12.42).
Figure 12.42. When you check the boxes to the left of the items you want to have backed up, Backup will scan your hard drive for those items and automatically include them.
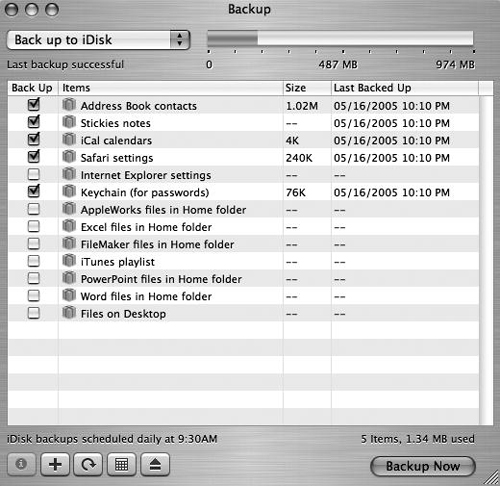
- At the top of the window, check the available-space gauge to ensure that you have enough space in which to copy the selected items. This gauge appears when you select Back up to iDisk in step 4 (Figure 12.43).
Figure 12.43. When backing up files to your iDisk, check the gauge at the top to ensure that you have enough space available for the files you’ve selected in the Back Up column.

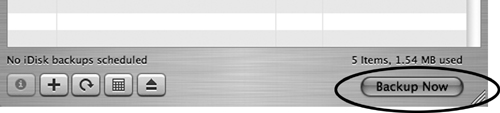
- In the lower right corner of the window, click the Backup Now button (Figure 12.44).
Figure 12.44. Click the Backup Now button to begin your backup.

Backup scans for the files to be saved and goes straight to work creating your backup in the location you’ve specified. You’ll see a progress bar as items are copied to the location you set in step 4.
Tip
• When backing up files to your iDisk, you’ll need to have your .Mac member name and password entered in the .Mac pane of System Preferences, and you’ll have to have Internet access (which makes sense when you think about it). A backup can potentially take up gigabytes of space, so when backing up to your iDisk, remember that you’ll need to make the backup small enough to fit on your iDisk.
To back up to a CD or DVD with Backup 2
- Open Backup.
If this is the first time you’ve launched Backup, you may receive a message saying that BackupHelper wants permission to access your keychain (see Figure 12.38). This is OK. If you’ve already launched Backup, go to step 3.
- Click Always Allow.
If this is the first time you’ve launched Backup, a dialog appears, thanking you for joining .Mac (see Figure 12.39).
- Click OK.
Backup displays its main window.
- From the pop-up menu in the upper left corner, choose Back up to CD/DVD (Figure 12.45).
Figure 12.45. Choose Back up to CD/DVD from the Backup popup menu to back up items to optical discs.
- In the Back Up column of the main window, check the boxes to the left of the items that you want to back up (Figure 12.46).
Figure 12.46. When you check the boxes to the left of the items you want to have backed up, Backup will scan your hard drive for those items and automatically include them.

- In the lower right corner of the window, click the Backup Now button. A dialog pops up, asking you to name your backup.
- In the “Name your backup” field, type a name for your backup, and then click Begin Backup (Figure 12.47).
Figure 12.47. Before you back up to CD/DVD media, Backup requires that you give a name to your backup. It provides a good one, though—the current date and time. If you like this name, or after you’ve typed in a name of your own, click Begin Backup.

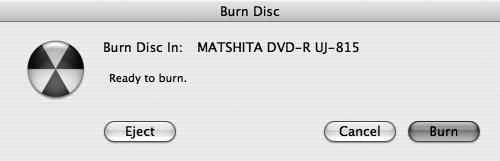
Backup asks you to insert a disc (Figure 12.48).
Figure 12.48. To continue the backup process, insert a CD and click Burn in the dialog when the button becomes activated.

- Insert a disc.
The Burn button is activated.
- Click Burn (Figure 12.49).
Figure 12.49. Click the Burn button to burn the backup to CD or DVD.
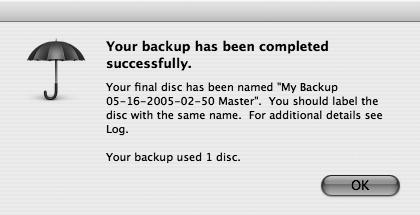
Backup burns the files to the disc that you inserted (Figure 12.50). Depending on the size of the backup, you may need to insert more than one disc when asked. When finished with the process, Backup provides a short summary dialog, giving you the name that you should use to label the CD or DVD, and noting how many discs the backup used (Figure 12.51).
Figure 12.50. After you click the Burn button, Backup goes to work gathering files and burning them to CD or DVD.

Figure 12.51. When finished, Backup tells you whether the backup process was successful, what to label the disc, and how many discs the process used.
- Click OK to finish.
Tips
• When you back up your data to CDs or DVDs, Backup tells you in advance how many blank disks you’ll need.
• Backup allows backing up to CDs and DVDs only if your Mac has a Mac OS X– supported optical drive—there’s a complete list at Mac OS X Storage Device Support (www.apple.com/macosx/upgrade/storage.html).
To back up to a drive
- Open Backup.
If this is the first time you’ve launched Backup, you may receive a message saying that BackupHelper wants permission to access your keychain (see Figure 12.38). This is OK. If you’ve already launched Backup, go to step 3.
- Click Always Allow.
If this is the first time you’ve launched Backup, a dialog appears, thanking you for joining .Mac (see Figure 12.39).
- Click OK.
Backup displays its main window.
- From the pop-up menu in the upper left corner, choose Back up to Drive (Figure 12.52).
Figure 12.52. Select Back up to Drive from the pop-up menu in the Backup window to back up items to hard drives or network volumes.

- At the top of the window, click the Set button (Figure 12.53).
Figure 12.53. Click the Set button to choose a location on a drive for your backup.

- In the “Set a backup location” dialog that drops down, click Create (Figure 12.54).
Figure 12.54. Click Create to create a new backup file and set a location in which backups will take place.

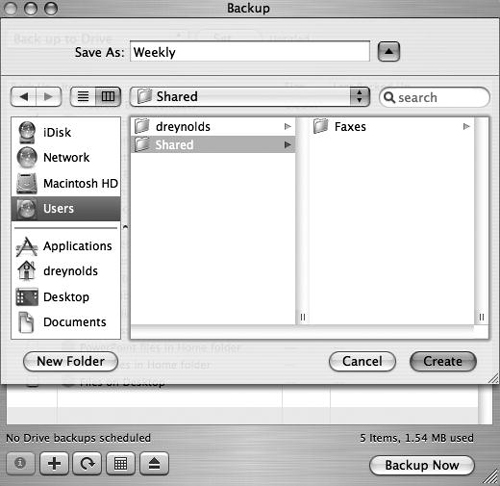
- In the file browser window that rolls down, navigate to the location you want to use for the backup, type a name for your backup in the Save As field, and click Create (Figure 12.55).
Figure 12.55. In the file browser, navigate to the location you want to use for your backup, give it a name in the Save As field, and click Create. We’re calling this backup “Weekly” to indicate how often we’ll use it for a backup, but you can name it anything (as long as you use standard alphanumeric characters).
Backup displays its main window with the new backup name reflected in the top portion of the window, just to the right of the Set button (Figure 12.56).
Figure 12.56. The main Backup window has your new backup listed at the top. Here, it’s named Weekly, but it could be named anything—even “Spike MacRashton.”

- In the Back Up column, check the boxes of the items that you want to back up (Figure 12.57).
Figure 12.57. When you check the boxes to the left of the items you want to have backed up, Backup will scan your hard drive for those items and automatically include them.
- In the lower right corner of the window, click the Backup Now button (Figure 12.58).
Figure 12.58. Click the Backup Now button to begin your backup.
Backup scans for the files to be saved and goes straight to work creating your backup in the location you’ve specified. You’ll see a progress bar as items are copied to the location you set in step 4.
Tip
• Although you can back up your files to the same hard drive, it’s not a very good idea. What happens if your drive crashes? You lose your originals and your backup, that’s what.
Using Backup 2’s QuickPicks
Backup 2 comes prepopulated with a series of items called QuickPicks that make it easy to automate backups. These QuickPicks back up information that’s likely to be important—especially information that you may not know the location of (think back to the last time you knew where your Adobe Photoshop preferences or Actions Palette files were stored).
The selection of QuickPicks varies, depending on the backup location you’ve selected (after all, no one can copy respectable iPhoto and iTunes libraries to an iDisk, the combination of which would be many gigabytes more than an iDisk can hold).
To take advantage of these QuickPicks, simply check the boxes next to the ones you want to use. Backup will do any necessary configuration for you (such as scanning for the files to be included), and the items will be included in the backup.
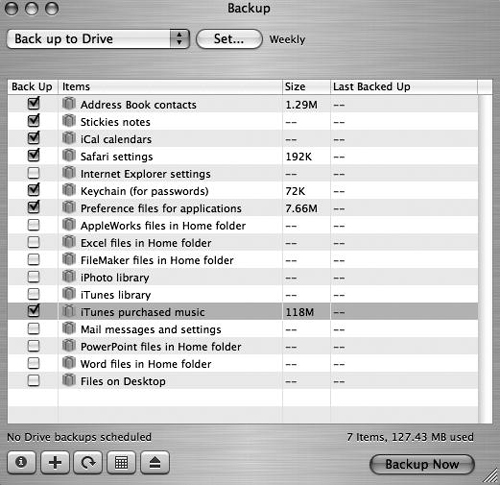
These QuickPicks cover the following (Figure 12.59):
• Address Book contacts. Backs up the contact information you have stored in Address Book.
• Stickies notes. If you use Stickies, this QuickPick will back up your notes.
• iCal calendars. Creates a copy of your iCal calendar information.
• Safari settings. Backs up your Safari settings and bookmarks, as well as any cache files (this can make your Safari backup larger than it might otherwise be).
• Internet Explorer settings. Backs up your Microsoft Internet Explorer bookmarks and settings.
• Keychain (for passwords). Makes a copy of passwords that you’ve entered in the Keychain application.
• Preferences (not available for iDisk backups). Backs up the preference files for all of your applications. This one’s a huge deal—it catches all of those files that keep your Mac’s applications acting the way you expect.
• AppleWorks files in Home folder. Scans all files in your home directory and makes a backup of all AppleWorks files.
• Excel files in Home folder. Scans all files in your home directory and makes a backup of all Microsoft Excel files.
• FileMaker files in Home folder. Scans all files in your home directory and makes a backup of all FileMaker databases.
• iPhoto library. Copies your iPhoto digital photography. Since these backups can be really large, this option isn’t available for iDisk backups.
• iTunes library. Copies your iTunes music library. Again, since these can be really large backups, this option isn’t available for iDisk backups.
• iTunes playlist. Makes a copy of any iTunes playlists. This option is only available for iDisk backups.
• iTunes purchases. Makes a copy of any iTunes purchased music. This option is not available for iDisk backups.
• PowerPoint files in Home folder. Scans all files in your home directory and makes a backup of all PowerPoint files.
• Word files in Home folder. Scans all files in your home directory and makes a backup of all Word files.
• Files on Desktop. Makes a copy of all the files you keep on your Desktop.
Figure 12.59. The Backup interface has a set of file groups, called QuickPicks, that you can use to quickly create a backup.

Adding File Groups with Backup 2
Although you can perform a perfectly good backup using just QuickPicks, you can also choose your own collections of files and folders to back up.
To add a file group in Backup 2
- Open Backup.
Backup displays its main window.
- Do one of the following:
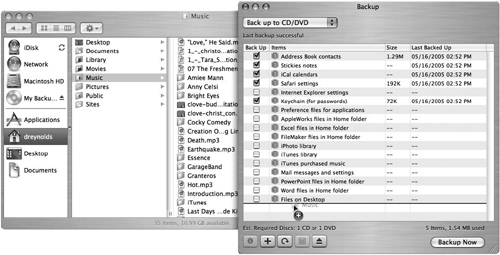
• In the Finder, select the files you want to back up, and drag them into the Backup window (Figure 12.60).
Figure 12.60. Drag the files or folders (or any combination of them) into the Backup window to add them as QuickPicks.
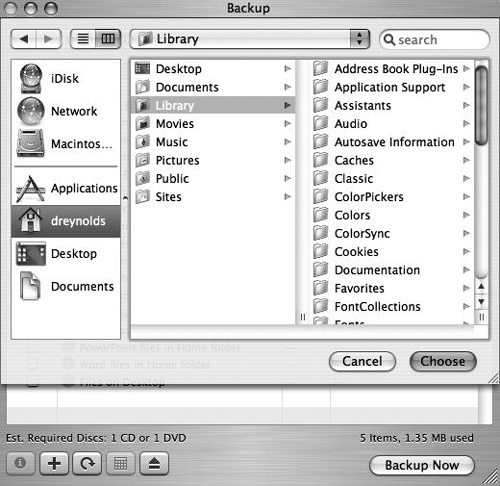
• In the lower left corner of the main Backup window, click the plus (+) button (Figure 12.61) to bring up a filebrowser window. Navigate to the folder that you want to back up, and click Choose (Figure 12.62).
Figure 12.61. Click the plus (+) button to open a file browser that allows you to choose files or folders to include in a backup group.
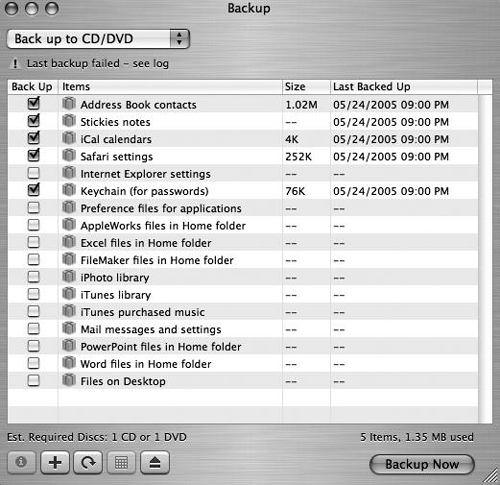
Figure 12.62. Once you’ve navigated to the file or folder you want to include in a file group, click Choose.
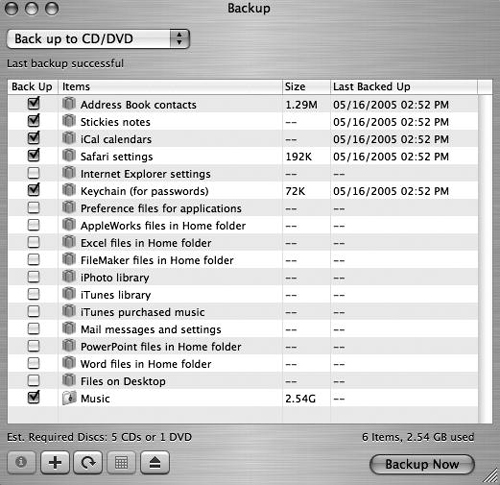
The items you dragged into the window appear as files and folders below the QuickPicks in the list. These files and folders have checked boxes next to them, indicating that they will be backed up during the next backup operation (Figure 12.63).
Figure 12.63. The file or folder you choose appears at the bottom of the window with its box checked, ready to be included during the next backup.
Tip
• You can drag files and folders from any Finder window, including a search-results window. To create a backup list of files you search for, perform a search and then drag the items you want to back up from the search-results window into the Backup window.
To remove a file group in Backup 2
- Open Backup.
Backup displays its main window.
- Control-click the file or folder you want to remove.
A contextual menu appears under the pointer with one choice—Delete.
- Choose Delete from the menu (Figure 12.64).
Figure 12.64. Choosing Delete from the contextual menu brought up by Control-clicking an item deletes the item from the QuickPick list.

The item is deleted from the list of files to be backed up.
Tips
• You can also delete an item by selecting it in the window and pressing Delete.
• If you’ve got a two-button mouse, you can remove an item from the list of QuickPicks and folders by right-clicking it. If you delete a standard QuickPick and later decide you want that QuickPick back, choose Edit > Restore All QuickPicks.
Scheduling Backups with Backup 2
Backup’s real power lies in its ability to take you out of the equation. By setting up backups on a schedule, you ensure that backups happen at a time that’s convenient (such as at night), and that they actually happen.
To set up a Backup 2 schedule
- Open Backup and set up a backup.
- In the lower left corner of the window, click the Schedule button (Figure 12.65). This button is activated only if you’ve chosen to back up to your iDisk or drive. You cannot schedule automatic backups to a CD or DVD.
Figure 12.65. Click the Schedule button (the one that looks like a calendar) to open the schedule dialog.

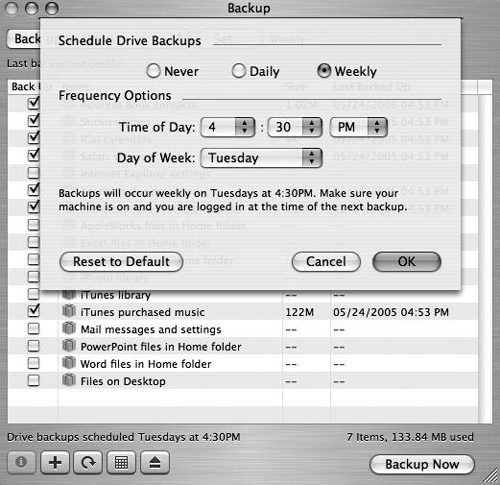
The schedule dialog slides down (Figure 12.66).
Figure 12.66. The schedule dialog allows you to choose when backups occur.

- Do the following:
• Click the Never, Daily, or Weekly radio button to set the frequency of the scheduled backup.
• From the Time of Day pop-up menus, choose the time at which you want the backup to happen (these menus will not be activated unless you click the Daily or Weekly radio button).
• From the Day of Week pop-up menu, choose the day of the week on which you want the backup to happen (this menu will not be activated unless you click the Weekly radio button).
- Click OK.
Your backup is now scheduled. For a scheduled backup to happen, be sure your Mac is on and that you are logged in at the time when the backup is supposed to happen—otherwise, the backup won’t take place. Your backup’s schedule appears at the bottom of the window, along with the size of the backup and number of items to be backed up (Figure 12.67).
Figure 12.67. Once you’ve scheduled a backup, basic information about that scheduled backup appears in the main Backup window.
Tips
• The Schedule button is available only for iDisk and drive backups—CD/DVD backups can’t be scheduled because they need you to be there to change discs.
• You can set up two backups—one to your iDisk and one to a drive—that use two different schedules. Why? A good use for this is to schedule a daily backup of your most critical files to your iDisk, and a weekly backup of important (but not quite so critical) files to a drive. That way, you’re sure that your most important stuff gets taken care of on a daily basis and is safe on your iDisk, without taking up the room that a more complete backup can take. The larger, weekly backup goes to a drive.
To turn off a Backup 2 schedule
- Open Backup.
- Click the Schedule button (Figure 12.68).
Figure 12.68. Click the Schedule button (the one that looks like a calendar) to open the schedule dialog.

The schedule dialog slides down (Figure 12.69).
Figure 12.69. The schedule dialog allows you to choose when backups occur. It also allows you to turn off backups.
- Click the Never radio button to select it (Figure 12.70).
Figure 12.70. Click the Never radio button to turn off a scheduled backup.

- Click OK.
Your scheduled backup has been turned off.
Restoring Files with Backup 2
With luck, you won’t ever have to restore files from a backup that you’ve made, but you shouldn’t count on it. After all, there would be no point in creating backups if you couldn’t restore your data from them.
To restore files from a backup
- Ensure that the media that contain your backup files are available to you. This includes CDs or DVDs, FireWire or USB hard drives, network volumes, or Internet access if you’ve backed up to your iDisk.
- Open Backup.
Backup’s main window is displayed.
- In the pop-up menu in the upper left corner, choose the source from which you want to restore your backup files (Figure 12.71). Your choices are Restore from iDisk, Restore from CD/DVD, and Restore from Drive.
Figure 12.71. Choose the location from which you’ll be restoring files from backup—iDisk, a CD/DVD, or a drive.

The Backup window lists the files that are available to be restored (Figure 12.72). If you’re restoring files from a CD or DVD, a dialog opens, asking you to insert the appropriate CD or DVD (Figure 12.73).
Figure 12.72. The files that are in a given backup are listed in the Restore pane.

Figure 12.73. If you’re restoring files from a CD or DVD backup, you will be asked to insert the master disc from the backup set. Insert the disc to continue.

- If prompted, insert the master disc of your backup CD or DVD set.
- In the list of available files, check the boxes next to the items you want to restore.
- Click the Restore Now button (Figure 12.74).
Figure 12.74. Click the Restore Now button to restore the checked items from your backup.

If the restoration will cause a file to be overwritten, you’ll be notified and asked whether you want to overwrite existing files (Figure 12.75).
Figure 12.75. If you’re replacing existing files with files from a backup (even ones with cryptic names, such as this one), Backup warns you and gives you the option of replacing the duplicate item or skipping it.
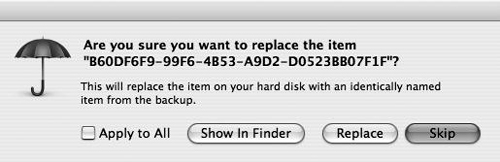
- Click Replace to replace the existing items with copies from the backup; click Skip to skip the replacement for that file.
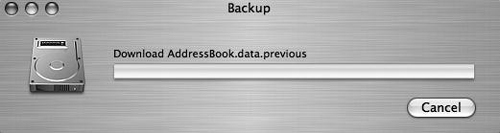
Backup restores the selected files from the location to which they were backed up (Figure 12.76).
Figure 12.76. When restoring files from a backup, Backup presents a progress dialog that lets you know which files are being restored.
Tips
• If you want to restore only selected files from within an item, show the item’s information by selecting it and clicking the Information button (marked with an “i”) in the lower right corner, or double-clicking the item. Then, check just the files you want to restore.
• It’s a good idea to practice restoring files from a backup. That way, if bad things happen, you’ll be ready to recover needed files quickly.