
CHAPTER 23
THE GAME CLIENT
By now we’ve met most of our requirements, at least to the point of implementation. Testing them for correct operation and completeness I will leave as an exercise for you, gentle reader, because you may (and probably will) want to modify and enhance the requirements anyway.
According to my list, the requirements that remain outstanding are the following:
2. Internet multiplayer game play.
3. Global in-game chat.
11. All other players are enemies.
12. All point values configurable from a setup file.
14. 3 points per vehicle destroyed.
15. Ability to race around the track and score 5 points for each lap you lead. (partial)
16. Laps can only be scored in the car.
17. A 10-lap race with no time limit.
18. A 10-point bonus for winning the race.
29. When one map is finished, cycle to the next in the list.
Of this list, I will leave numbers 14, 16, 17, and 18 and the remaining portion of number 15 (scoring 5 points) to you to complete as exercises. They are variations of the coin scoring and the lap and checkpoint tracking we covered in Chapter 22. The functioning code is available in the RESOURCESKoob file, if you need help.
Most of the remaining work requires additional client code to support the server additions we made in the last chapter—we’ll add some multiplayer support, a little bit more client support, and user interfaces to access those capabilities.
CLIENT INTERFACES
We are going to add code to allow users to run a server and to allow players to connect to a server. In order to make that connection, we will want to provide the user with an interface he can use to find servers, decide which one offers an interesting game, and then connect to the server.
Another thing we need to do is make sure that when the user quits a server, he returns to his selection interface rather than simply exiting as Koob does now.
Additionally, we need to add a capability to the playing interface to provide a chat window with a text entry where players can type in messages to send to other players. Maybe they’ll want to exchange recipes or something. Yeah, that’s it—recipes! It’s not like they’re going to taunt anyone anyway, is it?
In Chapter 6 you saw the ServerScreen interface module that combined these interfaces. In this chapter we’ll look at the same issue but in a slightly different way, in order to show how easy it is to make different—yet equally valid—design decisions.
Also, we’ll need to modify a few of the files, like the MenuScreen interface, to more closely conform to our needs.
In a later section we’ll add the code required to make these interfaces functional.
MenuScreen Interface
We will make some changes to our main menu screen so that it provides the user with the additional choices to:
![]() view information about the games and credits
view information about the games and credits
![]() play in single-player mode (as it already has)
play in single-player mode (as it already has)
![]() host a game
host a game
![]() connect to another server
connect to another server
Open your MenuScreen.gui file, in KOOBcontrolclientinterfaces and locate the three GuiButtonCtrl objects. These buttons have the text labels “Start Game”, “Connect To Server”, and “Quit”, in order from top to bottom. Delete the entirety of the top two controls: “Start Game” and “Connect To Server”. Delete the two controls in their entirety, from where it says
new GuiButtonCtrl() {
down to the closing brace (“}”), for each control. When you are done, you should only have the “Quit” and “Setup” controls remaining, as well as the GuiChunked BitmapCtrl that encompasses the remaining control.
In the place of the deleted controls, insert the following:
  new GuiButtonCtrl() {
    profile = "GuiButtonProfile";
    horizSizing = "right";
    vertSizing = "top";
    position = "30 138";
    extent = "120 20";
    minExtent = "8 8";
    visible = "1";
    command = "Canvas.setContent(SoloScreen);";
    text = "Play Solo";
    groupNum = "-1";
    buttonType = "PushButton";
      helpTag = "0";
  };
  new GuiButtonCtrl() {
    profile = "GuiButtonProfile";
    horizSizing = "right";
    vertSizing = "top";
    position = "30 166";
    extent = "120 20";
    minExtent = "8 8";
    visible = "1";
    command = "Canvas.setContent(ServerScreen);";
    text = "Find a Server";
    groupNum = "-1";
    buttonType = "PushButton";
      helpTag = "0";
  };
  new GuiButtonCtrl() {
    profile = "GuiButtonProfile";
    horizSizing = "right";
    vertSizing = "top";
    position = "30 192";
    extent = "120 20";
    minExtent = "8 8";
    visible = "1";
    command = "Canvas.setContent(HostScreen);";
    text = "Host Game";
    groupNum = "-1";
    buttonType = "PushButton";
      helpTag = "0";
  };
  new GuiButtonCtrl() {
    profile = "GuiButtonProfile";
    horizSizing = "right";
    vertSizing = "top";
    position = "30 237";
    extent = "120 20";
    minExtent = "8 8";
    visible = "1";
    command = "getHelp();";
    helpTag = "0";
    text = "Info";
    groupNum = "-1";
    buttonType = "PushButton";
  };
You may, if you wish, use the built-in GUI Editor (press F10) to do this. Make sure that you set all the properties to match those just listed.
The significant thing to note about these controls is the command property. Each one replaces a displayed MenuScreen interface with a new interface, according to its function, with the exception of the Info button.
The Info button uses the getHelp feature of the common code base. It searches all the directories nested under the root main directory looking for files with the extension .hfl, and then it lists them in alphanumeric order. If you preface the filename with a number (such as 1., 2., and so on), it will sort them numerically.
This should give you a main menu that looks like Figure 23.1.
SoloScreen Interface
The SoloScreen interface, as shown in Figure 23.2, prepares a list of mission files that it finds in the maps subdirectory in the controldata directory tree. From this list, you can select the map or mission you want to play. Its code and definition can be found in the SoloScreen modules.
Figure 23.1
MenuScreen interface.
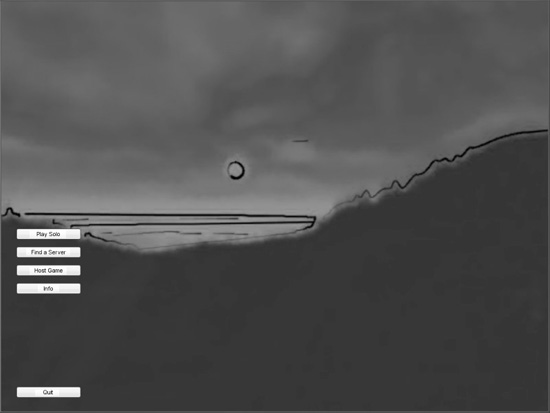
Figure 23.2
SoloScreen interface.
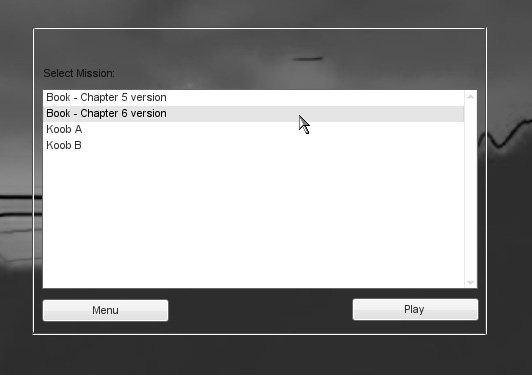
It’s worth remembering that even when you play in solo mode, underneath the hood, the Torque Engine is still running in two parts: a client and a server. They are just closely coupled with no cross-network calls being made.
Host Interface
The Host interface is somewhat similar, as you can see in Figure 23.3, but it offers more options: the ability to set a time limit and a score limit, plus map selection modes. Its code and definition can be found in the HostScreen modules.
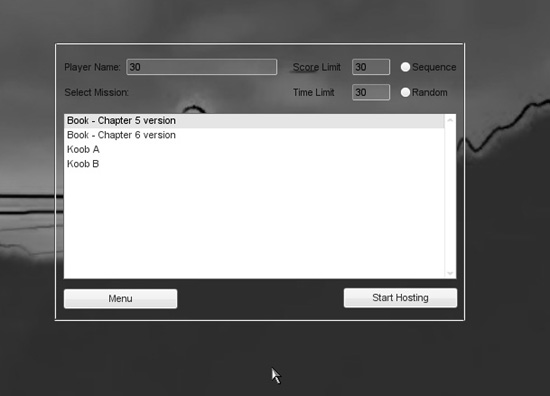
If both time and score limits are set, the first one reached ends the game. A setting of 0 makes that limit infinite. The sequence mode causes the server to step through the maps in order as shown in the listing, as each game finishes and the new one loads. The random mode causes the server to randomly select a map for each game. The time limit is saved by the control in the variable $Game::Duration, and the score limit is saved as $Game::MaxPoints.
One thing we should do is create default values for those two variables, just in case something goes wrong somewhere. These default values will be overridden by whatever values the player puts in the appropriate boxes in the HostScreen.
Open Koobcontrolserverserver.cs, and at the top of the file put the following initialization code in:
$Game::Duration = 20;
$Game::Maxpoints = 0;
The duration is measured in minutes. For testing purposes you might be interested in setting the duration to one minute, so that your game only lasts 60 seconds. That way you don’t have to wait around twiddling your thumbs for the game to cycle to the next one. When you need more time for testing a level, increase the numbers for the duration.
For maximum points, right now, let’s go with 0, which means that there is no maximum. This will be a time-limited game.
FindServer Interface
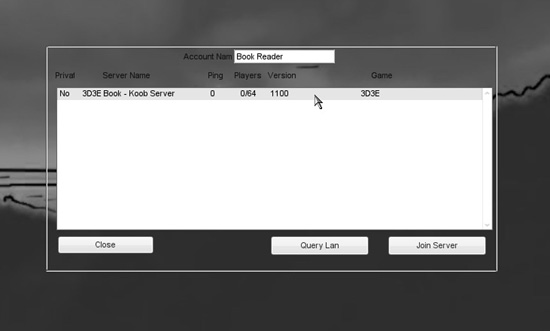
The FindServer interface, shown in Figure 23.4, lets you browse for servers. Its code and definition can be found in the ServerScreen modules. It will find servers that are running on the local LAN you are connected to (if you are connected to one, of course). It does not attempt to reach out via the Internet to contact the master servers at GarageGames to find games for you to connect to, as was done in earlier editions of this book. If you want to implement master server query code for yourself, you should substitute the QueryMaster function for the QueryLan function. GarageGames no longer keeps a master server running 24/7, so you will have to write your own master server software to connect to. This can be done using TorqueScript but is beyond the scope of this book. There are master server resources available from the GarageGames user community.
Figure 23.4
FindServer interface.
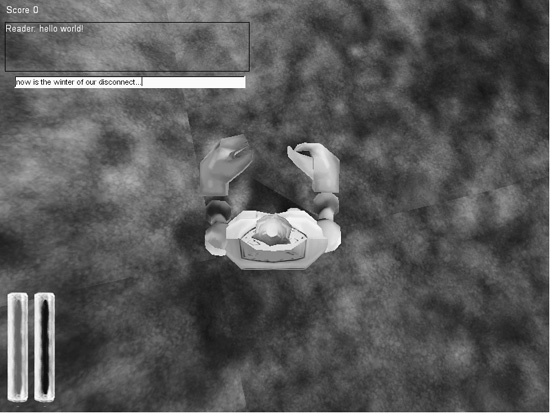
ChatBox Interface
In order to display chat messages from other players, we need to put a control in our main player interface. We also need to have a control that will allow us to type in messages to be sent to other players, as depicted in Figure 23.5.

Open the file koobcontrolclientInitialize.cs, and look for the following lines in the Interface definitions section of the function InitializeClient:
  Exec("./interfaces/chatbox.gui");
  Exec("./interfaces/messagebox.gui");
If they aren’t there, type them in.
Next, open the file koobcontrolclientmiscpresetkeys.cs, and add the following keyboard input binding statements to the end of the file:
function pageMessageBoxUp( %val )
{
  if ( %val )
     PageUpMessageBox();
}
function pageMessageBoxDown( %val )
{
  if ( %val )
     PageDownMessageBox ();
}
PlayerKeymap.bind(keyboard, "t", ToggleMessageBox );
PlayerKeymap.bind(keyboard, "PageUp", PageMessageBoxUp );
PlayerKeymap.bind(keyboard, "PageDown", PageMessageBoxDown );
The first two functions are glue functions that are called by two of the key bindings at the bottom and then make the appropriate call to the functions that scroll the messages in the message box. We need these functions in order to filter out the key up and key down signals from the engine. We only want the action to take place when the key is pressed. We can do this by checking the value of %val when we enter the function—it will be nonzero when the key is pressed and zero when it is released. Then there is a binding that calls ToggleMessageBox, which is defined in messagebox.cs (one of the files we’ve copied in an earlier chapter that we will examine shortly).
In the interface files there are a couple of concepts you should note. To illustrate, look at the definition of the ChatBox interface, contained in chatbox.gui:
new GuiControl(MainChatBox) {
  profile = "GuiModelessDialogProfile";
  horizSizing = "width";
  vertSizing = "height";
  position = "0 0";
  extent = "640 480";
  minExtent = "8 8";
  visible = "1";
  modal = "1";
  setFirstResponder = "0";
  noCursor = true;

  new GuiNoMouseCtrl() {
    profile = "GuiDefaultProfile";
    horizSizing = "relative";
    vertSizing = "bottom";
    position = "0 0";
    extent = "400 300";
    minExtent = "8 8";
    visible = "1";
   new GuiBitmapCtrl(OuterChatFrame)
   {
     profile = "GuiDefaultProfile";
     horizSizing = "width";
     vertSizing = "bottom";
     position = "8 32";
     extent = "272 88";
     minExtent = "8 8";
     visible = "1";
     setFirstResponder = "0";
     bitmap = "./hudfill.png";

     new GuiButtonCtrl(chatPageDown)
     {
       profile = "GuiButtonProfile";
       horizSizing = "right";
       vertSizing = "bottom";
       position = "220 58";
       extent = "36 14";
       minExtent = "8 8";
       visible = "0";
       text = "Dwn";
     };

     new GuiScrollCtrl(ChatScrollFrame)
     {
       profile = "ChatBoxScrollProfile";
       horizSizing = "width";
       vertSizing = "bottom";
       position = "0 0";
       extent = "256 72";
       minExtent = "8 8";
       visible = "1";
       setFirstResponder = "0";
       willFirstRespond = "1";
       hScrollBar = "alwaysOff";
       vScrollBar = "alwaysOff";
       constantThumbHeight = "0";

       new GuiMessageVectorCtrl(ChatBox)
       {
         profile = "ChatBoxMessageProfile";
         horizSizing = "width";
         vertSizing = "height";
         position = "1 1";
         extent = "256 16";
         minExtent = "8 8";
         visible = "1";
         setFirstResponder = "0";
         lineSpacing = "0";
         lineContinuedIndex = "10";
         allowedMatches[0] = "http";
         allowedMatches[1] = "tgeserver";
         matchColor = "0 0 255 255";
         maxColorIndex = 5;
       };
      };
     };
    };
   };
You’ve probably noticed that there is a heck of a lot of indenting. This shows that there are many nested objects within objects. Each nesting level is there for a reason.
The outer level, owned by MainChatBox, is a general-purpose GuiControl container that encompasses the entire screen, occupying the same extents as the Canvas that we view the 3D world through.
Inside that is a GuiNoMouseCtrl control whose role is to shield the chat boxes within it from being accessible by a mouse cursor, if you were to display one on the screen.
Inside that is the GuiBitmapCtrl control named OuterChatFrame, which has two useful functions. You can use it to provide a nice bitmap background for your chat box if you want one, and it holds two subobjects.
One of those subobjects is an icon that appears to tell you when you’ve scrolled the chat box up far enough to hide text off the bottom of the box. That control is a GuiButtonCtrl named chatPageDown.
The other control is a GuiScrollCtrl named ChatScrollFrame, which provides scroll bars for both vertical and horizontal scrolling.
And finally, in the inner sanctum is the actual control that contains the text of the chat box when it is displayed. This GuiMessageVectorCtrl supports multiline buffers of text that will display new text at the bottom and scroll older text up. You can use commands (that we have bound to the PageUp and PageDown keys) to scroll up and down through the text buffer.
MessageBox Interface
The MessageBox interface is where we type in our messages, as shown in Figure 23.6.
Figure 23.6
MessageBox interface.
It is not normally on the screen but pops up when we press the key we bound to it. This, too, has several nested levels, though not as many as the ChatBox interface.
new GuiControl(MessageBox)
{
  profile = "GuiDefaultProfile";
  horizSizing = "width";
  vertSizing = "height";
  position = "0 0";
  extent = "640 480";
  minExtent = "8 8";
  visible = "0";
  noCursor = true;

  new GuiControl(MessageBox_Frame)
  {
    profile = "GuiDefaultProfile";
    horizSizing = "right";
    vertSizing = "bottom";
    position = "120 375";
    extent = "400 24";
    minExtent = "8 8";
    visible = "1";

    new GuiTextCtrl(MessageBox_Text)
    {
      profile = "GuiTextProfile";
      horizSizing = "right";
      vertSizing = "bottom";
      position = "6 5";
      extent = "10 22";
      minExtent = "8 8";
      visible = "1";
    };

    new GuiTextEditCtrl(MessageBox_Edit)
    {
      profile = "GuiTextEditProfile";
      horizSizing = "right";
      vertSizing = "bottom";
      position = "0 5";
      extent = "10 22";
      minExtent = "8 8";
      visible = "1";
      altCommand = "$ThisControl.eval();";
      escapeCommand = "MessageBox_Edit.onEscape();";
      historySize = "5";
      maxLength = "120";
    };
   };
 };
It is all familiar stuff, but take note that the outer object, MessageBox, is initially invisible. The code that pops the box up will make it visible and invisible again as needed.
There is a GuiTextCtrl named MessageBox_Text that is at the same level as the GuiTextEditCtrl named MessageBox_Edit. The MessageBox_Text can be used to put a prompt in front of the area where the message will be typed in, although it has no text here in the definition. The MessageBox_Edit control is the control that accepts our typed-in message. The altCommand property specifies what statement to execute when the Enter key is pressed, and the escapeCommand property specifies what to do when the Escape key is pressed. The handlers for these two functions will be discussed later in the code discussion in the “Client Code” section.
CLIENT CODE
I’m not going to make you type in great reams of program code at this stage of the game, though you don’t get off the hook completely. You will have to make some changes to accommodate the new stuff, and we’ll also examine the contents of some of the new stuff to see what it does.
MenuScreen Interface Code
Open the file koobcontrolclientinitialize.cs, locate the function Initialize Client, and add the following lines in the grouping with the other similar statements:
  Exec("./interfaces/hostscreen.gui");
  Exec("./interfaces/soloscreen.gui");

  Exec("./misc/hostscreen.cs");
  Exec("./misc/soloscreen.cs");
Like I promised, I won’t make you type in those four files referenced in those exec statements; you can copy them from 3D3ERESOURCESCH23 and put them into the directories under the koobcontrolclient directory in the subdirectories specified in the exec statements.
Each of these files is basically one module split into two parts. The actual interface definitions are in the files with the .gui extensions, while the code that manages the interfaces is in the files with the same prefix name but ending with the .cs extension.
If you go back to the previous code listing for menuscreen.gui, you will see where each of these new interfaces is invoked. HostScreen is defined in hostscreen.gui, and SoloScreen is defined in soloscreen.gui.
Each interface has roughly the same form. There is an OnWake method for the interface object that is called by the engine when that object is displayed by the Set Content call in the related button in the MenuScreen interface. This method prepares the interface and fills the various data fields in the interfaces.
SoloScreen Interface Code
The SoloScreen interface that you saw in Figure 23.2 prepares a list of mission files that it finds so that you can select one of them to play with. The functional code for the SoloScreen interface, extracted from soloscreen.cs, is shown here for discussion (don’t type it in):
function PlaySolo()
{
   %id = SoloMissionList.getSelectedId();
   %mission = getField(SoloMissionList.getRowTextById(%id), 1);

   createServer("SinglePlayer", %mission);
   %conn = new GameConnection(ServerConnection);
   RootGroup.add(ServerConnection);
   %conn.setConnectArgs("Reader");
// %conn.setConnectArgs($pref::Player::Name);
// %conn.setJoinPassword($Client::Password);
   %conn.connectLocal();
}


//--------------------------------------
function SoloScreen::onWake()
{
  SoloMissionList.clear();
  %i = 0;
   for(%file = findFirstFile($Server::MissionFileSpec); %file !$= ""; %file = find-
NextFile($Server::MissionFileSpec))
   if (strStr(%file, "assets/maps/") != -1 )
       SoloMissionList.addRow(%i++, getMissionDisplayName(%file) @ "	" @ %file );
 SoloMissionList.sort(0);
 SoloMissionList.setSelectedRow(0);
 SoloMissionList.scrollVisible(0);
}


//---------------------------------------
function getMissionDisplayName( %missionFile )
 {
  %file = new FileObject();

  %MissionInfoObject = "";
  %theLevelInfoObjectName = "";
 if ( %file.openForRead( %missionFile ) ) {
            %inInfoBlock = false;

            while ( !%file.isEOF() ) {
                   %line = %file.readLine();
                   %line = trim( %line );
                   if( strstr(%line, "new LevelInfo(" ) != -1)
                   {
                       %inInfoBlock = true;
                       %theLevelInfoObjectName = ExtractInfoObjectName(%line);
      }
      else if( %inInfoBlock && %line $= "};" )
      {
         %inInfoBlock = false;
         %MissionInfoObject = %MissionInfoObject @ %line;
         break;
      }

      if( %inInfoBlock )
        %MissionInfoObject = %MissionInfoObject @ %line @ " ";
     }

     %file.close();
    }
    %MissionInfoObject = "%MissionInfoObject = " @ %MissionInfoObject;
    eval( %MissionInfoObject );

    %file.delete();

    %levelname=%theLevelInfoObjectName.LevelName;
    %theLevelInfoObjectName.delete();
    if( %levelname !$= "" )
      return %levelname;
    else
      return fileBase(%missionFile);
   }

   function ExtractInfoObjectName(%theString)
   {
     %start = strpos(%theString, "(" ) + 1;
     %end = strpos(%theString, ")" );
     return getSubStr(%theString,%start,%end-%start); }
The onWake method is as described in earlier chapters; in this case the onWake method clears the mission list and then populates it according to the matching files it finds in the path indicated by $Server::MissionFileSpec. This variable is set in the file koobcontrolserverinitialize.cs with the following line in the InitializeServer function:
$Server::MissionFileSpec = "*/maps/*.mis";
There are a couple of things you should understand about the way the search is done in the code presented.
First, there is the matter of the syntax used here. It can be difficult to decipher C-based code because of the looseness allowed—and TorqueScript’s syntax is extremely close to that of the C language and C++. You will recall that with most statements that employ a code block, such as if and for, you can use the long form or the short form, depending on your needs.
For example, the long form using braces
  if (%a==1) {
   %x=5;
  }
can also be written as
  if (%a==1)
  {
   %x=5;
  }
or as
if (%a==1)
{
%x=5;
}
There are also other minor variations, but I’m sure you get the idea. The compiler doesn’t care about the lines the code appears on, and it doesn’t care about the amount of white space (tabs, spaces, and carriage returns). It only cares that the correct tokens and keywords are in the right place and that they make sense according to the compiler’s parsing rules. Of course, white space is used to separate tokens and keywords, but the amount is not important to the parser.
The short form of these kinds of statements does depend on statement context, however. First, note that the preceding code can also be written as
if (%a==1)% x=5;
This demonstrates that the braces in the earlier example are superfluous in this particular flavor of statement. However,
  if (%a==1)
   %x=5;
is a valid rendition of the short form—but the conditional code that you want executed must exist as a single statement that immediately follows the conditional test. In this example, if the test is satisfied, %x is assigned the value 5. If the test is not satisfied, the ensuing assignment is not carried out.
However, using the same form
  if (%a==1)
   %x=5; %b=6;
if the test is satisfied, %x is assigned the value 5 as before, and %b is assigned the value 6. But (and this is a big but) if the test is not satisfied, although the ensuing assignment statement is not carried out, the one after it still is. So with this last bit of code, %b always gets assigned the value 6.
By now you may be wondering why this digression. Here’s why: the SoloScreen:: onWake method has the following statements that search for available mission files to use to populate its list:
  for(%file = findFirstFile($Server::MissionFileSpec);
      %file !$= ""; %file = findNextFile($Server::MissionFileSpec))
  if (strStr(%file, "assets/maps/") != -1 )
      SoloMissionList.addRow(%i++, getMissionDisplayName(%file) @ "	" @
        %file );
You might be tempted to misinterpret this code, even if you thoroughly understand programming in C or TorqueScript. What we need to do is simplify the code to remove obfuscation introduced by the line context: We’ll change all instances of findFirstFile($Server::MissionFileSpec) to fFF(), all instances of findNextFile($Server::MissionFileSpec)) to fNF(), and finally, all instances of getMissionDisplayName(%file) to gMDN(). Now the code will look like this (it won’t compile, but we don’t care about that):
for(%file = fFF();
     %file !$= ""; %file = fNF())
     if (strStr(%file, "assets/maps/") != -1 )
         SoloMissionList.addRow(%i++, gMDN()@ "	" @ %file );
If we tidy up the white space a bit, we get this:
for(%file = fFF(); %file !$= ""; %file = fNF())
     if (strStr(%file, "assets/maps/") != -1 )
         SoloMissionList.addRow(%i++, gMDN()@ "	" @ %file );
And hey, presto! The code structure reveals the algorithm quite nicely. The original line wrapping made the code hard to understand and made it look wrong when it actually wasn’t. There are several lessons to be learned here:
1. Make sure your programming editor lets you display long lines of maybe 150 characters or more, just in case you have them.
2. Pay attention to your function and variable name lengths. Long descriptive names are extremely useful when you are trying to understand unfamiliar or long-forgotten code, but there are times when they can confuse more than explain.
3. Your own code may confuse you at some later point just as much as it might confuse someone else who needs to understand it (someone you’ve called in to fix bugs for you, for example).
What fix do I recommend for this? Shorter names? No. Instead, use braces and indenting and put the statements in the long form in order to remove any contextual ambiguity.
  for(%file = findFirstFile($Server::MissionFileSpec);
      %file !$= ""; %file = findNextFile($Server::MissionFileSpec))
  {
    if (strStr(%file, "assets/maps/") != -1 )
    {
     SoloMissionList.addRow(%i++, getMissionDisplayName(%file) @ "	" @ %file );
    } // end of if
  } // end of for
You can also add comments if they clarify what you are doing. Don’t worry about insulting the intelligence of expert programmers by doing this. Any seasoned hand will greatly appreciate anything you do to make it quick and easy to understand what you are doing. Especially if they are doing code reviews for you!
Now, after that long-windedness, we can address the second issue about that code: what does it do?
The initial findFirstFile uses the variable to search the specified directory for the first instance of a matching file. If you actually do find a match, the path name is deposited in the %file variable, and you enter a loop. In each iteration of the loop, calls are made to findNextFile, which will find any new file in the sequence that matches the search criteria. If findNextFile does not find any more matching files, the %file variable is set to NULL, and the loop exits. In the loop we check the contents of the path name in %file to make sure that the file it has found is in the path assetsmaps. If the file we found is not in that path, then we consider it to be invalid and ignore it. If the file path does contain assetsmaps, then we add it to our mission list using the SoloMissionList.addRow method.
The findFirstFile-findNextFile construct is a powerful one. It maintains an internal list of the files that it has found on your behalf. You just need to extract the path names as they appear.
Having said all that about such a small chunk of code, I should point out that this interface is a basic one. You might consider adding a few more capabilities, such as the sequence or random map selection option you’ll find next in the Host interface.
The getMissionDisplayName is a bigger and more impressive-looking bit of work, but its function is fairly straightforward, albeit with a semimagical twist to it, so to speak. It opens up a file as directed and looks through it for the line that contains the statement “%MissionInfoObject = “. It then creates an actual MissionInfoObject by building up the statement line-by-line and feeding it to eval(). We then use the newly created object to access the name property to obtain the level name and return that level name to the calling function. This is a pretty clever way to examine a file. Pretty sensible, too, when you realize that mission files are simply TorqueScript files with a different extension.
This bit of code presents to you a lot of possibilities about how you can use Torque-Script. One that comes to mind is a reprogrammable AI robot, where you merely read in the new instructions at run time, with the instructions written in Torque-Script. No need to create your own robot control language!
Showing Level Information While Loading
Up until now, the little screen that shows when a map is loading has been showing some “canned” text—the same text no matter which map is loading. You might not be satisfied with that, so I’ll show you how to change it so that it will display the level name and description that can be found in the map’s mission file in the theLevelInfo object.
In the file koobcontrolclientmisc ransfer.cs, locate the function near the top called handleLoadInfoMessage(). In that function find the following two lines of code (the strings might be somewhat different):
   LOAD_MapName.setText( "Book B: Chapter 5 version");
   LOAD_MapDescription.setText( "A map showing many gameplay and world elements");
And replace them with these two lines of code:
   LOAD_MapName.setText( %mapName);
   LOAD_MapDescription.setText( %msgString);
The “canned” version was used from the beginning because not all of the support capability was in the game yet. But now everything we need is in the game, so we can get the level name and description from the messages that come in from the server, and display them in the loading screen.
You could use a similar display method to put changing text, or even random images in the loading screen, if you like.
Host Interface Code
The Host interface code is similar to the SoloScreen code that you just looked at. There is nothing remarkable about it that hasn’t already been mentioned, except that you should add some code to provide the player the ability to choose between playing maps in sequence (as exists now) or randomly.
You will want to have the Sequence and Random buttons that I’ve already provided in HostScreen.gui set a variable that your onWake code can examine. If the variable has one value, leave things as they are. If the variable has a different value, then have the onWake method choose a map randomly. One simple method to introduce the randomness is to select a random value between 0 and the number of available maps and then to reject that many maps when the findNextFile function returns them. Then you would accept the next map returned.
Give it a try.
FindServer Interface Code
You saw the FindServer interface way back there in Figure 23.4. It lets you browse for servers with which you can connect. We’ve already looked at how this part of Torque works, back in Chapter 5, 6, and 7, so I won’t go into too much detail here. The functional code for the FindServer interface, extracted from ServerScreen.cs, is shown here for a brief discussion:
function ServerScreen::onWake()
{
  JoinServer.SetActive(ServerList.rowCoutn() > );
  ServerScreen.queryLan();
}
function ServerScreen::queryLan(%this)
{
  queryLANServers(
  28000,    // lanPort for local queries
  0,        // Query flags
  $Client::GameTypeQuery,    // gameTypes
  $Client::MissionTypeQuery, // missionType
  0,        // minPlayers
  100,      // maxPlayers
  0,        // maxBots
  2,        // regionMask
  0,        // maxPing
  100,      // minCPU
  0         // filterFlags
  );
}
function ServerScreen::Cancel(%this)
{
  CancelServerQuery();
}
function ServerScreen::Join(%this)
{
  CancelServerQuery();
  %id = ServerList.GetSelectedId();
  %index = getField(ServerList.GetRowTextById(%id),6);
  if (SetServerInfo(%index)) {
    %conn = new GameConnection(ServerConnection);
    %conn.SetConnectArgs($pref::Player::Name);
    %conn.SetJoinPassword($Client::Password);
    %conn.Connect($ServerInfo::Address);
  }
} function ServerScreen::Close(%this)
{
  cancelServerQuery();
  Canvas.SetContent(MenuScreen);
}
function ServerScreen::Update(%this)
{
  ServerQueryStatus.SetVisible(false);
  ServerServerList.Clear();
  %sc = getServerCount();
  for (%i = 0; %i < %sc; %i++) {
    setServerInfo(%i);
    ServerServerList.AddRow(%i,
      ($ServerInfo::Password? "Yes": "No") TAB
      $ServerInfo::Name TAB
      $ServerInfo::Ping TAB
      $ServerInfo::PlayerCount @ "/" @ $ServerInfo::MaxPlayers TAB
      $ServerInfo::Version TAB
      $ServerInfo::GameType TAB
      %i); // ServerInfo index stored also
  }
  ServerServerList.Sort(0);
  ServerServerList.SetSelectedRow(0);
  ServerServerList.scrollVisible(0);

  ServerJoinServer.SetActive(ServerServerList.rowCount() > 0);
}
function onServerQueryStatus(%status, %msg, %value)
{
  if (!ServerQueryStatus.IsVisible())
    ServerQueryStatus.SetVisible(true);
  switch$ (%status) {
    case "start":
    case "ping":
      ServerStatusText.SetText("Finding Hosts");
      ServerStatusBar.SetValue(%value);
    case "query":

      case "done":
      ServerQueryStatus.SetVisible(false);
      ServerScreen.update();
  }
}
Here the OnWake method makes the list active if there is anything already available from a previous incarnation to list. It’s invoked as soon as the interface object is displayed on the screen.
When you click the Query Lan button, the queryLan method is called, which then scans the local area network looking for port 28000 (which is the default value of $Pref::Server::Port) on each computer it finds. If the port is open, the engine sends a query onto the port. If there is a Torque 3D server on that port on that computer, the server will respond appropriately, depending on the query masks. If the found server returns any information, it is deposited in the server information list, the Update method is invoked, and the list is created on the screen. This back-and-forth transaction is described in greater detail in Chapter 6.
The onServerQueryStatus method handles the various responses from the master server and deposits returned information, according to the changing states, into the various fields of the list.
ChatBox Interface Code
Open the file koobcontrolclientinitialize.cs, and add the following lines to the function InitializeClient:
  Exec("./misc/chatbox.cs");
  Exec("./misc/messagebox.cs");
Note: it’s important that you place these lines above the line that execs presetkey.cs, because there will be code in presetkeys.cs in the future that will rely on those other two files being loaded first.
Also add these lines to the same function:
  Exec("./interfaces/chatbox.gui");
  Exec("./interfaces/messagebox.gui");
Put these two lines that load the interfaces right after the other code that loads interfaces.
These four exec statements load the files that will provide our chat interface. You can copy them from 3D3ERESOURCESCH23 and put them into the directories under the koobcontrolclient directory in the subdirectories specified in the exec statements.
Now, let’s add something to one of the files you just copied: koobcontrolclient chatbox.cs. Open that file up and at the very top of the file look for these two lines above everything else:
new MessageVector(MsgBoxMessageVector);
$LastframeTarget = 0;
If they aren’t already there, type them in and save your work.
The first line creates a dynamic array that carries chat messages (a MessageVector) and the second line is a variable that tracks the position within that array.
The ChatBox interface receives its text via a rather convoluted route. The message text originates at one of the clients and is sent to the server. The server receives the typed message and passes it to some common code that handles chat messages between the server and the client. Once the message arrives at the client common code, it is passed to the message handler called onChatMessage, which we provide in our client control code in our ChatBox.cs module. There is a parallel handler we are expected to supply in our client control code called onServerMessage, which is essentially the same as the one for the chat messages. These two functions look like this (don’t type this in):
function onChatMessage(%message, %voice, %pitch
{
  if (GetWordCount(%message)) {
     ChatBox.AddLine(%message);
  }
}
function onServerMessage(%message)
{
  if (GetWordCount(%message)) {
     ChatBox.AddLine(%message);
  }
}
Not much needed here—just adding the new text to the ChatBox object using its AddLine method.
The AddLine method is where all the heavy lifting is done; it looks like this (again, no typing):
function ChatBox::addLine(%this,%text)
{
 %textHeight = %this.profile.fontSize + %this.lineSpacing;
 if (%textHeight <= 0)
   %textHeight = 12;
 %chatScrollHeight = getWord(%this.getGroup().extent, 1);
 %chatPosition = getWord(%this.extent, 1) - %chatScrollHeight +
    getWord(%this.position, 1);
 %linesToScroll = mFloor((%chatPosition / %textHeight) + 0.5);
 if (%linesToScroll > 0)
     %origPosition = %this.position;
 while( !chatPageDown.isVisible() && ChatBoxMessageVector.getNumLines() &&
        (ChatBoxMessageVector.getNumLines() >= $pref::frameMessageLogSize))
 {
   %tag = ChatBoxMessageVector.getLineTag(0);
   if(%tag != 0)
      %tag.delete();
   ChatBoxMessageVector.popFrontLine();
 }
 ChatBoxMessageVector.pushBackLine(%text, $LastframeTarget);
 $LastframeTarget = 0;
 if (%linesToScroll > 0)
 {
  chatPageDown.setVisible(true);
  %this.position = %origPosition;
 }
 else
   chatPageDown.setVisible(false);
}
We start out by getting the font size from the profile. We need this in order to determine the height and width spacing requirements for scrolling and frame sizing.
Then we use getGroup to obtain the handle for the object group this control belongs to. And we use that handle to get the parent group’s handle. Then we use that handle to get the extent property, which tells us the height and width of the parent object. We take the second value in the extent—which is the height—by using getWord to get word number 1, which is actually the second word. (We perverted programmers usually count starting at 0 instead of 1—but not always!)
The object retains the current output position using the position parameter, and that is used to calculate where the next position will be and saved as %chat Position. We then use the calculations to figure out %linesToScroll, which dictates the text scroll action and the scroll bar actions.
Next, we enter a loop that extracts text from the text buffer called MsgBoxMessage-Vector line by line and inserts the lines in the ChatBox control.
Finally, we adjust the visibility of the scroll down prompt based on whether or not our position causes text to be out of sight at the bottom of the display.
While we’re at it, let’s get that chat box to appear on the player’s display. Open the file KOOBcontrolclientmiscscreens.cs and, if they aren’t already there, add the following lines to the first method in the file, PlayerInterface::onWake, placing the lines just below the call to activateDirectInput() (Yes! Start typing!):
  Canvas.pushDialog( MainChatBox );
  chatBox.attach(ChatMsgMessageVector);
There you go. We linked the chat box to the display, and then linked the message vector to the chat box.
MessageBox Interface Code
The MessageBox interface accepts our input from the keyboard.
We need to add a message handler to the server to receive the typed messages when they are sent from the client. Because of the context, it makes more sense to do that here than in Chapter 22, even though we are mostly dealing with client issues in this chapter.
Open the file koobcontrolserverserver.cs, and add the following function to the end of the file (more typing):
function serverCmdTypedMessage(%client, %text)
{
  if(strlen(%text) >= $Pref::Server::MaxChatLen)
     %text = getSubStr(%text, 0, $Pref::Server::MaxChatLen);
  ChatMessageAll(%client, 'c4%1: %2', %client.name, %text);
}
This handler grabs the incoming typed message, makes sure that it isn’t too long (we may want to restrict chat messages in order to preserve bandwidth requirements), and then sends the message to the common code server function called ChatMessageAll. The ChatMessageAll function will distribute the message to all the other clients logged in to our game.
Next, let’s look at the code that manages this on behalf of the MessageBox interface (no typing):
function MessageBox::Open(%this)
{
 %offset = 6;
 if(%this.isVisible())
   return;
 %windowPos = "8" @ ( getWord( outerChatFrame.position, 1 ) + getWord(
outerChatFrame.extent, 1 ) + 1 );
 %windowExt = getWord( OuterChatFrame.extent, 0 ) @ " " @ getWord(
MessageBox_Frame.extent, 1 );
 %textExtent = getWord(MessageBox_Text.extent, 0);
 %ctrlExtent = getWord(MessageBox_Frame.extent, 0);
 Canvas.pushDialog(%this);
 MessageBox_Frame.position = %windowPos;
 MessageBox_Frame.extent = %windowExt;
  MessageBox_Edit.position = setWord(MessageBox_Edit.position, 0, %textExtent + % offset);
  MessageBox_Edit.extent = setWord(MessageBox_Edit.extent, 0, %ctrlExtent - %textEx-tent - (2 * %
offset));
  %this.setVisible(true);
  deactivateKeyboard();
  MessageBox_Edit.makeFirstResponder(true);
 }
 function MessageBox::Close(%this)
 {
   if(!%this.isVisible())
      return;
   Canvas.popDialog(%this);
   %this.setVisible(false);
   if ( $enableDirectInput )
     activateKeyboard();
   MessageBox_Edit.setValue("");
  }
  function MessageBox::ToggleState(%this)
  {
    if(%this.isVisible())
       %this.close();
    else
       %this.open();
   }
   function MessageBox_Edit::OnEscape(%this)
   {
     MessageBox.close();
   }
   function MessageBox_Edit::Eval(%this)
   {
     %text = trim(%this.getValue());
     if(%text !$= "")
        commandToServer('TypedMessage', %text);
     MessageBox.close();
   }
   function ToggleMessageBox(%make)
   {
     if(%make)
        MessageBox.toggleState();
   }
The Open method does some assignments of local variables based on the settings of properties of the MessageBox object. This is so we can place the message box into a position relative to the chat display; in this case we are going to put it below and offset a little bit to the right.
Once we’ve done this, the code loads the MessageBox control into the Canvas using Canvas.pushDialog(%this), where %this is the handle of the Message-Box control object, and positions it according to the values of the earlier saved local variables.
When we’ve completed the positioning of the control, then the code makes it visible.
Next, the code turns off keyboard input for the Canvas object and sets the MessageBox_Edit subobject responsible for handling key inputs. From this point on, all typing goes into the MessageBox_Edit subobject, until something changes that.
The Close method removes the control from the Canvas, makes the control invisible again, and restores keyboard input handling to the Canvas.
The ToggleState method merely opens or closes the message box in a toggle fashion. If the control is open, it closes it, and vice versa.
The OnEscape method closes the control. This method is defined as the escape-Command property value in the interface definition in MessageBox.gui.
The Eval method obtains the entered text, trims empty spaces from the end, and sends the text to the server as the parameter for a TypedMessage message, which the server knows how to handle.
Finally, the ToggleMessageBox method is bound to the “T” key in our presets.cs file. When it receives a non-null value in %make, it changes the current MessageBox open state using the ToggleState method. Open koobcontrolclientmisc presetkeys.cs and type this line in at the bottom of the file:
PlayerKeymap.bindCmd(keyboard, "t", "ToggleMessageBox(1);", "");
GAME CYCLING
The final feature we need to implement is the ability to cycle games when they are over—that is, when a player has reached either the score limit or the time limit.
First, add the following functions to the end of koobcontrolserverserver.cs:
function DoGameDurationEnd()
{
  if (!$Game::Cycling) {
    $Game::Cycling = true;
    $Game::Schedule = schedule(0, 0, "onCycleExec");
  }
}
function onCycleExec()
{
  EndGame();
  $Game::Schedule = schedule($Game::EndGamePause * 1000, 0,
    "onCyclePauseEnd");
}

function onCyclePauseEnd()
{
  $Game::Cycling = false;
  %search = $Server::MissionFileSpec;
  for (%file = findFirstFile(%search); %file !$= "";
     %file = findNextFile(%search)) {
    if (%file $= $Server::MissionFile) {
      %file = findNextFile(%search);
      if (%file $= "")
       %file = findFirstFile(%search);
      break;
    }
  }
  clearCenterPrintAll(); // get rid of game over screen.
  loadMission(%file);
}
function EndGame()
{
  if (!$Game::Running)
  {
    error("endGame: No game running!");
    return;
  }
  cancel($Game::Schedule);
  cancel($Game::SyncClocksSchecule);
  %theWinner = "Somebody";
  centerPrintAll("Game Over
" @ %theWinner @ " wins.",
      $Game::EndGamePause, 2);
  $Game::Running = false;
}
The first function, DoGameDurationEnd, schedules the actual cycling code to occur at some later point. In this case we do it right away after making sure that we aren’t actually already cycling.
The function onCycleExec actually ends the game. The EndGame function just stops when it finishes, but before stopping, it sends a message to all of the clients informing them that the game is over. Further action is scheduled to be taken by the onCyclePauseEnd function. This allows us to put up a victory screen or other messages and leave them up for an appropriate viewing time before continuing on to the next game. This code uses the global variable $Game::EndGamePause, so it would be a good idea to initialize that variable somewhere. Put the line
$Game::EndGamePause = 10;
anywhere in the StartGame() function in koobcontrolserverserver.cs. That defaults the cycle pause to last 10 seconds. If you want to, it would be a smashing idea to add an edit control into the HostScreen interface to allow the host to adjust this value at start time as well. I’m sure there is a whole host of other parameters that you could add to the host interface (hehe, see what I did there?).
Okay, in order to provoke the actual DoGameDurationEnd function into being, we do two things. First, when the game is launched, we schedule its demise based on $Game::Duration. Locate the function StartGame farther up in the server.cs file, way up near the top, and look at these lines:
  if ($Game::Duration)
    $Game::Schedule = schedule($Game::Duration*1000,0,"DoGameDurationEnd");
This starts the game timer running. When it expires it invokes the DoGameDurationEnd function.
Something we need to do is add some code that checks to see if a player has hit the $Game::MaxPoints limit.
Locate the function GameConnection::DoScore(), and add this code to the top of the function:
  %client.score = (%client.lapsCompleted * $Game::Laps_Multiplier) +
                  (%client.money * $Game::Money_Multiplier) +
                  (%client.deaths * $Game::Deaths_Multiplier) +
                  (%client.kills * $Game::Kills_Multiplier) ;
This code accumulates the various scoring values into a single overall score. Now add the following code to the end of the same DoScore function:
   if (%client.score >= $Game::MaxPoints &&
       $Game::MaxPoints !$= "" &&
       $Game::MaxPoints != 0) // set maxpoints to "" or 0 to ignore maxpoints
  cycleGame();
This causes the game cycling activity to happen if any one player hits the score limit. If the ::MaxPoints variable hasn’t been initialized (and equals “” or null) or has been set to 0, then the points-based ending of the game is ignored, and the game is duration-based only. Game cycling entails ending the game, loading a new map, and dropping the players into the game in the new map.
Game Over
We need to add some kind of notification to the player that the level has ended and that somebody won. I’ll show you how to notify all of the players in the game that the game is over, and that somebody won (or it was a tie). I’m leaving it to you to figure out how to determine who the winner is (or if it’s a tie). All the info you need access to is available in the code, you just need to work out how to go through the list of clients and find the winner, and how to pass that information on to all the clients.
Add the following control to the PlayerInterface, by opening Koobcontrolclient interfacesplayerinterface.gui, and inserting this control after the last control in the file, but before the line at the bottom with the final closing-brace/semicolon pair.
  new GuiBitmapCtrl(centerPrintDlg) {
    bitmap = "art/gui/hudfill.png";
    wrap = "0";
    position = "250 350";
    extent = "500 256";
    minExtent = "8 8";
    horizSizing = "center";
    vertSizing = "center";
    profile = "CenterPrintProfile";
    visible = "0";
    active = "1";
    tooltipProfile = "GuiToolTipProfile";
    hovertime = "1000";
    isContainer = "0";
    hidden = "1";
    canSave = "1";
    canSaveDynamicFields = "0";


  new GuiMLTextCtrl(CenterPrintText) {
    lineSpacing = "2";
    allowColorChars = "0";
    maxChars = "-1";
    useURLMouseCursor = "0";
    position = "0 0";
    extent = "500 64";
    minExtent = "8 8";
    horizSizing = "center";
    vertSizing = "center";
    profile = "CenterPrintTextProfile";
    visible = "1";
    active = "1";
    tooltipProfile = "GuiToolTipProfile";
    hovertime = "1000";
    isContainer = "0";
    canSave = "1";
    canSaveDynamicFields = "0";
    };
  };
This control will receive the game over message that will be sent to each client via the EndGame function we saw earlier in the chapter.
FINAL CHANGE
The final, very, very last piece of code we are going to change will allow us to remain in the program after we exit a game. Previously, when we exited a game using the Escape key, the program quit. This final change tidies that up for us. Open the file koobcontrolclientmiscpresetkeys.cs, locate the function DoExitGame(), and change it to match the following:
function DoExitGame()
{
  if ( $Server::ServerType $= "SinglePlayer" )
    MessageBoxYesNo( "Exit Mission", "Exit Game?", "disconnect();", "");
  else
   MessageBoxYesNo( "Disconnect", "Disconnect?", "disconnect();", "");
}
This function now checks to see if we are in single- or multiplayer mode. It does this to provide a customized exit prompt depending on which mode it is. In any event, the disconnect function is called to break the connection with the game server.
MOVING RIGHT ALONG
So, there you have it. I hope your fingers aren’t worn to the bone. You can see that there is a great deal of power available to those worn fingertips. I’m sure that as you’ve progressed through the preceding chapters, your head began to fill with all sorts of ideas about things you might want to do. In the next and final chapter of the book, I have a few things I want to say on that topic.