BONUS CHAPTER 2
3ds Max 2012 Keyboard Shortcuts
Overriding the keyboard shortcuts
Using the Hotkey Map
Main interface shortcuts
Dialog box shortcuts
Character Studio shortcuts
Miscellaneous shortcuts
The key to working efficiently with Max is learning the keyboard shortcuts. If you know the keyboard shortcuts, you don't need to spend time moving the mouse cursor all around the interface; you can simply press a keyboard shortcut and get instant access to commands and tools.
Using Keyboard Shortcuts
Most of the major dialog boxes, such as the Material Editor and Track View, have their own set of keyboard shortcuts. When the Keyboard Shortcut Override toggle button on the main toolbar is enabled, keyboard shortcuts work for both the main interface and the separate dialog boxes. If there is a conflict, the dialog box's shortcut takes precedence.
For example, in the main Max window, the A key toggles the Angle Snap feature on and off, but in the Track View-Curve Editor window, the A key enables Add Keys mode. If the Curve Editor is open and the Keyboard Shortcut Override toggle is enabled, then the Add Keys mode is enabled. If the Keyboard Shortcut Override toggle is off, then the Angle Snap is activated.
If you want to change any of the keyboard shortcuts, the Customize User Interface dialog box includes a Keyboard panel for making changes. You can open this dialog box using the Customize ![]() Customize User Interface command.
Customize User Interface command.
Cross-Referenc
Chapter 4, “Customizing the Max Interface and Setting Preferences,” offers more details on creating custom keyboard shortcuts.
Using the Keyboard Shortcut Map
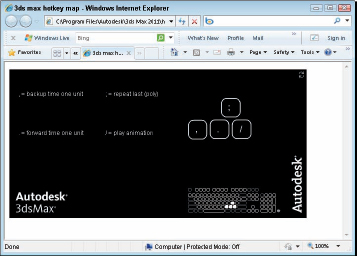
In the Help menu, you can find the Keyboard Shortcut Map menu command that opens an interactive window, shown in Figure 1, and displays all the current keyboard shortcuts for the main interface.
Note
The Keyboard Shortcut Map window is a Flash-enabled application that runs within a web browser. You need to allow ActiveX controls to run in order to see the application.
Moving the mouse cursor over the keyboard displayed in the lower-right corner of the Keyboard Shortcut Map window highlights the respective section of the keyboard and displays all keyboard shortcuts associated with those keys. The icon in the upper-right corner refreshes the interface, and the arrow icon in the lower-right corner cycles through all the keys.
FIGURE 1 The Keyboard Shortcut Map window displays keyboard shortcuts interactively.
Main Interface Shortcuts
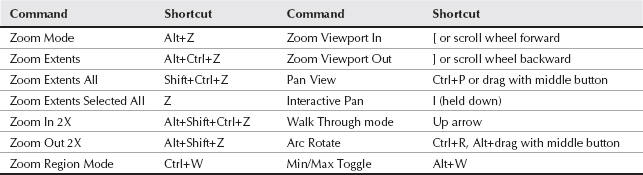
Tables 1 through 17 present the shortcut keys for the main interface.

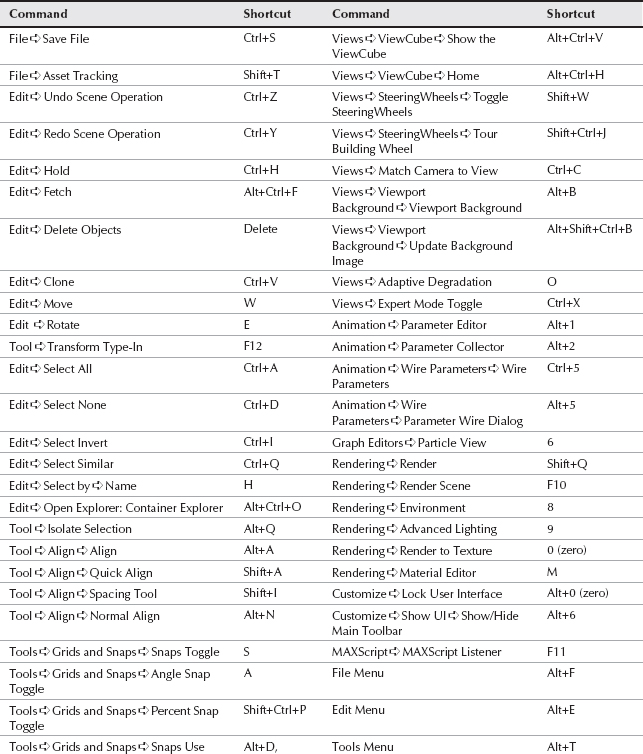
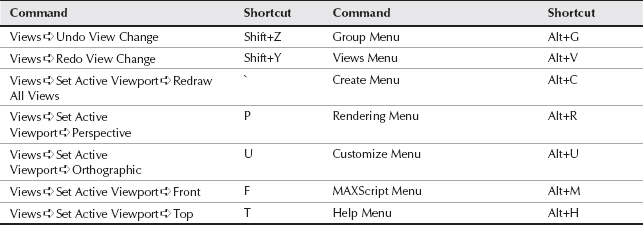
TABLE 2 Main and Floating Toolbars
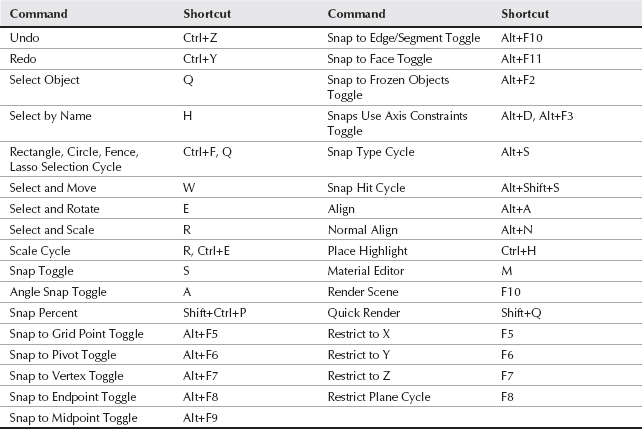
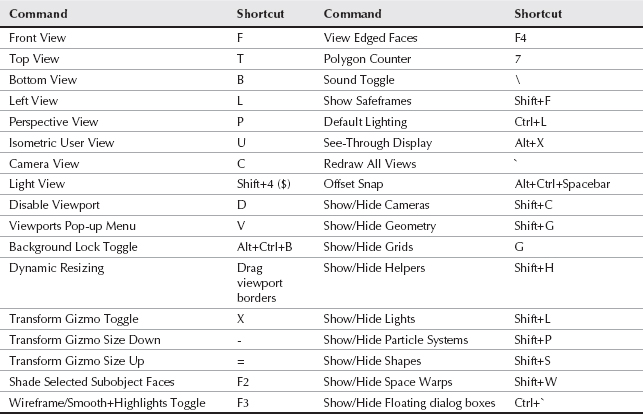
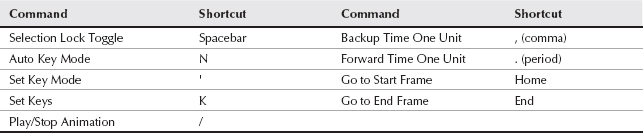
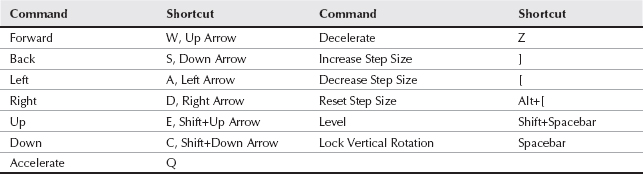
TABLE 5 Viewport Navigation Controls

Note
The Virtual Viewport option is available only when the OpenGL display driver is used.
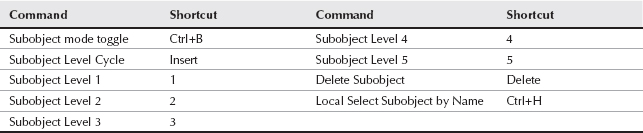

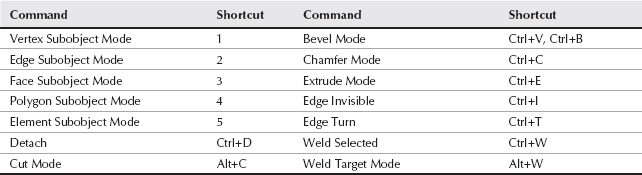
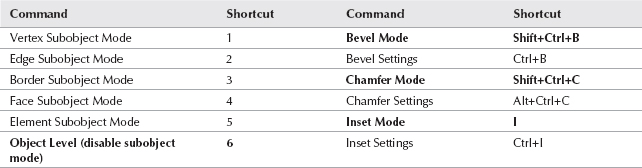
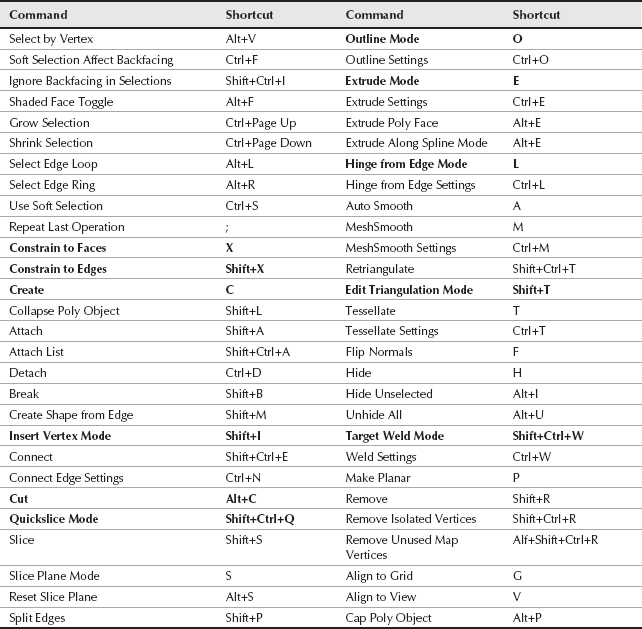
All commands in Table 12 that are listed in bold can be used as press-and-release keyboard shortcuts. These enable you to access a different command by pressing and holding the keyboard shortcut; when you release the keyboard shortcut, Max returns to the previous mode. Press-and-release commands are activated only if the Overrides Active option in the Keyboard panel of the Customize User Interface dialog box is enabled.
The following commands can be accessed using press-and-release keyboard shortcuts if you define a keyboard shortcut for them: Bridge, Constrain to None, Constrain to Normal, Paint Deform Push/Pull/Relax, Paint Soft Selection, and Turn.
Note
Don't confuse the keyboard shortcuts that work with the Edit Poly modifier with those for the Editable Poly object. Some of the same keyboard shortcuts work for both, but most don't work for the Editable Poly object.
You can use press-and-release keyboard shortcuts, highlighted in bold in Table 13, with Editable Poly objects.
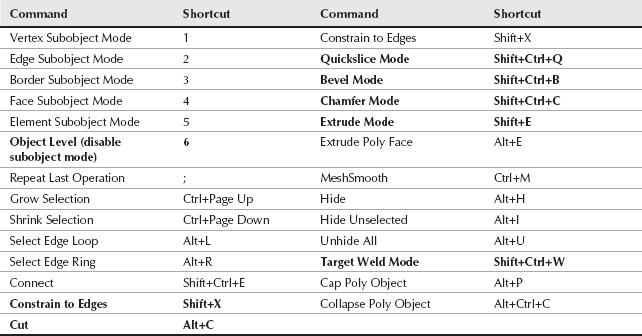
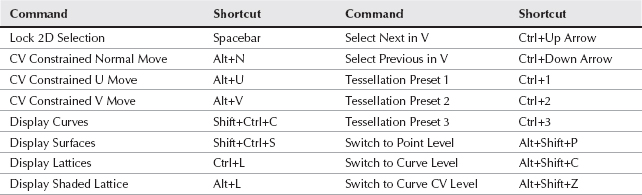
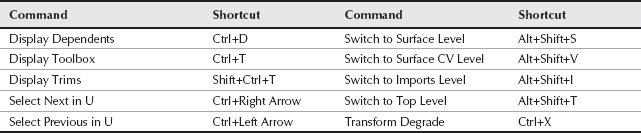
TABLE 15 Free-Form Deformations

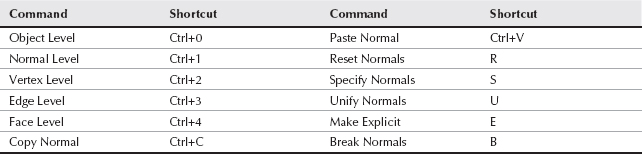
TABLE 16 Edit Normals Modifier

Dialog Box Shortcuts
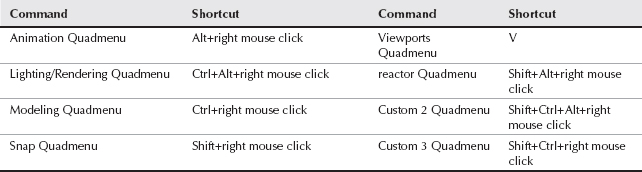
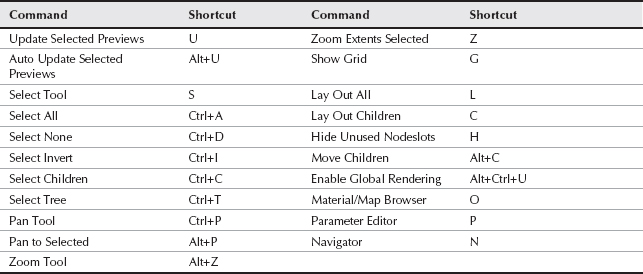
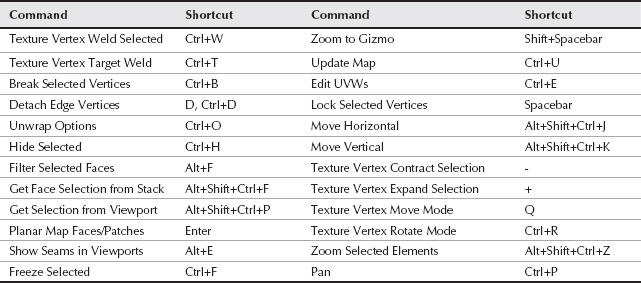
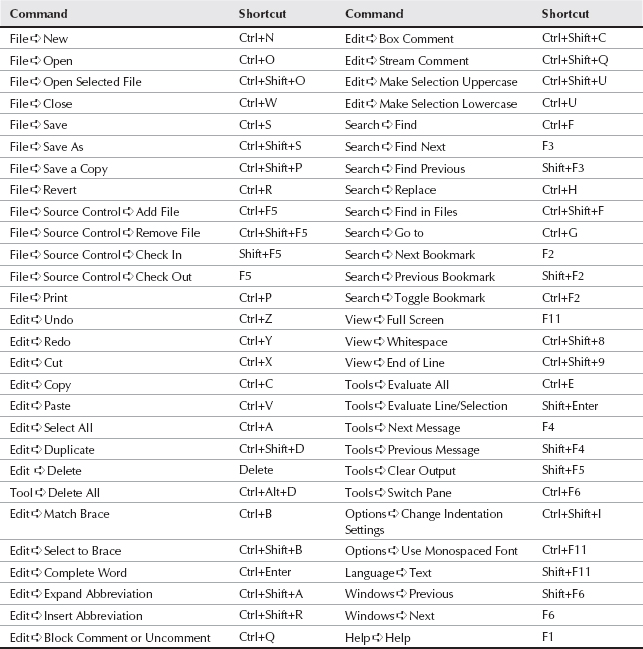
Tables 18 through 26 show shortcut keys that work with the various dialog boxes. The dialog box must be selected for these shortcuts to work. It is possible for modeless dialog boxes to have the dialog box visible but not selected.
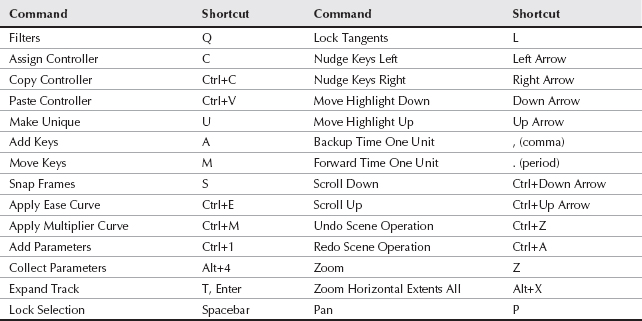
TABLE 18 Compact Material Editor

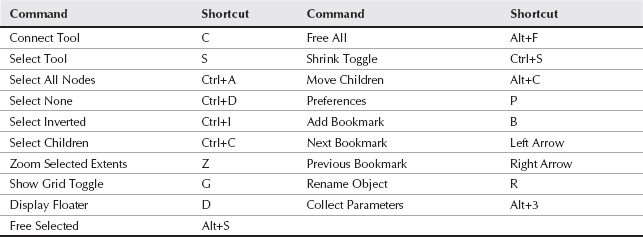
TABLE 19 Slate Material Editor


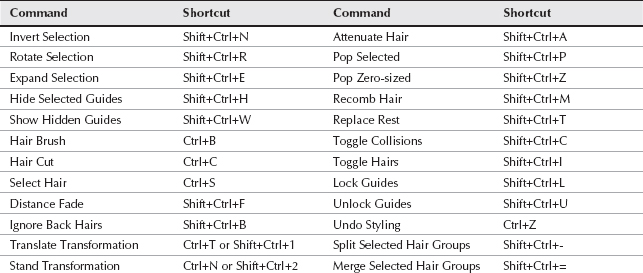
Character Studio Shortcuts
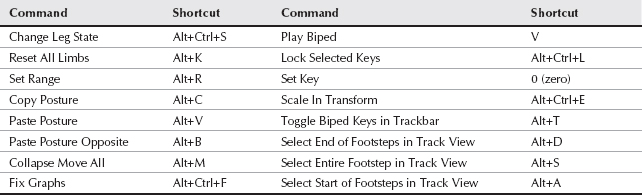
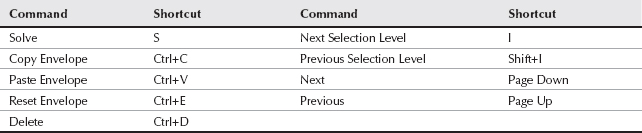
Tables 27 and 28 show shortcut keys that work with the Character Studio modules.
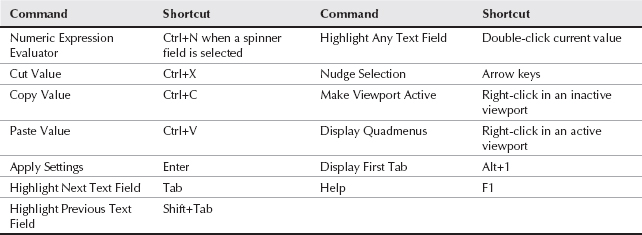
Miscellaneous Shortcuts
In addition to specific shortcuts for the main interface and the dialog boxes, Max provides several general shortcuts that can be used in many different places, as listed in Table 29.