
This chapter is devoted to the topic of model binders and action filters. First, we tackle the subject of model binders. You learn how to use a model binder to instantiate an object from a browser request.
For example, we already used the default model binder several times in this book. Whenever we use a class as a parameter for a controller action—such as a Product class—we are using the default model binder.
In some situations, you want to create a custom model binder. When you create a custom model binder, you get to decide how a new object is instantiated out of the ether.
In this chapter, you also learn how to create action filters. An action filter is a class that executes code before or after a controller action is invoked. You can use an action filter, for example, to log each time a controller action is invoked.
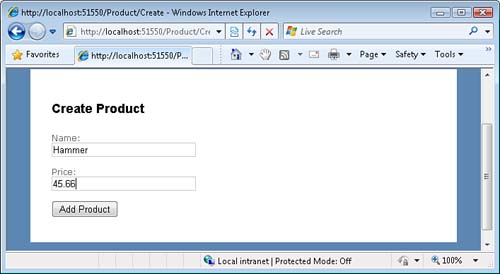
A model binder is responsible for mapping a browser request into an object. Consider the view in Listing 7.1. This view contains a simple HTML form for creating a new product (see Figure 7.1).
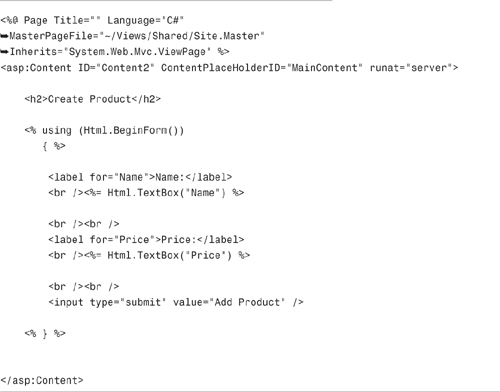
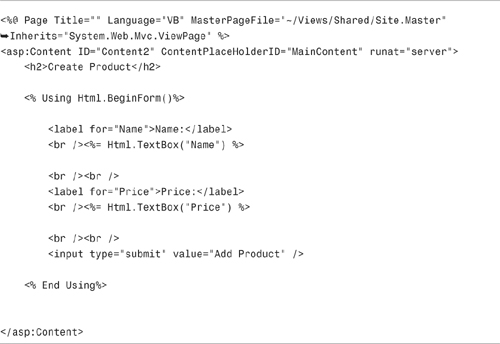
When you submit the form in Listing 7.1, you submit the form to the controller action in Listing 7.2.
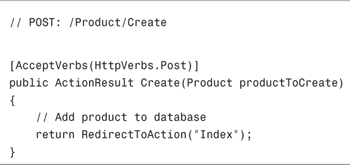
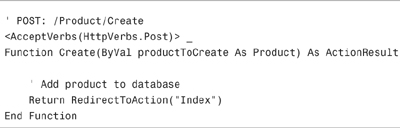
Notice that the controller action in Listing 7.2 accepts a Product parameter. A model binder—in this case, the default model binder—is responsible for instantiating a new Product class for the parameter. The default model binder also handles assigning the values of the HTML form fields to the properties of the new Product class.
The ASP.NET MVC framework ships with three model binders:
• Default model binder
• Form collection model binder
• HTTP posted file base model binder
In the following sections, you learn how to use each of these model binders. Later in this chapter, you learn how to extend the ASP.NET MVC framework by creating a custom model binder.
The default model binder is smart enough to create a variety of different types of objects from a browser request including the following:
• A primitive type such as a string, decimal, or DateTime.
• A class such as a Product or Customer class.
• An array such as a string or Product array.
• A collections such as an IEnumerable<T>, ICollection<T>, IList<T>, T[], Collection<T>, and List<T>.
• A dictionary such as an IDictionary<TKey, TValue> and Dictionary<TKey, TValue>.
For example, the view in Listing 7.3 contains a list of check boxes (see Figure 7.2). The check boxes all have the same name, and they are all part of the same check box group.
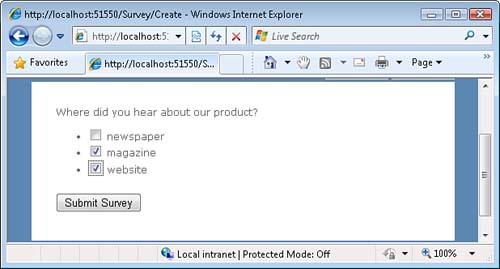
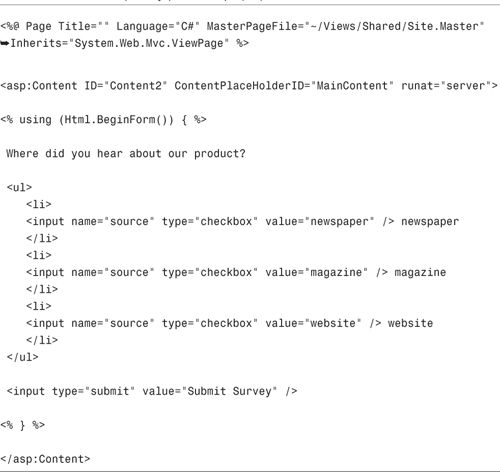
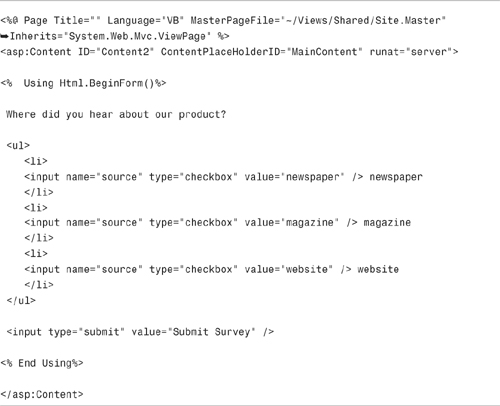
The Create() action in Listing 7.4 accepts a collection parameter that represents a list of strings. The default model binder converts the input fields in the form post into this parameter automatically.
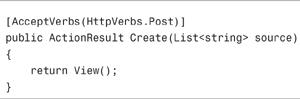
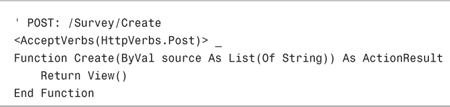
So if a user selects the magazine and website check boxes, the source collection will contain these two strings automatically.
The default model binder is smart enough to handle most complex classes. For example, the Customer class in Listing 7.5 includes an Address property that returns an instance of the Address class.
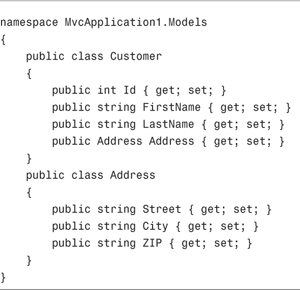
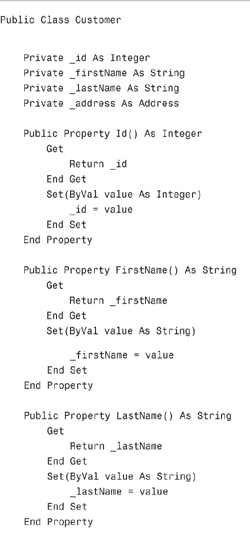
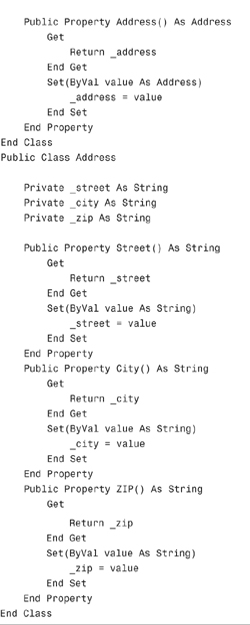
The view in Listing 7.6 contains an HTML form for creating a new customer (see Figure 7.3). Notice that the form consists of two subforms: a form for the customer and a form for the customer address. The view that generates this form is contained in Listing 7.6.
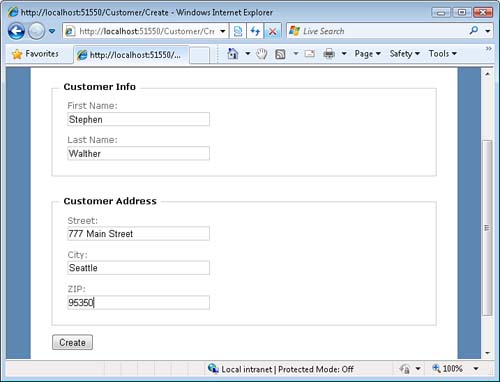
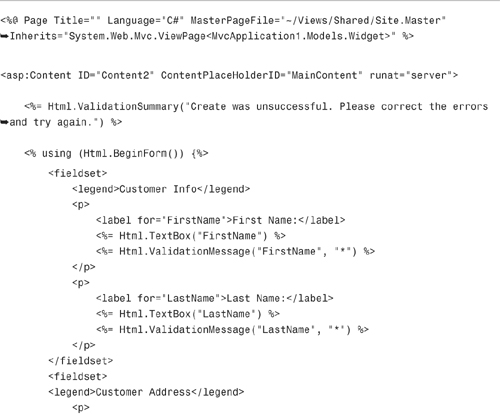
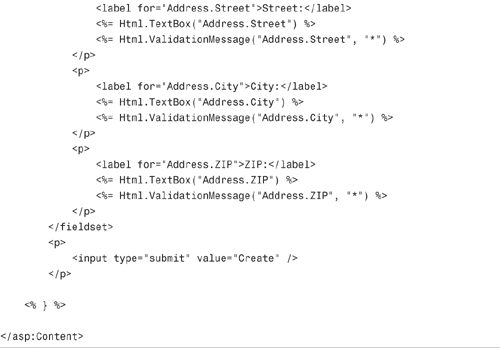
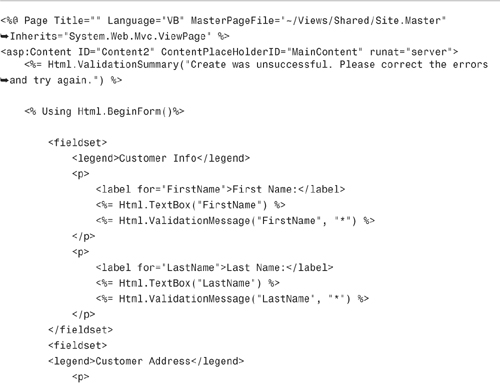
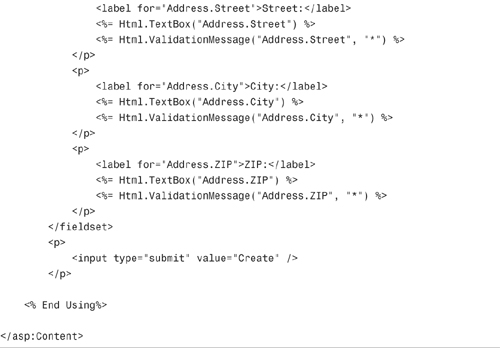
Notice that each of the address form fields is qualified with an Address prefix. For example, the form field that corresponds to the Street property is named Address.Street. The default model binder maps the Address.Street property to the Street property automatically.
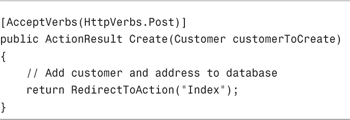
Finally, the Create() action in Listing 7.7 accepts an instance of the Customer class. The default model binder correctly populates the properties of the Customer.Address property.

You can use the Bind attribute to control how a model binder converts a request into an object. The Bind attribute has the following properties:
• Exclude—Enables you to exclude a comma-separated list of properties from binding
• Include—Enables you to include a comma-separated list of properties in binding
• Prefix—Enables you to associate a parameter with a particular form field prefix
The most common way that you use the Bind attribute is when you exclude an Id property from binding. For example, the Movies database table includes a column named Id that is an Identity column. Because the value of an Identity column is generated by the database automatically, you don’t want to bind a form field to this property.
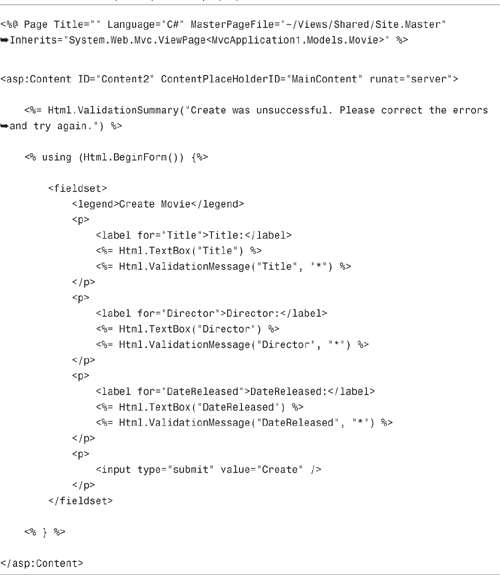
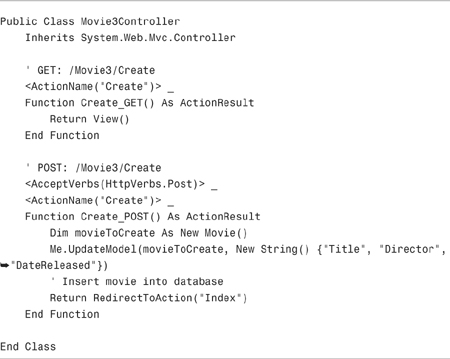
Consider the HTML form in Listing 7.8. The HTML form includes fields for the Title, Director, and DateReleased fields. However, it does not include a form field that corresponds to the Id column because the value of this column is generated automatically in the database.
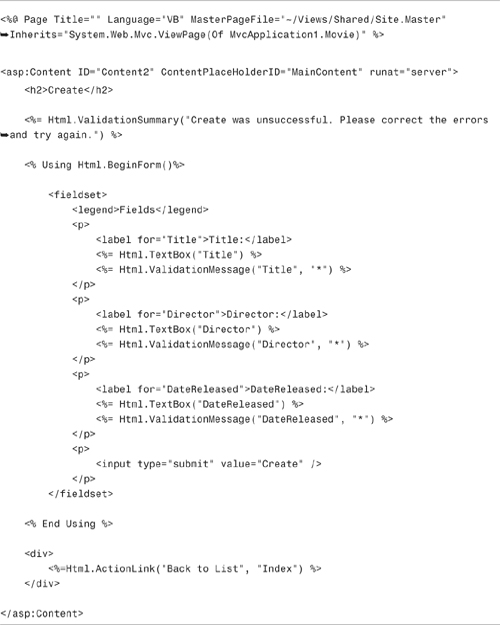
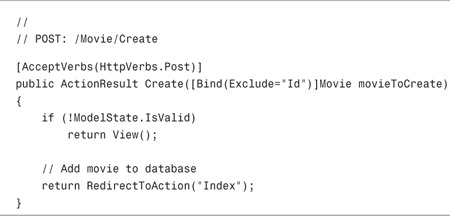
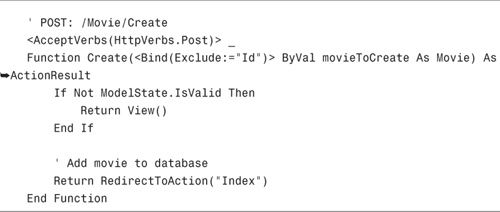
The Create() method in Listing 7.9 illustrates how you can use the Bind attribute to exclude the Id property from binding. The Bind attribute is applied to the Movie parameter.
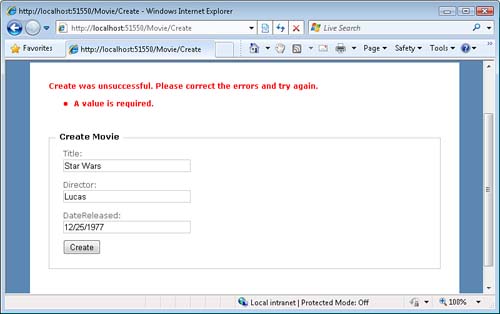
If you neglect to use the Bind attribute to exclude the Id property, you get the (somewhat mysterious) validation error message in Figure 7.4. This validation error message results from the fact that the Movie Create() form does not have an Id form field.
In the previous section, we applied the Bind attribute to a method parameter. You also can apply the Bind attribute to a class.
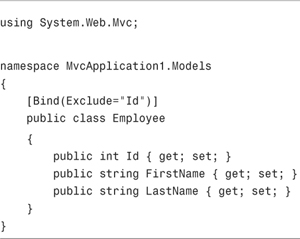
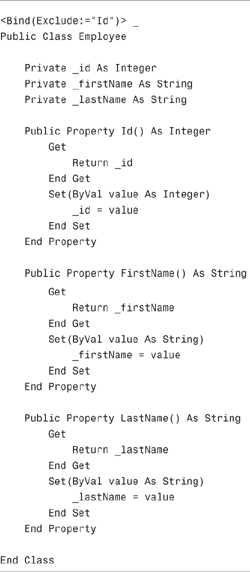
For example, the class in Listing 7.10 represents an employee. Notice that the Bind attribute is applied to the class to exclude the Employee Id property from binding.
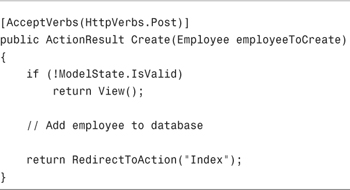
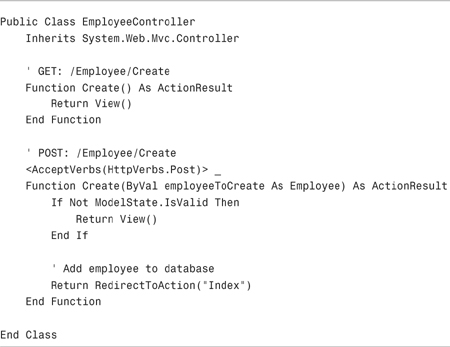
After you apply the Bind attribute to a class, you no longer need to use the attribute in the controller. The Employee controller Create() action in Listing 7.11 does not use the Bind attribute. However, the default model binder respects the Bind attribute on the class and does not attempt to assign a value to the Employee Id property.
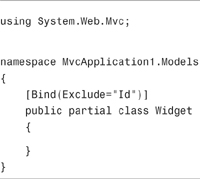
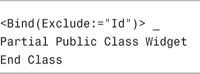
You can use the Bind attribute on a class even when the class is generated by the Microsoft Entity Framework (or LINQ to SQL). Entity Framework classes are partial classes. Therefore, you can create a partial class and apply the Bind attribute to the partial class.
Imagine, for example, that you create a data model for a database table named Widgets with the Entity Framework. Imagine that you have created the Widget entity in Figure 7.5.
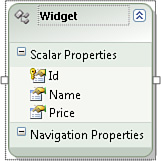
The Widget entity includes an Id property. You can exclude this Id property from binding by using the Bind attribute with a partial class. The partial class is contained in Listing 7.12.
You can use the Bind attribute to map form fields with particular prefixes to particular classes. Use the Prefix property of the Bind attribute to associate a form field prefix with an action parameter. Using prefixes with form fields is particularly useful when you have the potential of naming conflicts in an HTML form.
In reality, you often won’t need to use the Bind attribute to map prefixes to parameters because the default model binder is smart enough to do the correct mapping automatically. The default model binder will map form fields with a particular prefix to a parameter with the same name as the prefix.
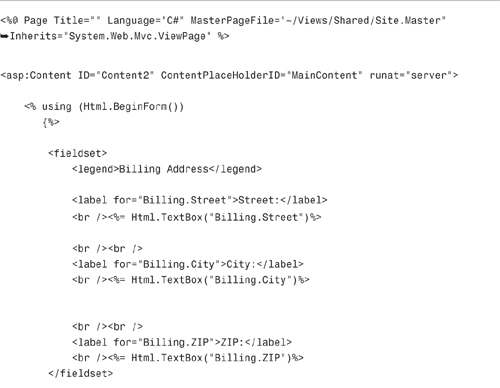
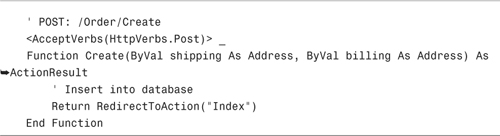
For example, the form in Listing 7.13 includes both a billing address and a shipping address. Notice how the form fields are qualified with either the prefix Billing or Shipping.
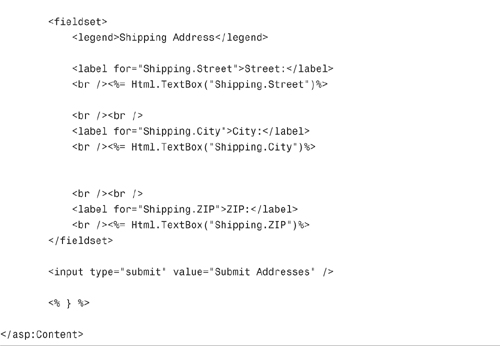
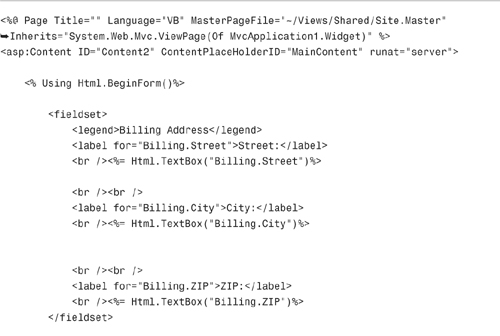
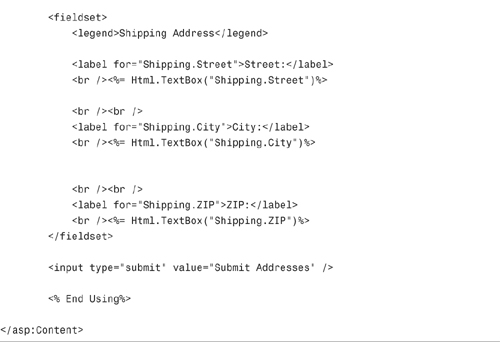
The Create() action in Listing 7.14 contains a shipping and billing parameter. The default model binder correctly associates the right form fields with the right parameters—even without the help of the Bind Prefix property. The default model binder matches the form field prefix to the parameter name.
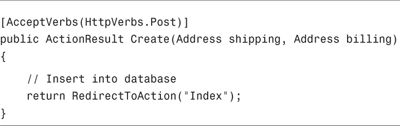
If the name of an action parameter did not match a form field prefix name, you must use the Bind attribute’s Prefix property to explicitly associate the right prefix with the right parameter. However, in most cases, there is no need to use the Bind attribute’s Prefix property.
As an alternative to using the default model binder to pass strongly typed parameters to a controller action, you can take advantage of the form collection model binder. The form collection model binder represents an untyped collection of form fields.
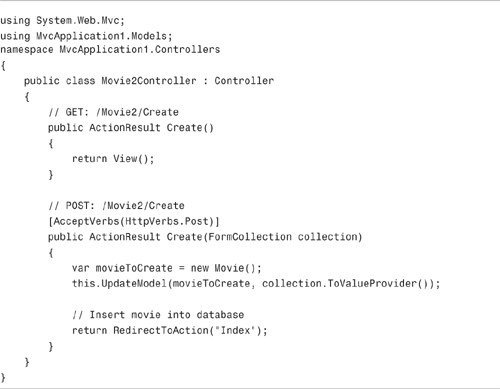
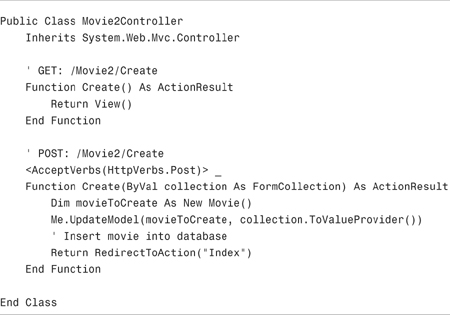
For example, the Movie controller Create() action in Listing 7.15 accepts a form collection parameter. In the body of the Create() action, the form fields are bound to an instance of the Movie class with the help of the UpdateModel() method.
When the second Create() action is invoked, the UpdateModel() method assigns the form fields to an instance of the Movie class. The UpdateModel() method supports the following parameters:
• model—The object that is the target of the binding.
• prefix—Only form fields with this prefix will be bound to the model.
• includeProperties—An array of properties to include when binding.
• excludeProperties—An array of properties to exclude when binding.
• valueProvider—The source of the information used during binding.
Note
Behind the scenes, the UpdateModel() method uses the set of model binders registered for the application. For example, the UpdateModel() method uses the default model binder and any custom model binders that you create.
You don’t actually need to use the form collection model binder. You can use the UpdateModel() method without passing the form collection to the UpdateModel() method. For example, the Create() action in Listing 7.16 does not accept any parameters, and the UpdateModel() method still works.
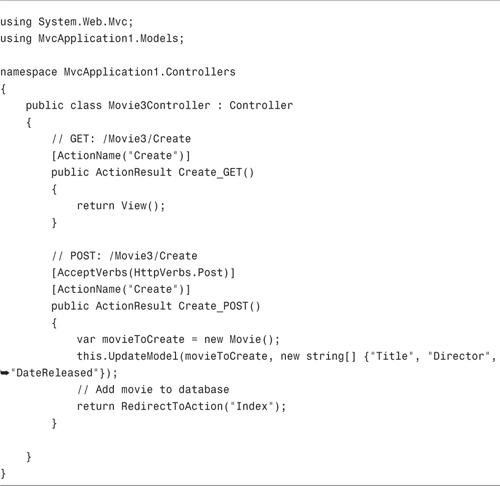
In Listing 7.16, the UpdateModel() method is called with the model and includeProperties parameters. A form collection is not passed to the UpdateModel() method.
The third model binder included in the ASP.NET MVC framework is the HTTP posted file base model binder. This model binder enables you to pass uploaded files to a controller action.
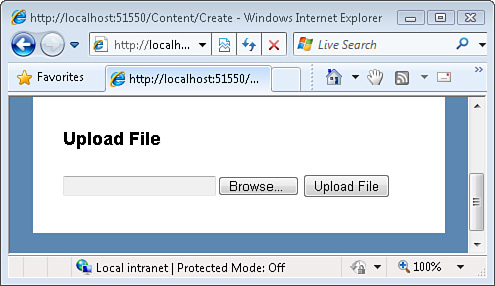
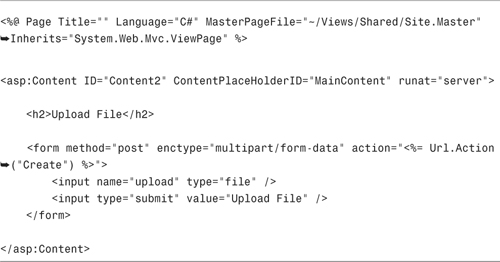
The view in Listing 7.17 renders a form for uploading files (see Figure 7.6).
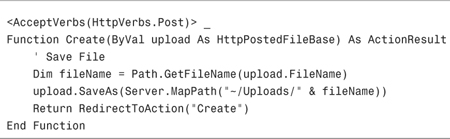
The controller action in Listing 7.18 illustrates how you can accept a file upload and save the file upload to the file system. Notice that the controller action accepts an HttpPostedFileBase parameter.

The default model binder is powerful. However, it cannot handle every object. If you need to handle a type of object that is beyond the power of the default model binder, you need to create a custom model binder.
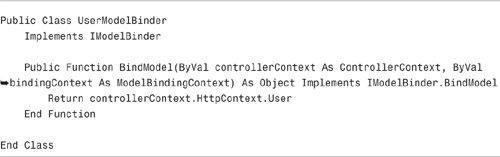
You create a custom model binder by implementing the IModelBinder interface. This interface has a single method named BindModel().
Note
The user model binder example in Listing 7.19 is roughly based on an example originally created by Scott Hanselman, who is another member of my team at Microsoft. You can see his blog entry at www.hanselman.com/blog/IPrincipalUserModelBinderInASPNETMVCForEasierTesting.aspx.
For example, Listing 7.19 contains a new model binder named the user model binder. This model binder enables you to pass a user parameter to a controller action that represents the current authenticated user automatically.

After you create a custom model binder, there are two ways that you can use it. First, you can use the ModelBinder attribute and apply the custom model binder to a single parameter. This approach is illustrated by the GetSecret() action in Listing 7.20.
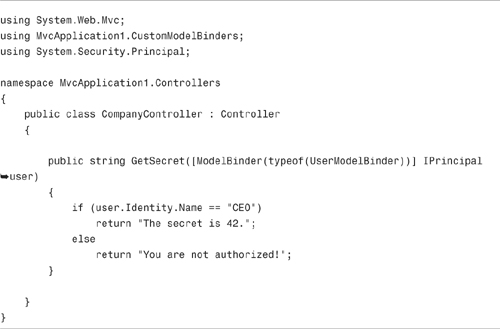
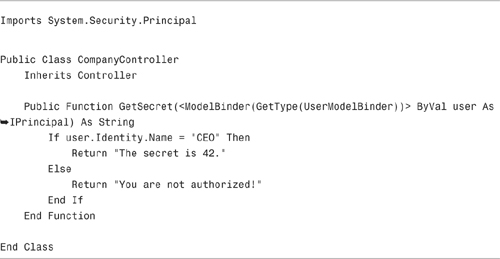
If you invoke the controller action in Listing 7.20, and you are not logged in with the username CEO, you cannot see the secret message. The user parameter gets its value automatically from the user model binder.
If you plan to use a custom model binder in multiple places within an application, you should register the custom model binder for the entire application. Listing 7.21 illustrates how you can register the user model binder in the Application_Start event handler in the Global.asax file.
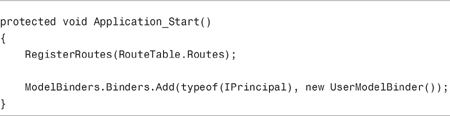
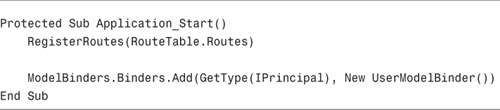
When you register a custom model binder, you associate the model binder with a particular type. In Listing 7.21, the user model binder is associated with the IPrincipal type.
Note
Another situation in which I discovered that I needed to create a custom model binder was when I was working with LINQ to SQL. The default model binder won’t deserialize the LINQ to SQL Version property because it is a System.Data.Linq.Binary property. Luckily, you don’t have to write this model binder yourself. The ASP.NET MVC Futures, available at CodePlex.com, includes a LinqBinaryModelBinder.
An action filter enables you to execute code in the following situations:
• Immediately before a controller action is executed
• Immediately after a controller action is executed
• Immediately before an action result is executed
• Immediately after an action result is executed
An action filter is an attribute that you apply to a controller action or entire controller. Several features of the ASP.NET MVC framework are implemented with action filters. For example, the OutputCache, HandleError, and Authorize attributes are all action filters.
Note
Technically, the Authorize and HandleError attributes are filter attributes instead of action filter attributes. (Action filters derive from filters.) Because you want certain types of filters to run before others, such as the Authorize filter, the ASP.NET MVC framework distinguishes these two types of filters.
You can do all manner of strange and interesting things in an action filter. For example, you can use an action filter to modify the view data that a controller action returns.
In this section, we create a simple custom action filter named the Log. This filter logs each action event to the Visual Studio output window.
Note
As an alternative to using an action filter, you can handle the OnActionExecuting(), OnActionExecuted(), OnResultExecuting(), or OnResultExecuted() methods on the controller class. These events are raised before and after a controller action and controller action result are executed.
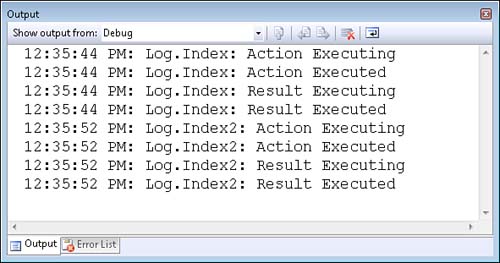
In this section, we create a custom action filter that logs each action event to the Visual Studio Output window (see Figure 7.7). You can open the Visual Studio Output window by selecting the menu option Debug, Windows, Output.
You can use the Log action filter to help debug your controllers. The Log action filter is contained in Listing 7.22.
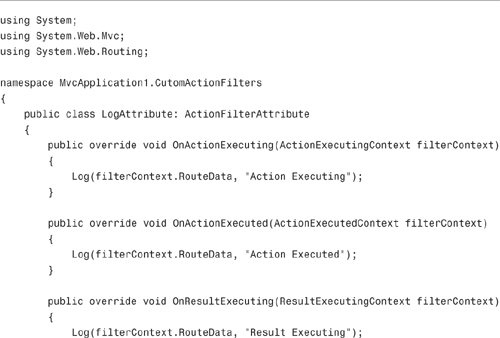
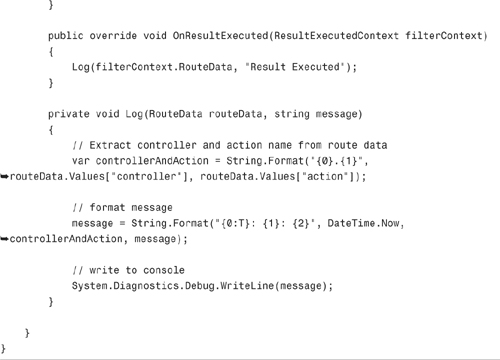
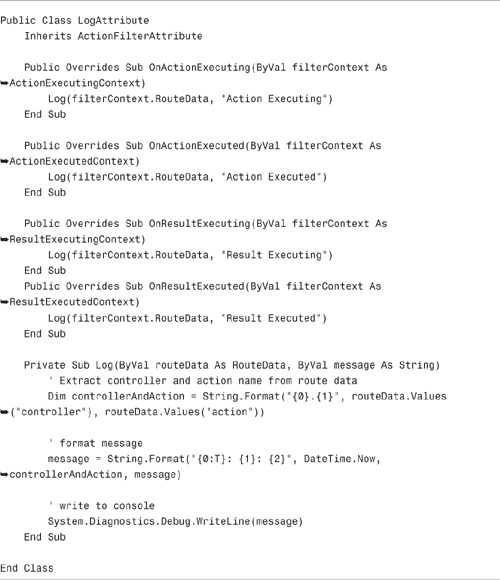
The LogAttribute class in Listing 7.22 inherits from the base ActionFilterAttribute class and the derived class overrides the OnActionExecuting(), OnActionExecuted(), OnResultExecuting(), and OnResultExecuted() method. Each of these methods writes a message to the Visual Studio Output window with the help of the Log() method.
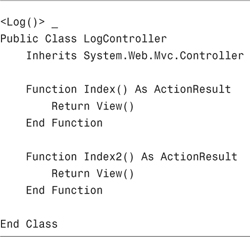
You can apply the Log action filter to either a particular controller action or an entire controller. For example, the Log action filter is applied to the entire controller contained in Listing 7.23. When you call the Index() or Index2() action, the action events are logged to the Output window.

The bulk of this chapter was devoted to the topic of model binders. In this chapter, you learned how to work with the three model binders included with the ASP.NET MVC framework: the default model binder, the form collection model binder, and the HTTP posted file base model binder. You also learned how you can create a custom model binder.
In the final part of this chapter, we explored the topic of action filters. You learned how to create a custom action filter that logs action events to the Visual Studio Output window.