
Creating a consistent page layout is important for a professional web application. In this chapter, you learn how to create a common page layout for the pages in your web application by taking advantage of view master pages. You learn how to create both view master pages and view content pages. You also learn how to pass data from a controller to a view master page.
Next, we discuss how you can create partial views (partials) by creating view user controls. You can use view user controls to display the same content in multiple pages. You learn how to create view user controls and how you can use a view user control as a template when displaying database data.
View master pages enable you to create a common layout for the pages in your ASP.NET MVC application. For example, you can place standard navigational elements, such as a menu or tab strip, in a master page so that the navigation elements appear on every page in your application.
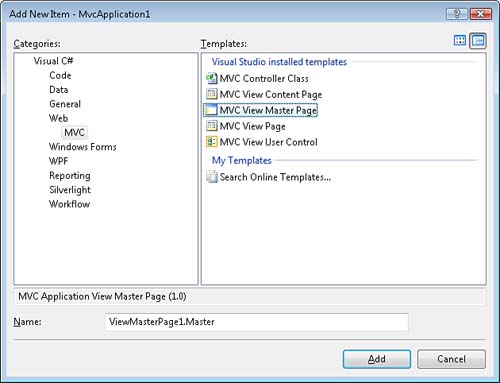
Normally, to make the master page available to all views, you create a master page in the ViewsShared folder. Right-click the ViewsShared folder and select the menu option Add, New Item. Select the WebMVC category, select the MVC View Master Page template, and click the Add button (see Figure 10.1).
Note
When you create a new ASP.NET MVC project, you get a master page named Site.master automatically. You can modify this master page to fit your needs or delete it and start from scratch.
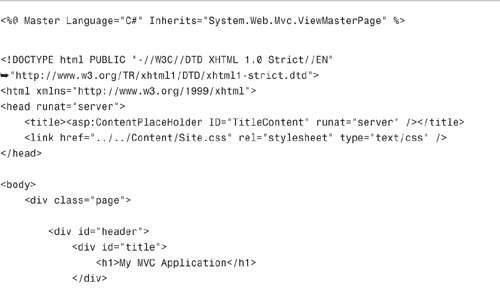
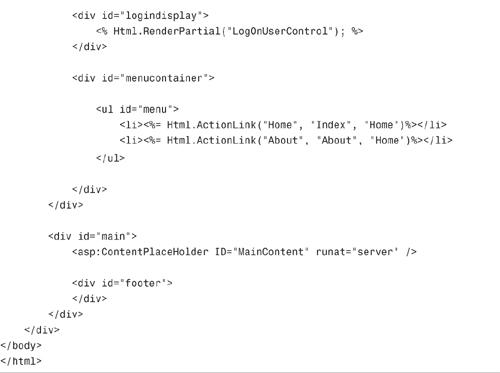
The master page in Listing 10.1, named MyMaster.master, is the default master page that you get when you create a new master page from the Visual Studio MVC View Master Page template.
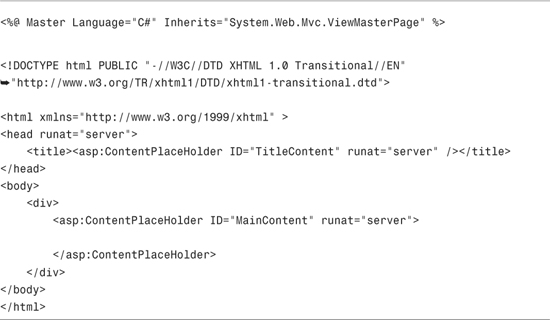
A master page looks like a standard ASP.NET MVC view. It can contain both HTML and script. Notice that it contains the standard opening and closing <html>, <head>, <title>, and <body> tags.
However, unlike a standard view, a master page contains one or more <asp:ContentPlaceHolder> tags. The <asp:ContentPlaceHolder> tags mark the areas of the master page that can be overridden in particular view content pages.
You can add as many <asp:ContentPlaceHolder> tags to a master page as you want. Each <asp:ContentPlaceHolder> tag marks another area that can be customized in a content page.
You can add default content inside of the <asp:ContentPlaceHolder> tag. If the <asp:ContentPlaceHolder> tag is not overridden in a view content page, the default content contained in the <asp:ContentPlaceHolder> tag appears.
You can even nest <asp:ContentPlaceHolder> tags. Nesting <asp:ContentPlaceHolder> tags is useful when you want to have the option of overriding smaller or greater areas in the master page from the view content page.
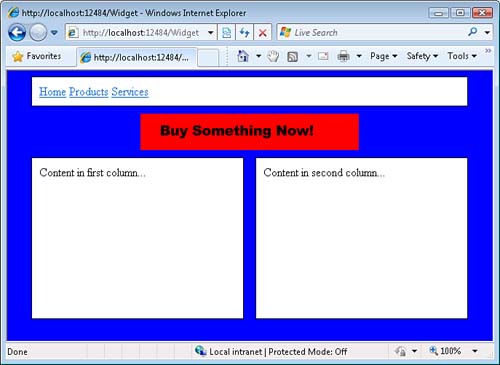
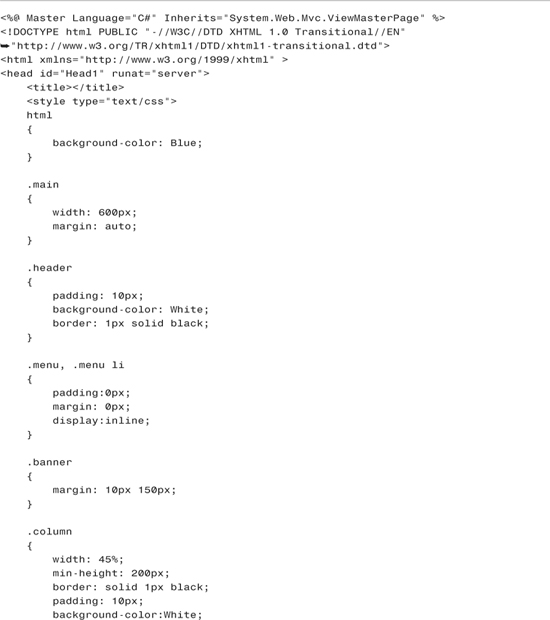
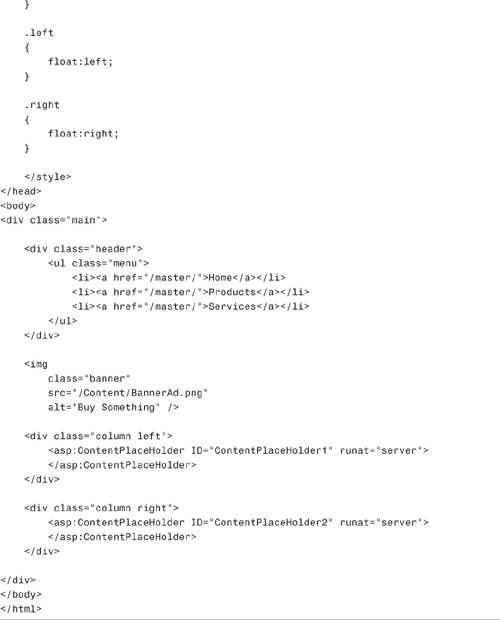
For example, the view master page in Listing 10.2 creates a two-column layout. Each column contains one <asp:ContentPlaceHolder> tag. Notice that the master page also contains navigational links and a banner advertisement (see Figure 10.2). Anything that you want to appear in multiple views in your application, you put in a view master page.
After you create a view master page, you can create one or more view content pages based on the master page. A view content page fills in the holes in the master page template.
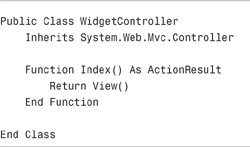
Imagine that you have created the controller in Listing 10.3.
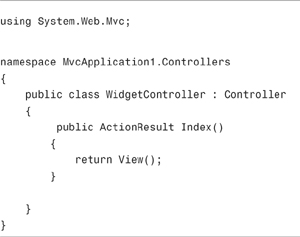
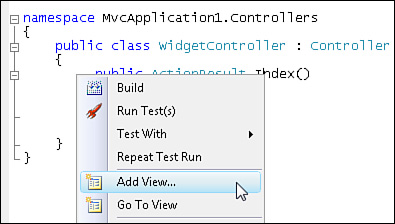
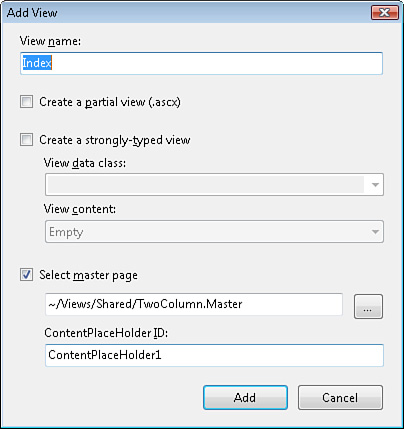
The Index() action in Listing 10.3 returns a view located at ViewsWidgetIndex.aspx. You can create a view content page for this view by right-clicking the Index() action in the source code editor and selecting the menu option Add View (see Figure 10.3).
Selecting Add View opens the Add View dialog. From within this dialog, you can select a view master page and enter the name of the primary ContentPlaceHolder tag from the master page. For example, you can select the TwoColumn.master view master page and enter ContentPlaceHolder1 (see Figure 10.4).
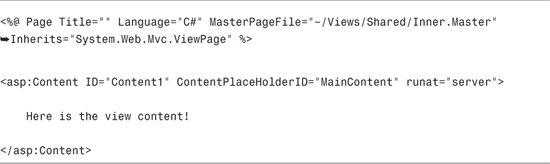
When you click Add, the view content page in Listing 10.4 is created.
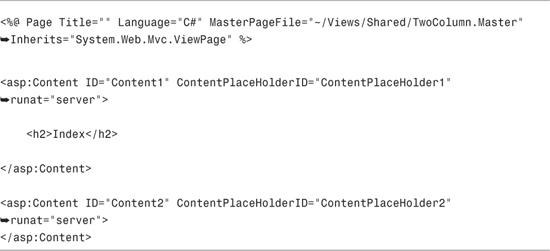
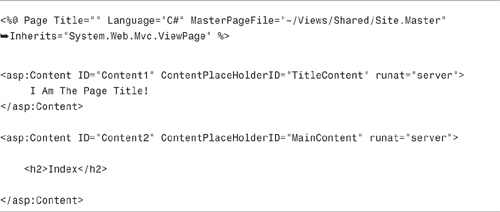
The view content page in Listing 10.4 consists of two <asp:Content> tags. The <asp:Content> tags are associated with the <asp:ContentPlaceHolder> tags in the master page through the <asp:Content> tag’s ContentPlaceHolderID attributes.
You cannot place any content outside of these <asp:Content> tags. You create the content for a view content page by adding content within the <asp:Content> tags.
By placing content inside of the <asp:Content> tags, you can override the corresponding area of the master page. You can place any content that you want inside of the <asp:Content> tag including HTML and script.
The view content page in Listing 10.4 is associated with its master page through the <%@ Page %> directive MasterPageFile attribute. You can convert existing views into view content pages by adding the MasterPageFile attribute to the view and moving all the view’s content into <asp:Content> controls.
The ASP.NET MVC framework provides you with an alternative method of associating a view content page with a master page. Instead of associating a view content page with a master page by using the MasterPageFile attribute, you can associate a view content page with a master page when you return a view from a controller action.
Note
The master page specified in a controller overrides the master page specified with a content view page. In other words, the controller takes precedence over the MasterPageFile attribute.
Why would you want to use this second method of setting the master page? One advantage of this second method is that you can select a master page dynamically at runtime.
Imagine, for example, that you decide to enable the users of your web application to skin the application. In other words, you want to allow visitors to pick their favorite color scheme and page layout. In that case, you can serve different master pages for each user by specifying the master page in the controller action.
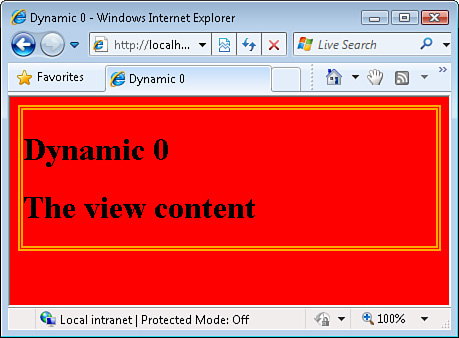
The controller in Listing 10.5 illustrates how you can dynamically set the master page at runtime. The Index() action randomly selects either the Dynamic0.master or Dynamic1.master view master page.
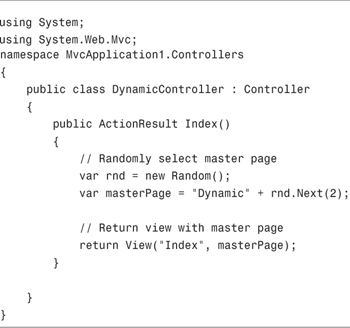
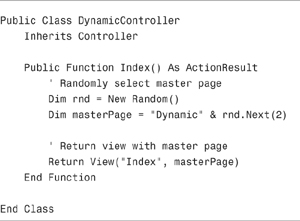
Depending on the master page that is randomly selected, the view has a different color scheme and layout (see Figure 10.5).
You don’t want every page in a web application to share the same page title. For one thing, that would make bookmarking pages difficult.
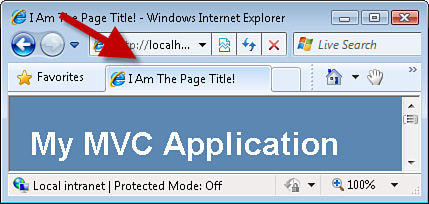
The default master page includes the <asp:ContentPlaceHolder> tag named TitleContent for the page title (see Listing 10.6). Therefore, if you want to customize the title of a page, you can provide the <asp:Content> tag that corresponds to this ContentPlaceHolder in a view content page (see Listing 10.7).
When the Index view in Listing 10.7 is rendered to a browser, the title I Am The Page Title! is displayed (see Figure 10.6).
Most websites have multiple sections with different page layouts. Some pages might contain a single column, and some pages might contain multiple columns.
Typically, however, certain elements of the website design are constant. Every page has the same outer chrome consisting of navigation links, website logo, banner advertisements, and footer text.
You can nest one master page within another master page. Master pages can be nested infinitely deep. The outer master page can contain the standard content that you want to display on all pages in your application. The interior master page can contain particular page layouts. In this way, your website can have multiple page layouts but keep some elements constant.
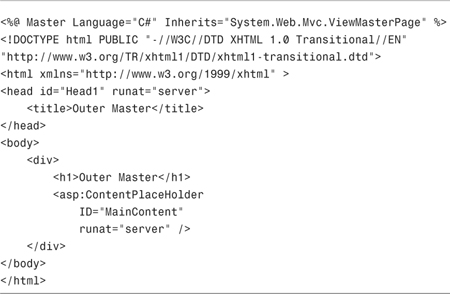
The master page in Listing 10.8 is the outer master page. Notice that it is just a normal master page that contains one <asp:ContentPlaceHolder> tag—nothing special about it.
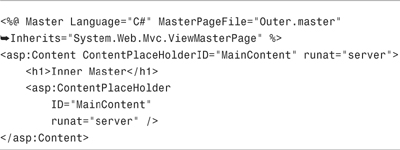
The master page in Listing 10.9 is the nested master page. Notice that it has a MasterPageFile attribute that points to the Outer.master master page from Listing 10.8. The nested master page contains both <asp:Content> tags and <asp:ContentPlaceHolder> tags.
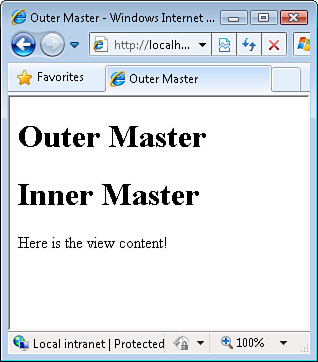
Finally, the view in Listing 10.10 has a MasterPageFile attribute that points to the master page in Listing 10.9. When the view in Listing 10.10 is returned by a controller, the outer master page, the inner master page, and the Index view are merged and rendered to the browser (see Figure 10.7).
Imagine that you want to show some data that you have retrieved from the database in your website master page. For example, if you create a Movie Database application, you might want to display a list of movie category links on your master page and retrieve the categories from a database table.
You pass data to a view by taking advantage of view data. How do you pass data to a master page?
You also can use view data to pass data to a master page. However, you should not add the data required by the master page in each controller action. Instead, you should create a base class for all your controllers—an Application controller—and modify the view data in the Application controller class. That way, you can avoid violating the DRY Principle (Don’t Repeat Yourself), which makes your code more maintainable.
Listing 10.11 contains an abstract (MustInherit) class named ApplicationController. Notice that the class inherits from the Controller base class just like any standard ASP.NET MVC controller. However, because the ApplicationController is an abstract class, you can’t actually use the class as a controller.
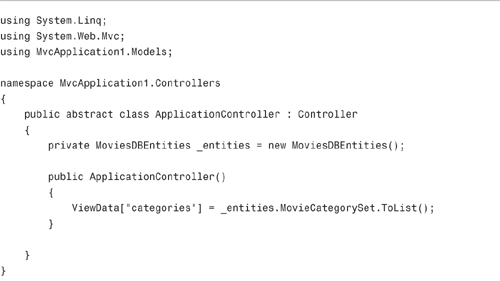
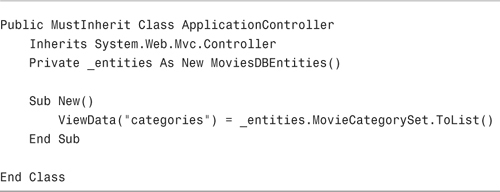
The constructor in the ApplicationController class modifies the view data. A list of movie categories is retrieved from the database and added to the view data dictionary with the key categories.
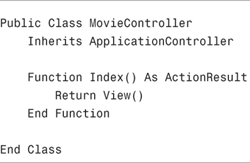
The controller in Listing 10.12 inherits from the ApplicationController class. Because the controller inherits from the base ApplicationController class, the list of movie categories is added to the controller’s view data automatically.

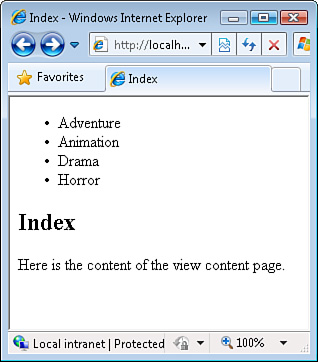
Finally, the master page in Listing 10.13 displays the list of movie categories by retrieving the list from view data (see Figure 10.8).


To summarize, if you need to display data in a sitewide master page, you should inherit all the controllers in your application from a base ApplicationController class. That way, you can modify the view data in just the ApplicationController to modify the view data returned by all your controller actions.
A view user control represents a partial view. In other words, user controls give you a method to encapsulate visual content so that the same content can be displayed in multiple views. A user control can contain (X)HTML and script. Imagine, for example, that you want to display a list of featured products. If you want to display the list of featured products on every page, you can add the list of featured products to a master page. However, if you want to display the list of featured products only on certain pages and not others, it makes more sense to create a user control.
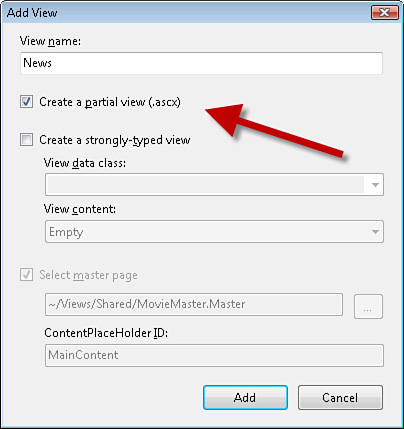
Typically, you want to add a user control to the ViewsShared folder because you use a user control across multiple views. Right-click the ViewsShared folder and select the menu option Add, View. Give your user control a name, check the check box labeled Create a Partial View (.ascx), and click the Add button (see Figure 10.9). Notice that you do not select a master page in the case of a partial.
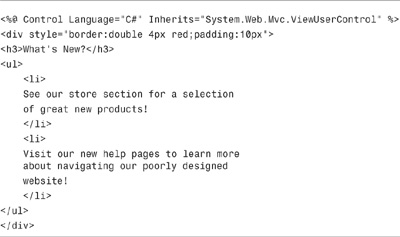
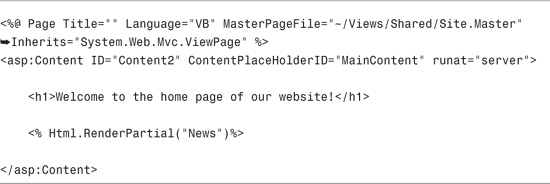
The user control in Listing 10.14 contains a list of news items. This user control contains static content.
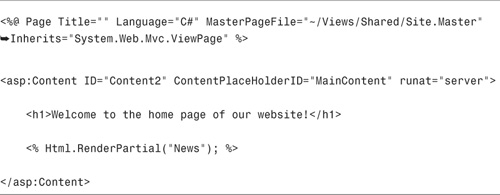
After you create a user control, you can add the user control to a view by calling the Html.RenderPartial() method in the view. The view in Listing 10.15 uses the News user control to display news items.
Warning
The Html.RenderPartial() method does not return a string. Therefore, use the <% %> script delimiters instead of the <%= %> delimiters when calling this method.
When the Index view in Listing 10.15 is rendered to the browser, the news user control is rendered as well (see Figure 10.10).
The user control discussed in the previous section contained static content. However, you often want to display content that you have retrieved from a database within a user control. For example, you might want to display a list of featured products in a user control (see Figure 10.11).

How do you pass data from a controller to a user control? If you know that you want to add a user control to more than one view, it makes sense to create an action filter that adds the data required by the user control to view data.
The user control in Listing 10.16 displays a list of featured products. The user control accesses the ViewData.Model property to get the list of featured products.
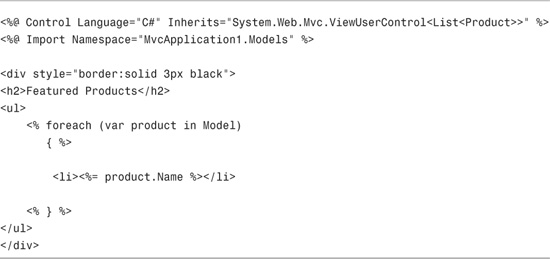
The featured user control in Listing 10.16 is a typed user control. Just like a view, a user control can be typed. The Inherits attribute causes the Model property to be cast to a list of products.
The Index view in Listing 10.17 uses the featured user control to display a list of featured products.
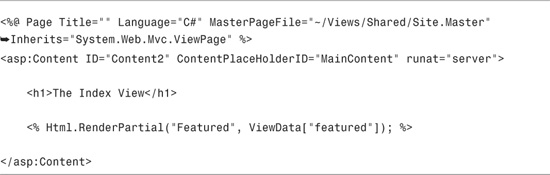
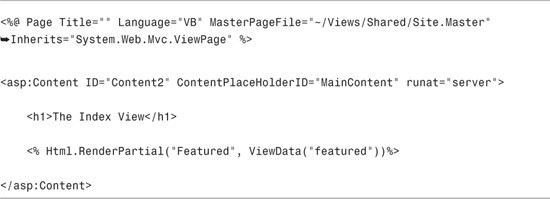
Notice that two values are passed to the Html.RenderPartial() method. The first value represents the name of the featured user control. The second value is a value from view data. The value of the featured item from view data is assigned to the ViewData.Model property of the featured user control.
We can add the featured products to view data by taking advantage of an action filter. The FeaturedProduct action filter is contained in Listing 10.18.
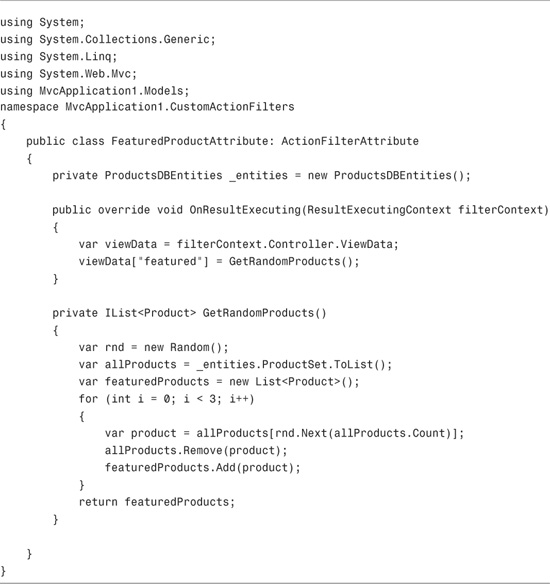
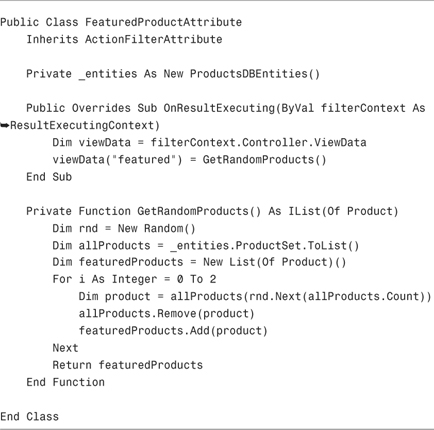
The action filter in Listing 10.18 overrides the base ActionFilterAttribute’s OnResultExecuting() method. This method executes before the controller action result executes. This action filter adds a new item to view data that represents a list of featured products.
The action filter calls the GetRandomProducts() method to get a list of three randomly selected products from the database. This list of random products is assigned to an item named featured in view data.
The controller in Listing 10.19 illustrates how you can use the featured action filter to add the featured products view data to some actions, but not others.
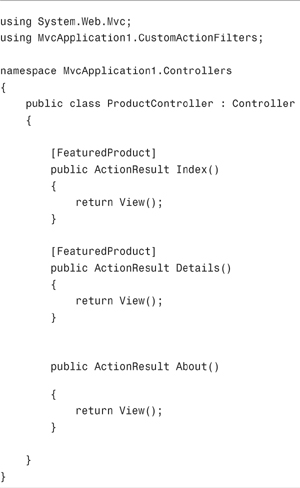
The controller in Listing 10.19 has three action methods: Index(), Details(), and About(). Only the first two action methods are decorated with the featured action filter. Therefore, the list of featured products is added only to the view data when one of the first two action methods is invoked.
You can use a view user control as a template when displaying a set of database records. For example, when displaying a set of database records in an HTML table, you can use a view user control as a template for each row.
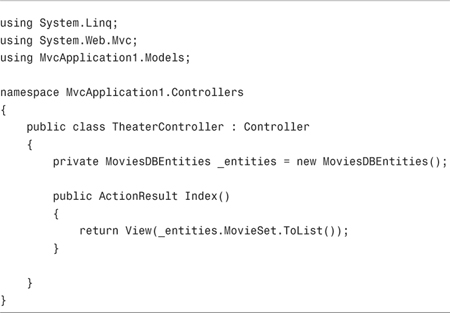
The controller in Listing 10.20 returns a set of movies in view data.

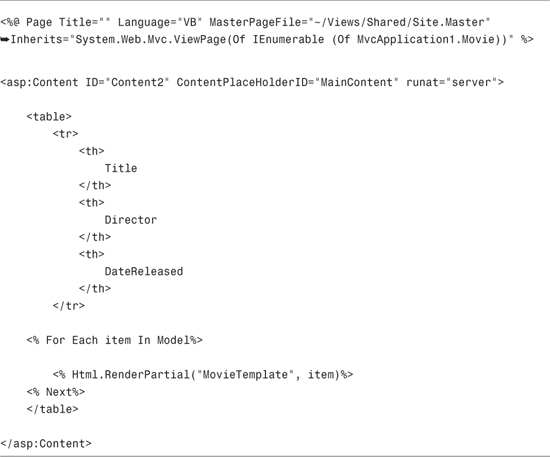
The view in Listing 10.21 renders the set of movies in an HTML table by looping through the view data model.
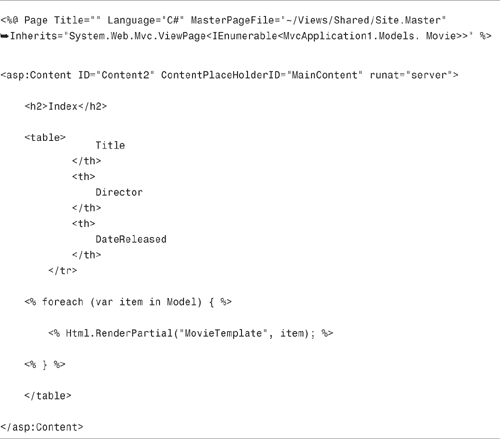
Notice that the Html.RenderPartial() method is called to render each table row. A user control named MovieTemplate is used to render each movie row. The MovieTemplate is contained in Listing 10.22.
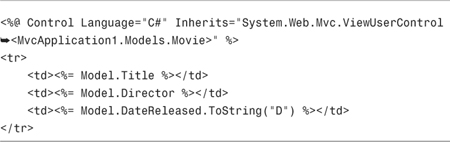
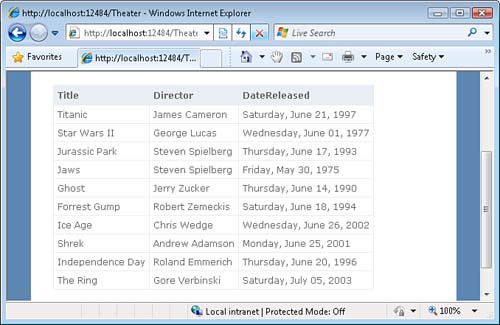
The MovieTemplate user control acts as a template for each row of data (see Figure 10.12). Splitting a single view into a separate view and user control can make a view more manageable.
In this chapter, you learned two methods of sharing visual content across multiple pages in an ASP.NET MVC application. First, you learned how to use view master pages to give the pages a common layout. You learned how to create both view master pages and view content pages. You also learned how to pass data from an application controller to a view master page.
In the second part of this chapter, we discussed view user controls (partials). You learned how to use a view user control to display the same visual content on multiple pages. Finally, you learned how to use a view user control as a template when displaying database data.