In This Chapter
Ajax (Asynchronous JavaScript and XML) enables you to avoid requesting an entire HTML page every time you want to get new content from the web server. When you perform an Ajax request, you retrieve only the content that you need.
Ajax applications are better than normal applications because Ajax applications are more responsive. When you interact with an Ajax application, you spend less time starting at a loading page. You are not required to reload an entire page whenever you need to update any of the content displayed by the page.
In this chapter, you learn one approach to using Ajax within the context of an ASP.NET MVC application. You learn how to take advantage of the Ajax helpers to perform asynchronous requests against the web server.
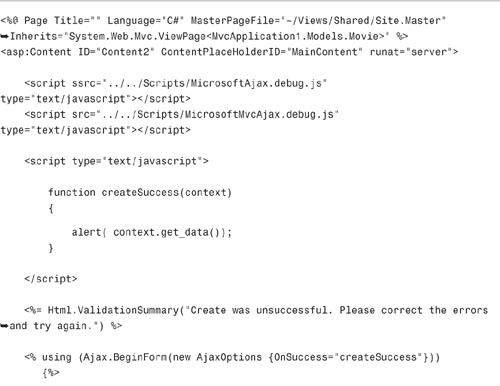
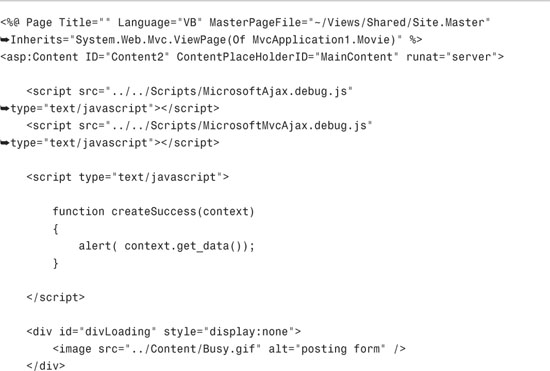
Before you can use the Ajax helpers, you must first include two JavaScript libraries in your page: the MicrosoftAjax.js library and the MicrosoftMvcAjax.js library. Both of these libraries are included in the default Visual Studio ASP.NET MVC template within the Scripts folder.
Warning
The JavaScript libraries must be included in the right order. Also, the libraries must be included before any Ajax helper method is called.
The Scripts folder includes two debug versions of these libraries named MicrosoftAjax.debug.js and MicrosoftMvcAjax.debug.js. When developing your application, you should use the debug versions of the libraries because the debug versions return more detailed error messages. However, in production, don’t use the debug versions because these libraries are significantly larger (and take longer to download) than the release versions. For example, the MicrosoftAjax.debug.js library is 304KB while Microsoft the MicrosoftAjax.js is just 98KB.
If you plan to use Ajax in multiple pages within your application, you should consider including the two JavaScript libraries within a master page instead of including the libraries in individual views. That way, you need to include only the libraries once for your entire application. Furthermore, you can easily switch between the debug and release versions of the libraries by changing the libraries in one location within the master page.
If something goes wrong on the server when you perform an Ajax request, you will never see the error message. When working with Ajax, you need to take advantage of a debugging tool that enables you to monitor the request and response traveling between the browser and server.
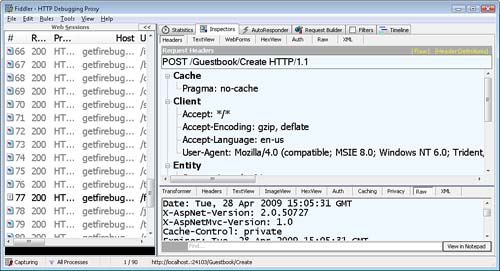
I use two tools to debug my Ajax applications. First, I use a free tool named Fiddler, which enables you to view the request and response traffic (see Figure 14.1). You can use Fiddler with any web browser including Internet Explorer and Firefox. Fiddler can be downloaded from the following location: www.fiddler2.com/fiddler2/.
Note
When using Fiddler to inspect requests made against localhost, you need to add a period in the browser address bar after localhost. For example, the following request will not be captured by Fiddler:
http://localhost:24103/Guestbook
The following request will be captured by Fiddler:
http://localhost.:24103/Guestbook
The other tool that I use extensively when debugging Ajax applications is Firebug. Because Firebug is a Firefox extension, it works only with the Firefox browser. You can download Firebug from the following location:
Note
Firebug does much more than just displaying requests and responses. For example, Firebug enables you to inspect DOM elements and CSS rules.
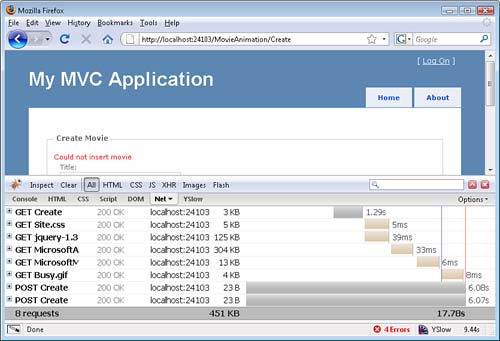
Like Fiddler, you can use Firebug to inspect requests and responses. Firebug has a Net tab that enables you to inspect all traffic between the browser and the server. You also can pick the XHR subtab to filter the traffic to only Ajax requests and responses (see Figure 14.2). You can expand any result in the list to see the content of the request and response.
Normally, when you post an HTML form to the web server, you need to post the entire HTML page that contains the form. By taking advantage of the Ajax.BeginForm() helper, you can post a form asynchronously.
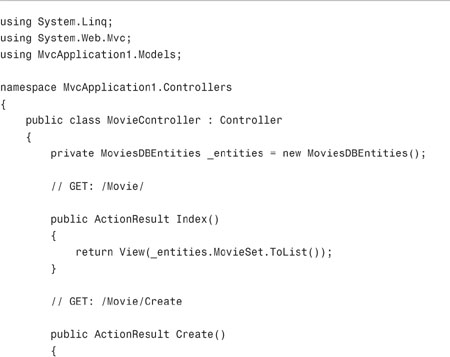
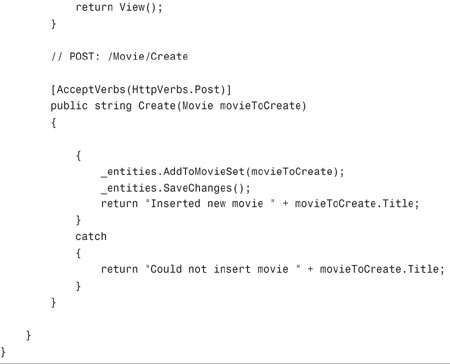
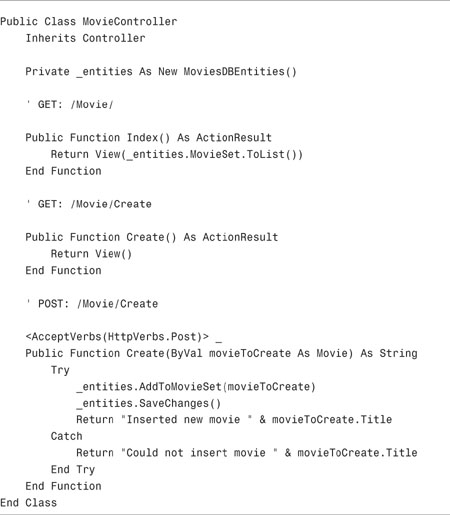
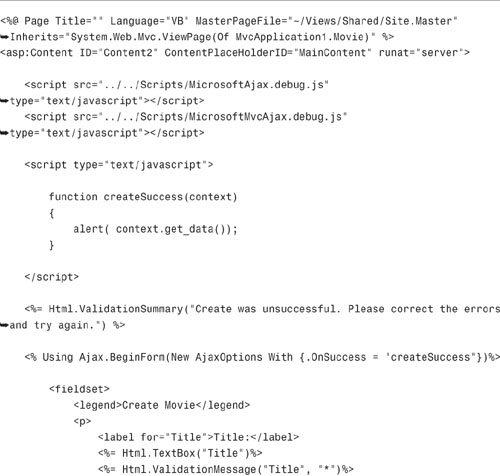
Imagine that you have created the controller in Listing 14.1. This controller has three actions named Index(), Create(), and Create(). The Index() action returns a view that displays a set of movies. The first Create() method displays a form for creating a new movie, and the second Create() method actually inserts the new movie into the database.
Notice that the second Create() action returns a string. If the movie is successfully inserted into the database, a success message string is returned. Otherwise, a failure message string is returned.
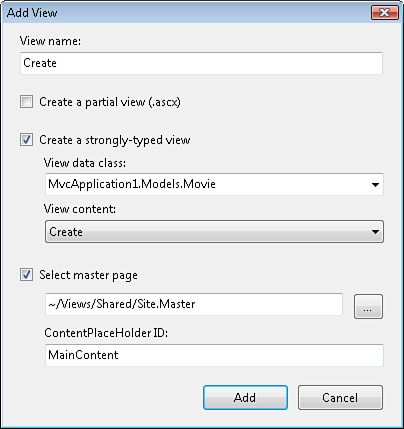
You can add the Create view to your project in the normal way: Right-click the Create() action in the code editor and select the menu option Add View. In the Add View dialog, create a strongly typed Create view that creates a new movie (see Figure 14.3).
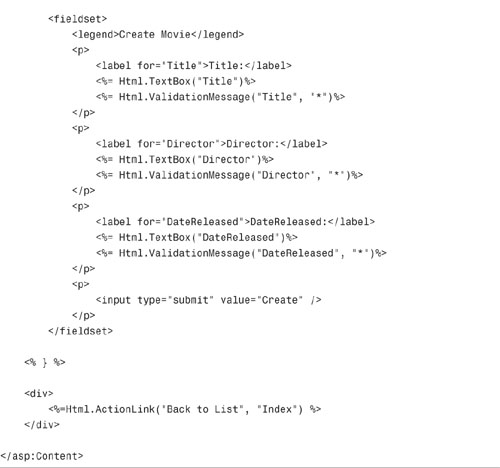
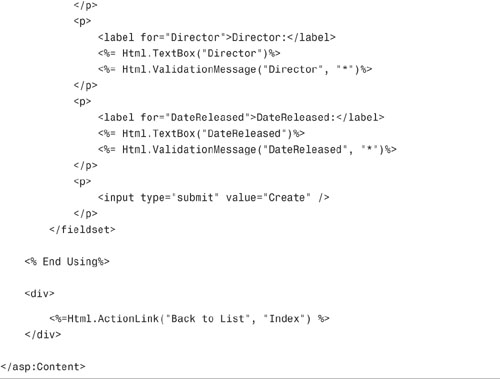
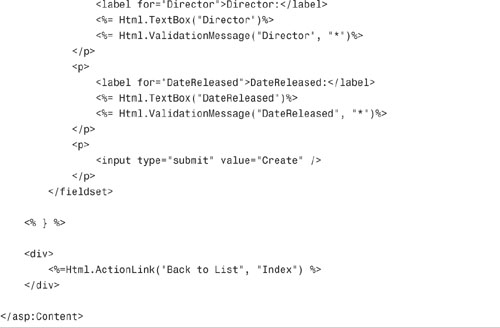
The Create view generated by Visual Studio does not perform an Ajax post of the form data. By default, a Create view performs a normal form post. You need to modify the view so that it looks like the view in Listing 14.2.
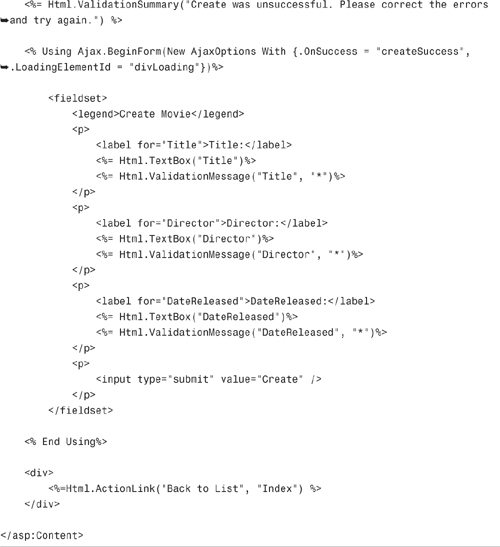
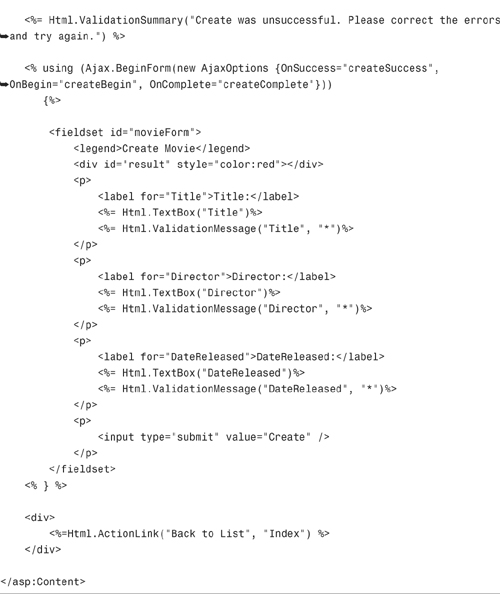
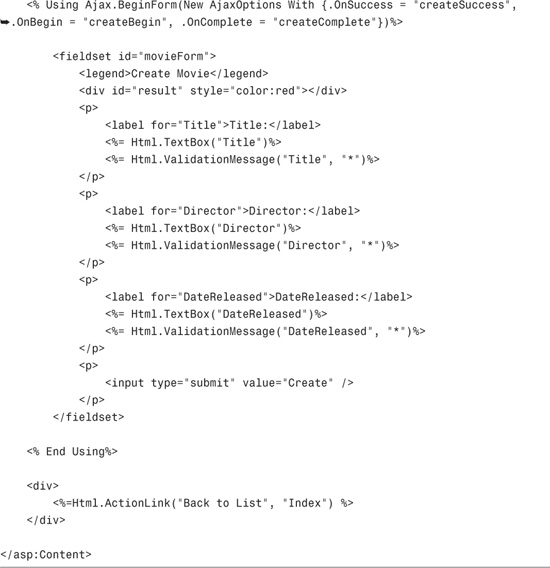
Notice that instead of calling Html.BeginForm(), the view in Listing 14.2 contains a call to Ajax.BeginForm(). Calling Ajax.BeginForm() performs an asynchronous post.
Notice, furthermore, that an instance of the AjaxOptions class is passed to the Ajax.BeginForm() helper method. The JavaScript createSuccess() method is called after the post is successful.
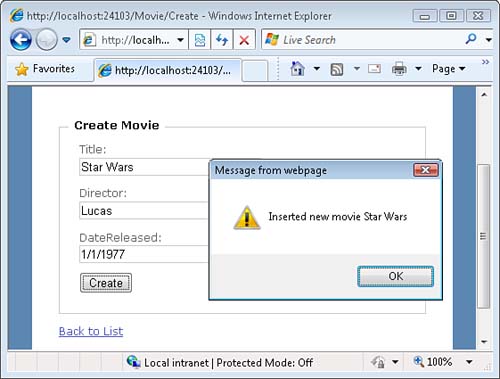
In Listing 14.2, the createSuccess() method displays whatever string that the Create() controller returns. If a new movie titled Star Wars is added to the database successfully, the message Inserted New Movie Star Wars appears (see Figure 14.4).
Normally, when you post an HTML form to the server, the browser provides feedback on the progress of the post. The busy indicator spins, and you know that something is happening. When performing an Ajax post, in contrast, the browser does not provide any indication of progress.
When building Ajax applications, it is a good idea to provide some indicator of progress. Otherwise, a user might conclude that nothing is actually happening.
In this section, we explore two methods of displaying progress. You learn how to display a busy wait picture. You also learn how to display a jQuery animation during an Ajax post.
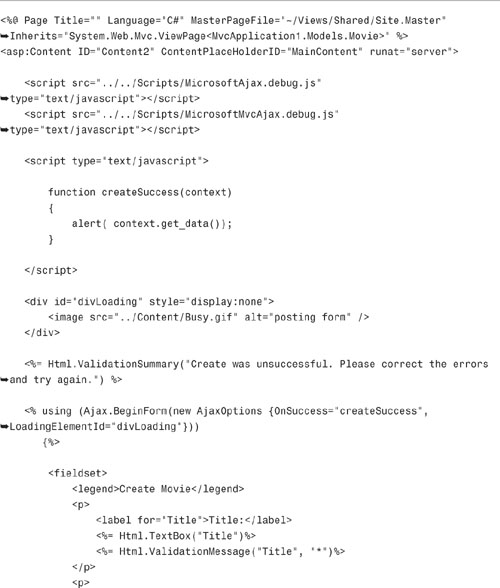
The AjaxOptions class includes a property named LoadingElementId. If you assign the name of an element in the page to this property, the Ajax.BeginForm() helper displays this element while performing an asynchronous post.
For example, the view in Listing 14.3 contains a DIV element with the Id divLoading. The divLoading element is assigned to the LoadingElementId property.
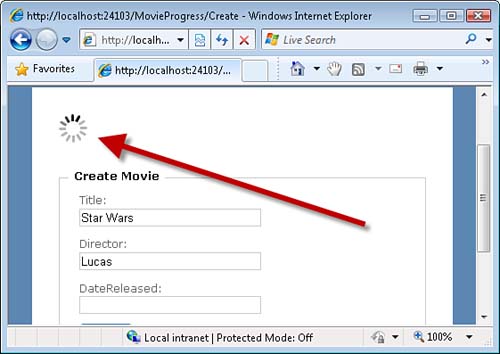
The divLoading tag in Listing 14.3 contains an image that displays an animated progress indicator (see Figure 14.5). Notice that the element has a style property that hides the element by default. The element is displayed only during the asynchronous post.
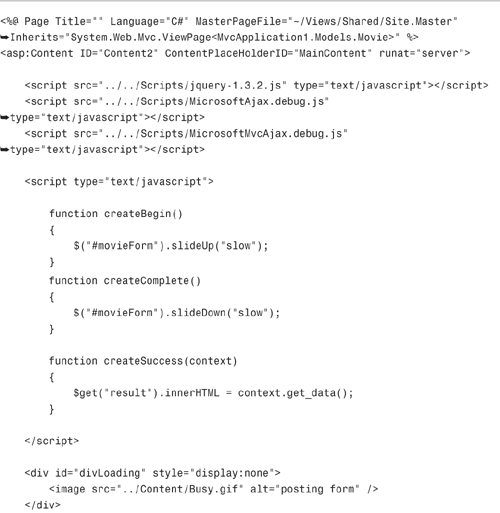
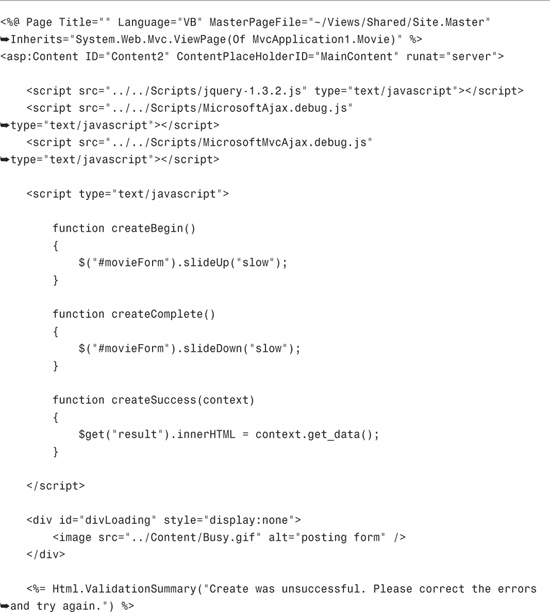
As an alternative to displaying a busy indicator during an Ajax post, you can display an animation. The AjaxOptions class includes an OnBegin and OnComplete property. You can use the OnBegin property to start the animation and the OnComplete property to end the animation.
For example, the view in Listing 14.4 displays a jQuery animation during an Ajax form post.
Notice that the view in Listing 14.4 includes the jQuery library. The jQuery library is included in the Scripts folder in the default ASP.NET MVC Visual Studio template.
The OnBegin property points at a JavaScript method named createBegin(). This method performs a jQuery slideUp animation on the movie form. The OnComplete property points at a JavaScript method named createComplete(). This method returns the movie form to its original state.
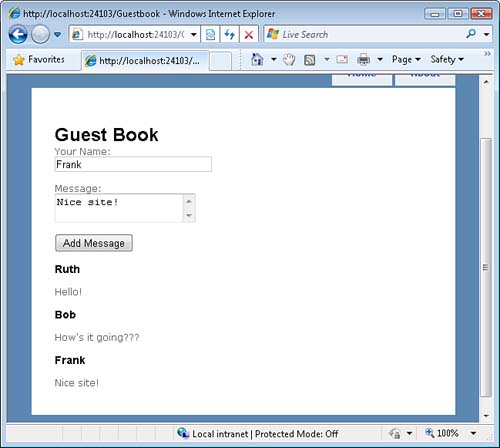
You can use the UpdateTargetId property to update page content after an Ajax post. For example, imagine that you create a simple guest book application, (Yes, I know that no one has created a guest book application since the late ’90s—but we are pretending here.) When you enter a new name and message, you want the list of entries to be updated automatically (see Figure 14.6).
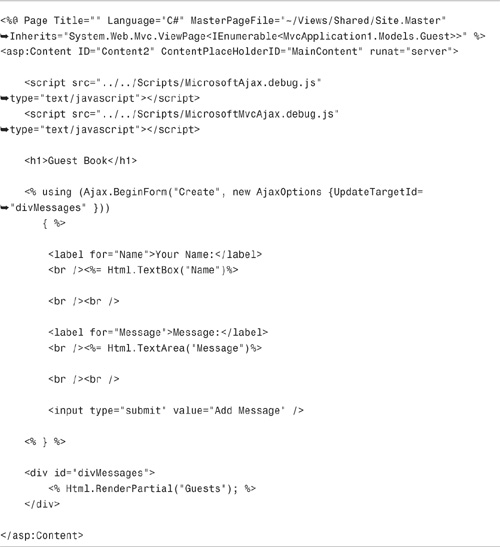
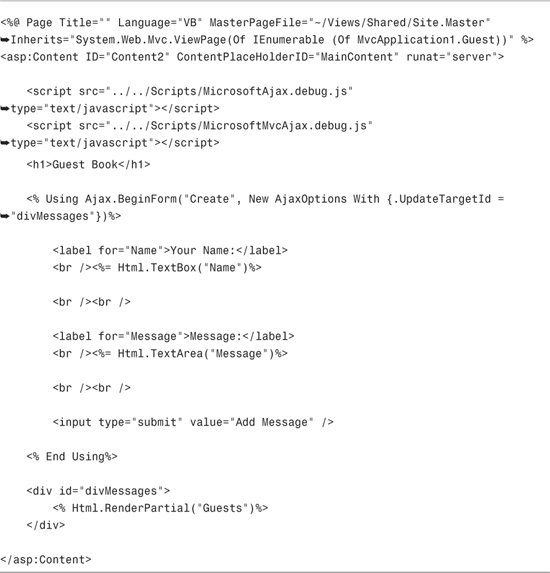
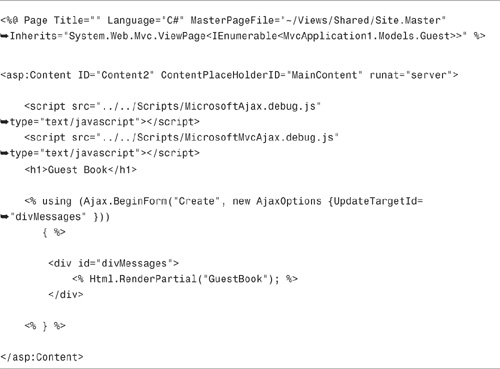
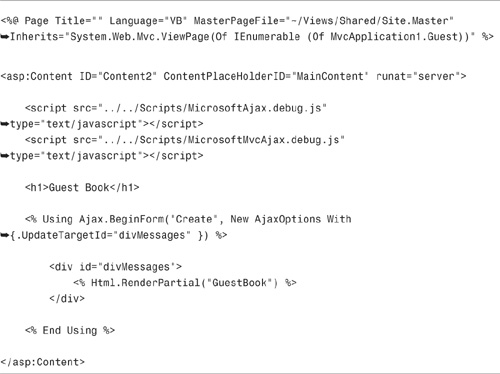
The view in Listing 14.5 uses the Ajax.BeginForm() helper to render a form that performs an Ajax post. Notice that the AjaxOptions include an UpdateTargetId property that is assigned the value divMessages. The divMessages DIV tag encircles a call to Html.RenderPartial() that renders the Guests partial.
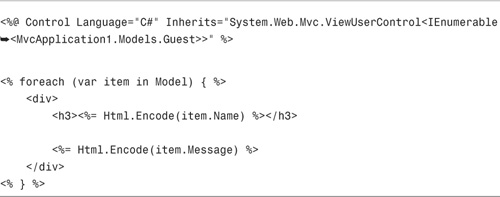
The Guests partial (see Listing 14.6) renders the list of messages. When you post a new message, then Ajax.BeginForm() helper updates the list of messages with the help of the Guests partial.
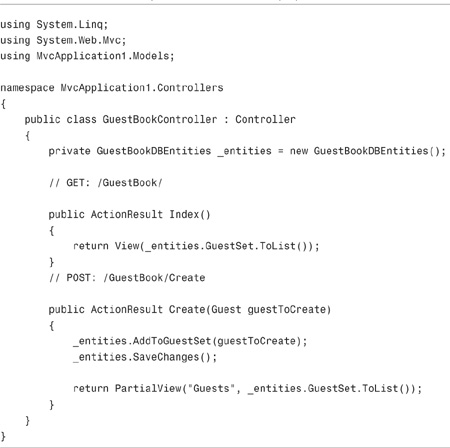
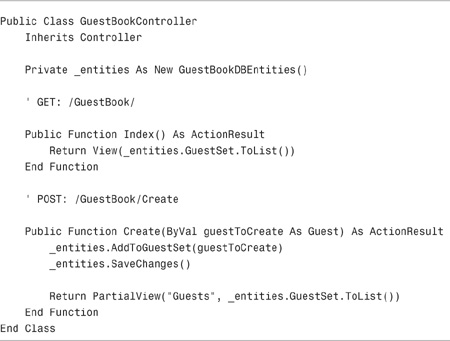
The controller used by the guest book application is contained in Listing 14.7. Notice that the Create() action returns a partial view result. The partial view result returns a fragment of HTML rendered with the help of the Guests partial.
Normally, you need to validate form data when you submit the data to the server. For example, you might want to make a particular form field required and display an error message when the required field does not have a value. In this section, you learn how to display validation error messages when performing an Ajax post.
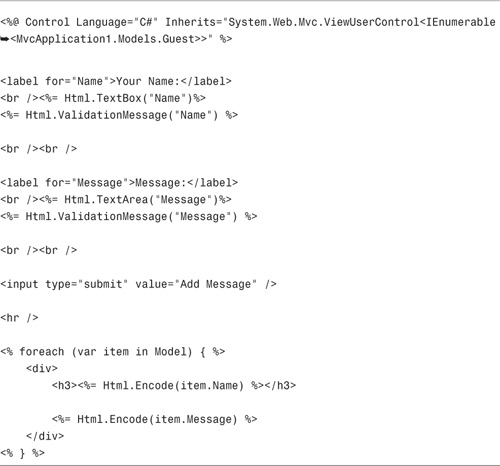
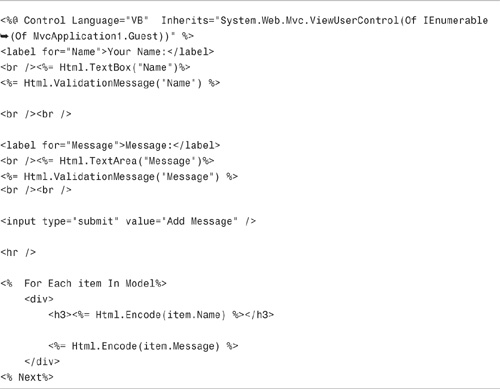
The view in Listing 14.8 contains a partial named GuestBook. This partial contains most of the content of the view including the HTML form and the list of guest book entries.
The GuestBook partial is contained in Listing 14.9. Notice that it contains calls to the server-side Html.ValidateMessage() helper method. This method renders a validation error message on the server side.
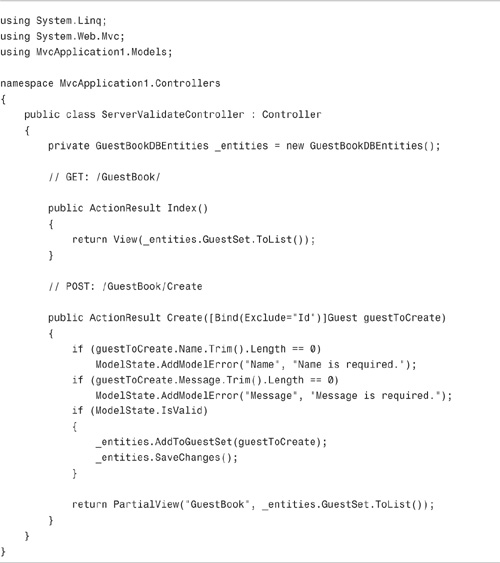
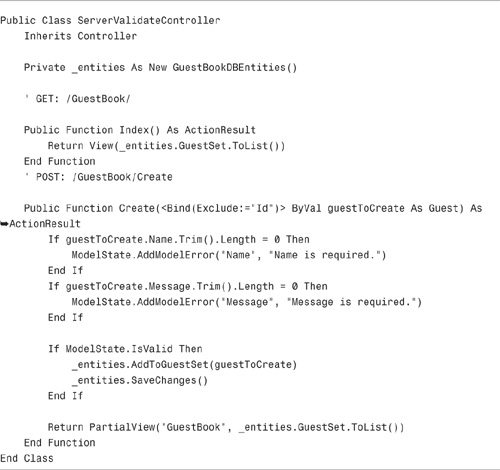
The controller used by this modified guest book application is contained in Listing 14.10. The Create() action returns the GuestBook partial.
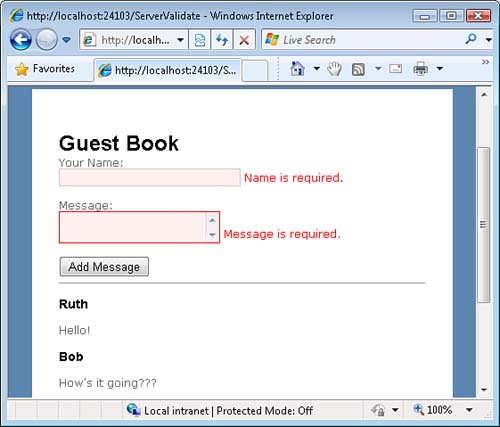
If there are validation errors, the error messages will be rendered by the Html.ValidateMessage() helper within the GuestBook partial. Because the contents of the HTML form are updated when performing a form post, any validation messages will appear after the form post (see Figure 14.7).
Note
The disadvantage of server-side validation is that the entire form must be passed across the wire every time that you do an Ajax form post. If you want to avoid transmitting this big chunk of HTML, you can use client-side validation. We discuss client-side validation in Chapter 15, “Using jQuery.”
By taking advantage of Ajax, you can create a web application that provides a better user experience. However, what happens when someone attempts to use your application with a browser that does not support JavaScript?
You can design your application so that it works with both JavaScript enabled and JavaScript disabled. In other words, you can provide both an uplevel and downlevel user experience.
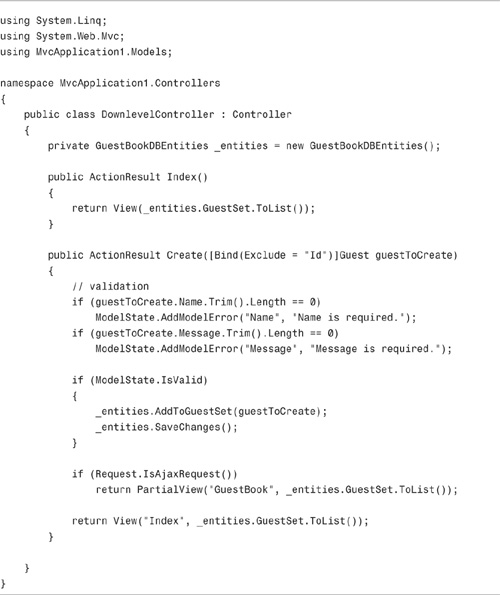
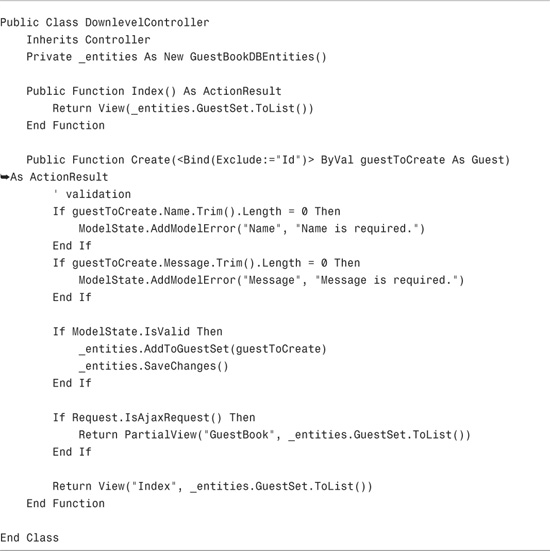
The controller in Listing 14.11 contains a Create() action that works with both uplevel and downlevel browsers. When the Create() action is invoked by a downlevel browser, an entire view is returned to the browser. When the Create() action is invoked by an uplevel browser, a partial view is returned.
The Create() action uses the IsAjaxRequest() method to determine whether the action is invoked within the context of an Ajax request. If the IsAjaxRequest() method returns true, the partial view is returned. Otherwise, the full view is returned.
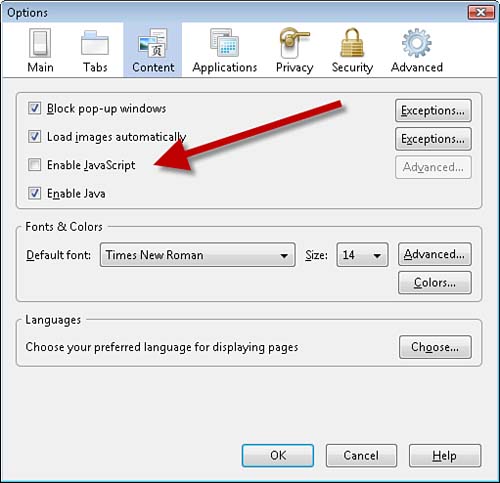
The easiest way to verify that the controller works with both downlevel and uplevel browsers is to turn off JavaScript in your browser. For example, you can disable JavaScript in Firefox by selecting the menu option Tools, Options and selecting the Content tab (see Figure 14.8).
The second Ajax helper included in the ASP.NET MVC framework is the Ajax.ActionLink() helper. This helper enables you to render a link that retrieves content from the web server asynchronously.
The Ajax.ActionLink() helper is valuable when you want to create master/detail pages and you don’t want to rerender the entire page every time someone selects a master record. You can use the Ajax.ActionLink() to limit the update to the details section only, and not the entire page, when you click a link.
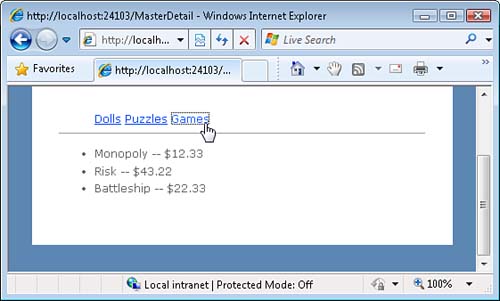
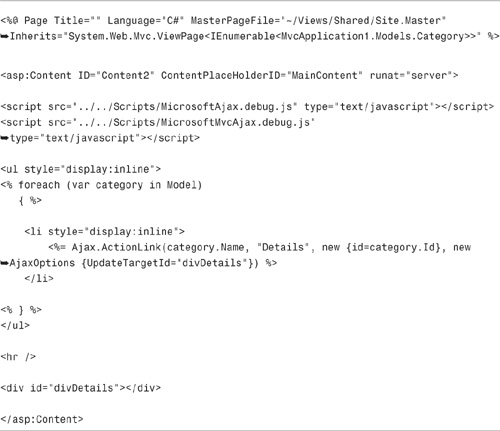
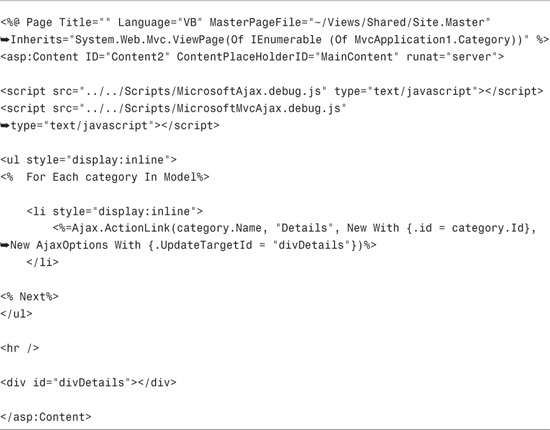
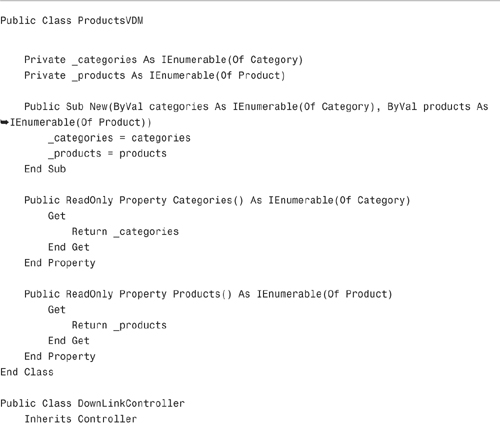
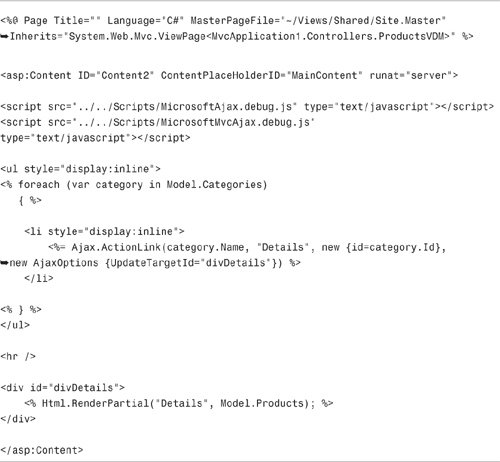
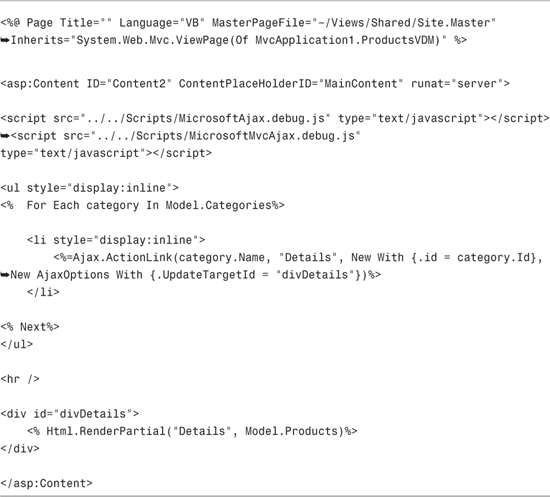
For example, the view in Listing 14.12 displays a master/detail page that lists product categories and matching products (see Figure 14.9). When you click a category, the list of matching products is retrieved from the server through an Ajax request.
Notice the call to the Ajax.ActionLink() helper. Three parameters are passed to the helper: the link text, the action to invoke, and AjaxOptions. The UpdateTargetId property of the AjaxOptions class specifies the HTML element to update with the results of the Ajax request.
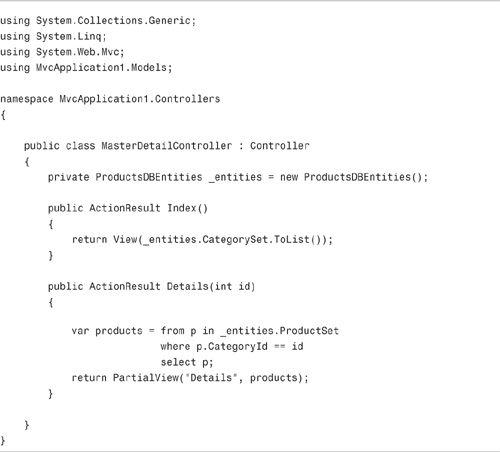
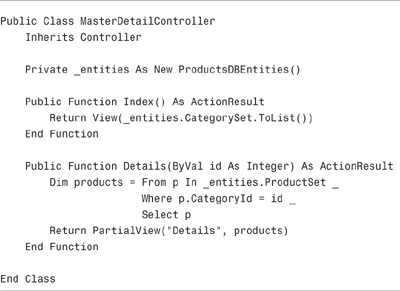
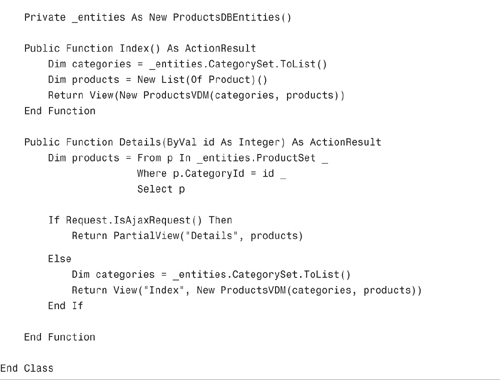
The master detail page uses the controller in Listing 14.13. This controller has two actions. The Index() action is invoked when the page is first requested. The Details() action is invoked when you click a category link rendered by the Ajax.ActionLink() helper. The Details() action is invoked only within the context of an Ajax request.
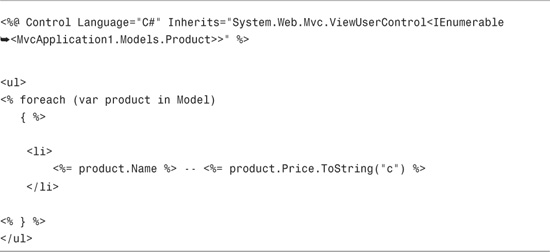
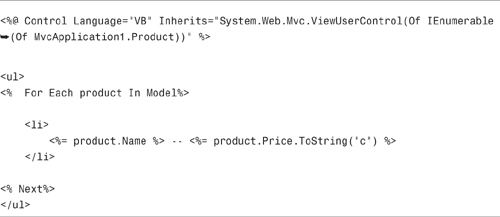
Notice that the Details() action returns a partial view result named Details. The Details partial is contained in Listing 14.14. This partial renders a set of products in a bulleted list.
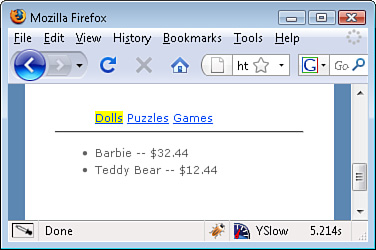
Typically, when you select a link in a master/detail page, you want to highlight the link selected. For example, if you click a category to view a list of matching products, you want to highlight the selected category (see Figure 14.10).
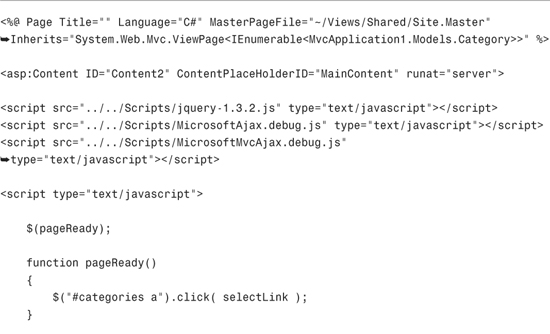
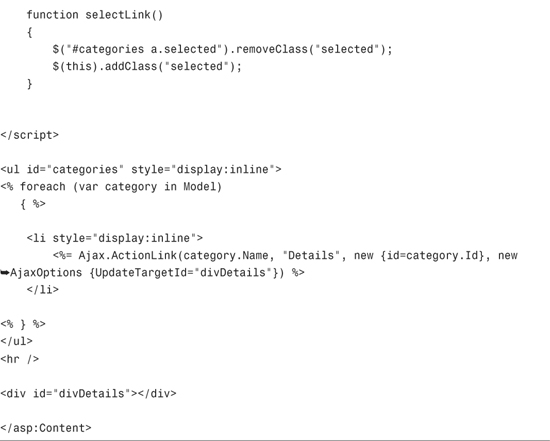
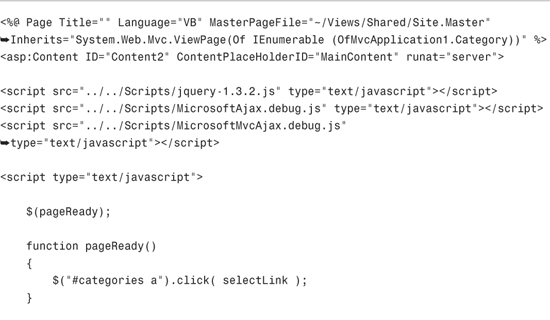
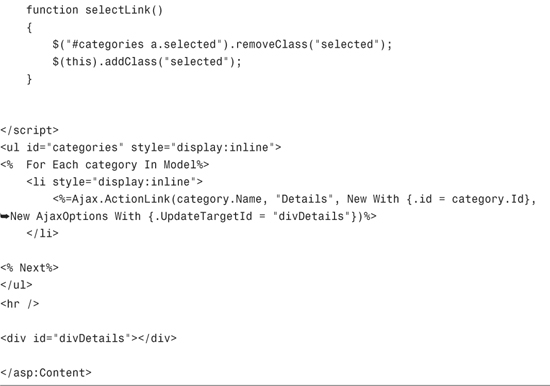
The easiest way to highlight a link is to use jQuery. The Index view in Listing 14.15 changes the background color of the selected link to yellow.
The pageReady() JavaScript function is called after the HTML page is ready (after the DOM is loaded). The pageReady function associates a click handler with each of the category links. When you click a category link, the selectLink() method is called.
The selectLink() method returns a CSS class named selected from the currently selected category link. Next, the method adds the selected class to the link that was clicked.
The selected CSS class is defined in the Site.css file like this:
.selected {background-color:yellow;}
You also can use the Ajax.ActionLink() helper to render a delete link. Even better, you can use the Ajax.ActionLink() to render a delete link that performs a proper HTTP DELETE.
The HTTP protocol supports the following HTTP operations:
• OPTIONS—Returns information about the communication options available (idempotent)
• GET—Returns whatever information is identified by the request (idempotent)
• HEAD—Performs the same operation as GET without returning the message body (idempotent)
• POST—Posts new information or updates existing information (not idempotent)
• PUT—Posts new information or updates existing information (idempotent)
• DELETE—Deletes information (idempotent)
• TRACE—Performs a message loop back (idempotent)
• CONNECT—Used for SSL tunneling
These operations are defined as part of the HTTP 1.1 standard that you can read about at www.w3.org/Protocols/rfc2616/rfc2616-sec9.html.
HTML supports only GET and POST operations. When you click a link, you perform a GET operation against the web server and when you submit an HTML form, you can perform either a GET or a POST operation. The other HTTP operations are not supported.
If you want to perform an HTTP operation other than a GET or POST, you need to use JavaScript. One easy way to generate the necessary JavaScript is to use an Ajax.ActionLink() helper.
For example, for security reasons, you should not perform an HTTP GET when you click a delete link. If you allow a GET operation to result in the deletion of a record from your website, you open your website to cross-site scripting attacks.
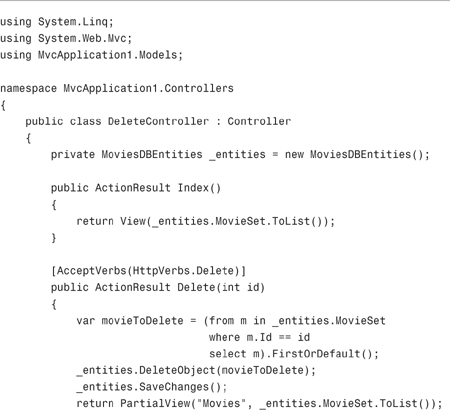
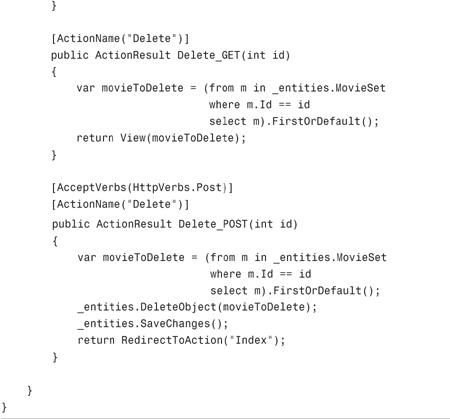
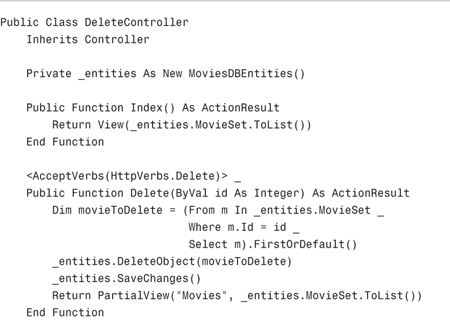
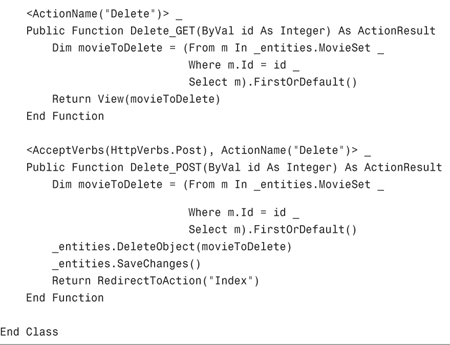
The controller in Listing 14.16 exposes three Delete() actions. This first Delete() action can be invoked only in the context of an HTTP DELETE operation.
Note
The Delete_GET() and Delete_POST() actions provide downlevel browser support. If a browser does not support JavaScript, the DELETE_GET() action displays a delete confirmation form. When you submit the delete confirmation form to the Delete_POST() action, the corresponding movie record is deleted. The downlevel Delete() actions are also immune from cross-site scripting attacks because they require an HTTP POST operation.
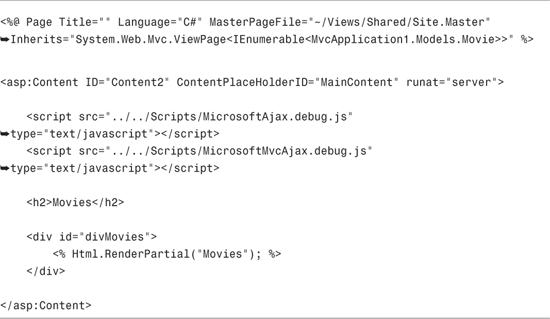
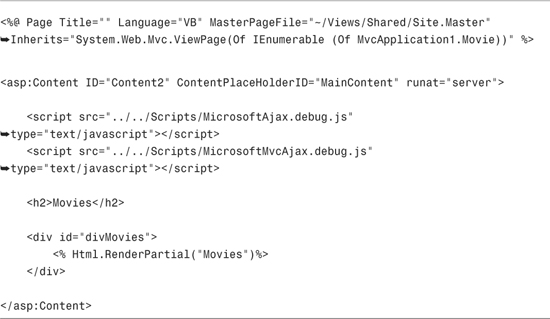
The view returned by the Index() action is contained in Listing 14.17. Nothing much happens within this view. The view simply renders the partial contained in Listing 14.18.
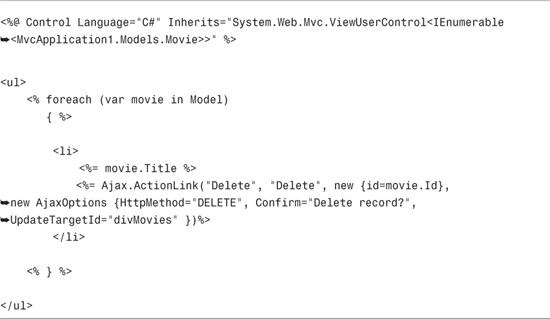
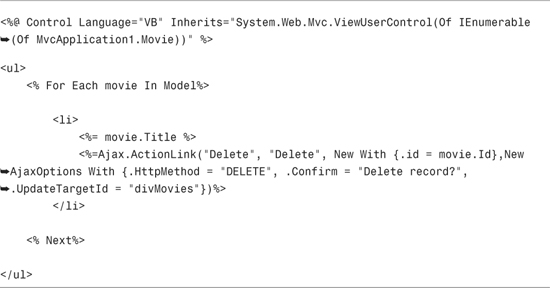
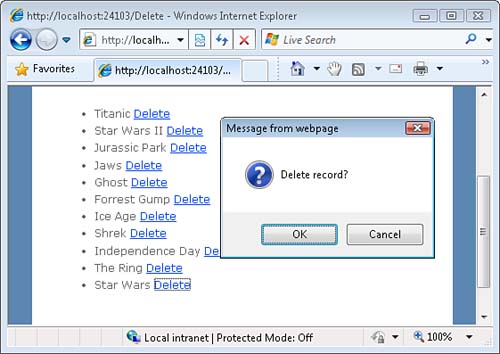
The Ajax.ActionLink(), in Listing 14.18, displays a delete link next to each movie record (see Figure 14.11). This helper method has five parameters: the link text, the action, the route values, the AjaxOptions, and the UpdateTargetId.
The AjaxOptions specifies the type of HTTP operation to perform when you click the link. The Ajax.ActionLink() in Listing 14.18 performs an HTTP DELETE operation.
The AjaxOptions includes a Confirm property. When you assign a string value to the Confirm property, clicking the link pops up a JavaScript confirmation dialog (see Figure 14.11).
The Ajax.ActionLink() helper is compatible with both uplevel and downlevel browsers. When you click on the link rendered by the Ajax.ActionLink() helper, an uplevel browser—a browser that supports JavaScript—performs an Ajax request. A downlevel browser—a browser that does not support JavaScript or that has JavaScript disabled—performs a normal request.
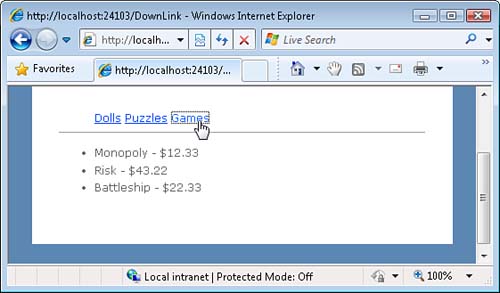
For example, you can use the Ajax.ActionLink() helper to create a master/detail page that works with both downlevel and uplevel browsers (see Figure 14.12).
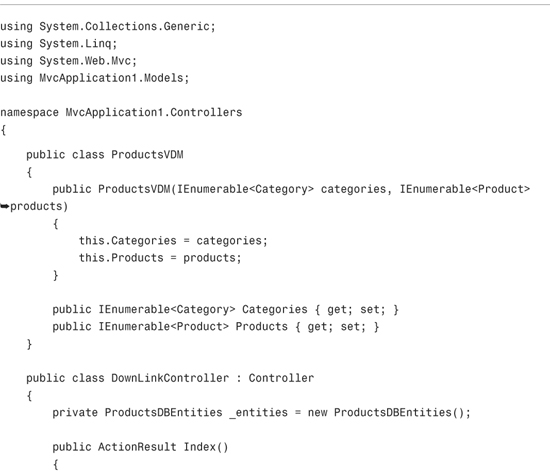
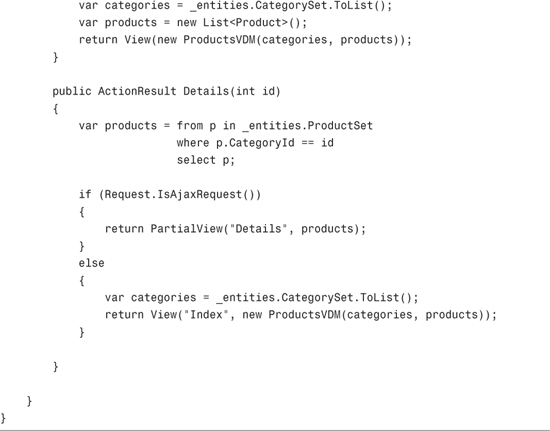
The Details() action in Listing 14.19 supports both uplevel and downlevel browsers. When invoked by an uplevel browser, the action returns a partial view. When invoked by a downlevel browser, the action returns a normal view. The IsAjaxRequest() method is used to detect whether the action is invoked within the context of an Ajax request.
Notice that less work must be performed on the web server and database server during an Ajax request. Notice, furthermore, that less data must be pushed across the wire. During an Ajax request, only the matching products must be retrieved. During a normal request, in context, both the categories and products must be retrieved.
The Index() action returns the view in Listing 14.20. This view displays the list of categories and calls the Html.RenderPartial() helper method to display the list of products.
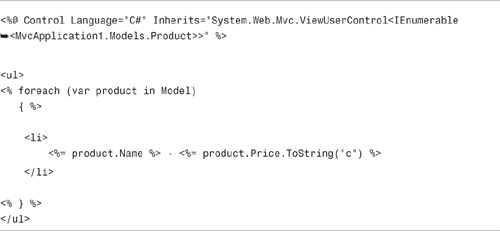
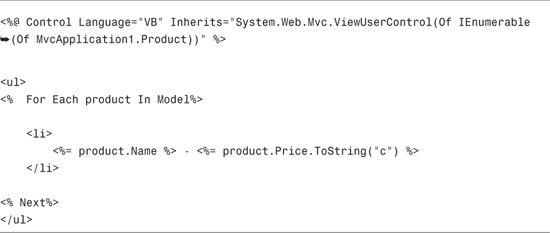
The Details partial is contained in Listing 14.21. This partial is responsible for rendering the list of movies.
In the previous section, we used the IsAjaxRequest() method within a controller to detect whether the action was invoked by an Ajax request. Using the IsAjaxRequest() method in a controller action can result in controller actions that are difficult to maintain. The controller action is given multiple responsibilities. The same action must handle both Ajax and non-Ajax requests.
Instead of using the IsAjaxRequest() method, you can use the AcceptAjax attribute. That way, you can create separate controller actions to handle Ajax requests and normal requests.
Unfortunately, the AcceptAjax attribute is not part of the standard Microsoft ASP.NET MVC framework. This attribute—currently—is included in ASP.NET MVC Futures, and it might be included in future versions of the official ASP.NET MVC framework.
Note
You can download the ASP.NET MVC Futures project from the www.ASP.net/mvc website that is the official Microsoft ASP.NET MVC website.
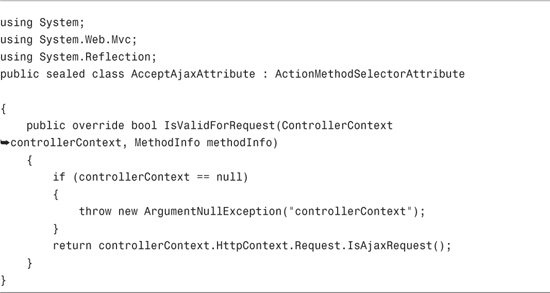
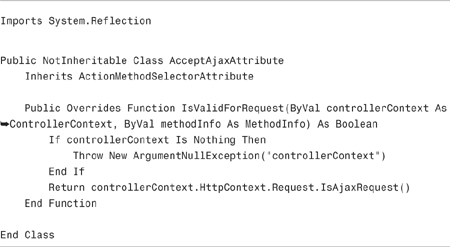
Fortunately, the AcceptAjax attribute is a simple attribute to create. The source code for this attribute is contained in Listing 14.22.
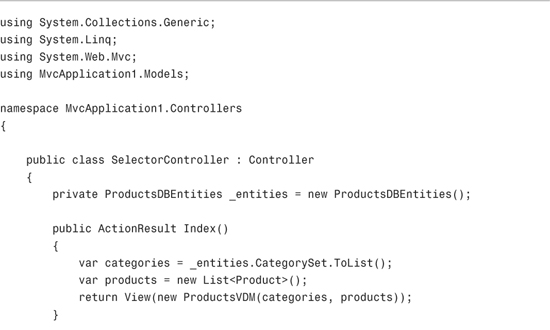
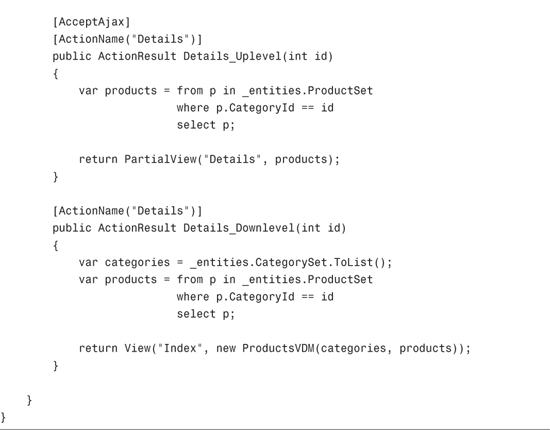
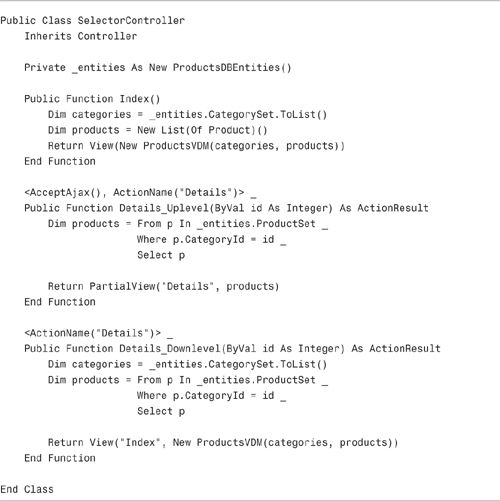
The controller in Listing 14.23 illustrates how you can use the AcceptAjax attribute. Notice that there are two Details() actions. One action has the AcceptAjax attribute, and it can be invoked only within the context of an Ajax request.
Compare the controller in Listing 14.23 with the controller (that does the same thing) in Listing 14.19. The controller that uses the AcceptAjax attribute is easier to understand and maintain.
In this chapter, you learned how to use the two Ajax helpers included with the ASP.NET MVC framework. In the first part of this chapter, you learned how to use the Ajax.BeginForm() helper to post an HTML form asynchronously. We discussed how you can display progress using an animated GIF or a jQuery animation during the form post operation. You also learned how to support both uplevel and downlevel browsers.
In the second part of this chapter, you learned how to use the Ajax.ActionLink() helper to retrieve content from the web server asynchronously. You learned how to use the Ajax.ActionLink() helper to create master/detail pages. Finally, we discussed how you can provide both uplevel and downlevel browser support when using the Ajax.ActionLink() helper.
In the next chapter, you learn how to use jQuery to perform Ajax calls from pure JavaScript.

